OAuth 2.0
These topics cover concepts, configuration, and usage procedures for working with OAuth 2.0 and Identity Cloud.
AM as the authorization server
How Identity Cloud plays the role of the authorization server.
Configure AM for OAuth 2.0
Configure Identity Cloud as an OAuth 2.0 authorization server.
OAuth 2.0 grant flows
Discover the OAuth 2.0 flows and how to implement them in Identity Cloud.
OAuth 2.0 endpoints
Endpoints Identity Cloud exposes as an OAuth 2.0 authorization server.
OAuth 2.0 consent
Allow OAuth 2.0 clients to skip consent, and users to save and revoke consent.
OAuth 2.0 scopes
Learn about scopes and how to configure them.
ForgeRock® Identity Platform serves as the basis for our simple and comprehensive Identity and Access Management solution. We help our customers deepen their relationships with their customers and improve the productivity and connectivity of their employees and partners. For more information about ForgeRock and about the platform, visit https://www.forgerock.com.
Identity Cloud as authorization server
As an authorization server, Identity Cloud authenticates resource owners and obtains their authorization to return access tokens to clients.
Before you configure OAuth 2.0 in your environment, familiarize yourself with the OAuth 2.0 authorization framework and related standards.
OAuth 2.0 concepts
RFC 6749, the OAuth 2.0 authorization framework lets a third-party application obtain limited access to a resource (usually user data) on behalf of the resource owner or the application itself.
The main actors in the OAuth 2.0 authorization framework are the following:
| Actor | Description |
|---|---|
Resource owner (RO) |
The owner of the resource. For example, a user who stores their photos in a photo-sharing service. The resource owner uses a user-agent, usually a web-browser, to communicate with the client. |
Client |
The third-party application that wants to access the resource. The client makes requests on behalf of the resource owner and with their authorization. For example, a printing service that needs to access the resource owner’s photos to print them. Identity Cloud can act as a client. |
Authorization server (AS) |
The authorization service that authenticates the resource owner and/or the client, issues access tokens to the client, and tracks their validity. Access tokens prove that the resource owner authorizes the client to act on their behalf over specific resources for a limited period of time. Identity Cloud can act as the authorization server. |
Resource server (RS) |
The service hosting the protected resources. For example, a photo-sharing service. The resource server must be able to validate the tokens issued by the authorization server. A website protected by a web or a Java agent can act as the resource server. |
The following sequence diagram demonstrates the basic OAuth 2.0 flow:

To use Identity Cloud as an authorization server, register an OAuth 2.0 application (client) in the Identity Cloud admin UI. Clients can also register themselves dynamically.
Supported OAuth 2.0 features
As an authorization server, Identity Cloud supports the following features:
| Feature | Details |
|---|---|
|
|
|
|
Other OAuth 2.0 standards |
|
Delegates the consent-gathering part of an OAuth 2.0 flow to a separate service. |
|
Customizable scope grants |
You can customize how scopes are granted to the client, regardless of the grant flow used. Identity Cloud can grant scopes statically or dynamically:
|
Security considerations
| OAuth 2.0 messages involve credentials and access tokens that allow the bearer to retrieve protected resources. You must protect the messages going across the network and prevent attackers from capturing requests or responses. |
RFC 6749 includes a number of security considerations and requires Transport Layer Security (TLS) to protect sensitive messages. Make sure you read these security considerations and implement them in your deployment.
When you are deploying a combination of other clients and resource servers, pay special attention to the OAuth 2.0 threat model and security considerations before putting your service into production.
Identity Cloud as client and resource server
When Identity Cloud functions as an OAuth 2.0 client, it provides a session after successfully authenticating the resource owner and obtaining authorization. The client can then access resources protected by agents.
To configure Identity Cloud as an OAuth 2.0 client, use the Social Provider Handler node node as part of the authentication journey.
This sequence diagram shows how the client gains access to protected resources where Identity Cloud functions as both authorization server and client:

Because the OAuth 2.0 client functionality is implemented as an Identity Cloud authentication node, you do not need to deploy your own resource server implementation when using Identity Cloud as an OAuth 2.0 client. Use web or Java agents or IG to protect resources.
For more information about configuring Identity Cloud as an OAuth 2.0 client, refer to Social authentication.
|
To use your own client and resource server, make sure the resource server implements the logic for handling access tokens and refresh tokens. The resource server can use the To design your own scopes implementation, refer to Customize OAuth2.0 using JavaScript extensions. |
Authorization server configuration
Configure the OAuth 2.0 provider service to expose the OAuth 2.0 endpoints and OAuth 2.0 administration endpoints.
-
Under Native Consoles > Access Management, go to Realms > Realm Name > Services > OAuth2 Provider.
-
On the OAuth 2.0 provider page, select the Advanced tab.
-
Configure the Grant Types that clients will be able to use to request access, refresh, and ID tokens. For a list of supported grant types, refer to OAuth 2.0 grant flows and OpenID Connect grant flows.
Although UMA is on the grant types list, UMA is not currently supported in Identity Cloud. -
Configure Persistent Claims.
Persistence lets you retain custom claims when you refresh an access token.
In the Persistent Claims field, enter the claims that must be persisted between tokens. When an access token is refreshed, any claims that are listed here will be on the new token.
-
These claims are added before the access token modification script, allowing you to manipulate them in the modification script. For example, if a token has a claim called
hostnamethat you want to be persisted when the token is refreshed, you could add that claim to the Persistent Claims list. You could then modify the script to persist thathostnamein the new token, if it exists, or to add a hostname to the new token, if it does not exist. -
Only custom, non-standard claims can be persisted. Standard claims, such as
scope(defined in the OAuth 2.0 specification) andauditTrackingId(defined by default in Identity Cloud) cannot be persisted.
-
Additional configuration options
The OAuth 2.0 provider is highly configurable:
-
To configure the OAuth 2.0 provider, go to Native Consoles > Access Management, then to Realms > Realm Name > Services > OAuth2 Provider.
The following table describes the high-level configuration of the OAuth 2.0 provider service. For more details, refer to the OAuth2 Provider reference.
| Task | Resources |
|---|---|
Configure the authorization server to issue refresh tokens Learn why refresh tokens are useful in your environment, how to configure Identity Cloud to issue them, and how to request them. |
|
Adjust the lifetimes of tokens and codes If necessary, adjust the lifetimes for authorization codes (a lifetime of 10 minutes or less is recommended in RFC 6749), access tokens, and refresh tokens. Configure them on the Core tab of the provider. |
N/A |
Configure the OAuth 2.0 service to provide scopes dynamically The OAuth 2.0 provider can leverage the Identity Cloud Authorization service to grant or deny scopes dynamically. |
|
Decide how scopes appear in the consent pages To change how scopes appear, configure the Client Registration Scope Allowlist field on the Advanced tab of the OAuth 2.0 provider. Define each scope as a string that represents the internal scope name,
optionally followed by a For example:
|
|
Decide how to manage consent You can:
|
|
Configure a remote consent server This is useful, for example, when your environment must hand off the consent-gathering part of the OAuth 2.0 flows to a separate service. |
|
Configure OpenID-Connect specific options |
Token storage
Identity Cloud OAuth 2.0-related services are stateless unless otherwise indicated; no token information is stored in your Identity Cloud tenant. Instead, they either cache the OAuth 2.0/OpenID Connect tokens in the core token service (CTS) token store (server-side), or present them to the client (client-side).
Both client-side and server-side token storage support all of Identity Cloud’s OAuth 2.0 features.
Configure token storage
By default, OAuth 2.0 tokens are configured for client-side storage.
You can update the token storage location to server-side under Native Consoles > Access Management:
-
To configure for all client applications, go to Realms > Realm Name > Services > OAuth2 Provider.
Alternatively, to override provider settings on the client, go to Realms > Realm Name > Applications > OAuth 2.0 > Clients > Client ID > OAuth2 Provider Overrides.
Note that Enable OAuth2 Provider Overrides must be enabled for the setting to apply.
-
Disable Use Client-Side Access & Refresh Tokens.
-
Save your changes.
Client-side tokens
Identity Cloud returns a token to the client after successfully completing one of the grant flows.
In this example, the token is stored in the access_token property:
{
   "access_token":"eyJ0eXAiOiJKV1QiLOT05FIiwiYWxnQY1lIjoxNTM5MDEzMzYyLsbSI6Ii8iLCj...",
   "scope":"write",
   "token_type":"Bearer",
   "expires_in":3599
}
Example decoded access token
{
     typ: "JWT",
     zip: "NONE",
     alg: "HS256"
}
{
     sub: "(usr!myClient)",
     subname" "myClient",
     cts: "OAUTH2_STATELESS_GRANT",
     auditTrackingId: "f20f4099-5248-4399-a7f0-2d54d4020099-108676",
     iss: "https://<tenant-env-fqdn>/am/oauth2",
     tokenName: "access_token",
     token_type: "Bearer",
     authGrantId: "1LUgI8zcDWqcfEnnLdZDnNqA2wc",
     aud: "myClient",
     nbf: 1539075967,
     grant_type: "client_credentials",
     scope: [
      "write"
     ],
     auth_time: 1539075967,
     realm: "/alpha",
     exp: 1539079567,
     iat: 1539075967,
     expires_in: 3600,
     jti: "FTQT6eZkDhm6PHEaSthORoTLB80"
}
[signature]
Client-side tokens:
-
Are larger than the reference returned for server-side tokens.
Consider their size if they must be sent in a header because the size of the token cannot exceed the maximum header size allowed by your end users' browsers.
The size of client-side tokens also increases when you customize Identity Cloud to store additional attributes in the tokens.
-
Are presented to the client after successfully completing an OAuth 2.0 grant flow.
Therefore, tokens are vulnerable to tampering attacks, and you should configure Identity Cloud to sign and encrypt them.
-
Can be introspected without calling the authorization server.
-
Incur overhead when tokens are decrypted and verified because Identity Cloud does not store the decrypt sequence of the token in memory.
-
Support token denylisting.
This feature maintains a list of revoked tokens and authorization codes stored in the CTS token store. Token denylisting protects against replay attacks and is always enabled for client-side tokens.
Each time a client presents a client-side token in a request, Identity Cloud checks if the token was revoked in the CTS token store. If it was not revoked, Identity Cloud decrypts the token to retrieve its information.
Client-side refresh tokens have corresponding entries in a CTS allowlist rather than a denylist. When presenting a client-side refresh token, Identity Cloud checks that a matching entry is found in the CTS allowlist, and prevents reissue if the record does not exist.
Adding a client-side OAuth 2.0 token to the denylist removes the associated refresh token from the allowlist.
Protect client-side tokens
To protect OAuth 2.0 client-side access and refresh tokens, Identity Cloud supports encrypting their JWTs using AES authenticated encryption. Because this encryption also protects the integrity of the JWT, you only need to configure Identity Cloud to sign client-side tokens if token encryption is disabled.
|
Client-side tokens must be signed and/or encrypted for security reasons. If your environment does not support encrypting OAuth 2.0 tokens, you must configure signing to protect them against tampering. |
Encrypt tokens
If you enable token encryption, token signature is disabled because encryption is performed using direct symmetric encryption.
To configure the OAuth 2.0 provider to encrypt client-side and refresh tokens:
-
Under Native Consoles > Access Management, go to Realms > Realm Name > Services > OAuth2 Provider.
-
On the Advanced tab, enable Encrypt Client-Side Tokens.
-
Save your changes.
Client-side OAuth 2.0 access and refresh tokens will now be encrypted.
Sign tokens
Identity Cloud supports digital signature algorithms that secure the integrity of client-side tokens.
Token signature is enabled by default when client-side tokens are enabled. By default, token signature is configured using a demo key that you must change in production environments.
Identity Cloud exposes the public key to validate client-side token signatures in its JWK URI. Refer to /oauth2/connect/jwk_uri.
To configure the OAuth 2.0 provider to sign client-side tokens:
-
Under Native Consoles > Access Management, go to Realms > Realm Name > Services, and click OAuth2 Provider.
-
On the Advanced tab, in the OAuth2 Token Signing Algorithm list, select the signing algorithm to use for signing client-side tokens.
-
Save your changes.
Client-side OAuth 2.0 access and refresh tokens will now be signed.
Server-side tokens
The CTS token store is the authoritative source for server-side tokens.
Identity Cloud returns a reference to the token to the client, which does not contain any of the token information.
In the following example, the reference is stored in the access_token property:
{
  "access_token": "sbQZuveFumUDV5R1vVBl6QAGNB8",
  "scope": "write",
  "token_type": "Bearer",
  "expires_in": 3599
}
Server-side tokens:
-
Are less vulnerable to tampering attacks because clients cannot access tokens other than to introspect them.
-
Are not cached in memory.
Each time a client presents a token ID in a request, Identity Cloud checks if the token exists in the CTS token store in case it has been revoked. If it is available, Identity Cloud retrieves its information.
Reading from and writing to the CTS token store has a performance impact.
-
Can only be introspected using a call to the authorization server.
Scopes
OAuth 2.0 flows require scopes to limit the client’s access to the resource owner’s resources.
What are scopes?
Scopes are a way to restrict client access to the resource owner’s resources, as defined in the OAuth 2.0 Authorization Framework.
Scopes are not associated with data and, in practice, they are just concepts specified as strings that the resource server must interpret in order to provide the required access or resources to the client. The OAuth 2.0 framework does not define any particular value for scopes since they are dependent on the architecture of your environment.
For example, a client may request the write scope,
which the resource server may interpret as that the client wants to save some new information in the user’s account,
such as images or documents.
A client can request one or more scopes, which Identity Cloud may display in the consent screen. If the resource owner agrees to share access to their resources, scopes are included in the access token.
For security reasons, Identity Cloud only accepts the scopes set in the Scope(s) or Default Scope(s) fields in the client profile (Realms > Realm Name > Applications > OAuth 2.0 > Clients > Client ID > Core).
If the client requests scopes, Identity Cloud checks them against the Scope(s) field in the client profile.
If the client requests a scope that is not configured, Identity Cloud returns an Unknown/invalid scope(s) error.
If the client does not request any scopes, Identity Cloud uses the scopes in the Default Scope(s) field of the client profile. If no default scopes are set in the client profile, Identity Cloud uses the scopes set in the Default Scope(s) field of the OAuth 2.0 provider.
If no scopes are configured by default, Identity Cloud returns a No scope requested error.
Identity Cloud does not use the default scopes in any other circumstance.
| You can use an access token modification script to override the allowed scopes specified at the OAuth 2.0 client level. |
The Client Registration Scope Allowlist field of the OAuth 2.0 provider restricts the scopes with which a client can register. In this sense, this field is used for OpenID Connect discovery and dynamic client registration only.
You can also use this field to configure how Identity Cloud presents the scopes on the consent screen. By default, the UI does not display scope-derived claims in the consent screen. You can configure the scopes to display.
Because scope names are arbitrary, they might not be descriptive enough for the resource owner to understand their purpose. In addition, you might not want resource owners to observe a particular scope that is for internal use only.
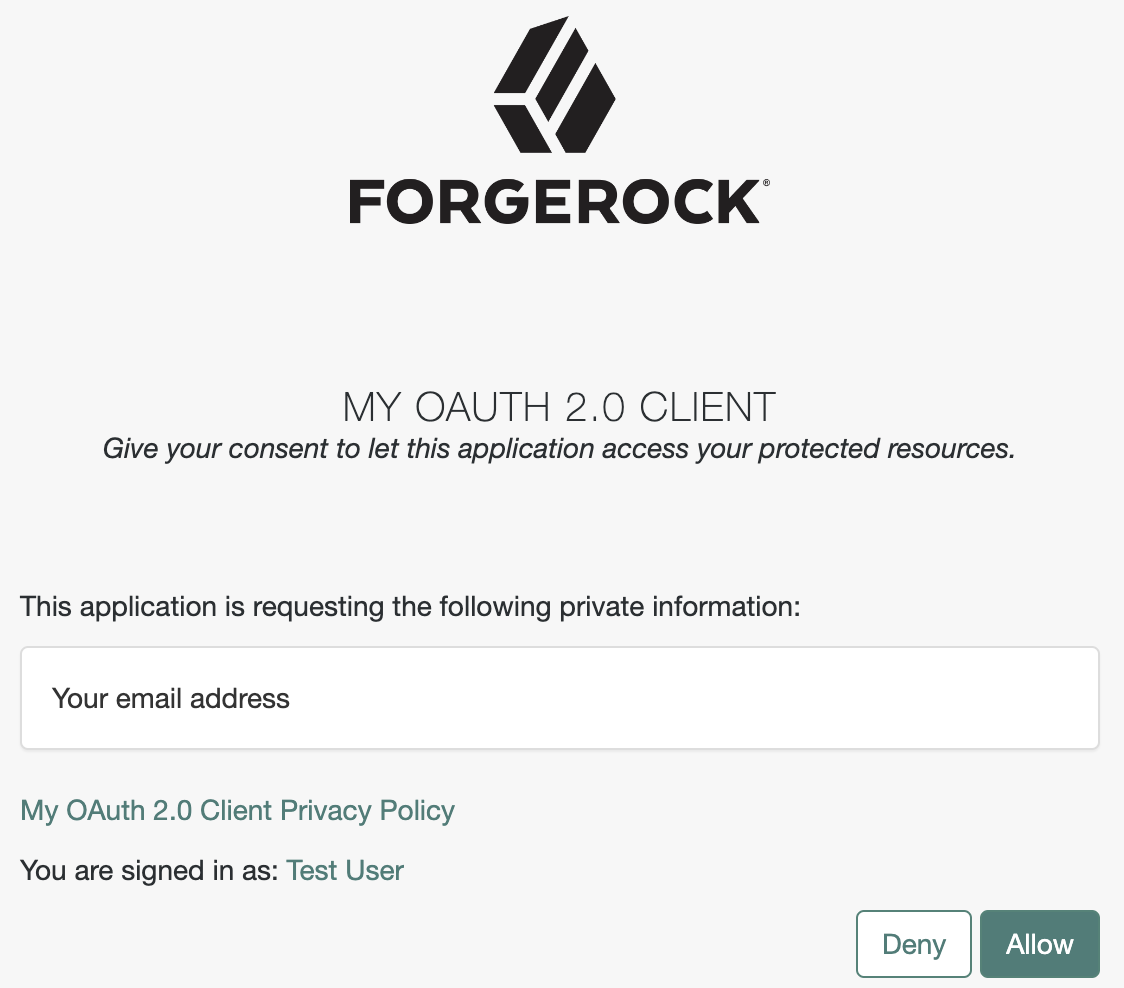
Display scopes in the consent screen
The default consent screen only displays standard claims.
For example, a client application requests scope=email read.
The email claim is standard in OpenID Connect, and a default display configuration exists.
The read scope is non-standard and no display configuration exists by default:
Client application settings
Use the Identity Cloud admin UI to customize the display of OAuth 2.0 scopes and OpenID Connect claims for individual client applications.
For OAuth 2.0 scopes:
-
Go to Applications > Client ID > Sign On > General Settings > Scopes.
-
Edit the Scopes settings using the extended scope allowlist format.
For example, include a read scope with an explanation for display to users,
read|en|Permission to view messages in your account. -
Save your work.
For OpenID Connect claims:
-
Go to Applications > Client ID > Sign On > General Settings > Show advanced settings > Access.
-
Edit the Claims settings.
-
Save your work.
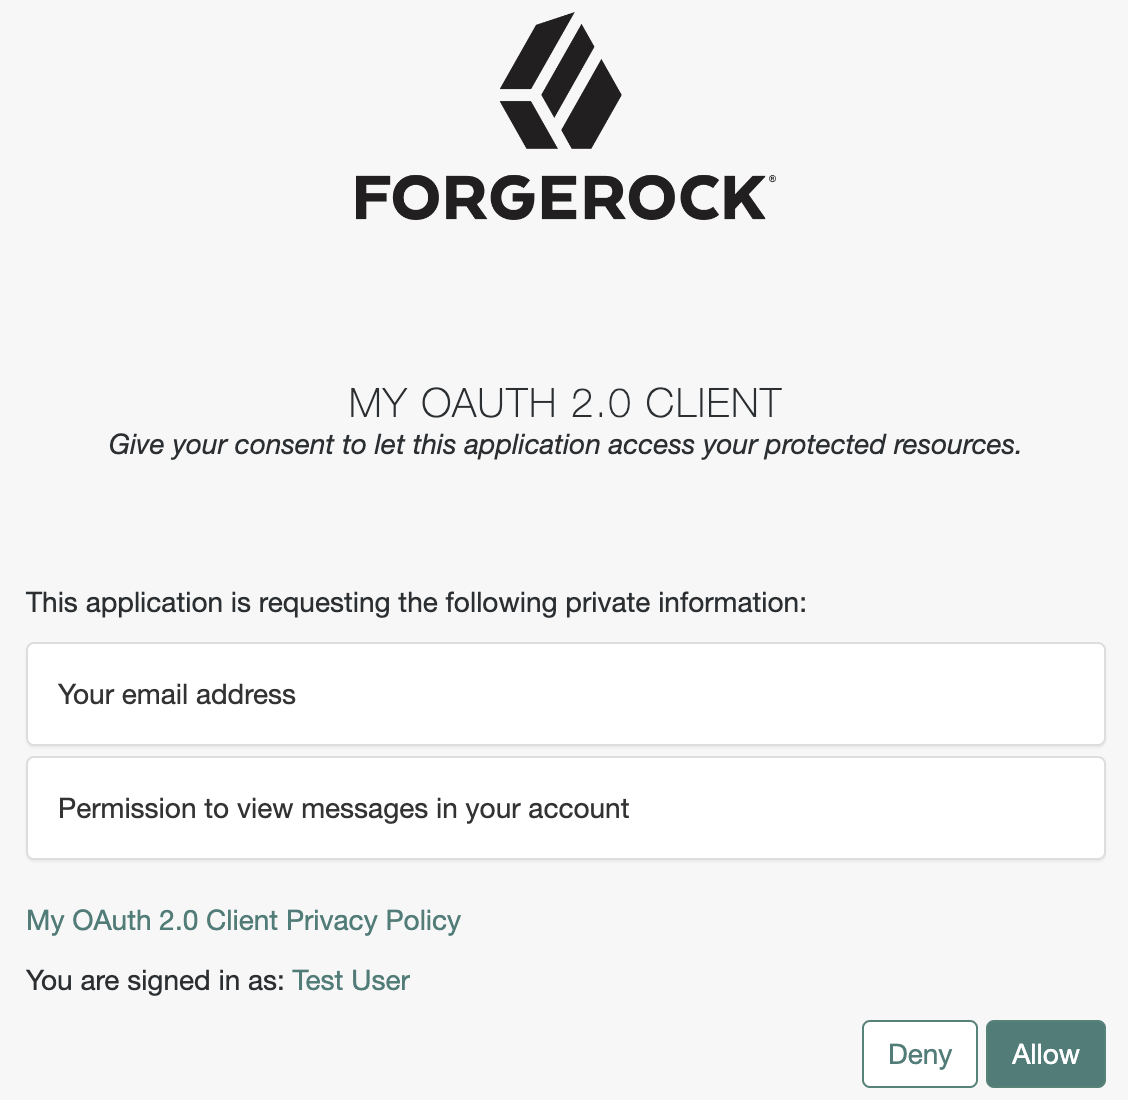
The following example shows the consent screen for a client application requesting scope=email read
after you updated the client application scopes setting to include
read|en|Permission to view messages in your account:
Realm settings
Under Native Consoles > Access Management, customize the display of OAuth 2.0 scopes and OpenID Connect claims for all client applications in a realm:
-
For OAuth 2.0 scope display settings, update the OAuth 2.0 provider configuration:
-
Go to Realms > Realm Name > Services > OAuth2 Provider.
-
On the Advanced tab, edit the Client Registration Scope Allowlist settings.
-
Save your work.
-
-
For OpenID Connect claims display settings, update the OAuth 2.0 provider configuration:
-
Go to Realms > Realm Name > Services > OAuth2 Provider.
-
On the OpenID Connect tab, edit the Supported Claims settings.
-
Save your work.
-
Special scopes
Identity Cloud reserves the following special scopes that cannot be added during dynamic client registration:
- am-introspect-all-tokens
-
Add this scope to the Scopes(s) field in a client profile to let the client introspect tokens issued to other clients, as long as all clients are registered in the same realm.
For example:
-
Client A is registered in the
/customers/NArealm, and it is issued a token there. -
Client B is registered in the
/customersrealm. It cannot introspect Client A’s token because they are not in the same realm. Client B can only introspect tokens from other clients registered in the/customersrealm.
-
- am-introspect-all-tokens-any-realm
-
Add this scope to the Scopes(s) field in a client profile to let the client introspect tokens issued to other clients, as long as they are registered in the realm of the introspecting client, or in a subrealm of it.
For example:
-
Client A is registered in the
/customers/NArealm, and it is issued a token there. -
Client B is registered in the
/customersrealm. It can introspect Client A’s token because the/customers/NArealm is a subrealm of the/customersrealm.Client B can introspect tokens for any client registered in the
/customerrealm, or any subrealm of it.
-
For security reasons, give these scopes only to the clients that need them.
Related information:
-
For examples of requesting scopes from the authorization server, refer to any of the grant flows in OAuth 2.0 grant flows.
-
To configure Identity Cloud to grant scopes dynamically by evaluating authorization policies at runtime, refer to Authorization and policy decisions and Dynamic OAuth 2.0 authorization.
Manage consent
Many OAuth 2.0 and OIDC flows require user consent to grant the client access to the user’s resources.
Implied consent
By default, OAuth 2.0 and OIDC client applications in Identity Cloud use implied consent; Identity Cloud does not prompt for consent during authorization flows. This simplifies the flows. The user has only to sign on to grant the client access to protected resources.
A client application may opt to disable implied consent, however, and prompt the user explicitly:
-
In the Identity Cloud admin UI, go to Applications > Client ID > Sign On > General Settings > Show advanced settings > Authentication.
-
Clear Implied Consent.
-
Save your changes.
Gather consent
If you opt to require explicit consent, configure how the client application appears to the user.
-
Customize the built-in Identity Cloud End User UI consent screen:
-
In the Identity Cloud admin UI, go to Applications > Client ID > Sign On > General Settings > Show advanced settings > Consent Screen.
-
Update the applicable fields:
- Display Name
-
Display this name to the user when prompting for consent.
- Display Description
-
Explain the decision to the user when prompting for consent.
- Privacy Policy URI
-
Add for the client applications privacy policy.
-
Save your work.
-
-
Delegate consent gathering to another service.
For details, refer to Remote consent service.
Display scopes
Users grant consent based on scopes.
Scopes restrict what is shared with the client and limit what the client can do with the user’s data.
In OAuth 2.0, the meanings of scopes depend on the implementation.
In OpenID Connect, scopes map to standard user data claims;
for example, the profile scope requests access to the user’s default profile claims.
If you opt to require explicit consent and use the built-in Identity Cloud End User UI consent screen, configure how the consent screen displays scopes and claims. For details, refer to Display scopes in the consent screen.
Store consent decisions
If you opt to require explicit consent, Identity Cloud can store the consent decisions in the user profile. This minimizes redundant prompts and improves the user experience.
When an OAuth 2.0 client application requests scopes, Identity Cloud checks the user profile for scopes the user has already consented to. Identity Cloud does not prompt the user to consent again to the same scopes, only scopes the user has not consented to.
To save consent:
-
Add an attribute, such as
custom_consent, to user profiles for saving consent decisions.The attribute must be of type
array.For instructions on adding the attribute, refer to Customize user identities.
-
Under Native Consoles > Access Management, go to Realms > Realm Name > Services > OAuth2 Provider and select the Consent tab.
-
In the Saved Consent Attribute field, add the name of the attribute you created, such as
custom_consent. -
Save your changes.
To force Identity Cloud to prompt for consent for a specific client request, add the prompt=consent parameter.
|
Revoke consent
You can revoke a client application’s access at any time through the Identity Cloud End User UI:
-
Sign on as an end user.
Your dashboard page displays.
-
Click Edit Your Profile.
-
Under Authorized Applications, expand the application’s entry.
-
Click Revoke Access:
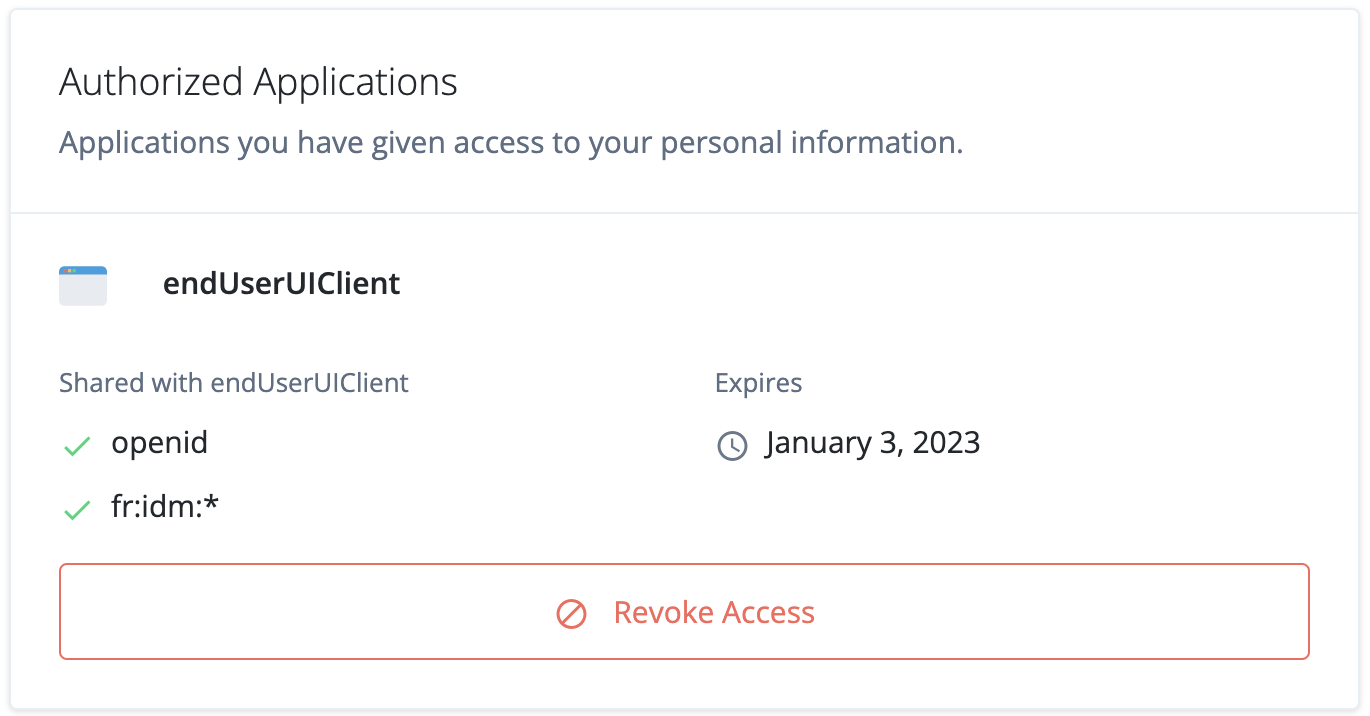 Figure 5. Authorized Applications pane
Remote consent service
Identity Cloud supports OAuth 2.0 remote consent services. A remote consent service gathers resource owner consent separately from an authorization server such as Identity Cloud.
The remote consent service displays a consent page, gathers the result, signs and encrypts the result, and returns it to the authorization server.

The consent request
For an OAuth 2.0 flow requiring user consent, Identity Cloud creates a consent request JSON Web Token (JWT). The JWT contains the necessary information to render a consent gathering page.
{
  "aud": "rcs",
  "claims": {},
  "clientId": "myClient",
  "client_description": "<optional-description>",
  "client_name": "My Client",
  "consentApprovalRedirectUri": "https://<tenant-env-fqdn>/am/oauth2/realms/root/realms/alpha/authorize?client_id=myClient&response_type=code&redirect_uri=<redirect-uri>&scope=write&state=1234zy",
  "csrf": "<opaque-csrf-string>",
  "exp": 1678800541,
  "iat": 1678800361,
  "iss": "https://<tenant-env-fqdn>/am/oauth2/realms/root/realms/alpha",
  "save_consent_enabled": true,
  "scopes": {
      "write": null
  },
  "username": "a0325ea4-9d9b-4056-931b-ab64704cc3da"
}
The consent request body includes these fields:
aud-
The expected recipient of the JWT. In this case, the remote consent service.
claims-
The claims the request makes. Include any additional information required for display on the remote consent page to help the resource owner determine whether to grant consent. For example, Open Banking OAuth 2.0 flows include identifiers for money transactions.
client_description-
A description of the OAuth 2.0 client making the request.
clientId-
The ID of the OAuth 2.0 client making the request.
client_name-
The display name of the OAuth 2.0 client making the request.
consentApprovalRedirectUri-
Where to redirect the resource owner after they have provided consent. The remote consent service must send the response JWT as a
consent_responseform parameter in a POST operation to this URI. csrf-
A unique string to return in the response to help prevent cross-site request forgery (CSRF) attacks.
Identity Cloud generates this string from a hash of the user’s session ID.
exp-
The expiration time of the JWT. Use short expiration times such as 180 seconds. The JWT is intended for machine-to-machine interactions.
iat-
Creation time of the JWT.
iss-
The name of the issuer configured for the OAuth 2.0 provider service (under Native Consoles > Access Management).
save_consent_enabled-
Whether to let the resource owner choose to save their consent decision. If set to
false, the value of thesave_consentproperty in the consent response from the remote consent service must also befalse. scopes-
The requested scopes.
username-
The authenticated resource owner’s identifier. Encrypt the JWT if the username is considered personally identifiable information.
Acting as the authorization server, Identity Cloud signs and encrypts the JWT.
When it receives the request, the remote consent service:
-
Decrypts the JWT.
-
Verifies the signature.
-
Verifies the validity of the
aud,issandexpfields. -
Renders the consent page to present to the resource owner.
The consent response
After the remote consent service gathers the resource owner’s consent, it creates a consent response JWT. The remote consent service encrypts and signs the consent response JWT and returns it to Identity Cloud.
{
  "consent_response" : {
      "aud": "https://<tenant-env-fqdn>/am/oauth2/realms/root/realms/alpha",
      "claims": {},
      "clientId": "myClient",
      "client_description": "<optional-description>",
      "client_name": "My Client",
      "consentApprovalRedirectUri": "https://<tenant-env-fqdn>/am/oauth2/realms/root/realms/alpha/authorize?client_id=myClient&response_type=code&redirect_uri=<redirect-uri>&scope=write&state=1234zy",
      "csrf": "<opaque-csrf-string>",
      "decision": true,
      "exp": 1678810581,
      "iat": 1678810401,
      "iss": "rcs",
      "save_consent": true,
      "scopes": "[write]",
      "username": "a0325ea4-9d9b-4056-931b-ab64704cc3da"
  }
}
The consent response body includes these fields:
aud-
The expected recipient of the JWT; must match the
issof the request. claims-
The claims the request made.
client_description-
A description of the OAuth 2.0 client making the request.
clientId-
Must match the
clientIdof the request. client_name-
The display name of the OAuth 2.0 client making the request.
consentApprovalRedirectUri-
Where to redirect the resource owner after they have provided consent.
csrf-
A unique string to return in the response to help prevent cross-site request forgery (CSRF) attacks.
decision-
truemeans the resource owner granted consent;falsemeans the resource owner withheld consent. exp-
The expiration time of the JWT. Use short expiration times such as 180 seconds. The JWT is intended for machine-to-machine interactions.
iat-
Creation time of the JWT.
iss-
The name of the issuer; must match the
audof the request. save_consent-
trueif the resource owner chose to save their consent decision. If the request hadsave_consent_enabled: false, this must also befalse. scopes-
The requested scopes; must be equivalent to or a subset of the
scopesin the request. username-
The authenticated resource owner’s identifier.
When it receives the response, Identity Cloud:
-
Decrypts the JWT.
-
Verifies the signature.
-
Verifies the validity of the
aud,issandexpfields. -
Processes the response, for example, to save the resource owner’s consent.
| Identity Cloud rejects compressed response JWTs whose expanded size is larger than 32 KiB (32768 bytes). |
Configuration
For asymmetric (public key/private key) encryption, Identity Cloud and the remote consent service supply their public keys as JSON Web Keys (JWKs). This lets each of them verify signatures and decrypt JWTs.
Complete these tasks to configure Identity Cloud to use a remote consent service:
-
Add the details of the remote consent service to an application profile (under Native Consoles > Access Management).
Each realm can have a single remote consent service, configured as a remote consent agent profile.
For details, refer to Remote consent agent profile.
-
Enable remote consent and specify the profile in the OAuth 2.0 provider service for the realm.
For details, refer to Use the profile.
-
Configure the remote consent service to access the Identity Cloud
jwk_uri.
Remote consent agent profile
-
Under Native Consoles > Access Management, go to Realms > Realm Name > Applications > OAuth 2.0 > Remote Consent and click Add Remote Consent Agent.
-
Set the Agent ID, such as
myRemoteConsentAgent. -
If the remote consent service uses an HMAC algorithm to sign JWTs, set Remote Consent Service secret to the shared symmetric key.
-
Click Create.
-
Configure the profile settings as required and save your work.
The remote consent agent profile has the following settings:
- Group
-
Configure several remote consent agent profiles by assigning them to a group.
Default: Unassigned
- Remote Consent Service secret
-
The HMAC shared symmetric key and optional password for the service to authenticate to Identity Cloud.
- Redirect URL
-
Redirect the resource owner user-agent here to gather consent.
- Enable consent request Encryption
-
Whether to encrypt the consent request JWT.
Default: Enabled
- Consent request Encryption Algorithm
-
The algorithm to encrypt the consent request JWT:
-
A128KW: AES Key Wrapping with 128-bit key derived from the client secret. -
A192KW: AES Key Wrapping with 192-bit key derived from the client secret. -
A256KW: AES Key Wrapping with 256-bit key derived from the client secret. -
RSA-OAEP: RSA with Optimal Asymmetric Encryption Padding (OAEP) with SHA-1 and MGF-1. -
RSA-OAEP-256: RSA with OAEP with SHA-256 and MGF-1. -
RSA1_5: RSA with PKCS#1 v1.5 padding. -
dir: Direct encryption with AES using the hashed client secret.
Default:
RSA-OAEP-256 -
- Consent request Encryption Method
-
The method to encrypt the consent request JWT:
-
A128GCM,A192GCM, andA256GCM: AES in Galois Counter Mode (GCM) authenticated encryption mode. -
A128CBC-HS256,A192CBC-HS384, andA256CBC-HS512: AES encryption in CBC mode with HMAC-SHA-2 for integrity.
Default:
A128GCM -
- Consent response signing algorithm
-
The JSON Web Algorithm (JWA) to verify a signed consent response JWT:
-
ES256: ECDSA with SHA-256 and NIST standard P-256 elliptic curve. -
ES384: ECDSA with SHA-384 and NIST standard P-384 elliptic curve. -
ES512: ECDSA with SHA-512 and NIST standard P-521 elliptic curve. -
HS256: HMAC with SHA-256. -
HS384: HMAC with SHA-384. -
HS512: HMAC with SHA-512. -
RS256: RSASSA-PKCS-v1_5 using SHA-256.
Default:
RS256 -
- Consent response encryption algorithm
-
The algorithm to decrypt the consent response JWT:
-
A128KW: AES Key Wrapping with 128-bit key derived from the client secret. -
A192KW: AES Key Wrapping with 192-bit key derived from the client secret. -
A256KW: AES Key Wrapping with 256-bit key derived from the client secret. -
RSA-OAEP-256: RSA with OAEP with SHA-256 and MGF-1. -
dir: Direct encryption with AES using the hashed client secret.
The decryption key depends on the algorithm:
-
For
RSA-OAEP-256, Identity Cloud uses the key mapped to theam.services.oauth2.remote.consent.response.decryptionsecret label. -
For the other (symmetric encryption) options, Identity Cloud uses the remote consent service secret.
Default:
RSA-OAEP-256 -
- Consent Request Signing Algorithm
-
The algorithm to sign the consent request JWT:
The signing key depends on the algorithm:
-
For asymmetric options, Identity Cloud uses the key mapped to the secret labels shown in the following table:
Secret label Algorithms am.applications.agents.remote.consent.request.signing.ES256ES256
am.applications.agents.remote.consent.request.signing.ES384ES384
am.applications.agents.remote.consent.request.signing.ES512ES512
am.applications.agents.remote.consent.request.signing.RSAPS256
PS384
PS512
RS256
RS384
RS512 -
For symmetric options, Identity Cloud uses the remote consent service secret.
As Identity Cloud and the remote consent client share the HMAC secret, a malicious actor with the secret could potentially create trusted JWTs. To protect against misuse, Identity Cloud also signs the JWT with the non-shared signing key mapped to the
am.services.oauth2.jwt.authenticity.signingsecret label.
Default:
RS256 -
- Consent response encryption method
-
The method to decrypt the consent response JWT:
-
A128GCM,A192GCM, andA256GCM: AES in Galois Counter Mode (GCM) authenticated encryption mode. -
A128CBC-HS256,A192CBC-HS384, andA256CBC-HS512: AES encryption in CBC mode with HMAC-SHA-2 for integrity.
Default:
A128GCM -
- Public key selector
-
How the remote consent service provides its public keys:
-
JWKs_URI: published online -
JWKs: provided as JWKs
-
Default: JWKs_URI
- Json Web Key URI
-
The URI for the remote consent service JWKs.
- JWKs URI content cache timeout in ms
-
The duration to cache the JWKs after reading them from the URI.
Default:
3600000(milliseconds) - JWKs URI content cache miss cache time
-
The duration to wait to fetch the JWKs again when a key ID (
kid) is missing in the cached JWKs.Use this property as a rate limit to prevent denial-of-service attacks against the URI. Identity Cloud rejects responses requiring unknown key IDs newer than the configured duration.
Default:
60000(milliseconds) - Json Web Key
-
The remote consent service keys; for example:
{ "keys": [{ "kty": "RSA", "kid": "RemA6Gw0...LzsJ5zG3E=", "use": "enc", "alg": "RSA-OAEP-256", "n": "AL4kjz74rDo3VQ3Wx...nhch4qJRGt2QnCF7M0", "e": "AQAB" }, { "kty": "RSA", "kid": "wUy3ifIIaL...eM1rP1QM=", "use": "sig", "alg": "RS256", "n": "ANdIhkOZeSHagT9Ze...ciOACVuGUoNTzztlCUk", "e": "AQAB" }] } - Consent Request Time Limit
-
A consent request JWT expires after this duration.
Default:
180(seconds)
Use the profile
To use the remote consent service for all OAuth 2.0 flows and client applications in the realm:
-
Under Native Consoles > Access Management, go to Realms > Realm Name > Services > OAuth2 Provider and switch to the Consent tab.
-
Select Enable Remote Consent.
-
Select the profile in the Remote Consent Service ID list.
-
If necessary, update the settings for signing and encryption.
-
Save your work.
To use the remote consent service for a single OAuth 2.0 client application:
-
Under Native Consoles > Access Management, go to Realms > Realm Name > Applications > OAuth 2.0 > Clients > Client ID and switch to the OAuth2 Provider Overrides tab.
-
Select Enable OAuth2 Provider Overrides.
-
Select Enable Remote Consent.
-
Select the profile in the Remote Consent Service ID list.
-
Save your work.
Client application registration
OAuth 2.0 or OIDC client applications must register with Identity Cloud before they can connect.
Registration involves setting up a client application profile in one of the following ways:
-
Using the Identity Cloud admin UI.
For details, refer to Application management (current).
-
Programmatically.
For details, refer to Dynamic client registration.
Shared application settings
To define shared settings for multiple client application profiles, you have these alternatives:
-
Configure default settings for all clients in the realm.
Client applications inherit their default settings from the OAuth 2.0 provider service. Find the settings under Native Consoles > Access Management > Realms > Realm Name > Services > OAuth2 Provider#.
-
Create an OAuth 2.0 client profile group.
Client applications that belong to the group can inherit its settings.
Create group settings
-
Under Native Consoles > Access Management, go to Realms > Realm Name > Applications > OAuth 2.0 > Clients.
-
On the Groups tab, click + Add Group, and click Create.
-
Adjust the configuration as needed, saving changes on each tab.
Inherit group settings
-
Under Native Consoles > Access Management, go to Realms > Realm Name > Applications > OAuth 2.0 > Clients > Client ID.
-
On the Core tab, select the Group in the drop-down.
-
Save your work.
Selecting a group refreshes the client configuration, discarding any other unsaved settings.
Inheritance icons appear next to inherited group settings. Not all properties can inherit their value; for example, the Client secret property is specific to each client application.
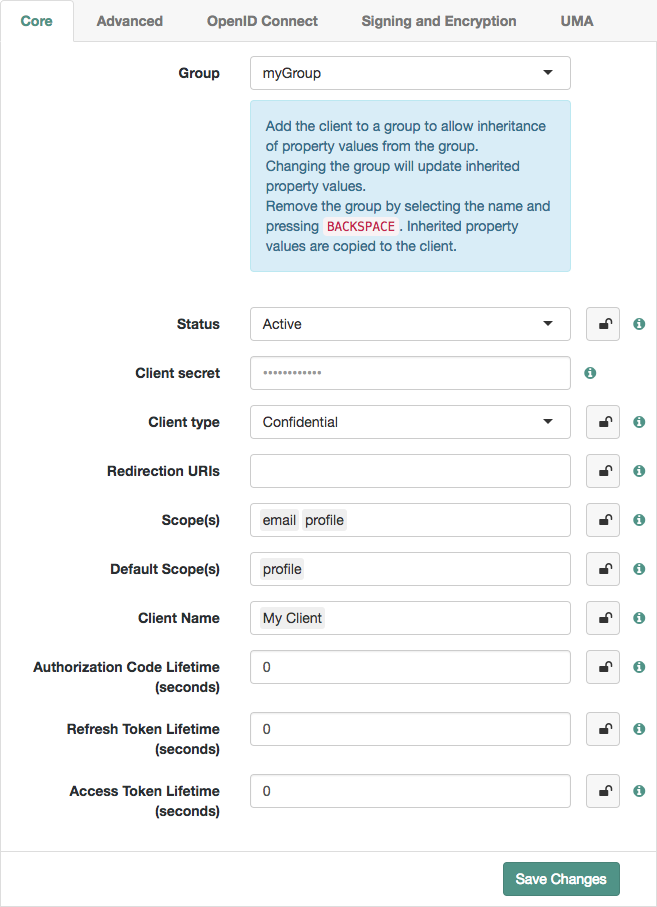 Figure 6. Inheriting group settings
 -
Inherit settings by clicking their inheritance icons .
The icon changes to , indicating the setting is inherited.
-
Save your work.
Configuration changes have the following effects:
-
When you change inherited settings in the group, the client applications get them automatically.
-
When you change a client application’s Group, locked settings inherit from the new group.
-
When you remove or delete a group, Identity Cloud writes inherited settings to the client profile, which you can edit independently.
Client application authentication
OAuth 2.0 client applications send their authentication credentials using one of the following mechanisms:
-
The Authorization header (HTTP Basic) (default)
Authentication depends on the Client Type defined in the Identity Cloud admin UI under Applications > Name > Sign On > General Settings > Advanced > Authentication:
- Confidential clients
-
These applications include websites and services that make secure connections to Identity Cloud.
They can protect their client secret or JSON Web Token (JWT).
You configure the authentication method for a confidential client in the Identity Cloud admin UI under Applications > Name > Sign On > General Settings > Advanced > Authentication as the Token Endpoint Authentication Method.
When a client authenticates with form parameters, the server can store POST data on the user-agent in an
OAUTH_REQUEST_ATTRIBUTEScookie. Identity Cloud uses the cookie to continue the authentication process across redirects. It marks the cookie for deletion on the next successful OAuth 2.0 authorization. - Public clients
-
These are single-page applications (SPAs) and applications running on devices.
They cannot protect secrets.
Public clients identify themselves by client ID, but do not fully authenticate.
Public OpenID Connect clients must specify
noneas their authentication method.
Authorization header (HTTP Basic)
This is the default authentication method for Identity Cloud confidential clients.
The OAuth 2.0 client authenticates by sending the credentials in an HTTP Basic authentication (Authorization) header.
The value is client_id:client_secret, first URL encoded,
then base64 encoded.
For example, myClient:forgerock encodes to bXlDbGllbnQ6Zm9yZ2Vyb2Nr:
$ curl \
--request POST \
--header "Authorization: Basic bXlDbGllbnQ6Zm9yZ2Vyb2Nr" \
...
To confirm this authentication method for a confidential OAuth 2.0 client, check the client profile in the Identity Cloud admin UI:
-
Go to Applications > Name > Sign On > General Settings > Advanced > Authentication.
-
Verify the Token Endpoint Authentication Method is
client_secret_basicand save your work.
Make sure all connections to Identity Cloud use HTTPS to protect the secret.
|
URL encode the For example, a client with ID
|
Form parameters (HTTP POST)
The OAuth 2.0 client authenticates by sending client_id and client_secret form parameters in an HTTP POST request:
$ curl \
--request POST \
--data "client_id=myClient" \
--data "client_secret=forgerock" \
...
To use this authentication method for a confidential OAuth 2.0 client, edit the client profile in the Identity Cloud admin UI:
-
Go to Applications > Name > Sign On > General Settings > Advanced > Authentication.
-
Set the Token Endpoint Authentication Method to
client_secret_postand save your work.
Make sure all connections to Identity Cloud use HTTPS to protect the secret.
JWT profile
The OAuth 2.0 client authenticates by sending a signed JSON Web Token (JWT) Bearer Token as described in RFC 7523, JWT Profile for OAuth 2.0 Client Authentication and Authorization Grants:
$ curl \
--request POST \
--data "client_assertion_type=urn%3Aietf%3Aparams%3Aoauth%3Aclient-assertion-type%3Ajwt-bearer" \
--data "client_assertion=the-signed-JWT" \
...
Client configuration
The JWT issuer must digitally sign the JWT or apply a Message Authentication Code (MAC). When the client is the JWT issuer, it can sign the JWT with a private key.
To use this authentication method for a confidential OAuth 2.0 client, edit the client profile in the Identity Cloud admin UI:
-
Go to Applications > Name > Sign On > General Settings and add Grant Types:
JWT Bearer. -
Under Applications > Name > Sign On > General Settings > Advanced > Authentication, set Token Endpoint Authentication Method to
private_key_jwt. -
Update additional settings depending on the mechanism for signing the JWT.
Identity Cloud must validate the JWT to authenticate the client:
Mechanism Settings Certificate-based
The client protects the JWT with public-private key cryptography with the public key in a digital certificate:
-
Under Applications > Name > Sign On > General Settings > Advanced > Authentication, set Client JWT Bearer Public Key to the PEM-format value of the JWT issuer’s public key, as in the following example:
-----BEGIN CERTIFICATE-----
MIIDETCCAfmgAwIBAgIEU8SXLjANBgkqhkiG9w0BAQsFADA5MRswGQYDVQQKExJvcGVuYW0uZXhh
bXBsZS5jb20xGjAYBgNVBAMTEWp3dC1iZWFyZXItY2xpZW50MB4XDTE0MTAyNzExNTY1NloXDTI0
...
TeGSgcqEAd6XlGXY1+M/yIeouUTi0F1bk1rNlqJvd57Xb4CEq17tVbGBm0hkECM8
-----END CERTIFICATE-----
-
Under Applications > Name > Sign On > General Settings > Advanced > Signing and Encryption, set Public key selector to
X509.
A client can have only one public key.
HMAC secret
The client protects the JWT with a Hash-based Message Authentication Code (HMAC).
-
Under Applications > Name > Client Credentials, reset the client secret to the HMAC secret.
The HMAC secret must contain at least 32 octets and sufficient entropy for a cryptographically strong key, as described in the Symmetric Key Entropy section of the OpenID Connect 1.0 specification.
A client can have only one HMAC secret.
JWK Set in the client profile
The client protects the JWT with public-private key cryptography with the public key in a JSON Web Key (JWK):
-
Under Applications > Name > Sign On > General Settings > Advanced > Signing and Encryption, set Public key selector to
JWKs. -
In the Json Web Key field, paste the JWK Set, as in the following example:
{
  "keys": [
    {
      "alg": "RSA-OAEP-256",
      "kty": "RSA",
      "use": "sig",
      "kid": "RemA6Gw0...LzsJ5zG3E=",
      "n": "AL4kjz74rDo3VQ3Wx...nhch4qJRGt2QnCF7M0",
      "e": "AQAB"
    }
  ]
}
Enter a JWK Set with multiple JWKs for certificate rotation.
JWK Set in a URI
The client protects the JWT with public-private key cryptography with the public key in a JWK:
-
Under Applications > Name > Sign On > General Settings > Advanced > Signing and Encryption, set Public key selector to
JWKs_URI. -
In the Json Web Key URI field, paste the URI to the JWK set.
-
-
Save your work.
Make sure all connections to Identity Cloud use HTTPS to protect any secrets, including the JWT.
The JWT profile flow
The following sequence diagram shows a JWT profile authentication flow:

-
The client requests a JWT from the issuer.
Clients can generate their own JWTs. They can also delegate the task to a separate service in the deployment.
Identity Cloud cannot generate JWTs for this purpose.
-
The issuer returns a signed JWT to the client.
-
The client POSTs the JWT and a client assertion type as parameters of an OAuth 2.0 request:
-
client_assertion_type=urn%3Aietf%3Aparams%3Aoauth%3Aclient-assertion-type%3Ajwt-bearer -
client_assertion=the-signed-JWT
-
-
Identity Cloud validates the JWT using the public key from the client profile.
-
Identity Cloud issues the response, such as an access token.
The JWT profile claims
The JWT Bearer Token must contain at least the following claims:
| Claim | Description | ||
|---|---|---|---|
|
The authorization server that is the intended audience of the JWT;
must be the Identity Cloud token endpoint, such as
|
||
|
The expiration time. This must be at most 30 minutes in the future.
If not, Identity Cloud returns a |
||
|
The unique identifier of the issuer that digitally signs the JWT:
|
||
|
A random, unique identifier for the JWT. Required if the client requests the |
||
|
The principal who is the subject of the JWT; must be the |
Identity Cloud ignores keys specified in JWT headers, such as jku and jwe.
For additional details, refer to the section of RFC 7523 on JWT Format and Processing Requirements.
Sample JWT profile client
The Identity Cloud code samples include a Java-based client to test the JWT token bearer flow.
For details, refer to How do I access and build the sample code provided for AM (All versions)? in the Knowledge Base.
Proof-of-possession
Proof-of-possession is a way to ensure that the client sending a request to the resource server possesses a particular cryptographic key. In other words, it is a way of proving the identity of the client.
Configure proof-of-possession to control which clients access your resources, or to mitigate against token theft; a malicious user with an access token must also present the cryptographic key to access the resources.
Identity Cloud supports JWK-based proof-of-possession.
JWK-based proof-of-possession
With proof-of-possession, the OAuth 2.0 client uses a known cryptographic key to prove its identity to the resource server.
How it works
Proof-of-possession has the OAuth 2.0 client include a JSON Web Key (JWK) with the client’s public key in a request for an access token:
-
The client presents the access token to a resource server.
-
The resource server gets the client’s public key from the access token.
-
The resource server uses the public key from the JWK to issue and validate a challenge-response with the client.
-
The client uses the private key to respond to the challenge.
Successfully solving the challenge cryptographically confirms proof-of-possession of the access token.
For details, refer to RFC 7800,
Proof-of-Possession Key Semantics for JSON Web Tokens (JWTs).
Identity Cloud does not support jwe and jku format keys; the public key must be represented in jwk format.
This sequence diagram displays the flow:

-
The client requests an access token using an OAuth 2.0 grant flow with the JWK in the request.
Before using the flow, the client gets a public-private key pair and prepares the JWK to hold the public key.
-
The authorization server returns the access token to the client:
-
When Identity Cloud uses server-side OAuth 2.0 token storage, it keeps the JWK with the access token in the CTS token store and provides the client with the access token ID.
-
When Identity Cloud uses client-side OAuth 2.0 token storage, the access token is a JWT with the JWK embedded.
-
-
The client requests access to the protected resources from the resource server.
-
The resource server recovers the JWK associated with the access token:
-
When Identity Cloud uses server-side OAuth 2.0 token storage, the resource server introspects the access token to get the JWK.
-
When Identity Cloud uses client-side OAuth 2.0 token storage, the access token is a JWT with the JWK embedded.
-
-
The resource server creates a challenge using the public key from the JWK.
For example, the challenge could be a message or a nonce encrypted with the public key.
-
The resource server sends the challenge to the client.
-
The client solves the challenge using its private key.
-
The client sends the response to the challenge to the resource server.
The resource server validates the response, confirming the client’s proof-of-possession, and grants access.
Demonstrate proof-of-possession
Demonstrate the process with an OAuth 2.0 client that uses the client credentials grant:
Create an OAuth 2.0 client
-
Create a confidential OAuth 2.0 client account.
In the Identity Cloud admin UI, select Applications > + Add Application, and create a new Service client with the following credentials:
- Client ID
-
myClient - Client Secret
-
forgerock
-
Under Sign On > General Settings > Scopes, add
accessand save your work.
Get an access token
-
Generate a public-private key pair for the OAuth 2.0 client.
Identity Cloud supports both RSA and elliptic curve (EC) key types.
To demonstrate the process, use an online JWK generator, such as https://mkjwk.org/.
For production deployments, store the key pair with the private key in a secure location. The OAuth 2.0 client must never reveal the private key. It uses the private key to solve the challenge from the resource server.
-
Represent the public key as a JWK.
Adapt the output to use the JWK format fields.
Proof-of-possession requires a JWK where the key fields depend on the key type and the body is a single public key object, not an array, as in the following example:
{ "jwk": { "kty": "EC", "use": "enc", "crv": "P-256", "kid": "myPublicJsonWebKey", "x": "D5kNqoGZbLZa77xdh4HSlSZIJcHxNw4UP0pgd5wbXvU", "y": "tX3SnRZgUOy48FV0XTCtaQNLG_DxXGbcVk94KvpyXrk" } } -
Base64-encode your JWK, as in the following example:
ewogICJqd2siOiB7CiAgICAia3R5IjogIkVDIiwKICAgICJ1c2UiOiAiZW5jIiwKICAgICJjc nYiOiAiUC0yNTYiLAogICAgImtpZCI6ICJteVB1YmxpY0pzb25XZWJLZXkiLAogICAgIngiOi AiRDVrTnFvR1piTFphNzd4ZGg0SFNsU1pJSmNIeE53NFVQMHBnZDV3Ylh2VSIsCiAgICAieSI 6ICJ0WDNTblJaZ1VPeTQ4RlYwWFRDdGFRTkxHX0R4WEdiY1ZrOTRLdnB5WHJrIgogIH0KfQ== -
Include the base64-encoded JWK as the value of the
cnf_keyparameter to request an access token:$ curl \ --request POST \ --user 'myClient:forgerock' \ --data 'grant_type=client_credentials' \ --data 'scope=access' \ --data 'cnf_key=eyJqd2siOnsia3R5IjoiRUMiLCJ1c2UiOiJlbmMiLCJjcnYiOiJQLTI1NiIsImtpZCI6Im15UHVibGljSnNvbldlYktleSIsIngiOiJENWtOcW9HWmJMWmE3N3hkaDRIU2xTWklKY0h4Tnc0VVAwcGdkNXdiWHZVIiwieSI6InRYM1NuUlpnVU95NDhGVjBYVEN0YVFOTEdfRHhYR2JjVms5NEt2cHlYcmsifX0=' \ 'https://<tenant-env-fqdn>/am/oauth2/realms/root/realms/alpha/access_token' {"access_token":"nhFC8RBEA6Zm672ir9GlWOMdJYc","scope":"access","token_type":"Bearer","expires_in":3599}By default, Identity Cloud uses server-side OAuth 2.0 tokens. The response includes the access token ID.
If Identity Cloud used client-side OAuth 2.0 tokens, the
access_tokenfield would contain the embedded JWK.
Use the access token
-
The client uses the access token to request a protected resource on the resource server.
This step is not shown in the demonstration.
-
The resource server uses the access token to get the public key.
In this demonstration where Identity Cloud uses server-side OAuth 2.0 tokens, use the OAuth 2.0 client credentials to introspect the token on behalf of the resource server.
The
cnffield contains the JWK:$ curl \ --request POST \ --user 'myClient:forgerock' \ --data 'token=nhFC8RBEA6Zm672ir9GlWOMdJYc' \ 'https://<tenant-env-fqdn>/am/oauth2/realms/root/realms/alpha/introspect' { "active": true, "scope": "access", "realm": "/alpha", "client_id": "myClient", "user_id": "myClient", "username": "myClient", "token_type": "Bearer", "exp": 1671126270, "sub": "myClient", "subname": "myClient", "iss": "https://<tenant-env-fqdn>/am/oauth2/realms/root/realms/alpha", "cnf": { "jwk": { "kty": "EC", "use": "enc", "crv": "P-256", "kid": "myPublicJsonWebKey", "x": "D5kNqoGZbLZa77xdh4HSlSZIJcHxNw4UP0pgd5wbXvU", "y": "tX3SnRZgUOy48FV0XTCtaQNLG_DxXGbcVk94KvpyXrk" } }, "authGrantId": "CBmKDJ1Ei8V7HhyXcKAyHaNR42I", "auditTrackingId": "3c47dc23-a35f-4a34-9f73-daf709d42400-385803" } -
The resource server uses the public key to confirm proof-of-possession with a challenge-response interaction.
This step is not shown in the demonstration.
By successfully responding to the challenge, the client proves it has the private key for the public key it presented to get the access token.
-
The resource server grants access to the resource.
Refresh tokens
Refresh tokens (RFC 6749) let an OAuth 2.0 client get a new access token with identical or narrower scopes than the original and without involving the resource owner. Identity Cloud can issue refresh tokens for all OAuth 2.0/OpenID Connect grant flows except the implicit and client credentials flows.
About refresh tokens
Access tokens have short lifetimes because they grant any bearer access to a protected resource.
Refresh tokens give an OAuth 2.0 client something to exchange for a new access token. The exchange does not involve resource owner interaction. Refresh tokens are useful when an OAuth 2.0 client needs:
-
Long term access to a protected resource.
-
Access when the resource owner is unavailable.
-
Multiple operations to access the same protected resources, and the resource owner should only have to grant consent once.
Refresh tokens are safer than long-lived access tokens. To exchange a refresh token for an access token, the OAuth 2.0 client must authenticate. A malicious user with a compromised access token has access to the protected resource. A user with a refresh token must also have the client ID and client secret to obtain an access token.
Settings for refresh tokens
Refresh tokens configuration settings include:
- Token issuance
-
By default, Identity Cloud issues a refresh token whenever it issues an access token. When Identity Cloud issues a new refresh token, it expires the old refresh token.
You can disable refresh token issuance in the OAuth 2.0 provider configuration under Native Consoles > Access Management > Realms > Realm Name > Services > OAuth2 Provider > Core:
- Issue Refresh Tokens
-
Whether to issue refresh tokens with access tokens.
- Issue Refresh Tokens on Refreshing Access Tokens
-
Whether to issue new refresh tokens when exchanging a refresh token for an access token.
- Token lifetime
-
Refresh tokens are long-lived by default.
You set the lifetime of refresh tokens in the OAuth 2.0 provider settings or for individual OAuth 2.0 clients. By default, Identity Cloud relies on the OAuth 2.0 provider configuration.
In the Identity Cloud admin UI, you can change the setting per client under Applications > Client ID > Sign On > Advanced settings > Token Lifetimes.
For details, refer to the OAuth2 provider reference.
- Grace period
-
The grace period specifies how long an OAuth 2.0 client can replay requests to exchange a refresh token for an access token if there’s a network problem or other transient issue.
For details, refer to the OAuth2.0 provider reference.
Clients can revoke refresh tokens using the /oauth2/token/revoke endpoint. The next time the client requires access to protected resources, it must involve the resource owner.
Demonstrate refresh tokens
Demonstrate using refresh tokens with the following steps:
OAuth 2.0 client
-
Create a confidential OAuth 2.0 client account.
In the Identity Cloud admin UI, select Applications > + Add Application, and create a new Web client with the following credentials:
- Client ID
-
myClient - Client Secret
-
forgerock
-
Under Sign On > General Settings > Sign-in URLs, add
https://www.example.com:443/callbackand save your work.
Resource owner
An OAuth 2.0 client requests the access token on behalf of a resource owner. Create the OAuth 2.0 resource owner account:
-
Record the username and password.
Get an access token
-
Authenticate as the resource owner:
curl \ --request POST \ --header 'Content-Type: application/json' \ --header 'X-OpenAM-Username: <resource-owner-username>' \ --header 'X-OpenAM-Password: <resource-owner-password>' \ --header 'Accept-API-Version: resource=2.0, protocol=1.0' \ 'https://<tenant-env-fqdn>/am/json/realms/root/realms/alpha/authenticate' {"tokenId":"<resource-owner-tokenId>","successUrl":"/enduser/?realm=/alpha","realm":"/alpha"} -
Request the authorization code as the client:
curl \ --dump-header - \ --request POST \ --Cookie '<session-cookie-name>=<resource-owner-tokenId>' \ --data 'scope=openid' \ --data 'response_type=code' \ --data 'client_id=myClient' \ --data 'csrf=<resource-owner-tokenId>' \ --data 'redirect_uri=https://www.example.com:443/callback' \ --data 'state=abc123' \ --data 'decision=allow' \ 'https://<tenant-env-fqdn>/am/oauth2/realms/root/realms/alpha/authorize' ... location: https://www.example.com:443/callback?code=<authorization-code>&iss=https%3A%2F%2F... ... -
Exchange the authorization code for an access token as the client:
curl \
--request POST \
--user 'myClient:forgerock' \
--data 'grant_type=authorization_code' \
--data 'code=<authorization-code>' \
--data 'redirect_uri=https://www.example.com:443/callback' \
'https://<tenant-env-fqdn>/am/oauth2/realms/root/realms/alpha/access_token'
{
  "access_token": "<access-token>",
  "refresh_token": "<refresh-token>",
  "scope": "openid",
  "id_token": "<id-token>",
  "token_type": "Bearer",
  "expires_in": 3599
}
Refresh an access token
Exchange the refresh token for a new access token:
$ curl \
--request POST \
--data "grant_type=refresh_token" \
--data "refresh_token=<refresh-token>" \
--data "client_id=myClient" \
--data "client_secret=forgerock" \
--data "scope=openid" \
"https://<tenant-env-fqdn>/am/oauth2/realms/root/realms/alpha/access_token"
{
  "access_token": "<new-access-token>",
  "refresh_token": "<new-refresh-token>",
  "scope": "openid",
  "id_token": "<id-token>",
  "token_type": "Bearer",
  "expires_in": 3599
}
|
Macaroons: sharable tokens
Macaroons are bearer tokens that you use in place of regular OAuth 2.0 access and refresh tokens. They let multiple clients and resource servers share a single token without compromising security.
Coordinating multiple access tokens with different scopes across a set of clients can be complicated.
The idea behind macaroons is to issue a single access token with a broad scope. The client creates as many sharable tokens as needed from the initial token by restricting its scope.
This is useful in a microservice architecture; for example, where a single client delegates tasks to other services that have a limited set of capabilities or are bound by certain restrictions.
Caveats
To restrict macaroon token scopes, use caveats.
Caveats are restrictions included in the token that must be satisfied when using the token. For example, an expiry time could be set as a caveat. When the expiry time is past, the token is invalid.
Caveats that can be satisfied locally are referred to as first-party caveats. Caveats satisfied by a service external from Identity Cloud are referred to as third-party caveats.
Supported first-party caveats
There is no standard format for caveats in macaroons. Identity Cloud uses a JSON-based syntax that mirrors the existing JSON Web Token (JWT)-based token restrictions:
scope-
Restricts the scope of the token.
The resulting scope is the intersection of the original scopes and any
scopecaveats. exp-
Restricts the expiry time of the token.
The effective expiry time is the minimum of the original expiry time and any expiry caveats. If you append more than one
expcaveat, the most restrictive one applies. cnf-
Binds the access token to a client certificate.
You can only bind one client certificate to a macaroon. Identity Cloud ignores attempts to bind a new certificate with subsequent caveats.
aud-
Restricts the audience of the token.
The effective audience is the intersection of any audience restriction and
audcaveats.
Identity Cloud returns other caveats in a caveats object in the JSON introspection response.
|
OpenID Connect clients must ensure the following information is present in the JSON:
|
Third-party caveats
Third-party caveats require the client to use a service other than Identity Cloud to prove they satisfy the condition specified by the caveat. They are useful where services external to Identity Cloud run authorization checks relevant to the access token.
Consider the case where you have an identity provider service external to Identity Cloud to query whether the user related to the access token belongs to a particular user group.
Another use case for third-party caveats is transactional authorization, requiring a user to authorize every access to a resource. Consider the case where a payment is tied to a unique transaction. You create a macaroon access token with a third-party caveat requiring the client to obtain a one-time discharge macaroon from an external transactional service.
A third-party caveat has the following parts:
-
A hint describing where the client can find the third-party service, which is usually a URL.
-
A unique secret key to sign discharge macaroons, known as the discharge key.
-
An identifier indicating to the third-party service which condition to check and how to recover the discharge key.
There is no standard format for the identifier.
Discharge macaroons
A third-party service returns proof a condition is satisfied in a discharge macaroon. The client must present both the access token macaroon and the discharge macaroon to access a protected resource.
A discharge macaroon can hold first-party caveats, such as expiry time. This allows for flows where the access token macaroon is long-lived, and the discharge macaroon is not, forcing the client to acquire a new discharge macaroon for each access to a protected resource.
|
Identity Cloud treats first-party caveats attached to discharge macaroons like caveats on the access token. For example, if the discharge macaroon limits the expiry time to five minutes, the introspection response lists the expiry time of the access token as five minutes, even if the access token is valid for longer. |
Append caveats
A client appends caveats to a macaroon using a macaroon library. This depends on your client, not Identity Cloud.
To manage first-party caveats and to inspect the caveats on a macaroon, you can use the /json/token/macaroon endpoint.
Endpoints and macaroons
Identity Cloud OAuth 2.0 endpoints that support access tokens also support macaroons without further configuration. Identity Cloud endpoints reject macaroons whose caveats are not satisfied.
For macaroons with third-party caveats, use the X-Discharge-Macaroon header to pass discharge macaroons.
Macaroons and token storage
Identity Cloud layers macaroons on top of the existing server-side OAuth 2.0 tokens and client-side OAuth 2.0 tokens. When you enable macaroons, Identity Cloud issues one of the following:
- Server-side macaroon tokens
-
Identity Cloud stores the access token in the CTS and issues macaroons to clients. The macaroon identifier points to the access token in the CTS.
- Client-side macaroon tokens
-
Identity Cloud issues signed or encrypted JWTs as access tokens wrapped in a macaroon.
Make sure the resulting token fits in the storage available to the client. If the storage available is limited to the size of a browser cookie, for example, the token may be too large to store. Token size can also impact network performance.
Enable macaroons
Follow these steps to enable macaroons in the OAuth 2.0 provider service:
-
Under Native Consoles > Access Management, go to Realms > Realm Name > Services > OAuth2 Provider.
-
On the Core tab, enable Use Macaroon Access and Refresh Tokens and save your changes.
-
On the Advanced tab, select the Macaroon Token Format.
If possible, use the default
V2format.Macaroons using the older
V1token format are much less efficient. Only useV1when you require compatibility with older macaroon libraries. -
Set the OAuth2 Token Signing Algorithm to
HS256or stronger. -
Save your changes.
OAuth 2.0 grant flows
This section describes the supported OAuth 2.0 flows and provides the information required to implement them. The examples assume the realm is configured for client-side tokens, but they also apply to server-side tokens,
Consult the following table to decide which grant flow is best for your environment based on the type of OAuth 2.0 client application.
| Client type | Suitable grant | Description |
|---|---|---|
A web application running on a server.
For example, a |
(RFC 6749) The authorization server uses the user-agent, for example, the resource owner’s browser, to transport a code that is later exchanged for an access token. |
|
A native application or a single-page application (SPA). For example, a desktop or mobile application, or a JavaScript application. |
(RFC 6749, RFC 7636) The authorization server uses the user agent, for example, the resource owner’s browser, to transport a code that is later exchanged for an access token. Because the client does not communicate securely with the authorization server, the code may be intercepted by malicious users. The implementation of the Proof Key for Code Exchange (PKCE) standard mitigates against those attacks. |
|
A web application, a native application, or a SPA that needs to make complex and highly secure authorization requests. |
(RFC 9126) Clients can push the payload of an authorization request directly to the authorization server without exposing sensitive request data to the browser. The server provides them with a request URI used to secure a subsequent authorization request. |
|
A single-page application (SPA). For example, a JavaScript application. |
(RFC 6749) The authorization server gives the access token to the user-agent so it can forward the token to the client; therefore, the access token might be exposed to the user and other applications. For security purposes, you should use the authorization code grant with PKCE when possible. |
|
The client is trusted with the resource owner credentials. For example, the resource owner’s operating system. |
(RFC 6749) The resource owner provides their credentials to the client, which uses them to obtain an access token from the authorization server. This flow should only be used if other flows are not available. |
|
The client is the resource owner, rather than acting on behalf of the resource owner. |
(RFC 6749) Similar to the resource owner password credentials grant type, but the resource owner is not part of the flow and the client accesses information relevant to itself. |
|
An input-constrained device. For example, a TV set. |
(RFC 8628) The resource owner authorizes the client to access protected resources on their behalf by using a different user-agent and entering a code displayed on the client device. |
|
An input-constrained device that can generate a Proof Key for Code Exchange (PKCE) challenge. |
(Custom Identity Cloud flow, based on RFC 8628 and RFC 7636) The resource owner authorizes the client to access protected resources on their behalf by using a different user-agent and entering a code displayed on the client device. Because the client does not communicate securely with the authorization server, the code may be intercepted by malicious users. The implementation of the PKCE standard mitigates against those attacks. |
|
The client has a SAML 2.0 trust relationship with the resource owner. For example, an application in an environment where a SAML 2.0 and an OAuth 2.0 ecosystem coexist. |
(RFC 7522) The client uses the resource owner’s SAML 2.0 assertion to obtain an access token from the authorization server without interacting with the resource owner again. |
|
The client has a trust relationship with the resource owner that is specified as a JWT. For example, an application in an environment where a non-SAML 2.0 and an OAuth 2.0 ecosystem coexist. |
(RFC 7523) The client uses a signed JWT to obtain an access token from the authorization server without interacting with the resource owner. |
|
Identity Cloud supports associating a confirmation key with an access token to support proof-of-possession interactions. For more information, refer to JWK-based proof-of-possession. |
Authorization code grant
- Endpoints
-
-
/oauth2/userinfo (OpenID Connect [OIDC])
The authorization code grant flow for OAuth 2.0 and OIDC lets a confidential client, such as a web application running on a server, exchange an authorization code for an access token to get authorized access to protected resources.
The authorization code grant is secure because:
-
It is a two-step process:
-
The resource owner authenticates to the authorization server and authorizes the client to access the protected resource. As confirmation, the client receives a temporary authorization code from the server.
-
The authorization server validates the authorization code and exchanges it for an access token.
-
-
The authorization server delivers the access token directly to the client, usually over HTTPS. Neither the access token nor the client secret is exposed publicly, which protects confidential clients.
The authorization code grant flow
OAuth 2.0

-
The client, usually a web-based service, receives a request to access a protected resource. To access the resource, the client requires authorization from the resource owner.
-
The client redirects the resource owner’s user-agent to the authorization server.
-
The authorization server authenticates the resource owner, confirms resource access, and gathers consent if required.
-
The authorization server redirects the resource owner’s user agent to the client.
-
During the redirection process, the authorization server appends an authorization code.
-
The client receives the authorization code and authenticates to the authorization server to exchange the code for an access token.
Note that this example assumes a confidential client. Public clients are not required to authenticate.
-
If the authorization code is valid, the authorization server returns an access token (and a refresh token, if configured) to the client.
-
The client requests access to the protected resource from the resource server.
-
The resource server contacts the authorization server to validate the access token.
-
The authorization server validates the token and responds to the resource server.
-
If the token is valid, the resource server lets the client access the protected resource.
OIDC

-
The end user wants to use the services provided by the relying party (RP). The RP, usually a web-based service, requires an account to provide those services.
The end user issues a request to share their information with the RP.
-
To access the end user’s information in the OpenID provider (OP), the RP requires end user consent.
The RP redirects the end user’s user-agent...
-
...to the OP.
-
The OP authenticates the end user, confirms resource access, and gathers consent if necessary.
-
The OP redirects the end user’s user-agent to the RP.
-
During the redirection process, the OP appends an authorization code.
-
The RP authenticates to the OP and exchanges the authorization code for an access token and an ID token.
Note that this example assumes a confidential client. Public clients are not required to authenticate.
-
If the authorization code is valid, the OP returns an access token and an ID token to the RP.
-
The RP validates the ID token and its claims.
The RP can use the ID token subject ID claim as the end user’s identity.
-
If the RP requires additional claims, it sends a request to the /oauth2/userinfo endpoint with the access token for authorization.
-
If the access token is valid, the
/oauth2/userinfoendpoint returns any additional claims.The RP can use the subject ID and the additional claims to identify the end user.
Demonstrate the authorization code grant flow
Perform these steps to get an authorization code and exchange it for an access token:
Prepare the demonstration
Complete these steps to prepare the authorization code grant flow demonstration:
-
Create an application owner profile and record the username and password.
-
Register a client application.
-
In the Identity Cloud admin UI, go to Applications and select + Custom Application.
-
Select the sign-in method as OIDC - OpenId Connect and application type as Web.
-
Create the application, providing the following details:
- Name
-
myClient - Owners
-
<application-owner> - Client ID
-
myClient - Client Secret
-
forgerock
-
Switch to the Sign On tab and under General Settings, set these fields to have the following values:
- Sign-in URLs
-
https://www.example.com:443/callback - Scopes
-
write(for OAuth 2.0)
openidandprofile(for OIDC)
-
Save your changes.
-
-
Create a resource owner profile and record the username and password.
Get an authorization code using a browser
-
The client redirects the resource owner’s user-agent to the authorization server’s /oauth2/authorize endpoint, including the following query parameters:
-
client_id:myClient -
response_type:code -
scope:write(OAuth 2.0);openidandprofile(OIDC) -
redirect_uri:https://www.example.com:443/callback
https://<tenant-env-fqdn>/am/oauth2/realms/root/realms/alpha/authorize
?client_id=myClient
&response_type=code
&scope=write
&state=abc123
&redirect_uri=https://www.example.com:443/callback
For OIDC, set
scope=openid profileinstead.The URL is split and spaces added for readability purposes.
The
scopeparameter is optional if default values are configured in the authorization server or the client.The
stateparameter is included to protect against CSRF attacks but is also optional. -
-
The resource owner authenticates to the authorization server. In this demonstration, they sign in using the default journey configured for the realm.
By default, client applications in Identity Cloud use implied consent. If Identity Cloud is configured to require explicit consent, the authorization server presents the resource owner with a consent screen. To continue the flow, the resource owner must select
Allowto grant consent.The authorization server redirects the resource owner to the URL specified in the
redirect_uriparameter. -
Inspect the URL in the browser.
It contains a
codeparameter with the authorization code issued by the authorization server.For example:
https://www.example.com/callback?code=<authorization-code>&iss... -
Follow the steps to get an access token.
Get an authorization code using REST
-
Authenticate as the resource owner.
For example:
$ curl \ --request POST \ --header 'Content-Type: application/json' \ --header 'X-OpenAM-Username: <resource-owner-username>' \ --header 'X-OpenAM-Password: <resource-owner-password>' \ --header "Accept-API-Version: resource=2.0, protocol=1.0" \ 'https://<tenant-env-fqdn>/am/json/realms/root/realms/alpha/authenticate' {"tokenId":"<tokenId>","successUrl":"/enduser/?realm=/alpha","realm":"/alpha"} -
As the client, call the /oauth2/authorize endpoint to request the authorization code. Provide the resource owner’s SSO token in a cookie and the following parameters:
-
scope:write(OAuth 2.0);openidandprofile(OIDC) -
response_type:code -
client_id:myClient -
csrf:<tokenId> -
redirect_uri:https://www.example.com:443/callback -
decision:allowFor example:
$ curl --dump-header - \
--request POST \
--Cookie "<session-cookie-name>=<tokenId>" \
--data "scope=write" \
--data "response_type=code" \
--data "client_id=myClient" \
--data "csrf=<tokenId>" \
--data "redirect_uri=https://www.example.com:443/callback" \
--data "state=abc123" \
--data "decision=allow" \
"https://<tenant-env-fqdn>/am/oauth2/realms/root/realms/alpha/authorize"
For OIDC, set
scope=openid profileinstead.The
scopeparameter is optional if default values are configured in the authorization server or the client.The
stateparameter is included to protect against CSRF attacks but is also optional.If the authorization server is able to authenticate the user and the client, it returns an HTTP 302 response with the authorization code appended to the redirection URL:
HTTP/2 302
...
location: https://www.example.com:443/callback?code=<authorization-code>&iss=https%3A%2F%2Fopenam.example.com%3A8443%2Fam%2Foauth2%2Frealms%2Froot%2Frealms%2Falpha&state=abc123&client_id=myClient
...
-
-
Follow the steps to get an access token.
Exchange an authorization code for an access token
As the client, call the /oauth2/access_token endpoint to exchange the authorization code for an access token. Provide the following parameters:
-
Authentication credentials:
myClient:forgerock -
grant_type:authorization_code -
code:<authorization-code> -
redirect_uri:https://www.example.com:443/callbackFor example:
$ curl \
--request POST \
--user 'myClient:forgerock' \
--data "grant_type=authorization_code" \
--data "code=<authorization-code>" \
--data "redirect_uri=https://www.example.com:443/callback" \
"https://<tenant-env-fqdn>/am/oauth2/realms/root/realms/alpha/access_token"
This example uses
--user '<client_id>:<client_secret>'to authenticate the client, the default for Identity Cloud OAuth 2.0 client applications.For information about the different ways to authenticate confidential clients, refer to Client application authentication.
The
redirect_uriand client parameters must match those used for the authorization code request, or the authorization server will not validate the code.For OAuth 2.0, the authorization server returns an access token; for example:
{
  "access_token": "<access-token>",
  "refresh_token": "<refresh-token>",
  "scope": "write",
  "token_type": "Bearer",
  "expires_in": 3599
}
For OIDC, the OP returns an access token and an ID token; for example:
{
  "access_token": "<access-token>",
  "refresh_token": "<refresh-token>",
  "scope": "openid profile",
  "id_token": "<id-token>",
  "token_type": "Bearer",
  "expires_in": 3599
}
If the RP does not require the access token, revoke it.
By default, Identity Cloud also issues a refresh token whenever it issues access tokens.
Additional OIDC claims
An RP can request additional claims about the end user with the access token at the /oauth2/userinfo endpoint:
$ curl \
--request GET \
--header "Authorization Bearer <access-token>" \
"https://<tenant-env-fqdn>/am/oauth2/realms/root/realms/alpha/userinfo"
{
  "name": "<resource-owner-display-name>",
  "family_name": "<resource-owner-family-name>",
  "given_name": "<resource-owner-given-name>",
  "sub": "<resource-owner-id>",
  "subname": "<resource-owner-id>"
}
Authorization code grant with PKCE
- Endpoints
-
-
/oauth2/userinfo (OpenID Connect [OIDC])
The authorization code grant, when combined with the Proof Key for Code Exchange (PKCE) standard (RFC 7636), is used when a public client, such as a native or SPA application, requires access to protected resources.
The flow is similar to the regular authorization code grant, but the client must generate a code that is used in the communication between the client and the authorization server. This code mitigates against interception attacks performed by malicious users.
Browser-based clients making OAuth 2.0 requests to different domains must implement Cross-Origin Resource Sharing (CORS) calls to access OAuth 2.0 resources in different domains.
The PKCE flow adds three parameters to those used for the authorization code grant:
code_verifier-
A random string that correlates the authorization request with the token request.
code_challenge-
A string derived from the code verifier sent in the authorization request, which is validated against the code verifier during the token request.
code_challenge_method-
The method used to derive the code challenge.
The authorization code grant with PKCE flow
OAuth 2.0

-
The client receives a request to access a protected resource. To access the resource, the client requires authorization from the resource owner. When using the PKCE standard, the client must generate a unique code and a way to verify it, and append the code to the request for the authorization code.
-
The client redirects the resource owner’s user-agent to the authorization server.
-
The authorization server authenticates the resource owner, confirms resource access, and gathers consent if not previously saved.
-
If the resource owner’s credentials are valid, the authorization server stores the code challenge and redirects the resource owner’s user agent to the redirection URI.
-
During the redirection process, the authorization server appends an authorization code to the request to the client.
-
The client receives the authorization code and calls the authorization server’s token endpoint to exchange the authorization code for an access token appending the verification code to the request.
-
The authorization server verifies the code stored in memory using the validation code. It also verifies the authorization code. If both codes are valid, the authorization server returns an access token (and a refresh token, if configured) to the client.
-
The client requests access to the protected resource from the resource server.
-
The resource server contacts the authorization server to validate the access token.
-
The authorization server validates the token and responds to the resource server.
-
If the token is valid, the resource server allows the client to access the protected resource.
OIDC

-
The end user wants to use the services provided by the relying party (RP). The RP, usually a web-based service, requires an account to provide those services.
The end user issues a request to share their information with the RP.
-
To access the end user’s information in the OpenID provider (OP), the RP requires end user consent. When using the PKCE standard, the RP must generate a unique code and a way to verify it, and append the code to the request for the authorization code.
-
The RP redirects the end user’s user-agent with
code_challengeandcode_challenge_method... -
...to the OP.
-
The OP authenticates the end user, confirms resource access, and gathers consent if necessary.
-
On success, the OP stores the code challenge and its method.
-
The OP redirects the end user’s user-agent to the redirection URI, usually at the RP.
-
During the redirection process, the OP appends an authorization code.
-
The RP authenticates to the OP and exchanges the authorization code for an access token and an ID token, appending the verification code to the request.
-
The OP verifies the code challenge it stored using the validation code, and verifies the authorization code.
-
If the codes are valid, the OP issues an access token and an ID token to the RP.
-
The RP validates the ID token and its claims.
The RP can use the ID token subject ID claim as the end user’s identity.
-
If the RP requires additional claims, it sends a request to the /oauth2/userinfo endpoint with the access token for authorization.
-
If the access token is valid, the
/oauth2/userinfoendpoint returns any additional claims.The RP can use the subject ID and the additional claims to identify the end user.
Demonstrate the authorization code grant with PKCE flow
Perform these steps to get an authorization code and exchange it for an access token:
Prepare the demonstration
Complete these steps to prepare the authorization code grant with PKCE flow demonstration:
-
Create an application owner profile and record the username and password.
-
Register a client application.
-
In the Identity Cloud admin UI, go to Applications and select + Custom Application.
-
Select the sign-in method as OIDC - OpenId Connect and application type as Native / SPA.
-
Create the application, providing the following details:
- Name
-
myClient - Owners
-
<application-owner> - Client ID
-
myClient
-
Switch to the Sign On tab and under General Settings, set these fields to have the following values:
- Sign-in URLs
-
https://www.example.com:443/callback - Scopes
-
write(for OAuth 2.0)
openidandprofile(for OIDC)
-
Save your changes.
-
-
Create a resource owner profile and record the username and password.
Generate a code verifier and a code challenge
The client application must generate a code verifier, a high-entropy URL-safe random string between 43 and 128 characters long, and a code challenge, a base64url-encoded hash of the code verifier.
It is mandatory to create the challenge using a SHA-256 algorithm if the client supports it, as specified in the PKCE standard (RFC 7636).
The following example code generates values such as
082b7ab3042995bcb3163ec83cf5f348ff4393d5713630eb5f09dcf7d0c2cca39749313556c260558eb49355ff86d0e61449
for the code verifier and K7Dz7AcV1urbgo4FYNgy2QAAz6v2LyIdmmGPzsFZbAc for the code challenge:
const crypto = require('crypto');

const verifier = crypto.randomBytes(50).toString('hex').slice(0, 128);
const challenge = crypto.createHash('sha256')
    .update(Buffer.from(verifier))
    .digest('base64')
    .replace(/=/g, '')
    .replace(/\+/g, '-')
    .replace(/\//g, '_');

console.log("verifier: " + verifier);
console.log("challenge: " + challenge);
// Generate random 128-character code_verifier from 8 * 16-character random passwords
var code_verifier = "";
for (let i=0; i<8; i++ ){
code_verifier += pm.variables.replaceIn('{{$randomPassword}}');
}
// Generate code_challenge with SHA-256 of verifier, then Base64 URL encode the result
var code_challenge = createSHA256Hash(code_verifier);
// Set global variables in Postman
pm.globals.set("code_verifier", code_verifier);
pm.globals.set("code_challenge", code_challenge);
function createSHA256Hash(code_verifier) {
return code_challenge = base64URLEncode(CryptoJS.SHA256(code_verifier))
}
function base64URLEncode(hash) {
return hash.toString(CryptoJS.enc.Base64)
.replace(/=/g, '')
.replace(/\+/g, '-')
.replace(/\//g, '_');
}The client is now ready to request an authorization code.
Get an authorization code using a browser
-
The client redirects the resource owner’s user-agent to the authorization server’s /oauth2/authorize endpoint, including the following query parameters:
-
client_id:myClient -
response_type:code -
scope:write(OAuth 2.0);openidandprofile(OIDC) -
redirect_uri:https://www.example.com:443/callback -
code_challenge:<code_challenge> -
code_challenge_method:S256
The
Code Verifier Parameter Requiredsetting (under Native Consoles > Access Management > Realms > Realm Name > Services > OAuth2 Provider > Advanced) specifies whether Identity Cloud requires clients to include a code verifier in their calls.However, if a client makes a call to Identity Cloud with the
code_challengeparameter, Identity Cloud honors the code exchange regardless of the value ofCode Verifier Parameter Required. For more information, refer to Authorization server configuration.For example:
https://<tenant-env-fqdn>/am/oauth2/realms/root/realms/alpha/authorize
?client_id=myClient
&response_type=code
&scope=write
&redirect_uri=https://www.example.com:443/callback
&code_challenge=K7Dz7AcV1urbgo4FYNgy2QAAz6v2LyIdmmGPzsFZbAc
&code_challenge_method=S256
&state=abc123
For OIDC, set
scope=openid profileinstead.The URL is split and spaces added for readability purposes.
The
scopeparameter is optional if default values are configured in the authorization server or the client.The
stateparameter is included to protect against CSRF attacks but is also optional. -
-
The resource owner authenticates to the authorization server. In this demonstration, they sign in using the default journey configured for the realm.
By default, client applications in Identity Cloud use implied consent. If Identity Cloud is configured to require explicit consent, the authorization server presents the resource owner with a consent screen. To continue the flow, the resource owner must select
Allowto grant consent.The authorization server redirects the resource owner to the URL specified in the
redirect_uriparameter. -
Inspect the URL in the browser.
It contains a
codeparameter with the authorization code the authorization server issued.For example:
https://www.example.com/callback?code=<authorization-code>&iss... -
Follow the steps to get an access token.
Get an authorization code using REST
-
Authenticate as the resource owner.
For example:
$ curl \ --request POST \ --header 'Content-Type: application/json' \ --header 'X-OpenAM-Username: <resource-owner-username>' \ --header 'X-OpenAM-Password: <resource-owner-password>' \ --header "Accept-API-Version: resource=2.0, protocol=1.0" \ 'https://<tenant-env-fqdn>/am/json/realms/root/realms/alpha/authenticate' {"tokenId":"<tokenId>","successUrl":"/enduser/?realm=/alpha","realm":"/alpha"} -
As the client, call the /oauth2/authorize endpoint to request the authorization code. Provide the resource owner’s SSO token in a cookie and the following parameters:
-
scope:write(OAuth 2.0);openidandprofile(OIDC) -
response_type:code -
client_id:myClient -
csrf:<tokenId> -
redirect_uri:https://www.example.com:443/callback -
decision:allow -
code_challenge:<code_challenge> -
code_challenge_method:S256The
Code Verifier Parameter Requiredsetting (under Native Consoles > Access Management > Realms > Realm Name > Services > OAuth2 Provider > Advanced) specifies whether Identity Cloud requires clients to include a code verifier in their calls.However, if a client makes a call to Identity Cloud with the
code_challengeparameter, Identity Cloud honors the code exchange regardless of the value ofCode Verifier Parameter Required. For more information, refer to Authorization server configuration.For example:
$ curl --dump-header - \
--request POST \
--Cookie "<session-cookie-name>=<tokenId>" \
--data "scope=write" \
--data "response_type=code" \
--data "client_id=myClient" \
--data "csrf=<tokenId>" \
--data "redirect_uri=https://www.example.com:443/callback" \
--data "state=abc123" \
--data "decision=allow" \
--data "code_challenge=K7Dz7AcV1urbgo4FYNgy2QAAz6v2LyIdmmGPzsFZbAc" \
--data "code_challenge_method=S256" \
"https://<tenant-env-fqdn>/am/oauth2/realms/root/realms/alpha/authorize"
For OIDC, set
scope=openid profileinstead.The
scopeparameter is optional if default values are configured in the authorization server or the client.The
stateparameter is included to protect against CSRF attacks but is also optional.If the authorization server is able to authenticate the user and the client, it returns an HTTP 302 response with the authorization code appended to the redirection URL:
HTTP/2 302
...
location: https://www.example.com:443/callback?code=<authorization-code>&iss...
...
-
-
Follow the steps to get an access token.
Exchange an authorization code for an access token
As the client, call the /oauth2/access_token endpoint to exchange the authorization code for an access token. Provide the following parameters:
-
client_id:myClient -
grant_type:authorization_code -
code:<authorization-code> -
redirect_uri:https://www.example.com:443/callback -
code_verifier:<code-verifier>For example:
$ curl \
--request POST \
--data "client_id=myClient" \
--data "grant_type=authorization_code" \
--data "code=<authorization-code>" \
--data "redirect_uri=https://www.example.com:443/callback" \
--data "code_verifier=<code-verifier>" \
"https://<tenant-env-fqdn>/am/oauth2/realms/root/realms/alpha/access_token"
The
client_idand theredirect_uriparameters specified in this call must match those used for the authorization code request or the authorization server will not validate the code.For OAuth 2.0, the authorization server returns an access token; for example:
{
  "access_token": "<access-token>",
  "refresh_token": "<refresh-token>",
  "scope": "write",
  "token_type": "Bearer",
  "expires_in": 3599
}
For OIDC, the OP returns an access token and an ID token; for example:
{
  "access_token": "<access-token>",
  "refresh_token": "<refresh-token>",
  "scope": "openid profile",
  "id_token": "<id-token>",
  "token_type": "Bearer",
  "expires_in": 3599
}
By default, the authorization server also issues a refresh token whenever it issues access tokens.
Additional OIDC claims
An RP can request additional claims about the end user with the access token at the /oauth2/userinfo endpoint:
$ curl \
--request GET \
--header "Authorization Bearer <access-token>" \
"https://<tenant-env-fqdn>/am/oauth2/realms/root/realms/alpha/userinfo"
{
  "name": "<resource-owner-display-name>",
  "family_name": "<resource-owner-family-name>",
  "given_name": "<resource-owner-given-name>",
  "sub": "<resource-owner-id>",
  "subname": "<resource-owner-id>"
}
Authorization code grant with PAR
- Endpoints
The pushed authorization request (PAR) endpoint provides enhanced security and cryptographic integrity when used with the authorization code grant flow, and optionally, in conjunction with PKCE.
PAR lets the authorization server authenticate the client before making an authorization request to enable early detection of invalid or illegal requests.
To further protect authorization details when passing through third-party applications, clients can use JWT-based request objects as defined by RFC9101, to wrap confidential and potentially complex request parameters.
In response to this pre-authorization backchannel request, the client receives a request URI that is used to reference the payload data in subsequent interactions with the server.
|
PAR is optional by default, but you can enable Require Pushed Authorization Requests under Native Consoles > Access Management to enforce the use of the PAR endpoint to initiate authorization requests. To force all clients in a realm to use PAR, configure the OAuth 2.0 provider’s advanced settings. To force an individual client, go to Realms > Realm Name > Applications > OAuth 2.0 > Clients > Client ID and enable the setting on the Advanced tab. |
The authorization code grant with PAR flow

-
The client pushes a request to the PAR endpoint, providing both client and request details.
-
Identity Cloud validates both client and request, and if successful, returns a request URI as a reference to the request payload and an expiry period for the request URI.
-
The client receives a request to access a protected resource. To access the resource, the client requires authorization from the resource owner.
-
The client redirects the resource owner’s user-agent to the authorization server.
-
The authorization server authenticates the resource owner, confirms resource access, and gathers consent if not previously saved.
-
The client requests an authorization code, typically through a web browser, by passing in the request_uri and client_id.
-
The client_id is validated against the request, and if successful, the authorization code is returned to the client.
-
The client authenticates to the authorization server using the received code in exchange for an access token.
Note that this example assumes a confidential client. Public clients are not required to authenticate.
-
If the authorization code is valid, the authorization server returns an access token (and a refresh token, if configured) to the client.
-
The client requests access to the protected resources from the resource server.
-
The resource server contacts the authorization server to validate the access token.
-
The authorization server validates the token and responds to the resource server.
-
If the token is valid, the resource server allows the client to access the protected resource.
Demonstrate the authorization code grant with PAR flow
Perform these steps to get a PAR request URI and an authorization code to exchange for an access token:
Prepare the demonstration
Complete these steps to prepare the authorization code grant with PAR flow demonstration:
-
Create an application owner profile and record the username and password.
-
Register a client application.
-
In the Identity Cloud admin UI, go to Applications and select + Custom Application.
-
Select the sign-in method as OIDC - OpenId Connect and application type as Web.
-
Create the application, providing the following details:
- Name
-
myClient - Owners
-
<application-owner> - Client ID
-
myClient - Client Secret
-
forgerock
-
Switch to the Sign On tab and under General Settings, set these fields to have the following values:
- Sign-in URLs
-
https://www.example.com:443/callback - Scopes
-
write
-
Save your changes.
-
-
Configure the duration of the request URI:
-
Under Native Consoles > Access Management, go to Services > OAuth2 Provider and switch to the Advanced tab.
-
Set PAR Request URI Lifetime to a value sufficient to cover the duration of the PAR request.
For more information, refer to PAR Request URI Lifetime.
-
Save your changes.
-
-
Create a resource owner profile and record the username and password.
Get a PAR request URI
As the client, call the authorization server’s PAR endpoint. Specify parameters directly in the request body. Alternatively, for large or sensitive data, Identity Cloud supports the JWT-Secured Authorization Request (JAR) standard for PAR, which lets you wrap parameters in a signed and encrypted JWT.
Example parameters with a JWT:
-
client_id:myClient -
client_secret:forgerock -
request:<signed-encrypted-jwt-value>
Example parameters without a JWT:
-
client_id:myClient -
client_secret:forgerock -
redirect_uri:https://www.example.com:443/callback -
scope:write -
response_type:code -
code_challenge:<code_challenge> -
code_challenge_method:S256
For information about required parameters and an example JWT request object, refer to /oauth2/par.
Example PAR request with a JWT:
$ curl --request POST \
--data "client_id=myClient" \
--data "client_secret=forgerock" \
--data "request=<signed-encrypted-jwt-value>" \
"https://<tenant-env-fqdn>/am/oauth2/realms/root/realms/alpha/par"
Example PAR request without a JWT:
$ curl --request POST \
--data "client_id=myClient" \
--data "client_secret=forgerock" \
--data "response_type=code" \
--data "scope=write" \
--data "code_challenge=<code_challenge>" \
--data "code_challenge_method=S256" \
--data "redirect_uri=https://www.example.com:443/callback" \
"https://<tenant-env-fqdn>/am/oauth2/realms/root/realms/alpha/par"
On success, the authorization server returns the following JSON:
{
  "request_uri": "zizBvZPwAmzfcDOMKTPv0QTaRA8",
  "expires_in": 90
}-
request_uri: A reference to the PAR request payload. -
expires_in: The validity period of the request URI in seconds.
Get an authorization code using a browser
-
Ensure the client has retrieved a request URI by following the steps described in Get a PAR request URI.
-
The client redirects the resource owner’s user-agent to the authorization server’s /oauth2/authorize endpoint including the following query parameters:
-
client_id:myClient -
response_type:code -
redirect_uri:https://www.example.com:443/callback -
request_uri:<par_request_uri>
For example:
https://<tenant-env-fqdn>/am/oauth2/realms/root/realms/alpha/authorize \
?client_id=myClient \
&request_uri=<par_request_uri>
&response_type=code \
&scope=write \
&state=abc123 \
&redirect_uri=https://www.example.com:443/callback
The URL is split and spaces added for readability purposes.
The
scopeparameter is optional if default values are configured in the authorization server or the client.The
stateparameter is included to protect against CSRF attacks but is also optional. -
-
The resource owner authenticates to the authorization server. In this demonstration, they sign in using the default journey configured for the realm.
By default, client applications in Identity Cloud use implied consent. If Identity Cloud is configured to require explicit consent, the authorization server presents the resource owner with a consent screen. To continue the flow, the resource owner must select
Allowto grant consent.The authorization server redirects the resource owner to the URL specified in the
redirect_uriparameter. -
Inspect the URL in the browser.
It contains a
codeparameter with the authorization code the authorization server has issued.For example:
https://www.example.com/callback?code=<authorization-code>&iss... -
Follow the steps to get an access token.
Get an authorization code using REST
-
Ensure the client has retrieved a request URI by following the steps described in Get a PAR request URI.
-
Authenticate as the resource owner.
For example:
$ curl \ -i \ --request POST \ --header "Content-Type: application/json" \ --header 'X-OpenAM-Username: <resource-owner-username>' \ --header 'X-OpenAM-Password: <resource-owner-password>' \ --header "Accept-API-Version: resource=2.0, protocol=1.0" \ 'https://<tenant-env-fqdn>/am/json/realms/root/realms/alpha/authenticate' {"tokenId":"<tokenId>","successUrl":"/enduser/?realm=/alpha","realm":"/alpha"} -
As the client, call the /oauth2/authorize endpoint to request the authorization code. Provide the resource owner’s SSO token in a cookie and the following parameters:
-
client_id:myClient -
response_type:code -
scope:write -
request_uri:<par_request_uri> -
csrf:<tokenId> -
redirect_uri:https://www.example.com:443/callback -
decision:allow
For information about the parameters supported by the
/oauth2/authorizeendpoint, refer to /oauth2/authorize.For example:
$ curl --dump-header - \
--request POST \
--Cookie "<session-cookie-name>=<tokenId>" \
--data "request_uri=<par_request_uri>" \
--data "client_id=myClient" \
--data "scope=write" \
--data "response_type=code" \
--data "csrf=<tokenId>" \
--data "redirect_uri=https://www.example.com:443/callback" \
--data "state=abc123" \
--data "decision=allow" \
"https://<tenant-env-fqdn>/am/oauth2/realms/root/realms/alpha/authorize"
The
scopeparameter is optional if default values are configured in the authorization server or the client.The
stateparameter is included to protect against CSRF attacks but is also optional.If the authorization server is able to authenticate the user and the client, it returns an HTTP 302 response with the authorization code appended to the redirection URL:
HTTP/2 302 ... location: https://www.example.com:443/callback?code=<authorization-code>&iss... ... -
-
Perform the steps in Exchange an authorization code for an access token to get an access token.
Exchange an authorization code for an access token
As the client, call the /oauth2/access_token endpoint to exchange the authorization code for an access token. Provide the following parameters:
-
myClient:forgerock -
grant_type:authorization_code -
code:<authorization-code> -
redirect_uri:https://www.example.com:443/callback -
code_verifier:<code-verifier>For example:
$ curl \
--request POST \
--user 'myClient:forgerock' \
--data "grant_type=authorization_code" \
--data "code=<authorization-code>" \
--data "redirect_uri=https://www.example.com:443/callback" \
--data "code_verifier=<code-verifier>" \
"https://<tenant-env-fqdn>/am/oauth2/realms/root/realms/alpha/access_token"
The
redirect_uriand client parameters specified in this call must match those used as part of the authorization code request, or the authorization server will not validate the code.The authorization server returns an access token, for example:
{
  "access_token": "<access-token>",
  "refresh_token":"<refresh-token>",
  "scope": "write",
  "token_type": "Bearer",
  "expires_in": 3599
}
By default, the authorization server also issues a refresh token whenever it issues access tokens.
Implicit grant
- Endpoints
-
-
/oauth2/userinfo (OpenID Connect [OIDC])
The implicit grant is designed for public clients that run inside the resource owner’s user-agent, for example, JavaScript applications. For OIDC, this flow lets the relying party (RP) interact directly with the OpenID provider (OP), and receive tokens directly from the authorization endpoint.
Because applications running in the user-agent are considered less trusted than applications running in servers, the authorization server or OP never issues refresh tokens in this flow. Also, you must consider the security impact of cross-site scripting (XSS) attacks that could leak the access token to other systems, and implement cross-origin resource sharing (CORS) to make OAuth 2.0 requests to different domains.
Due to the security implications of this flow, ForgeRock recommends that you use the Authorization code grant with PKCE flow whenever possible.
The implicit grant flow
OAuth 2.0

-
The client, usually a single-page application (SPA), receives a request to access a protected resource. To access the resource, the client requires authorization from the resource owner.
-
The client redirects the resource owner’s user-agent or opens a new frame to the Identity Cloud authorization service.
-
The authorization server authenticates the resource owner, confirms resource access, and gathers consent if not previously saved.
-
If the resource owner’s credentials are valid, the authorization server returns the access token to the user-agent as part of the redirection URI.
-
Now, the client must extract the access token from the URI. In this example, the user-agent follows the redirection to the web-hosted server that contains the protected resource without the access token.
-
The web-hosted server returns a web page with an embedded script to extract the access token from the URI.
In another possible scenario, the redirection URI is a dummy URI in the client, and the client already has the logic in itself to extract the access token.
-
The user-agent executes the script and retrieves the access token.
-
The user-agent returns the access token to the client.
-
The client requests access to the protected resources presenting the access token to the resource server.
-
The resource server contacts the authorization server to validate the access token.
-
The authorization server validates the token and responds to the resource server.
-
If the token is valid, the resource server allows the client to access the protected resource.
OIDC

-
The RP, usually an SPA, receives a request to access user information at the OP. To access this information, the RP requires authorization from the end user.
-
The RP redirects the end user’s user-agent or opens a new frame to the OP.
As part of the implicit flow, the request includes the
openidscope and thenonceparameter. -
The OP authenticates the end user, confirms resource access, and gathers consent if necessary.
-
On success, the OP returns access and ID tokens to the user-agent in the redirection URI.
-
The user-agent extracts the tokens from the URI.
In this example, the user-agent follows the redirection to the RP without the tokens.
-
The RP returns a web page with an embedded script to extract the tokens from the URI.
In another possible scenario, the redirection URI is a dummy URI in the RP application and the RP application already has the logic to extract the tokens.
-
The user-agent executes the script and retrieves the tokens.
-
The user-agent returns the tokens to the RP.
-
The RP validates the ID token and its claims.
The RP can use the ID token subject ID claim as the end user’s identity.
-
If the RP requires additional claims, it sends a request to the /oauth2/userinfo endpoint with the access token for authorization.
-
If the access token is valid, the
/oauth2/userinfoendpoint returns any additional claims.The RP can use the subject ID and the additional claims to identify the end user.
Demonstrate the implicit grant flow
Perform these steps to get an access token:
Prepare the demonstration
Complete these steps to prepare the implicit grant demonstration:
-
Create an application owner profile and record the username and password.
-
Register a client application.
-
In the Identity Cloud admin UI, go to Applications and select + Custom Application.
-
Select the sign-in method as OIDC - OpenId Connect and application type as Native / SPA.
-
Create the application, providing the following details:
- Name
-
myClient - Owners
-
<application-owner> - Client ID
-
myClient
-
Switch to the Sign On tab and under General Settings, set these fields to have the following values:
- Sign-in URLs
-
https://www.example.com:443/callback - Scopes
-
write(for OAuth 2.0)
openidandprofile(for OIDC) - Grant Types
-
Implicit
-
Save your changes.
-
-
Create a resource owner profile and record the username and password.
Get an access token using a browser
-
The client redirects the resource owner’s user-agent to the authorization server’s /oauth2/authorize endpoint, including the following query parameters:
-
client_id:myClient -
response_type:token(OAuth 2.0);token id_token(OIDC) -
scope:write(OAuth 2.0);openidandprofile(OIDC) -
redirect_uri:https://www.example.com:443/callback
For example:
https://<tenant-env-fqdn>/am/oauth2/realms/root/realms/alpha/authorize \
?client_id=myClient \
&response_type=token \
&scope=write \
&redirect_uri=https://www.example.com:443/callback \
&state=abc123
For OIDC, use
scope=openid profileandresponse_type=token id_tokeninstead.The URL is split and spaces added for readability purposes.
The
scopeparameter is optional if default values are configured in the authorization server or the client.The
stateparameter is included to protect against CSRF attacks but is also optional. -
-
The resource owner authenticates to the authorization server. In this demonstration, they sign in using the default journey configured for the realm.
By default, client applications in Identity Cloud use implied consent. If Identity Cloud is configured to require explicit consent, the authorization server presents the resource owner with a consent screen. To continue the flow, the resource owner must select
Allowto grant consent.The authorization server redirects the resource owner to the URL specified in the
redirect_uriparameter. -
Inspect the URL in the browser.
For OAuth 2.0, it contains the access token the authorization server has issued; for example:
https://www.example.com/callback#access_token=<access_token>&iss...For OIDC, it contains the access and ID tokens; for example:
https://www.example.com/callback#access_token=<access_token>&id_token=<id_token>...
Get an access token using REST
-
Authenticate as the resource owner.
For example:
$ curl \ --request POST \ --header "Content-Type: application/json" \ --header 'X-OpenAM-Username: <resource-owner-username>' \ --header 'X-OpenAM-Password: <resource-owner-password>' \ --header "Accept-API-Version: resource=2.0, protocol=1.0" \ 'https://<tenant-env-fqdn>/am/json/realms/root/realms/alpha/authenticate' {"tokenId":"<tokenId>","successUrl":"/enduser/?realm=/alpha","realm":"/alpha"} -
As the client, call the /oauth2/authorize endpoint to request the authorization code. Provide the resource owner’s SSO token in a cookie and the following parameters:
-
client_id:myClient -
response_type:token(OAuth 2.0);token id_token(OIDC) -
scope:write(OAuth 2.0);openidandprofile(OIDC) -
csrf:<tokenId> -
redirect_uri:https://www.example.com:443/callback -
decision:allow
For example:
$ curl \
--Cookie "<session-cookie-name>=<tokenId>" \
--request POST \
--data "client_id=myClient" \
--data "response_type=token" \
--data "scope=write" \
--data "state=123abc" \
--data "decision=allow" \
--data "csrf=<tokenId>" \
--data "redirect_uri=https://www.example.com:443/callback" \
"https://<tenant-env-fqdn>/am/oauth2/realms/root/realms/alpha/authorize"
For OIDC, use
scope=openid profileandresponse_type=token id_tokeninstead.The
scopeparameter is optional if default values are configured in the authorization server or the client.The
stateparameter is included to protect against CSRF attacks but is also optional.For OAuth 2.0, if the authorization server is able to authenticate the user, it returns an HTTP 302 response with the access token appended to the redirection URI:
HTTP/2 302
...
location: https://www.example.com:443/callback#access_token=<access-token>&iss...
...
For OIDC, it returns the access and ID tokens in the redirection URI:
HTTP/2 302 ... location: https://www.example.com:443/callback#access_token=<access-token>&&id_token=<id_token>... ... -
Additional OIDC claims
An RP can request additional claims about the end user with the access token at the /oauth2/userinfo endpoint:
$ curl \
--request GET \
--header "Authorization Bearer <access-token>" \
"https://<tenant-env-fqdn>/am/oauth2/realms/root/realms/alpha/userinfo"
{
  "name": "<resource-owner-display-name>",
  "family_name": "<resource-owner-family-name>",
  "given_name": "<resource-owner-given-name>",
  "sub": "<resource-owner-id>",
  "subname": "<resource-owner-id>"
}
Resource owner password credentials grant
- Endpoints
The resource owner password credentials (ROPC) grant flow lets the client use the resource owner’s username and password to get an access token.
Because the resource owner shares their credentials with the client, this flow is deemed the most insecure of the OAuth 2.0 flows. The resource owner’s credentials can potentially be leaked or abused by the client application, and the resource owner has no control over the authorization process.
Only implement the ROPC grant flow if the resource owner has a trusted relationship with the client, such as when the client is part of the device operating system or a highly privileged application.
The ROPC grant flow

-
The resource owner provides the client with their username and password.
-
The client sends the resource owner’s and its own credentials to the authorization server, which authenticates the credentials and authorizes the resource owner’s request.
-
If the credentials are valid, the authorization server returns an access token to the client.
-
The client requests access to the protected resource, presenting the access token to the resource server.
-
The resource server contacts the authorization server to validate the access token.
-
The authorization server validates the token and responds to the resource server.
-
If the token is valid, the resource server lets the client access the protected resource.
Demonstrate the ROPC grant flow
Perform these steps to get an access token:
Prepare the demonstration
Complete these steps to prepare the ROPC grant flow demonstration:
-
Create an application owner profile and record the username and password.
-
Register a client application.
-
In the Identity Cloud admin UI, go to Applications and select + Custom Application.
-
Select the sign-in method as OIDC - OpenId Connect and application type as Web.
-
Create the application, providing the following details:
- Name
-
myClient - Owners
-
<application-owner> - Client ID
-
myClient - Client Secret
-
forgerock
-
Switch to the Sign On tab and under General Settings, set these fields to have the following values:
- Grant Types
-
Resource Owner Password Credentials - Sign-in URLs
-
https://www.example.com:443/callback - Scopes
-
write
-
Save your changes.
-
-
Create a resource owner profile and record the username and password.
-
Under Native Consoles > Access Management, go to Realms > Realm Name > Services > OAuth2 Provider > Advanced and check that the Grant Types field includes
Resource Owner Password Credentials.
Define an ROPC journey
Configure Identity Cloud to use a journey that can authenticate a resource owner without UI-based interaction,
such as the Login journey.
Identity Cloud invokes the journey that first appears in the configuration in the following order:
-
For a specific REST call to /oauth2/access_token, specify the journey as the auth_chain parameter.
-
For the realm, set the Password Grant Authentication Service property in the OAuth 2.0 provider service.
Under Native Consoles > Access Management, go to Realms > Realm Name > Services > OAuth2 Provider > Advanced.
-
Also at the realm level, but at a lower priority, Identity Cloud uses the journey defined in the Organization Authentication Configuration property.
Under Native Consoles > Access Management, go to Realms > Realm Name > Authentication > Settings > Core to set this property.
Get an access token using the ROPC grant flow
-
The resource owner provides their credentials to the client. This is done outside the scope of this procedure.
-
As the client, call /oauth2/access_token specifying the resource owner’s and the client’s credentials, and
grant_type=password.For example:
$ curl \
--request POST \
--user '<client-id>:<client-secret>' \
--data "grant_type=password" \
--data "username=<resource-owner-username>" \
--data "password=<resource-owner-password>" \
--data "scope=write" \
'https://<tenant-env-fqdn>/am/oauth2/realms/root/realms/alpha/access_token'
The
scopeparameter is optional if default values are configured in the authorization server or the client.Identity Cloud returns an access token, for example:
{
  "access_token": "<access-token>",
  "refresh_token": "<refresh-token>",
  "scope": "write",
  "token_type": "Bearer",
  "expires_in": 3599
}
By default, the authorization server also issues a refresh token whenever it issues access tokens.
Client credentials grant
- Endpoints
The client credentials grant is intended for clients who are also resource owners that need to access their own data rather than acting on behalf of a user.
For example, an application that needs access to a protected resource to update its configuration might use the client credentials grant to get an access token.
The client credentials grant flow supports confidential clients only.
The client credentials grant flow

-
The client sends its credentials to the authorization server to get authenticated and requests an access token.
-
If the client credentials are valid, the authorization server returns an access token to the client.
-
The client requests access to the protected resource from the resource server.
-
The resource server contacts the authorization server to validate the access token.
-
The authorization server validates the token and responds to the resource server.
-
If the token is valid, the resource server allows the client to access the protected resource.
Demonstrate the client credentials grant flow
Perform these steps to get an access token:
Prepare the demonstration
Complete these steps to prepare the client credentials grant flow demonstration:
-
Create an application owner profile and record the username and password.
-
Register a client application.
-
In the Identity Cloud admin UI, go to Applications and select + Custom Application.
-
Select the sign-in method as OIDC - OpenId Connect and application type as Web.
-
Create the application, providing the following details:
- Name
-
myClient - Owners
-
<application-owner> - Client ID
-
myClient - Client Secret
-
forgerock
-
Switch to the Sign On tab and under General Settings, update these fields to have the following values:
- Sign-in URLs
-
https://www.example.com:443/callback - Scopes
-
write
-
Ensure Grant Types contains
Client Credentials. -
Save your changes.
-
-
Create a resource owner profile and record the username and password.
-
Under Native Consoles > Access Management, go to Realms > Realm Name > Services > OAuth2 Provider > Advanced and ensure the Grant Types field includes
Client Credentials.
Get an access token using the client credentials grant
As the client, call /oauth2/access_token
specifying the client’s credentials, and grant_type=client_credentials.
For example:
$ curl
--request POST \
--user '<client-id>:<client-secret>' \
--data "grant_type=client_credentials" \
--data "scope=write" \
"https://<tenant-env-fqdn>/am/oauth2/realms/root/realms/alpha/access_token"|
The |
Identity Cloud returns an access token, for example:
{
  "access_token": "<access-token>",
  "scope": "write",
  "token_type": "Bearer",
  "expires_in": 3599
}
Device authorization grant
The device authorization grant, formerly known as the device flow, is designed for client devices that have limited user interfaces, such as a set-top box, streaming radio, or a server process running on a headless operating system.
Instead of logging in with the client device, you can authorize the client to access protected resources on your behalf. You log in with a different user agent, such as a phone or Internet browser, and authenticate using a code that the client device displays.
The device authorization grant flow

-
The client device requests a device code from Identity Cloud.
-
Identity Cloud returns a device code, a user code, a URL for entering the user code, and an interval, in seconds.
-
The client device provides instructions to the user to enter the user code. The client can choose an appropriate method to convey the instructions, for example, text instructions on screen, or a QR code.
-
The client device continuously polls Identity Cloud to check if authorization has completed.
-
If the user hasn’t completed the authorization, Identity Cloud returns an HTTP 403 status code with an
authorization_pendingmessage. -
The user follows the instructions from the client device to enter the user code by using a separate device.
-
If the user code is valid, Identity Cloud redirects the resource owner for authentication.
-
On authentication, Identity Cloud prompts the user to confirm the user code and pre-populates the page with the code entered previously.
-
The user can authorize the client device. The Identity Cloud consent page also displays the requested scopes and their values.
If the user had a valid session when they entered the code and the client is configured to skip consent, Identity Cloud doesn’t display the confirmation or the consent pages.
This is also true if you perform the call using REST and pass the
decision=allowparameter. -
On authorization, Identity Cloud responds to the client device’s polling with an HTTP 200 status and an access token, giving the client device access to the requested resources.
Demonstrate the device authorization grant flow
Follow these steps to demonstrate the OAuth 2.0 device grant flow:
Prepare the demonstration
Complete these steps to prepare the device authorization grant demonstration:
-
Create an application owner profile and record the username and password.
-
Register a client application.
-
In the Identity Cloud admin UI, go to Applications and select + Custom Application.
-
Select the sign-in method as OIDC - OpenId Connect and application type as Native / SPA.
-
Create the application, providing the following details:
- Name
-
myClient - Owners
-
<application-owner> - Client ID
-
myClient
-
Switch to the Sign On tab and under General Settings, set these fields to have the following values:
- Sign-in URLs
-
https://www.example.com:443/callback - Scopes
-
write - Grant Types
-
Device Code
-
Save your changes.
-
-
Create a resource owner profile and record the username and password.
Get a user code for the device
Devices can display a user code and instructions for a user. You can use these instructions on a separate client to provide consent, allowing the device to access resources.
User codes consist of a random selection of characters. You can configure the character set.
By default, Identity Cloud generates the user code from eight of the following characters:
234567ABCDEFGHIJKLMNOPQRSTVWXYZabcdefghijkmnopqrstvwxyz
|
You can configure the list of possible characters to improve usability. For example,
remove similar characters such as The length of the user code is also configurable. For more information, refer to the device flow configuration. |
Perform the following steps to request a user code in the OAuth 2.0 device flow:
-
As the client, call the /oauth2/device/code endpoint, specifying at least the client ID,
myClient.For information about client authentication methods, refer to Client application authentication.
For example:
$ curl \
--request POST \
--data "client_id=myClient" \
--data "scope=write" \
"https://<tenant-env-fqdn>/am/oauth2/realms/root/realms/alpha/device/code"
{
    "interval": 5,
    "device_code": "7a95a0a4-6f13-42e3-ac3e-d3d159c94c55...",
    "verification_uri": "https://<tenant-env-fqdn>/am/oauth2/realms/root/realms/alpha/device/user",
    "verification_url": "https://<tenant-env-fqdn>/am/oauth2/realms/root/realms/alpha/device/user",
    "verification_uri_complete": "https://<tenant-env-fqdn>/am/oauth2/realms/root/realms/alpha/device/user?user_code=VAL12e0v",
    "user_code": "VAL12e0v",
    "expires_in": 300
}
On success, Identity Cloud returns a user code, a
verification_uri, and averification_uri_completevalue that comprises the user code appended to the URI. You can use theverification_uri_completevalue to create QR codes.The output includes the
verification_urlto support earlier versions of the specification.Identity Cloud also returns an interval, in seconds, that the client device must wait before it can request an access token again.
Under Native Consoles > Access Management, go to Realms > Realm Name > Services > OAuth2 Provider > Device Flow to configure the returned values.
-
The client device must now instruct the user to enter the user code and grant access to the OAuth 2.0 device.
The client can choose an appropriate method to convey the instructions, for example, text instructions on screen or a QR code. Perform the steps in one of the following procedures:
-
To grant access to the client without using a browser, refer to Grant consent using REST.
-
To grant access to the client using a browser, refer to Grant consent using a browser.
-
-
The client device must start polling the authorization server for the access token using the interval and device code information obtained in the previous step.
For more information, refer to Poll for authorization.
Grant consent using REST
The OAuth 2.0 device authorization grant requires the user to grant consent to let a client device access a resource. The authorization server provides the client with an access token.
To grant consent with a user code without using a browser, perform the following steps:
-
The resource owner logs in to the authorization server.
For example:
$ curl \ --include \ --request POST \ --header "Content-Type: application/json" \ --header "X-OpenAM-Username: <resource-owner-username>" \ --header "X-OpenAM-Password: <resource-owner-password>" \ --header "Accept-API-Version: resource=2.0, protocol=1.0" \ 'https://<tenant-env-fqdn>/am/json/realms/root/realms/alpha/authenticate' { "tokenId":"<tokenId>", "successUrl":"/enduser/?realm=/alpha", "realm":"/alpha "} -
As the client, call the /oauth2/device/user endpoint. Provide the resource owner’s SSO token in a cookie, and at least the following parameters:
-
user_code=<resource-owner-user-code> -
decision=allow -
csrf=<tokenId>
The
scopeand theclient_idparameters aren’t required because the user code already contains that information.$ curl \ --request POST \ --header "Cookie: <session-cookie-name>=<tokenId>" \ --data "user_code=VAL12e0v" \ --data "decision=allow" \ --data "csrf=<tokenId>" \ "https://<tenant-env-fqdn>/am/oauth2/realms/root/realms/alpha/device/user"Identity Cloud returns HTML containing a JavaScript fragment named
pageData, with details of the result. The following example shows the default HTML response:<!DOCTYPE html> <!-- Copyright … -→ <html lang="en"> <head> <meta charset="utf-8"> <meta http-equiv="X-UA-Compatible" content="IE=edge"> <meta name="viewport" content="width=device-width, initial-scale=1"> <meta name="description" content="OAuth2 Authorization"> <title>OAuth2 Authorization Server</title> </head> <body style="display:none"> <div id="wrapper">Loading…</div> <footer id="footer" class="footer"></footer> <script type="text/javascript"> pageData = { locale: "en_US", baseUrl : "https://<tenant-env-fqdn>/am", realm : "\/alpha", done: true }; </script> <script src="https://<tenant-env-fqdn>/am/main-device.js"></script> </body> </html>The
done: trueline in thepageDatafragment means the flow can continue.To return the output in JSON format instead of HTML, include the
Accept: application/jsonheader in the request. The following example returns the output in JSON:$ curl \ --request POST \ --header "Cookie: iPlanetDirectoryPro=ne1QUOjPzY0r…" \ --header "Accept: application/json" \ --data "user_code=Gp4qkX4G" \ --data "decision=allow" \ --data "csrf=ne1QUOjPzY0r…" \ "https://<tenant-env-fqdn>/am/oauth2/realms/root/realms/alpha/device/user" { "baseUrl": "https://<tenant-env-fqdn>/am", "errorCode": null, "realm": "/alpha", "csrf": "1hQSplblZgaErLQ0/1rvcEvw5lj/cJQx3lrC3dV/3ac=", "locale": "en_US", "userCode": "Gp4qkX4G" }In this case, the
"errorCode": nullmeans the request is successful and the flow can continue.If the supplied user code is wrong or has been used, the output includes the following
pageDatafragment:pageData = { locale: "en_US", errorCode: "not_found", realm : "/alpha", baseUrl : "https://<tenant-env-fqdn>/am" oauth2Data: { csrf: "ErFIk8pMraJ1rvKbloTgpp6b7GZ57kyk9HaIiKMVK3g=", userCode: "VAL12e0v" } } -
|
In accordance with Section 4.1.1 of the OAuth 2.0 authorization framework, the authorization server must obtain an authorization decision from the resource owner. Clients using the endpoints to register consent must ensure this requirement is met. Identity Cloud can’t assert that consent was given in these cases. |
Grant consent using a browser
The OAuth 2.0 device flow requires that the user grants consent to allow the client device to access the resources.
The authorization server would then provide the client with an access token.
To grant consent with a user code using a browser, perform the following steps:
-
The resource owner navigates to the verification URL acquired with the user code. For example:
https://<tenant-env-fqdn>/am/oauth2/realms/root/realms/alpha/device/user -
The resource owner logs in to the authorization server.
-
The resource owner enters their user code:
 Figure 13. OAuth 2.0 User Code
The
verification_uri_completeproperty in the response appends the user code as a query parameter.Identity Cloud prefills the form with the user code value if provided in the
user_codequery parameter. -
The resource owner authorizes the device flow client by allowing the requested scopes:
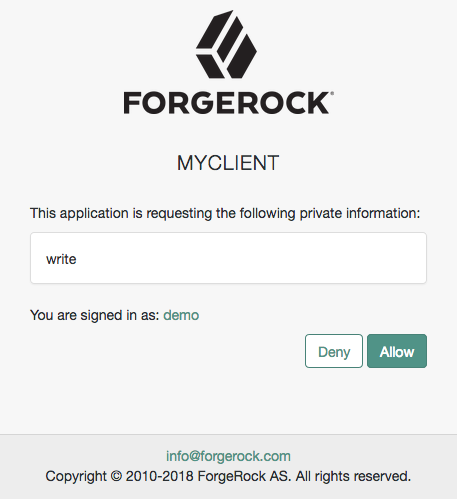 Figure 14. OAuth 2.0 Consent Page
By default, client applications use implied consent. Identity Cloud does not display the screen to the user.
-
Identity Cloud adds the OAuth 2.0 client to the user’s profile page in the Authorized Apps section and displays that the user is done with the flow:
 Figure 15. OAuth 2.0 Done Page
The device that polls the authorization server (Identity Cloud) can now obtain an access token.
Poll for authorization
The client device must poll the authorization server for an access token, since it cannot know whether the resource owner has already given consent or not.
Perform the following steps to poll for an access token:
-
On the client device, create a POST request to poll the
/oauth2/access_tokenendpoint to request an access token specifying, at least, the following parameters:-
client_id=<your-client-id> -
grant_type=urn:ietf:params:oauth:grant-type:device_code -
device_code=<your-device-code>
For information about the parameters supported by the
/oauth2/access_tokenendpoint, refer to /oauth2/access_token.The client device must wait for the number of seconds previously provided as the value of
intervalbetween polling Identity Cloud for an access token. For example:$ curl \ --request POST \ --data "client_id=myClient" \ --data "grant_type=urn:ietf:params:oauth:grant-type:device_code" \ --data "device_code=<your-device-code>" \ "https://<tenant-env-fqdn>/am/oauth2/realms/root/realms/alpha/access_token"If the user has authorized the client device, Identity Cloud returns an HTTP 200 status code with an access token that can be used to request resources:
{
    "access_token": "<access-token>",
    "refresh_token": "<refresh-token>",
    "scope": "write",
    "token_type": "Bearer",
    "expires_in": 3599
}
If the user hasn’t authorized the client device, Identity Cloud returns an HTTP 403 status code with the following error message:
{
    "error": "authorization_pending",
    "error_description": "The user has not yet completed authorization"
}
If the client device polls faster than the specified interval, Identity Cloud returns an HTTP 400 status code with the following error message:
{ "error": "slow_down", "error_description": "The polling interval has not elapsed since the last request" } -
Device authorization grant with PKCE
The device authorization grant is designed for client devices that have limited user interfaces, such as a set-top box. Because the devices are usually public clients, it’s possible for malicious users to intercept the device code. If a device allows it, you can mitigate against interception attacks by combining the device authorization grant with the Proof Key for Code Exchange (PKCE) standard (RFC 7636).
Identity Cloud implements this grant by adding the following parameters to those used for the device authorization grant:
code_verifier-
Contains a random string that correlates the authorization request to the token request.
code_challenge-
Contains a string derived from the code verifier that is sent in the authorization request and needs to be verified later with the code verifier.
code_challenge_method-
Contains the method used to derive the code challenge.
The device authorization grant flow with PKCE

-
When using the PKCE standard, the device must be able to generate a code verifier and a code challenge. For details, refer to the PKCE standard (RFC 7636).
For examples that generate a code verifier and a code challenge, refer to Generate a code verifier and a code challenge.
-
The client device requests a device code from Identity Cloud, appending the code challenge previously generated to the request.
-
Identity Cloud returns a device code, a user code, a URL for entering the user code, and an interval, in seconds.
-
The client device provides instructions to the user to enter the user code. The client can choose an appropriate method to convey the instructions, for example, text instructions on screen, or a QR code.
-
The client device begins to continuously poll Identity Cloud to check if authorization has been completed, appending the code verifier previously generated.
-
If the user has not yet completed the authorization, Identity Cloud returns an HTTP 403 status code, with an
authorization_pendingmessage. -
The user follows the instructions from the client device to enter the user code by using a separate device.
-
The authorization server verifies the code challenge stored in memory using the validation code. It also verifies the user code. If both codes are valid, Identity Cloud redirects the resource owner for authentication.
-
Upon authentication, the user is prompted to confirm the user code. The page is pre-populated with the one entered before.
-
The user can authorize the client device. The Identity Cloud consent page also displays the requested scopes, and their values.
If the user has a valid session when they enter the code and the client can skip consent, Identity Cloud doesn’t display the confirmation or the consent pages.
This is also true if you perform the call using REST and pass the
decision=allowparameter. -
Upon authorization, Identity Cloud responds to the client device’s polling with an HTTP 200 status, and an access token, giving the client device access to the requested resources.
Demonstrate the device authorization grant flow with PKCE
Follow these steps to grant consent with a user code and poll for authorization:
Prepare the demonstration
Complete these steps to prepare the device authorization grant demonstration:
-
Create an application owner profile and record the username and password.
-
Register a client application.
-
In the Identity Cloud admin UI, go to Applications and select + Custom Application.
-
Select the sign-in method as OIDC - OpenId Connect and application type as Native / SPA.
-
Create the application, providing the following details:
- Name
-
myClient - Owners
-
<application-owner> - Client ID
-
myClient
-
Switch to the Sign On tab and under General Settings, set these fields to have the following values:
- Sign-in URLs
-
https://www.example.com:443/callback - Scopes
-
write - Grant Types
-
Device Code
The
Code Verifier Parameter Requiredsetting (under Native Consoles > Access Management > Realms > Realm Name > Services > OAuth2 Provider > Advanced) specifies whether Identity Cloud requires clients to include a code verifier in their calls.However, if a client makes a call to Identity Cloud with the
code_challengeparameter, Identity Cloud honors the code exchange regardless of the value ofCode Verifier Parameter Required. For more information, refer to Authorization server configuration. -
Save your changes.
-
-
Create a resource owner profile and record the username and password.
Get a user code for the device
Devices can display a user code and instructions for a user. These can be used on a separate client to provide consent, allowing the device to access the resources.
Devices can display a user code and instructions for a user. You can use these instructions on a separate client to provide consent, allowing the device to access resources.
User codes consist of a random selection of characters. You can configure the character set.
By default, Identity Cloud generates the user code from eight of the following characters:
234567ABCDEFGHIJKLMNOPQRSTVWXYZabcdefghijkmnopqrstvwxyz
|
You can configure the list of possible characters to improve usability. For example,
remove similar characters such as The length of the user code is also configurable. For more information, refer to the device flow configuration. |
Perform the following steps to request a user code in the OAuth 2.0 device flow:
-
As the client, call the /oauth2/device/code endpoint, specifying at least the following parameters:
-
client_id=<your-client-id> -
code_challenge=<your-code-challenge> -
code_challenge_method=S256Creating the challenge using a SHA-256 algorithm is mandatory if the device supports it, as per RFC 7636.
For information about client authentication methods, refer to Client application authentication.
For example:
$ curl \
--request POST \
--data "client_id=myClient" \
--data "code_challenge=<your-code-challenge>" \
--data "code_challenge_method=S256" \
--data "scope=write" \
"https://<tenant-env-fqdn>/am/oauth2/realms/root/realms/alpha/device/code"
{
    "interval": 5,
    "device_code": "7a95a0a4-6f13-42e3-ac3e-d3d159c94c55...",
    "verification_uri": "https://<tenant-env-fqdn>/am/oauth2/realms/root/realms/alpha/device/user",
    "verification_url": "https://<tenant-env-fqdn>/am/oauth2/realms/root/realms/alpha/device/user",
    "verification_uri_complete": "https://<tenant-env-fqdn>/am/oauth2/realms/root/realms/alpha/device/user?user_code=VAL12e0v",
    "user_code": "VAL12e0v",
    "expires_in": 300
}
On success, Identity Cloud returns a user code, a
verification_uri, and averification_uri_completevalue that comprises the user code appended to the URI. You can use theverification_uri_completevalue to create QR codes.The output includes the
verification_urlto support earlier versions of the specification.Identity Cloud also returns an interval, in seconds, that the client device must wait before it can request an access token again.
Under Native Consoles > Access Management, go to Realms > Realm Name > Services > OAuth2 Provider > Device Flow to configure the returned values.
-
-
The client device should now provide instructions to the user to enter the user code and grant access to the OAuth 2.0 device.
The client may choose an appropriate method to convey the instructions, for example, text instructions on screen, or a QR code. Perform the steps in one of the following procedures:
-
To grant access to the client using a browser, refer to Grant consent using a browser.
-
To grant access to the client without using a browser, refer to Grant consent using REST.
-
-
The client device should also begin polling the authorization server for the access token using the interval and device code information obtained in the previous step and the PKCE code verifier.
For more information, refer to Poll for authorization.
Grant consent using REST
The OAuth 2.0 device authorization grant requires the user to grant consent to let a client device access a resource. The authorization server provides the client with an access token.
To grant consent with a user code without using a browser, perform the following steps:
-
The resource owner logs in to the authorization server.
For example:
$ curl \ --include \ --request POST \ --header "Content-Type: application/json" \ --header "X-OpenAM-Username: <resource-owner-username>" \ --header "X-OpenAM-Password: <resource-owner-password>" \ --header "Accept-API-Version: resource=2.0, protocol=1.0" \ 'https://<tenant-env-fqdn>/am/json/realms/root/realms/alpha/authenticate' { "tokenId":"<tokenId>", "successUrl":"/enduser/?realm=/alpha", "realm":"/alpha "} -
As the client, call the /oauth2/device/user endpoint. Provide the resource owner’s SSO token in a cookie, and at least the following parameters:
-
user_code=<resource-owner-user-code> -
decision=allow -
csrf=<tokenId>
The
scopeand theclient_idparameters aren’t required because the user code already contains that information.$ curl \ --request POST \ --header "Cookie: <session-cookie-name>=<tokenId>" \ --data "user_code=VAL12e0v" \ --data "decision=allow" \ --data "csrf=<tokenId>" \ "https://<tenant-env-fqdn>/am/oauth2/realms/root/realms/alpha/device/user"Identity Cloud returns HTML containing a JavaScript fragment named
pageData, with details of the result. The following example shows the default HTML response:<!DOCTYPE html> <!-- Copyright … -→ <html lang="en"> <head> <meta charset="utf-8"> <meta http-equiv="X-UA-Compatible" content="IE=edge"> <meta name="viewport" content="width=device-width, initial-scale=1"> <meta name="description" content="OAuth2 Authorization"> <title>OAuth2 Authorization Server</title> </head> <body style="display:none"> <div id="wrapper">Loading…</div> <footer id="footer" class="footer"></footer> <script type="text/javascript"> pageData = { locale: "en_US", baseUrl : "https://<tenant-env-fqdn>/am", realm : "\/alpha", done: true }; </script> <script src="https://<tenant-env-fqdn>/am/main-device.js"></script> </body> </html>The
done: trueline in thepageDatafragment means the flow can continue.To return the output in JSON format instead of HTML, include the
Accept: application/jsonheader in the request. The following example returns the output in JSON:$ curl \ --request POST \ --header "Cookie: iPlanetDirectoryPro=ne1QUOjPzY0r…" \ --header "Accept: application/json" \ --data "user_code=Gp4qkX4G" \ --data "decision=allow" \ --data "csrf=ne1QUOjPzY0r…" \ "https://<tenant-env-fqdn>/am/oauth2/realms/root/realms/alpha/device/user" { "baseUrl": "https://<tenant-env-fqdn>/am", "errorCode": null, "realm": "/alpha", "csrf": "1hQSplblZgaErLQ0/1rvcEvw5lj/cJQx3lrC3dV/3ac=", "locale": "en_US", "userCode": "Gp4qkX4G" }In this case, the
"errorCode": nullmeans the request is successful and the flow can continue.If the supplied user code is wrong or has been used, the output includes the following
pageDatafragment:pageData = { locale: "en_US", errorCode: "not_found", realm : "/alpha", baseUrl : "https://<tenant-env-fqdn>/am" oauth2Data: { csrf: "ErFIk8pMraJ1rvKbloTgpp6b7GZ57kyk9HaIiKMVK3g=", userCode: "VAL12e0v" } } -
|
In accordance with Section 4.1.1 of the OAuth 2.0 authorization framework, the authorization server must obtain an authorization decision from the resource owner. Clients using the endpoints to register consent must ensure this requirement is met. Identity Cloud can’t assert that consent was given in these cases. |
Grant consent using a browser
The OAuth 2.0 device flow requires that the user grants consent to allow the client device to access the resources.
The authorization server would then provide the client with an access token.
To grant consent with a user code using a browser, perform the following steps:
-
The resource owner navigates to the verification URL acquired with the user code. For example:
https://<tenant-env-fqdn>/am/oauth2/realms/root/realms/alpha/device/user -
The resource owner logs in to the authorization server.
-
The resource owner enters their user code:
Figure 17. OAuth 2.0 User CodeThe
verification_uri_completeproperty in the response appends the user code as a query parameter.Identity Cloud prefills the form with the user code value if provided in the
user_codequery parameter. -
The resource owner authorizes the device flow client by allowing the requested scopes:
Figure 18. OAuth 2.0 Consent PageBy default, client applications use implied consent. Identity Cloud does not display the screen to the user.
-
Identity Cloud adds the OAuth 2.0 client to the user’s profile page in the Authorized Apps section and displays that the user is done with the flow:
Figure 19. OAuth 2.0 Done PageThe device that polls the authorization server (Identity Cloud) can now obtain an access token.
Poll for authorization
The client device must poll the authorization server for an access token, as it can’t know whether the resource owner has given consent.
Perform the following steps to poll for an access token:
-
On the client device, create a POST request to poll the /oauth2/access_token endpoint to request an access token specifying, at least, the following parameters:
-
client_id=<your-client-id> -
grant_type=urn:ietf:params:oauth:grant-type:device_code -
device_code=<your-device-code> -
code_verifier=<your-code-verifier>
The client device must wait for the number of seconds previously provided as the value of
intervalbetween polling Identity Cloud for an access token. For example:$ curl \ --request POST \ --data "client_id=myClient" \ --data "grant_type=urn:ietf:params:oauth:grant-type:device_code" \ --data "device_code=<your-device-code>" \ --data "code_verifier=<your-code-verifier>" \ "https://<tenant-env-fqdn>/am/oauth2/realms/root/realms/alpha/access_token"If the user has authorized the client device, Identity Cloud returns an HTTP 200 status code with an access token that can be used to request resources:
{
    "access_token": "<access-token>",
    "refresh_token": "<refresh-token>",
    "scope": "write",
    "token_type": "Bearer",
    "expires_in": 3599
}
If the user hasn’t authorized the client device, Identity Cloud returns an HTTP 403 status code with the following error message:
{
    "error": "authorization_pending",
    "error_description": "The user has not yet completed authorization"
}
If the client device is polling faster than the specified interval, Identity Cloud returns an HTTP 400 status code with the following error message:
{ "error": "slow_down", "error_description": "The polling interval has not elapsed since the last request" } -
SAML 2.0 profile for authorization
- Endpoints
RFC 7522 Security Assertion Markup Language (SAML) 2.0 Profile for OAuth 2.0 Client Authentication and Authorization Grants defines the use of SAML 2.0 assertions for requesting access tokens and for client authentication. This page describes how to exchange a JWT bearer token for an access token.
In this profile, the SAML 2.0 identity provider (IDP) authenticates the resource owner, obtains authorization, and prepares a signed assertion to use the Identity Cloud REST APIs. Identity Cloud does not interact with the resource owner in this grant flow or present consent pages.
SAML assertion for authorization flow

-
The client directs the resource owner to the IDP for authentication.
-
The IDP authenticates the resource owner and returns a signed assertion.
-
On success, the IDP supplies a signed assertion.
-
The IDP redirects the resource owner to the client with the assertion.
-
The client exchanges the assertion for an access token.
-
Identity Cloud validates the assertion and returns an error if it cannot validate the assertion.
On success, Identity Cloud issues an access token to the client.
-
The client uses the token when requesting access to protected resources.
-
The resource server contacts the authorization server to validate the access token.
-
The authorization server validates the token and responds to the resource server.
-
The resource server allows the client to access the protected resources.
Configuration requirements
The OAuth 2.0 client application must:
-
Inform the resource owner they grant consent by authenticating with the IDP.
-
Consume the access token and handle errors as necessary.
-
Include Grant Types:
SAML2in its Identity Cloud profile.
The IDP must:
-
Issue signed assertions.
-
Specify an issuer in the assertion matching the IDP’s name; for example,
https://idp.example.com:8443/idp. -
Specify an audience in the assertion matching the service provider’s (SP) name; for example,
https://<tenant-env-fqdn>:443/am/. -
Specify the resource owner with an identifier known to Identity Cloud; otherwise, Identity Cloud returns an error such as the following:
{"error_description":"AM identity should not be null","error":"server_error"}When using a transient flow, configure an identity in the SP’s Transient User setting to map all transient ID references to a specific identity.
The Identity Cloud configuration must include:
-
The OAuth 2.0 provider and SAML v2.0 SP in the same Identity Cloud server.
-
A requirement in the SP configuration for signed assertions from the IDP.
-
A circle of trust with the IDP and the SP.
-
Grant Types:
SAML2in the OAuth 2.0 provider configuration. (This is the case by default.)
Example access token request
$ curl \
--request POST \
--user 'myClient:forgerock' \
--data 'grant_type=urn%3Aietf%3Aparams%3Aoauth%3Agrant-type%3Asaml2-bearer' \
--data 'assertion=<saml-assertion>' \
--data 'redirect_uri=https://www.example.com:443/callback' \
--data 'scope=openid' \
'https://<tenant-env-fqdn>/am/oauth2/realms/root/realms/alpha/access_token'
As shown in the example, the request includes these parameters:
grant_type=urn%3Aietf%3Aparams%3Aoauth%3Agrant-type%3Asaml2-bearer-
Required for this grant.
assertion=<saml-asserion>-
The base64-encoded, then URL-encoded SAML v2.0 assertion.
scope=openid-
Example scope. The
scopeparameter is required if no default scopes are set for the client.
JWT profile for authorization
- Endpoints
RFC 7523 JSON Web Token (JWT) Profile for OAuth 2.0 Client Authentication and Authorization Grants defines the use of JWT bearer tokens for requesting access tokens and for client authentication. This page describes how to exchange a JWT bearer token for an access token. For client authentication, refer to JWT profile.
In this profile, the client or another issuer authenticates the resource owner, obtains authorization, and prepares a signed JWT bearer token to use the Identity Cloud REST APIs. Identity Cloud does not interact with the resource owner in this grant flow.
You configure Identity Cloud to trust the issuer with a trusted JWT issuer profile to access the issuer’s public keys. Identity Cloud supports only asymmetric (public-private key) signing algorithms; HMAC-based signing is not supported. Identity Cloud validates the JWT signature and content using the trusted JWT issuer profile.
JWT for authorization flow

-
The client directs the resource owner to the issuer for authentication and to obtain authorization.
-
The issuer authenticates the resource owner and obtains consent.
-
On success, the issuer supplies a signed JWT.
-
The issuer redirects the resource owner to the client with the JWT.
-
The client exchanges the JWT for an access token.
-
Identity Cloud validates the JWT according to RFC 7523, section 3 with the following additional checks:
-
Match the
issclaim with the trusted JWT issuer JWT Issuer setting. -
Validate the JWT signature with the trusted JWT issuer’s public key.
Identity Cloud returns an error if it cannot validate the JWT.
-
-
As authorization server, Identity Cloud issues an access token to the client.
-
The client uses the token when requesting access to protected resources.
-
The resource server contacts the authorization server to validate the access token.
-
The authorization server validates the token and responds to the resource server.
-
The resource server allows the client to access the protected resources.
Demonstrate JWT for authorization flow
Set up a trusted JWT issuer profile
-
Under Native Consoles > Access Management, go to Realms > Realm Name > Applications > OAuth 2.0 > Trusted JWT Issuer.
-
Click + Add Trusted JWT Issuer Agent, provide the following settings, and then click Create:
- Agent ID
-
An identifier for the profile.
- JWT Issuer
-
The URI to uniquely identify the issuer; this must match the
issclaim in the JWT.
-
Configure at least the issuer’s public keys by setting either of these fields:
- JWKs URI
-
The URL to the issuer’s JSON Web Key (JWK) set; for example:
https://www.example.com/issuer/jwk_uri. Use this setting to simplify the process of key rotation.If you configure this field, also check and update the JWKs URI content cache timeout in ms and JWKs URI content cache miss cache time as necessary.
- JWK Set
-
The issuer’s JWK set; for example:
{
  "keys": [{
    "kty": "RSA",
    "e": "AQAB",
    "kid": "example",
    "alg": "RS256",
    "n": "uzfshBc3malq8JYIyskEKV6e0X42oAboChGEMKCld92YRsVpiPWc4LpFw2lFhOGy6v5qxnkEsLJf-aMQNSMFkux0356PBGWWWJO1_IlC6EjMJMMvKaCjzZLpEVXEtKj0VjXZl07kQQ8F8SGc_tzp6Sgd-R3nR-tC1HpVAar_DFhISikwm1NyupEhI05sxhyiC_09f5xwY23wwpXx4qrGETsogP8k4FE9jgCiyhafhj9qMHI6skGoLyQgQkqFRn5Krfg6UdPvnEwF5sK3GATWk7sUKR62-ia_986Em0ObSP5230WS8hJO__o3MN-b6qN3o-mdO-a1_E1PRLRY03GHHQ"
  }]
}
-
Configure additional settings as necessary:
- Consented Scopes Claim
-
A JWT claim specifying an array or space-separated allowlist of scopes.
- Resource Owner Identity Claim
-
The JWT claim holding the Identity Cloud identifier for the resource owner.
When you configure an alternative identifier, the JWT must still include a
subclaim. - Allowed Subjects
-
Optionally restrict the subjects to the resource owners specified here.
-
Save your changes.
Set up an OAuth 2.0 client
-
Create an application owner profile and record the username and password.
-
Register a client application.
-
In the Identity Cloud admin UI, go to Applications and select + Custom Application.
-
Select the sign-in method as OIDC - OpenId Connect and application type as Web.
-
Create the application, providing the following details:
- Name
-
myClient - Owners
-
<application-owner> - Client ID
-
myClient - Client Secret
-
forgerock
-
Switch to the Sign On tab and under General Settings, set these fields to have the following values:
- Sign-in URLs
-
https://www.example.com:443/callback - Grant Types
-
Add
JWT Bearer
-
Save your changes.
-
Set up a resource owner profile
-
Record the identifier of the profile to use as the
subclaim in the JWT.
Issue a signed JWT
As the issuer, prepare and sign the JWT for the client.
The JWT is signed using the issuer’s asymmetric key pair and includes at least the following claims:
| Claim | Description |
|---|---|
|
A string or array of strings for the intended audience(s), the Identity Cloud access token endpoint(s). Example: Notice the port number in the URL. |
|
Expiration time in seconds since Jan 1, 1970, UTC. Example: |
|
The JWT issuer’s unique identifier. Example: |
|
The Identity Cloud identifier for the resource owner. Example: |
Request an access token
As the client, exchange the JWT for an access token:
$ curl \
--request POST \
--user 'myClient:forgerock' \
--data 'grant_type=urn%3Aietf%3Aparams%3Aoauth%3Agrant-type%3Ajwt-bearer' \
--data 'assertion=<jwt-from-issuer>' \
--data 'redirect_uri=https://www.example.com:443/callback' \
--data 'scope=openid' \
'https://<tenant-env-fqdn>/am/oauth2/realms/root/realms/alpha/access_token'
{
  "access_token": "<access-token>",
  "refresh_token": "<refresh-token>",
  "scope": "openid",
  "id_token": "<id-token>",
  "token_type": "Bearer",
  "expires_in": 3599
}
As shown in the example, the request includes these parameters:
grant_type=urn%3Aietf%3Aparams%3Aoauth%3Agrant-type%3Ajwt-bearer-
Required for this grant.
assertion=<jwt-from-issuer>-
The signed JWT.
scope=openid-
Required if the scopes are not in the JWT and no default scopes are set for the client.
Token exchange
Identity Cloud supports RFC 8693, OAuth 2.0 Token Exchange for OAuth 2.0 and OpenID Connect tokens:
| From/to | Access token | ID token | Refresh tokens1 | SAML assertion |
|---|---|---|---|---|
Access token |
|
|
|
|
ID token |
|
|
|
|
1 You can’t exchange a token directly for a refresh token. When Identity Cloud issues refresh tokens (default), it also issues them on token exchange.
|
Clients can exchange tokens only at the OAuth 2.0 provider that issued them. This restriction applies to Identity Cloud domains and to realms.
For example, a token issued by |
Differences with normal token issuance:
-
Identity Cloud copies claims and values that must not change, such as subject and issuer claims, from the subject token to the new token.
Identity Cloud ignores irrelevant claims, such as those missing from the resulting token type, and claims that cannot be inferred from the subject token, such as those present in the resulting token, but not in the subject token.
-
Identity Cloud does not copy scopes, but derives them from the scope implementation.
For details, refer to Scopes.
-
Identity Cloud adds the
actandmay_actclaims when relevant. -
Token exchange involves no user interaction.
There is no way to request consent for expanded scopes or claims. The client application must ensure user consent beforehand or must ensure an expanded scope or claim is unrelated to the user’s resources.
Use cases
OAuth2.0 clients exchange tokens for impersonation or delegation.
Impersonation
To impersonate means to pretend you are someone else when performing a job or duty.
Use impersonation for token exchange when it is not necessary to maintain separation between the user and the client.
The client obtains a subject token with the user’s authorization. It exchanges this token for a new token it can use directly to access a protected resource. Due to the risk of identity theft, allow token impersonation across trusted systems only.
| To try token exchange with impersonation, refer to Demonstrate impersonation. |
Example with an access token
A user chooses to transfer money using their bank application, an OAuth 2.0 client.
The user authenticates to the application and trusts the application to act on their behalf
when accessing the internal banking system to perform transactions.
When the user authenticates, the application gets a subject token
with change_data, create_accounts, read_accounts, and transfer scopes.
The scopes represent all banking services available through the application.
The user chooses to transfer money, which requires only the transfer scope.
To reduce the security risk, the application exchanges the broad-scope access token
for a restricted access token with only the transfer scope, which it uses to access the transfer service:

Example with an ID token
The client could request an ID token instead of an access token.
When the user authenticates, the application gets an ID token as the subject token.
The ID token attests to the user’s identity and authorization, but does not include scopes to access banking services.
The user chooses to transfer money, and the application exchanges the ID token
for an expanded access token with the transfer scope, which it uses to access the transfer service:

Delegation
To delegate means to give a job or duty to someone else who performs the job on your behalf.
Use delegation for token exchange when maintaining separation between the user and the client is important. This approach is more secure when the token must traverse third-party systems.
| To try token exchange with delegation, refer to Demonstrate delegation. |
In delegation, the client has two tokens:
-
A subject token obtained with the user’s authorization.
-
An actor token obtained for itself or a user it represents.
The client exchanges both tokens for a new token it can use to access the protected resource.
The new token has an act (actor) claim.
The act claim, visible on introspection,
signals to the resource server that the client using the token is not the user.
A resource server can adapt its behavior as necessary.
The following example shows the act claim field of an access token:
"act": {
  "sub": "delegateClient"
}
The sub field specifies the subject of the actor token.
Example with an actor access token
A user phones a call center about a problem with their water supply. The operator who responds verifies the user’s identity and creates an ID token as the subject token. The operator also creates an access token as the actor token for themselves.
The operator exchanges both tokens for an access token with the repair scope restricted to booking a repair.
The operator would need a different token to end the user’s contract, for example.
When they book a repair for the user, both the operator and the user are reflected in the repair request:


Terminology
- Act claim
-
Token claim identifying a delegate acting on behalf of another identity.
Identity Cloud automatically adds this claim as needed when issuing a token.
- Actor token
-
The access or ID token representing a delegate acting on behalf of another identity.
- Exchanged token
-
The new access or ID token resulting from token exchange.
Exchanged tokens do not expire at the same time as their subject tokens. They expire after the amount of time specified in the Access Token Lifetime (seconds) or the OpenID Connect JWT Token Lifetime (seconds) settings of the OAuth 2.0 provider service or client configuration.
- Expanded token
-
An access token with scopes or claims not present in the subject token.
An exchanged token can have different scopes and claims from the subject token. Expanded tokens work well when exchanging ID tokens for access tokens, for example, where scopes and claims differ.
- May act claim
-
Token claim specifying who is allowed to act for the identity on behalf of whom the request is made.
Only the identity specified in the
may_actclaim can exchange tokens for another token.You must write a script to add this claim as needed when issuing a token. For details, refer to Authorize exchange.
- Restricted token
-
An access token with narrower scopes or claims than those of the subject token.
Instead of gathering consent for different sets of scopes and claims, clients gather consent for a broad range initially and then restrict scope during token exchange.
- Subject token
-
The access or ID token representing the identity on behalf of whom the request is made.
The client can obtain the subject token with any supported OAuth 2.0 or OpenID Connect flow.
Configuration
Token exchange configuration requires:
-
A script to authorize exchange.
-
Settings in the OAuth 2.0 provider or the OAuth 2.0 client application configuration.
Authorize exchange
A claim on the original token authorizes specified clients and actors to perform the exchange.
You write a script Identity Cloud runs when issuing tokens to set the claim.
The may_act claim
The may_act claim on a token identifies the authorized actor who can exchange the token.
Identity Cloud sets this claim when issuing the original token.
-
For impersonation, the
may_actclaim must specify the client ID of the authorized actor. -
For delegation, the
may_actclaim must specify the client ID and thesub(subject) of the actor token.
Identity Cloud rejects token exchange requests from clients or actors who are not authorized by the may_act claim.
The following example claim allows:
-
An
impersonationClientto exchange the token and impersonate the user. -
A
delegateClientto exchange the token to act on the user’s behalf using the original token and an actor token issued directly to the client with the client credentials grant.
"may_act": {
  // String or array of client IDs who can exchange the token:
  "client_id": ["impersonationClient", "delegateClient"],
  // String or array identifying the actor token subject(s) for delegation:
  "sub": "delegateClient"
}
May act scripts
Identity Cloud has no default functionality to authorize token exchange for specific clients.
Instead, Identity Cloud uses a script you write to set the may_act claim.
The script runs when issuing a token.
It is an OAuth2 May Act type script.
The following example JavaScript produces the previous example claim without the comments:
(function () {
    var frJava = JavaImporter(
        org.forgerock.json.JsonValue
    );

    var mayAct = frJava.JsonValue.json(frJava.JsonValue.object())
    mayAct.put('client_id', ['impersonationClient', 'delegateClient'])
    mayAct.put('sub', 'delegateClient')
    token.setMayAct(mayAct)
}());
For a commented example, refer to the sample may act script.
Identity Cloud doesn’t support wildcards in the client_id and sub fields.
Your scripts must enumerate clients and actors.
The script doesn’t specify the token type. The client requesting an exchange token optionally specifies the token type.
May act script variables
Identity Cloud binds the following variables into OAuth2 May Act scripts:
clientProperties-
A map of properties configured in the relevant client profile. Only present if Identity Cloud correctly identified the client.
The keys in the map are as follows:
clientId-
The URI of the client.
allowedGrantTypes-
The list of the allowed grant types for the client. For details, refer to the Javadoc for GrantType.
allowedResponseTypes-
The list of the allowed response types for the client.
allowedScopes-
The list of the allowed scopes for the client.
customProperties-
A map of any custom properties added to the client.
These properties can include lists or maps as sub-maps. For example, the script includes
customMap[Key1]=Value1ascustomMap>Key1>Value1in the object.To add custom properties to a client, go to Native Consoles > Access Management > OAuth 2.0 > Clients > Client ID > Advanced and update the Custom Properties field.
identity-
The identity of the resource owner.
logger-
Write a message to the Identity Cloud debug log.
In Identity Cloud, this corresponds to the
am-corelog source.The name of the debug logger starts with
scripts.OAUTH2_MAY_ACT. requestProperties-
A map of the properties present in the request. Always present.
The keys in the map are as follows:
requestUri-
The URI of the request.
realm-
The realm to which the request was made.
requestParams-
The request parameters and posted data. Each value in this map is a list of one or more properties.
To mitigate the risk of reflection-type attacks, use OWASP best practices when handling these properties.
Refer to Unsafe use of Reflection.
requestHeaders-
The value of the named request header. Returns a map of
<String, List<String>>as a native JavaScript object, for example:var ipAddress = requestProperties.requestHeaders["X-Forwarded-For"][0]Header names are case-sensitive.
scopes-
Contains a set of the requested scopes. For example:
[ "read", "transfer", "download" ] scriptName-
The display name of the script. Always present.
session-
Contains a representation of the user’s session object if the request contained a session cookie.
token-
Contains a representation of the token to be updated. The token is a mutable object; changes update the resulting token.
Use the
token.setMayAct(JsonValue value)method to add amay_actclaim to a token.
OAuth 2.0 provider settings
The OAuth 2.0 provider settings govern token exchange behavior for all clients in the realm. To access these settings, go to Native Consoles > Access Management > Realms > Realm Name > Services > OAuth2 Provider.
The relevant settings are:
- Core tab
-
-
OAuth2 Access Token May Act Script: Use the selected script to set the
may_actclaim on all access tokens. -
OIDC ID Token May Act Script: Use the selected script to set the
may_actclaim on all ID tokens.
Choose
--- Select a script ---to prevent Identity Cloud from setting the claim. -
- Advanced tab
-
-
Grant Types: Add the
Token Exchangetype to permit token exchange requests. -
Token Exchanger Plugins: Remove any token exchange combinations you do not want to allow.
-
Token Validator Plugins: If necessary, remove validations that tokens meet the criteria for exchange.
-
Client settings
Individual OAuth 2.0 client settings govern authentication levels granted to exchanged tokens and can override OAuth 2.0 provider settings. To access these settings, go to Native Consoles > Access Management > Realms > Realm Name > Applications > OAuth 2.0 > Clients > Client ID.
The relevant settings are:
- Advanced tab
-
-
Token Exchange Auth Level: The authentication level granted to exchanged tokens when the subject token had no
auth_levelclaim. This setting always applies to exchanged ID tokens. -
Grant Types: Add the
Token Exchangetype to permit token exchange requests.
-
- OAuth2 Provider Overrides tab
-
-
Enable OAuth2 Provider Overrides: Use these settings instead of those on the OAuth2 Provider service.
-
OAuth2 Access Token May Act Script: Use the selected script to set the
may_actclaim on access tokens. -
OIDC ID Token May Act Script: Use the selected script to set the
may_actclaim on ID tokens.
For the may act script settings, choose
--- Select a script ---to prevent Identity Cloud from setting the claim. -
Request parameters
Token exchange requests target the /oauth2/access_token endpoint. The requests use the following specific parameters:
| Parameter | Description |
|---|---|
|
Required. Use |
|
Required. The original token to exchange. Example: |
|
Required. The type of subject token, either access token or ID token. One of:
|
|
Required for delegation. The token representing the delegate. Example: |
|
Required for delegation. The type of actor token, either access token or ID token. One of:
|
|
Optional. The type of requested exchanged token, either access token or ID token. One of:
|
Demonstrate impersonation
This page demonstrates token exchange with impersonation.
Prepare the demonstration
Start by preparing the demonstration:
May act script
The script adds a may_act claim to the subject token.
-
In the Identity Cloud admin UI, select Scripts > Auth Scripts > + New Script.
-
In the New Script window, select OAuth2 May Act and continue.
-
In the new script window, name the script
May actand save the following JavaScript:(function () { var frJava = JavaImporter( org.forgerock.json.JsonValue ); var mayAct = frJava.JsonValue.json(frJava.JsonValue.object()) mayAct.put('client_id', 'impersonationClient') token.setMayAct(mayAct) }());This script generates a
may_actclaim to permit the impersonating actor client to exchange the subject token.
Subject client
The OAuth 2.0 client profile in this example overrides the OAuth 2.0 provider settings. This lets you test the script without affecting access tokens issued to other clients.
-
Create a confidential OAuth 2.0 client account to get an original token for the subject.
In the Identity Cloud admin UI, select Applications > + Add Application, and create a new Web client with the following settings:
- Client ID
-
myClient - Client Secret
-
forgerock
-
Add the following settings under Sign On > General Settings and save your work:
- Sign-in URLs
-
https://www.example.com:443/callback - Scopes
-
change_data
create_accounts
read_accounts
transfer
-
Override OAuth 2.0 provider settings for this client.
Under Native Consoles > Access Management, select Realms > alpha > Applications > OAuth 2.0 > Clients > myClient. Switch to the OAuth2 Provider Overrides tab, update the following settings and save your work:
- Enable OAuth2 Provider Overrides
-
Enabled
- OAuth2 Access Token May Act Script
-
May act - OIDC ID Token May Act Script
-
May act
Actor client
-
Create a confidential OAuth 2.0 client account for the service that acts on behalf of the user.
In the Identity Cloud admin UI, select Applications > + Add Application, and create a new Service client with the following settings:
- Client ID
-
impersonationClient - Client Secret
-
forgerock
-
Add the following settings under Sign On > General Settings and save your work:
- Sign-in URLs
-
https://www.example.com:443/callback - Grant Types
-
Refresh Token
Token Exchange - Scopes
-
transfer
Test the demonstration
After preparing the demonstration, test your work using HTTP calls to REST endpoints.
The demonstration uses the Authorization code grant flow followed by token exchange:
-
The resource owner authenticates to obtain an SSO token.
-
The subject client relies on Implied Consent being enabled (default) in the Identity Cloud admin UI under Applications > Client ID > Sign On > Advanced settings > Authentication. It assumes the resource owner grants the client access.
-
The subject client requests the authorization code and exchanges it for an access token. Your script sets the
may_actclaim in the access token. -
The actor client exchanges the subject token for an access token.
Follow these steps:
-
Authenticate as the resource owner:
curl \ --request POST \ --header 'Content-Type: application/json' \ --header 'X-OpenAM-Username: <resource-owner-username>' \ --header 'X-OpenAM-Password: <resource-owner-password>' \ --header 'Accept-API-Version: resource=2.0, protocol=1.0' \ 'https://<tenant-env-fqdn>/am/json/realms/root/realms/alpha/authenticate' {"tokenId":"<resource-owner-tokenId>","successUrl":"/enduser/?realm=/alpha","realm":"/alpha"} -
Request the authorization code as the subject client:
curl \ --dump-header - \ --request POST \ --Cookie '<session-cookie-name>=<resource-owner-tokenId>' \ --data 'scope=change_data create_accounts read_accounts transfer' \ --data 'response_type=code' \ --data 'client_id=myClient' \ --data 'csrf=<resource-owner-tokenId>' \ --data 'redirect_uri=https://www.example.com:443/callback' \ --data 'state=abc123' \ --data 'decision=allow' \ 'https://<tenant-env-fqdn>/am/oauth2/realms/root/realms/alpha/authorize' ... location: https://www.example.com:443/callback?code=<authorization-code>&iss=https%3A%2F%2F... ... -
Exchange the authorization code for an access token as the subject client:
curl \
--request POST \
--user 'myClient:forgerock' \
--data 'grant_type=authorization_code' \
--data 'code=<authorization-code>' \
--data 'redirect_uri=https://www.example.com:443/callback' \
'https://<tenant-env-fqdn>/am/oauth2/realms/root/realms/alpha/access_token'
{
  "access_token": "<access-token>",
  "refresh_token": "<refresh-token>",
  "scope": "change_data transfer create_accounts read_accounts",
  "token_type": "Bearer",
  "expires_in": 3599
}
Your script has set the
may_actclaim, which is not directly visible. To see themay_actclaim, you must introspect the access token. -
Request an exchanged token as the actor client:
curl \
--request POST \
--user 'impersonationClient:forgerock' \
--data 'grant_type=urn:ietf:params:oauth:grant-type:token-exchange' \
--data 'scope=transfer' \
--data 'subject_token=<access-token>' \
--data 'subject_token_type=urn:ietf:params:oauth:token-type:access_token' \
'https://<tenant-env-fqdn>/am/oauth2/realms/root/realms/alpha/access_token'
{
  "access_token": "<exchanged-token>",
  "refresh_token": "<new-refresh-token>",
  "issued_token_type": "urn:ietf:params:oauth:token-type:access_token",
  "scope": "transfer",
  "token_type": "Bearer",
  "expires_in": 3599
}
The
issued_token_typeshows this is an exchanged token.
Demonstrate delegation
This page demonstrates token exchange with delegation.
Prepare the demonstration
Start by preparing the demonstration:
May act script
The script adds a may_act claim to the subject token.
-
In the Identity Cloud admin UI, select Scripts > Auth Scripts > + New Script.
-
In the New Script window, select OAuth2 May Act and continue.
-
In the new script window, name the script
May actand save the following JavaScript:(function () { var frJava = JavaImporter( org.forgerock.json.JsonValue ); var mayAct = frJava.JsonValue.json(frJava.JsonValue.object()) mayAct.put('client_id', 'delegateClient') mayAct.put('sub', 'delegateClient') token.setMayAct(mayAct) }());This script generates a
may_actclaim to permit the delegate actor client to exchange the subject token, provided it also supplies an actor token where it is the subject.
Subject client
The OAuth 2.0 client profile in this example overrides the OAuth 2.0 provider settings. This lets you test the script without affecting access tokens issued to other clients.
-
Create a confidential OAuth 2.0 client account to get an original token for the subject.
In the Identity Cloud admin UI, select Applications > + Add Application, and create a new Web client with the following settings:
- Client ID
-
myClient - Client Secret
-
forgerock
-
Add the following settings under Sign On > General Settings and save your work:
- Sign-in URLs
-
https://www.example.com:443/callback - Scopes
-
change_contract
repair
-
Override OAuth 2.0 provider settings for this client.
Under Native Consoles > Access Management, select Realms > alpha > Applications > OAuth 2.0 > Clients > myClient. Switch to the OAuth2 Provider Overrides tab, update the following settings and save your work:
- Enable OAuth2 Provider Overrides
-
Enabled
- OAuth2 Access Token May Act Script
-
May act - OIDC ID Token May Act Script
-
May act
Actor client
-
Create a confidential OAuth 2.0 client account for the service that acts on behalf of the user.
In the Identity Cloud admin UI, select Applications > + Add Application, and create a new Service client with the following settings:
- Client ID
-
delegateClient - Client Secret
-
forgerock
-
Add the following settings under Sign On > General Settings and save your work:
- Grant Types
-
Refresh Token
Token Exchange - Scopes
-
repair
Test the demonstration
After preparing the demonstration, test your work using HTTP calls to REST endpoints.
The demonstration uses the Authorization code grant and and Client credentials grant flows followed by token exchange:
-
The resource owner authenticates to obtain an SSO token.
-
The subject client relies on Implied Consent being enabled (default) in the Identity Cloud admin UI under Applications > Client ID > Sign On > Advanced settings > Authentication. It assumes the resource owner grants the client access.
-
The subject client requests the authorization code and exchanges it for an access token. Your script sets the
may_actclaim in the access token. -
The actor client requests an actor token with its client credentials.
-
The actor client exchanges the subject token and actor token for an ID token.
Follow these steps:
-
Authenticate as the resource owner:
curl \ --request POST \ --header 'Content-Type: application/json' \ --header 'X-OpenAM-Username: <resource-owner-username>' \ --header 'X-OpenAM-Password: <resource-owner-password>' \ --header 'Accept-API-Version: resource=2.0, protocol=1.0' \ 'https://<tenant-env-fqdn>/am/json/realms/root/realms/alpha/authenticate' {"tokenId":"<resource-owner-tokenId>","successUrl":"/enduser/?realm=/alpha","realm":"/alpha"} -
Request the authorization code as the subject client:
curl \ --dump-header - \ --request POST \ --Cookie '<session-cookie-name>=<resource-owner-tokenId>' \ --data 'scope=change_contract repair' \ --data 'response_type=code' \ --data 'client_id=myClient' \ --data 'csrf=<resource-owner-tokenId>' \ --data 'redirect_uri=https://www.example.com:443/callback' \ --data 'state=abc123' \ --data 'decision=allow' \ 'https://<tenant-env-fqdn>/am/oauth2/realms/root/realms/alpha/authorize' ... location: https://www.example.com:443/callback?code=<authorization-code>&iss=https%3A%2F%2F... ... -
Exchange the authorization code for an access token as the subject client:
curl \
--request POST \
--user 'myClient:forgerock' \
--data 'grant_type=authorization_code' \
--data 'code=<authorization-code>' \
--data 'redirect_uri=https://www.example.com:443/callback' \
'https://<tenant-env-fqdn>/am/oauth2/realms/root/realms/alpha/access_token'
{
  "access_token": "<subject-access-token>",
  "refresh_token": "<refresh-token>",
  "scope": "change_contract repair",
  "token_type": "Bearer",
  "expires_in": 3599
}
Your script has set the
may_actclaim, which is not directly visible. To see themay_actclaim, you must introspect the access token. -
Request an access token as the actor client:
curl \ --request POST \ --user 'delegateClient:forgerock' \ --data 'grant_type=client_credentials' \ --data 'scope=repair' \ 'https://<tenant-env-fqdn>/am/oauth2/realms/root/realms/alpha/access_token' {"access_token":"<actor-access-token>","scope":"repair","token_type":"Bearer","expires_in":3599} -
Request an exchanged token as the actor client:
curl \
--request POST \
--user 'delegateClient:forgerock' \
--data 'grant_type=urn:ietf:params:oauth:grant-type:token-exchange' \
--data 'scope=repair' \
--data 'subject_token=<subject-access-token>' \
--data 'subject_token_type=urn:ietf:params:oauth:token-type:access_token' \
--data 'actor_token=<actor-access-token>' \
--data 'actor_token_type=urn:ietf:params:oauth:token-type:access_token' \
--data 'requested_token_type=urn:ietf:params:oauth:token-type:id_token' \
'https://<tenant-env-fqdn>/am/oauth2/realms/root/realms/alpha/access_token'
{
  "access_token": "<exchanged-id-token>",
  "refresh_token": "<new-refresh-token>,"
  "issued_token_type": "urn:ietf:params:oauth:token-type:id_token",
  "scope": "repair",
  "token_type": "Bearer",
  "expires_in": 3599
}
The
issued_token_typeshows this is an exchanged token.
OAuth 2.0 endpoints
Client applications can use the following OAuth 2.0 authorization server endpoints:
| Endpoint | Description |
|---|---|
Register a pushed authorization request and get a request URI (RFC 9126 PAR endpoint) |
|
Obtain consent and an authorization grant (RFC 6749 authorization endpoint) |
|
Initiate backchannel authorization (Backchannel flow endpoint) |
|
Obtain an access token (RFC 6749 token endpoint) |
|
Obtain a device code (Device flow endpoint) |
|
Obtain consent and authorization grant (Device flow endpoint) |
|
Revoke access tokens and refresh tokens (RFC 7009 endpoint) |
|
Retrieve metadata about a token, such as approved scopes and the context in which the token was issued (RFC 7662 endpoint) |
|
Retrieve metadata about a macaroon, and add caveats. |
For reference documentation on related endpoints, refer to:
OAuth 2.0 endpoint parameters
Requests to OAuth 2.0 endpoints use the following parameters.
Refer to the individual OAuth 2.0 endpoint pages to determine the required and optional parameters for each endpoint.
acr_values
The OpenID Connect authentication context class reference values. OpenID Connect (OIDC) flows only.
Authentication context class reference values communicate acceptable Levels of Assurance (LoAs) users must satisfy when authenticating to the OpenID provider. For details, refer to Authentication requirements.
actor_token
The token representing a delegate acting on behalf of another identity in Token exchange.
actor_token_type
The type of the actor token:
-
urn:ietf:params:oauth:token-type:access_token -
urn:ietf:params:oauth:token-type:id_token
auth_chain
A string naming the journey to authenticate the resource owner for Resource owner password credentials grant. The journey must permit username-password authentication without UI interaction. Otherwise, the request results in an HTTP 500 Internal Server Error.
Default: The default authentication journey for the realm.
claims
A JSON object containing the user attributes to return in the ID token. OIDC flows only.
client_assertion
A signed JSON Web Token (JWT) to use as client credentials for JWT profile authentication.
client_assertion_type
The type of assertion for JWT profile authentication.
Set client_assertion_type=urn%3Aietf%3Aparams%3Aoauth%3Aclient-assertion-type%3Ajwt-bearer.
client_id
A unique string identifier for the application making the request.
For a pushed authorization request
or a JWT-secured authorization request (RFC 9101),
this value must match the client_id claim in the request object.
client_secret
A string password credential for the confidential client application making the request.
Use this parameter for client authentication with Form parameters (HTTP POST).
Do not use with the cnf_key parameter.
cnf_key
A base64-encoded JSON Web Key (JWK) for JWK-based proof-of-possession.
Do not use with the client_secret parameter.
code_challenge
A generated code verifier string for RFC 7636 Proof Key for Code Exchange (PKCE).
For details, refer to Generate a code verifier and a code challenge.
code_challenge_method
A string specifying the method to derive the PKCE code challenge:
-
plain(default; plaintext code challenge ) -
S256(recommended; hashed code challenge)
csrf
The SSO token string linking the request to user session to protect against Cross-Site Request Forgery (CSRF) attacks.
This parameter duplicates the value of the session cookie, the resource owner’s SSO token.
Built-in consent pages include this parameter once the resource owner has authenticated, and send it with the resource owner’s consent. Custom consent pages and flows that do not use a browser must set this parameter explicitly unless you use a Remote consent service. For an example, refer to the Authorization code grant.
decision
A string indicating whether the resource owner consents to the requested access:
-
allowto grant consent -
Any other value denies consent
grant_type
A string specifying the type of grant to acquire an access token:
authorization_codeclient_credentials-
For the Client credentials grant.
passwordrefresh_tokenurn:ietf:params:oauth:grant-type:device_code-
For the Device authorization grant. Identity Cloud also supports the earlier
http://oauth.net/grant_type/device/1.0specification. urn:ietf:params:oauth:grant-type:saml2-bearer-
For the SAML 2.0 profile for authorization.
urn:ietf:params:oauth:grant-type:jwt-bearer-
For the JWT profile for authorization.
urn:ietf:params:oauth:grant-type:token-exchange-
For the Token exchange.
urn:openid:params:grant-type:ciba-
For the Backchannel request grant.
id_token_hint
A previously issued ID token passed as a hint about the end user’s session with the client. OIDC flows only.
Set the response_type and prompt parameters to none when using this parameter.
For details, refer to Session Management Draft 10.
login_hint
A string specifying the ID used to log in. OIDC flows only.
The ID depends on the authentication journey.
When provided as part of the OpenID Connect authentication request,
an HttpOnly cookie (only sent over HTTPS) named oidcLoginHint gets the value of login_hint.
For details, refer to GSMA Mobile Connect.
nonce
A string linking the client session with the ID token to mitigate against replay attacks. OIDC flows only.
prompt
A space-separated, case-sensitive list of ASCII strings that indicates whether to prompt the end user for authentication and consent. OIDC flows only.
consent-
Prompt the end user for consent even if a consent response was previously saved.
login-
Prompts the end user to authenticate using the journey specified with the
serviceparameter. When the user re-authenticates, Identity Cloud destroys the original session and creates a new one for the new journey.Default: The default journey for the realm.
none-
Do not display authentication or consent pages. Use this only when you set
id_token_hintandresponse_type=none.
redirect_uri
The URI to return the resource owner to after authorization is complete.
Default: A value from the client profile Sign-in URLs setting in the Identity Cloud admin UI.
response_mode
A string specifying the mechanism for returning response parameters:
form_post-
Return a self-submitting form that contains the code instead of redirecting to the redirect URL with the code as a string parameter. For details, refer to OAuth 2.0 Form Post Response Mode.
fragment-
Return parameters encoded in the URL fragment; default when
response_type=token. fragment.jwt-
Return a JWT in a fragment.
jwt-
Return parameters in a JWT; in a query string for the
coderesponse type, or appended to the fragment for thetokenresponse type.A JWT-secured authorization response (JARM) returns authorization response parameters in a signed, optionally encrypted, JWT.
Configure the algorithms to secure the JWT in the Identity Cloud admin UI under Applications > Client ID > Sign On > General Settings > Show advanced settings > Signing and Encryption.
In addition to claims specific to the response type, such as
codeoraccess_token, the JWT contains these mandatory claims:-
iss: the URL of the issuer—the authorization server that generated the response -
aud: the audience—the client ID intended as the response recipient -
exp: the expiration of the JWT—10 minutes is the recommended maximum
On error, the JWT contains:
-
An
errorstring -
A
statestring if specified by the client -
An error description
For details, refer to JWT-Secured Authorization Response Mode for OAuth 2.0 (JARM).
-
query-
Return parameters encoded in the query string; default when
response_type=code. query.jwt-
Return a JWT in a query parameter. Do not use this with
id_tokenortokenresponse types unless the response JWT is encrypted.
For details, refer to Response Modes.
Identity Cloud publishes supported response modes as response_modes_supported
through the /oauth2/.well-known/openid-configuration endpoint.
response_type
A string specifying the response expected from the authorization server:
code-
An authorization code for an authorization code grant
code id_token-
An authorization code and an ID token for a hybrid grant
code token-
An authorization code and an access token for a hybrid grant
code token id_token-
An authorization code, an access token, and an ID token for a hybrid grant
id_token-
An ID token for an implicit grant
none-
Do not issue any token or code in the response; for use with
id_token_hintonly token-
An access token for an implicit grant
token id_token-
An access token and an ID token for an implicit grant
request
A base64url-encoded JWT whose claims are required for an OIDC flow, a JWT-secured authorization (JAR) request (RFC 9101), or a pushed authorization request (PAR) (RFC 9126).
This JWT is called the request object.
Request object validation rules depend on the type of request and the OAuth 2.0 provider configuration.
The validation rules apply whether you pass the request object by value with the request parameter
or as a reference with the request_uri parameter:
- General validation rules
-
These rules apply for all request objects:
-
If the request object is signed or encrypted, you must include the
issandaudparameters, as shown in the Example request object.For the public keys to encrypt a request object JWT, make a request to the realm’s /oauth2/connect/jwk_uri endpoint.
-
The
exp(expiration time) andnbf(not before) claims set the timeframe when the request object is valid.If the OAuth 2.0 provider settings declare them mandatory, you must include the
expandnbfclaims.If specified, validation uses these claims even when the OAuth 2.0 provider settings do not require them.
To ensure the values meet the requirements for the Financial-grade API (FAPI) security profile, refer to the OAuth 2.0 provider configuration reference.
-
Compressed JWTs must not be larger than 32 KiB (32768 bytes) when uncompressed.
-
- JAR validation rules
-
These rules apply when the request object does not contain OIDC-specific parameters or when the OAuth 2.0 provider setting Request Object Processing Specification specifies
JARprocessing:-
The request object must be signed. It may be encrypted.
-
The request object must include a
client_idmatching theclient_idparameter of the request. -
The authorization request uses only the request object claims, even when the request specifies the same claims in query string parameters.
-
- OIDC validation rules
-
These rules apply for OIDC requests when the OAuth 2.0 provider setting Request Object Processing Specification specifies
OIDC(default):-
The request object does not require signing or encryption.
-
You may send query string parameters and a request object in the same request.
You can keep sensitive information protected in the request object, and keep parameters that change frequently, such as
nonceandstate, visible and mutable across calls.The claims in the request object supersede the query string parameters.
-
You must include the
response_typeandclient_idas query string parameters, even if you include them in the request object.Their values in the request object must match those passed as query string parameters.
-
You must include the
openidscope as a query string parameter, even if you include it in the request object.The
scopeclaim may differ from thescopequery string parameter. Use this to protect application-related scopes in the request object, but process the request as part of an OpenID Connect flow.
-
- PAR validation rules
-
These rules apply for pushed authorization request objects:
-
The request object must be signed. It may be encrypted.
-
You must include the
client_ideven though it is also a required query string parameter. -
The
response_typeclaim in the request object passed by value takes the place of theresponse_typequery string parameter. -
You must include claims for all other parameters required for the successful completion of the grant flow.
For example, include the
code_challengefor an Authorization code grant with PKCE flow. -
When you include the request object, omit all other parameters except to authenticate the client.
The request object must include claims for all other request details. Otherwise, the response is an
Invalid parameter scopeerror.
-
Example request object
The following example JWT request object includes OIDC claims and iss, aud, nbf, and exp claims.
Identity Cloud ignores keys specified in JWT headers, such as jku and jwe:
{
  "client_id": "myClient",
  "iss": "myClient",
  "aud": "https://<tenant-env-fqdn>/am/oauth2/realms/root/realms/alpha",
  "nbf": 1675351332,
  "exp": 1675351692,
  "redirect_uri": "https://www.example.com:8443",
  "scope": "openid profile",
  "claims": {
    "id_token": {
      "acr": {
        "essential": true,
        "values": ["example_journey1", "example_journey2"]
      }
    }
  }
}
To pass the request object by value, specify the encoded JWT as shown in this example OIDC call:
https://<tenant-env-fqdn>/am/oauth2/realms/root/authorize? \
&request=eyJhbGciOiJSUzI1NiIsImtpZCI6ImsyYmRjIn0.ew0KICJpc3MiOiAiczZCaGRSa3... \
&client_id=myClient \
&scope=openid profile \
&response_type=code%20id_token \
&nonce=abc123 \
&state=123abc
request_uri
A reference to JWT request object(s).
-
For PAR flows, this references the data at the time of the PAR request.
The authorization request fails if the request URI has expired.
-
For OIDC flows and JAR requests, this references an array of URIs to retrieve request objects whose claims constitute the request parameters.
You must pre-register the URIs in the client profile. In the Identity Cloud admin UI, go to Applications > Client ID > Sign On > Show advanced settings > Authentication > Request URIs. Each request URI must not exceed 512 ASCII characters and must use either HTTP or HTTPS; for example,
https://www.example.com:8443/JTWs/myJWT.Identity Cloud caches the request objects to avoid requesting them too often. To force Identity Cloud to flush the cache, add a unique fragment to the
request_uriparameter; for example,?request_uri=https://www.example.com:8443/JTWs/myJWT#foo.
requested_token_type
The type of token requested for Token exchange:
-
urn:ietf:params:oauth:token-type:access_token(default) -
urn:ietf:params:oauth:token-type:id_token
save_consent
save_consent=on means save the scopes the resource owner’s consented to.
Saving consent requires prior configuration. For details, refer to Store consent decisions.
scope
A string specifying the permissions the client application requests from the resource owner. Separate scopes with spaces.
Some grants, such as the authorization code grant, do not call the token endpoint with the scope. The scope is defined in the authorization code. For details, refer to the documentation for the flow under OAuth 2.0 grant flows.
Default: The default scopes specified in the client profile or the OAuth 2.0 provider configuration.
service
A string naming the journey to authenticate the resource owner.
Default: The default authentication journey for the realm.
For details, refer to Authentication parameters.
state
A string value to maintain state between the request and the callback.
During authentication, the client sends this parameter to the authorization server. The authorization server sends it back unchanged in the response.
Use the value to ensure the response belongs to the user who initiated the requests. This mitigates against CSRF attacks.
Use a base64-encoded string of data that is unique to a user and to this request.
subject_token
The original token to exchange in Token exchange.
subject_token_type
The type of the subject token:
-
urn:ietf:params:oauth:token-type:access_token -
urn:ietf:params:oauth:token-type:id_token
ui_locales
A string indicating the end user’s preferred languages for the user interface. OIDC flows only.
The ui_locales parameter is a space-separated list ordered by preference; for example, en fr-CA fr.
/oauth2/par
The /oauth2/par endpoint is the OAuth 2.0 pushed authorization request (PAR) endpoint
defined in RFC 9126.
Use this endpoint to push an authorization request payload directly to the authorization server for the following flows:
-
Authorization code grant (OAuth 2.0 and OIDC)
-
Authorization code grant with PKCE (OAuth 2.0 and OIDC)
-
Implicit grant (OAuth 2.0 and OIDC)
Specify the realm in the request URL; for example:
https://<tenant-env-fqdn>/am/oauth2/realms/root/realms/alpha/parThe PAR endpoint supports the following parameters:
| Parameter | Description | Required |
|---|---|---|
The OpenID Connect authentication context class reference values. |
||
The user attributes to be returned in the ID token. |
No |
|
A signed JSON Web Token (JWT) to use as client credentials. |
Yes, for JWT profile authentication |
|
The type of assertion, |
Yes, for JWT profile authentication |
|
Uniquely identifies the application making the request. |
Yes, even when it is also included in a |
|
The password for a confidential client. |
Yes, when authenticating with Form parameters (HTTP POST) |
|
The code verifier generated for the PKCE flow. |
Yes, for confidential clients and for all clients using the Authorization code grant with PKCE flow |
|
The method to derive the code challenge. |
Yes, when the |
|
The SSO token string linking the request to the user session to protect against Cross-Site Request Forgery attacks. |
Yes, when gathering consent without a remote consent service |
|
Specifies whether the resource owner consents to the requested access. |
Yes, when gathering consent unless consent is already saved for the scope |
|
Previously issued ID token previously passed as a hint about the end user’s session with the client. |
No |
|
String value that can be set to the ID the user uses to log in. |
No |
|
String value that associates the client session with the ID token. |
No |
|
Specifies whether to prompt the end user for authentication and consent. |
No |
|
The URI to return the resource owner to after authorization is complete. |
No |
|
A base64url-encoded JWT with the claims required for PAR validation.(1) |
Yes |
|
Specifies the mechanism for returning response parameters. |
No |
|
The type of response expected from the authorization server. |
Yes |
|
Specifies whether to store a resource owner’s consented scopes. |
No |
|
The scopes linked to the permissions requested by the client from the resource owner. |
No |
|
The authentication journey to use when authenticating the resource owner. |
No |
|
The value to maintain state between the request and the callback. |
No, but strongly recommended |
|
The end user’s preferred languages for the user interface. |
No |
(1) When you use a request object, define all the request parameters as claims in the JWT.
Use only the following client authentication parameters alongside the request:
client_assertion
client_assertion_type
client_id
client_secret
Otherwise, the response is an Invalid parameter scope error.
The following is an example of a PAR request object:
{
  "client_id": "myClient",
  "nbf": 1594140030,
  "redirect_uri": "https://www.example.com:8443",
  "scope" : "write",
  "exp": 1594140390,
  "response_type" : "code",
  "code_challenge" :  "QR1D-7w1-rOQvlFe1CeqZigqaIpmZXatDMVvZ50o",
  "code_challenge_method" : "S256"
}
/oauth2/authorize
The /oauth2/authorize endpoint is the OAuth 2.0 authorization endpoint
defined in RFC 6749.
Use this endpoint to gather consent and authorization from the resource owner for the following flows:
-
Authorization code grant (OAuth 2.0 and OIDC)
-
Authorization code grant with PKCE (OAuth 2.0 and OIDC)
-
Authorization code grant with PAR (OAuth 2.0)
-
Implicit grant (OAuth 2.0 and OIDC)
Specify the realm in the request URL; for example:
https://<tenant-env-fqdn>/am/oauth2/realms/root/realms/alpha/authorizeThe authorization endpoint supports the following parameters:
| Parameter | Description | Required |
|---|---|---|
The OpenID Connect authentication context class reference values. |
||
The user attributes to be returned in the ID token. |
No |
|
Uniquely identifies the application making the request. |
Yes |
|
The code verifier generated for the PKCE flow. |
Yes, for the Authorization code grant with PKCE flow |
|
The method to derive the code challenge. |
Yes, when the |
|
The SSO token string linking the request to the user session to protect against Cross-Site Request Forgery attacks. |
Yes, when gathering consent without a remote consent service |
|
Specifies whether the resource owner consents to the requested access. |
Yes, when gathering consent unless consent is already saved for the scope |
|
Previously issued ID token passed as a hint about the end user’s session with the client. |
No |
|
String value that can be set to the ID the user uses to log in. |
No |
|
String value that associates the client session with the ID token. |
No |
|
Specifies whether to prompt the end user for authentication and consent. |
No |
|
The URI to return the resource owner to after authorization is complete. |
No |
|
Specifies the mechanism for returning response parameters. |
No |
|
The type of response expected from the authorization server. |
Yes |
|
The JWT request object. |
Yes, for JAR request and OIDC flows requiring a request object and providing no |
|
For PAR or OIDC flows, a reference to JWT request object(s). |
Yes, for JAR request and OIDC flows requiring a request object and providing no |
|
Specifies whether to store a resource owner’s consented scopes. |
No |
|
The scopes linked to the permissions requested by the client from the resource owner. |
No |
|
The authentication journey to use when authenticating the resource owner. |
No |
|
The value to maintain state between the request and the callback. |
No, but strongly recommended |
|
The end user’s preferred languages for the user interface. |
No |
/oauth2/bc-authorize
The /oauth2/bc-authorize endpoint is the backchannel authorization endpoint for
OpenID Connect Client-Initiated Backchannel Authentication Flow - Core 1.0.
Use this endpoint to initiate backchannel authorization with the resource owner with the following flow:
-
Backchannel request grant (OpenID Connect)
Specify the realm in the request URL; for example:
https://<tenant-env-fqdn>/am/oauth2/realms/root/realms/alpha/bc-authorizeThe endpoint supports the following parameters:
| Parameter | Description | Required |
|---|---|---|
A signed JSON Web Token (JWT) to use as client credentials. |
Yes, for JWT profile authentication |
|
The type of assertion, |
Yes, for JWT profile authentication |
|
Uniquely identifies the application making the request. |
Yes |
|
The password for a confidential client. |
Yes, when authenticating with Form parameters (HTTP POST) |
(1) The endpoint requires a signed JWT with these claims:
| Claim | Description | Example |
|---|---|---|
|
A string identifying the mechanism for the end user to provide authorization. |
|
|
A string or array of strings indicating the intended audience of the JWT. Must include the authorization server OAuth 2.0 endpoint. |
|
|
A short (100 character max.) string message to display to the user when obtaining authorization. For push notification, messages must:
|
|
|
The expiration time in seconds since January 1, 1970 UTC.
An expiration time more than 30 minutes in the future causes a |
|
|
An ID token identifying the principal and subject of the JWT (the end user). Required when not using |
|
|
The unique identifier of the JWT issuer; must match the client ID in the application profile. |
|
|
A string identifying the principal and subject of the JWT (the end user). Required when not using |
|
|
A string holding a space-separated list of the requested scopes; must include |
|
/oauth2/access_token
The /oauth2/access_token endpoint is the OAuth 2.0
token endpoint (RFC 6749).
Use this endpoint to acquire an access or refresh token with the following flows:
-
Authorization code grant (OAuth 2.0 and OIDC)
-
Authorization code grant with PKCE (OAuth 2.0 and OIDC)
-
Authorization code grant with PAR (OAuth 2.0)
-
Client credentials grant (OAuth 2.0)
-
Resource owner password credentials grant (OAuth 2.0)
-
Device flow (OAuth 2.0)
-
SAML 2.0 profile for authorization grant (OAuth 2.0)
-
Token exchange (OAuth 2.0 | OpenID Connect)
Specify the realm in the request URL; for example:
https://<tenant-env-fqdn>/am/oauth2/realms/root/realms/alpha/access_tokenThe access_token endpoint supports the following parameters:
| Parameter | Description | Required |
|---|---|---|
The token representing a delegate acting on behalf of another identity. |
Yes, for Token exchange |
|
The type of actor token. |
Yes, for Token exchange |
|
A string naming the journey to authenticate the resource owner. |
No, only for Resource owner password credentials grant |
|
|
A string holding a base64-encoded then URL-encoded SAML 2.0 assertion |
Yes, when |
A signed JSON Web Token (JWT) to use as client credentials. |
Yes, for JWT profile authentication |
|
The type of assertion, |
Yes, for JWT profile authentication |
|
Uniquely identifies the application making the request. |
Yes |
|
The password for a confidential client; do not use with |
Yes, when authenticating with Form parameters (HTTP POST) |
|
A base64-encoded JSON Web Key (JWK); do not use with |
Yes, for JWK-based proof-of-possession |
|
|
A string holding the authorization code for an authorization code grant. |
Yes, when |
A random string correlating a PKCE authorization request with the token request. |
Yes, for flows with PKCE |
|
|
A string holding the device code requested from the user for a device flow. |
Yes, when |
A string specifying the type of grant to acquire an access token. |
Yes |
|
|
A string holding the resource owner password for the Resource owner password credentials grant. |
Yes, when |
The URI to return the resource owner to after authorization is complete. |
Yes, when |
|
|
The refresh to get a new access token. |
Yes, for Refresh tokens |
The type of token requested in exchange. |
No, but recommended for Token exchange |
|
The scopes linked to the permissions requested by the client from the resource owner. |
No |
|
The original token to exchange. |
Yes, for Token exchange |
|
The type of subject token. |
Yes, for Token exchange |
|
|
A string holding the resource owner username for the Resource owner password credentials grant. |
Yes, when |
/oauth2/device/code
The Device authorization grant endpoint defined in RFC 8628 OAuth 2.0 Device Authorization Grant.
Client devices use this endpoint in the following flows to get the codes and information required to obtain the resource owner’s consent for device access:
Specify the realm in the request URL; for example:
https://<tenant-env-fqdn>/am/oauth2/realms/root/realms/alpha/device/codeThe device code endpoint supports the following parameters:
| Parameter | Description | Required |
|---|---|---|
The OpenID Connect authentication context class reference values. |
||
The user attributes to be returned in the ID token. |
No |
|
Uniquely identifies the application making the request. |
Yes |
|
The code verifier generated for the PKCE flow. |
Yes, for the Authorization code grant with PKCE flow |
|
The method to derive the code challenge. |
Yes, when the |
|
String value that can be set to the ID the user uses to log in. |
No |
|
String value that associates the client session with the ID token. |
No |
|
Specifies whether to prompt the end user for authentication and consent. |
No |
|
The scopes linked to the permissions requested by the client from the resource owner. |
No |
|
The value to maintain state between the request and the callback. |
No, but strongly recommended |
|
The end user’s preferred languages for the user interface. |
No |
/oauth2/device/user
This is the Device authorization grant endpoint for user interaction.
Client devices use this endpoint to confirm the resource owner’s consent in the following flows:
Specify the realm in the request URL; for example:
https://<tenant-env-fqdn>/am/oauth2/realms/root/realms/alpha/device/userThe device user endpoint supports the following parameters:
| Parameter | Description | Required |
|---|---|---|
The SSO token string linking the request to the user session to protect against Cross-Site Request Forgery attacks. |
Yes, when gathering consent without a remote consent service |
|
Specifies whether the resource owner consents to the requested access. |
Yes, when gathering consent unless consent is already saved for the scope |
|
Specifies whether to store a resource owner’s consented scopes. |
No |
|
The scopes linked to the permissions requested by the client from the resource owner. |
No |
|
|
The user code confirmed by the resource owner. |
Yes |
/oauth2/token/revoke
Endpoint defined in RFC 7009 Token Revocation to revoke access tokens and refresh tokens.
When you revoke a refresh token, you revoke all tokens issued with the same authorization grant. If you obtained multiple access tokens for a single user with different authorization grants, you must revoke the tokens separately to invalidate each one.
Specify the realm in the request URL; for example:
https://<tenant-env-fqdn>/am/oauth2/realms/root/realms/alpha/revokeThe revoke token endpoint supports the following parameters:
| Parameter | Description | Required |
|---|---|---|
A signed JSON Web Token (JWT) to use as client credentials. |
Yes, for JWT profile authentication |
|
The type of assertion, |
Yes, for JWT profile authentication |
|
Uniquely identifies the application making the request. |
Yes |
|
The password for a confidential client. |
Yes, when authenticating with Form parameters (HTTP POST) |
|
|
The access token or refresh token to revoke. |
Yes |
The following example revokes a refresh token:
$ curl \
--request POST \
--user "myClient:forgerock" \
--data "client_id=myClient" \
--data "token=<refresh-token>" \
"https://<tenant-env-fqdn>/am/oauth2/realms/root/realms/alpha/token/revoke"
{}
/oauth2/introspect
The /oauth2/introspect endpoint is defined in RFC 7662
OAuth 2.0 Token Introspection.
A resource server uses this endpoint to retrieve details about a token, such as:
-
The approved scopes
-
The user who authorized the client to obtain the token
-
The expiry time
-
The proof-of-possession JSON Web Key (JWK)
The resource server must authenticate to access this endpoint.
To introspect macaroon access tokens containing third-party caveats,
use the X-Discharge-Macaroon header to pass the discharge macaroon.
Specify the realm in the request URL; for example:
https://<tenant-env-fqdn>/am/oauth2/realms/root/realms/alpha/introspectThe token introspection endpoint supports the following parameters:
| Parameter | Description | Required |
|---|---|---|
A signed JSON Web Token (JWT) to use as client credentials. |
Yes, for JWT profile authentication |
|
The type of assertion, |
Yes, for JWT profile authentication |
|
Uniquely identifies the application making the request. |
Yes |
|
The password for a confidential client. |
Yes, when authenticating with Form parameters (HTTP POST) |
|
|
The token to introspect. |
Yes |
Example
The following example demonstrates token introspection:
$ curl \
--request POST \
--user "myClient:forgerock" \
--data "token=<access-token>" \
"https://<tenant-env-fqdn>/am/oauth2/realms/root/realms/alpha/introspect"
{
  "active": true,
  "scope": "profile",
  "realm": "/alpha",
  "client_id": "myClient",
  "user_id": "a0325ea4-9d9b-4056-931b-ab64704cc3da",
  "username": "a0325ea4-9d9b-4056-931b-ab64704cc3da",
  "token_type": "Bearer",
  "exp": 1675703376,
  "sub": "a0325ea4-9d9b-4056-931b-ab64704cc3da",
  "subname": "a0325ea4-9d9b-4056-931b-ab64704cc3da",
  "iss": "https://<tenant-env-fqdn>/am/oauth2/realms/root/realms/alpha",
  "auth_level": 0,
  "authGrantId": "sReMmkL05mN4xtDMQdVrpjXB_go",
  "auditTrackingId": "1d7a3317-03a9-4461-9d12-745f886019c2-5860187",
  "expires_in": 3575
}
Response signing and encryption
The default introspection response is a plain JSON object.
Identity Cloud also supports the JWT Response for OAuth Token Introspection Internet-Draft, which adds signed JWT or signed and encrypted JWT responses.
A client application can request a signed JWT by adding an Accept: application/jwt header to the request.
To enable signing and encryption for all requests, follow these steps:
-
In the Identity Cloud admin UI, go to Applications > Client ID > Sign On > General Settings > Show advanced settings > Endpoint Response Formats and select the response type in the Token Inspection Response Format drop-down list.
-
Save your work.
-
If you need to configure signing and encryption, go to Native Consoles > Access Management > Realms > Realm Name > Applications > OAuth 2.0 > Clients > Client ID > Signing and Encryption and configure the following properties:
- Token introspection response signing algorithm
-
Default:
RS256 - Token introspection response encryption algorithm
-
Default:
RSA-OAEP-256 - Token introspection encrypted response encryption algorithm
-
Default:
A128CBC-HS256
-
Save your work.
Requests for plain JSON now return errors.
Response content
The following table describes fields you may find in the introspection response:
| Field | Description |
|---|---|
|
Whether the token is active ( |
|
The authentication level for the resource owner who granted access to the token. |
|
The client the token was issued to. |
|
The confirmation key claim. The |
|
Expiration time in seconds since January 1, 1970 UTC. |
|
Expiration time in seconds from now; the value decreases with every request to Identity Cloud. Unlike the calculated value, the expiration time stored in the token does not change. For client-side tokens, Identity Cloud only returns this to a client in the same realm as the resource owner. |
|
The token issuer. |
|
The macaroon the token validates, including any caveats. |
|
The space-separated list of the scopes associated with the token. |
|
The subject of the access token. This can use the format
Examples: |
|
The type of token. |
|
Deprecated form of |
|
The user who authorized the client to obtain the token. |
/json/token/macaroon
The /json/token/macaroon endpoint lets you inspect and manipulate
macaroon tokens.
Specify the realm in the request URL; for example:
https://<tenant-env-fqdn>/am/oauth2/realms/root/realms/alpha/token/macaroonThis endpoint supports these parameters:
| Field | Description |
|---|---|
|
Return details about the macaroon. |
|
Add a caveat to the macaroon, returning a new macaroon. |
You can manipulate macaroons locally using a macaroon library. Anyone in possession of a macaroon token can inspect and restrict the macaroon securely.
The following example restricts the scope of a macaroon token and inspects the result.
The original scope of the unrestricted token is openid profile:
$ curl \
--request POST \
--header "Content-Type: application/json" \
--header "cache-control: no-cache" \
--data '{
  "macaroon": "<macaroon-token>",
  "caveat": {"type": "first-party", "identifier": {"scope": "profile"}}
}' \
'https://<tenant-env-fqdn>/am/json/realms/root/realms/alpha/token/macaroon?_action=restrict'
{
  "macaroon": "<restricted-macaroon-token>"
}

$ curl \
--request POST \
--header "Content-Type: application/json" \
--header "cache-control: no-cache" \
--data '{"macaroon": "<restricted-macaroon-token>"}' \
'https://<tenant-env-fqdn>/am/json/realms/root/realms/alpha/token/macaroon?_action=inspect'
{
  "identifier": "<identifier>",
  "location": "",
  "caveats": [{
    "type": "first-party",
    "identifier": {
      "scope": "profile"
    }
  }],
  "signature": "<signature>"
}|
OpenID Connect clients must ensure the following information is present in the JSON:
|
Legacy endpoints
Identity Cloud exposes the following legacy endpoints:
| Endpoint | Description |
|---|---|
Retrieve metadata about a token, revoke access, and refresh tokens |
|
Validate tokens and retrieve token metadata to determine how to respond to requests for protected resources |
|
Use legacy endpoints when required to upgrade or migrate an existing deployment. Avoid using legacy endpoints in new deployments. |
/frrest/oauth2/token (Legacy)
Use this endpoint when you cannot use the following alternatives:
- /oauth2/introspect
-
Retrieve metadata from OAuth 2.0 tokens.
- /oauth2/token/revoke
-
Delete (revoke) OAuth 2.0 tokens.
- /users/user/oauth2/applications
-
List clients with tokens granted by specific resource owners and delete tokens.
The /frrest/oauth2/token endpoint does not include the realm in the path:
-
To list the contents of a token, send an HTTP GET request to:
https://<tenant-env-fqdn>/am/frrest/oauth2/token/<access-token>Use the resource owner SSO token as the cookie for authorization; for example,
<session-cookie-name>=<resource-owner-tokenId>. -
To list the tokens for the current resource owner, send an HTTP GET request to
https://<tenant-env-fqdn>/am/frrest/oauth2/token/?_queryId=access_tokenUse the resource owner SSO token as the cookie for authorization; for example,
<session-cookie-name>=<resource-owner-tokenId>. -
To list the tokens for a specific user, send an HTTP GET request to:
https://<tenant-env-fqdn>/am/frrest/oauth2/token/?_queryId=userName=username,realm=/realmUse the SSO token of an administrative user as the cookie for authorization; for example,
<session-cookie-name>=<admin-tokenId>. -
To delete (revoke) a token, send an HTTP DELETE request to:
https://<tenant-env-fqdn>/am/frrest/oauth2/token/<access-token>`Use the SSO token of an administrative user as the cookie for authorization; for example,
<session-cookie-name>=<admin-tokenId>.
/oauth2/tokeninfo (Legacy)
Use this endpoint when you cannot use the standard /oauth2/introspect endpoint.
To inspect the contents of the token, send an HTTP GET request to:
https://<tenant-env-fqdn>/am/oauth2/realms/root/realms/realm/tokeninfoUse the token as a bearer token in an authorization header;
for example, Authorization: Bearer <access-token>.
OAuth 2.0 administration endpoints
Identity Cloud exposes the following administration and supporting REST endpoints:
| Endpoint | Description |
|---|---|
Register, list, and delete OAuth 2.0 clients (Identity Cloud specific-endpoint) |
|
List OAuth 2.0 clients holding active tokens granted by specific resource owners, and delete tokens for a combination of resource owner and client (Identity Cloud-specific endpoint) |
/realm-config/agents/OAuth2Client
Invoke this Identity Cloud-specific endpoint to create, list, and delete OAuth 2.0 clients.
Create an OAuth 2.0 client
This example registers a basic OAuth 2.0 client named myClient in the alpha realm.
Provide the SSO token of the tenant administrator as a header,
and append the name of the client to the URL:
$ curl \
--request PUT \
--header "Accept-API-Version: resource=1.0" \
--header "Content-Type: application/json" \
--header "Accept: application/json" \
--header "<session-cookie-name>: AQIC5wM...3MTYxOA..*" \
--data '{
   "coreOAuth2ClientConfig":{
      "agentgroup":"",
      "status":{
         "inherited":true,
         "value":"string"
      },
      "userpassword":"forgerock",
      "clientType":{
         "inherited":false,
         "value":"Confidential"
      },
      "redirectionUris":{
         "inherited":false,
         "value":[
            "https://www.example.com:443/callback"
         ]
      },
      "scopes":{
         "inherited":false,
         "value":[
            "write",
            "read"
         ]
      },
      "defaultScopes":{
         "inherited":true,
         "value":[
            "write"
         ]
      },
      "clientName":{
         "inherited":true,
         "value":[
            "My Test Client"
         ]
      }
   },
   "advancedOAuth2ClientConfig":{
      "name":{
         "inherited":false,
         "value":[
            null
         ]
      },
      "grantTypes":{
         "inherited":true,
         "value":[
            "authorization_code",
            "client_credentials"
         ]
      },
      "tokenEndpointAuthMethod":{
         "inherited":true,
         "value":"client_secret_basic"
      }
   }
}' \
"https://<tenant-env-fqdn>/am/json/realms/root/realms/alpha/realm-config/agents/OAuth2Client/myClient"
Display output
{
    "_id": "myClient",
    "_rev": "720283894",
    "overrideOAuth2ClientConfig": {
        "issueRefreshToken": true,
        "validateScopePluginType": "PROVIDER",
        "tokenEncryptionEnabled": false,
        "evaluateScopePluginType": "PROVIDER",
        "oidcMayActScript": "[Empty]",
        "oidcClaimsScript": "[Empty]",
        "scopesPolicySet": "oauth2Scopes",
        "accessTokenModificationPluginType": "PROVIDER",
        "authorizeEndpointDataProviderClass": "org.forgerock.oauth2.core.plugins.registry.DefaultEndpointDataProvider",
        "oidcClaimsPluginType": "PROVIDER",
        "providerOverridesEnabled": false,
        "authorizeEndpointDataProviderScript": "[Empty]",
        "statelessTokensEnabled": false,
        "authorizeEndpointDataProviderPluginType": "PROVIDER",
        "remoteConsentServiceId": null,
        "enableRemoteConsent": false,
        "validateScopeClass": "org.forgerock.oauth2.core.plugins.registry.DefaultScopeValidator",
        "usePolicyEngineForScope": false,
        "evaluateScopeClass": "org.forgerock.oauth2.core.plugins.registry.DefaultScopeEvaluator",
        "overrideableOIDCClaims": [],
        "accessTokenMayActScript": "[Empty]",
        "evaluateScopeScript": "[Empty]",
        "clientsCanSkipConsent": false,
        "accessTokenModificationScript": "[Empty]",
        "issueRefreshTokenOnRefreshedToken": true,
        "validateScopeScript": "[Empty]"
    },
    "advancedOAuth2ClientConfig": {
        "logoUri": {
            "inherited": false,
            "value": []
        },
        "subjectType": {
            "inherited": false,
            "value": "public"
        },
        "clientUri": {
            "inherited": false,
            "value": []
        },
        "tokenExchangeAuthLevel": {
            "inherited": false,
            "value": 0
        },
        "responseTypes": {
            "inherited": false,
            "value": [
                "code",
                "token",
                "id_token",
                "code token",
                "token id_token",
                "code id_token",
                "code token id_token",
                "device_code",
                "device_code id_token"
            ]
        },
        "mixUpMitigation": {
            "inherited": false,
            "value": false
        },
        "customProperties": {
            "inherited": false,
            "value": []
        },
        "javascriptOrigins": {
            "inherited": false,
            "value": []
        },
        "policyUri": {
            "inherited": false,
            "value": []
        },
        "softwareVersion": {
            "inherited": false
        },
        "tosURI": {
            "inherited": false,
            "value": []
        },
        "sectorIdentifierUri": {
            "inherited": false
        },
        "tokenEndpointAuthMethod": {
            "inherited": false,
            "value": "client_secret_basic"
        },
        "refreshTokenGracePeriod": {
            "inherited": false,
            "value": 0
        },
        "isConsentImplied": {
            "inherited": false,
            "value": false
        },
        "softwareIdentity": {
            "inherited": false
        },
        "grantTypes": {
            "inherited": false,
            "value": [
                "authorization_code"
            ]
        },
        "require_pushed_authorization_requests": {
            "inherited": false,
            "value": false
        },
        "descriptions": {
            "inherited": false,
            "value": []
        },
        "requestUris": {
            "inherited": false,
            "value": []
        },
        "name": {
            "inherited": false,
            "value": [
                "null"
            ]
        },
        "contacts": {
            "inherited": false,
            "value": []
        },
        "updateAccessToken": {
            "inherited": false
        }
    },
    "signEncOAuth2ClientConfig": {
        "tokenEndpointAuthSigningAlgorithm": {
            "inherited": false,
            "value": "RS256"
        },
        "idTokenEncryptionEnabled": {
            "inherited": false,
            "value": false
        },
        "tokenIntrospectionEncryptedResponseEncryptionAlgorithm": {
            "inherited": false,
            "value": "A128CBC-HS256"
        },
        "requestParameterSignedAlg": {
            "inherited": false
        },
        "authorizationResponseSigningAlgorithm": {
            "inherited": false,
            "value": "RS256"
        },
        "clientJwtPublicKey": {
            "inherited": false
        },
        "idTokenPublicEncryptionKey": {
            "inherited": false
        },
        "mTLSSubjectDN": {
            "inherited": false
        },
        "jwkStoreCacheMissCacheTime": {
            "inherited": false,
            "value": 60000
        },
        "jwkSet": {
            "inherited": false
        },
        "idTokenEncryptionMethod": {
            "inherited": false,
            "value": "A128CBC-HS256"
        },
        "jwksUri": {
            "inherited": false
        },
        "tokenIntrospectionEncryptedResponseAlg": {
            "inherited": false,
            "value": "RSA-OAEP-256"
        },
        "authorizationResponseEncryptionMethod": {
            "inherited": false
        },
        "userinfoResponseFormat": {
            "inherited": false,
            "value": "JSON"
        },
        "mTLSCertificateBoundAccessTokens": {
            "inherited": false,
            "value": false
        },
        "publicKeyLocation": {
            "inherited": false,
            "value": "jwks_uri"
        },
        "tokenIntrospectionResponseFormat": {
            "inherited": false,
            "value": "JSON"
        },
        "requestParameterEncryptedEncryptionAlgorithm": {
            "inherited": false,
            "value": "A128CBC-HS256"
        },
        "userinfoSignedResponseAlg": {
            "inherited": false
        },
        "idTokenEncryptionAlgorithm": {
            "inherited": false,
            "value": "RSA-OAEP-256"
        },
        "requestParameterEncryptedAlg": {
            "inherited": false
        },
        "authorizationResponseEncryptionAlgorithm": {
            "inherited": false
        },
        "mTLSTrustedCert": {
            "inherited": false
        },
        "jwksCacheTimeout": {
            "inherited": false,
            "value": 3600000
        },
        "userinfoEncryptedResponseAlg": {
            "inherited": false
        },
        "idTokenSignedResponseAlg": {
            "inherited": false,
            "value": "RS256"
        },
        "tokenIntrospectionSignedResponseAlg": {
            "inherited": false,
            "value": "RS256"
        },
        "userinfoEncryptedResponseEncryptionAlgorithm": {
            "inherited": false,
            "value": "A128CBC-HS256"
        }
    },
    "coreOpenIDClientConfig": {
        "claims": {
            "inherited": false,
            "value": []
        },
        "backchannel_logout_uri": {
            "inherited": false
        },
        "defaultAcrValues": {
            "inherited": false,
            "value": []
        },
        "jwtTokenLifetime": {
            "inherited": false,
            "value": 0
        },
        "defaultMaxAgeEnabled": {
            "inherited": false,
            "value": false
        },
        "clientSessionUri": {
            "inherited": false
        },
        "defaultMaxAge": {
            "inherited": false,
            "value": 600
        },
        "postLogoutRedirectUri": {
            "inherited": false,
            "value": []
        },
        "backchannel_logout_session_required": {
            "inherited": false,
            "value": false
        }
    },
    "coreOAuth2ClientConfig": {
        "userpassword": null,
        "status": {
            "inherited": false,
            "value": "Active"
        },
        "clientName": {
            "inherited": false,
            "value": []
        },
        "clientType": {
            "inherited": false,
            "value": "Confidential"
        },
        "loopbackInterfaceRedirection": {
            "inherited": false,
            "value": false
        },
        "defaultScopes": {
            "inherited": false,
            "value": []
        },
        "refreshTokenLifetime": {
            "inherited": false,
            "value": 0
        },
        "scopes": {
            "inherited": false,
            "value": [
                "write",
                "read"
            ]
        },
        "accessTokenLifetime": {
            "inherited": false,
            "value": 0
        },
        "redirectionUris": {
            "inherited": false,
            "value": [
                "https://www.example.com:443/callback"
            ]
        },
        "authorizationCodeLifetime": {
            "inherited": false,
            "value": 0
        }
    },
    "coreUmaClientConfig": {
        "claimsRedirectionUris": {
            "inherited": false,
            "value": []
        }
    },
    "_type": {
        "_id": "OAuth2Client",
        "name": "OAuth2 Clients",
        "collection": true
    }
}
Update an OAuth 2.0 client
To update an existing OAuth 2.0 client, use a similar PUT request to the create request. Make sure you include all the attributes to be retained in the client configuration. If you omit an attribute in the JSON payload, the request effectively deletes that attribute from the client.
Query OAuth 2.0 clients
This example lists the OAuth 2.0 clients in the alpha realm.
Provide the SSO token of a tenant administrator as a header.
$ curl \
--request GET \
--header "Accept-API-Version: resource=1.0" \
--header "<session-cookie-name>: AQIC5wM...3MTYxOA..*" \
"https://<tenant-env-fqdn>/am/json/realms/root/realms/alpha/realm-config/agents/OAuth2Client?_queryFilter=true"
Display output
{
  "result": [
    {
      "_id": "myClient",
      "_rev": "-1788958356",
      "overrideOAuth2ClientConfig": {
        "issueRefreshToken": true,
        "validateScopePluginType": "PROVIDER",
        "tokenEncryptionEnabled": false,
        "evaluateScopePluginType": "PROVIDER",
        "oidcMayActScript": "[Empty]",
        "oidcClaimsScript": "[Empty]",
        "accessTokenModificationPluginType": "PROVIDER",
        "authorizeEndpointDataProviderClass": "org.forgerock.oauth2.core.plugins.registry.DefaultEndpointDataProvider",
        "oidcClaimsPluginType": "PROVIDER",
        "providerOverridesEnabled": false,
        "authorizeEndpointDataProviderScript": "[Empty]",
        "statelessTokensEnabled": false,
        "authorizeEndpointDataProviderPluginType": "PROVIDER",
        "remoteConsentServiceId": null,
        "enableRemoteConsent": false,
        "validateScopeClass": "org.forgerock.oauth2.core.plugins.registry.DefaultScopeValidator",
        "usePolicyEngineForScope": false,
        "evaluateScopeClass": "org.forgerock.oauth2.core.plugins.registry.DefaultScopeEvaluator",
        "overrideableOIDCClaims": [],
        "accessTokenMayActScript": "[Empty]",
        "evaluateScopeScript": "[Empty]",
        "clientsCanSkipConsent": false,
        "accessTokenModificationScript": "[Empty]",
        "issueRefreshTokenOnRefreshedToken": true,
        "validateScopeScript": "[Empty]"
      },
      "advancedOAuth2ClientConfig": {
        "logoUri": [],
        "subjectType": "public",
        "clientUri": [],
        "tokenExchangeAuthLevel": 0,
        "responseTypes": [
          "code",
          "token",
          "id_token",
          "code token",
          "token id_token",
          "code id_token",
          "code token id_token",
          "device_code",
          "device_code id_token"
        ],
        "mixUpMitigation": false,
        "customProperties": [],
        "javascriptOrigins": [],
        "policyUri": [],
        "softwareVersion": null,
        "sectorIdentifierUri": null,
        "tosURI": [],
        "tokenEndpointAuthMethod": "client_secret_basic",
        "isConsentImplied": false,
        "refreshTokenGracePeriod": 0,
        "softwareIdentity": null,
        "grantTypes": [
          "authorization_code"
        ],
        "require_pushed_authorization_requests": false,
        "descriptions": [],
        "requestUris": [],
        "name": [],
        "contacts": [],
        "updateAccessToken": null
      },
      "signEncOAuth2ClientConfig": {
        "tokenEndpointAuthSigningAlgorithm": "RS256",
        "idTokenEncryptionEnabled": false,
        "tokenIntrospectionEncryptedResponseEncryptionAlgorithm": "A128CBC-HS256",
        "requestParameterSignedAlg": null,
        "authorizationResponseSigningAlgorithm": "RS256",
        "clientJwtPublicKey": null,
        "idTokenPublicEncryptionKey": null,
        "mTLSSubjectDN": null,
        "jwkStoreCacheMissCacheTime": 60000,
        "jwkSet": null,
        "idTokenEncryptionMethod": "A128CBC-HS256",
        "jwksUri": null,
        "tokenIntrospectionEncryptedResponseAlg": "RSA-OAEP-256",
        "authorizationResponseEncryptionMethod": null,
        "userinfoResponseFormat": "JSON",
        "mTLSCertificateBoundAccessTokens": false,
        "publicKeyLocation": "jwks_uri",
        "tokenIntrospectionResponseFormat": "JSON",
        "requestParameterEncryptedEncryptionAlgorithm": "A128CBC-HS256",
        "userinfoSignedResponseAlg": null,
        "idTokenEncryptionAlgorithm": "RSA-OAEP-256",
        "requestParameterEncryptedAlg": null,
        "authorizationResponseEncryptionAlgorithm": null,
        "mTLSTrustedCert": null,
        "jwksCacheTimeout": 3600000,
        "userinfoEncryptedResponseAlg": null,
        "idTokenSignedResponseAlg": "RS256",
        "userinfoEncryptedResponseEncryptionAlgorithm": "A128CBC-HS256",
        "tokenIntrospectionSignedResponseAlg": "RS256"
      },
      "coreOpenIDClientConfig": {
        "claims": [],
        "backchannel_logout_uri": null,
        "defaultAcrValues": [],
        "jwtTokenLifetime": 0,
        "defaultMaxAgeEnabled": false,
        "clientSessionUri": null,
        "defaultMaxAge": 600,
        "postLogoutRedirectUri": [],
        "backchannel_logout_session_required": false
      },
      "coreOAuth2ClientConfig": {
        "status": "Active",
        "clientName": [],
        "clientType": "Confidential",
        "loopbackInterfaceRedirection": false,
        "defaultScopes": [],
        "agentgroup": null,
        "refreshTokenLifetime": 0,
        "scopes": [],
        "accessTokenLifetime": 0,
        "redirectionUris": [],
        "authorizationCodeLifetime": 0
      },
      "coreUmaClientConfig": {
        "claimsRedirectionUris": []
      },
      "_type": {
        "_id": "OAuth2Client",
        "name": "OAuth2 Clients",
        "collection": true
      }
    }
  ],
  "resultCount": 1,
  "pagedResultsCookie": null,
  "totalPagedResultsPolicy": "EXACT",
  "totalPagedResults": 1,
  "remainingPagedResults": -1
}
Delete an OAuth 2.0 client
This example deletes an OAuth 2.0 client named myClient in the alpha realm.
Provide the SSO token of the tenant administrator as a header,
and append the name of the client to the URL:
$ curl \
--request DELETE \
--header "Accept-API-Version: resource=1.0" \
--header "<session-cookie-name>: AQIC5wM...3MTYxOA..*" \
"https://<tenant-env-fqdn>/am/json/realms/root/realms/alpha/realm-config/agents/OAuth2Client/myClient"
{
    "_id": "myClient",
    "_rev": "-614477476",
    ...
}
/users/user/oauth2/applications
Invoke this Identity Cloud-specific endpoint to list the applications granted OAuth 2.0 access and to delete tokens for a specified client.
To call the endpoint, you must compose the path to the realm where the client is registered.
Query applications
This example lists all the OAuth 2.0 clients holding active tokens granted in the alpha realm for the user, bjensen.
You must provide the SSO token of the tenant administrator or the resource owner as a header,
and include the user’s _id in the URL:
$  curl --request GET \
--header "Accept-API-Version: resource=1.1" \
--header "<session-cookie-name>: Ua6fsH2vjgHqVY..." \
"https://<tenant-env-fqdn>/am/json/realms/root/realms/alpha/users/1dff18dc-ac57-4388-8127-dff309f80002/oauth2/applications?_queryFilter=true"
{
    "result": [
        {
            "_id": "myClient",
            "_rev": "-1121350941",
            "name": null,
            "scopes": {
                "write": "write"
            },
            "expiryDateTime": null,
            "logoUri": null
        }
    ],
    "resultCount": 1,
    "pagedResultsCookie": null,
    "totalPagedResultsPolicy": "NONE",
    "totalPagedResults": -1,
    "remainingPagedResults": -1
}
On success, Identity Cloud returns an HTTP 200 code and a JSON object with information about the tokens, such as the granted scopes and the ID for the client to which they belong.
Delete tokens for a client
The following example deletes all tokens held by the OAuth 2.0 client myClient granted in the
alpha realm by bjensen.
You must provide the SSO token of the tenant administrator or the resource owner as a header,
and include the _id of the resource owner (bjensen) and name of the client (myClient) in the URL:
$ curl --request DELETE \
--header "Accept-API-Version: resource=1.1" \
--header "<session-cookie-name>: Ua6fsH2vjgHqVY..." \
"https://<tenant-env-fqdn>/am/json/realms/root/realms/alpha/users/1dff18dc-ac57-4388-8127-dff309f80002/oauth2/applications/myClient"
{
    "_id": "myClient",
    "_rev": "-1121350941",
    "name": null,
    "scopes": {
        "write": "write"
    },
    "expiryDateTime": null,
    "logoUri": null
}
On success, Identity Cloud returns an HTTP 200 code and a JSON object with information about the deleted tokens, such as the granted scopes and ID of the client.
Customize OAuth2.0 using JavaScript extensions
Identity Cloud lets you script extensions in JavaScript to customize OAuth 2.0 authorization server functionality, such as modifying access tokens or customizing how Identity Cloud processes scopes.
Supported extensions
The following table describes the extensible features of an Identity Cloud OAuth 2.0 authorization server.
| Feature | Extension options | Samples |
|---|---|---|
Modify the OAuth 2.0 access token before the token is persisted or returned to the client. |
||
Return additional data from an authorization request. |
||
Evaluate and return an OAuth 2.0 access token’s scope information. |
||
Customize the requested scopes for authorization, access token, refresh token, and backchannel authorization requests. |
||
Fetch the resource owner’s information based on an issued access token. |
Use extensions
The Identity Cloud scripting environment runs scripts that you create and manage using the Identity Cloud admin UI.
After creating a script, configure the OAuth 2.0 provider service to use it.
- Access token modification
-
-
Under Native Consoles > Access Management, go to Realms > Realm Name > Services > OAuth2 Provider > Plugins.
-
Select your script in the Access Token Modification Script drop-down.
-
- Authorize endpoint data provider
-
-
Under Native Consoles > Access Management, go to Realms > Realm Name > Services > OAuth2 Provider > Plugins.
-
Select
SCRIPTEDin the Authorize Endpoint Data Provider Plugin Type drop-down. -
Select your script in the Authorize Endpoint Data Provider Script drop-down.
-
- Scope evaluator
-
-
Under Native Consoles > Access Management, go to Realms > Realm Name > Services > OAuth2 Provider > Plugins.
-
Select
SCRIPTEDin the Scope Evaluation Plugin Type drop-down. -
Select your script in the Scope Evaluation Provider Script drop-down.
-
- Scope validator
-
-
Under Native Consoles > Access Management, go to Realms > Realm Name > Services > OAuth2 Provider > Plugins.
-
Select
SCRIPTEDin the Scope Validation Plugin Type drop-down. -
Select your script in the Scope Validation Provider Script drop-down.
-
- User info claims
-
-
Under Native Consoles > Access Management, go to Realms > Realm Name > Services > OAuth2 Provider > Plugins.
-
Select your script in the OIDC Claims Script drop-down.
-
For reference information, refer to OAuth2 provider plugins.
It is also possible to configure extensions in client profiles. Under Native Consoles > Access Management, go to Realms > Realm Name > Applications > OAuth 2.0 > Clients > Client ID > OAuth2 Provider Overrides.
Common OAuth 2.0 extension bindings
An extension script has access to bindings, objects that Identity Cloud injects into the script execution context.
Some extension scripts have access to the following bindings. For additional bindings, refer to the comments in the sample scripts.
| Binding | Information |
|---|---|
|
The OAuth 2.0 access token. For details, refer to AccessToken. |
|
An HTTP client for making external HTTP requests. Always present in all extension scripts. |
|
An identity Identity Cloud can access. For details, refer to AMIdentity. |
|
Write a message to the Identity Cloud debug log. Always present in all extension scripts. In Identity Cloud, this corresponds to the Logger names use the format: For information about debug logs, refer to Get audit and debug logs. |
|
The display name of the script. Always present in all extension scripts. |
|
The user’s session object. For details, refer to SSOToken. |
Access tokens
Use this extension point to modify the key-value pairs in an OAuth 2.0 access token before Identity Cloud issues it.
This page demonstrates a simple script. For additional options, refer to the sample access token modification script. Identity Cloud uses the sample script as the default, commented OAuth 2.0 access token modification script.
Constraints
You can modify both client-side and server-side access tokens. You can also modify macaroons used in place of regular tokens.
Identity Cloud stores the modifications in client-side and server-side access tokens. When issuing modified access tokens, consider the following constraints:
-
Removing or changing native properties may render the access token unusable.
Identity Cloud relies on native properties that it includes in the access token. If you remove or modify those properties, Identity Cloud considers the access token invalid. This can cause the OAuth 2.0 flows to break.
-
Modifying access tokens can significantly increase the size of the token.
Adding key-value pairs to OAuth 2.0 access tokens affects the size of client-side JSON web tokens (JWT), or the size of server-side tokens, if enabled.
Make sure the modified tokens fit within your client and user-agent size limits.
For more information, refer to Token storage.
Prepare the demonstration
Start by preparing the demonstration:
Sample script
The sample adds key-value pairs to the access token.
It uses methods of the accessToken and identity bindings.
-
Create the script.
In the Identity Cloud admin UI, select Scripts > Auth Scripts > + New Script, and create a new OAuth2 Access Token Modification script.
-
Name the script
Demo access token modification. -
Replace the default JavaScript with the following and save your script:
(function () {
  // Add a field next to the access token in the /oauth2/access_token response.
  accessToken.addExtraData('hello', 'world');

  // Add identity profile attribute values to the /oauth2/introspect response.
  accessToken.setField('mail', identity.getAttribute('mail'));
  accessToken.setField('phone', identity.getAttribute('telephoneNumber').toArray()[0]);

  // No return value is expected.
}());
The
accessTokenmethods update the access token before Identity Cloud issues it.The
identitymethods get attribute values from the resource owner’s profile.
OAuth 2.0 client
The OAuth 2.0 client profile in this example overrides the OAuth 2.0 provider settings. This lets you test the script without affecting access tokens issued to other clients.
-
Create a confidential OAuth 2.0 client account.
In the Identity Cloud admin UI, select Applications > + Add Application, and create a new Web client with the following settings:
- Client ID
-
myClient - Client Secret
-
forgerock
-
Add the following settings in the client profile and save your work:
- Sign-in URLs
-
https://www.example.com:443/callback - Scopes
-
access
-
Override OAuth 2.0 provider settings for this client.
Under Native Consoles > Access Management, select Realms > alpha > Applications > OAuth 2.0 > Clients > myClient, switch to the OAuth2 Provider Overrides tab, update the following settings and save your work:
- Enable OAuth2 Provider Overrides
-
Enabled
- Access Token Modification Plugin Type
-
SCRIPTED - Access Token Modification Script
-
Demo access token modification
Resource owner
An OAuth 2.0 client requests the access token on behalf of a resource owner.
-
Create the OAuth 2.0 resource owner account.
In the Identity Cloud admin UI, select Identities > Manage > Alpha Realm - Users > + New Alpha Realm - User and fill the required fields.
Record the username and password.
-
Update the following settings in the new user profile and save your work:
- Email Address
-
user@example.com - Telephone Number
-
(555) 323-1234
Test the demonstration
After preparing the demonstration, test your work using HTTP calls to REST endpoints.
The demonstration uses the Authorization code grant flow:
-
The resource owner authenticates to obtain an SSO token.
-
The client relies on Implied Consent being enabled (default). It assumes the resource owner grants the client access.
-
The client requests the authorization code and exchanges it for an access token your script modified.
-
The client introspects the access token.
Follow these steps:
-
Authenticate as the resource owner:
curl \ --request POST \ --header 'Content-Type: application/json' \ --header 'X-OpenAM-Username: <resource-owner-username>' \ --header 'X-OpenAM-Password: <resource-owner-password>' \ --header 'Accept-API-Version: resource=2.0, protocol=1.0' \ 'https://<tenant-env-fqdn>/am/json/realms/root/realms/alpha/authenticate' {"tokenId":"<resource-owner-tokenId>","successUrl":"/enduser/?realm=/alpha","realm":"/alpha"} -
Request the authorization code as the client:
curl \ --dump-header - \ --request POST \ --Cookie '<session-cookie-name>=<resource-owner-tokenId>' \ --data 'scope=access' \ --data 'response_type=code' \ --data 'client_id=myClient' \ --data 'csrf=<resource-owner-tokenId>' \ --data 'redirect_uri=https://www.example.com:443/callback' \ --data 'state=abc123' \ --data 'decision=allow' \ 'https://<tenant-env-fqdn>/am/oauth2/realms/root/realms/alpha/authorize' ... location: https://www.example.com:443/callback?code=<authorization-code>&iss=https%3A%2F%2F... ... -
Exchange the authorization code for an access token as the client:
curl \
--request POST \
--user 'myClient:forgerock' \
--data 'grant_type=authorization_code' \
--data 'code=<authorization-code>' \
--data 'redirect_uri=https://www.example.com:443/callback' \
'https://<tenant-env-fqdn>/am/oauth2/realms/root/realms/alpha/access_token'
{
  "access_token": "<access-token>",
  "refresh_token": "<refresh-token>",
  "scope": "access",
  "hello": "world",
  "token_type": "Bearer",
  "expires_in": 3599
}
The script added
"hello": "world"alongside the access token in the /oauth2/access_token response. -
Introspect the access token as the client:
curl \
--request POST \
--user 'myClient:forgerock' \
--data 'token=qOshQEHOg2r-AU2kmJgBzfUEC5M' \
'https://<tenant-env-fqdn>/am/oauth2/realms/root/realms/alpha/introspect'
{
  "active": true,
  "scope": "access",
  "realm": "/alpha",
  "client_id": "myClient",
  "user_id": "014c54bd-6078-4639-8316-8ce0e7746fa4",
  "username": "014c54bd-6078-4639-8316-8ce0e7746fa4",
  "token_type": "Bearer",
  "exp": 1668597726,
  "sub": "014c54bd-6078-4639-8316-8ce0e7746fa4",
  "subname": "014c54bd-6078-4639-8316-8ce0e7746fa4",
  "iss": "https://<tenant-env-fqdn>/am/oauth2/realms/root/realms/alpha",
  "auth_level": 0,
  "authGrantId": "dNJ9r6jMA6yZ88nnho7f6KDCESk",
  "auditTrackingId": "3819034a-4294-4b56-94ea-8e6015869083-2607123",
  "mail": ["user@example.com"],
  "phone": "(555) 323-1234"
}
The script added
"mail": ["user@example.com"]and"phone": "(555) 323-1234".
Use a validated script
Test your access token modification scripts as you did for the demonstration. After validating your script with OAuth 2.0 provider overrides in your test client, you can update the OAuth 2.0 provider configuration to use the script in one of the following ways:
-
Under Native Consoles > Access Management, select Realms > realm > Services > OAuth2 Provider, switch to the Plugins tab, edit the Access Token Modification Script, and save your work.
-
In the Identity Cloud admin UI, select Scripts > Auth Scripts > OAuth2 Access Token Modification Script, and replace the script content with your validated script.
Available objects
Identity Cloud injects the following objects into the execution context of an OAuth 2.0 access token modification script:
| Binding | Information | ||
|---|---|---|---|
|
The OAuth 2.0 access token. For details, refer to AccessToken. |
||
|
A map of properties configured in the client profile. The map has the following keys:
The map is |
||
|
An HTTP client for making external HTTP requests. |
||
|
An identity Identity Cloud can access. For details, refer to AMIdentity. |
||
|
Write a message to the Identity Cloud debug log. Always present in all extension scripts. In Identity Cloud, this corresponds to the Logger names use the format For information about debug logs, refer to Get audit and debug logs. |
||
|
A map of the properties present in the request. The map has the following keys:
|
||
|
The display name of the script. |
||
|
An array of the requested scopes; for example, |
||
|
The user’s session object if the request contains a session cookie. For details, refer to SSOToken. |
Authorize endpoint data provider
Use this extension point to add data to Identity Cloud’s response to an OAuth 2.0 authorization request.
This page demonstrates a simple script. For additional options, refer to the sample authorize endpoint extension script.
Prepare the demonstration
Start by preparing the demonstration:
Sample script
The sample adds query string parameters to the redirect URL in the OAuth 2.0 authorization response.
-
Create the script.
Under Native Consoles > Access Management, select Realms > alpha > Scripts > + New Script.
- Name
-
Demo OAuth 2.0 authz data extension - Script Type
-
Oauth2 Authorize Endpoint Data Provider
-
In the new script window, select Language:
JavaScriptand save the following script:(function () { var map = new java.util.HashMap() // Add an arbitrary query string parameter. map.put("key", "value") // Add the IP address if available. if (session) { map.put("ipAddress", session.getProperty("Host")) } return map }());
OAuth 2.0 client
The OAuth 2.0 client profile in this example overrides the Identity Cloud OAuth 2.0 provider settings. This lets you test the script without affecting access tokens issued to other clients.
-
Create a public OAuth 2.0 client account.
In the Identity Cloud admin UI, select Applications > + Add Application, and create a new Native / SPA client with the following setting:
- Client ID
-
myClient
-
Add the following settings in the client profile and save your work:
- Sign-in URLs
-
https://www.example.com:443/callback - Scopes
-
access
-
Override OAuth 2.0 provider settings for this client.
Under Native Consoles > Access Management, select Realms > alpha > Applications > OAuth 2.0 > Clients > myClient, switch to the OAuth2 Provider Overrides tab, update the following settings and save your work:
- Enable OAuth2 Provider Overrides
-
Enabled
- Authorize Endpoint Data Provider Plugin Type
-
SCRIPTED - Authorize Endpoint Data Provider Script
-
Demo OAuth 2.0 authz data extension
Resource owner
An OAuth 2.0 client requests the access token on behalf of a resource owner.
Create the OAuth 2.0 resource owner account:
-
In the Identity Cloud admin UI, select Identities > Manage > Alpha Realm - Users > + New Alpha Realm - User and fill the required fields.
-
Record the username and password.
Test the demonstration
After preparing the demonstration, test your work using HTTP calls to REST endpoints.
The demonstration uses a partial Authorization code grant flow. It validates only the extension to the authorization endpoint and stops before exchanging the code for an access token:
-
The resource owner authenticates to obtain an SSO token.
-
The client relies on Implied Consent being enabled (default). It assumes the resource owner grants the client access.
-
The client requests the authorization code.
Follow these steps:
-
Authenticate as the resource owner:
curl \ --request POST \ --header 'Content-Type: application/json' \ --header 'X-OpenAM-Username: <resource-owner-username>' \ --header 'X-OpenAM-Password: <resource-owner-password>' \ --header 'Accept-API-Version: resource=2.0, protocol=1.0' \ 'https://<tenant-env-fqdn>/am/json/realms/root/realms/alpha/authenticate' {"tokenId":"<resource-owner-tokenId>","successUrl":"/enduser/?realm=/alpha","realm":"/alpha"} -
Request the authorization code as the client:
curl \
--dump-header - \
--request POST \
--Cookie '<session-cookie-name>=<resource-owner-tokenId>' \
--data 'scope=access' \
--data 'response_type=code' \
--data 'client_id=myClient' \
--data 'csrf=<resource-owner-tokenId>' \
--data 'redirect_uri=https://www.example.com:443/callback' \
--data 'state=abc123' \
--data 'decision=allow' \
'https://<tenant-env-fqdn>/am/oauth2/realms/root/realms/alpha/authorize'
...
location: https://www.example.com:443/callback?code=...&ipAddress=IP-address&key=value...
...
The script added
ipAddress=IP-addressandkey=valueto the redirect URL in the response.
Use a validated script
Test your authorize endpoint data provider scripts as you did for the demonstration. After validating your script with OAuth 2.0 provider overrides in your test client, you can update the OAuth 2.0 provider configuration to use the script:
-
Under Native Consoles > Access Management, select Realms > Realm Name > Services > OAuth2 Provider.
-
Switch to the Plugins tab and edit the following settings:
- Authorize Endpoint Data Provider Plugin Type
-
SCRIPTED - Authorize Endpoint Data Provider Script
-
Your script
-
Save your work.
Available objects
Identity Cloud injects the following objects into the execution context of an OAuth 2.0 authorize endpoint data provider script:
| Binding | Information |
|---|---|
|
An HTTP client for making external HTTP requests. |
|
Write a message to the Identity Cloud debug log. In Identity Cloud, this corresponds to the Logger names use the format For information about debug logs, refer to Get audit and debug logs. |
|
The display name of the script. |
|
The user’s session object. For details, refer to SSOToken. |
Scope evaluation
Use this extension point to change how Identity Cloud evaluates and retrieves scopes for OAuth 2.0 access token introspection.
This page demonstrates the sample scope evaluation script. The script treats scopes as profile attributes for the resource owner. Identity Cloud populates the scopes with profile attribute values in response to a token introspection request.
Prepare the demonstration
Start by preparing the demonstration:
Sample script
The sample script populates scopes with attributes from the resource owner’s user profile.
It uses methods of the accessToken, identity, and logger bindings.
-
Under Native Consoles > Access Management, select Realms > alpha > Scripts > + New Script.
- Name
-
Demo scope evaluation extension - Script Type
-
OAuth2 Evaluate Scope
-
In the new script window, select Language:
JavaScriptand save the following script:(function () { var map = new java.util.HashMap(); if (identity) { var scopes = accessToken.getScope().toArray(); scopes.forEach(function (scope) { var attributes = identity.getAttribute(scope).toArray(); map.put(scope, attributes.join(",")); }); } else { logger.error('identity is null'); } return map; }());
Resource owner
-
Create a resource owner profile and record the username and password.
In this example, the resource owner also plays the role of application owner for the OAuth 2.0 client.
-
Update the following setting in the new user profile and save your work:
- Email Address
-
user@example.com
OAuth 2.0 client
The OAuth 2.0 client profile in this example overrides the Identity Cloud OAuth 2.0 provider settings. This lets you test the script without affecting access tokens issued to other clients.
-
Register a client application.
-
In the Identity Cloud admin UI, go to Applications and select + Custom Application.
-
Select the sign-in method as OIDC - OpenId Connect and application type as Web.
-
Create the application, providing the following details:
- Name
-
myClient - Owners
-
<resource-owner> - Client ID
-
myClient - Client Secret
-
forgerock
-
-
Add the following settings in the client profile under Sign On > General Settings and save your work:
- Sign-in URLs
-
https://www.example.com:443/callback - Scopes
-
mail
-
Override OAuth 2.0 provider settings for this client.
Under Native Consoles > Access Management, select Realms > alpha > Applications > OAuth 2.0 > Clients > myClient. Switch to the OAuth2 Provider Overrides tab, update the following settings and save your work:
- Enable OAuth2 Provider Overrides
-
Enabled
- Scope Evaluation Plugin Type
-
SCRIPTED - Scope Evaluation Script
-
Demo scope evaluation extension
Test the demonstration
After preparing the demonstration, test your work using HTTP calls to REST endpoints.
The demonstration uses the Authorization code grant flow:
-
The resource owner authenticates to obtain an SSO token.
-
The client relies on Implied Consent being enabled (default) in the Identity Cloud admin UI under Applications > Client ID > Advanced settings > Authentication. It assumes the resource owner grants the client access.
-
The client requests the authorization code and exchanges it for an access token your script modified.
-
The client uses the legacy
/oauth2/tokeninfoendpoint to inspect the access token.
Follow these steps:
-
Authenticate as the resource owner:
curl \ --request POST \ --header 'Content-Type: application/json' \ --header 'X-OpenAM-Username: <resource-owner-username>' \ --header 'X-OpenAM-Password: <resource-owner-password>' \ --header 'Accept-API-Version: resource=2.0, protocol=1.0' \ 'https://<tenant-env-fqdn>/am/json/realms/root/realms/alpha/authenticate' {"tokenId":"<resource-owner-tokenId>","successUrl":"/enduser/?realm=/alpha","realm":"/alpha"} -
Request the authorization code as the client:
curl \ --dump-header - \ --request POST \ --Cookie '<session-cookie-name>=<resource-owner-tokenId>' \ --data 'scope=mail' \ --data 'response_type=code' \ --data 'client_id=myClient' \ --data 'csrf=<resource-owner-tokenId>' \ --data 'redirect_uri=https://www.example.com:443/callback' \ --data 'state=abc123' \ --data 'decision=allow' \ 'https://<tenant-env-fqdn>/am/oauth2/realms/root/realms/alpha/authorize' ... location: https://www.example.com:443/callback?code=<authorization-code>&iss=https%3A%2F%2F... ... -
Exchange the authorization code for an access token as the client:
curl \ --request POST \ --user 'myClient:forgerock' \ --data 'grant_type=authorization_code' \ --data 'code=<authorization-code>' \ --data 'redirect_uri=https://www.example.com:443/callback' \ 'https://<tenant-env-fqdn>/am/oauth2/realms/root/realms/alpha/access_token' { "access_token": "<access-token>", "refresh_token": "<refresh-token>", "scope": "mail", "token_type": "Bearer", "expires_in": 3599 } -
Get information about the access token as the client acting as a resource server:
curl \
--request GET \
--header 'Authorization: Bearer <access-token>' \
'https://<tenant-env-fqdn>/am/oauth2/realms/root/realms/alpha/tokeninfo'
{
  "access_token": "<access-token>",
  "mail": "user@example.com",
  "grant_type": "authorization_code",
  "auth_level": 0,
  "auditTrackingId": "<audit-tracking-id>",
  "scope": ["mail"],
  "realm": "/alpha",
  "token_type": "Bearer",
  "expires_in": 3497,
  "authGrantId": "<auth-grant-id>",
  "client_id": "myClient"
}
The script added
"mail": "user@example.com".
Use a validated script
Test your scope evaluation scripts as you did for the demonstration. After validating your script with OAuth 2.0 provider overrides in your test client, you can update the OAuth 2.0 provider configuration to use the script.
-
Under Native Consoles > Access Management, add the script to the target realm if you haven’t done so.
-
Select Realms > Realm Name > Services > OAuth2 Provider, switch to the Plugins tab, and edit these settings before saving your work:
-
Scope Evaluation Plugin Type
-
Scope Evaluation Script
-
Available objects
Identity Cloud injects the following objects into the execution context of an OAuth 2.0 scope evaluation script:
| Binding | Information |
|---|---|
|
The OAuth 2.0 access token. For details, refer to AccessToken. |
|
An HTTP client for making external HTTP requests. |
|
An identity Identity Cloud can access. For details, refer to AMIdentity. |
|
Write a message to the debug log. Always present in all extension scripts. In Identity Cloud, this corresponds to the Logger names use the format For information about debug logs, refer to Get audit and debug logs. |
|
The display name of the script. |
Scope validation
Use this extension point to change how Identity Cloud validates requested OAuth 2.0 scopes.
The extension defines these functions to customize scope validation by OAuth 2.0 endpoint:
| Function | Endpoints |
|---|---|
|
|
|
|
|
|
|
For additional details, refer to the sample scope validation script.
Prepare the demonstration
Start by preparing the demonstration:
Sample script
The sample reproduces the default validation behavior and adds a custom scope on successful validation.
It uses the scope-related bindings.
-
Create the script.
In the Identity Cloud admin UI, select Scripts > Auth Scripts > + New Script, and create a new OAuth2 Validate Scope script.
-
Name the script
Demo scope validator. -
Add the following JavaScript and save your work:
function validateScopes() {
  var frJava = JavaImporter(
    org.forgerock.oauth2.core.exceptions.InvalidScopeException
  )

  var scopes
  if (requestedScopes) {
    scopes = new java.util.HashSet(allowedScopes)
    scopes.retainAll(requestedScopes)
    if (requestedScopes.size() > scopes.size()) {
      var invalidScopes = new java.util.HashSet(requestedScopes)
      invalidScopes.removeAll(allowedScopes)
      throw new frJava.InvalidScopeException('Unknown/invalid scope(s)')
    }
  } else {
    scopes = defaultScopes
  }

  if (scopes) {
      // Validation succeeded. Add a custom scope.
      scopes.add('custom')
      return scopes
  } else {
      throw new frJava.InvalidScopeException('No scope requested and no default scope configured')
  }
}

function validateAuthorizationScope() {
  return validateScopes()
}

function validateAccessTokenScope() {
  return validateScopes()
}

function validateRefreshTokenScope() {
  return validateScopes()
}

function validateBackChannelAuthorizationScope() {
  return validateScopes()
}
OAuth 2.0 client
The OAuth 2.0 client profile in this example overrides the OAuth 2.0 provider settings. This lets you test the script without affecting access tokens issued to other clients.
-
Create a confidential OAuth 2.0 client account.
In the Identity Cloud admin UI, select Applications > + Add Application, and create a new Web client with the following settings:
- Client ID
-
myClient - Client Secret
-
forgerock
-
Add the following settings in the client profile and save your work:
- Sign-in URLs
-
https://www.example.com:443/callback - Scopes
-
custom
mail
In this demonstration, the client requests only the
mailscope. For successful validation, Identity Cloud must allow thecustomscope even though the client does not request it. -
Override OAuth 2.0 provider settings for this client.
Under Native Consoles > Access Management, select Realms > alpha > Applications > OAuth 2.0 > Clients > myClient. Switch to the OAuth2 Provider Overrides tab, update the following settings and save your work:
- Enable OAuth2 Provider Overrides
-
Enabled
- Scope Validation Plugin Type
-
SCRIPTED - Scope Validation Script
-
Demo scope validator
Resource owner
An OAuth 2.0 client requests the access token on behalf of a resource owner.
-
Create the OAuth 2.0 resource owner account.
In the Identity Cloud admin UI, select Identities > Manage > Alpha Realm - Users > + New Alpha Realm - User and fill the required fields.
Record the username and password.
-
Update the following settings in the new user profile and save your work:
- Email Address
-
user@example.com
Test the demonstration
After preparing the demonstration, test your work using HTTP calls to REST endpoints.
The demonstration uses the Authorization code grant flow:
-
The resource owner authenticates to obtain an SSO token.
-
The client relies on Implied Consent being enabled (default). It assumes the resource owner grants the client access.
-
The client requests the authorization code and exchanges it for an access token your script modified.
-
The client introspects the access token.
Follow these steps:
-
Authenticate as the resource owner:
curl \ --request POST \ --header 'Content-Type: application/json' \ --header 'X-OpenAM-Username: <resource-owner-username>' \ --header 'X-OpenAM-Password: <resource-owner-password>' \ --header 'Accept-API-Version: resource=2.0, protocol=1.0' \ 'https://<tenant-env-fqdn>/am/json/realms/root/realms/alpha/authenticate' {"tokenId":"<resource-owner-tokenId>","successUrl":"/enduser/?realm=/alpha","realm":"/alpha"} -
Request the authorization code as the client:
curl \ --dump-header - \ --request POST \ --Cookie '<session-cookie-name>=<resource-owner-tokenId>' \ --data 'scope=mail' \ --data 'response_type=code' \ --data 'client_id=myClient' \ --data 'csrf=<resource-owner-tokenId>' \ --data 'redirect_uri=https://www.example.com:443/callback' \ --data 'state=abc123' \ --data 'decision=allow' \ 'https://<tenant-env-fqdn>/am/oauth2/realms/root/realms/alpha/authorize' ... location: https://www.example.com:443/callback?code=<authorization-code>&iss=https%3A%2F%2F... ... -
Exchange the authorization code for an access token as the client:
curl \
--request POST \
--user 'myClient:forgerock' \
--data 'grant_type=authorization_code' \
--data 'code=<authorization-code>' \
--data 'redirect_uri=https://www.example.com:443/callback' \
'https://<tenant-env-fqdn>/am/oauth2/realms/root/realms/alpha/access_token'
{
  "access_token": "<access-token>",
  "refresh_token": "<refresh-token>",
  "scope": "mail custom",
  "token_type": "Bearer",
  "expires_in": 3599
}
Notice the response contains both the requested scope and the additional scope,
"scope": "mail custom". -
Introspect the access token as the client:
curl \
--request POST \
--user 'myClient:forgerock' \
--data 'token=zPwX1RzsUo7XYSSSjr7xw4P7Av0' \
'https://<tenant-env-fqdn>/am/oauth2/realms/root/realms/alpha/introspect'
{
  "active": true,
  "scope": "mail custom",
  "realm": "/alpha",
  "client_id": "myClient",
  "user_id": "014c54bd-6078-4639-8316-8ce0e7746fa4",
  "username": "014c54bd-6078-4639-8316-8ce0e7746fa4",
  "token_type": "Bearer",
  "exp": 1670257212,
  "sub": "014c54bd-6078-4639-8316-8ce0e7746fa4",
  "subname": "014c54bd-6078-4639-8316-8ce0e7746fa4",
  "iss": "https://<tenant-env-fqdn>/am/oauth2/realms/root/realms/alpha",
  "auth_level": 0,
  "authGrantId": "LtuYkc-HLKN58cCao_hmNfMeGZw",
  "auditTrackingId": "b187bfdc-c0ff-4942-b4be-34a8c7134c40-1943612"
}
Notice the response contains both scopes.
Use a validated script
Test your scope validation scripts as you did for the demonstration. After validating your script with OAuth 2.0 provider overrides in your test client, you can update the OAuth 2.0 provider configuration to use the script.
-
In the Identity Cloud admin UI, add the script to the target realm if you have not done so.
-
Select Realms > Realm Name > Services > OAuth2 Provider, switch to the Plugins tab, and edit these settings before saving your work:
-
Scope Validation Plugin Type
-
Scope Validation Script
-
Available objects
Identity Cloud injects the following objects into the execution context of an OAuth 2.0 scope validation script:
| Binding | Information |
|---|---|
|
The set of scope strings Identity Cloud allows this client to request. |
|
The set of scope strings configured as defaults for this client. |
|
An HTTP client for making external HTTP requests. |
|
Write a message to the Identity Cloud debug log. Always present in all extension scripts. In Identity Cloud, this corresponds to the The logger identifier takes the form For details, refer to Debug. |
|
The set of scope strings in the client request. |
|
The display name of the script. |
OpenID Connect 1.0 (OIDC) claims
Use this extension point to modify and override claims in an ID token
and in the response to a /userinfo request.
This page demonstrates changes to the default OpenID Connect 1.0 claims extension script to retrieve custom attribute values from the end user profile.
For additional examples, refer to the following Knowledge Base articles:
Prepare the demonstration
Start by preparing the demonstration:
Sample script
The sample replaces the locale and zoneinfo claims with custom claims from end user profile attributes.
-
Create the script.
In the Identity Cloud admin UI, select Scripts > Auth Scripts > + New Script, and create a new OIDC Claims script.
-
Name the script
Demo OIDC claims. -
Edit the default JavaScript as follows and save your script.
-
In the
utils.setScopeClaimsMapfunction call, replace thelocaleandzoneinfofields with references to the custom claimscustom_stringandcustom_multivalue:utils.setScopeClaimsMap({ profile: [ 'name', 'family_name', 'given_name', 'custom_string', 'custom_multivalue' ], email: ['email'], address: ['address'], phone: ['phone_number'] }); -
In the
utils.setClaimResolversfunction call, replace thelocaleandzoneinfodefinitions with definitions for the custom claims:utils.setClaimResolvers({ name: utils.getUserProfileClaimResolver('cn'), family_name: utils.getUserProfileClaimResolver('sn'), given_name: utils.getUserProfileClaimResolver('givenname'), custom_string: utils.getUserProfileClaimResolver('fr-attr-str1'), custom_multivalue: utils.getUserProfileClaimResolver('fr-attr-multi1'), email: utils.getUserProfileClaimResolver('mail'), address: utils.getAddressClaimResolver( // ... utils.getUserProfileClaimResolver('postaladdress') ), phone_number: utils.getUserProfileClaimResolver('telephonenumber')}); });The attributes
fr-attr-str1andfr-attr-multi1are end user profile attributes. You set their values when creating the end user profile.
-
Relying party
This OIDC relying party (client) profile overrides the OAuth 2.0 provider settings. The override lets you test the script without affecting ID and access tokens issued to other applications.
-
Create a confidential OAuth 2.0 client account.
In the Identity Cloud admin UI, select Applications > + Add Application, and create a new Web client with the following settings:
- Client ID
-
myClient - Client Secret
-
forgerock
-
Add the following settings in the client profile and save your work:
- Sign-in URLs
-
https://www.example.com:443/callback - Scopes
-
openid
profile
-
Override OAuth 2.0 provider settings for this client.
Under Native Consoles > Access Management, select Realms > alpha > Applications > OAuth 2.0 > Clients > myClient, switch to the OAuth2 Provider Overrides tab, update the following settings and save your work:
- Enable OAuth2 Provider Overrides
-
Enabled
- OIDC Claims Plugin Type
-
SCRIPTED - OIDC Claims Script
-
Demo access token modification
End user
The end user profile holds the values for the custom attributes referenced in your script.
-
Create the end user account.
In the Identity Cloud admin UI, select Identities > Manage > Alpha Realm - Users > + New Alpha Realm - User and fill the required fields.
Record the username and password.
-
Update the following settings in the new end user profile and save your work:
- Generic Unindexed String 1
-
Custom string - Generic Unindexed Multivalue 1
-
custom
value
The script takes custom claim values from the attributes
fr-attr-str1andfr-attr-multi1. As described in User identity attributes and properties reference, the Identity Cloud admin UI labels these Generic Unindexed String 1 and Generic Unindexed Multivalue 1. -
Display the Raw JSON for the end user profile.
Find the following settings in the JSON:
{
  "frUnindexedString1": "Custom string",
  "frUnindexedMultivalued1": [
    "custom",
    "value"
  ]
}
The attributes
fr-attr-str1andfr-attr-multi1map tofrUnindexedString1andfrUnindexedMultivalued1in the JSON representation.
Test the demonstration
After preparing the demonstration, test your work using HTTP calls to REST endpoints.
The demonstration uses the Authorization code grant flow:
-
The end user authenticates to obtain an SSO token.
-
The relying party (client) relies on Implied Consent being enabled (default) in the Identity Cloud admin UI under Applications > Client ID > Advanced settings > Authentication. It assumes the end user grants user info access to the relying party.
-
The relying party requests the authorization code and exchanges it for an ID token.
-
The relying party requests user info.
Follow these steps:
-
Authenticate as the end user:
curl \ --request POST \ --header 'Content-Type: application/json' \ --header 'X-OpenAM-Username: <end-user-username>' \ --header 'X-OpenAM-Password: <end-user-password>' \ --header 'Accept-API-Version: resource=2.0, protocol=1.0' \ 'https://<tenant-env-fqdn>/am/json/realms/root/realms/alpha/authenticate' {"tokenId":"<end-user-tokenId>","successUrl":"/enduser/?realm=/alpha","realm":"/alpha"} -
Request the authorization code:
curl \ --dump-header - \ --request POST \ --Cookie '<session-cookie-name>=<end-user-tokenId>' \ --data 'scope=openid profile' \ --data 'response_type=code' \ --data 'client_id=myClient' \ --data 'csrf=<end-user-tokenId>' \ --data 'redirect_uri=https://www.example.com:443/callback' \ --data 'state=abc123' \ --data 'decision=allow' \ 'https://<tenant-env-fqdn>/am/oauth2/realms/root/realms/alpha/authorize' ... location: https://www.example.com:443/callback?code=<authorization-code>&iss=https%3A%2F%2F... ... -
Exchange the authorization code for an ID token:
curl \ --request POST \ --user 'myClient:forgerock' \ --data 'grant_type=authorization_code' \ --data 'code=<authorization-code>' \ --data 'redirect_uri=https://www.example.com:443/callback' \ 'https://<tenant-env-fqdn>/am/oauth2/realms/root/realms/alpha/access_token' { "access_token": "<access-token>", "refresh_token": "<refresh-token>", "scope": "openid profile", "id_token": "...", "token_type": "Bearer", "expires_in": 3599 } -
Display the claims in the ID token.
You can use the
jqcommand to display the values. In the following command,<IDToken>is the single-line JSON response object from the previous step:jq -R 'split(".") | .[1] | @base64d | fromjson' <<< '<IDToken>' { "at_hash": "_0Uie6DRQNgxqiSFa4EIDg", "sub": "014c54bd-6078-4639-8316-8ce0e7746fa4", "auditTrackingId": "b187bfdc-c0ff-4942-b4be-34a8c7134c40-3099380", "subname": "014c54bd-6078-4639-8316-8ce0e7746fa4", "iss": "https://<tenant-env-fqdn>/am/oauth2/realms/root/realms/alpha", "tokenName": "id_token", "given_name": "Test", "custom_string": "Custom string", "sid": "f1ChiEDjsYqYc/ML20bm4QZ9kQvmbIJmD+hZwkRdfOo=", "aud": "myClient", "c_hash": "j0ry4449CY9GonHxNEgC4A", "acr": "0", "org.forgerock.openidconnect.ops": "5NkCJhSacAzRsdELBgRJvbpuVMk", "s_hash": "bKE9UspwyIPg8LsQHkJaiQ", "custom_multivalue": [ "value", "custom" ], "azp": "myClient", "auth_time": 1670316296, "name": "Test User", "realm": "/alpha", "exp": 1670319945, "tokenType": "JWTToken", "iat": 1670316345, "family_name": "User" }The script included
"custom_string": "Custom string"and"custom_multivalue": ["value", "custom"]. -
Make a request for user info:
curl \
--request POST \
--header 'Authorization: Bearer dvZ3qHCBghiDvW1tu4Z-I6K3ogY' \
'https://<tenant-env-fqdn>/am/oauth2/realms/root/realms/alpha/userinfo'
{
  "name": "Test User",
  "family_name": "User",
  "given_name": "Test",
  "custom_string": "Custom string",
  "custom_multivalue": ["value", "custom"],
  "sub": "014c54bd-6078-4639-8316-8ce0e7746fa4",
  "subname": "014c54bd-6078-4639-8316-8ce0e7746fa4"
}
The script included the custom claims.
Use a validated script
Test your access token modification scripts as you did for the demonstration. After validating your script with OAuth 2.0 provider overrides in your test client, you can update the OAuth 2.0 provider configuration to use the script in one of the following ways:
-
Under Native Consoles > Access Management, select Realms > realm > Services > OAuth2 Provider, switch to the Plugins tab, edit the OIDC Claims Script, and save your work.
-
In the Identity Cloud admin UI, select Scripts > Auth Scripts > Realm Name endUserUIClient OIDC Claims Script, and replace the script content with your validated script.
Available objects
Identity Cloud injects the following objects into the execution context of a user info claims script:
| Binding | Information | ||
|---|---|---|---|
|
An object (map) of the default OIDC claims Identity Cloud provides. The keys are the claim strings. The values are the claim value objects. |
||
|
An array of string values from the For details, refer to Claims Languages and Scripts in the OpenID Connect Core 1.0 specification. |
||
|
The default OIDC claims Identity Cloud provides. An array of claim objects. |
||
|
A read-only object (map) of the following client properties. This is present if Identity Cloud identified the client specified in the request.
|
||
|
An HTTP client for making external HTTP requests. |
||
|
An identity Identity Cloud can access. For details, refer to AMIdentity. |
||
|
Write a message to the Identity Cloud debug log. Always present in all extension scripts. In Identity Cloud, this corresponds to the Logger names use the format For information about debug logs, refer to Get audit and debug logs. |
||
|
An object (map) of requested claims.
This is empty unless the request includes the Under Native Consoles > Access Management, go to Realms > Realm Name > Services > OAuth2 Provider > Advanced OpenID Connect. Enable Enable "claims_parameter_supported" and save your change. For details about the |
||
|
An array of the requested claims objects. This is empty unless the request includes claims. A claim with a single value means the script should return only that value. |
||
|
A read-only object (map) of the following request properties.
|
||
|
The set of scope strings in the client request. |
||
|
The display name of the script. |
||
|
The user’s session object. For details, refer to SSOToken. |