![]()
Axiad enables customers to move to a passwordless future without the friction and risk of fragmented solutions. By addressing authentication holistically, regardless of underlying IT complexity, organizations can vastly improve their cybersecurity posture.
Please refer to our website for more information about Axiad.
Axiad SCIM Connector enables automatic provisioning of users and groups between Axiad Cloud and ForgeRock using the secure and standard protocol, System for Cross-Domain Identity Management (SCIM). The Axiad SCIM connector allows partners to leverage certificate based authentication, which is the most secure, phishing-resistant form of multi-factor authentication (MFA) and is being increasingly deployed in enterprises as well as the public sector. Many enterprise employees, as well as the majority of federal agencies and defense employees/contractors, use a strong authenticator such as a smart card or hardware device for authentication. CBA streamlines the process of authenticating users with a variety of authenticators while improving overall protection.
Axiad provides this SCIM Connector as a starting point for integrating ForgeRock and Axiad Cloud. Since every ForgeRock implementation is different we have provided a basic mapping of ForgeRock attributes for SCIM provisioning. Your organization's implementation may have differences which will require updates to ensure the SCIM Connector works properly.
Your Axiad SCIM Connector may also not require all the attributes that are described below or your ForgeRock implementation may not have all the data populated for all attributes listed. The SCIM attribute mapping will need to be updated as appropriate for your data and business requirements.
Please work with Axiad Customer Success before implementing a SCIM connector as they will need to provide an attribute list and credentials for your Axiad Cloud tenant.
- ForgeRock Identity Management (OpenIDM) 7.3.0 or above
- Axiad Cloud tenant
- Axiad Cloud tenant available attribute list
- Axiad Cloud tenant SCIM credentials
- Appropriate Axiad SCIM connector configuration files
If your Axiad Cloud tenant is already configured with the required mappings attribute there is no additional Axiad configuration needed. If assistance is needed with your Axiad Cloud environment to configure SCIM, please contact Axiad Customer Success.
- Get the latest SCIM Connector configuration and mapping file from the Axiad Customer Success team.
- Copy the
provisioner.openicf-AxiadSCIMConnector.jsonfile into theconfdirectory where ForgeRock Identity Management is deployed. - If the
sync.jsonfile exist in theconfdirectory, copy the contents ofmapping-AxiadSCIMConnector.jsonin the mappings array inside theconf\sync.jsonfile. If thesync.jsonfile doesn't exist, copy the sync.json file to theconfdirectory.
Log into the ForgeRock Identity Management console
Click
CONFIGUREon the menu bar and selectCONNECTORS. The AxiadSCIMConnector will be available as shown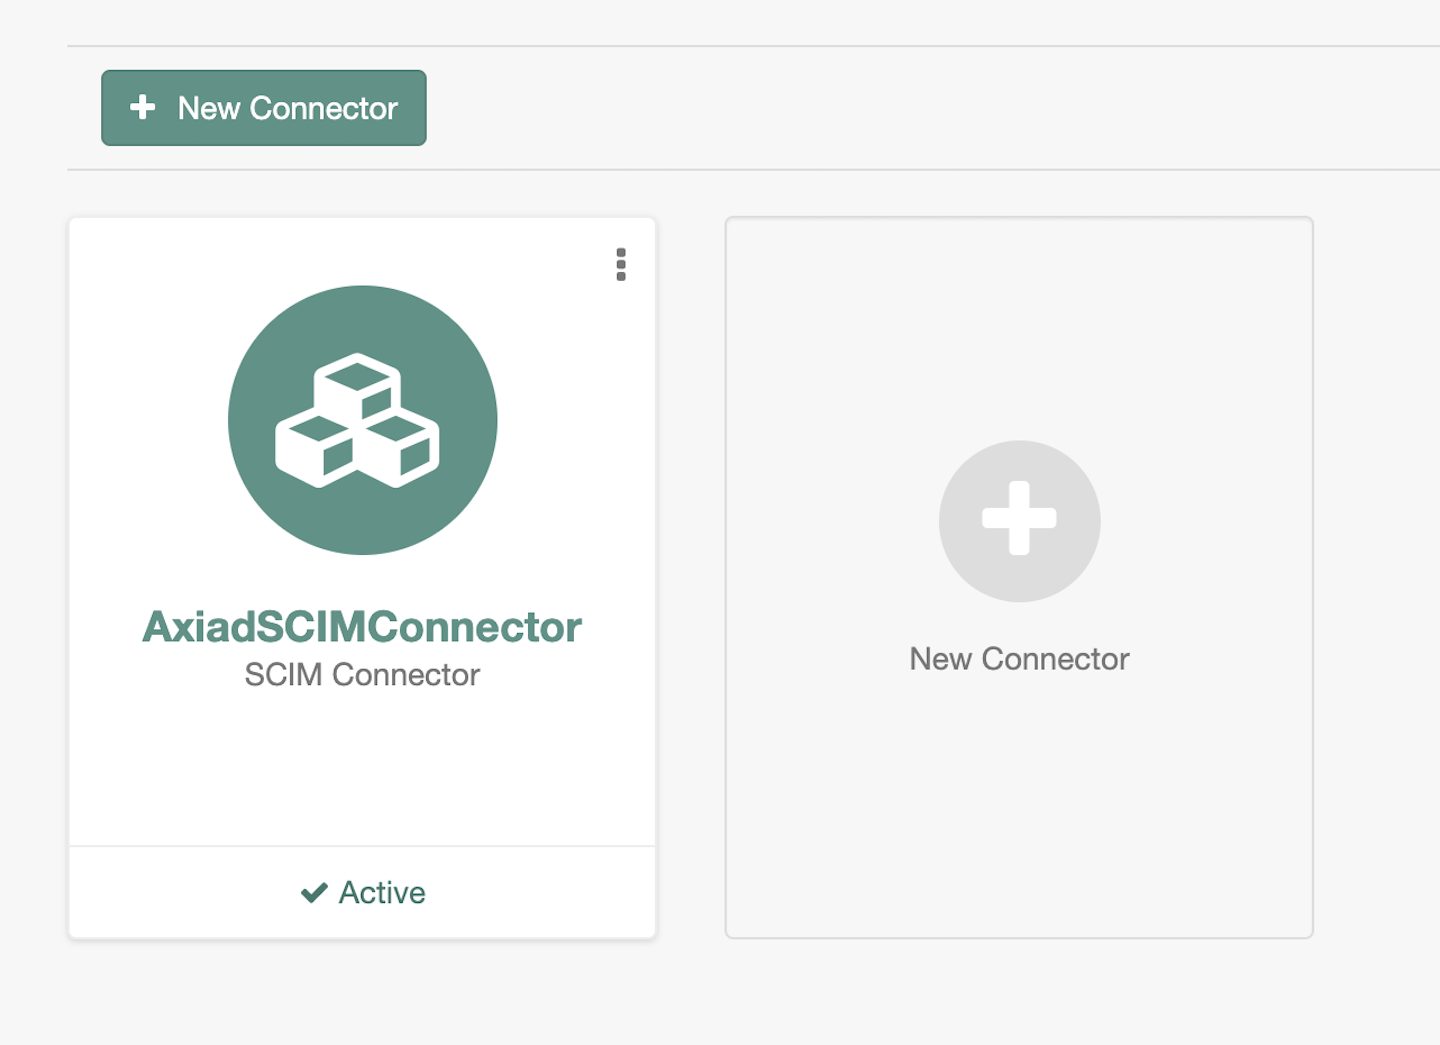
Click on the
Axiad SCIM Connector3.1. Configure the
SCIM EndpointunderBase Connector Detailssection as shown. If you do not have the SCIM endpoint, please contact Axiad Customer Success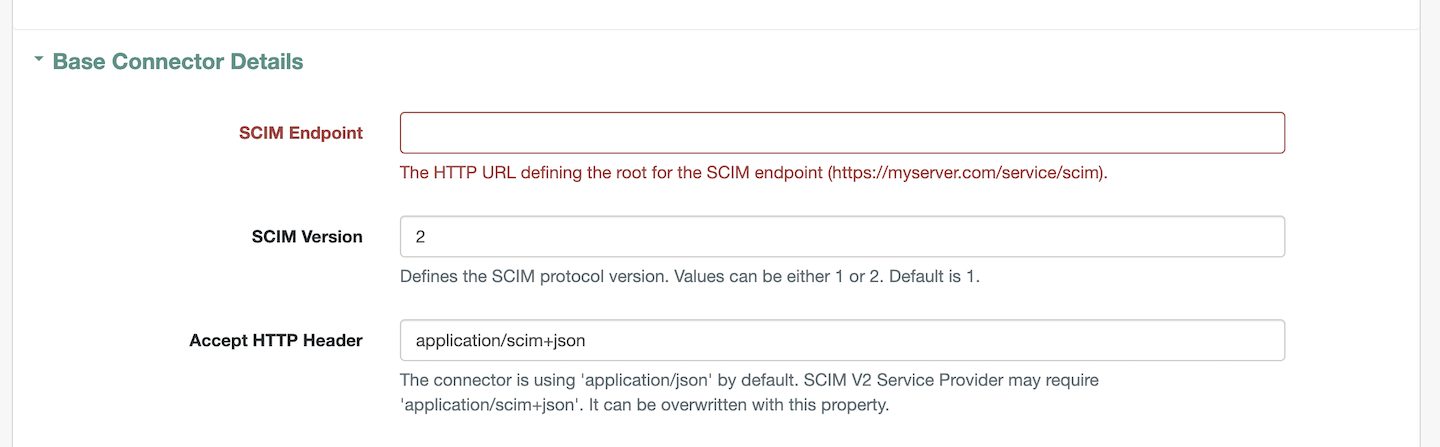
3.2. Configure the
Authentication tokenunder theAdditional Optionssection as shown. If you do not have the token please contact Axiad Customer Success
3.3. Click on save.
Click CONFIGURE on the menu bar and select Mappings. Axiad SCIM mappings will be available as shown
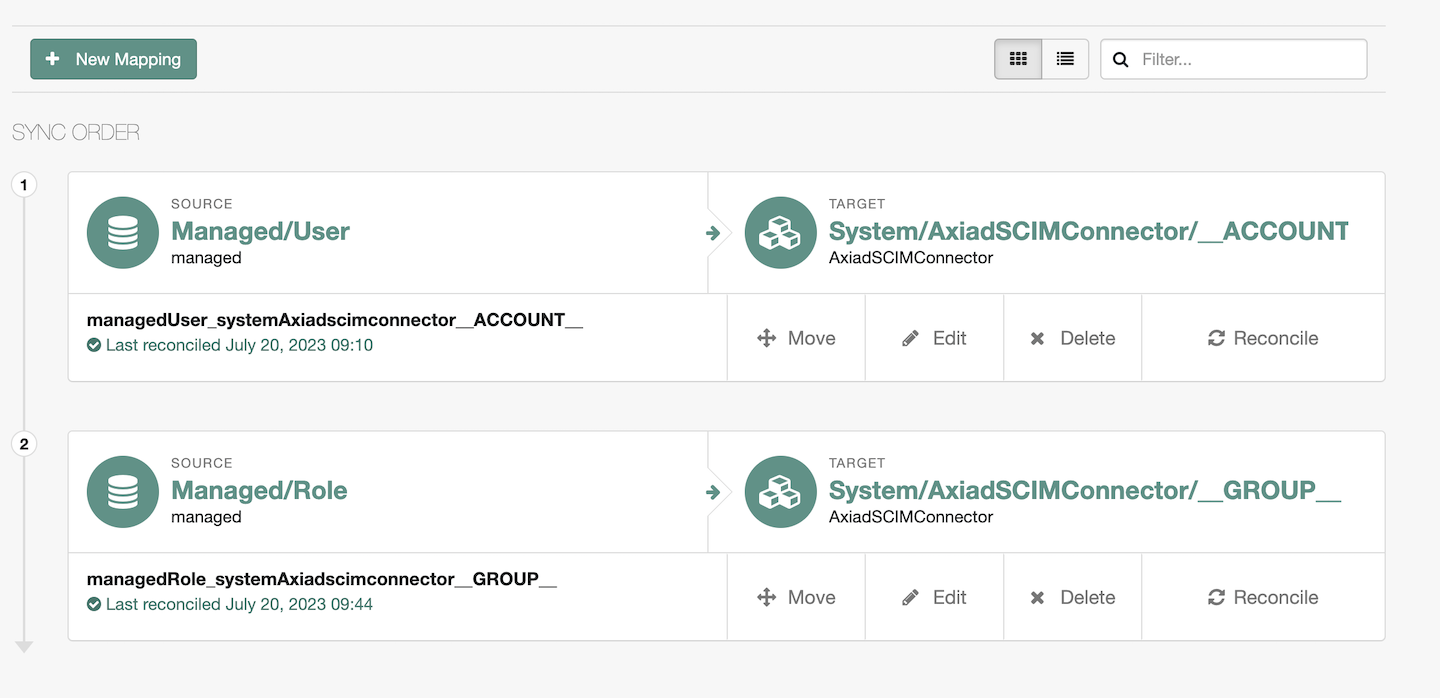
Click on
Editwhere SOURCE isManaged/Userand verify the settings are correct. You should have received a list of supported SCIM attributes from the Axiad Customer Success team. The attribute list Axiad provides includes all attributes mapped within your Axiad Cloud tenant. You must delete all unused attributes from the SCIM mapping to avoid unnecessary data synchronizations.1.1. Verify the
Propertiestab has theAttributes Gridas shown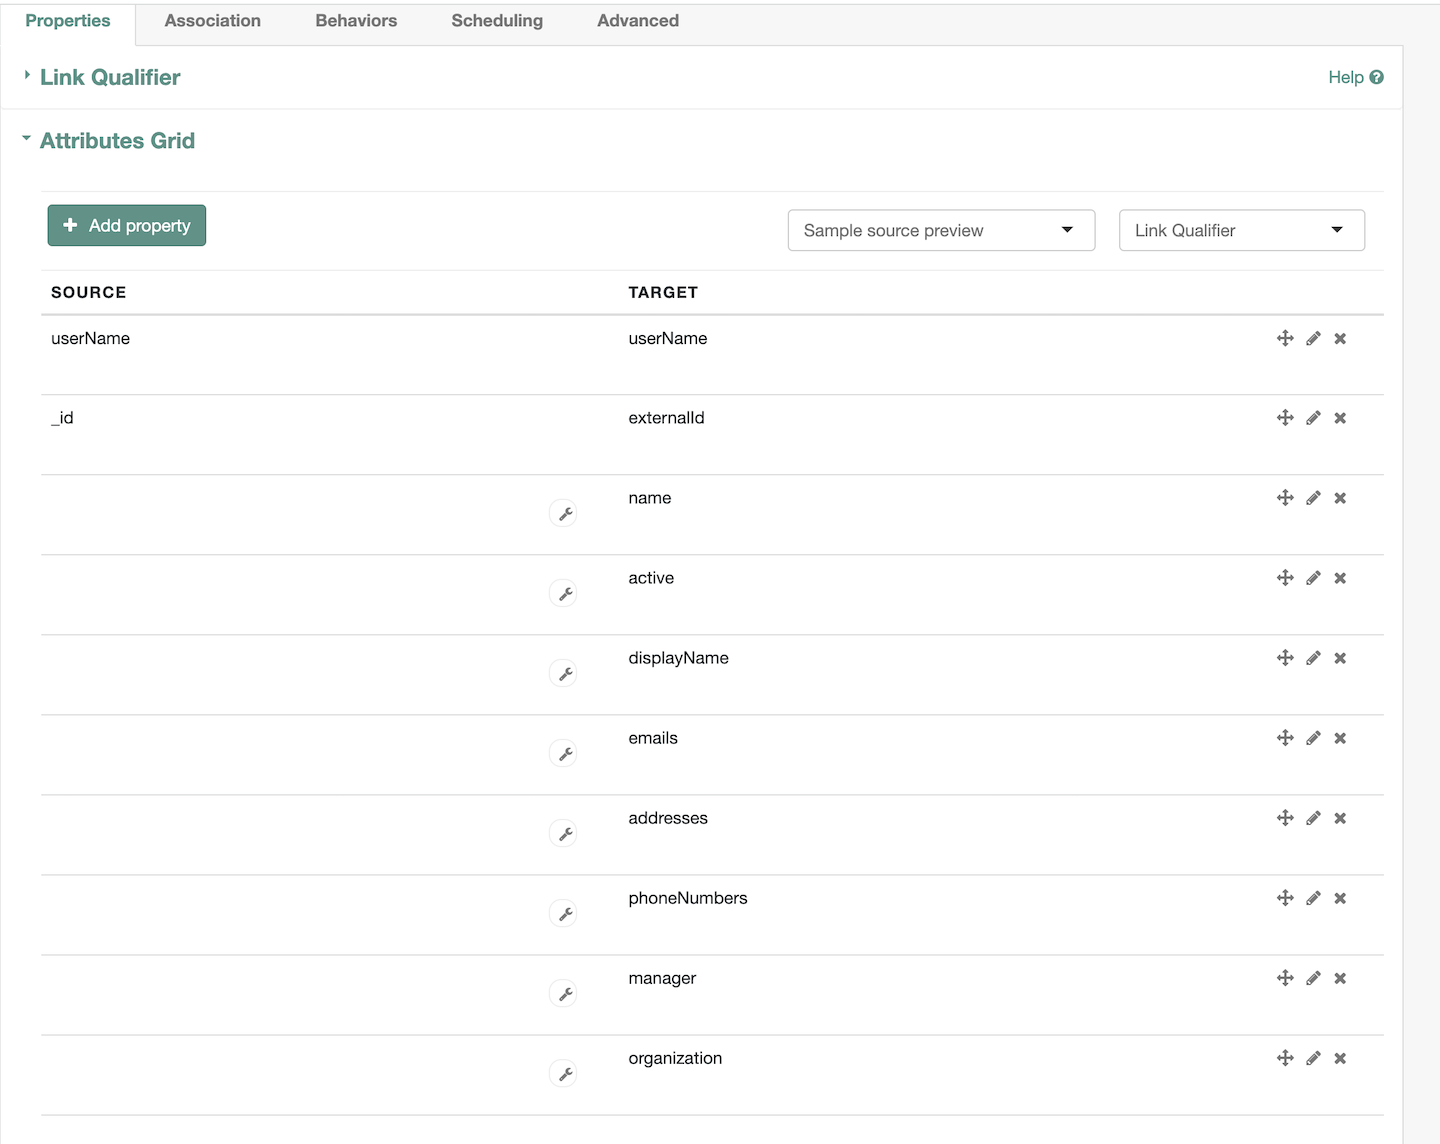
Note : By default the
Organizationproperty is mapped to the 1st organization in an array. If this is different than what you expect please change the mapping accordingly.1.2. Verify the
Associationtab has theAssociation Rulesas shown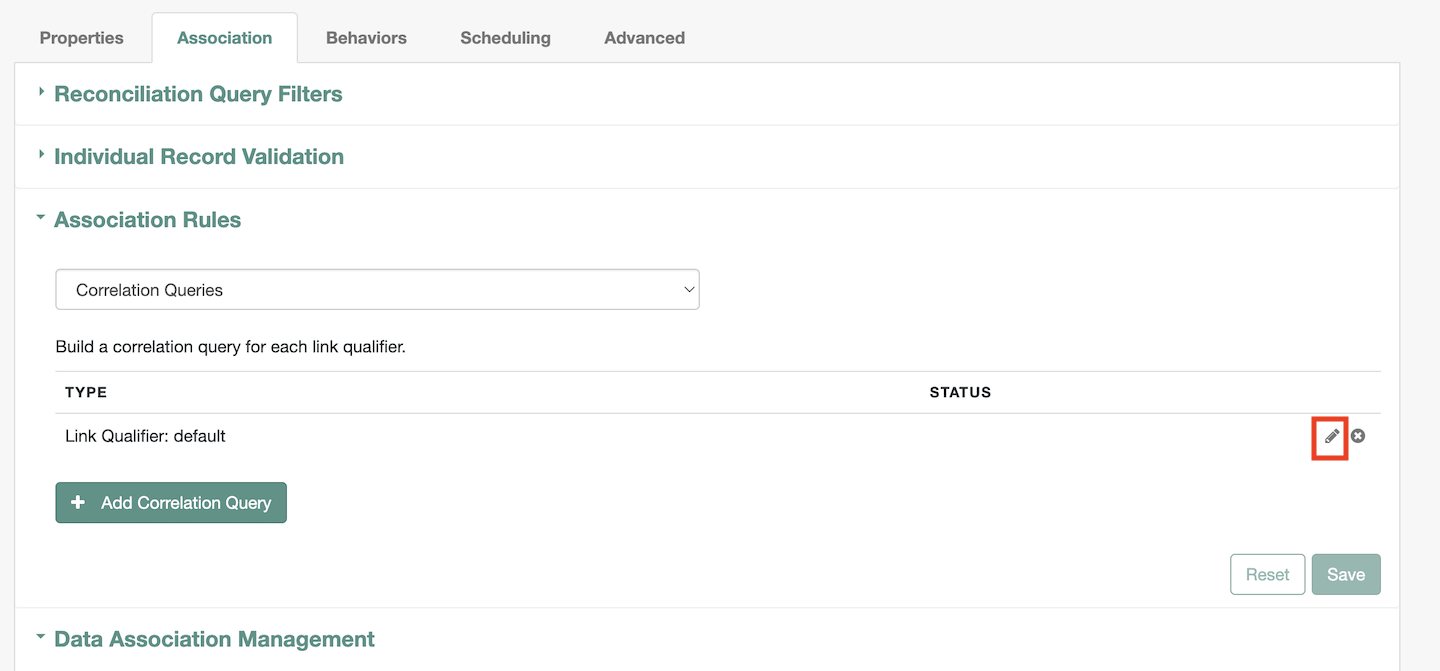
1.2.1. Under
Association Rulesclick on thepencilicon (as highlighted in above image) to verify theCorrelation Queryconfig as shown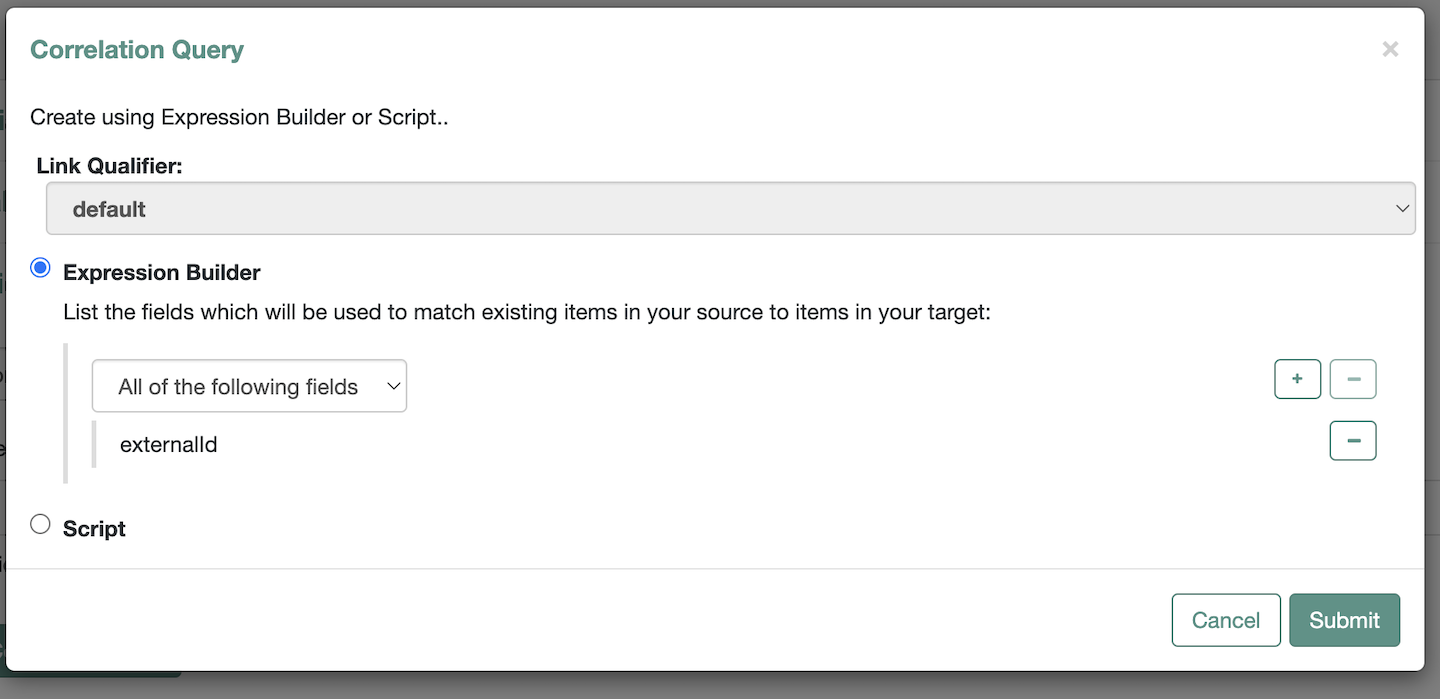
1.3. Verify the
Behaviorstab has thePoliciesas shown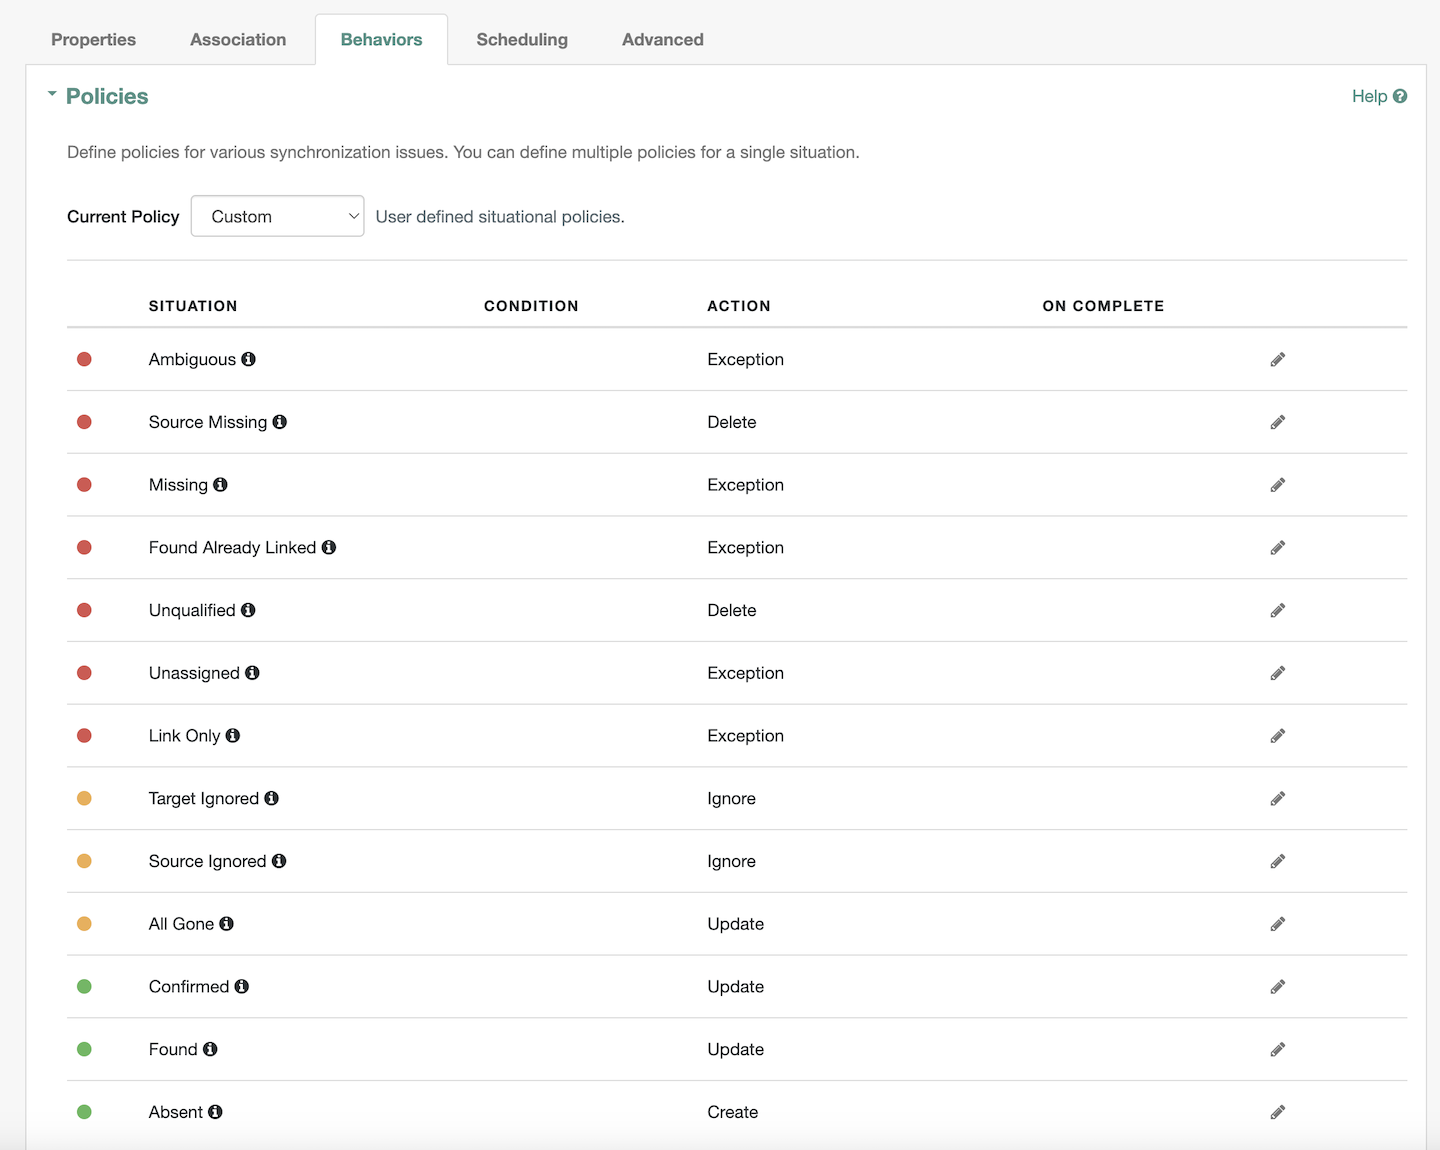
1.4. Verify the
Advancedtab has theAdditional Mapping Optionsas shown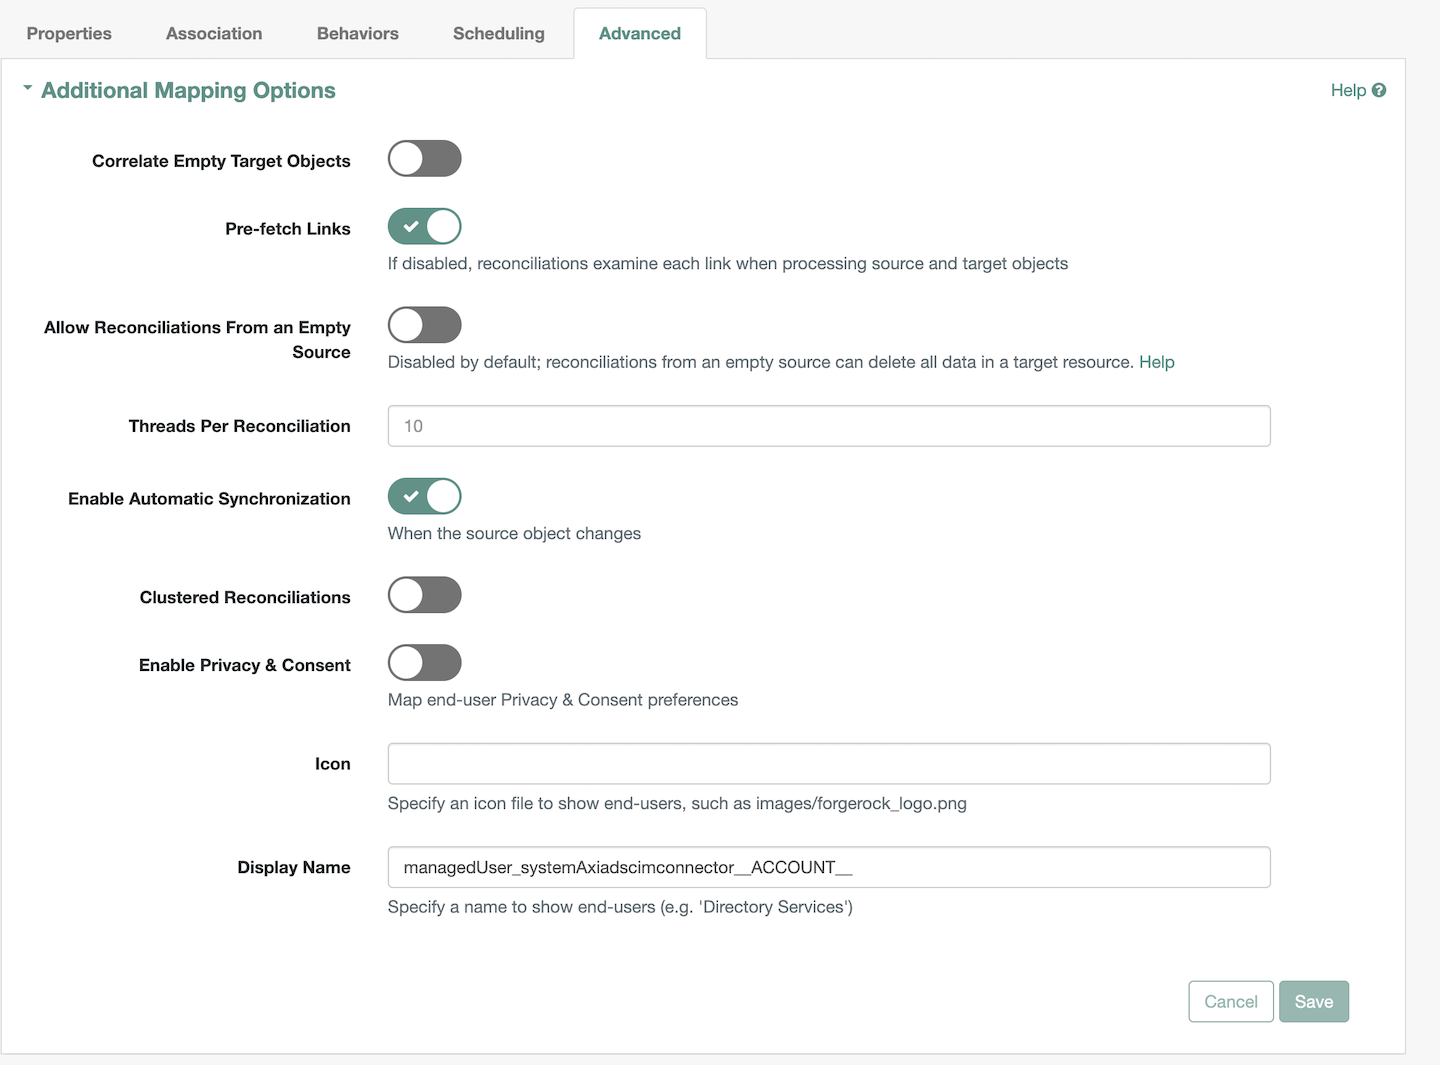
1.5. Under the
Schedulingtab, you canAdd Reconciliation Scheduleas per your organization's requirements
Click on
Editwhere SOURCE isManaged/Roleand verify the settings are correct1.1. Verify the
Propertiestab has theAttributes Gridas shown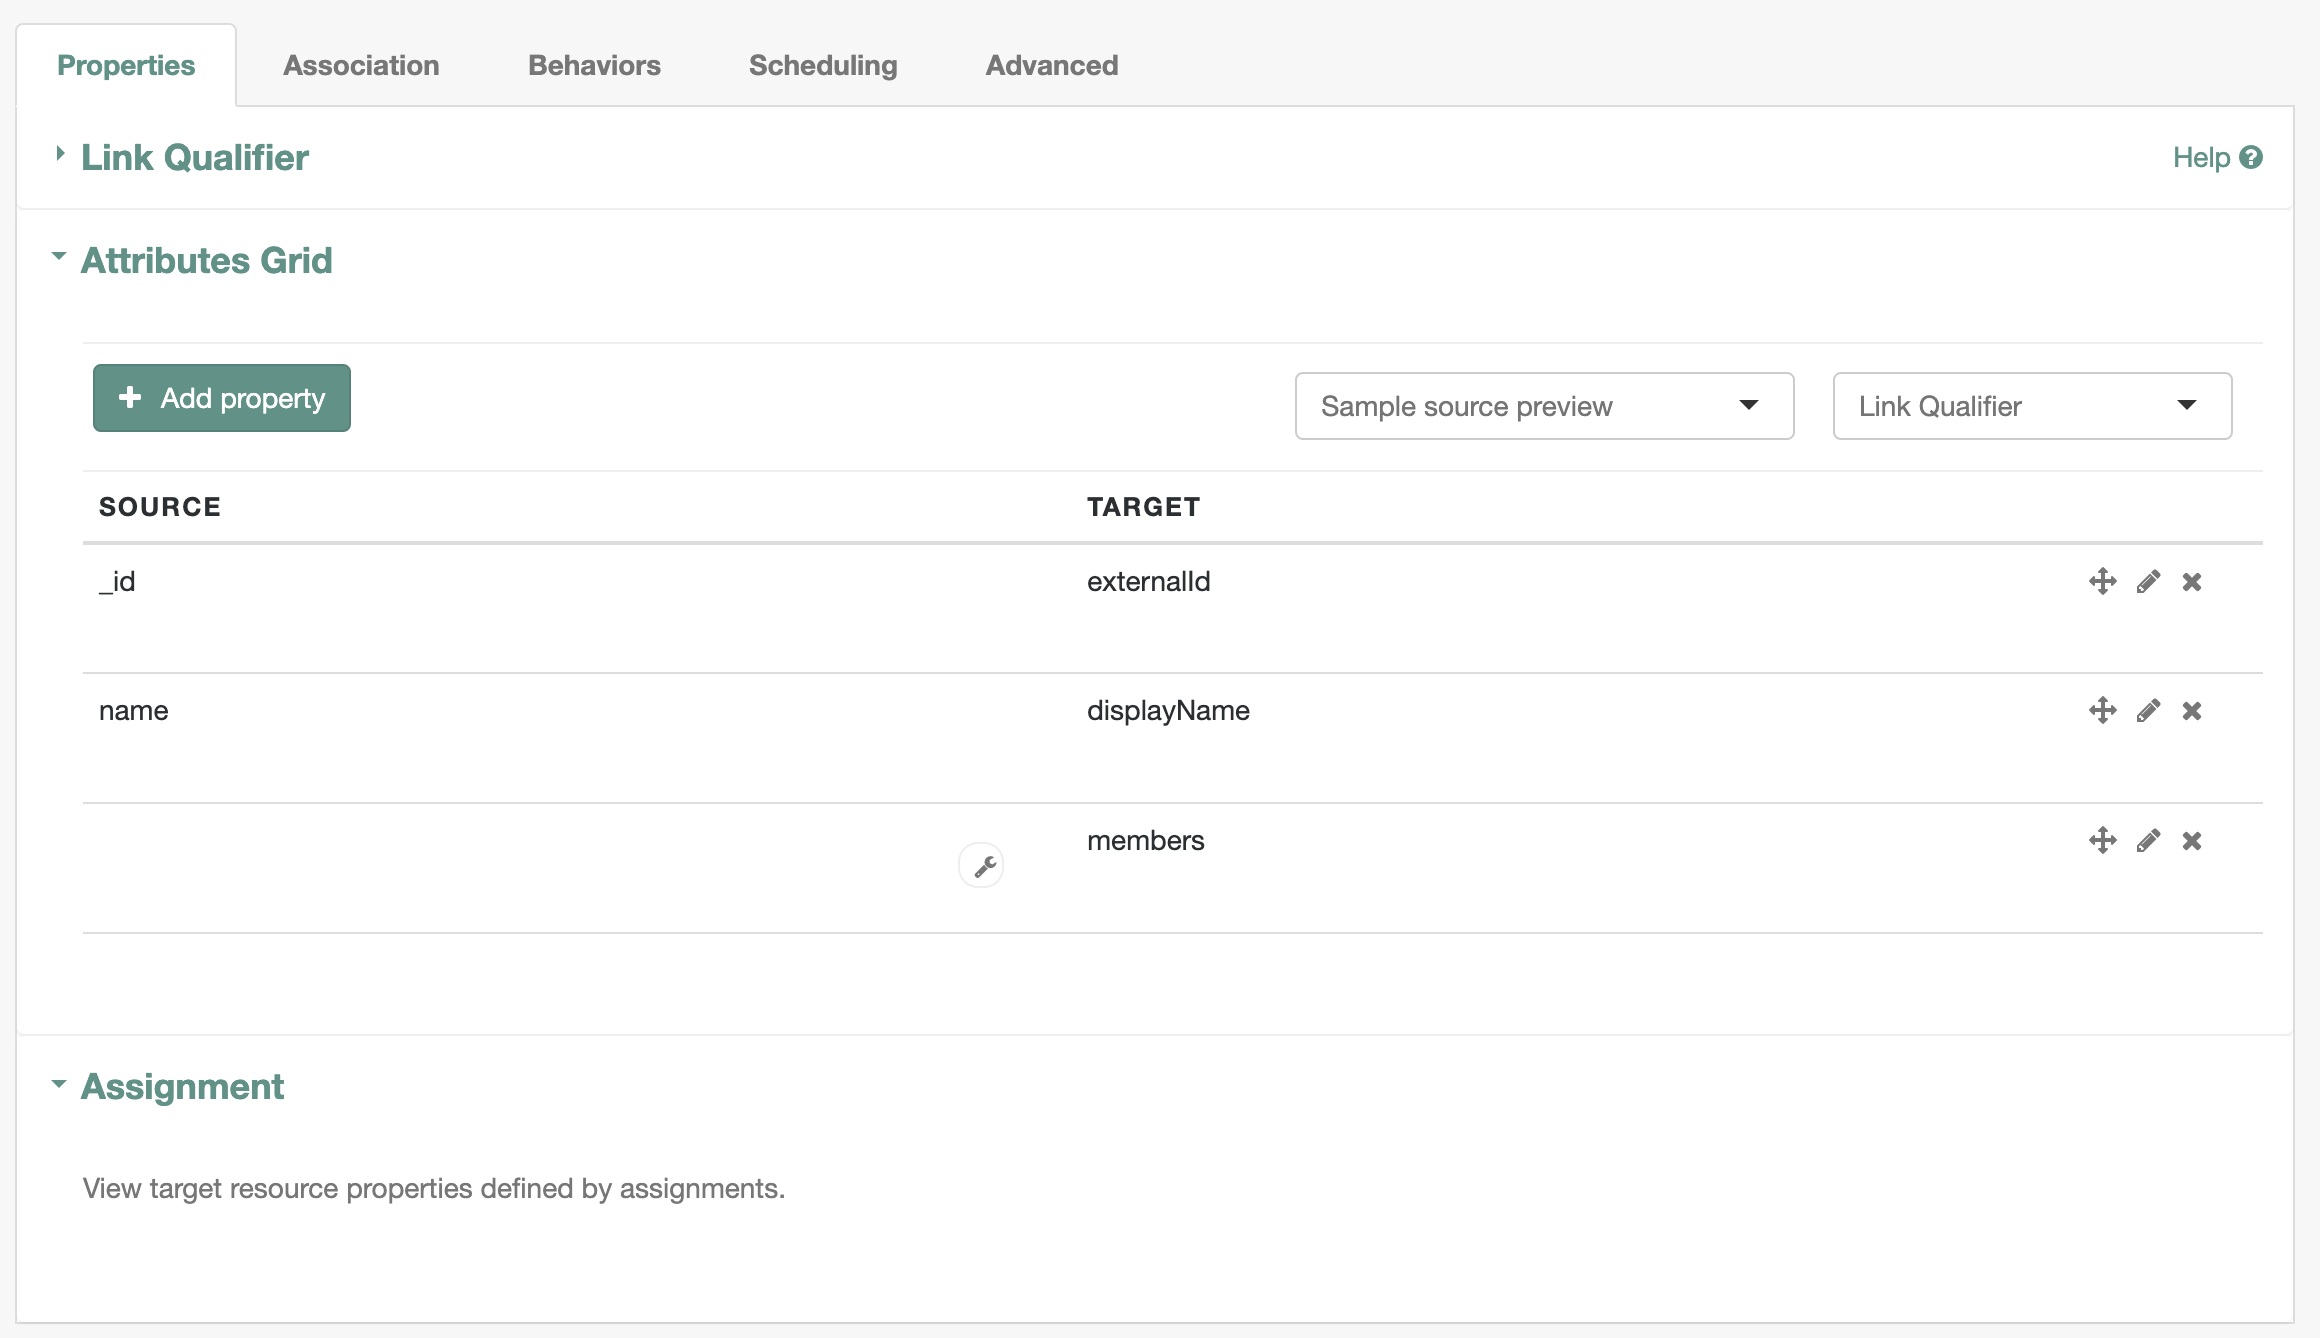
1.2. Verify the
Associationtab has theAssociation Rulesas shown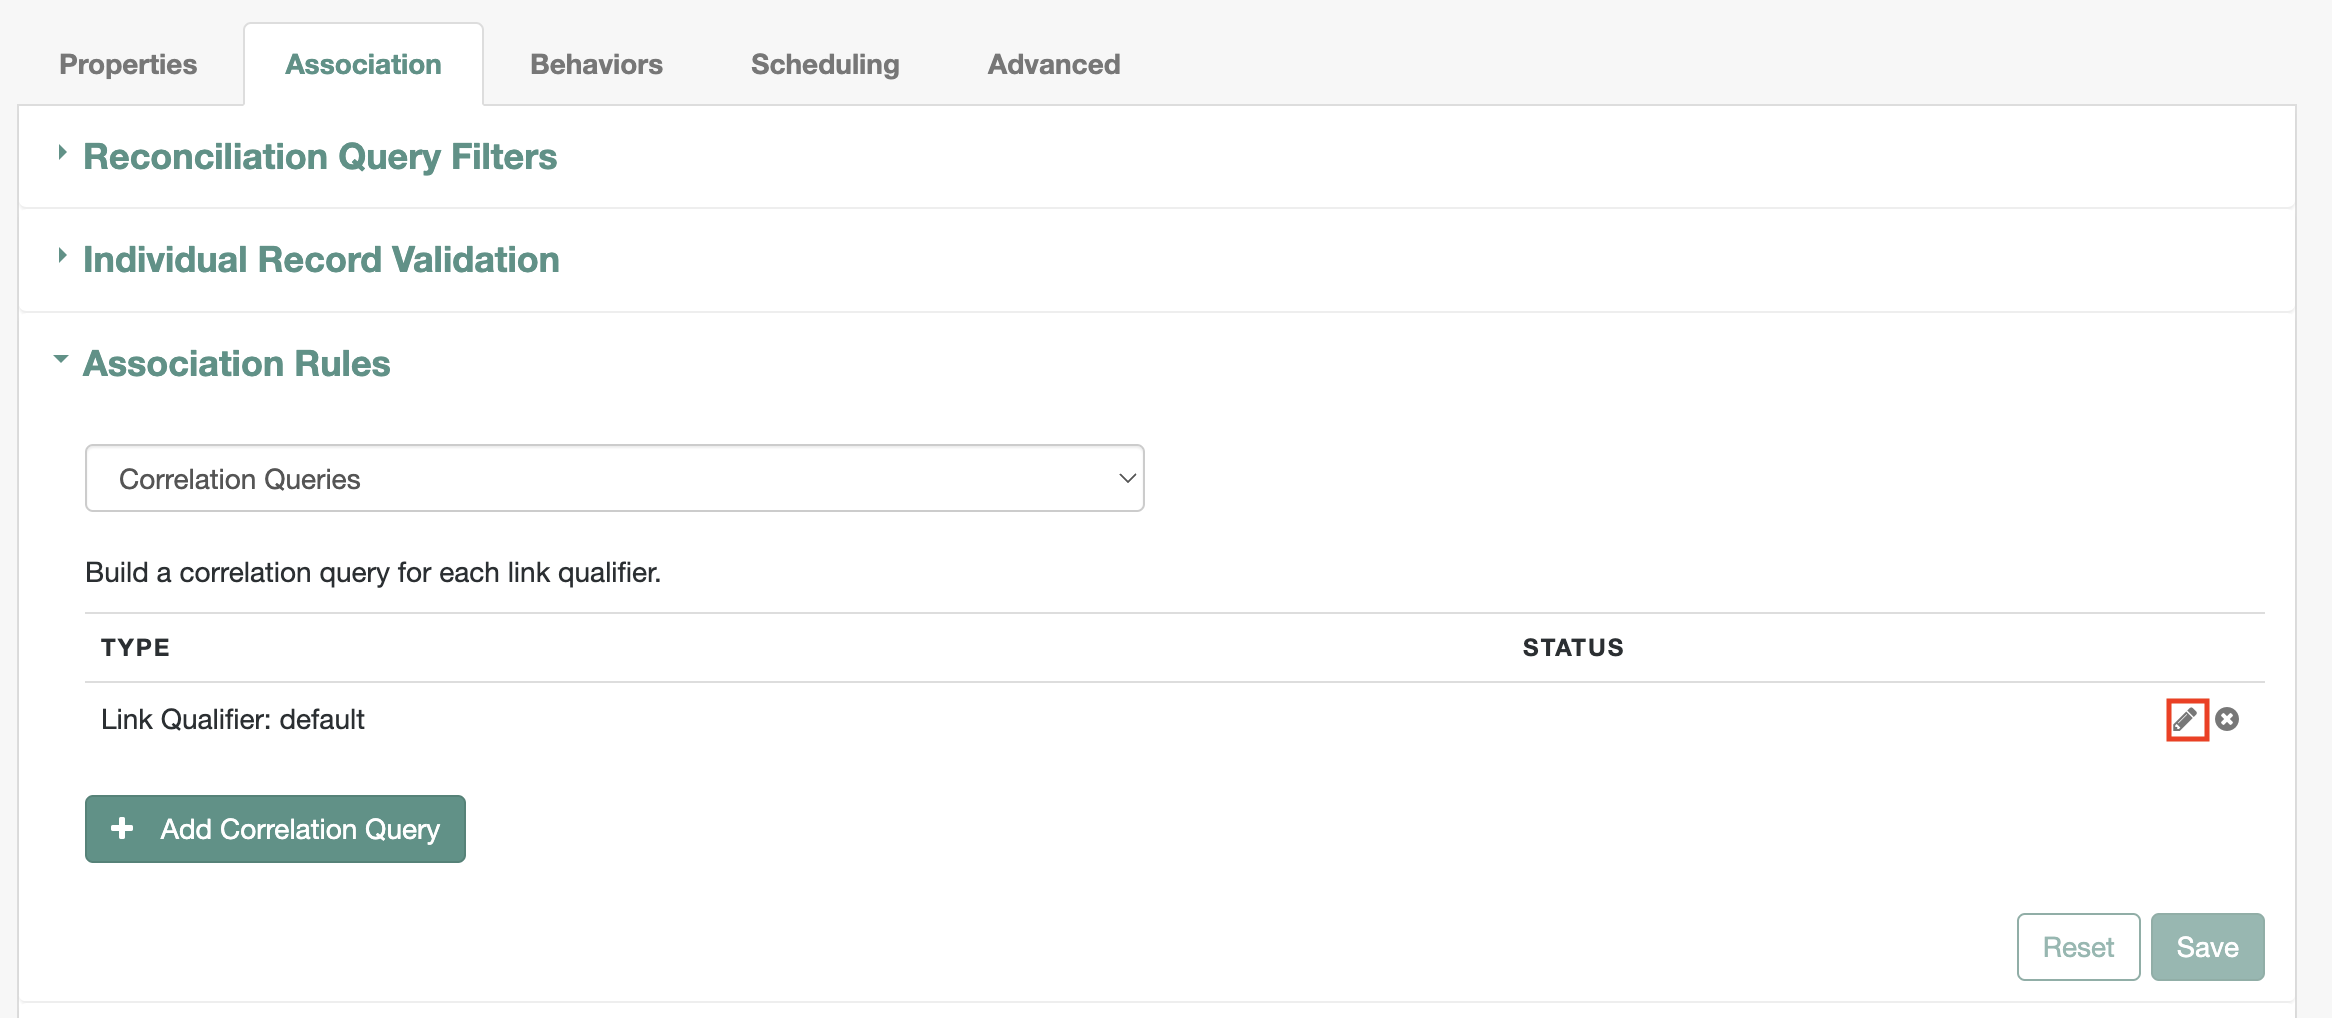
1.2.1. Under
Association Rulesclick on thepencilicon (as highlighted in above image) to verify theCorrelation Queryconfig as shown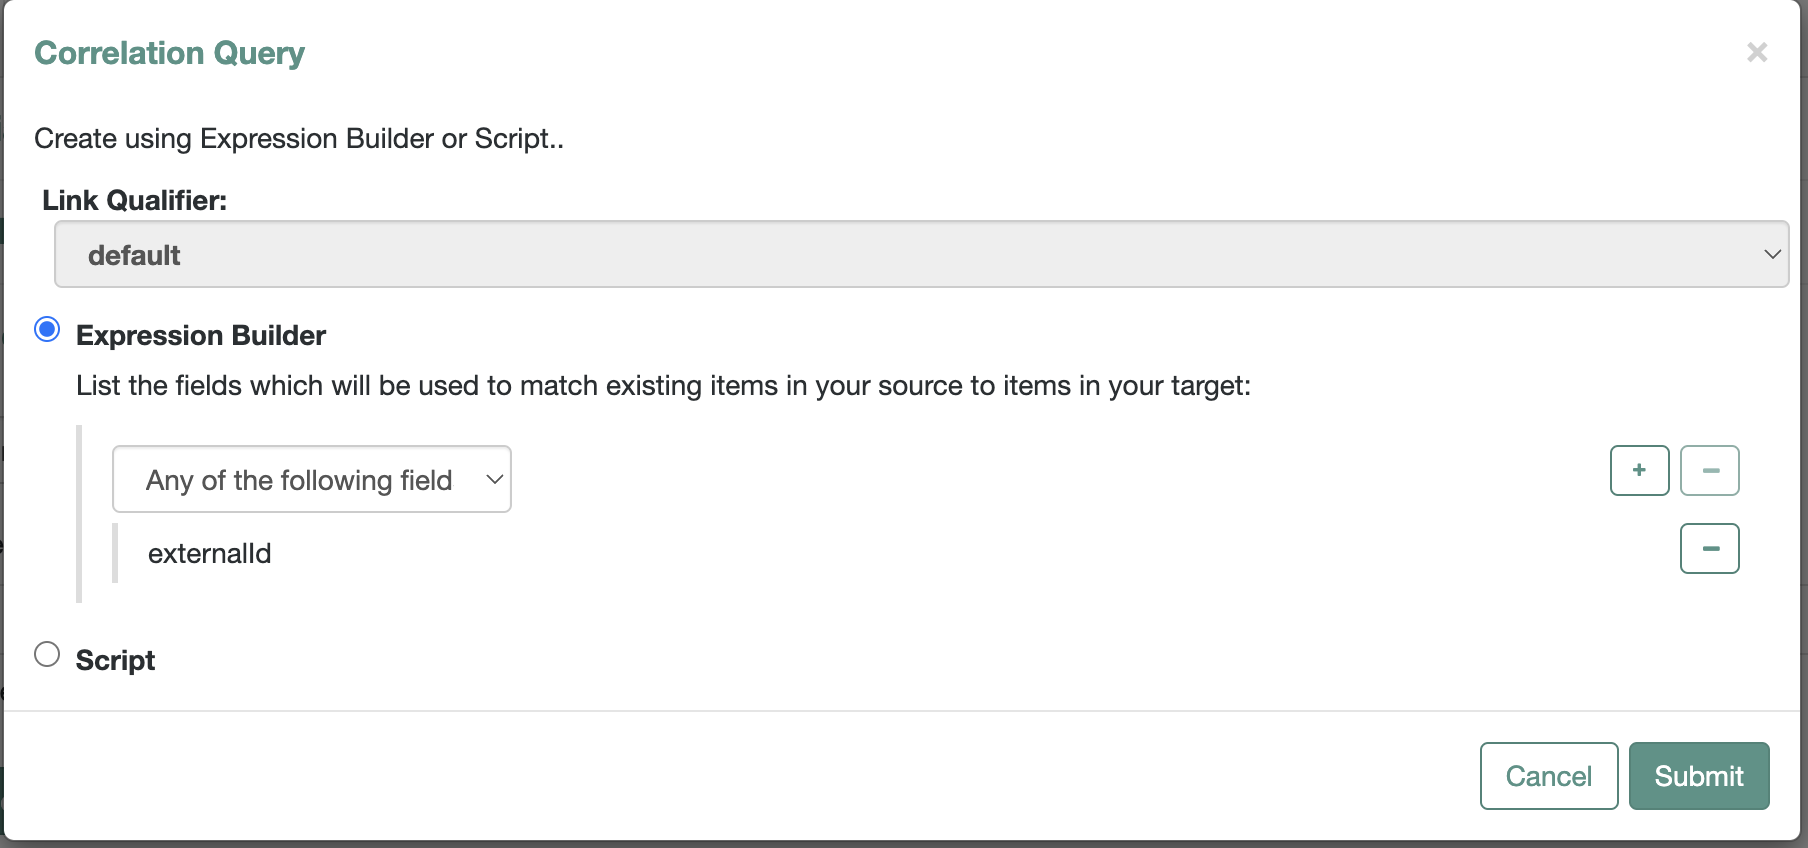
1.3. Verify the
Behaviorstab has thePoliciesas shown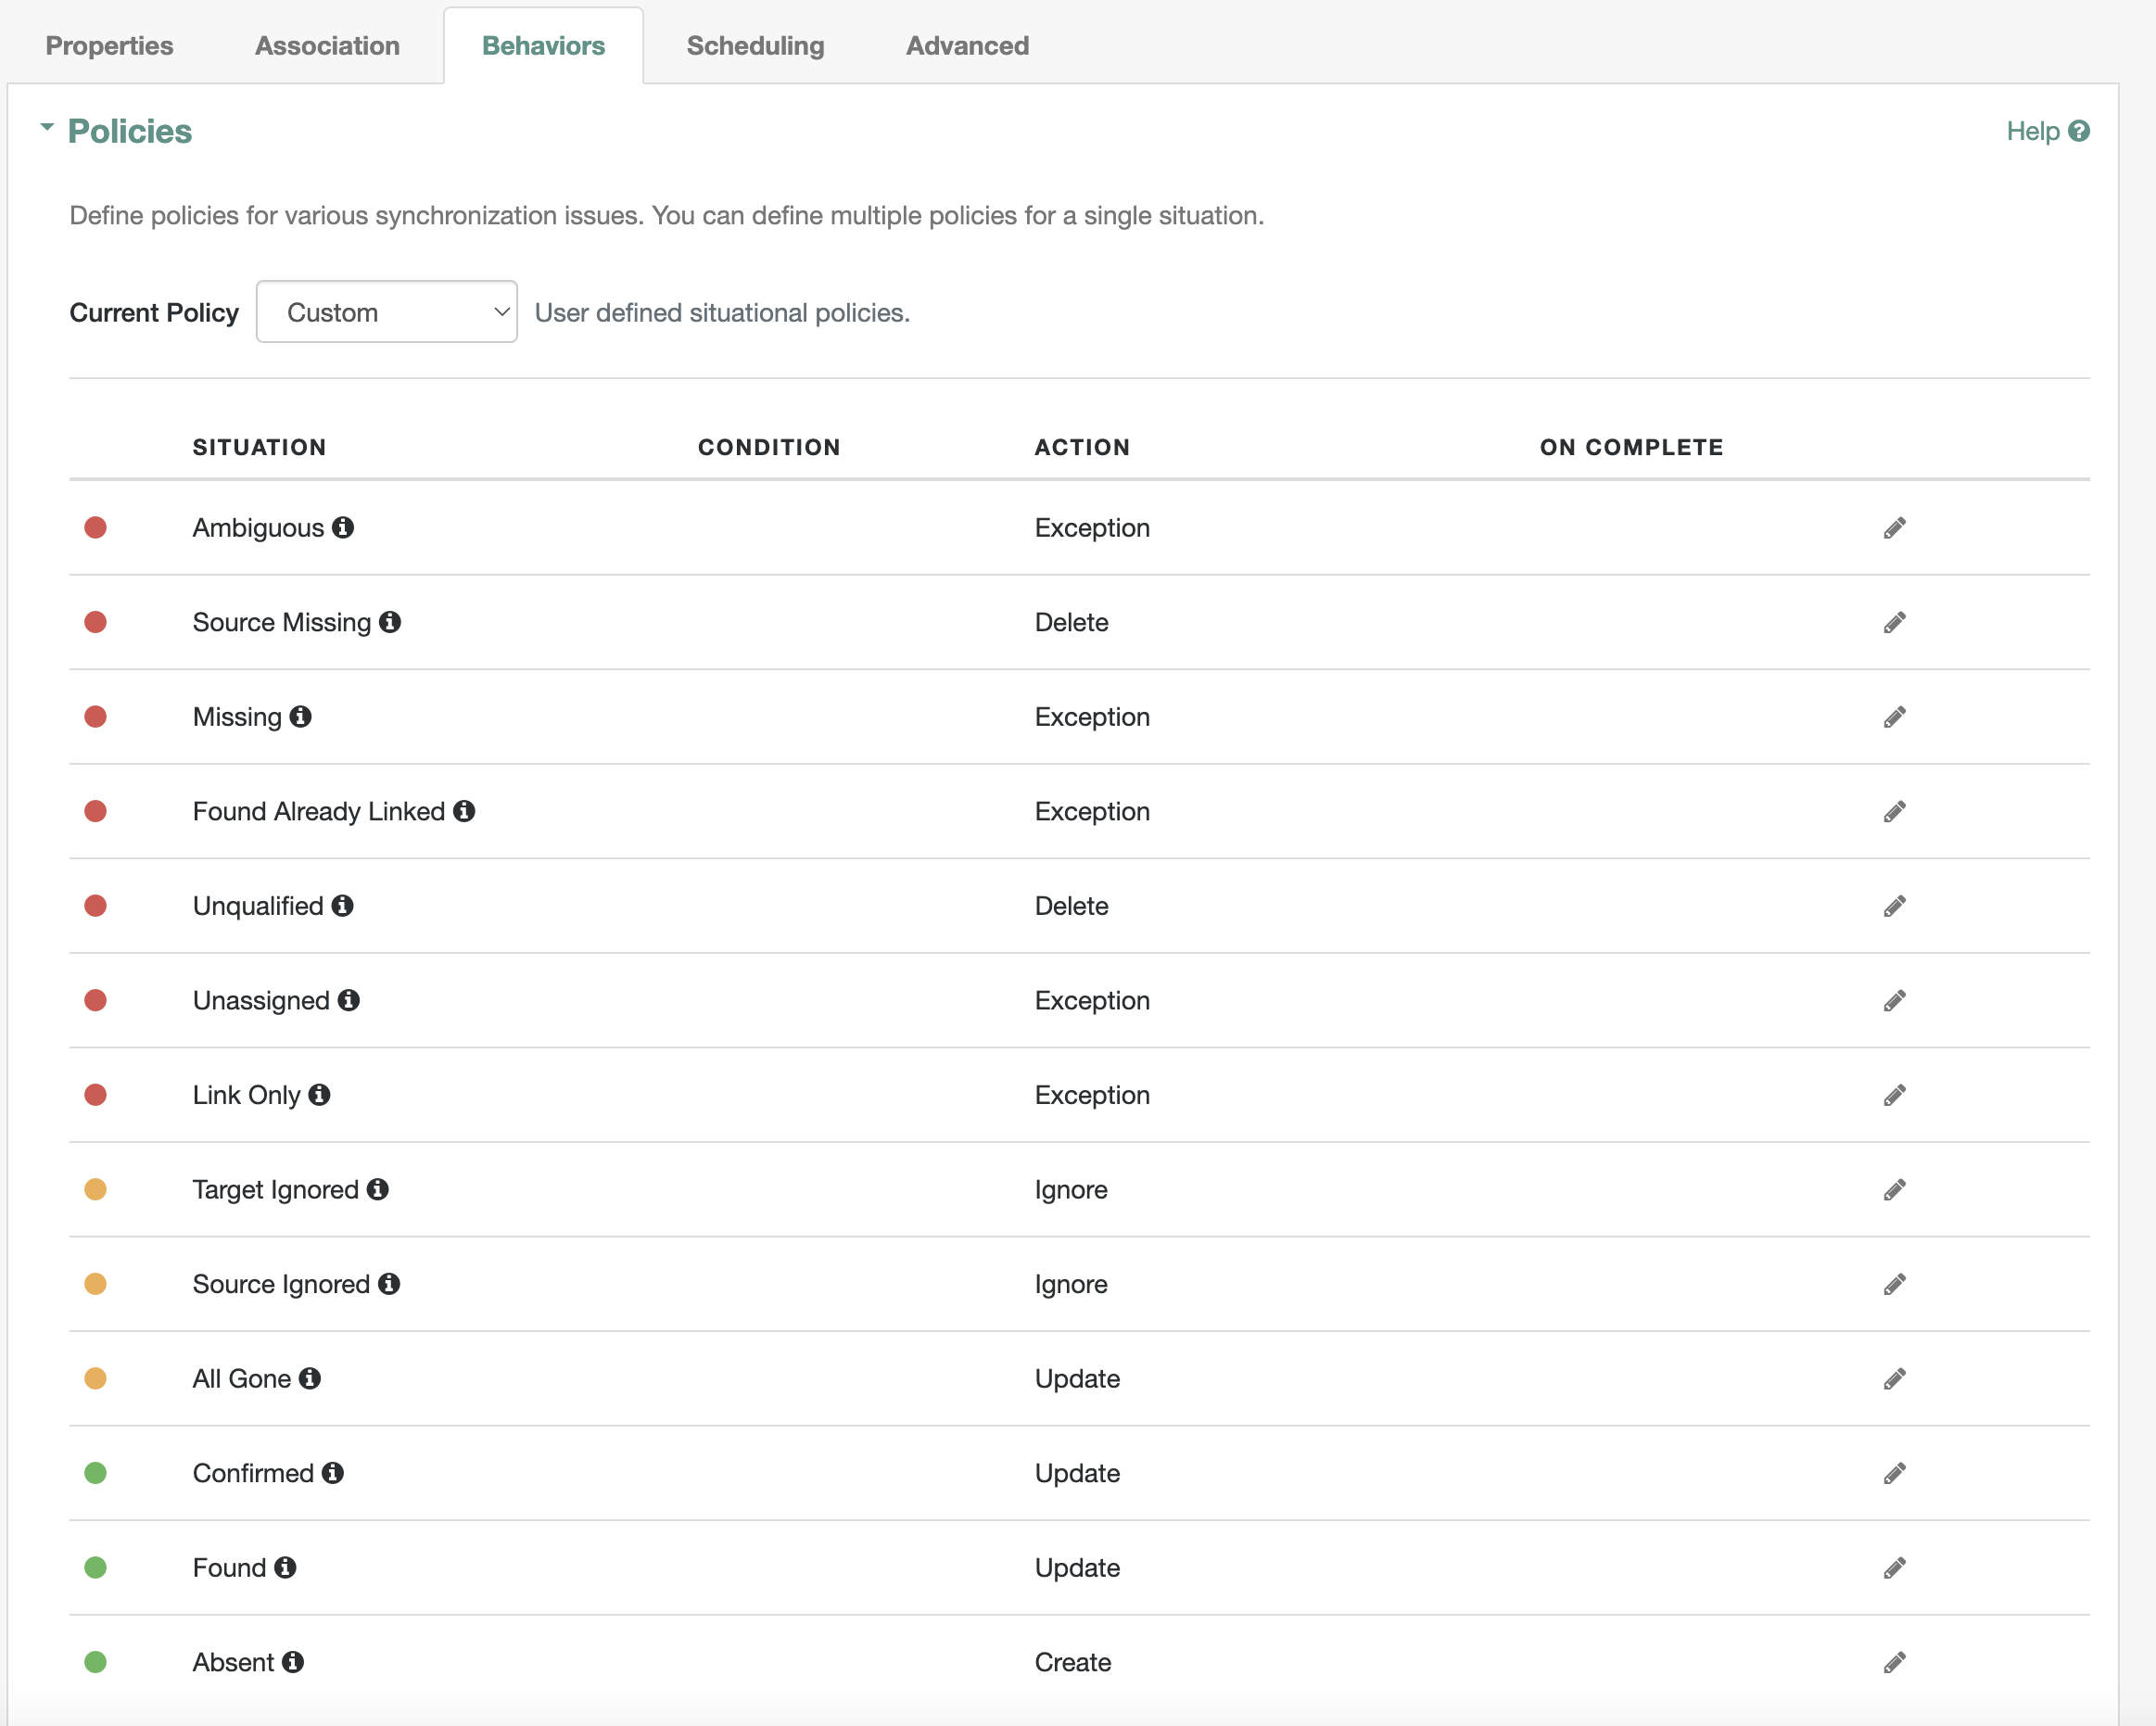
1.4. Verify the
Advancedtab has theAdditional Mapping Optionsas shown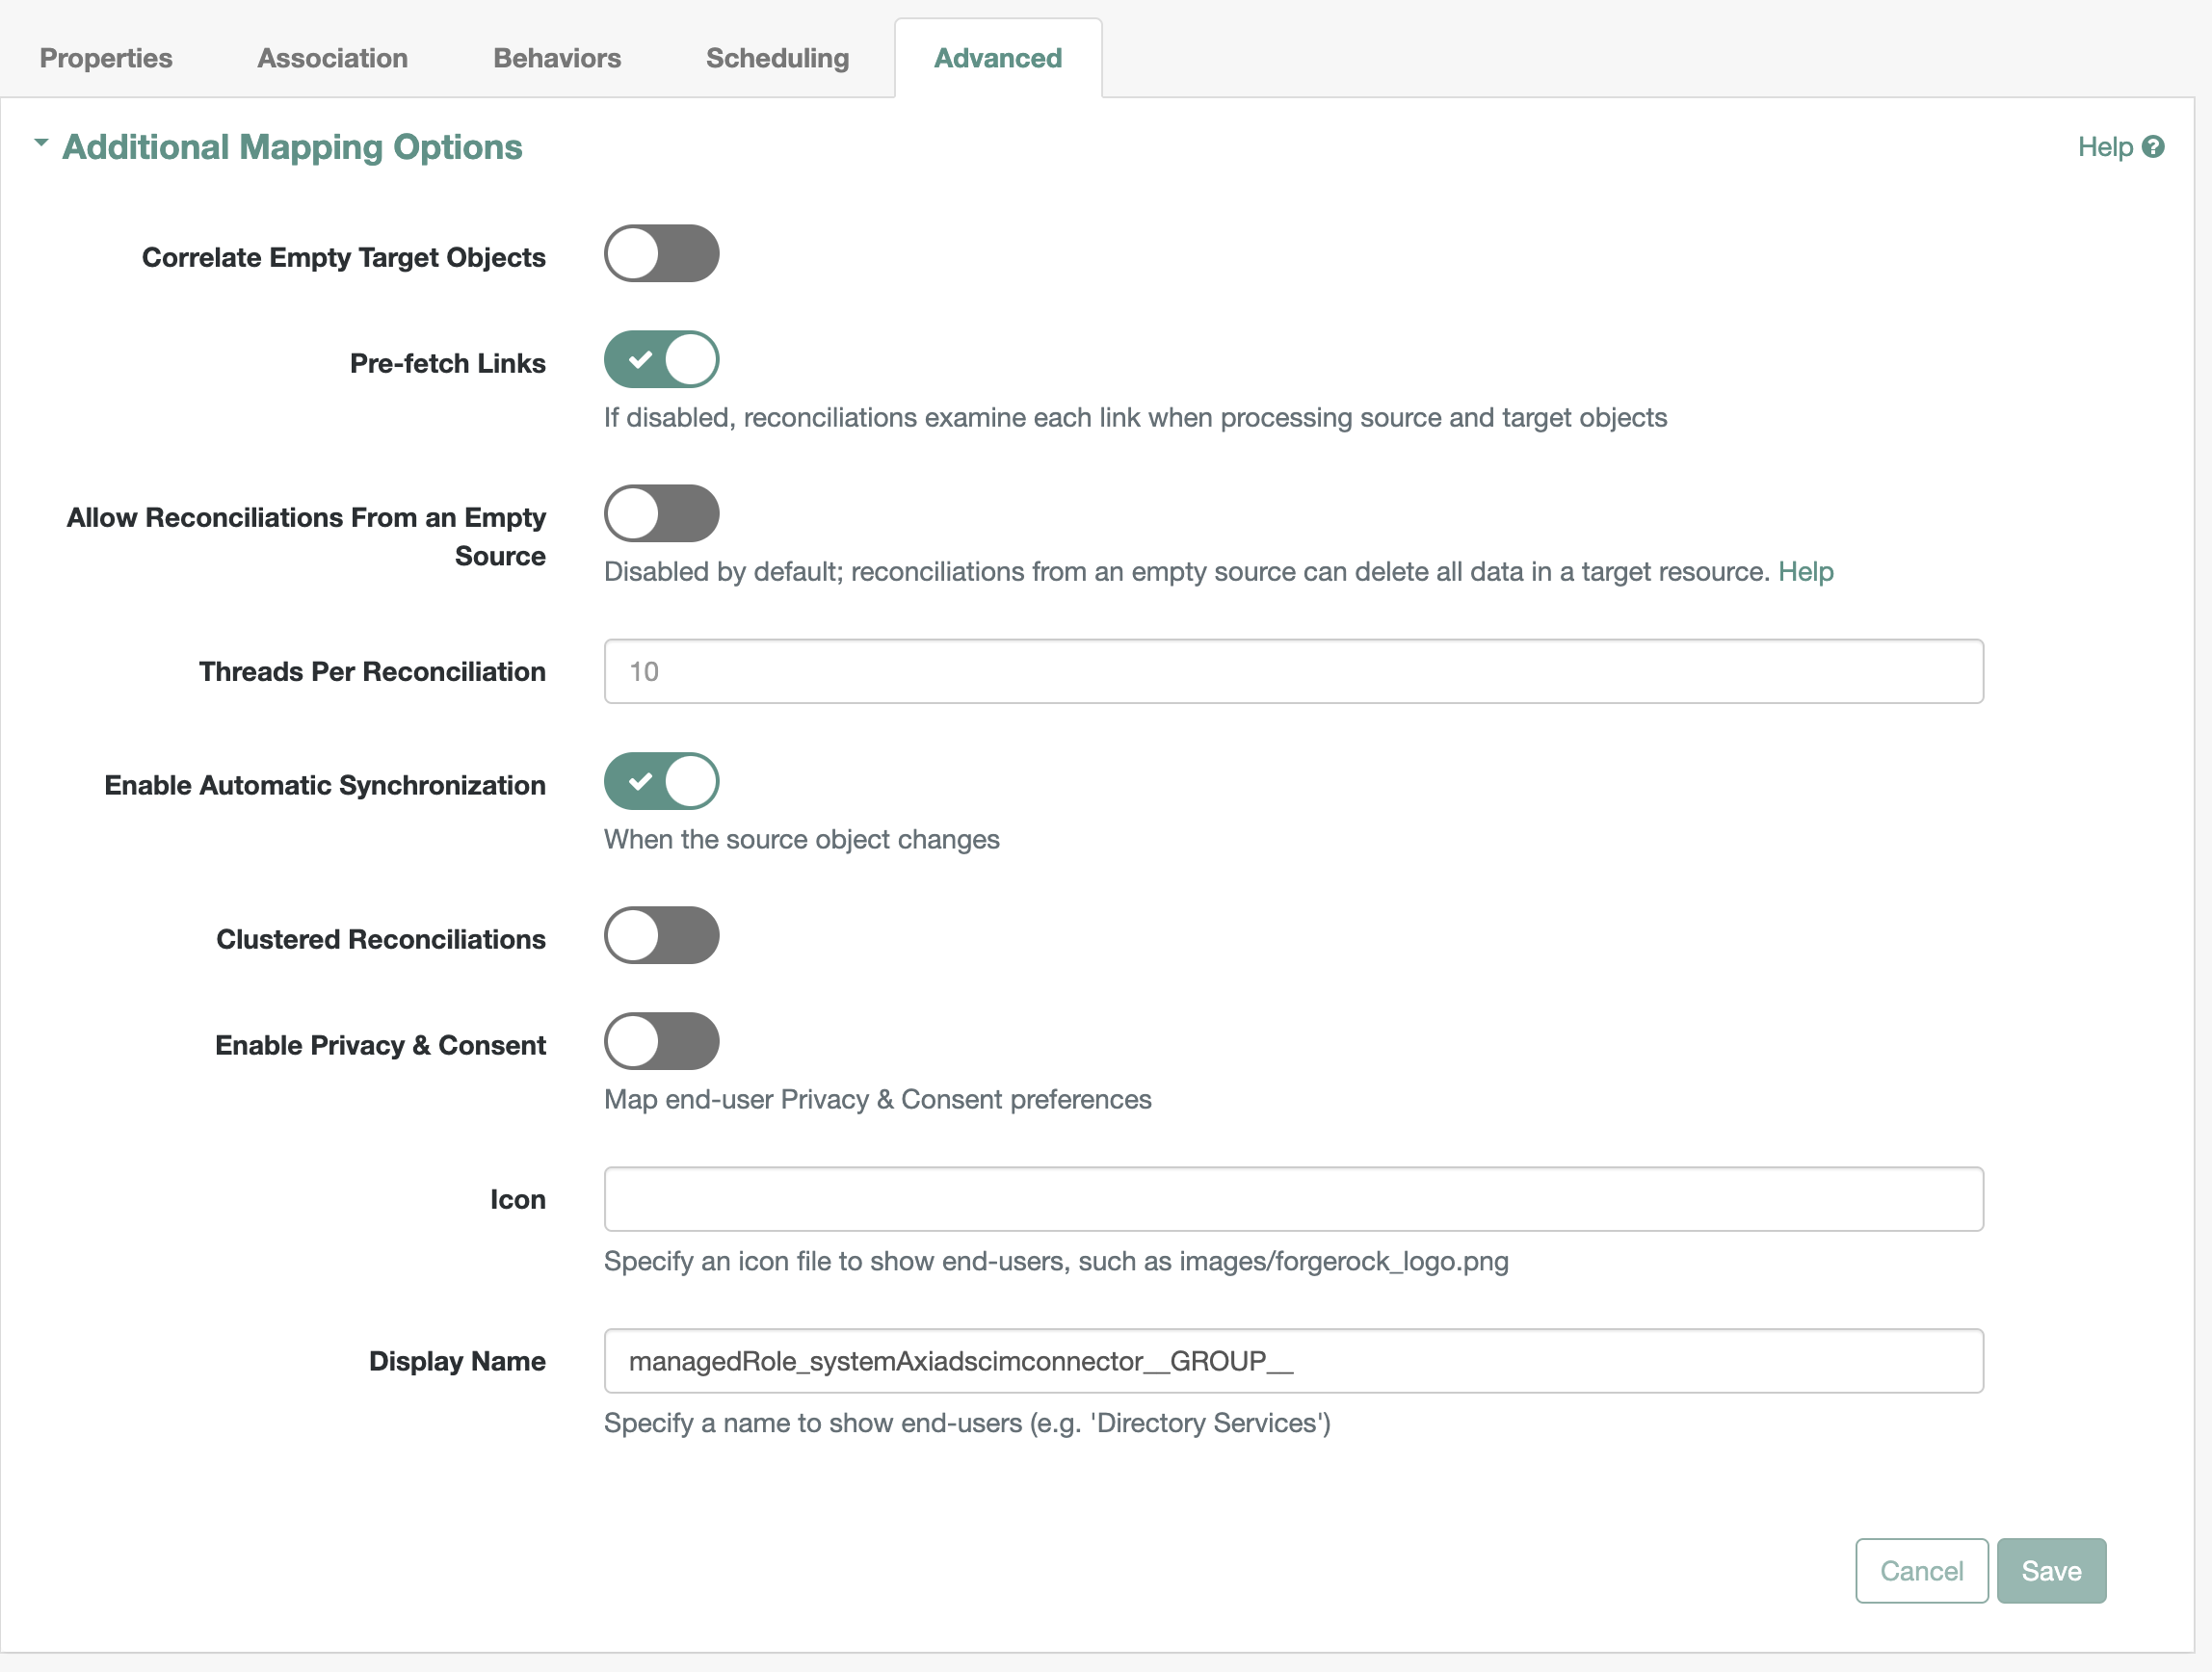
1.5. Under the
Schedulingtab, you canAdd Reconciliation Scheduleas per your organization's requirements
- Click
CONFIGUREon the menu bar and selectMANAGED OBJECTS - Click the 'User' managed object
Edit the
managerpropertyUnder
Details, click onShow advanced optionsEnable
Viewable,User Editable,Return by Defaultand theNotify Selfoptions as shown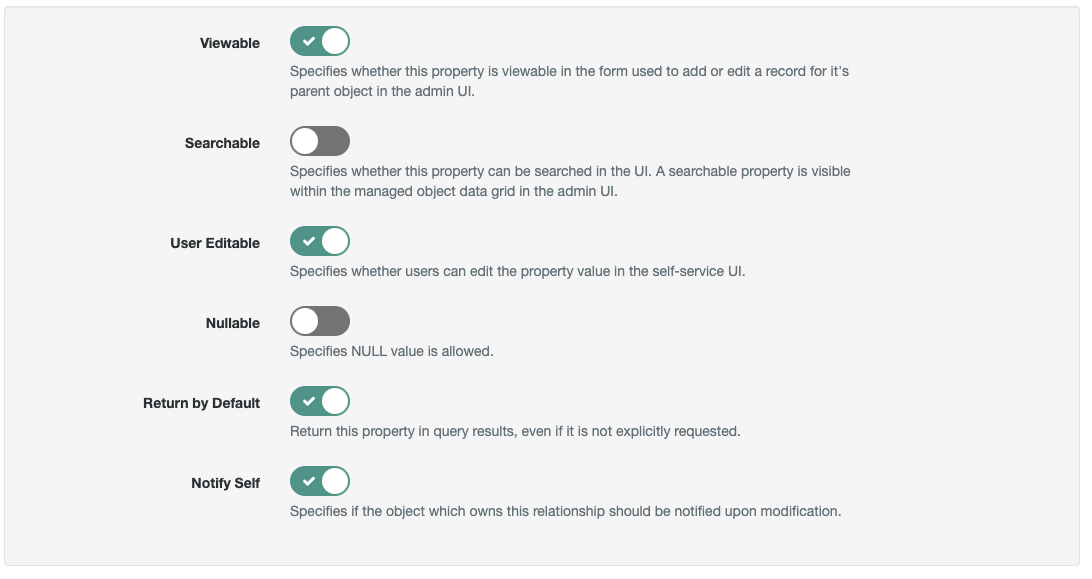
Edit the
Relationship Configuration, highlighted with a red rectangle as shown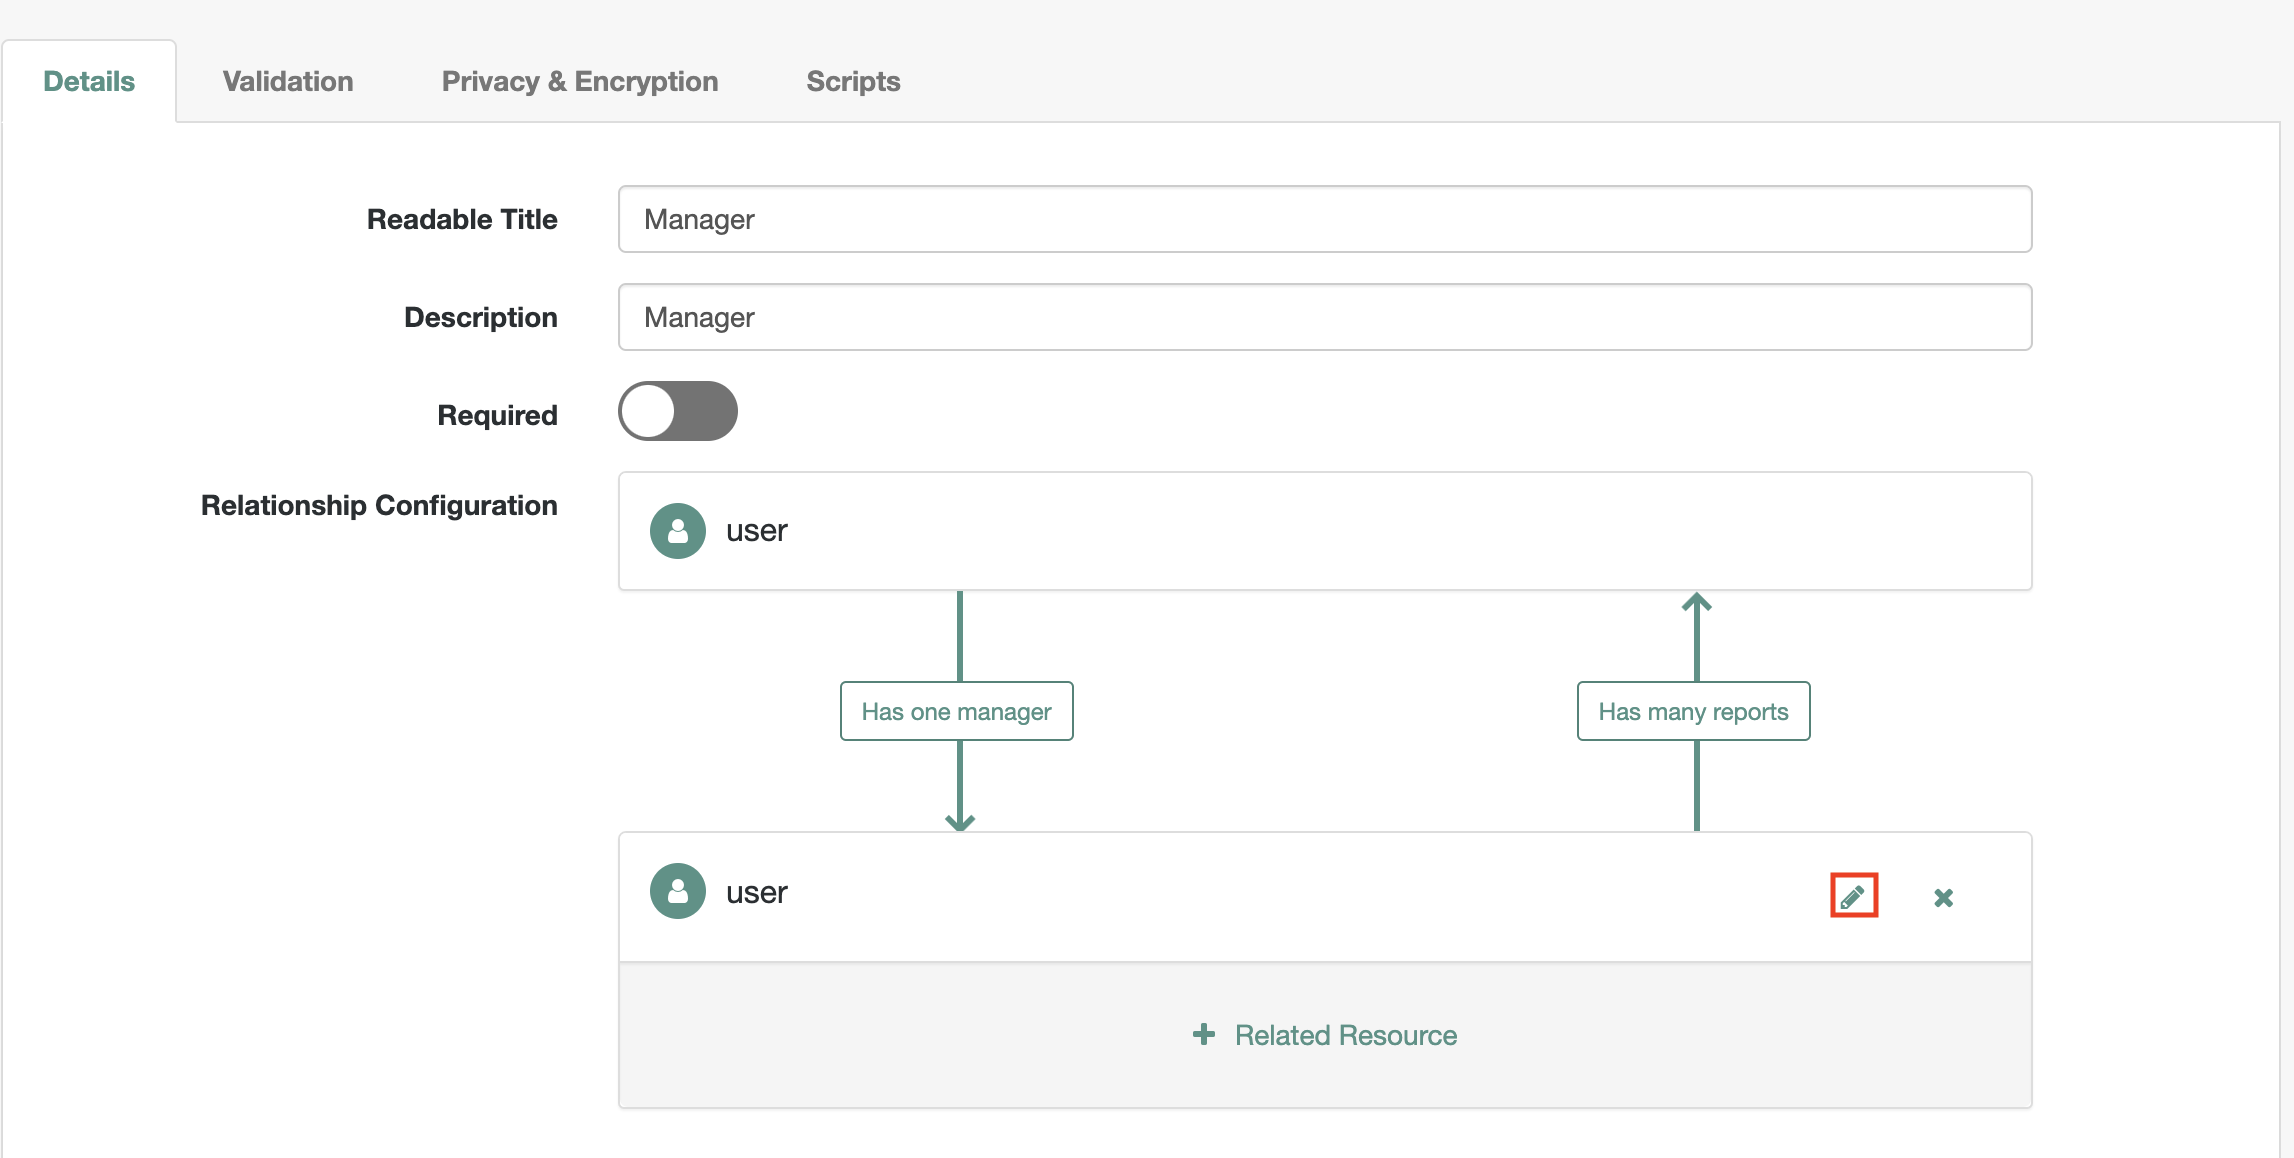
4.1. Enable
Notifyon theEdit Resourcescreen as shown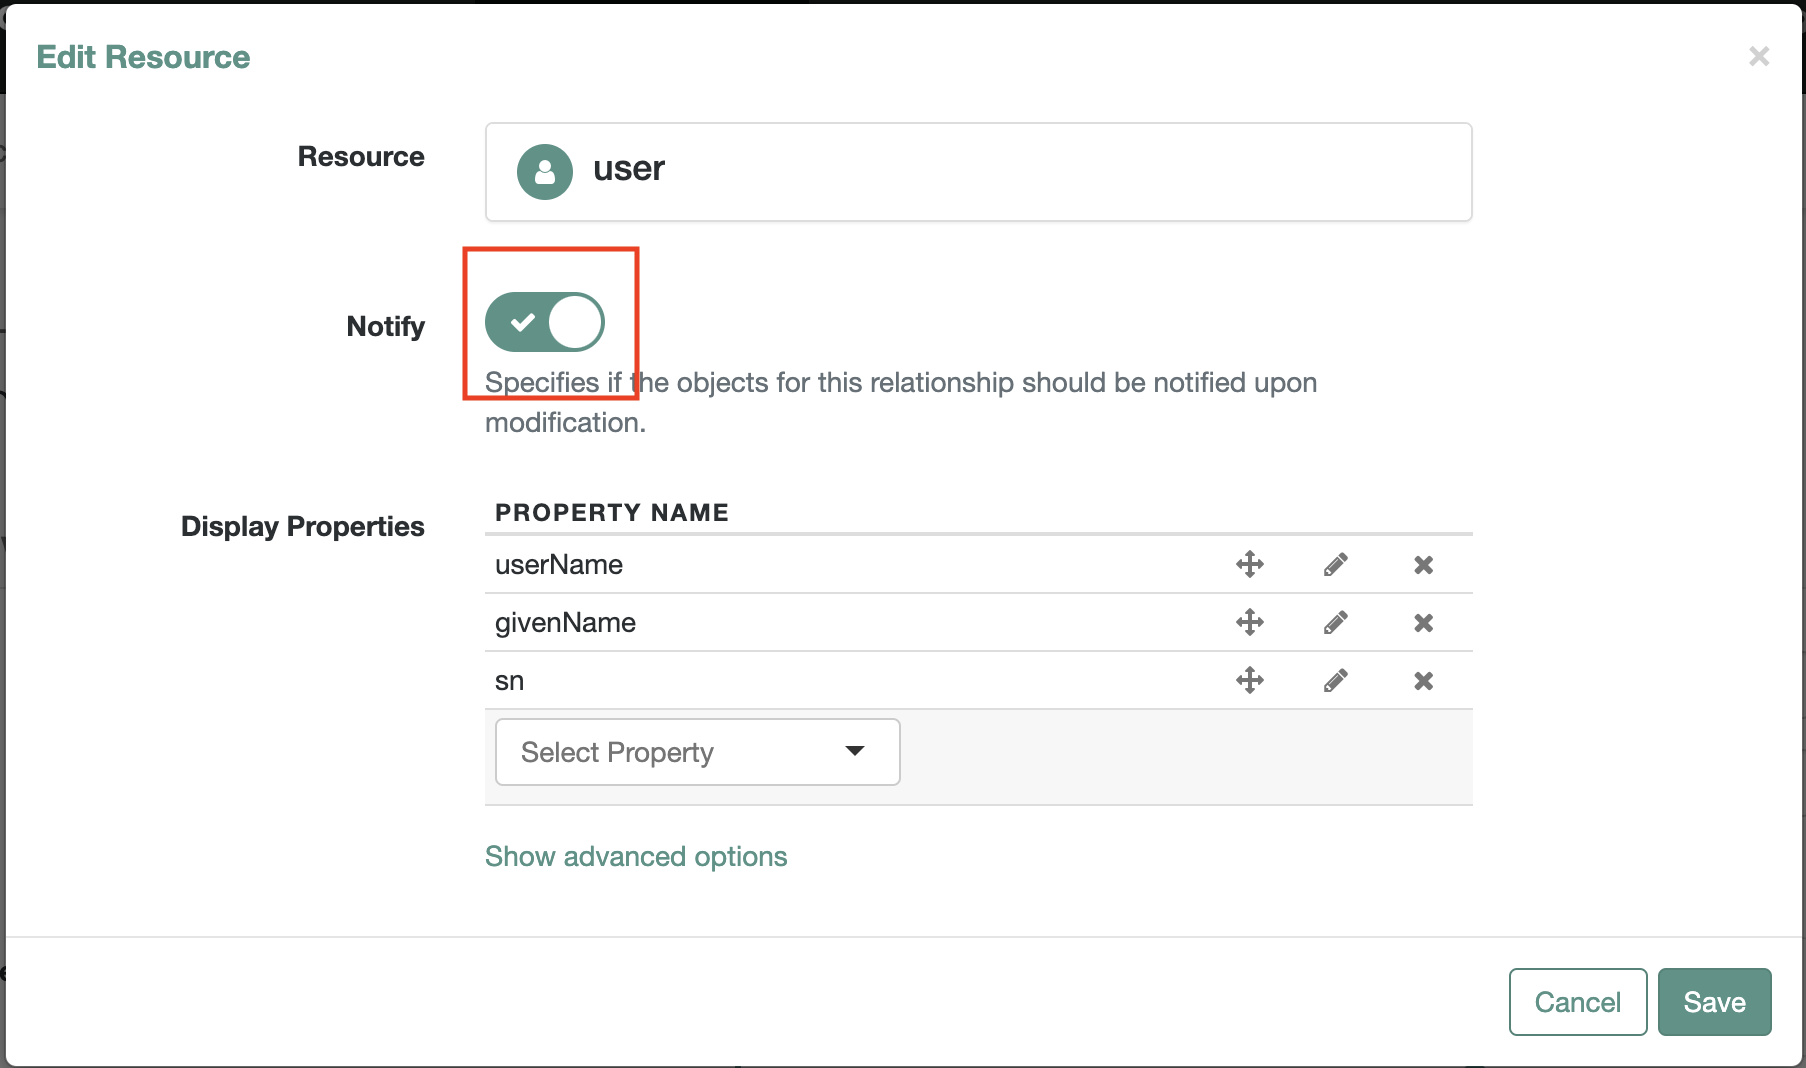
Edit the
memberOfOrgIDspropertyUnder
Details, click onShow advanced optionsEnable
User Editable,Return by Defaultand theVirtualoptions as shown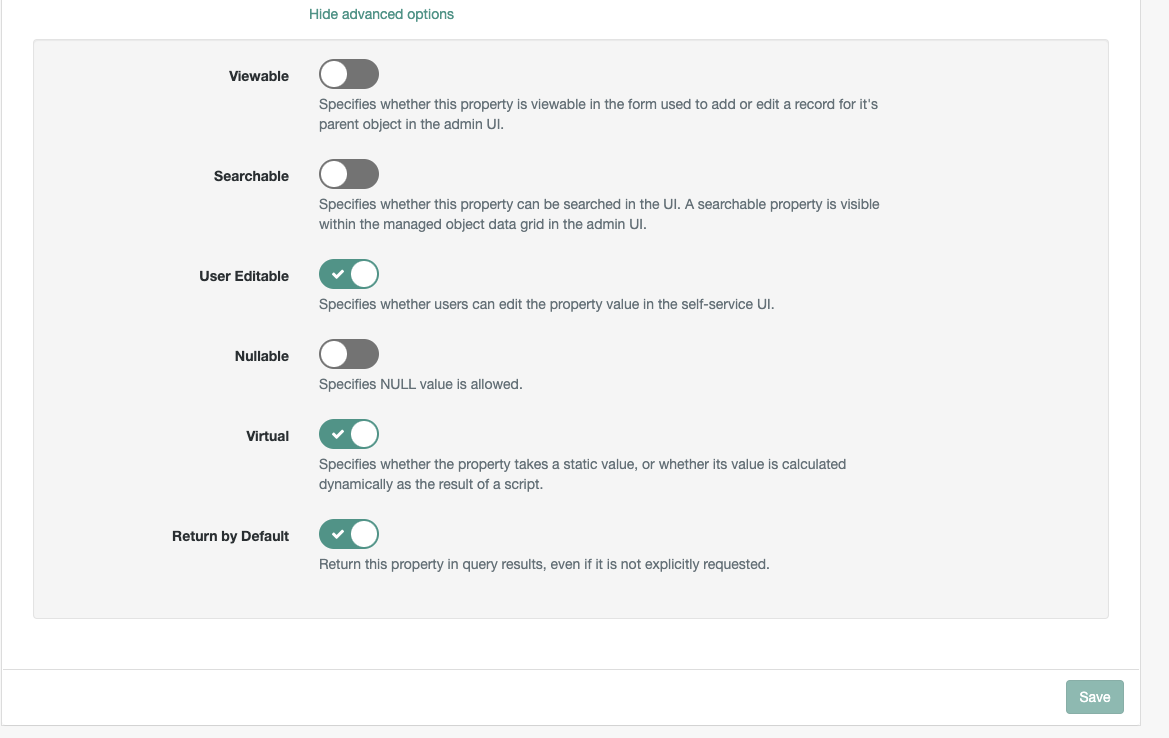
- Click
CONFIGUREon the menu bar and selectMANAGED OBJECTS - Click the 'Role' managed object
Edit the
memberspropertyUnder
Details, click onShow advanced optionsEnable
Viewable,User Editable,Return by Defaultand theNotify Selfoptions as shown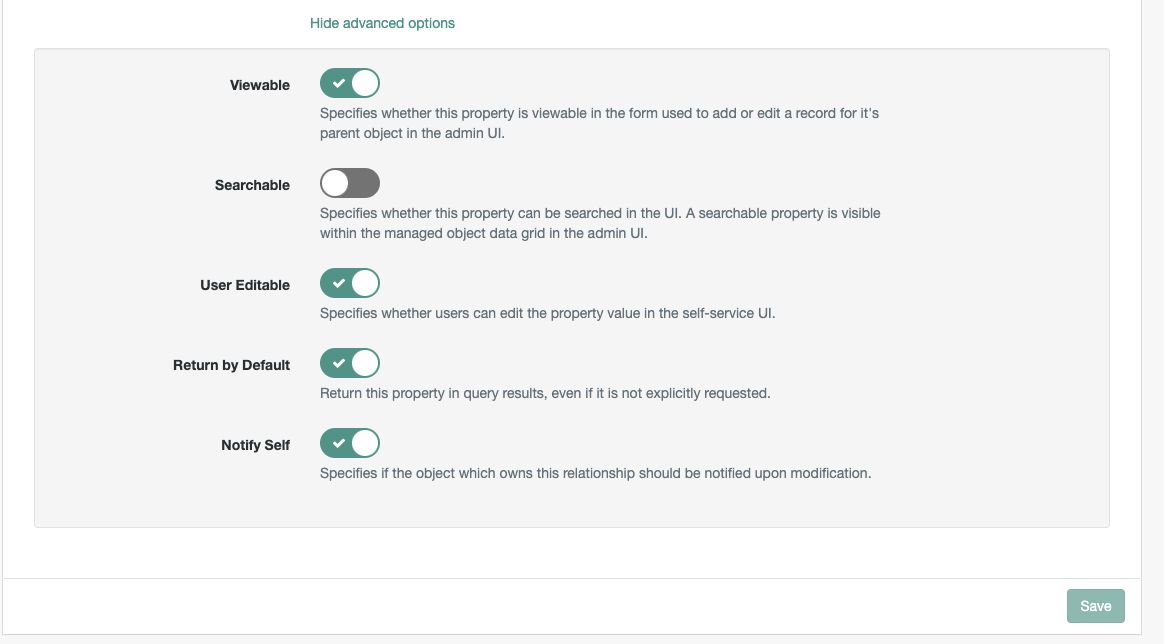
Edit the
Relationship Configuration, highlighted with a red rectangle as shown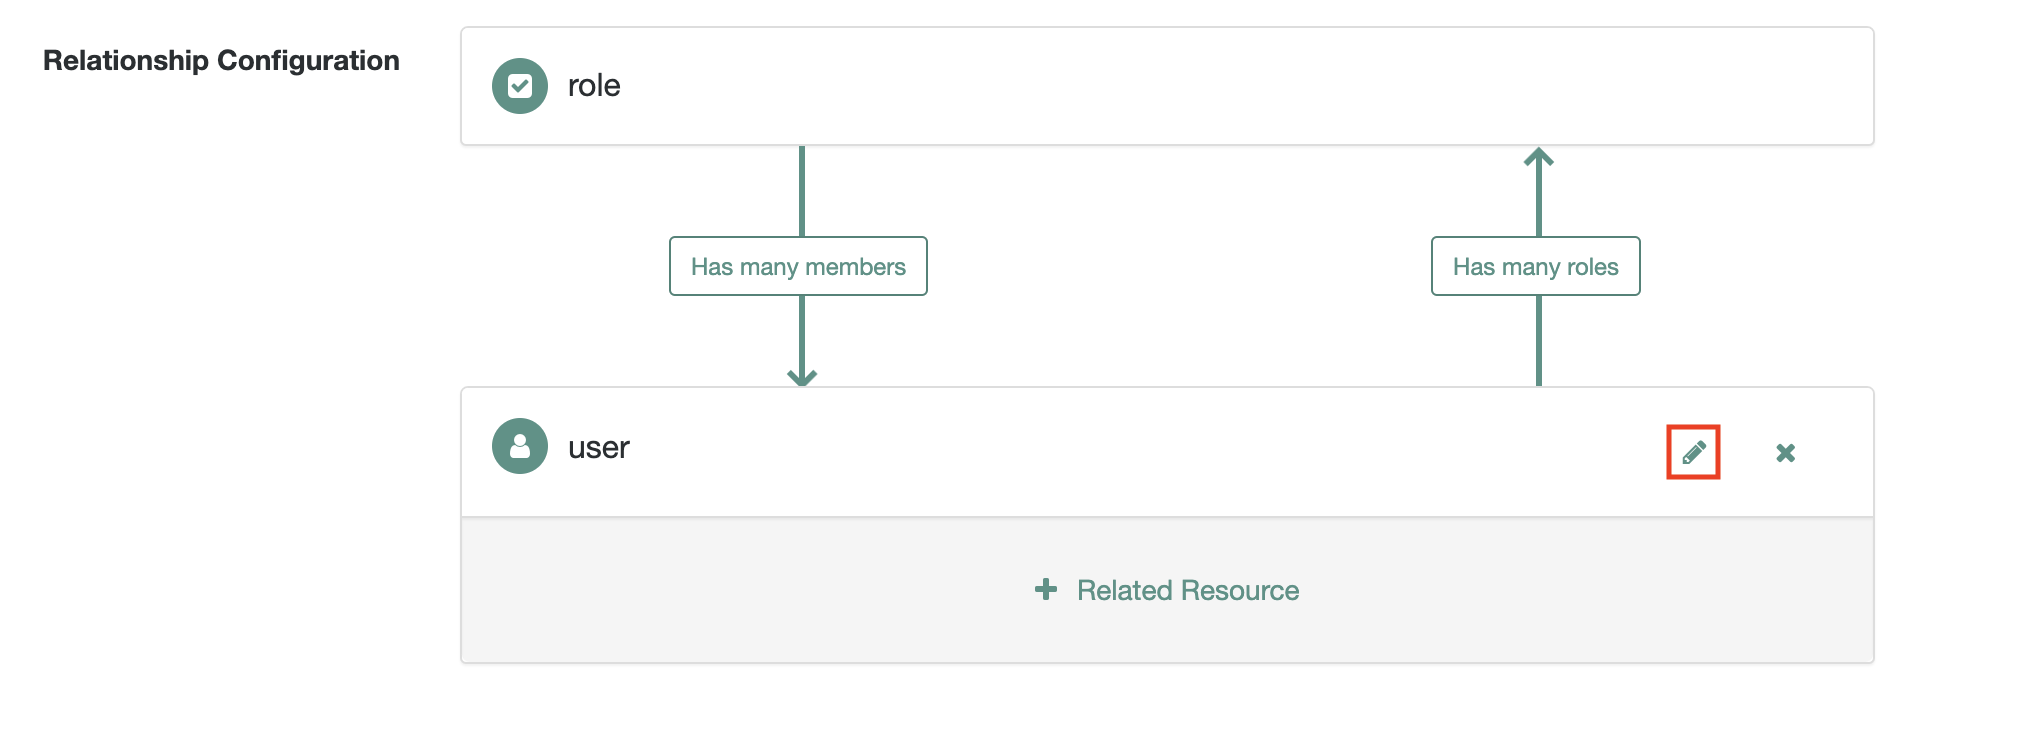
4.1. Enable
Notifyon theEdit Resourcescreen as shown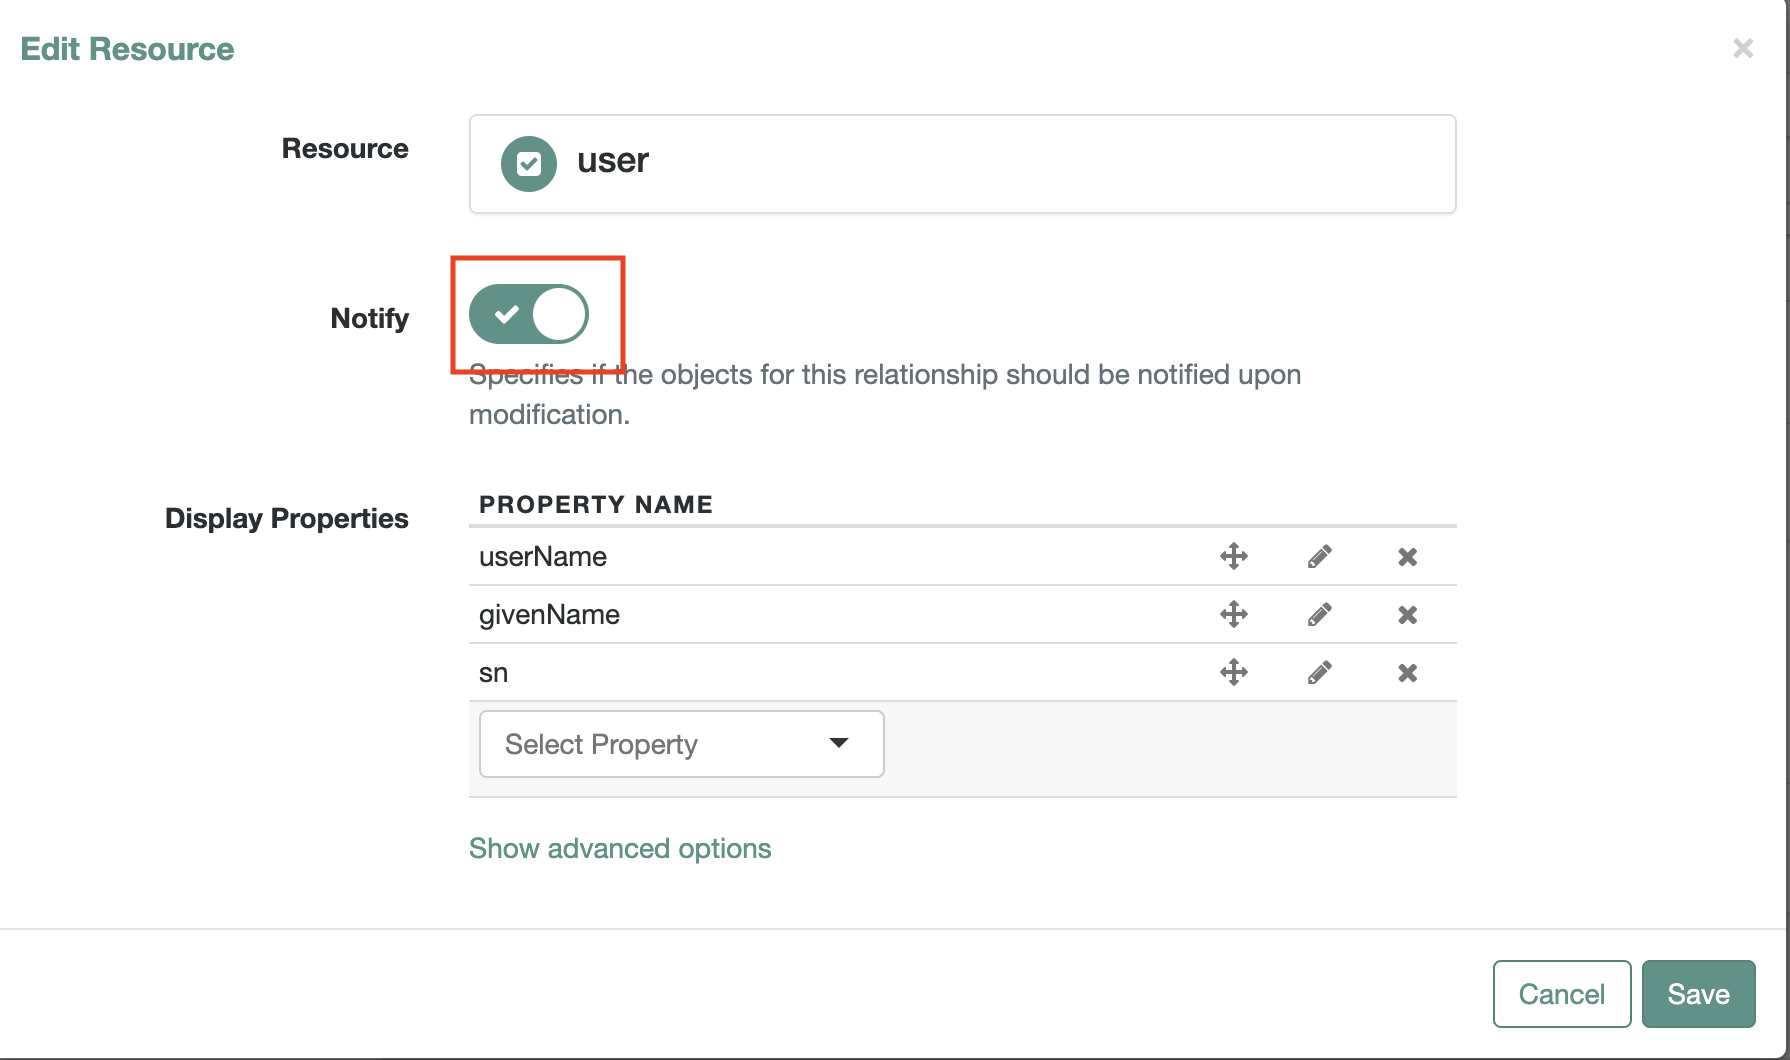
How to validate
UserprovisioningCreate a new user in ForgeRock
Wait for few seconds and if the user synchorization between
ForgeRockandAxiadis successful, aLinked Systemtab will appear in ForgeRock for the new user as shown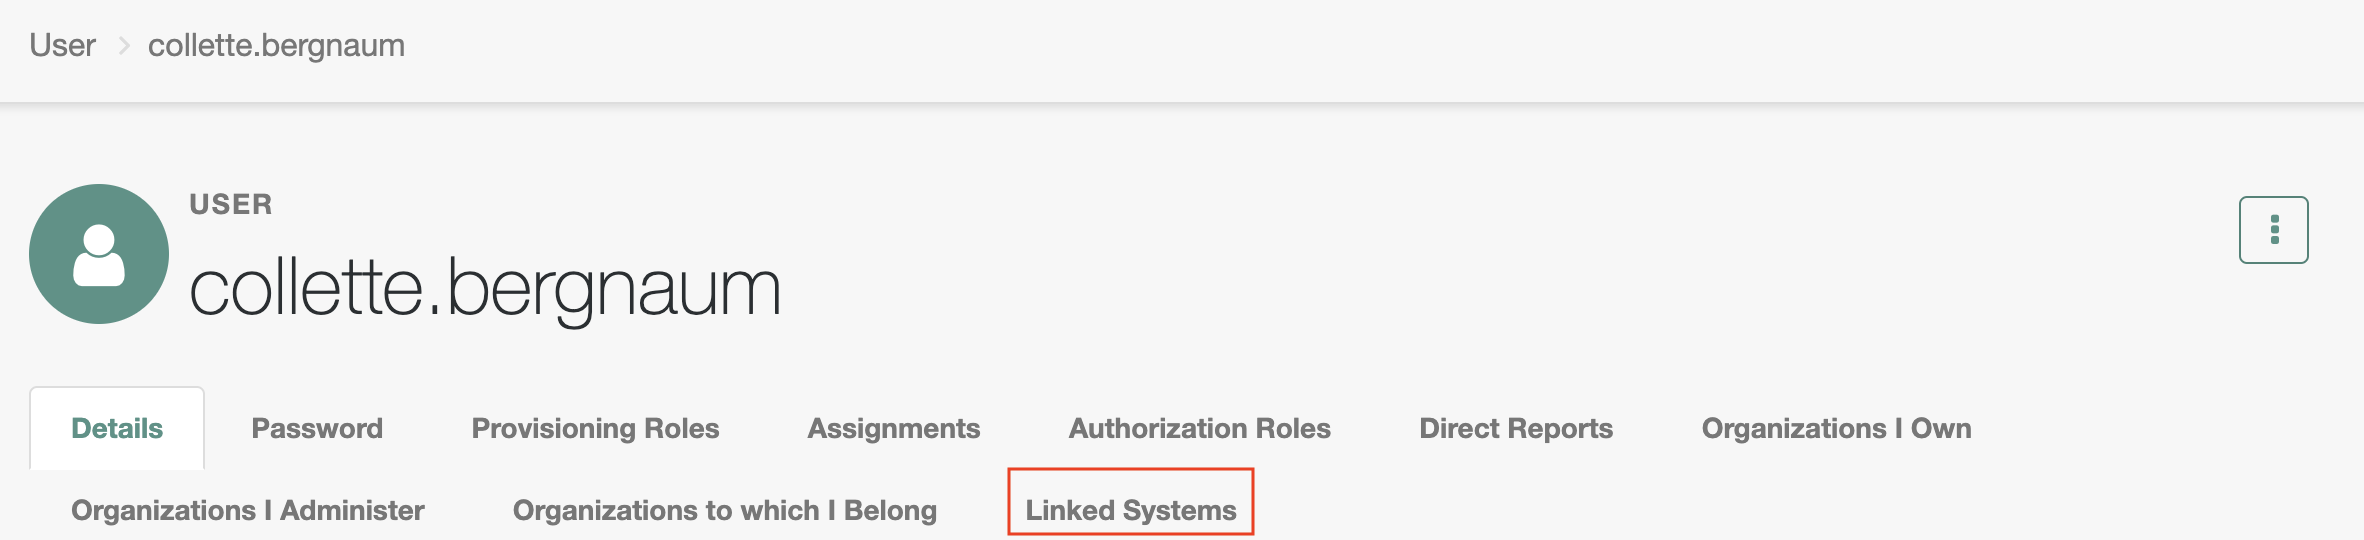
Navigate to the
Linked SystemtabVerify all the mapped attributes for this user have synced to Axiad and are displaying correctly in ForgeRock
How to validate
RoleprovisioningCreate a new role in ForgeRock
Wait for few seconds and if the role synchorization between
ForgeRockandAxiadis successful, aLinked Systemtab will appear in ForgeRock for the new role as shown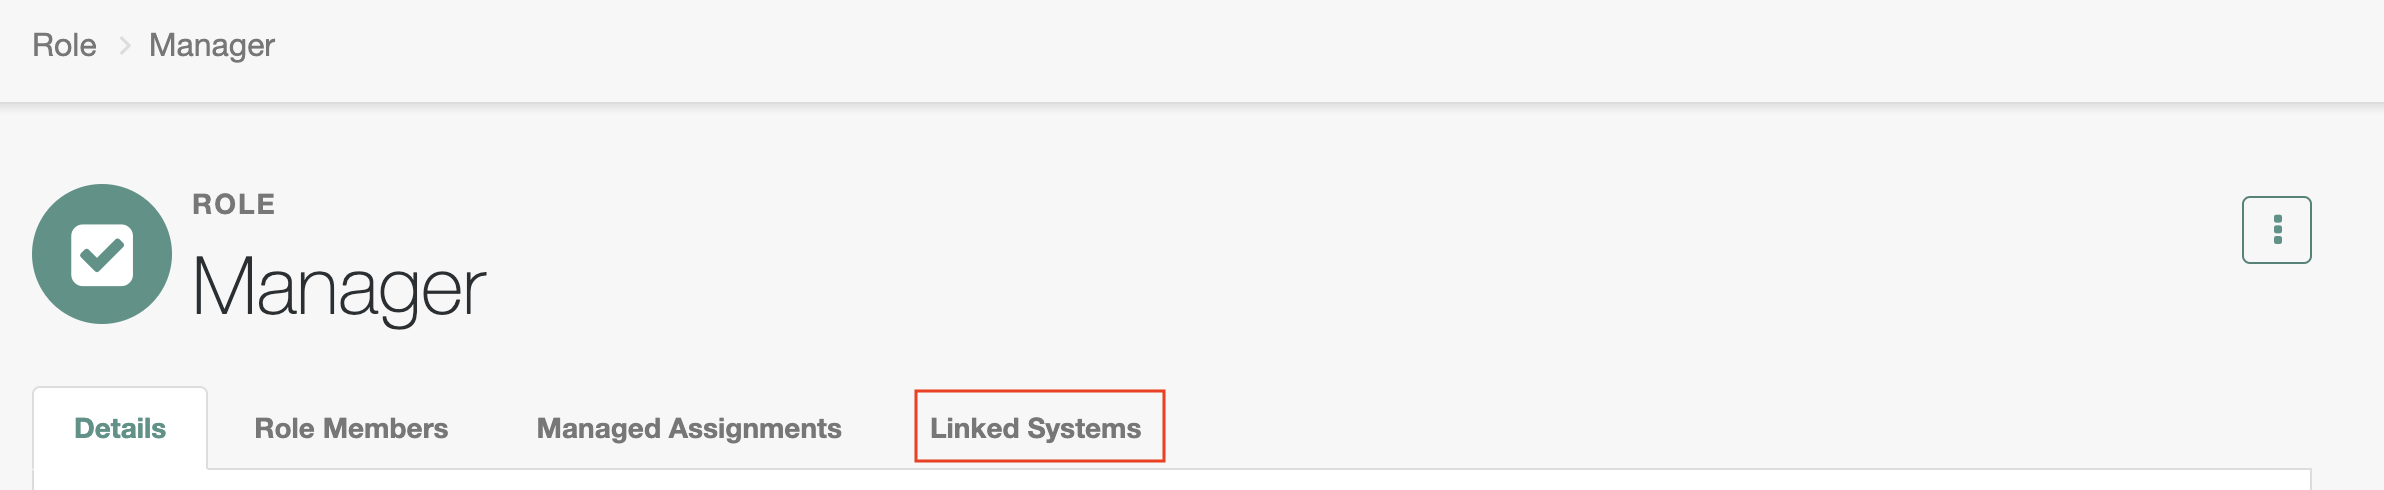
Navigate to the
Linked SystemtabVerify all the mapped attributes for this role have synced to Axiad and are displaying correctly in ForgeRock
Log into the ForgeRock Identity Management console
Click
CONFIGUREon the menu bar and selectMappingsClick on
Reconcilewhere source isManaged/Useras shown
Verify the result of reconcilation by clicking the
editbutton on theManaged/Usermapping
Log into the ForgeRock Identity Management console
Click
CONFIGUREon the menu bar and selectMappingsClick on
Reconcilewhere source isManaged/Roleas shown
Verify the result of reconcilation by clicking the
editbutton on theManaged/Rolemapping