Configuring User Registration
AM provides self-registration features that allow users to create an account.
You can configure AM to perform user registration, or you can delegate user registration to IDM, depending on your requirements.
This section covers configuring AM to:
Perform user registration itself. See "To Configure User Self-Registration by AM".
Delegate user registration to IDM. See "To Delegate User Self-Registration to IDM".
Although you can configure user self-registration without any additional security mechanisms, such as email verification or KBA security questions, we recommend configuring the email verification service with user self-registration at a minimum.
Log in to the AM console as the administrator.
Configure the Email Service as described in "Configuring the Email Service".
Navigate to Realms > Realm Name > Services and select the User Self-Service service.
Select the User Registration tab.
Enable User Registration.
Enable Captcha to turn on the Google reCAPTCHA plugin. Make sure you configured the plugin as described in "Configuring the Google reCAPTCHA Plugin".
Enable Email Verification to turn on the email verification service. We recommend you leave Email Verification enabled, so users who self-register must perform email address verification.
Enable Verify Email before User Detail to verify the user's email address before requesting the user details.
By default, the user self-registration flow validates the email address after the user has provided their details. Enable this setting for backwards-compatibility with self-registration flows configured in OpenAM 13 or 13.5.
Enable Security Questions to display security questions to the user during the self-registration, after which the user must enter their answers to the questions. During the forgotten password or forgotten username services, the user will be presented with the security questions to be able to reset their passwords or retrieve their usernames if Security Questions is enabled.
In the Token LifeTime field, enter an appropriate number of seconds for the token lifetime. If the token lifetime expires before the user self-registers, then the user will need to restart the registration process over again.
Default:
300seconds.To customize the User Registration outgoing email, perform the following steps:
In the Outgoing Email Subject field, enter the Subject line of the email.
The syntax is
lang|subject-text, wherelangis the ISO-639 language code, such asenfor English,frfor French, and others. For example, the subject line values could be:en|Registration Emailandfr|Inscription E-mail.In the Outgoing Email Body field, enter the text of the email.
The syntax is
lang|email-text, wherelangis the ISO-639 language code. Note that email body text must be all on one line and can contain any HTML tags within the body of the text.For example, the email body text could be:
en|Thank you for registration to our site! Click <a href="%link%">here</a> to register to the site.
In the Valid Creation Attributes field, enter the user attributes the user can be set during user registration. The attributes are based on the AM identity repository.
For Destination After Successful Registration, select one of the following options:
auto-login. User is automatically logged in and sent to the appropriate page within the system.
default. User is sent to a success page without being logged in. In this case, AM displays a "You have successfully registered" page. The user can then click the Login link to log in to AM. This is the default selection.
login. User is sent to the login page to authenticate.
Save your changes.
Under the Advanced Configuration tab, configure the User Registration Confirmation Email URL for your deployment. The default is:
https://openam.example.com:8443/openam/XUI/?realm=${realm}#register/.Save your changes.
IDM offers user self-registration functionality, much like AM, but provides additional onboarding and provisioning features.
You can configure the IDM Provisioning service to allow IDM to complete user registration after authenticating to AM using a social identity authentication module, for example.
Verify the following pre-requisites:
The AM and IDM instances are connected to the same user data store.
For more information, see the Platform Setup Guide.
The AM instance has a copy of the signing and encryption keys from the IDM installation in its default keystore.
Follow the instructions in "Copying Key Aliases" to copy the following key aliases to the AM default keystore:
openidm-selfservice-keyselfservice
Restart AM when completed to apply the changes.
Log in to the AM console as the administrator, and navigate to Configure > Global Services > IDM Provisioning.
Perform the following actions on the IDM Provisioning page:
Enable the IDM Provisioning service by selecting Enabled.
Enter the URL of the IDM instance in the Deployment URL field, for example
https://openidm.example.com.(Optional) If you created new signing or encryption keys, enter their details, ensuring the keys are identical and available in the default keystores of both AM and IDM.
For more information on IDM security, see the ForgeRock Identity Management 7 Security Guide.
If you have copied the
openidm-selfservice-keyandselfservicekey alises from IDM, you can leave the default values for the key-related properties.If you are using IDM 6 or earlier, enable the Signing Compatibility Mode property.
For more details of the available properties, see "IDM Provisioning".
Save your changes.
In the AM console, navigate to Realms > Realm Name > Authentication > Modules, and create or select a social authentication module in which to enable IDM user registration.
On the social authentication module page, perform the following actions on the Account Provisioning tab:
Select Use IDM as Registration Service.
Ensure Create account if it does not exist is enabled.
Save your changes.
Successfully authenticating to a social authentication module that has IDM as the registration service redirects the user to IDM to complete the user registration.
For information on integrating AM and IDM, see the Platform Setup Guide.
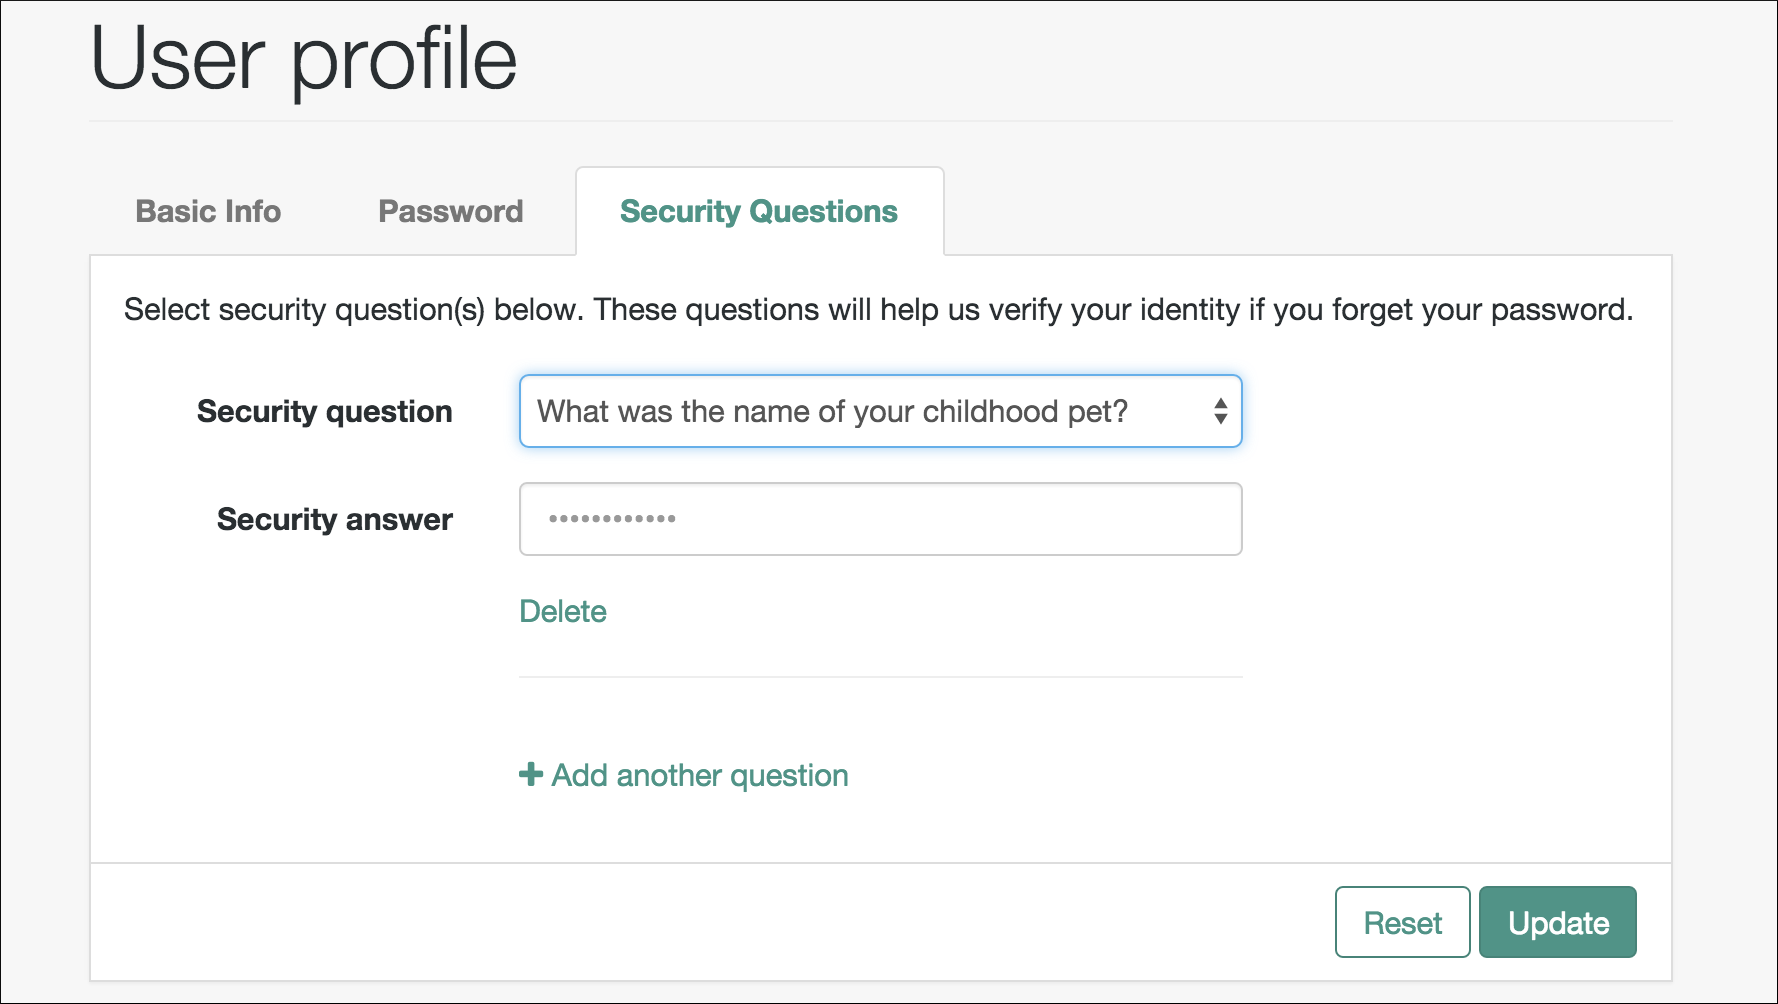
User Management of Passwords and Security Questions
Once the user has self-registered to your system, they can change their password and security questions at any time on the user profile page. The user profile page provides tabs to carry out these functions.