Guide providing a number of "sample deployments" that walk you through the essential features of ForgeRock® Identity Management software, as they would be implemented.
Preface
ForgeRock Identity Platform™ serves as the basis for our simple and comprehensive Identity and Access Management solution. We help our customers deepen their relationships with their customers, and improve the productivity and connectivity of their employees and partners. For more information about ForgeRock and about the platform, see https://www.forgerock.com.
The ForgeRock Common REST API works across the platform to provide common ways to access web resources and collections of resources.
1. Using This Guide
This guide describes a number of sample deployments that demonstrate the core
functionality of ForgeRock Identity Management (IDM) software. The samples correspond to
the configurations provided in the openidm/samples
directory.
This guide is written for anyone testing IDM to manage identities, and to ensure compliance with identity management regulations.
The guide covers a number of IDM features, often including multiple features in a single sample.
You do not need a complete understanding of IDM software to learn something from this guide, although a background in identity management and maintaining web application software can help. You do need some background in managing services on your operating systems and in your application servers. You can nevertheless get started with this guide, and then learn more as you go along.
2. Accessing Documentation Online
ForgeRock publishes comprehensive documentation online:
The ForgeRock Knowledge Base offers a large and increasing number of up-to-date, practical articles that help you deploy and manage ForgeRock software.
While many articles are visible to community members, ForgeRock customers have access to much more, including advanced information for customers using ForgeRock software in a mission-critical capacity.
ForgeRock product documentation, such as this document, aims to be technically accurate and complete with respect to the software documented. It is visible to everyone and covers all product features and examples of how to use them.
3. Using the ForgeRock.org Site
The ForgeRock.org site has links to source code for ForgeRock open source software, as well as links to the ForgeRock forums and technical blogs.
If you are a ForgeRock customer, raise a support ticket instead of using the forums. ForgeRock support professionals will get in touch to help you.
Chapter 1. Overview of the Samples
This chapter lists all the samples provided with IDM and gives a high-level overview of the purpose of each sample. This chapter also provides information that is required for all of the samples. Read this chapter, specifically "Running the Samples" and "Preparing IDM" before you try any of the samples.
1.1. Samples Provided With IDM
A number of samples are provided in the openidm/samples
directory. This section describes the purpose of each sample:
- Getting Started
The Getting Started sample describes how to install and evaluate IDM.
(samples/getting-started)- "Synchronizing Data From a CSV File to IDM"
This sample demonstrates one-way synchronization from an external resource to an IDM repository. The external resource in this case is a simple CSV file. User objects in that file are synchronized with the managed users in the IDM repository.
(samples/sync-with-csv)- "One Way Synchronization From LDAP to IDM"
This sample uses the generic LDAP connector to connect to an LDAP directory. The sample includes one mapping from the LDAP directory to the managed user repository, and demonstrates reconciliation from the external resource to the repository.
(samples/sync-with-ldap)- "Two Way Synchronization Between LDAP and IDM"
This sample uses the generic LDAP connector to connect to an LDAP directory. The sample includes two mappings - one from the LDAP directory to the managed user repository, and one in the opposite direction. The sample demonstrates reconciliation from the LDAP directory to the repository and implicit synchronization from the managed user repository to the LDAP directory.
(samples/sync-with-ldap-bidirectional)- "Synchronizing LDAP Groups"
This sample uses the generic LDAP connector to connect to an LDAP directory. The sample builds on the previous sample by providing an additional mapping, from the LDAP groups object, to the managed groups object. The sample illustrates a new managed object type (groups) and shows how this object type is synchronized with group containers in LDAP.
(samples/sync-with-ldap-groups)- "Synchronizing LDAP Group Membership"
This sample uses the generic LDAP connector to connect to an LDAP directory. The sample includes two mappings, one from the LDAP directory to the managed user repository, and one from the repository to the LDAP directory. The sample demonstrates synchronization of group membership, that is, how the value of the
ldapGroupsproperty in a managed user object is mapped to the corresponding user object in LDAP.(samples/sync-with-ldap-group-membership)- "Synchronizing Data Between Two External Resources"
This sample demonstrates synchronization between two external resources, routed through the IDM repository. The resources are named
LDAPandADand represent two separate LDAP directories. In the sample both resources are simulated with simple CSV files.(samples/sync-two-external-resources)- "Asynchronous Reconciliation Using a Workflow"
This sample shows how you can use workflows to launch an asynchronous reconciliation operation.
(samples/sync-asynchronous)- "LiveSync With an LDAP Server"
This sample illustrates the liveSync mechanism that pushes changes from an external resource to the IDM repository. The sample uses an LDAP connector to connect to an LDAP directory, either ForgeRock Directory Services (DS) or Active Directory.
(samples/livesync-with-ad)- "Synchronizing Accounts With the Google Apps Connector"
This sample uses the Google Apps Connector to create users and groups on an external Google system and to reconcile those accounts with the IDM managed user repository.
(samples/sync-with-google)- "Synchronizing Users Between Salesforce and IDM"
This sample demonstrates how to create and update users in Salesforce, using the Salesforce Connector. The sample also shows synchronization of users between Salesforce and the IDM managed user repository.
(samples/sync-with-salesforce)- "Synchronizing Kerberos User Principals"
This sample demonstrates how to use the scripted Kerberos connector to manage Kerberos user principals and to reconcile user principals with IDM managed user objects.
(samples/sync-with-kerberos)- "Storing Multiple Passwords For Managed Users"
This sample demonstrates how to set up multiple passwords for managed users and how to synchronize separate passwords to different external resources. The sample includes two target LDAP servers, each with different password policy and encryption requirements. The sample also shows how to extend the password history policy to apply to multiple password fields.
(samples/multiple-passwords)- "Linking Multiple Accounts to a Single Identity"
This sample illustrates how IDM addresses links from multiple accounts to one identity. The sample shows how you can create links between a single source account and multiple target accounts, using link qualifiers that enable one-to-many relationships in mappings and policies.
(samples/multi-account-linking)- "Linking Historical Accounts"
This sample demonstrates the retention of inactive (historical) LDAP accounts that have been linked to a corresponding managed user account.
(samples/historical-account-linking)- "Provisioning With Roles"
This sample builds on the sample described in "One Way Synchronization From LDAP to IDM", and demonstrates how attributes are provisioned to an external system (an LDAP directory), based on role membership.
(samples/provisioning-with-roles)- "Using a Workflow to Provision User Accounts"
The provisioning workflow sample demonstrates a typical use case of a workflow — provisioning new users. The sample demonstrates the use of the Self-Service UI that lets end users complete a registration process.
(samples/provisioning-with-workflow)- "Connecting to DS With ScriptedREST"
This sample uses the Groovy Connector Toolkit to implement a ScriptedREST connector that interacts with the DS REST API.
(samples/scripted-rest-with-dj)- "Connecting to a MySQL Database With ScriptedSQL"
This sample uses the Groovy Connector Toolkit to implement a ScriptedSQL connector that interacts with an external MySQL database.
(samples/scripted-sql-with-mysql)- "Connecting to Active Directory With the PowerShell Connector"
This sample uses the MS Active Directory PowerShell module to demonstrate how you can synchronize managed objects with a Microsoft Active Directory deployment. The sample provides a number of PowerShell scripts that enable you to perform basic CRUD (create, read, update, delete) operations on an Active Directory server.
(samples/scripted-powershell-with-ad)- "Connecting to Azure AD With the PowerShell Connector"
This sample uses the Microsoft Azure Active Directory (Azure AD) PowerShell module to demonstrate how you can synchronize managed object data such as users and groups with a Microsoft AzureAD deployment.
(samples/scripted-powershell-with-azure-ad)- "Directing Audit Information To a MySQL Database"
This sample uses a ScriptedSQL implementation of the Groovy Connector Toolkit to direct audit information to a MySQL database.
(samples/audit-jdbc)- "Directing Audit Information To a JMS Broker"
This sample demonstrates how the JMS audit event handler can publish messages that comply with the Java(TM) Message Service Specification Final Release 1.1
(samples/audit-jms)- "Subscribing to JMS Messages"
This sample demonstrates the scripted JMS message handler, and how it performs ForgeRock REST operations.
(samples/scripted-jms-subscriber)- "Authenticating Using a Trusted Servlet Filter"
This sample demonstrates how to use a custom servlet filter and the "Trusted Request Attribute Authentication Module" to allow IDM to authenticate through another service.
(samples/trusted-servlet-filter)- "Integrating IDM With the ForgeRock Identity Platform"
This sample demonstrates the integration of three products within the ForgeRock Identity Platform. The sample shows ForgeRock Access Management, (AM), ForgeRock Directory Services (DS), and ForgeRock Identity Management (IDM) working together working together to manage identities and authentication.
(samples/full-stack)- "Creating a Custom Endpoint"
IDM supports scriptable custom endpoints that enable you to launch arbitrary scripts through an IDM REST URI. This example shows how custom endpoints are configured and returns a list of variables available to each method used in a custom endpoint script.
(samples/example-configurations/custom-endpoint)
1.2. Example Configuration Files
In addition to these complete, runnable samples, the
samples/ directory includes a number of example
configuration and data files that you can use when setting up your own
project. These examples files are under the
example-configurations subdirectory. Details on each of
these files is provided in the documentation that corresponds to the purpose
of the file. For example, the conf/external.email.json
file is described in
"Configuring Outbound Email" in the Integrator's Guide.
1.3. Running the Samples
Each sample directory in openidm/samples/ contains a
number of subdirectories, such as conf/ and
script/. To start IDM with a sample
configuration, navigate to the /path/to/openidm
directory and use the -p option of the startup
command to point to the sample whose configuration you want to use. Some, but
not all samples require additional software, such as an external LDAP server
or database.
Many of the procedures in this guide refer to paths such as
samples/sample-name. In each
of these cases, the complete path is assumed to be
/path/to/openidm/samples/sample-name.
When you move from one sample to the next, bear in mind that you are changing the IDM configuration. For information on how configuration changes work, see "Making Configuration Changes" in the Integrator's Guide.
The command-line examples in this chapter (and throughout the IDM documentation) assume a UNIX shell. If you are running these samples on Windows, adjust the command-line examples accordingly.
1.4. Preparing IDM
Install an instance of IDM specifically to try the samples. That way you can experiment as much as you like, and discard the result if you are not satisfied.
If you are using the same IDM instance for multiple samples, it
is helpful to clear out the repository created for an earlier sample. To do
so, shut down IDM and delete the
openidm/db/openidm directory.
$ rm -rf /path/to/openidm/db/openidm
IDM should then be ready to start with a new sample. For a number of the samples in this guide, users are created either with the UI or directly with a commons REST call. Users that have been created in the repository (managed users) should be able to log into the Self-Service UI.
Chapter 2. Synchronizing Data From a CSV File to IDM
This sample demonstrates one-way synchronization from an external resource to an IDM repository.
The external resource in this case is a simple CSV file. User objects in that file are synchronized with the managed users in the IDM repository.
This chapter walks you through the sample and demonstrates the configuration files that correspond to each part of the synchronization process. For a complete list of the samples provided with IDM, and an overview of each sample, see "Overview of the Samples".
2.1. About This Sample
IDM connects data objects held in separate resources by mapping one object to another. To connect to external resources, IDM uses connectors, that are configured for each external resource.
When objects in one external resource change, IDM determines how the changes affect the objects in the connected resource, and can make the changes in that resource as necessary. This sample demonstrates how IDM does this by using reconciliation. Reconciliation compares the objects in one resource to the mapped objects in another resource. For a complete explanation of reconciliation and synchronization, see "Types of Synchronization" in the Integrator's Guide.
In this sample, IDM connects to a CSV file that holds sample user data. The CSV file is configured as the authoritative source. A mapping is configured between objects in the CSV file and managed user objects in the IDM repository.
Note that you can use IDM to synchronized objects between two external resources without going through the IDM repository. In such a case, objects are synchronized directly through connectors to the external resources.
This sample involves only one external resource. In practice, you can connect as many resources as needed for your deployment.
The configuration files for this sample are located in the
/path/to/openidm/samples/sync-with-csv/conf directory.
When you start IDM with the -p project
variable (./startup.sh -p samples/sync-with-csv), the
project location
(&{idm.instance.dir}) is set to a value of
samples/sync-with-csv. All subsequent paths use this
project location as a base. Throughout this documentation, you will see
things like "...in your project's conf/ directory...".
The project here refers to the the value of the
&{idm.instance.dir} variable.
The following configuration files play important roles in this sample:
samples/sync-with-csv/conf/provisioner.openicf-csvfile.jsonThis file provides the configuration for this instance of the CSV connector. It describes, among other things, the connector version, the location of the CSV file resource, and the object types that are supported for this connection. For a complete understanding of connector configuration files, see "Configuring Connectors" in the Integrator's Guide.
samples/sync-with-csv/conf/sync.jsonThis file, also called a mapping file, defines the configuration for reconciliation and synchronization. This sample file includes only one mapping -
systemCsvfileAccounts_managedUser. The mapping specifies the synchronization configuration between the CSV file (source) and the IDM repository (target). Examine the file to see how objects are mapped between the two resources, and the actions that IDM should take when it finds objects in specific situations:{ "mappings": [ { "name" : "systemCsvfileAccounts_managedUser", "source" : "system/csvfile/account", "target": "managed/user", "correlationQuery": { "type": "text/javascript", "source": "var query = {'_queryId' : 'for-userName', 'uid' : source.name};query;" }, "properties": [ { "source": "email", "target": "mail" }, { "source": "firstname", "target": "givenName" }, { "source": "lastname", "target": "sn" }, { "source": "description", "target": "description" }, { "source": "_id", "target": "_id" }, { "source": "name", "target": "userName" }, { "source": "password", "target": "password" }, { "source" : "mobileTelephoneNumber", "target" : "telephoneNumber" }, { "source" : "roles", "transform" : { "type" : "text/javascript", "source" : "var _ = require('lib/lodash'); _.map(source.split(','), function(role) { return {'_ref': 'repo/internal/role/' + role} });" }, "target" : "authzRoles" } ], "policies": [ { "situation": "CONFIRMED", "action": "UPDATE" }, { "situation": "FOUND", "action": "IGNORE" }, { "situation": "ABSENT", "action": "CREATE" }, { "situation": "AMBIGUOUS", "action": "IGNORE" }, { "situation": "MISSING", "action": "IGNORE" }, { "situation": "SOURCE_MISSING", "action": "IGNORE" }, { "situation": "UNQUALIFIED", "action": "IGNORE" }, { "situation": "UNASSIGNED", "action": "IGNORE" } ] } ] }Source and target paths that start with
managed, such asmanaged/user, always refer to objects in the IDM repository. Paths that start withsystem, such assystem/csvfile/account, refer to external objects, in this case, objects in the CSV file.When you start a reconciliation, IDM queries all users in the source, and then creates, deletes, or modifies users in the IDM repository, as mapped in
conf/sync.json.For more information about synchronization, reconciliation, and the
sync.jsonfile, see "Synchronizing Data Between Resources" in the Integrator's Guide.samples/sync-with-csv/conf/schedule-reconcile_systemCsvAccounts_managedUser.jsonThe sample schedule configuration file defines a task that launches a reconciliation every minute for the mapping named
systemCsvfileAccounts_managedUser. The schedule is disabled by default:{ "enabled" : false, "type": "simple", "repeatInterval": 3600000, "persisted" : true, "concurrentExecution" : false, "misfirePolicy" : "fireAndProceed", "invokeService" : "sync", "invokeContext" : { "action" : "reconcile", "mapping" : "systemCsvfileAccounts_managedUser" } }IDM regularly scans the
conf/directory for any schedule configuration files. For information about the schedule configuration, see "Scheduling Tasks and Events" in the Integrator's Guide.Apart from the scheduled reconciliation run, you can also start reconciliation run through the REST interface. The call to the REST interface is an HTTP POST such as the following:
$ curl \
 --header "X-OpenIDM-Username: openidm-admin" \
 --header "X-OpenIDM-Password: openidm-admin" \
 --request POST \
 "http://localhost:8080/openidm/recon?_action=recon&mapping=systemCsvfileAccounts_managedUser&waitForCompletion=true"
The
waitForCompletion=trueparameter specifies that the operation should return only when it has completed.samples/sync-with-csv/data/csvConnectorData.csvThis CSV file is the external resource or data store in this sample. The file contains two users, bjensen and scarter. During the sample, you will reconcile those users from the CSV file to the managed user repository.
2.2. Running the Sample
To run this sample, start IDM with the configuration for the sample:
$ cd /path/to/openidm
$ ./startup.sh -p samples/sync-with-csv
You can work through the sample using the command line, or using the Admin UI. This section provides instructions for both methods.
2.2.1. Running the Sample by Using the Command Line
When you have started IDM, reconcile the objects in both resources.
You can trigger the reconciliation either by setting
"enabled" : truein the schedule configuration file (conf/schedule-reconcile_systemCsvAccounts_managedUser.json) and then waiting until the scheduled reconciliation happens, or by running the following curl command:$ curl \ --header "X-OpenIDM-Username: openidm-admin" \ --header "X-OpenIDM-Password: openidm-admin" \ --request POST \ "http://localhost:8080/openidm/recon?_action=recon&mapping=systemCsvfileAccounts_managedUser&waitForCompletion=true"
Successful reconciliation returns a reconciliation run ID, and the status of the reconciliation operation, as follows:
{ "_id":"2d87c817-3d00-4776-a705-7de2c65937d8", "state":"SUCCESS" }Display the managed user records that were created by the reconciliation operation.
You can use any REST client to query the repository. Perform an HTTP GET on the URL
http://localhost:8080/openidm/managed/user?_queryId=query-all-idswith the headers"X-OpenIDM-Username: openidm-admin"and"X-OpenIDM-Password: openidm-admin". The following example uses the curl command to obtain the managed user records, in JSON format:$ curl \ --header "X-OpenIDM-Username: openidm-admin" \ --header "X-OpenIDM-Password: openidm-admin" \ --request GET \ "http://localhost:8080/openidm/managed/user?_queryId=query-all-ids" { "result": [ { "_id": "bjensen", "_rev": "00000000a059dc9f" }, { "_id": "scarter", "_rev": "00000000d84ade1c" } ], ... }In addition to querying the users by their ID, you can user any arbitrary query filter to return the information you need. For more information, see "Defining and Calling Queries" in the Integrator's Guide.
Now display user bjensen's record by appending her user ID to the URL:
$ curl \ --header "X-OpenIDM-Username: openidm-admin" \ --header "X-OpenIDM-Password: openidm-admin" \ --request GET \ "http://localhost:8080/openidm/managed/user/bjensen" { "_id": "bjensen", "_rev": "00000000a059dc9f" "mail": "bjensen@example.com", "givenName": "Barbara", "sn": "Jensen", "description": "Created By CSV", "userName": "bjensen", "telephoneNumber": "1234567", "accountStatus": "active", "effectiveRoles": [], "effectiveAssignments": [] }This command returns bjensen's complete user record. If you need this level of information for all users, you can use the predefined query
query-allinstead ofquery-all-ids.You restrict the query output with the
fieldsparameter, as follows:$ curl \ --header "X-OpenIDM-Username: openidm-admin" \ --header "X-OpenIDM-Password: openidm-admin" \ --request GET \ "http://localhost:8080/openidm/managed/user?_queryFilter=true&_fields=userName,mail" { "result": [ { "_id": "scarter", "_rev": "00000000d84ade1c" "userName": "scarter", "mail": "scarter@example.com" }, { "_id": "bjensen", "_rev": "00000000a059dc9f" "userName": "bjensen", "mail": "bjensen@example.com" } ], ... }To test the scheduled reconciliation, add a user to the CSV data file,
samples/sync-with-csv/data/csvConnectorData.csv. For example, add user jberg as follows:"description", "uid", "username", "firstname", "lastname", "email", "mobile... "Created ...", "bjensen", "bjensen@example.com", "Barbara", "Jensen", "bjensen@example.com", "123456... "Created ...", "scarter", "scarter@example.com", "Steven", "Carter", "scarter@example.com", "123456... "Created ...", "jberg", "jberg@example.com", "James", "Berg", "jberg@example.com", "123456...If you enabled the scheduled reconciliation in Step 1, you can simply wait for the reconciliation operation to run. Otherwise, run the reconciliation manually with the same command you used in that step.
After the reconciliation has run, query the local repository to see the new user in the list of managed users:
$ curl \ --header "X-OpenIDM-Username: openidm-admin" \ --header "X-OpenIDM-Password: openidm-admin" \ --request GET \ "http://localhost:8080/openidm/managed/user?_queryId=query-all-ids" { "result": [ { "_id": "bjensen", "_rev": "00000000792afa08" }, { "_id": "scarter", "_rev": "000000004121fb7e" }, { "_id": "jberg", "_rev": "000000001298f6a6" } ], ... }You can see what happened in this sample by looking at the JSON format audit logs in the
openidm/auditdirectory:$ ls /path/to/openidm/audit/ access.audit.json authentication.audit.json recon.audit.json activity.audit.json config.audit.json sync.audit.json
For more information about the contents of each of these files, see "Logging Audit Events" in the Integrator's Guide.
To see what happened during the reconciliation operation, look at the reconciliation audit log,
openidm/audit/recon.audit.json. The following sample excerpt shows what happened during the second reconciliation run:{ "transactionId":"846b36f7-f4ce-4e50-a3dc-464f6c5340d4-273", "timestamp":"2017-02-06T13:20:03.983Z", "eventName":"recon", "userId":"openidm-admin", "action":"CREATE", "exception":null, "linkQualifier":"default", "mapping":"systemCsvfileAccounts_managedUser", "message":null, "situation":"ABSENT", "sourceObjectId":"system/csvfile/account/jberg", "status":"SUCCESS", "targetObjectId":"managed/user/jberg", "reconciling":"source", "ambiguousTargetObjectIds":"", "entryType":"entry", "reconId":"846b36f7-f4ce-4e50-a3dc-464f6c5340d4-273", "_id":"846b36f7-f4ce-4e50-a3dc-464f6c5340d4-284" }The relevant properties in this audit log are:
action,situation,sourceObjectId, andtargetObjectId. For each object in the source resource, reconciliation leads to an action on the target resource.You configure the action that IDM takes for each situation in the mapping file,
conf/sync.json. For the list of all possible situations and actions, see "Synchronization Situations and Actions" in the Integrator's Guide.
2.2.2. Running the Sample in the Administrative User Interface
IDM includes a web-based Administrative User Interface, known as the Admin UI. For details, see "Configuring the Server from the Admin UI" in the Integrator's Guide.
After starting IDM, access the Admin UI by navigating to
https://localhost:8443/admin. The first time you log in,
use the default administrative credentials, (Login: openidm-admin, Password:
openidm-admin).
Warning
To protect your deployment in production, change the default
administrative password. To do so, navigate to the Self-Service UI at
https://localhost:8443/ and click Change Password.
You should now see the Dashboard screen, with quick start cards for common administrative tasks. with the connectors and managed objects associated with that configuration.
Reconcile the two resources as follows:
Click Configure > Mappings, select the
systemCsvfileAccounts_managedUsermapping, and click Reconcile.After reconciliation, display the user records in both the source and target resources.
Select the Association tab and scroll down to the bottom of the page to see the resulting source and target users.
Chapter 3. One Way Synchronization From LDAP to IDM
This sample demonstrates one-way synchronization from an LDAP directory to an IDM repository. The sample shows how IDM can pick up new or changed objects from an external resource.
The sample has been tested with ForgeRock Directory Services (DS) but should work with any LDAPv3-compliant server. The configuration includes one mapping, from the LDAP resource to the IDM repository. The sample does not push any changes made to IDM managed user objects out to the LDAP server.
3.1. LDAP Server Configuration
This sample expects the following configuration for the LDAP server:
The LDAP server runs on the local host.
The LDAP server listens on port 1389.
A user with DN
cn=Directory Managerand passwordpasswordhas read access to the LDAP server.Directory data for that server is stored under base DN
dc=example,dc=com.User objects for that server are stored under base DN
ou=People,dc=example,dc=com.User objects have the object class
inetOrgPerson.User objects have the following attributes:
cndescriptiongivenNamemailsntelephoneNumberuiduserPassword
An example user object follows.
dn: uid=bjensen,ou=People,dc=example,dc=com objectClass: person objectClass: organizationalPerson objectClass: inetOrgPerson objectClass: top givenName: Barbara uid: bjensen cn: Barbara Jensen telephoneNumber: 1-360-229-7105 sn: Jensen mail: bjensen@example.com description: Created for OpenIDM userPassword: password
The LDIF data for this sample is provided in the file
openidm/samples/sync-with-ldap/data/Example.ldif. You can import this data during your DS setup.
The following steps provide setup instructions for DS 6.0. Adjust these instructions if you are using an older version of DS, or an alternative LDAP server.
Download DS from ForgeRock's BackStage site and extract the zip archive.
Set up DS and import the
Example.ldiffile for this sample:$ cd /path/to/opendj $ ./setup \ directory-server \ --rootUserDN "cn=Directory Manager" \ --rootUserPassword password \ --hostname localhost \ --ldapPort 1389 \ --adminConnectorPort 4444 \ --baseDN dc=com \ --ldifFile /path/to/openidm/samples/sync-with-ldap/data/Example.ldif \ --acceptLicense Validating parameters .....Done. Configuring Certificates .....Done. Configuring server .....Done. Importing data from /path/to/openidm/samples/sync-with-ldap/data/Example.ldif ........Done. Starting Directory Server ............Done. To see basic server status and configuration, you can launch /path/to/opendj/bin/status
3.2. Running the Sample
In this section, you will start IDM and reconcile the repository.
The mapping configuration file (sync.json) for this
sample includes one mapping, systemLdapAccounts_managedUser,
which synchronize users from the source LDAP server with the target
IDM repository.
Before you start, prepare IDM as described in "Preparing IDM", then start the server with the configuration for the sample:
$ cd /path/to/openidm $ ./startup.sh -p samples/sync-with-ldap
You can work through the sample using the command line, or using the Admin UI. This section provides instructions for both methods.
3.2.1. Running the Sample by Using the Command Line
Reconcile the repository by running the following command:
$ curl \ --header "X-OpenIDM-Username: openidm-admin" \ --header "X-OpenIDM-Password: openidm-admin" \ --request POST \ "http://localhost:8080/openidm/recon?_action=recon&mapping=systemLdapAccounts_managedUser&waitForCompletion=true" { "_id": "b1394d10-29b0-4ccf-81d8-c88948ea121c-4", "state": "SUCCESS" }The reconciliation operation creates the two users from the LDAP server in the IDM repository, assigning the new objects random unique IDs.
Retrieve the users from the repository by querying their IDs as follows:
$ curl \ --header "X-OpenIDM-Username: openidm-admin" \ --header "X-OpenIDM-Password: openidm-admin" \ --request GET \ "http://localhost:8080/openidm/managed/user?_queryId=query-all-ids" { "result": [ { "_id": "53b0bca5-ada4-4b4b-a224-f389b15cfee0", "_rev": "00000000792afa08" }, { "_id": "a09139f1-fb51-4c32-83c5-d74b57644cce", "_rev": "000000004121fb7e" } ], ... }Retrieve the individual user objects by including their ID in the URL, for example:
$ curl \ --header "X-OpenIDM-Username: openidm-admin" \ --header "X-OpenIDM-Password: openidm-admin" \ --request GET \ "http://localhost:8080/openidm/managed/user/53b0bca5-ada4-4b4b-a224-f389b15cfee0" { "_id": "53b0bca5-ada4-4b4b-a224-f389b15cfee0", "_rev": "00000000c7554e13", "displayName": "Barbara Jensen", "description": "Created for OpenIDM", "givenName": "Barbara", "mail": "bjensen@example.com", "sn": "Jensen", "telephoneNumber": "1-360-229-7105", "userName": "bjensen", "accountStatus": "active", "effectiveRoles": [], "effectiveAssignments": [] }
3.2.2. Running the Sample by Using the Admin UI
Log in to the Admin UI at the URL
https://localhost:8443/adminas the default administrative user (openidm-admin) with passwordopenidm-admin.Warning
To protect your deployment in production, change the default administrative password. To do so, navigate to the Self-Service UI at
https://localhost:8443/and click Change Password.Click Configure > Mappings.
This page shows one mapping, from the
ldapserver to the IDM repository (managed/user).Select the mapping, then select Reconcile.
The reconciliation operation creates the two users from the LDAP server in the IDM repository.
Retrieve the users in the repository. Click Manage > User.
You should now see two users from the LDAP server, reconciled to the IDM repository.
When you click a username, you can view the details of that user account.
Chapter 4. Two Way Synchronization Between LDAP and IDM
This sample demonstrates bidirectional synchronization between an LDAP directory and an IDM repository.
The sample has been tested with ForgeRock Directory Services, but should work with any LDAPv3-compliant server. The configuration includes two mappings, one from the LDAP resource to the IDM repository, and one from IDM to LDAP.
The LDIF data for this sample is provided in the file
openidm/samples/sync-with-ldap-bidirectional/data/Example.ldif.
Before you start, configure the LDAP server as shown in
"LDAP Server Configuration", but import the LDIF file that is
specific to this sample during the setup. The LDAP user must have write access
to create users from IDM on the LDAP server.
4.1. Running the Sample
In this section, you will start IDM and reconcile the two data
sources. The mapping configuration file (sync.json) for
this sample includes two mappings, systemLdapAccounts_managedUser,
which synchronizes users from the source LDAP server with the target
repository, and managedUser_systemLdapAccounts, which
synchronizes changes from the repository to the LDAP server.
Before you start, prepare IDM as described in "Preparing IDM", then start the server with the configuration for the sample:
$ cd /path/to/openidm $ ./startup.sh -p samples/sync-with-ldap-bidirectional
You can work through the sample using the command line, or using the Admin UI. This section provides instructions for both methods.
4.1.1. Running the Sample by Using the Command Line
Reconcile the repository over the REST interface by running the following command:
$ curl \ --header "X-OpenIDM-Username: openidm-admin" \ --header "X-OpenIDM-Password: openidm-admin" \ --request POST \ "http://localhost:8080/openidm/recon?_action=recon&mapping=systemLdapAccounts_managedUser&waitForCompletion=true" { "state": "SUCCESS", "_id": "027e25e3-7a33-4858-9080-161c2b40a6bf-2" }The reconciliation operation returns a reconciliation run ID and the status of the operation. Reconciliation creates user objects from LDAP in the IDM repository, assigning the new objects random unique IDs.
To retrieve the users from the repository, query their IDs as follows:
$ curl \ --header "X-OpenIDM-Username: openidm-admin" \ --header "X-OpenIDM-Password: openidm-admin" \ --request GET \ "http://localhost:8080/openidm/managed/user?_queryId=query-all-ids" { "result": [ { "_id": "d460ed00-74f9-48fb-8cc1-7829be60ddac", "_rev": "00000000792afa08" }, { "_id": "74fe2d25-4eb1-4148-a3ae-ff80f194b3a6", "_rev": "00000000a92657c7" } ], ... }To retrieve individual user objects, include the ID in the URL, for example:
$ curl \ --header "X-OpenIDM-Username: openidm-admin" \ --header "X-OpenIDM-Password: openidm-admin" \ --request GET \ "http://localhost:8080/openidm/managed/user/d460ed00-74f9-48fb-8cc1-7829be60ddac" { "_id": "d460ed00-74f9-48fb-8cc1-7829be60ddac", "_rev": "00000000792afa08", "displayName": "Barbara Jensen", "description": "Created for OpenIDM", "givenName": "Barbara", "mail": "bjensen@example.com", "telephoneNumber": "1-360-229-7105", "sn": "Jensen", "userName": "bjensen", "accountStatus": "active", "effectiveRoles": [], "effectiveAssignments": [] }Test the second mapping by creating a user in the IDM repository:
$ curl \ --header "X-OpenIDM-Username: openidm-admin" \ --header "X-OpenIDM-Password: openidm-admin" \ --header "Content-Type: application/json" \ --request POST \ --data '{ "mail":"fdoe@example.com", "sn":"Doe", "telephoneNumber":"555-1234", "userName":"fdoe", "givenName":"Felicitas", "description":"Felicitas Doe", "displayName":"fdoe"}' \ "http://localhost:8080/openidm/managed/user?_action=create" { "_id": "90d1f388-d8c3-4438-893c-be4e498e7a1c", "_rev": "00000000792afa08", "mail": "fdoe@example.com", "sn": "Doe", "telephoneNumber": "555-1234", "userName": "fdoe", "givenName": "Felicitas", "description": "Felicitas Doe", "displayName": "fdoe", "accountStatus": "active", "effectiveRoles": [], "effectiveAssignments": [] }By default, implicit synchronization is enabled for mappings from the
managed/userrepository to any external resource. This means that when you update a managed object, any mappings defined in thesync.jsonfile that have the managed object as the source are automatically executed to update the target system. For more information, see "Mapping Source Objects to Target Objects" in the Integrator's Guide.Test that the implicit synchronization has been successful by querying the users in the LDAP directory over REST, as follows:
$ curl \ --header "X-OpenIDM-Username: openidm-admin" \ --header "X-OpenIDM-Password: openidm-admin" \ --request GET \ "http://localhost:8080/openidm/system/ldap/account?_queryId=query-all-ids" { "result": [ { "_id": "0da50512-79bb-3461-bd04-241ee4c785bf", "dn": "uid=jdoe,ou=People,dc=example,dc=com" }, { "_id": "887732e8-3db2-31bb-b329-20cd6fcecc05", "dn": "uid=bjensen,ou=People,dc=example,dc=com" }, { "_id": "2f03e095-ec81-4eb5-9201-a4df2f1f9add", "dn": "uid=fdoe,ou=People,dc=example,dc=com" } ], ... }Note the new entry for user
fdoe.Query the complete entry by including
fdoe's LDAP ID in the URL.$ curl \ --header "X-OpenIDM-Username: openidm-admin" \ --header "X-OpenIDM-Password: openidm-admin" \ --request GET \ "http://localhost:8080/openidm/system/ldap/account/2f03e095-ec81-4eb5-9201-a4df2f1f9add" { "_id": "2f03e095-ec81-4eb5-9201-a4df2f1f9add", "telephoneNumber": "555-1234", "aliasList": [], "description": "Felicitas Doe", "uid": "fdoe", "dn": "uid=fdoe,ou=People,dc=example,dc=com", "cn": "fdoe", "givenName": "Felicitas", "employeeType": [], "mail": "fdoe@example.com", "objectClass": [ "top", "inetOrgPerson", "organizationalPerson", "person" ], "sn": "Doe", "kbaInfo": [], "ldapGroups": [] }
4.1.2. Running the Sample by Using the Admin UI
Log in to the Admin UI at the URL
https://localhost:8443/adminas the default administrative user (openidm-admin) with passwordopenidm-admin.Warning
To protect your deployment in production, change the default administrative password. To do so, navigate to the Self-Service UI at
https://localhost:8443/and click Change Password.Click Configure > Mappings.
This tab shows two configured mappings, one from the
ldapserver to the IDM repository (managed/user) and one from the repository to theldapserver.On the first mapping (LDAP to managed user), click Reconcile.
The reconciliation operation creates the two users from the LDAP server in the IDM repository.
Retrieve the users in the repository. Click Manage > User.
You should see two users from the LDAP server, reconciled to the repository.
To retrieve the details of a specific user, click that username in the User List page.
Add a new user in the repository by clicking New User in the User List page.
Complete the user details and click Save.
By default, implicit synchronization is enabled for mappings from the
managed/userrepository to any external resource. This means that when you update a managed object, any mappings defined in thesync.jsonfile that have the managed object as the source are automatically executed to update the target system. For more information, see "Mapping Source Objects to Target Objects" in the Integrator's Guide.To test that the implicit synchronization has been successful, select Manage > User and select the record of the new user you created in the previous step.
Select the Linked Systems tab. The information under this tab includes the external resource to which this user entry is mapped.
Chapter 5. Synchronizing LDAP Groups
This sample demonstrates synchronization between an LDAP directory and an IDM repository, with a focus on synchronizing LDAP group objects (rather than LDAP group membership, demonstrated in "Synchronizing LDAP Group Membership").
The sample has been tested with ForgeRock Directory Services (DS) but should work with any LDAPv3-compliant server. The sample includes mappings from the LDAP server to the IDM repository, and from the IDM repository to the LDAP server. During the reconciliation, user entries and group entries are synchronized.
The LDIF data for this sample is provided in the file
openidm/samples/sync-with-ldap-groups/data/Example.ldif.
Before you start, configure the LDAP server as shown in "LDAP Server Configuration", but import the LDIF file that is specific to this sample during the setup. This file includes a number of LDAP groups, including the following:
dn: ou=Groups,dc=example,dc=com ou: Groups objectClass: organizationalUnit objectClass: top dn: cn=openidm,ou=Groups,dc=example,dc=com uniqueMember: uid=jdoe,ou=People,dc=example,dc=com cn: openidm objectClass: groupOfUniqueNames objectClass: top dn: cn=openidm2,ou=Groups,dc=example,dc=com uniqueMember: uid=bjensen,ou=People,dc=example,dc=com cn: openidm2 objectClass: groupOfUniqueNames objectClass: top
The user with dn uid=jdoe,ou=People,dc=example,dc=com is
also imported with the Example.ldif file.
There is an additional user, bjensen in the sample LDIF
file. This user is essentially a "dummy" user, provided for compliance with
RFC 4519, which stipulates that every groupOfUniqueNames
object must contain at least one uniqueMember.
bjensen is not actually used in this sample.
5.1. Running the Sample
In this section, you will start IDM and reconcile the repository.
The mapping configuration file (sync.json) for this
sample includes three mappings:
systemLdapAccounts_managedUserSynchronizes users from the source LDAP server with the target IDM repository.
managedUser_systemLdapAccountsSynchronizes users from the IDM repository to the LDAP server.
systemLdapGroups_managedGroupSynchronizes groups from the source LDAP server with the target IDM repository.
Due to the similarity with the previous two samples described in this guide,
this sample focuses only on the groups mapping,
systemLdapGroups_managedGroup.
Before you start, prepare IDM as described in "Preparing IDM", then start the server with the configuration for the sample:
$ cd /path/to/openidm $ ./startup.sh -p samples/sync-with-ldap-groups
You can work through the sample using the command line, or using the Admin UI. This section provides instructions for both methods.
5.1.1. Running the Sample by Using the Command Line
Reconcile the group objects over the REST by running the following command:
$ curl \ --header "X-OpenIDM-Username: openidm-admin" \ --header "X-OpenIDM-Password: openidm-admin" \ --request POST \ "http://localhost:8080/openidm/recon?_action=recon&mapping=systemLdapGroups_managedGroup&waitForCompletion=true"
The reconciliation operation returns a reconciliation run ID, and the status of the operation.
The reconciliation creates managed group objects for each group that exists in DS. To list the managed groups, run the following command:
$ curl \ --header "X-OpenIDM-Username: openidm-admin" \ --header "X-OpenIDM-Password: openidm-admin" \ --request GET \ "http://localhost:8080/openidm/managed/group?_queryFilter=true"
The resulting JSON object should include content similar to the following.
{ "result": [ { "_id": "b6c4d7ce-2103-42c2-b5f2-74ca9309ad37", "_rev": "000000001298f6a6", "dn": "cn=Contractors,ou=Groups,dc=example,dc=com", "description": null, "uniqueMember": [], "name": "Contractors" }, { "_id": "2326b9ee-6975-4c19-aa3c-d228afc4ff71", "_rev": "00000000dc6160c8", "dn": "cn=openidm2,ou=Groups,dc=example,dc=com", "description": null, "uniqueMember": [ "uid=bjensen,ou=People,dc=example,dc=com" ], "name": "openidm2" }, { "_id": "035f6444-bce3-4931-96b7-e10b2301fe74", "_rev": "000000004cab60c8", "dn": "cn=Employees,ou=Groups,dc=example,dc=com", "description": null, "uniqueMember": [], "name": "Employees" }, { "_id": "65c8fb86-01e6-4fca-9237-e50c251f4575", "_rev": "0000000050c62938", "dn": "cn=Chat Users,ou=Groups,dc=example,dc=com", "description": null, "uniqueMember": [], "name": "Chat Users" }, { "_id": "5c3e4965-16d7-4a8f-af73-3ab165b66cf9", "_rev": "000000004121fb7e", "dn": "cn=openidm,ou=Groups,dc=example,dc=com", "description": null, "uniqueMember": [ "uid=jdoe,ou=People,dc=example,dc=com" ], "name": "openidm" } ], ... }
5.1.2. Running the Sample by Using the Admin UI
Log in to the Admin UI at the URL
https://localhost:8443/adminas the default administrative user (openidm-admin) with passwordopenidm-admin.Warning
To protect your deployment in production, change the default administrative password. To do so, navigate to the Self-Service UI at
https://localhost:8443/and click Change Password.Click Configure > Mappings.
This page shows three configured mappings, from the
ldapserver user accounts to the IDM repository (managed/user), from the IDM repository back to theldapserver, and from theldapserver group entries to the IDMmanaged/grouprepository.On the third mapping (LDAP groups to managed groups), click Reconcile.
The reconciliation operation creates the two groups from the LDAP server in the IDM repository.
Select Manage > Group to see the five groups from the LDAP server (source) that have been reconciled to the IDM repository (target).
Chapter 6. Synchronizing LDAP Group Membership
This sample demonstrates synchronization between an LDAP directory and an
IDM repository, with a focus on synchronizing LDAP group
membership, that is, how the value of the ldapGroups
property in a managed user object is mapped to the corresponding user object
in LDAP.
The sample has been tested with ForgeRock Directory Services (DS) but should work with any LDAPv3-compliant server. The sample includes mappings from the LDAP server to the IDM repository, and from the IDM repository to the LDAP server. During the reconciliation, memberships are synchronized, in addition to user entries.
The LDIF data for this sample is provided in the file
openidm/samples/sync-with-ldap-group-membership/data/Example.ldif.
Before you start, configure the LDAP server as shown in "LDAP Server Configuration", but import the LDIF file that is specific to this sample during the setup. This file includes a number of LDAP groups, including the following:
dn: ou=Groups,dc=example,dc=com ou: Groups objectClass: organizationalUnit objectClass: top dn: cn=openidm,ou=Groups,dc=example,dc=com uniqueMember: uid=jdoe,ou=People,dc=example,dc=com cn: openidm objectClass: groupOfUniqueNames objectClass: top dn: cn=openidm2,ou=Groups,dc=example,dc=com uniqueMember: uid=bjensen,ou=People,dc=example,dc=com cn: openidm2 objectClass: groupOfUniqueNames objectClass: top
The users with DNs uid=jdoe,ou=People,dc=example,dc=com
and uid=bjensen,ou=People,dc=example,dc=com are also
imported with the Example.ldif file.
6.1. Running the Sample
In this section, you will start IDM and reconcile the repository. Before you start, prepare IDM as described in "Preparing IDM", then start the server with the configuration for the sample:
$ cd /path/to/openidm $ ./startup.sh -p samples/sync-with-ldap-group-membership
You can work through the sample using the command line, or using the Admin UI. This section provides instructions for both methods.
6.1.1. Running the Sample by Using the Command Line
Reconcile the repository over the REST interface by running the following command:
$ curl \ --header "X-OpenIDM-Username: openidm-admin" \ --header "X-OpenIDM-Password: openidm-admin" \ --request POST \ "http://localhost:8080/openidm/recon?_action=recon&mapping=systemLdapAccounts_managedUser&waitForCompletion=true" { "_id": "6652c292-5309-40e5-b272-b74d67dd95c9-4", "state": "SUCCESS" }The reconciliation operation returns a reconciliation run ID and the status of the operation. Reconciliation creates user objects from LDAP in the IDM repository, assigning the new objects random unique IDs.
To retrieve the users from the repository, query their IDs as follows:
$ curl \ --header "X-OpenIDM-Username: openidm-admin" \ --header "X-OpenIDM-Password: openidm-admin" \ --request GET \ "http://localhost:8080/openidm/managed/user?_queryId=query-all-ids" { "result": [ { "_id": "b63fb9a7-99bc-4eb4-8bfd-15f14a756e5b", "_rev": "00000000792afa08" }, { "_id": "8462fe0c-2ab2-459a-a25e-474474889c9e", "_rev": "000000004121fb7e" } ], ... }To retrieve individual user objects, include the ID in the URL. The following request retrieves the user object for John Doe:
$ curl \ --header "X-OpenIDM-Username: openidm-admin" \ --header "X-OpenIDM-Password: openidm-admin" \ --request GET \ "http://localhost:8080/openidm/managed/user/8462fe0c-2ab2-459a-a25e-474474889c9e" { "_id": "8462fe0c-2ab2-459a-a25e-474474889c9e", "_rev": "000000004121fb7e", "displayName": "John Doe", "description": "Created for OpenIDM", "givenName": "John", "mail": "jdoe@example.com", "telephoneNumber": "1-415-599-1100", "sn": "Doe", "userName": "jdoe", "ldapGroups": [ "cn=openidm,ou=Groups,dc=example,dc=com" ], "accountStatus": "active", "effectiveRoles": [], "effectiveAssignments": [] }Note that John Doe's user object contains an
ldapGroupsproperty, the value of which indicates his groups on the LDAP server:"ldapGroups":["cn=openidm,ou=Groups,dc=example,dc=com"]
Update John Doe's
ldapGroupsproperty, to change his membership from theopenidmgroup to theopenidm2group.$ curl \ --header "X-OpenIDM-Username: openidm-admin" \ --header "X-OpenIDM-Password: openidm-admin" \ --header "Content-Type: application/json" \ --request POST \ --data '[ { "operation":"replace", "field":"/ldapGroups", "value": ["cn=openidm2,ou=Groups,dc=example,dc=com"] } ]' \ "http://localhost:8080/openidm/managed/user?_action=patch&_queryId=for-userName&uid=jdoe" { "displayName": "John Doe", "description": "Created for OpenIDM", "givenName": "John", "mail": "jdoe@example.com", "telephoneNumber": "1-415-599-1100", "sn": "Doe", "userName": "jdoe", "accountStatus": "active", "effectiveRoles": [], "effectiveAssignments": [], "_id": "8462fe0c-2ab2-459a-a25e-474474889c9e", "_rev": "0000000050c62938", "ldapGroups": [ "cn=openidm2,ou=Groups,dc=example,dc=com" ] }This command changes John Doe's
ldapGroupsproperty in the IDM repository, from"cn=openidm,ou=Groups,dc=example,dc=com"to"cn=openidm2,ou=Groups,dc=example,dc=com". As a result of implicit synchronization, the change is propagated to the LDAP server. John Doe is removed from the first LDAP group and added to the second LDAP group in DS.You can verify this change by querying John Doe's record on the LDAP server, as follows:
$ curl \ --header "X-OpenIDM-Username: openidm-admin" \ --header "X-OpenIDM-Password: openidm-admin" \ --request GET \ "http://localhost:8080/openidm/system/ldap/account/?_queryFilter=uid+eq+'jdoe'" { "result": [ { "_id": "0da50512-79bb-3461-bd04-241ee4c785bf", "sn": "Doe", "description": "Created for OpenIDM", "dn": "uid=jdoe,ou=People,dc=example,dc=com", "ldapGroups": [ "cn=openidm2,ou=Groups,dc=example,dc=com" ], "cn": "John Doe", "aliasList": [], "givenName": "John", "kbaInfo": [], "objectClass": [ "top", "inetOrgPerson", "organizationalPerson", "person" ], "mail": "jdoe@example.com", "uid": "jdoe", "employeeType": [], "telephoneNumber": "1-415-599-1100" } ], ... }
6.1.2. Running the Sample by Using the Admin UI
Log in to the Admin UI at the URL
https://localhost:8443/adminas the default administrative user (openidm-admin) with passwordopenidm-admin.Warning
To protect your deployment in production, change the default administrative password. To do so, navigate to the Self-Service UI at
https://localhost:8443/and click Change Password.Click Configure > Mappings.
This window shows two configured mappings, one from the LDAP server to the IDM repository (
managed/user) and one from the IDM repository to the LDAP server.On the first mapping (LDAP to managed user), click Reconcile.
The reconciliation operation creates the two users from the LDAP server in the IDM repository.
Select Manage > User. Examine the users reconciled from the LDAP server to the internal repository.
To retrieve the details of a specific user, click that username. In this case, click on user
jdoeand examine the information stored for this user.Select the Linked Systems tab.
The Linked Resource item indicates the external resource to which John Doe's managed object is mapped, in this case,
ldap/account.In this linked resource, John Doe's
ldapGroupsare displayed. Currently, John Doe is a member ofcn=openidm,ou=Groups,dc=example,dc=com.Update John Doe's
ldapGroupsproperty to change his membership from theopenidmgroup to theopenidm2group. Currently, you can only do this over the REST interface, as follows:$ curl \ --header "X-OpenIDM-Username: openidm-admin" \ --header "X-OpenIDM-Password: openidm-admin" \ --header "Content-Type: application/json" \ --request POST \ --data '[ { "operation":"replace", "field":"/ldapGroups", "value": ["cn=openidm2,ou=Groups,dc=example,dc=com"] } ]' \ "http://localhost:8080/openidm/managed/user?_action=patch&_queryId=for-userName&uid=jdoe" { "displayName": "John Doe", "description": "Created for OpenIDM", "givenName": "John", "mail": "jdoe@example.com", "telephoneNumber": "1-415-599-1100", "sn": "Doe", "userName": "jdoe", "accountStatus": "active", "effectiveRoles": [], "effectiveAssignments": [], "_id": "8462fe0c-2ab2-459a-a25e-474474889c9e", "_rev": "0000000050c62938", "ldapGroups": [ "cn=openidm2,ou=Groups,dc=example,dc=com" ] }This command changes John Doe's
ldapGroupsproperty in the IDM repository, from"cn=openidm,ou=Groups,dc=example,dc=com"to"cn=openidm2,ou=Groups,dc=example,dc=com". As a result of implicit synchronization, the change is propagated to the LDAP server. John Doe is removed from the first LDAP group and added to the second LDAP group in DS.You can verify this change by reloading John Doe's user information, selecting Linked Systems, and examining the value of his
ldapGroupsproperty.
Chapter 7. Synchronizing Data Between Two External Resources
This sample demonstrates synchronization between two external resources, routed through the IDM repository.
The resources are named LDAP and AD and
represent two separate LDAP directories. In the sample both resources are
simulated with simple CSV files.
The sample also demonstrates the (optional) configuration of an outbound email service. You can set up outbound email if you want to receive emailed reconciliation summaries.
7.1. Configuring Email for the Sample
If you do not configure the email service, the functionality of the sample does not change. However, you might see the following message in the OSGi console when you run a reconciliation operation:
Email service not configured; report not generated.
To configure IDM to send a reconciliation summary by email, follow these steps:
Copy the
external.email.jsonfile from thesamples/example-configurations/conf/directory to theconf/directory of this sample:$ cd /path/to/openidm $ cp samples/example-configurations/conf/external.email.json samples/sync-two-external-resources/confEdit the
external.email.jsonfile for outbound email, as described in "To Set Up Outbound Email" in the Integrator's Guide.In the
samples/sync-two-external-resources/scriptdirectory, edit thereconStats.jsscript to reflect the correct email details.Near the start of the file, locate the
var emailvariable and update the values as required:var email = { //UPDATE THESE VALUES from : "openidm@example.com", to : "youremail@example.com", cc : "idmadmin2@example.com,idmadmin3@example.com", subject : "Recon stats for " + global.mappingName, type : "text/html" }, template, ...
7.2. Running the Sample
No external configuration is required for this sample. Before you start, prepare IDM as described in "Preparing IDM".
Start the server with the configuration of this sample:
$ cd /path/to/openidm $ ./startup.sh -p samples/sync-two-external-resourcesExamine the data files.
The CSV files that simulate the two LDAP resources are located in the
openidm/samples/sync-two-external-resources/data/directory. Look at the contents of these files. Initially, thecsvConnectorLDAPData.csvfile contains one user and thecsvConnectorADData.csvfile contains no users.Run a reconciliation operation to synchronize the contents of the simulated LDAP resource with the IDM repository.
You can run the reconciliation in the Admin UI (Configure > Mappings, click
systemLdapAccounts_managedUser, then click Reconcile) or over the command-line as follows:$ curl \ --header "X-OpenIDM-Username: openidm-admin" \ --header "X-OpenIDM-Password: openidm-admin" \ --request POST \ "http://localhost:8080/openidm/recon?_action=recon&mapping=systemLdapAccounts_managedUser&waitForCompletion=true"
The reconciliation creates a managed user in the IDM repository. You do not need to run a second reconciliation to synchronize the AD resource. Implicit synchronization propagates any change made to managed users in the repository to the simulated AD resource.
For more information about implicit synchronization, see "Types of Synchronization" in the Integrator's Guide.
Review the contents of the simulated AD resource (
csvConnectorADData.csv):$ more openidm/samples/sync-two-external-resources/data/csvConnectorADData.csv "uid", "username", "password", "firstname", "description", "email", "lastname" "1", , "initial_Passw0rd","Barbara", , "bjensen@example.com","Jensen"
This file should now contain the same user that was present in the
csvConnectorLDAPData.csvfile.Alternatively, you can list users in the AD resource with the following command:
$ curl \ --header "X-OpenIDM-Username: openidm-admin" \ --header "X-OpenIDM-Password: openidm-admin" \ --request GET \ "http://localhost:8080/openidm/system/ad/account?_queryId=query-all-ids" { "result": [ { "_id": "1", "name": "1" } ], ... }Use the
_idof the user to read the complete user record from the AD resource:$ curl \ --header "X-OpenIDM-Username: openidm-admin" \ --header "X-OpenIDM-Password: openidm-admin" \ --request GET \ "http://localhost:8080/openidm/system/ad/account/1" { "_id": "1", "firstname": "Barbara", "lastname": "Jensen", "email": [ "bjensen@example.com" ], "name": "1" }To verify that the sample is working, repeat the process.
Set up a second user in the
csvConnectorLDAPData.csvfile. The following example shows how that file might appear with a second user (scarter):"uid","username","password", "firstname","description", "email", "lastname" "1", "bjensen", "TestPassw0rd2","Barbara", "Created By CSV","bjensen@example.com","Jensen" "2", "scarter", "Passw0rd", "Steve", "Created By CSV","scarter@example.com","Carter"
Rerun the reconciliation and query REST commands shown previously.
The reconciliation operation creates the new user from the simulated LDAP resource in the IDM repository. An implicit synchronization operation then creates that user in the AD resource.
If you configured the reconciliation email summary at the beginning of this sample, you should have received an email that lists the details of the reconciliation operations.
Chapter 8. Asynchronous Reconciliation Using a Workflow
This sample demonstrates asynchronous reconciliation using workflows.
The data for this sample is in the file
samples/sync-asynchronous/data/csvConnectorData.csv. That
file contains two users, as follows:
"description", "uid", "username", "firstname", "lastname", "email", "mobile..." "Created ...", "bjensen", "bjensen@example.com", "Barbara", "Jensen", "bjensen@example.com", 1234..." "Created ...", "scarter", "scarter@example.com", "Steven", "Carter", "scarter@example.com", 1234..."
During the sample, you will reconcile the users in the CSV file with the
managed user repository. Instead of creating each user immediately, the
reconciliation operation generates an approval request for each ABSENT user
(users who are not found in the repository). The configuration for this action
is defined in the conf/sync.json file, which specifies
that an ABSENT condition should launch the
managedUserApproval workflow:
...
{
"situation" : "ABSENT",
"action" : {
"workflowName" : "managedUserApproval",
"type" : "text/javascript",
"file" : "workflow/triggerWorkflowFromSync.js"
}
},
... When each request is approved by an administrator, an asynchronous reconciliation operation is launched, that ultimately creates the users in the repository.
8.1. Running the Sample
Before you start, prepare IDM as described in "Preparing IDM".
Start IDM with the configuration for this sample:
$ cd /path/to/openidm $ ./startup.sh -p samples/sync-asynchronous
The sample is configured to assign new workflow tasks to an admin account named
async.admin. You will need to create this account:$ curl \ --header "X-OpenIDM-Username: openidm-admin" \ --header "X-OpenIDM-Password: openidm-admin" \ --header "Content-Type: application/json" \ --request POST \ --data '{ "userName": "async.admin", "givenName": "async", "sn" : "admin", "password" : "Passw0rd", "displayName" : "async admin", "mail" : "async.admin@example.com", "authzRoles": [ {"_ref": "repo/internal/role/openidm-admin"}, {"_ref": "repo/internal/role/openidm-authorized"} ], "_id" : "asyncadmin" }' \ "http://localhost:8080/openidm/managed/user?_action=create" { "_id":"asyncadmin", "_rev":"00000000e8f502db", "userName":"async.admin", "givenName":"async", "sn":"admin", "displayName":"async admin", "mail":"async.admin@example.com", "accountStatus":"active", "effectiveRoles":[], "effectiveAssignments":[] }Run reconciliation over the REST interface:
$ curl \ --header "X-OpenIDM-Username: openidm-admin" \ --header "X-OpenIDM-Password: openidm-admin" \ --request POST \ "http://localhost:8080/openidm/recon?_action=recon&mapping=systemCsvfileAccounts_managedUser" { "_id": "98d7f3c5-684e-4ef0-b4f9-f2e816a339cf-32", "state": "ACTIVE" }The reconciliation operation returns a reconciliation run ID, and the status of the operation.
This reconciliation launches a workflow that generates an approval process for each ABSENT user. The approval processes must be approved by an administrator before the workflow can continue.
Review the approval tasks launched by the reconciliation.
To review the tasks in the Admin UI, log into the Admin UI at
https://localhost:8443/admin/using an administrator account (eitheropenidm-adminorasync.adminwill work) and select Manage > Tasks.You should see two task instances launched by the Managed User Approval Workflow.
To view the approval tasks over REST run the following command:
$ curl \ --header "X-OpenIDM-Username: openidm-admin" \ --header "X-OpenIDM-Password: openidm-admin" \ --request GET \ "http://localhost:8080/openidm/workflow/taskinstance?_queryId=query-all-ids"
The request returns two task instances, each with a process ID (
_id) and a process definition ID.{ "result": [ { "_id": "33", "_rev": "1", "activityInstanceVariables": {}, "cachedElContext": null, "category": null, "createTime": "2018-01-22T13:10:15.538Z", "delegationState": null, "delegationStateString": null, "deleted": false, "description": null, "dueDate": null, "eventName": null, "executionId": "5", "name": "Evaluate request", "owner": null, "parentTaskId": null, "priority": 50, "processDefinitionId": "managedUserApproval:1:4", "processInstanceId": "5", "processVariables": {}, "queryVariables": null, "revisionNext": 2, "suspended": false, "suspensionState": 1, "taskDefinitionKey": "evaluateRequest", "taskLocalVariables": {}, "tenantId": "", "assignee": "async.admin" }, { "_id": "34", "_rev": "1", "activityInstanceVariables": {}, "cachedElContext": null, "category": null, "createTime": "2018-01-22T13:10:15.538Z", "delegationState": null, "delegationStateString": null, "deleted": false, "description": null, "dueDate": null, "eventName": null, "executionId": "6", "name": "Evaluate request", "owner": null, "parentTaskId": null, "priority": 50, "processDefinitionId": "managedUserApproval:1:4", "processInstanceId": "6", "processVariables": {}, "queryVariables": null, "revisionNext": 2, "suspended": false, "suspensionState": 1, "taskDefinitionKey": "evaluateRequest", "taskLocalVariables": {}, "tenantId": "", "assignee": "async.admin" } ], ... }
Complete each approval task.
To complete the approval tasks using the UI, log into the Self-Service UI at
https://localhost:8443/#login/as userasync.adminwith passwordPassw0rd.You should see two Evaluate request tasks under My Tasks on the Dashboard.
For each task, click Details, select Yes, and click Complete.
Alternatively, approve the requests over REST, by setting
requestApprovedtotruefor each task instance, and using thecompleteaction. Specify the_idof each task in the URL.For example, to approve the first request:
$ curl \ --header "X-OpenIDM-Username: async.admin" \ --header "X-OpenIDM-Password: Passw0rd" \ --header "Content-Type: application/json" \ --request POST \ --data '{"requestApproved": "true"}' \ "http://localhost:8080/openidm/workflow/taskinstance/33?_action=complete" { "Task action performed": "complete" }Repeat this command for each task ID.
When the requests have been approved, select Manage > User in the Admin UI to see the new users in the repository, or query the managed users over REST as follows:
$ curl \ --header "X-OpenIDM-Username: openidm-admin" \ --header "X-OpenIDM-Password: openidm-admin" \ --request GET \ "http://localhost:8080/openidm/managed/user?_queryId=query-all-ids" { "result": [ { "_id": "asyncadmin", "_rev": "00000000e8f502db" }, { "_id": "scarter", "_rev": "000000007e120780" }, { "_id": "bjensen", "_rev": "00000000d9390751" } ], ... }
Chapter 9. LiveSync With an LDAP Server
This sample resembles the sample described in "Synchronizing Data Between Two External Resources". However, this sample demonstrates liveSync from one external LDAP resource to another. LiveSync is the mechanism by which changes are pushed from an external resource to IDM and then, optionally, to another external resource. For more information see "Types of Synchronization" in the Integrator's Guide.
The sample assumes a scenario where changes in an Active Directory server are synchronized, using LiveSync, with a ForgeRock Directory Services (DS) server.
The sample provides a configuration for two scenarios, depending on whether
you are using a live Active Directory (AD) service, or whether you are
simulating the AD service with a DS server. Each scenario is
associated with a file in the livesync-with-ad/alternatives
directory. Depending on your scenario, copy the corresponding file to the
livesync-with-ad/conf directory:
- Live AD Instance
If you have an AD instance to test with, use that AD instance as the first LDAP resource. For the second LDAP resource, configure DS as described in "Setting Up the LDAP Resources". The data for the DS instance is contained in the file
samples/livesync-with-ad/data/Example.ldif.For the connection to Active Directory, copy the
provisioner.openicf-realad.jsonfile to theconf/subdirectory and rename itprovisioner.openicf-ad.json.Because this sample demonstrates synchronization from the AD server to DS, data on the AD server is not changed.
- Simulated AD Instance
If you are simulating the AD instance with a DS server, copy the
provisioner.openicf-fakead.jsonfile to theconf/subdirectory and rename itprovisioner.openicf-ad.json.This sample simulates an AD server on the same instance of DS, using a different base DN (
dc=fakead,dc=com). You can also simulate the AD server with a separate DS instance, running on the same host, as long as the two instances communicate on different ports. The data for the simulated AD instance is contained in the filesamples/livesync-with-ad/data/AD.ldif. The data for the DS instance is contained in the filesamples/livesync-with-ad/data/Example.ldif.
9.1. Setting Up the LDAP Resources
Whether you use a simulated Active Directory server, or a live Active Directory server, you must still set up a DS instance as the second LDAP resource. The following section describes that setup.
9.1.1. Preparing DS
To use DS as the LDAP resource that simulates AD, you must set up DS for liveSync. The easiest way to do this is to configure the DS server for replication. A replicated DS instance includes an External Change Log (ECL) that publishes the changes for liveSync.
Follow these steps to install and configure a DS instance for liveSync:
Download DS from ForgeRock's BackStage site and extract the zip archive.
Set up DS and import the data file for this sample, as follows:
$ cd /path/to/opendj $ ./setup \ directory-server \ --hostname localhost \ --ldapPort 1389 \ --rootUserDN "cn=Directory Manager" \ --rootUserPassword password \ --adminConnectorPort 4444 \ --baseDN dc=com \ --ldifFile /path/to/openidm/samples/livesync-with-ad/data/Example.ldif \ --acceptLicense Validating parameters .....Done. Configuring Certificates .....Done. Configuring server .....Done. Importing data from /path/to/openidm/samples/livesync-with-ad/data/Example.ldif ........Done. Starting Directory Server ............Done. To see basic server status and configuration, you can launch /path/to/opendj/bin/status
The sample assumes the following configuration:
The DS server is installed on the localhost.
The server listens for LDAP connections on port 1389.
The administration connector port is 4444.
The root user DN is
cn=Directory Manager.The root user password is
password.
Configure the DS directory server as a replication server.
To enable liveSync, this server must be configured for replication, even if it does not actually participate in a replication topology. The following commands configure the server for replication.
$ cd /path/to/opendj/bin $ ./dsconfig create-replication-server \ --hostname localhost \ --port 4444 \ --bindDN "cn=Directory Manager" \ --bindPassword password \ --provider-name "Multimaster Synchronization" \ --set replication-port:8989 \ --set replication-server-id:2 \ --trustAll \ --no-prompt $ ./dsconfig create-replication-domain \ --hostname localhost \ --port 4444 \ --bindDN "cn=Directory Manager" \ --bindPassword password \ --provider-name "Multimaster Synchronization" \ --domain-name "fakead.com" \ --set base-dn:dc=fakead,dc=com \ --set replication-server:localhost:8989 \ --set server-id:3 \ --trustAll \ --no-prompt
When DS is configured, you can proceed with either a live or simulated AD instance.
9.1.2. Configuring the Connection to a Live AD Instance
To configure the connection to a live AD instance, open the connector
configuration file (provisioner.openicf-ad.json) in a
text editor. Update the file as required to reflect your AD instance. At a
minimum, check and update the following parameters:
hostThe hostname or IP address of the AD server
portThe LDAP port; 389 by default.
sslWhether the connection to the AD instance is secured over SSL; false by default.
principalThe full DN of the account that is used to bind to the server, for example, "CN=Administrator,CN=Users,DC=example,DC=com"
credentialsIf a password is used, replace null with that password. When IDM starts, it encrypts that password in the
provisioner.openicf-ad.conffile.baseContextsA list of DNs for account containers, for example, "CN=Users,DC=Example,DC=com"
baseContextsToSynchronizeSet to the same value as
baseContextsaccountSearchFilterThe LDAP search filter to locate accounts; only user accounts by default
accountSynchronizationFilterThe LDAP search filter to synchronize user accounts; only user accounts by default
If you do not want to filter out computer and disabled user accounts,
set the accountSearchFilter and
accountSynchronizationFilter to null.
9.1.3. Configuring the Connection to a Simulated AD Instance
If you do not have a testable instance of AD available, you can use the
AD.ldif file from the data/
subdirectory to simulate an AD instance in a separate suffix on the
existing DS instance.
If you have not already done so, copy the
provisioner.openicf-fakead.json file to the
conf subdirectory and rename it
provisioner.openicf-ad.json.
As previously mentioned, you can use a separate DS instance to simulate the AD server. However, the following instructions assume that the simulated AD server runs on the same DS instance.
Open the provisioner.openicf-ad.json file and
note the following:
DS directory server uses port 1389 by default for users who cannot use privileged ports, so this is the port that is specified in the provisioner file. Adjust the port if your DS server is listening on a different port.
The simulated AD server uses the base DN
dc=fakead,dc=com.
To load the data for the simulated AD instance, run the following command:
$ cd /path/to/opendj/bin $ ./ldapmodify \ --bindDN "cn=Directory Manager" \ --bindPassword password \ --hostname localhost \ --port 1389 \ --filename /path/to/openidm/samples/livesync-with-ad/data/AD.ldif # Processing ADD request for dc=fakead,dc=com # ADD operation successful for DN dc=fakead,dc=com # Processing ADD request for ou=People,dc=fakead,dc=com # ADD operation successful for DN ou=People,dc=fakead,dc=com # Processing ADD request for uid=bobf,ou=People,dc=fakead,dc=com # ADD operation successful for DN uid=bobf,ou=People,dc=fakead,dc=com # Processing ADD request for uid=stony,ou=People,dc=fakead,dc=com # ADD operation successful for DN uid=stony,ou=People,dc=fakead,dc=com
9.2. Running the Sample
Now that DS and a real or simulated AD server is configured, prepare IDM as described in "Preparing IDM". Then start IDM with the configuration for this sample.
$ cd /path/to/openidm $ ./startup.sh -p samples/livesync-with-ad
The following sections show how to synchronize the two external LDAP data stores by running a reconciliation operation, how to configure scheduled liveSync.
9.2.1. Reconciling the Two LDAP Data Stores
Review the entries in the DS server (imported from the
Example.ldif file). When you run reconciliation, any
entries that share the same uid with the AD data store
will be updated with the contents from AD.
If you have set up the simulated AD data store as described in
"Configuring the Connection to a Simulated AD Instance", compare the
entries in the AD.ldif and
Example.ldif files. Note that each file has two
different users (implying that the AD instance has users bobf and stony,
and the DS instance has users jdoe and bjensen.
Run reconciliation over the REST interface:
$ curl \ --header "X-OpenIDM-Username: openidm-admin" \ --header "X-OpenIDM-Password: openidm-admin" \ --request POST \ "http://localhost:8080/openidm/recon?_action=recon&mapping=systemAdAccounts_managedUser&waitForCompletion=true"
The reconciliation operation returns a reconciliation run ID, and the status of the operation.
{
"state": "SUCCESS",
"_id": "985ee939-fbe1-4607-a757-00b404b4ef77"
}The reconciliation operation synchronizes the data in the AD server with the IDM repository (managed/user). That information is then automatically synchronized to the DS server, as described in "Synchronization Situations and Actions" in the Integrator's Guide.
After reconciliation, list all users in the DS server:
$ curl \ --header "X-OpenIDM-Username: openidm-admin" \ --header "X-OpenIDM-Password: openidm-admin" \ --request GET \ "http://localhost:8080/openidm/system/ldap/account?_queryId=query-all-ids"
The result should resemble the following JSON object.
{
"result": [
{
"_id": "0da50512-79bb-3461-bd04-241ee4c785bf",
"dn": "uid=jdoe,ou=People,dc=example,dc=com"
},
{
"_id": "887732e8-3db2-31bb-b329-20cd6fcecc05",
"dn": "uid=bjensen,ou=People,dc=example,dc=com"
},
{
"_id": "9fba6f59-98c7-4791-a0c7-11e9401c983e",
"dn": "uid=bobf,ou=People,dc=example,dc=com"
},
{
"_id": "cefc89a4-c979-4769-8957-5d912a6447ad",
"dn": "uid=stony,ou=People,dc=example,dc=com"
}
],
"resultCount": 4,
"pagedResultsCookie": null,
"totalPagedResultsPolicy": "NONE",
"totalPagedResults": -1,
"remainingPagedResults": -1
}Note that the two users from the AD server have been added to the DS server.
9.2.2. Configuring LiveSync
You can launch a liveSync operation over REST, but liveSync requires a
configured schedule to poll for changes. When this sample's default liveSync
schedule (schedule-activeSynchroniser_systemAdAccount.json)
is enabled, a liveSync operation is launched every 15 seconds.
LiveSync pushes changes made in the AD data store to the IDM repository automatically.
The liveSync schedule is disabled by default. To activate liveSync, change
the value of the enabled property from
false to true:
{
"enabled" : true,
"type" : "simple",
"repeatInterval" : 15000,
"persisted" : true,
"concurrentExecution" : false,
"invokeService" : "provisioner",
"invokeContext" : {
"action" : "liveSync",
"source" : "system/ad/account"
},
"invokeLogLevel" : "debug"
}To test liveSync, create an LDIF file with a new user entry (
uid=bsmith) that will be added to the simulated AD data store.The following is the contents of a sample LDIF file (
bsmith.ldif) for demonstration purposes:dn: uid=bsmith,ou=People,dc=fakead,dc=com objectClass: person objectClass: inetOrgPerson objectClass: organizationalPerson objectClass: top givenName: Barry description: Created to see liveSync work uid: bsmith cn: Barry sn: Smith mail: bsmith@example.com telephoneNumber: 1-415-523-0772 userPassword: passw0rd
Use the ldapmodify command to add the new user to the AD data store:
$ cd /path/to/opendj/bin $ ./ldapmodify \ --port 1389 \ --bindDN "cn=Directory Manager" \ --bindPassword password \ --filename /path/to/bsmith.ldif
Within 15 seconds, liveSync should create the user in the IDM repository.
Test that the liveSync has worked by viewing the new user in IDM.
The easiest way to do this, is through the Self-Service UI. You should be able to log in to the Self-Service UI (at
https://localhost:8443/) as any of the user accounts in the AD data store.For this example, log in to the UI as user
bsmith, with passwordpassw0rd. The fact that you can log into the UI as this new user indicates that liveSync has synchronized the user from the AD data store to the managed/user repository.Implicit synchronization pushes this change out to the DS server. To test this synchronization operation, search the DS baseDN for the new user entry.
$ ./ldapsearch \ --port 1389 \ --baseDN ou=people,dc=example,dc=com \ "(uid=bsmith)"
Chapter 10. Synchronizing Accounts With the Google Apps Connector
OpenICF provides a Google Apps Connector that enables you to interact with Google's web applications.
This sample shows how to create users and groups on an external Google system how to synchronize those accounts with the IDM managed user repository. The sample requires that you have a Google Apps account. Obtaining a Google Apps account is described in the Google documentation.
10.1. Before You Start
To set up IDM to connect to your Google Apps account, you must have a Google Apps project (or create a new project) that authorizes consent for IDM.
Log in to the Google Apps Developers Console (at https://console.developers.google.com/start) and update your project or create a new project for IDM.
Enable the following APIs for your IDM project:
Admin SDK API
Enterprise License Manager API
Set up an OAuth2 Client ID.
The Google Apps connector uses OAuth2 to authorize the connection to the Google service. Set up an OAuth2 Client ID as follows:
In the Google Apps Developers Console, select Credentials > New Credentials > OAuth Client ID.
Click Configure Consent Screen and enter a Product Name.
This is the name that will be shown for all applications registered in this project.
For the purposes of this example, we use the Product Name
OpenIDM.Click Save.
Select Credentials > OAuth Client ID > Web application.
Under Authorized redirect URIs, enter the callback URL (the URL at which your clients will access your application). The default IDM callback URL is
https://localhost:8443/admin/oauth.html. Click Create to set up the callback URL.Click Create again to set up the client ID.
This step generates an OAuth Client ID and Client, similar to the following:
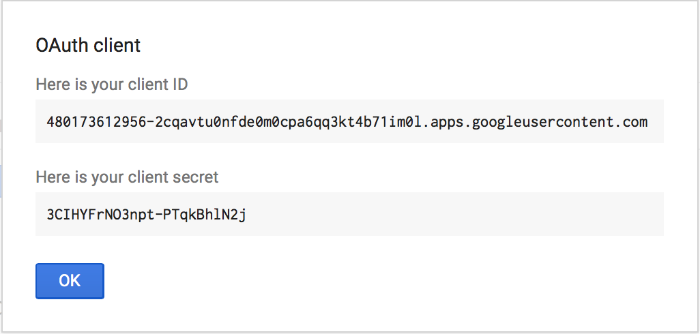
Copy and paste these values into a text file as you will need them when you configure the Google Apps connector.
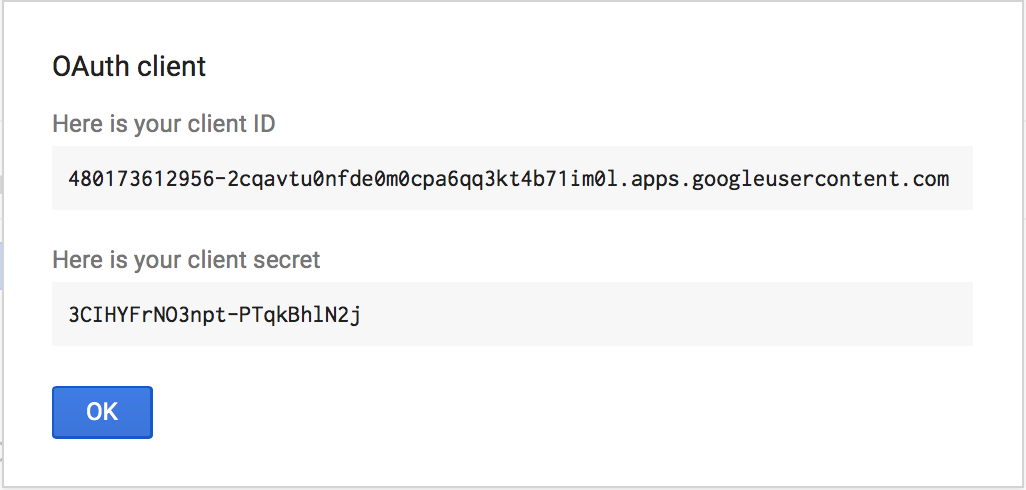
10.2. Configuring the Google Apps Connector
This procedure uses the Admin UI to set up the Google Apps connector.
To configure the connector, start IDM with the Google Apps sample configuration:
$ cd /path/to/openidm $ ./startup.sh -p samples/sync-with-google Executing ./startup.sh... Using OPENIDM_HOME: /path/to/openidm Using PROJECT_HOME: /path/to/openidm/samples/sync-with-google/ Using OPENIDM_OPTS: -Xmx1024m -Xms1024m Using LOGGING_CONFIG: -Djava.util.logging.config.file=/path/to/openidm/conf/logging.properties Using boot properties at /path/to/openidm/resolver/boot.properties -> OpenIDM ready
Log in to the Admin UI at the URL
https://localhost:8443/adminas the default administrative user (openidm-admin) with passwordopenidm-admin.This URL reflects the host on which IDM is installed and corresponds to the callback URL that you specified in the previous section. The URL must be included in the list of Authorized redirect URIs for your project.
Select Configure > Connectors and click on the Google Apps connector.
On the Details tab, set the Enabled field to True.
Enter the Oauth2 Client ID and Client Secret that you obtained in the previous section.
Click Save Connector Changes.
You are redirected to Google's Login page.
When you have logged in, Google requests that you allow access from your project, in this case, IDM.
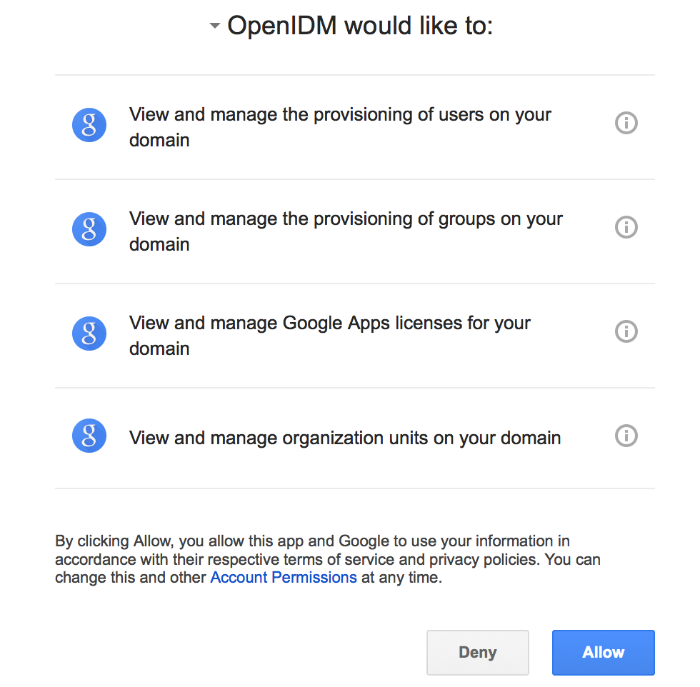
Click Allow.
If you click Deny here, you will need to return to the Connector Configuration > Details tab in the Admin UI and save your changes again.
When you allow access, you are redirected to the Connectors page in the Admin UI, where the Google Apps Connector should now be Active.
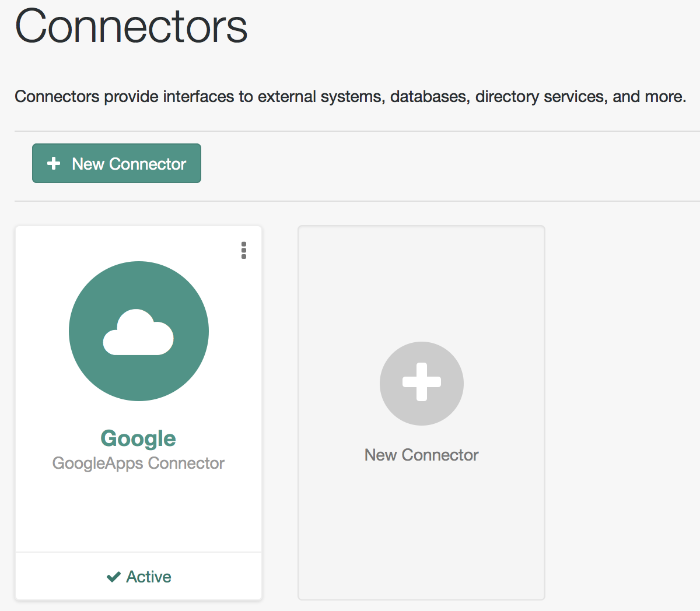

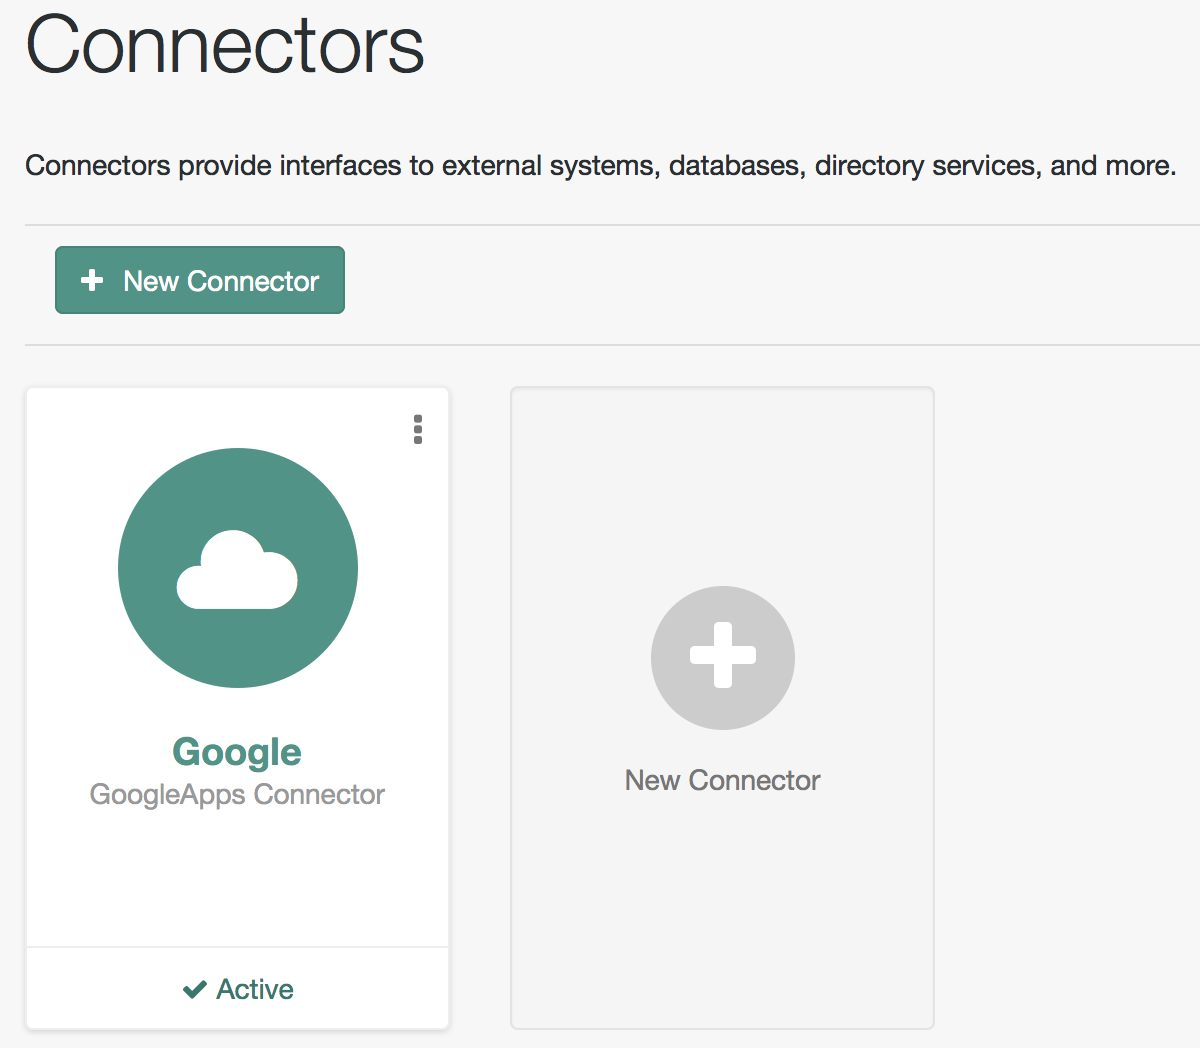
10.3. Running the Synchronization With Google Sample
This procedure uses create, read, update, and delete (CRUD) operations on the Google resource, to verify that the connector is working as expected. The procedure uses a combination of REST commands, to manage objects on the Google system, and the Admin UI, to reconcile users from the Google system to the manage user repository.
The sample configuration has one mapping from the Google system to the managed user repository.
All of the commands shown here assume that your domain is
example.com. Adjust the examples to manage your domain.
Create a user entry on your Google resource, over REST.
When you create resources for Google, note that the equals (
=) character cannot be used in any attribute value.The following command creates an entry for user
Sam Carter:$ curl \ --header "X-OpenIDM-Username: openidm-admin" \ --header "X-OpenIDM-Password: openidm-admin" \ --header "Content-Type: application/json" \ --request POST \ --data '{ "__NAME__": "samcarter@example.com", "__PASSWORD__" : "password", "givenName" : "Sam", "familyName": "Carter", "agreedToTerms": true, "changePasswordAtNextLogin" : false }' \ "http://localhost:8080/openidm/system/google/__ACCOUNT__?_action=create" { "_id": "103567435255251233551", "_rev": "\"iwpzoDgSq9BJw-XzORg0bILYPVc/LWHPMXXG8M0cjQAPITM95Y636cM\"", "orgUnitPath": "/", "isAdmin": false, "fullName": "Sam Carter", "customerId": "C02rsqddz", "relations": null, "nonEditableAliases": null, "suspensionReason": null, "includeInGlobalAddressList": true, "givenName": "Sam", "addresses": null, "isDelegatedAdmin": false, "changePasswordAtNextLogin": false, "isMailboxSetup": true, "__NAME__": "samcarter@example.com", "agreedToTerms": true, "externalIds": null, "ipWhitelisted": false, "aliases": null, "lastLoginTime": [ "1970-01-01T00:00:00.000Z" ], "organizations": null, "suspended": false, "deletionTime": null, "familyName": "Carter", "ims": null, "creationTime": [ "2016-02-02T12:52:30.000Z" ], "thumbnailPhotoUrl": null, "emails": [ { "address": "samcarter@example.com", "primary": true } ], "phones": null }Note the ID of the new user (
103567435255251233551in this example). You will need this ID for the update commands in this section.Reconcile the Google resource with the managed user repository.
This step should create the new user, Sam Carter (and any other users in your Google resource) in the managed user repository.
To run reconciliation follow these steps:
In the Admin UI, select Configure > Mappings.
Click on the sourceGoogle__ACCOUNT___managedUser mapping, and click Reconcile.
Select Manage > User and verify that the user Sam Carter has been created in the repository.
Update Sam Carter's phone number in your Google resource by sending a PUT request with the updated data, and specifying the user
_idin the request:$ curl \ --header "X-OpenIDM-Username: openidm-admin" \ --header "X-OpenIDM-Password: openidm-admin" \ --header "Content-Type: application/json" \ --request PUT \ --header "If-Match : *" \ --data '{ "__NAME__": "samcarter@example.com", "__PASSWORD__" : "password", "givenName" : "Sam", "familyName": "Carter", "agreedToTerms": true, "changePasswordAtNextLogin" : false, "phones" : [ { "value": "1234567890", "type": "home" }, { "value": "0987654321", "type":"work" } ] }' \ "http://localhost:8080/openidm/system/google/__ACCOUNT__/103567435255251233551" { "_id": "103567435255251233551", "_rev": "\"iwpzoDgSq9BJw-XzORg0bILYPVc/vfSJgHt-STUUto4lM_4ESO9izR4\"", ... "emails": [ { "address": "samcarter@example.com", "primary": true } ], "phones": [ { "value": "1234567890", "type": "home" }, { "value": "0987654321", "type": "work" } ] }Read Sam Carter's entry from your Google resource by including his
_idin the URL:$ curl \ --header "X-OpenIDM-Username: openidm-admin" \ --header "X-OpenIDM-Password: openidm-admin" \ --request GET \ "http://localhost:8080/openidm/system/google/__ACCOUNT__/103567435255251233551" { "_id": "103567435255251233551", "__NAME__": "samcarter@example.com", ... "phones": [ { "value": "1234567890", "type": "home" }, { "value": "0987654321", "type": "work" } ] }Create a group entry on your Google resource:
$ curl \ --header "X-OpenIDM-Username: openidm-admin" \ --header "X-OpenIDM-Password: openidm-admin" \ --header "Content-Type: application/json" \ --request POST \ --data '{ "__NAME__": "testGroup@example.com", "__DESCRIPTION__": "Group used for google-connector sample.", "name": "TestGroup" }' \ "http://localhost:8080/openidm/system/google/__GROUP__?_action=create" { "_id": "00meukdy40gpg98", "_rev": "\"iwpzoDgSq9BJw-XzORg0bILYPVc/LLhHx2plMJPKeY1-h6eX_OVDi4c\"", "adminCreated": true, "__NAME__": "testgroup@example.com", "aliases": null, "nonEditableAliases": null, "__DESCRIPTION__": "Group used for google-connector sample.", "name": "TestGroup", "directMembersCount": 0 }Add Sam Carter to the test group you have just created. Include the
Memberendpoint, and Sam Carter's_idin the URL. Specify the_idof the group you created as the value of thegroupKeyin the JSON payload:$ curl \ --header "X-OpenIDM-Username: openidm-admin" \ --header "X-OpenIDM-Password: openidm-admin" \ --header "Content-Type: application/json" \ --request PUT \ --data '{ "groupKey" : "00meukdy40gpg98", "role": "MEMBER", "__NAME__": "samcarter@example.com", "email": "samcarter@example.com", "type": "MEMBER" }' \ "http://localhost:8080/openidm/system/google/Member/103567435255251233551" { "_id": "00meukdy40gpg98/samcarter@example.com", "_rev": "\"iwpzoDgSq9BJw-XzORg0bILYPVc/CPNpkRnowkGWRvNQvUK9ev6gQ90\"", "__NAME__": "00meukdy40gpg98/samcarter@example.com", "role": "MEMBER", "email": "samcarter@example.com", "type": "USER", "groupKey": "103567435255251233551" }Read the group entry by specifying the group
_idin the request URL. Notice that the group has one member ("directMembersCount": 1).$ curl \ --header "X-OpenIDM-Username: openidm-admin" \ --header "X-OpenIDM-Password: openidm-admin" \ --request GET \ "http://localhost:8080/openidm/system/google/__GROUP__/00meukdy40gpg98" { "_id": "00meukdy40gpg98", "_rev": "\"iwpzoDgSq9BJw-XzORg0bILYPVc/chUdq5m5_cycV2G4sdl7ZKAF75A\"", "adminCreated": true, "__NAME__": "testgroup@example.com", "aliases": null, "nonEditableAliases": [ "testGroup@example.test-google-a.com" ], "__DESCRIPTION__": "Group used for google-connector sample.", "name": "TestGroup", "directMembersCount": 1 }Delete the group entry.
$ curl \ --header "X-OpenIDM-Username: openidm-admin" \ --header "X-OpenIDM-Password: openidm-admin" \ --request DELETE \ "http://localhost:8080/openidm/system/google/__GROUP__/00meukdy40gpg98" { "_id": "00meukdy40gpg98", "_rev": "\"iwpzoDgSq9BJw-XzORg0bILYPVc/chUdq5m5_cycV2G4sdl7ZKAF75A\"", "adminCreated": true, "__NAME__": "testgroup@example.com", "aliases": null, "nonEditableAliases": [ "testGroup@example.com.test-google-a.com" ], "__DESCRIPTION__": "Group used for google-connector sample.", "name": "TestGroup", "directMembersCount": 1 }The delete request returns the complete group object.
Delete Sam Carter, to return your Google resource to its original state.
$ curl \ --header "X-OpenIDM-Username: openidm-admin" \ --header "X-OpenIDM-Password: openidm-admin" \ --request DELETE \ "http://localhost:8080/openidm/system/google/__ACCOUNT__/103567435255251233551" { "_id": "103567435255251233551", "_rev": "\"iwpzoDgSq9BJw-XzORg0bILYPVc/ah6xBLujMAHieSWSisPa1CV6T3Q\"", "orgUnitPath": "/", "isAdmin": false, "fullName": "Sam Carter", "customerId": "C02rsqddz", "relations": null, "nonEditableAliases": [ "samcarter@example.com.test-google-a.com" ], "suspensionReason": null, "includeInGlobalAddressList": true, "givenName": "Sam", "addresses": null, "isDelegatedAdmin": false, "changePasswordAtNextLogin": false, "isMailboxSetup": true, "__NAME__": "samcarter@example.com", "agreedToTerms": true, "externalIds": null, "ipWhitelisted": false, "aliases": null, "lastLoginTime": [ "1970-01-01T00:00:00.000Z" ], "organizations": null, "suspended": false, "deletionTime": null, "familyName": "Carter", "ims": null, "creationTime": [ "2016-02-02T12:52:30.000Z" ], "thumbnailPhotoUrl": null, "emails": [ { "address": "samcarter@example.com", "primary": true } ], "phones": [ { "value": "1234567890", "type": "home" }, { "value": "0987654321", "type": "work" } ] }
In this sample, you used the Google Apps connector to add and delete user and group objects in your Google application, and to reconcile users from your Google application to the managed user repository. You can expand on this sample by customizing the connector configuration to provide additional synchronization functionality between IDM and your Google applications. For more information on configuring connectors, see "Connecting to External Resources" in the Integrator's Guide.
Chapter 11. Synchronizing Users Between Salesforce and IDM
The Salesforce connector enables provisioning, reconciliation, and synchronization between Salesforce and IDM.
This sample shows how to synchronize Salesforce user accounts and managed users in the IDM repository. You can use either the Admin UI, or the command line to run this sample. Both methods are outlined in the sections that follow.
11.1. Before you Start
To test this sample you must have an existing Salesforce organization, a Salesforce developer account, and a Connected App with OAuth enabled. For instructions on setting up a Connected App, see "Setting Up Salesforce" in the Integrator's Guide.
When you have set up the Connected App, locate the Consumer Key and Consumer Secret as you will need them in the following section.
11.2. Install the Sample
Prepare IDM as described in "Preparing IDM", then start the server with the configuration for the Salesforce sample:
$ cd /path/to/openidm $ ./startup.sh -p samples/sync-with-salesforce
11.3. Running the Sample by Using the Admin UI
The Admin UI is the recommended way to test this sample.
Log in to the Admin UI at the URL
https://localhost:8443/adminas the default administrative user (openidm-admin) with passwordopenidm-admin.Warning
To protect your deployment in production, change the default administrative password. To do so, navigate to the Self-Service UI at
https://localhost:8443/and click Change Password.The Resources tab shows the Salesforce connector, which is currently disabled.
Enable the Salesforce connector by completing the authentication details as follows. You will need the Consumer Key and Consumer Secret that you obtained in the previous section.
Select the Salesforce connector and select Enable to enable the connector.
Under Base Connector Details select Sandbox (for the purposes of testing the sample) and enter the Connector Key and Secret that you obtained in the previous section.
You can leave the remaining default configuration. Click Save to update the connector configuration.
The connector now attempts to access your Salesforce organization.
Enter your Salesforce login credentials.
On the permission request screen click Allow, to enable IDM to access your Salesforce Connected App.
Note
In the current IDM release, an issue is occasionally seen where the system appears to time out while retrieving the refresh token from Salesforce, at this stage. If this happens, refresh your browser and attempt the connector setup again.
On the Resources tab, your Salesforce Connector should now be Active.
To test reconciliation, select Configure > Mappings.
There are two configured mappings, one from Salesforce to the IDM repository (
managed/user) and one from the repository to Salesforce.Select Reconcile on the first mapping.
The reconciliation operation creates the users that were present in your Salesforce organization in the IDM repository.
Retrieve the users in the repository by selecting Manage > User.
The repository should now contain all the users from your Salesforce organization.
To test the second mapping (from IDM to Salesforce), update any user in the repository.
By default, implicit synchronization is enabled for mappings from the
managed/userrepository to any external resource. This means that when you update a managed object, any mappings defined in thesync.jsonfile that have the managed object as the source are automatically executed to update the target system. For more information, see "Mapping Source Objects to Target Objects" in the Integrator's Guide.To test that the implicit synchronization has been successful, check the updated user record in Salesforce.
11.4. Running the Sample by Using the Command Line
Running the sample by using the command line is a little more complex. This section breaks the sample into two tasks - configuring the connector, and then testing the configuration by running reconciliation operations between the two systems.
Before you start, you will need the Consumer Key and Consumer Secret that you obtained in the previous section.
Obtain the refresh token from salesforce.com by pointing your browser to the following URL:
SALESFORCE_URL/services/oauth2/authorize?response_type=code&client_id=CONSUMER_KEY&redirect_uri=REDIRECT_URI&scope=id+api+refresh_token
Where:
SALESFORCE_URL is one of the following:
https://login.salesforce.com
https://test.salesforce.com
A custom Salesforce MyDomain URL, such as:
https://ic-example-com--SUP1.cs21.my.salesforce.com
CONSUMER_KEY is the Consumer Key associated with the Connected App that you created within your Salesforce organization.
REDIRECT_URI corresponds to the IDM
/admin/oauth.htmlpage. This URI must match the Redirect URI specified within your Salesforce Connect App configuration, for example:https://localhost:8443/admin/oauth.html
or
http://localhost:8080/admin/oauth.html
You are redirected to Salesforce, and prompted to give this application access to your Salesforce account. When you have given consent, you should receive a response URL that looks similar to the following:
https://localhost:8443/admin/index.html#connectors/edit//&code=aPrxJZTK7Rs03PU634VK8Jn9o_U3ZY1ERxM7IiklF...
The
&codepart of this URL is an authorization code, that you need for the following step.Caution
Note that this authorization code expires after 10 minutes. If you do not complete the OAuth flow within that time, you will need to start this process again.
Copy the authorization code from the response URL and use it as the value of the
codeparameter in the following REST call. The consumer-key, redirect-uri, and SALESFORCE_URL must match what you used in the first step of this procedure:$ curl \ --verbose \ --data "grant_type=authorization_code" \ --data "client_id=consumer-key" \ --data "client_secret=consumer-secret" \ --data "redirect_uri=https://localhost:8443/admin/oauth.html" \ --data "code=access-token-code" \ "SALESFORCE_URL/services/oauth2/token" { "access_token": "00DS0000003K4fU!AQMAQOzEU.8tCjg8Wk79yKPKCtrtaszX5jrHtoT4NBpJ8x2NFZGjg3PNuc0TWq0EgiGS_mVkfg5f4pVN5...", "signature": "2uREX1lseXdg3Vng/2+Hrlo/KHOWYoim+poj74wKFtw=", "refresh_token": "5Aep861KIwKdekr90I4iHdtDgWwRoG7O_6uHrgJ.yVtMS0UaGxRqE6WFM77W7wCV4muVMgdqKjuWI2i5S6sjN2X", "token_type": "Bearer", "instance_url": "https://example-com.cs1.my.salesforce.com", "scope": "id api refresh_token", "issued_at": "1417182949781", "id": "https://login.salesforce.com/id/00DS0000003K4fUMAS/00530000009hWLcAAM" }The output includes an
access_tokenand arefresh_token. You will need therefresh_tokenin the following step.Edit the
configurationPropertiesin your Salesforce connector configuration file (openidm/samples/sync-with-salesforce/conf/provisioner.salesforce-salesforce.json) to include your Consumer Key (clientID), Consumer Secret (clientSecret), refresh token, and your Salesforce login URL.In addition, set the
instanceUrlto the value returned in the previous step, and set theenabledproperty totrue.The relevant excerpts of the
provisioner.salesforce-salesforce.jsonfile are as follows:{ "name" : "salesforce", "enabled" : true, ... "configurationProperties" : { "connectTimeout" : 120000, "loginUrl" : https://login.salesforce.com/services/oauth2/token, "idleCheckInterval" : 10000, "refreshToken" : "5Aep861KIwKdekr90I4iHdtDgWwRoG7O_6uHrgJ.yVtMS0UaGxRqE6WFM...", "clientSecret" : "4850xxxxxxxxxxxxx425", "clientId" : "3MVG98dostKihXN7Is8Q0g5q1xxxxxxxxxxxxxxxxxxxxxxxxxxxxxxxxxxxP...", "instanceUrl" : "https://example-com.cs1.my.salesforce.com", "version" : 29 } ...Check that your connector configuration is correct by testing the status of the connector, over REST.
$ curl \ --header "X-OpenIDM-Username: openidm-admin" \ --header "X-OpenIDM-Password: openidm-admin" \ --request POST \ "http://localhost:8080/openidm/system?_action=test" [ { "ok": true, "connectorRef": { "bundleVersion": "6.0.0", "systemType": "provisioner.salesforce", "displayName": "Salesforce Connector", "bundleName": "org.forgerock.openidm.salesforce", "connectorName": "org.forgerock.openidm.salesforce.Salesforce" }, "objectTypes": [ "User", "PermissionSet", "PermissionSetAssignment", "Profile", "PermissionSetLicenseAssign", "Organization", "PermissionSetLicense", "Group", "GroupMember" ], "config": "config/provisioner.salesforce/salesforce", "enabled": true, "name": "salesforce" } ]
The mapping configuration file (sync.json) for this
sample includes two mappings, sourceSalesforceUser_managedUser,
which synchronizes users from the Salesforce with the IDM
repository, and managedUser_sourceSalesforceUser,
which synchronizes changes from the repository to Salesforce.
Reconcile the repository over the REST interface by running the following command:
$ curl \ --header "X-OpenIDM-Username: openidm-admin" \ --header "X-OpenIDM-Password: openidm-admin" \ --request POST \ "http://localhost:8080/openidm/recon?_action=recon&mapping=sourceSalesforceUser_managedUser&waitForCompletion=true" { "state": "SUCCESS", "_id": "8a6281ef-6faf-43dd-af5c-3a842b38c468" }The reconciliation operation returns a reconciliation run ID and the status of the operation. Reconciliation creates user objects from Salesforce in the IDM repository, assigning the new objects random unique IDs.
Retrieve the managed users in the repository:
$ curl \ --header "X-OpenIDM-Username: openidm-admin" \ --header "X-OpenIDM-Password: openidm-admin" \ --request GET \ "http://localhost:8080/openidm/managed/user?_queryId=query-all-ids" { "result": [ { "_id": "180c6686-b098-460a-a246-4e03fa0b8eb2", "_rev": "00000000cfe1fccf" }, { "_id": "d0c25a0c-f7e6-4249-9c81-e546728f5bdd", "_rev": "000000000828e760" }, { "_id": "25181ab3-0d40-4f80-96d6-d620eef7b6da", "_rev": "0000000038b6e342" } ], "resultCount": 3, "pagedResultsCookie": null, "totalPagedResultsPolicy": "NONE", "totalPagedResults": -1, "remainingPagedResults": -1 }The output shows that the users in the Salesforce data store have been created in the repository.
Chapter 12. Synchronizing Kerberos User Principals
This sample demonstrates how to manage Kerberos user principals and how to reconcile user principals with IDM managed user objects.
The connector configuration
(/path/to/openidm/samples/sync-with-kerberos/conf/provisioner.openicf-kerberos.json))
assumes that IDM is running on a host that is separate from the
Kerberos host.
This sample assumes that the default realm is EXAMPLE.COM
and that there is an existing user principal openidm/admin.
Adjust the sample to match your Kerberos realm and principals.
12.1. Editing the Kerberos Connector Configuration
Before you run this sample, edit the connector configuration file to match your Kerberos environment. Specifically, set the correct values for the following properties:
hostThe host name or IP address of the machine on which Kerberos is running.
portThe SSH port on that machine.
Default:
22(the default SSH port)userThe username of the account that is used to connect to the SSH server.
passwordThe password of the account that is used to connect to the SSH server.
promptA string that represents the remote SSH session prompt. This must be the exact prompt string, in the format
username@target:, for exampleroot@localhost:~$. The easiest way to obtain this string is tosshinto the machine and copy paste the prompt.customConfigurationThe details of the admin user principal and the default realm.
This example assumes an admin user principal of
openidm/admin.For more information on setting this property, see
customConfigurationin the Connector Reference.customSensitiveConfigurationThe password for the user principal.
For more information on setting this property, see
customSensitiveConfigurationin the Connector Reference.
Your connector configuration should look something like the following:
...
"configurationProperties" : {
"host" : "192.0.2.0",
"port" : 22,
"user" : "admin",
"password" : "Passw0rd",
"prompt" : "admin@myhost:~$",
"sudoCommand" : "/usr/bin/sudo",
"echoOff" : true,
"terminalType" : "vt102",
"setLocale" : false,
"locale" : "en_US.utf8",
"connectionTimeout" : 5000,
"expectTimeout" : 5000,
"authenticationType" : "PASSWORD",
"throwOperationTimeoutException" : true,
"customConfiguration" : "kadmin { cmd = '/usr/sbin/kadmin.local'; user='openidm/admin'; default_realm='EXAMPLE.COM' }",
"customSensitiveConfiguration" : "kadmin { password = 'Passw0rd'}",
...IDM encrypts passwords in the configuration when it starts up, or whenever it reloads the configuration file.
For information about the complete Kerberos connector configuration, see "Configuring the Kerberos Connector" in the Connector Reference.
Caution
Do not modify the value of the scriptRoots or
classpath properties unless you have extracted the
scripts from the connector bundle and placed them on the filesystem.
12.2. Running the Kerberos Sample
The commands in this section achieve the following:
Start IDM and check that the connector can reach the Kerberos server.
Create two users in the managed repository.
Reconcile the managed repository with the Kerberos server so that the new users are created in Kerberos.
Retrieve the details of one of the new Kerberos principals from the server.
Delete one of the managed users.
Reconcile the managed repository again and note that the corresponding Kerberos principal has been deleted.
Start IDM with the configuration for the Kerberos sample:
$ cd /path/to/openidm
$ startup.sh -p samples/sync-with-kerberos
Test that your connector configuration is correct and that IDM can reach your Kerberos server, with the following command:
$ curl \ --header "X-OpenIDM-Username: openidm-admin" \ --header "X-OpenIDM-Password: openidm-admin" \ --request POST \ "http://localhost:8080/openidm/system?_action=test" [ { "name": "kerberos", "enabled": true, "config": "config/provisioner.openicf/kerberos", "objectTypes": [ "__ALL__", "account" ], "connectorRef": { "bundleName": "org.forgerock.openicf.connectors.kerberos-connector", "connectorName": "org.forgerock.openicf.connectors.kerberos.KerberosConnector", "bundleVersion": "[1.4.0.0,1.6.0.0)" }, "displayName": "Kerberos Connector", "ok": true } ]If the command returns
"ok": true, as in the preceding output, your configuration is correct and you can continue with the sample.Retrieve a list of the existing user principals in the Kerberos database:
$ curl \ --header "X-OpenIDM-Username: openidm-admin" \ --header "X-OpenIDM-Password: openidm-admin" \ --request GET \ "http://localhost:8080/openidm/system/kerberos/account?_queryId=query-all-ids" { "result": [ { "_id": "K/M@EXAMPLE.COM", "principal": "K/M@EXAMPLE.COM" }, { "_id": "kadmin/admin@EXAMPLE.COM", "principal": "kadmin/admin@EXAMPLE.COM" }, { "_id": "kadmin/changepw@EXAMPLE.COM", "principal": "kadmin/changepw@EXAMPLE.COM" }, { "_id": "kadmin/krb1.example.com@EXAMPLE.COM", "principal": "kadmin/krb1.example.com@EXAMPLE.COM" }, { "_id": "kiprop/krb1.example.com@EXAMPLE.COM", "principal": "kiprop/krb1.example.com@EXAMPLE.COM" }, { "_id": "krbtgt/EXAMPLE.COM@EXAMPLE.COM", "principal": "krbtgt/EXAMPLE.COM@EXAMPLE.COM" }, { "_id": "openidm/admin@EXAMPLE.COM", "principal": "openidm/admin@EXAMPLE.COM" } ], ... }Create two new managed users, either over REST or by using the Admin UI.
The following command creates users bjensen and scarter over REST. To create similar users by using the Admin UI, select Managed > User and click New User:
$ curl \ --header "X-OpenIDM-Username: openidm-admin" \ --header "X-OpenIDM-Password: openidm-admin" \ --header "Content-type: application/json" \ --request POST \ --data '{ "userName": "bjensen", "givenName": "Barbara", "sn" : "Jensen", "password" : "Passw0rd", "displayName" : "Barbara Jensen", "mail" : "bjensen@example.com" }' \ "http://localhost:8080/openidm/managed/user?_action=create" { "_id": "ce3d9b8f-1d15-4950-82c1-f87596aadcb6", "_rev": "00000000792afa08", "userName": "bjensen", "givenName": "Barbara", "sn": "Jensen", "displayName": "Barbara Jensen", "mail": "bjensen@example.com", "accountStatus": "active", "effectiveRoles": [], "effectiveAssignments": [] } $ curl \ --header "X-OpenIDM-Username: openidm-admin" \ --header "X-OpenIDM-Password: openidm-admin" \ --header "Content-type: application/json" \ --request POST \ --data '{ "userName": "scarter", "givenName": "Steven", "sn" : "Carter", "password" : "Passw0rd", "displayName" : "Steven Carter", "mail" : "scarter@example.com" }' \ "http://localhost:8080/openidm/managed/user?_action=create" { "_id": "a204ca60-b0fc-42f8-bf93-65bb30131361", "_rev": "000000004121fb7e", "userName": "scarter", "givenName": "Steven", "sn": "Carter", "displayName": "Steven Carter", "mail": "scarter@example.com", "accountStatus": "active", "effectiveRoles": [], "effectiveAssignments": [] }Run a reconciliation operation between the managed user repository and the Kerberos database to create the new users bjensen and scarter in Kerberos. You can run the reconciliation over REST, or using the Admin UI.
The following command creates runs the reconciliation over REST:
$ curl \ --header "X-OpenIDM-Username: openidm-admin" \ --header "X-OpenIDM-Password: openidm-admin" \ --request POST \ "http://localhost:8080/openidm/recon?_action=recon&mapping=managedUser_systemKerberos" { "_id": "862ab9ba-d1d9-4058-b6bc-a23a94b68776-234", "state": "ACTIVE" }To run the reconciliation by using the Admin UI, select Configure > Mappings, click on the
managedUser_systemKerberosmapping, and click Reconcile.Retrieve the list of Kerberos user principals again. You should now see bjensen and scarter in this list:
$ curl \ --header "X-OpenIDM-Username: openidm-admin" \ --header "X-OpenIDM-Password: openidm-admin" \ --request GET \ "http://localhost:8080/openidm/system/kerberos/account?_queryId=query-all-ids" { "result": [ { "_id": "bjensen@EXAMPLE.COM", "principal": "bjensen@EXAMPLE.COM" }, { "_id": "scarter@EXAMPLE.COM", "principal": "scarter@EXAMPLE.COM" }, ... { "_id": "openidm/admin@EXAMPLE.COM", "principal": "openidm/admin@EXAMPLE.COM" } ], ... }Retrieve bjensen's complete user principal from the Kerberos server:
$ curl \ --header "X-OpenIDM-Username: openidm-admin" \ --header "X-OpenIDM-Password: openidm-admin" \ --request GET \ "http://localhost:8080/openidm/system/kerberos/account/bjensen@EXAMPLE.COM" { "_id": "bjensen@EXAMPLE.COM", "lastFailedAuthentication": "[never]", "passwordExpiration": "[none]", "lastSuccessfulAuthentication": "[never]", "maximumTicketLife": "0 days 10:00:00", "lastModified": "Tue May 24 04:05:45 EDT 2016 (openidm/admin@EXAMPLE.COM)", "policy": "user [does not exist]", "expirationDate": "[never]", "failedPasswordAttempts": "0", "maximumRenewableLife": "7 days 00:00:00", "principal": "bjensen@EXAMPLE.COM", "lastPasswordChange": "Tue May 24 04:05:45 EDT 2016" }Note the default values for properties such as
maximumRenewableLife. These values are set in your connector configuration. For more information, see "Configuring the Kerberos Connector" in the Connector Reference.To perform this step in the Admin UI, select Manage > User, click bjensen's entry, and click the Linked Systems tab to display her corresponding entry on the Kerberos server.
Delete the managed user bjensen by specifying her managed object ID in the DELETE request.
First, obtain her ID by querying for her userName:
$ curl \ --header "X-OpenIDM-Username: openidm-admin" \ --header "X-OpenIDM-Password: openidm-admin" \ --request GET \ "http://localhost:8080/openidm/managed/user?_queryFilter=userName+eq+'bjensen'" { "result": [ { "_id": "ce3d9b8f-1d15-4950-82c1-f87596aadcb6", "_rev": "00000000a92657c7", "userName": "bjensen", "givenName": "Barbara", "sn": "Jensen", "displayName": "Barbara Jensen", "mail": "bjensen@example.com", "accountStatus": "active", "effectiveRoles": [], "effectiveAssignments": [] } ], ... }Now delete the user with ID
ce3d9b8f-1d15-4950-82c1-f87596aadcb6. This ID will obviously be different in your example.$ curl \ --header "X-OpenIDM-Username: openidm-admin" \ --header "X-OpenIDM-Password: openidm-admin" \ --request DELETE \ "http://localhost:8080/openidm/managed/user/ce3d9b8f-1d15-4950-82c1-f87596aadcb6" { "_id": "ce3d9b8f-1d15-4950-82c1-f87596aadcb6", "_rev": "00000000a92657c7", "userName": "bjensen", "givenName": "Barbara", "sn": "Jensen", "displayName": "Barbara Jensen", "mail": "bjensen@example.com", "accountStatus": "active", "effectiveRoles": [], "effectiveAssignments": [] }To delete bjensen's managed user entry by using the Admin UI, select Manage > User, click on bjensen's entry, select the checkbox next to her entry, and click Delete Selected.
Reconcile the managed user repository and the Kerberos database again:
$ curl \ --header "X-OpenIDM-Username: openidm-admin" \ --header "X-OpenIDM-Password: openidm-admin" \ --request POST \ "http://localhost:8080/openidm/recon?_action=recon&mapping=managedUser_systemKerberos" { "_id": "862ab9ba-d1d9-4058-b6bc-a23a94b68776-584", "state": "ACTIVE" }Retrieve the list of Kerberos user principals again. The Kerberos principal for bjensen should have been been removed from the list:
$ curl \ --header "X-OpenIDM-Username: openidm-admin" \ --header "X-OpenIDM-Password: openidm-admin" \ --request GET \ "http://localhost:8080/openidm/system/kerberos/account?_queryId=query-all-ids" { "result": [ { "_id": "K/M@EXAMPLE.COM", "principal": "K/M@EXAMPLE.COM" }, { "_id": "kadmin/admin@EXAMPLE.COM", "principal": "kadmin/admin@EXAMPLE.COM" }, { "_id": "kadmin/changepw@EXAMPLE.COM", "principal": "kadmin/changepw@EXAMPLE.COM" }, { "_id": "kadmin/krb1.example.com@EXAMPLE.COM", "principal": "kadmin/krb1.example.com@EXAMPLE.COM" }, { "_id": "kiprop/krb1.example.com@EXAMPLE.COM", "principal": "kiprop/krb1.example.com@EXAMPLE.COM" }, { "_id": "krbtgt/EXAMPLE.COM@EXAMPLE.COM", "principal": "krbtgt/EXAMPLE.COM@EXAMPLE.COM" }, { "_id": "scarter@EXAMPLE.COM", "principal": "scarter@EXAMPLE.COM" }, { "_id": "openidm/admin@EXAMPLE.COM", "principal": "openidm/admin@EXAMPLE.COM" } ], ... }
Note
Some user IDs in Kerberos include characters such as a forward slash
(/) and an "at sign" (@) that prevent
them from being used directly in a REST URL. For example,
openidm/system/kerberos/account/kadmin/admin@EXAMPLE.COM, where
the ID is kadmin/admin@EXAMPLE.COM. To retrieve such
entries directly over REST, you must URL-encode the Kerberos ID as follows:
"http://localhost:8080/openidm/system/kerberos/account/kadmin%2Fadmin%40EXAMPLE.COM"
Chapter 13. Storing Multiple Passwords For Managed Users
This sample demonstrates how to set up multiple passwords for managed users and how to synchronize separate passwords to different external resources.
Note that you cannot run this sample through the Admin UI. To make the sample
work with the Admin UI, set the viewable and
required fields of the password property
in the conf/managed.json file as follows:
"password" : {
"title" : "Password",
"type" : "string",
"viewable" : true,
"required" : true,
...13.1. Configuration of the Multiple Passwords Sample
This sample assumes the following scenario:
The managed/user repository is the source system.
There are two target LDAP servers —
ldapandldap2.For the purposes of this sample, the two servers are represented by two separate organizational units on a single ForgeRock Directory Services (DS) instance.
Managed user objects have two additional password fields, each mapped to one of the two LDAP servers.
The two LDAP servers have different requirements for password policy and encryption.
Both LDAP servers have a requirement for a password history policy, but the history size differs for the two policies.
The sample shows how to extend the password history policy, described in "Creating a Password History Policy" in the Integrator's Guide, to apply to multiple password fields.
The value of a managed user's
passwordfield is used by default for the additional passwords unless the CREATE, UPDATE, or PATCH requests on the managed user explicitly contain a value for these additional passwords.
The sample includes several customized configuration files in the
samples/multiple-passwords/conf/ directory. These
customizations are crucial to the sample functionality, and are described in
detail in the following list:
provisioner.openicf-ldap.jsonConfigures the connection to the first LDAP directory.
provisioner.openicf-ldap2.jsonConfigures the connection to the second LDAP directory.
sync.jsonProvides the mappings from the IDM managed user repository to the respective LDAP servers. The file includes two mappings:
A mapping from IDM managed users to the LDAP user objects at the
system/ldap/accountendpoint. This endpoint represents theou=Peoplesubtree.This mapping specifies an
onCreateand anonUpdatescript that pull the pre-hashed value (if it is present) out of the context chain and use it to set theuserPasswordon the target object. Note that this mapping does not include an explicit mapping fromldapPasswordtouserPassword, as this is handled in theonCreateandonUpdatescripts.A mapping from IDM managed users to the LDAP user objects at the
system/ldap2/accountendpoint. This endpoint represents theou=Customerssubtree.This mapping includes an explicit mapping from
ldap2PasswordtouserPasswordin the standard property mappings. Because this password is encrypted (as opposed to hashed) a transform script is defined which usesopenidm.decrypt()to set the value on the target object.
managed.jsonContains a customized schema for managed users that includes the additional password fields.
This file has been customized as follows:
An
onValidatescript stores the pre-hashed value of theldapPasswordfield. This value is stored in theManagedObjectContextin the Context chain of the request. During the sync event, the value can be pulled out of the context chain and used to map the target object. This is necessary because the hashed fields of a managed object are already hashed in the object itself by the time it reaches the sync process.The schema includes an
ldapPasswordfield that is mapped to the accounts in thesystem/ldap/accountstarget. This field is subject to the standard policies associated with thepasswordfield of a managed user. In addition, theldapPasswordmust contain two capital letters instead of the usual one capital letter requirement. This field also uses hashing instead of encryption.The schema includes an
ldap2Passwordfield that is mapped to the accounts in thesystem/ldap2/accountstarget. This field is subject to the standard policies associated with thepasswordfield of a managed user. In addition, theldap2Passwordmust contain two numbers instead of the usual one number requirement.A custom password history policy (
"policyId" : "is-new") applies to each of the two mapped password fieldsldapPassword, andldap2Password.
router.jsonA scripted filter on
managed/userandpolicy/managed/userthat populates the values of the additional password fields with the value of the mainpasswordfield if the additional fields are not included in the request content.
The sample includes the following customized scripts in the
script directory:
onCreate-onUpdate-sync.jsperforms custom mapping logic. Specifically, this script maps the pre-hashed password value and sets the target object DN on create events.storeFields.groovystores the pre-hashed values of fields in the context chain, on validate events.onCreate-user-custom.jsandonUpdate-user-custom.jsare used for validation of the password history policy when a user is created or updated.pwpolicy.jsis an additional policy script for the password history policy.set-additional-passwords.jspopulates the values of the additional password fields with the value of the mainpasswordfield if the additional fields are not included in the request content.
13.2. Understanding the Password History Policy
The sample includes a custom password history policy. Although the sample demonstrates the history of password attributes only, you can use this policy to enforce history validation on any managed object property.
The following configuration changes set up the password history policy:
A
fieldHistoryproperty is added to managed users. The value of this field is a map of field names to a list of historical values for that field. These lists of values are used by the policy to determine if a new value has previously been used.The
fieldHistoryproperty is not accessible over REST by default, and cannot be modified.The
onCreate-user-custom.jsscript performs the standardonCreatetasks for a managed user object but also stores the initial value of each of the fields for which IDM should keep a history. The script is passed the following configurable properties:historyFields— a list of the fields to store history on.historySize— the number of historical fields to store.
The
onUpdate-user-custom.jsscript compares the old and new values of the historical fields on update events to determine if the values have changed. When a new value is detected, it is stored in the list of historical values for that field.This script also contains logic to deal with the comparison of encrypted or hashed field values. The script is passed the following configurable properties:
historyFields— a list of the fields to store history on.historySize— the number of historical fields to store.
The
pwpolicy.jsscript contains the additional policy definition for the password history policy. This script compares the new field value with the list of historical values for each field.The policy configuration (
policy.json) references this script in itsadditionalFileslist, so that the policy service loads the policy definition. The new policy takes ahistoryLengthparameter, which indicates the number of historical values to enforce the policy on. This number must not exceed thehistorySizespecified in theonCreateandonUpdatescripts.The
ldapPasswordandldap2Passwordfields in the managed user schema have been updated with the policy. For the purposes of this sample thehistorySizehas been set to 2 forldapPasswordand to 4 forldap2Password.
13.3. Configuring the LDAP Server
This sample expects the configuration for the external LDAP server to be the same as described in "LDAP Server Configuration".
The following steps provide setup instructions for DS version 6.0. Adjust these instructions if you are using an older version of DS, or an alternative LDAP server.
The LDIF data for this sample is provided in the file
openidm/samples/multiple-passwords/data/Example.ldif.
Import this data during your DS setup.
Download DS from ForgeRock's BackStage site and extract the zip archive.
Set up DS and import the
Example.ldiffile for this sample:$ cd /path/to/opendj $ ./setup \ directory-server \ --hostname localhost \ --ldapPort 1389 \ --rootUserDN "cn=Directory Manager" \ --rootUserPassword password \ --adminConnectorPort 4444 \ --baseDN dc=com \ --ldifFile /path/to/openidm/samples/multiple-passwords/data/Example.ldif \ --acceptLicense Validating parameters .....Done. Configuring Certificates .....Done. Configuring server .....Done. Importing data from /path/to/openidm/samples/multiple-passwords/data/Example.ldif ........Done. Starting Directory Server ............Done. To see basic server status and configuration, you can launch /path/to/opendj/bin/status
Run an
ldapsearchon the LDAP directory and look at the organizational units:$ cd /path/to/opendj $ bin/ldapsearch \ --hostname localhost \ --port 1389 \ --bindDN "cn=directory manager" \ --bindPassword password \ --baseDN "dc=example,dc=com" \ "ou=*" \ ou dn: ou=People,dc=example,dc=com ou: people dn: ou=Customers,dc=example,dc=com ou: people ou: Customers
The organizational units,
ou=Peopleandou=Customers, represent the two different target LDAP systems that our mappings point to.
13.4. Demonstrating the Use of Multiple Accounts
This section starts IDM with the sample configuration, then creates a user with multiple passwords, adhering to the different policies in the configured password policy. The section tests that the user was synchronized to two separate LDAP directories, with the different required passwords, and that the user can bind to each of these LDAP directories.
Prepare IDM as described in "Preparing IDM", then start the server with the configuration for the multiple passwords sample:
$ cd /path/to/openidm $ ./startup.sh -p samples/multiple-passwords
Create a user in IDM. Include a main
passwordfield but no additional password fields. The additional password fields (ldapPasswordandldap2Password) will be populated with the value of the mainpasswordfield as a result of the script described previously.For the purposes of this example, we will not use the Admin UI, so that the result of each command can be clearly seen. Create the user over REST, by running the following command:
$ curl \ --header "X-OpenIDM-Username: openidm-admin" \ --header "X-OpenIDM-Password: openidm-admin" \ --header "Content-Type: application/json" \ --request PUT \ --data '{ "userName": "jdoe", "givenName": "John", "sn" : "Doe", "displayName" : "John Doe", "mail" : "john.doe@example.com", "password" : "Passw0rd" }' \ "http://localhost:8080/openidm/managed/user/jdoe" { "code": 403, "reason": "Forbidden", "message": "Policy validation failed", "detail": { "result": false, "failedPolicyRequirements": [ { "policyRequirements": [ { "policyRequirement": "AT_LEAST_X_CAPITAL_LETTERS", "params": { "numCaps": 2 } } ], "property": "ldapPassword" }, { "policyRequirements": [ { "policyRequirement": "AT_LEAST_X_NUMBERS", "params": { "numNums": 2 } } ], "property": "ldap2Password" } ] } }Notice that the create request failed with a policy validation failure on the two new password fields. Although the password met the requirement for the main
passwordfield, the user could not be created because the password did not meet the requirements of theldapPasswordandldap2Passwordfields.You can fix this problem either by updating the
passwordfield to one that passes both of the new requirements, or by updating the individual password fields to specifically pass their individual validation requirements.Now, try to create user jdoe again, this time providing individual values for each of the different password fields, that comply with the three different password policies:
$ curl \ --header "X-OpenIDM-Username: openidm-admin" \ --header "X-OpenIDM-Password: openidm-admin" \ --header "Content-Type: application/json" \ --request PUT \ --data '{ "userName": "jdoe", "givenName": "John", "sn" : "Doe", "displayName" : "John Doe", "mail" : "john.doe@example.com", "password" : "Passw0rd", "ldapPassword" : "PPassw0rd", "ldap2Password" : "Passw00rd" }' \ "http://localhost:8080/openidm/managed/user/jdoe" { "_id": "jdoe", "_rev": "000000001298f6a6", "userName": "jdoe", "givenName": "John", "sn": "Doe", "displayName": "John Doe", "mail": "john.doe@example.com", "ldapPassword": { "$crypto": { "value": { "algorithm": "SHA-256", "data": "CpbVZlXAEFL/LUqWyq9Bcks/tLVwJ0pHrc/smLWf8UmC/0BDtEKRo1o2IjB6mNFz" }, "type": "salted-hash" } }, "ldap2Password": { "$crypto": { "value": { "cipher": "AES/CBC/PKCS5Padding", "salt": "FQXojsuDX3JYeQguIykRDQ==", "data": "2oHsVDZmNfrIUtVN7LKB/A==", "iv": "hUK2gOWIhv6g+5Ykms46xg==", "key": "openidm-sym-default", "mac": "hAMNkwcxb7Ka/hrWRmogyw==" }, "type": "x-simple-encryption" } }, ... }The user has been created with three different passwords that comply with three distinct password policies. The passwords have been hashed or encrypted, as defined in the
managed.jsonfile.As a result of implicit synchronization, two separate LDAP accounts should have been created for user jdoe on our two simulated LDAP servers. For more information about implicit synchronization, see "Types of Synchronization" in the Integrator's Guide.
Query the IDs in the LDAP directory as follows:
$ curl \ --header "X-OpenIDM-Username: openidm-admin" \ --header "X-OpenIDM-Password: openidm-admin" \ --request GET \ "http://localhost:8080/openidm/system/ldap/account?_queryId=query-all-ids" { "result" : [ { "_id": "3bbf1f43-e120-4d34-a4c9-05bd02be23bd", "dn" : "uid=jdoe,ou=People,dc=example,dc=com" }, { "_id": "d6c73ea1-fd05-4b80-8625-c50303755c91", "dn" : "uid=jdoe,ou=Customers,dc=example,dc=com" } ], ... }Note that jdoe has two entries - one in
ou=Peopleand one inou=Customers.Now, see if you can search each LDAP server, as user jdoe, with the separate passwords that you created for each directory.
This step will indicate that the passwords were propagated correctly to the separate LDAP servers.
$ cd /path/to/opendj $ bin/ldapsearch \ --hostname localhost \ --port 1389 \ --bindDN uid=jdoe,ou=People,dc=example,dc=com \ --bindPassword PPassw0rd \ --baseDN dc=example,dc=com \ uid=jdoe dn: uid=jdoe,ou=People,dc=example,dc=com objectClass: top objectClass: inetOrgPerson objectClass: organizationalPerson objectClass: person mail: john.doe@example.com sn: Doe cn: John Doe givenName: John userPassword: {SSHA512}qr8cljBrAHF/rEOGQe71EvCJzuUbLmWnA7tOfN0t3FaQjJVK2Ys5M... uid: jdoe dn: uid=jdoe,ou=Customers,dc=example,dc=com objectClass: top objectClass: inetOrgPerson objectClass: organizationalPerson objectClass: person mail: john.doe@example.com sn: Doe cn: John Doe givenName: John uid: jdoe $ bin/ldapsearch \ --hostname localhost \ --port 1389 \ --bindDN uid=jdoe,ou=Customers,dc=example,dc=com \ --bindPassword Passw00rd \ --baseDN dc=example,dc=com \ uid=jdoe dn: uid=jdoe,ou=People,dc=example,dc=com objectClass: top objectClass: inetOrgPerson objectClass: organizationalPerson objectClass: person mail: john.doe@example.com sn: Doe cn: John Doe givenName: John uid: jdoe dn: uid=jdoe,ou=Customers,dc=example,dc=com objectClass: top objectClass: inetOrgPerson objectClass: organizationalPerson objectClass: person mail: john.doe@example.com sn: Doe cn: John Doe givenName: John userPassword: {SSHA512}PVtdOxRfBL8mG5duCE7RopCW5eA4NWJudZsW9WhNFpqC58M9koA9... uid: jdoePatch jdoe's managed user entry to change his
ldapPassword.$ curl \ --header "X-OpenIDM-Username: openidm-admin" \ --header "X-OpenIDM-Password: openidm-admin" \ --header "Content-Type: application/json" \ --request PATCH \ --data '[ { "operation" : "replace", "field" : "ldapPassword", "value" : "TTestw0rd" } ]' \ "http://localhost:8080/openidm/managed/user/jdoe" { "_id": "jdoe", "_rev": "000000001298f6a6", "userName": "jdoe", "givenName": "John", "sn": "Doe", "displayName": "John Doe", ... "ldapPassword": { "$crypto": { "value": { "algorithm": "SHA-256", "data": "Vc6hvmzXaSSdG9WroqOTg3PQVdixhpg9tD/uKT610Z/H5iC6vsoOpE0/R5FaiDUg" }, "type": "salted-hash" } }, ... }Search the "first" LDAP server again, as user jdoe, with this new password to verify that the password change was propagated correctly to the LDAP server.
$ cd /path/to/opendj $ bin/ldapsearch \ --hostname localhost \ --port 1389 \ --bindDN uid=jdoe,ou=People,dc=example,dc=com \ --bindPassword TTestw0rd \ --baseDN dc=example,dc=com \ uid=jdoe dn: uid=jdoe,ou=People,dc=example,dc=com objectClass: top objectClass: inetOrgPerson objectClass: organizationalPerson objectClass: person mail: john.doe@example.com sn: Doe cn: John Doe userPassword: {SSHA512}Fc1DATM62kIz5DZNJOUStBfvAlHl2QJtMwd8+bhCupUUoLhtIXr4D... givenName: John uid: jdoe dn: uid=jdoe,ou=Customers,dc=example,dc=com objectClass: top objectClass: inetOrgPerson objectClass: organizationalPerson objectClass: person mail: john.doe@example.com sn: Doe cn: John Doe givenName: John uid: jdoe
This concludes the demonstration of how multiple password policies can be managed across resources.
13.5. Demonstrating the Use of the Password History Policy
This section demonstrates the password history policy by patching jdoe's
managed user entry, changing his ldapPassword a number of
times.
Send the following patch requests, changing the value of jdoe's
ldapPasswordeach time:$ curl \ --header "X-OpenIDM-Username: openidm-admin" \ --header "X-OpenIDM-Password: openidm-admin" \ --header "Content-Type: application/json" \ --request PATCH \ --data '[ { "operation" : "replace", "field" : "ldapPassword", "value" : "TTestw0rd1" } ]' \ "http://localhost:8080/openidm/managed/user/jdoe" { "_id": "jdoe", "_rev": "00000000a92657c7", "userName": "jdoe", "givenName": "John", "sn": "Doe", "displayName": "John Doe", "mail": "john.doe@example.com", ... "ldapPassword": { "$crypto": { "value": { "algorithm": "SHA-256", "data": "N7WR9d+JsJDe2Atr5dc1bIVlhT+SaA+vKV1v2tUR2A13mpu/cTIQWiIBMpE/JilO" }, "type": "salted-hash" } }, } $ curl \ --header "X-OpenIDM-Username: openidm-admin" \ --header "X-OpenIDM-Password: openidm-admin" \ --header "Content-Type: application/json" \ --request PATCH \ --data '[ { "operation" : "replace", "field" : "ldapPassword", "value" : "TTestw0rd2" } ]' \ "http://localhost:8080/openidm/managed/user/jdoe" { "_id": "jdoe", "_rev": "00000000dc6160c8", "userName": "jdoe", "givenName": "John", "sn": "Doe", "displayName": "John Doe", ... "ldapPassword": { "$crypto": { "value": { "algorithm": "SHA-256", "data": "6ukaCgcNzGjG9++SoHnIPYlSV4JZ2MBtHt5YepONl/oSNGQ3SQh7YozSO1PA+HAC" }, "type": "salted-hash" } } } $ curl \ --header "X-OpenIDM-Username: openidm-admin" \ --header "X-OpenIDM-Password: openidm-admin" \ --header "Content-Type: application/json" \ --request PATCH \ --data '[ { "operation" : "replace", "field" : "ldapPassword", "value" : "TTestw0rd3" } ]' \ "http://localhost:8080/openidm/managed/user/jdoe" { "_id": "jdoe", "_rev": "00000000a92657c7", "userName": "jdoe", "givenName": "John", "sn": "Doe", "displayName": "John Doe", ... "ldapPassword": { "$crypto": { "value": { "algorithm": "SHA-256", "data": "zJUQB7xMoLWwJPZZli99iktMIL+L2rh2wo0ueODekQ/bKobk8JCAOvudFinSmX1T" }, "type": "salted-hash" } } }User jdoe now has a history of
ldapPasswordvalues, that containsTTestw0rd3,TTestw0rd2,TTestw0rd1, andTTestw0rd, in that order.The history size for the
ldapPasswordpolicy is set to 2. To demonstrate the history policy, attempt to patch jdoe's entry with a password value that was used in his previous 2 password resets:TTestw0rd2:$ curl \ --header "X-OpenIDM-Username: openidm-admin" \ --header "X-OpenIDM-Password: openidm-admin" \ --header "Content-Type: application/json" \ --request PATCH \ --data '[ { "operation" : "replace", "field" : "ldapPassword", "value" : "TTestw0rd2" } ]' \ "http://localhost:8080/openidm/managed/user/jdoe" { "code": 403, "reason": "Forbidden", "message": "Failed policy validation", "detail": { "result": false, "failedPolicyRequirements": [ { "policyRequirements": [ { "policyRequirement": "IS_NEW" } ], "property": "ldapPassword" } ] } }The password reset fails the
IS_NEWpolicy requirement.Now, reset jdoe's
ldapPasswordto a value that was not used in the previous two updates:$ curl \ --header "X-OpenIDM-Username: openidm-admin" \ --header "X-OpenIDM-Password: openidm-admin" \ --header "Content-Type: application/json" \ --request PATCH \ --data '[ { "operation" : "replace", "field" : "ldapPassword", "value" : "TTestw0rd" } ]' \ "http://localhost:8080/openidm/managed/user/jdoe" { "_id": "jdoe", "_rev": "00000000792afa08", "userName": "jdoe", "givenName": "John", "sn": "Doe", "displayName": "John Doe", ... "ldapPassword": { "$crypto": { "value": { "algorithm": "SHA-256", "data": "qAeh50kePULpYVkaUM8hgdDV/SeVDJorehoXQgmyK5jKEClB02PWZm0ny6eC/eLp" }, "type": "salted-hash" } } }This time, the password reset succeeds.
Chapter 14. Linking Multiple Accounts to a Single Identity
This sample illustrates how IDM handles links from multiple accounts to a single identity.
The sample is based on a common use case in the insurance industry, where a company (Example.com) employs agents to sell policies to their insured customers. Most of their agents are also insured, which means that they have two distinct roles within the company - customers, and agents. With minor changes, this sample works for other use cases. For example, you might have a hospital that employs doctors who treat patients. Some of the doctors are also patients of that hospital.
14.1. Before You Start: Link Qualifiers, Agents, and Insured Customers
You define mappings between source and target accounts in the your project's
sync.json file. As part of a mapping, you can create a
link between a single source account and multiple target accounts using a
link qualifier, that enables one-to-many relationships
in mappings and policies. For more information about mappings and link
qualifiers, see "Mapping Source Objects to Target Objects" in the Integrator's Guide and
"Mapping a Single Source Object to Multiple Target Objects" in the Integrator's Guide.
This sample uses two link qualifiers:
Insuredrepresents the accounts associated with Example.com's Insured customers, created under the LDAP containerou=Customers,dc=example,dc=com.Agentrepresents agent accounts, considered independent contractors, and created under the LDAP containerou=Contractors,dc=example,dc=com.
Assume that agents and insured customers connect via two different portals, and that each group has access to different features, depending on the portal.
Agents might have two separate accounts; one each for professional and personal use. Although the accounts are different, the identity information for each agent should be the same for both accounts.
This sample therefore uses link qualifiers to distinguish the two
categories of users. The link qualifiers are named
insured and agent, and are defined as
part of the managedUser_systemLdapAccounts mapping in the
sync.json file:
{
"name" : "managedUser_systemLdapAccounts",
"source" : "managed/user",
"target" : "system/ldap/account",
"linkQualifiers" : [
"insured",
"agent"
],
.....
}
You can check this configuration in the Admin UI. Click Configure >
Mappings > managedUser_systemLdapAccounts >
Properties > Link Qualifiers. You should see insured
and agent in the list of configured link qualifiers.
In addition, the sample uses a transformation script that determines the
LDAP Distinguished Name (dn) from the user category. The
following excerpt of the sync.json file shows that
script:
{
"target" : "dn",
"transform" : {
"type" : "text/javascript",
"globals" : { },
"source" :
"if (linkQualifier === 'agent') {
'uid=' + source.userName + ',ou=Contractors,dc=example,dc=com';
} else if (linkQualifier === 'insured') {
'uid=' + source.userName + ',ou=Customers,dc=example,dc=com';
}"
},
Finally, the following validSource script assesses the
effective roles of a managed user to determine if that user has an
Agent or Insured role. The script then
assigns a link qualifier based on the assessed role.
"validSource" : {
"type" : "text/javascript",
"globals" : { },
"source" : "var res = false;
var i=0;
while (!res && i < source.effectiveRoles.length) {
var roleId = source.effectiveRoles[i];
if (roleId != null && roleId.indexOf("/") != -1) {
var roleInfo = openidm.read(roleId);
logger.warn("Role Info : {}",roleInfo);
res = (((roleInfo.properties.name === 'Agent')
&&(linkQualifier ==='agent'))
|| ((roleInfo.properties.name === 'Insured')
&&(linkQualifier ==='insured')));
}
i++;
}
res"
}14.2. External LDAP Configuration
Configure the LDAP server as shown in "LDAP Server Configuration".
The LDAP user must have write access to create users from IDM on the LDAP server. When you configure the LDAP server, import the LDIF data file for this sample, openidm/samples/multi-account-linking/data/Example.ldif.
14.3. Running the Multi-Account Linking Sample
This section assumes that you have installed and configured ForgeRock Directory Services (DS), as described in the previous section.
Prepare IDM as described in "Preparing IDM", then start the server with the configuration for the Multi-Account Linking sample:
$ cd /path/to/openidm
$ ./startup.sh -p samples/multi-account-linking
Create the managed users.
For the purpose of this sample, create managed user entries for John Doe and Barbara Jensen. To create these users from the Admin UI, navigate to
https://localhost:8443/adminand click Manage > User > New User.Alternatively, use the following REST calls to create these managed user entries:
$ curl \ --header "Content-Type: application/json" \ --header "X-OpenIDM-Username: openidm-admin" \ --header "X-OpenIDM-Password: openidm-admin" \ --request POST \ --data '{ "displayName" : "Barbara Jensen", "description" : "Created for OpenIDM", "givenName" : "Barbara", "mail" : "bjensen@example.com", "telephoneNumber" : "1-360-229-7105", "sn" : "Jensen", "userName" : "bjensen", "accountStatus" : "active" }' \ "http://localhost:8080/openidm/managed/user?_action=create" { "_id": "580f1441-ff8e-434b-9605-90e10a6fbdf6", "_rev": "00000000792afa08", "displayName": "Barbara Jensen", "description": "Created for OpenIDM", "givenName": "Barbara", "mail": "bjensen@example.com", "telephoneNumber": "1-360-229-7105", "sn": "Jensen", "userName": "bjensen", "accountStatus": "active", "effectiveRoles": [], "effectiveAssignments": [] }$ curl \ --header "Content-Type: application/json" \ --header "X-OpenIDM-Username: openidm-admin" \ --header "X-OpenIDM-Password: openidm-admin" \ --request POST \ --data '{ "displayName" : "John Doe", "description" : "Created for OpenIDM", "givenName" : "John", "mail" : "jdoe@example.com", "telephoneNumber" : "1-415-599-1100", "sn" : "Doe", "userName" : "jdoe", "accountStatus" : "active" }' \ "http://localhost:8080/openidm/managed/user?_action=create" { "_id": "02632173-e413-4af1-8495-f749d5880226", "_rev": "000000001298f6a6", "displayName": "John Doe", "description": "Created for OpenIDM", "givenName": "John", "mail": "jdoe@example.com", "telephoneNumber": "1-415-599-1100", "sn": "Doe", "userName": "jdoe", "accountStatus": "active", "effectiveRoles": [], "effectiveAssignments": [] }In the output, you will see an
_idassociated with each user, for example,580f1441-ff8e-434b-9605-90e10a6fbdf6. Make a note of these_ids because you will need them when you assign roles to the managed users.Set up the managed roles.
This sample uses two managed roles, Agent, and Insured, to distinguish between the two user types described previously. To set up these roles in the Admin UI, navigate to
https://localhost:8443/adminand click Manage > Role > New Role.Alternatively, use the following REST calls to set up the two managed roles:
$ curl \ --header "Content-Type: application/json" \ --header "X-OpenIDM-Username: openidm-admin" \ --header "X-OpenIDM-Password: openidm-admin" \ --request POST \ --data '{ "name" : "Agent", "description" : "Role assigned to insurance agents." }' \ "http://localhost:8080/openidm/managed/role?_action=create" { "_id": "1b58ec8d-fae2-4b28-a5cf-b63567e4cf3f", "_rev": "000000005b3d5ebd", "name": "Agent", "description": "Role assigned to insurance agents." }$ curl \ --header "Content-Type: application/json" \ --header "X-OpenIDM-Username: openidm-admin" \ --header "X-OpenIDM-Password: openidm-admin" \ --request POST \ --data '{ "name" : "Insured", "description" : "Role assigned to insured customers." }' \ "http://localhost:8080/openidm/managed/role?_action=create" { "_id": "617368f2-fa4e-44a2-a25a-f0a86e16ef00", "_rev": "000000002b845f24", "name": "Insured", "description": "Role assigned to insured customers." }Take note of the
_idof each managed role. You will need these IDs to assign the roles to your managed users.Grant the managed roles to the users.
This step assumes that user jdoe is both an Agent and an Insured customer and that user bjensen is just an Insured customer of Example.com.
To grant the roles, you need the
_idfor each user and the_idof each role, that you obtained when you created the users and roles.The following command grants the Agent role to jdoe:
$ curl \ --header "Content-type: application/json" \ --header "X-OpenIDM-Username: openidm-admin" \ --header "X-OpenIDM-Password: openidm-admin" \ --request PATCH \ --data '[ { "operation" : "add", "field" : "/roles/-", "value" : { "_ref" : "managed/role/1b58ec8d-fae2-4b28-a5cf-b63567e4cf3f" } } ]' \ "http://localhost:8080/openidm/managed/user/02632173-e413-4af1-8495-f749d5880226" { "_id": "02632173-e413-4af1-8495-f749d5880226", "_rev": "00000000dc6160c8", "displayName": "John Doe", "description": "Created for OpenIDM", "givenName": "John", "mail": "jdoe@example.com", "telephoneNumber": "1-415-599-1100", "sn": "Doe", "userName": "jdoe", "accountStatus": "active", "effectiveRoles": [ { "_ref": "managed/role/1b58ec8d-fae2-4b28-a5cf-b63567e4cf3f" } ], "effectiveAssignments": [] }The following command grants the Insured role to user bjensen:
$ curl \ --header "Content-type: application/json" \ --header "X-OpenIDM-Username: openidm-admin" \ --header "X-OpenIDM-Password: openidm-admin" \ --request PATCH \ --data '[ { "operation" : "add", "field" : "/roles/-", "value" : { "_ref" : "managed/role/617368f2-fa4e-44a2-a25a-f0a86e16ef00" } } ]' \ "http://localhost:8080/openidm/managed/user/580f1441-ff8e-434b-9605-90e10a6fbdf6" { "_id": "580f1441-ff8e-434b-9605-90e10a6fbdf6", "_rev": "000000004cab60c8", "displayName": "Barbara Jensen", "description": "Created for OpenIDM", "givenName": "Barbara", "mail": "bjensen@example.com", "telephoneNumber": "1-360-229-7105", "sn": "Jensen", "userName": "bjensen", "accountStatus": "active", "effectiveRoles": [ { "_ref": "managed/role/617368f2-fa4e-44a2-a25a-f0a86e16ef00" } ], "effectiveAssignments": [] }The following command grants the Insured role to jdoe, because he is both an insured customer and an agent:
$ curl \ --header "Content-type: application/json" \ --header "X-OpenIDM-Username: openidm-admin" \ --header "X-OpenIDM-Password: openidm-admin" \ --request PATCH \ --data '[ { "operation" : "add", "field" : "/roles/-", "value" : { "_ref" : "managed/role/617368f2-fa4e-44a2-a25a-f0a86e16ef00" } } ]' \ "http://localhost:8080/openidm/managed/user/02632173-e413-4af1-8495-f749d5880226" { "_id": "02632173-e413-4af1-8495-f749d5880226", "_rev": "00000000a92657c7", "displayName": "John Doe", "description": "Created for OpenIDM", "givenName": "John", "mail": "jdoe@example.com", "telephoneNumber": "1-415-599-1100", "sn": "Doe", "userName": "jdoe", "accountStatus": "active", "effectiveRoles": [ { "_ref": "managed/role/1b58ec8d-fae2-4b28-a5cf-b63567e4cf3f" }, { "_ref": "managed/role/617368f2-fa4e-44a2-a25a-f0a86e16ef00" } ], "effectiveAssignments": [] }Note from the output that jdoe now has two managed roles (and thus, two values for his
effectiveRolesproperty.Create the managed assignments.
Assignments specify what a role actually does on a target system. A single account frequently has different functions on a system. For example, while agents might be members of the Contractor group, insured customers might be part of a Chat Users group (possibly for access to customer service). The following commands create two managed assignments that will be attached to the agent and insured roles. Note the
_idof each assignment because you will need these when you attach the assignment to its corresponding role.The following command creates an
ldapAgentassignment. Users who have this assignment will have theirldapGroupsproperty in DS set tocn=Contractors,ou=Groups,dc=example,dc=com. The assignment is associated with theagentlink qualifier:$ curl \ --header "Content-Type: application/json" \ --header "X-OpenIDM-Username: openidm-admin" \ --header "X-OpenIDM-Password: openidm-admin" \ --request POST \ --data '{ "name" : "ldapAgent", "description" : "LDAP Agent Assignment", "mapping" : "managedUser_systemLdapAccounts", "attributes": [ { "name": "ldapGroups", "value": [ "cn=Contractors,ou=Groups,dc=example,dc=com" ], "assignmentOperation" : "mergeWithTarget", "unassignmentOperation" : "removeFromTarget" } ], "linkQualifiers": ["agent"] }' \ "http://localhost:8080/openidm/managed/assignment?_action=create" { "_id": "cc0dbcdc-64a4-4f5b-aade-648fc012e2b5", "_rev": "00000000c7554e13", "name": "ldapAgent", "description": "LDAP Agent Assignment", "mapping": "managedUser_systemLdapAccounts", "attributes": [ { "name": "ldapGroups", "value": [ "cn=Contractors,ou=Groups,dc=example,dc=com" ], "assignmentOperation": "mergeWithTarget", "unassignmentOperation": "removeFromTarget" } ], "linkQualifiers": [ "agent" ] }The following command creates an
ldapCustomerassignment. Users who have this assignment will have theirldapGroupsproperty in DS set tocn=Chat Users,ou=Groups,dc=example,dc=com. The assignment is associated with theinsuredlink qualifier:$ curl \ --header "Content-Type: application/json" \ --header "X-OpenIDM-Username: openidm-admin" \ --header "X-OpenIDM-Password: openidm-admin" \ --request POST \ --data '{ "name" : "ldapCustomer", "description" : "LDAP Customer Assignment", "mapping" : "managedUser_systemLdapAccounts", "attributes": [ { "name": "ldapGroups", "value": [ "cn=Chat Users,ou=Groups,dc=example,dc=com" ], "assignmentOperation" : "mergeWithTarget", "unassignmentOperation" : "removeFromTarget" } ], "linkQualifiers": ["insured"] }' \ "http://localhost:8080/openidm/managed/assignment?_action=create" { "_id": "56b1f300-7156-4110-9b23-2052c16dd2aa", "_rev": "000000000cde398e", "name": "ldapCustomer", "description": "LDAP Customer Assignment", "mapping": "managedUser_systemLdapAccounts", "attributes": [ { "name": "ldapGroups", "value": [ "cn=Chat Users,ou=Groups,dc=example,dc=com" ], "assignmentOperation": "mergeWithTarget", "unassignmentOperation": "removeFromTarget" } ], "linkQualifiers": [ "insured" ] }Add the assignments to their respective roles.
Add the
ldapCustomerassignment to the Insured customer role:$ curl \ --header "Content-type: application/json" \ --header "X-OpenIDM-Username: openidm-admin" \ --header "X-OpenIDM-Password: openidm-admin" \ --request PATCH \ --data '[ { "operation" : "add", "field" : "/assignments/-", "value" : { "_ref" : "managed/assignment/56b1f300-7156-4110-9b23-2052c16dd2aa" } } ]' \ "http://localhost:8080/openidm/managed/role/617368f2-fa4e-44a2-a25a-f0a86e16ef00" { "_id": "617368f2-fa4e-44a2-a25a-f0a86e16ef00", "_rev": "0000000050c62938", "name": "Insured", "description": "Role assigned to insured customers." }Add the
ldapAgentassignment to the Agent role:$ curl \ --header "Content-type: application/json" \ --header "X-OpenIDM-Username: openidm-admin" \ --header "X-OpenIDM-Password: openidm-admin" \ --request PATCH \ --data '[ { "operation" : "add", "field" : "/assignments/-", "value" : { "_ref" : "managed/assignment/cc0dbcdc-64a4-4f5b-aade-648fc012e2b5" } } ]' \ "http://localhost:8080/openidm/managed/role/1b58ec8d-fae2-4b28-a5cf-b63567e4cf3f"
14.4. Reconciling Managed Users to the External LDAP Server
With the managed roles and assignments set up, you reconcile the managed user repository with the DS data store:
$ curl \ --header "X-OpenIDM-Username: openidm-admin" \ --header "X-OpenIDM-Password: openidm-admin" \ --request POST \ "http://localhost:8080/openidm/recon?_action=recon&mapping=managedUser_systemLdapAccounts"
With the roles, assignments and link qualifiers that you set up in the previous step, this reconciliation creates three new accounts in DS:
Two accounts under
ou=Customers,dc=example,dc=com(one for each user who has the insured customers role),bjensenandjdoe.One account under
ou=Contractors,dc=example,dc=com(for the use who has the agents role),jdoe.
Note that both of these users already existed in DS (from the
Example.ldif file that you imported during the setup).
If you query the list of users in DS now, you will see the
multiple accounts created for jdoe and bjensen as a result of the
reconciliation:
$ curl \
--header "X-OpenIDM-Username: openidm-admin" \
--header "X-OpenIDM-Password: openidm-admin" \
--request GET \
"http://localhost:8080/openidm/system/ldap/account?_queryId=query-all-ids"
{
"result": [
{
"_id": "3bbf1f43-e120-4d34-a4c9-05bd02be23bd",
"dn": "uid=jdoe,ou=People,dc=example,dc=com"
},
{
"_id": "d6c73ea1-fd05-4b80-8625-c50303755c91",
"dn": "uid=bjensen,ou=People,dc=example,dc=com"
},
{
"_id" : "0acc77a5-0f38-473b-b533-e37ca1d4fd4c",
"dn": "uid=jdoe,ou=Contractors,dc=example,dc=com"
},
{
"_id" : "3310b29a-0d7f-4ed5-aa0d-795d2780e002",
"dn": "uid=bjensen,ou=Customers,dc=example,dc=com"
},
{
"_id" : "3c8e3c3d-f748-44c1-8cfc-172f5b0a9b5e",
"dn": "uid=jdoe,ou=Customers,dc=example,dc=com"
}
],
...
}
Chapter 15. Linking Historical Accounts
This sample demonstrates the retention of inactive (historical) LDAP accounts that have been linked to a corresponding managed user account. The sample builds on "Two Way Synchronization Between LDAP and IDM" and uses the LDAP connector to connect to a ForgeRock Directory Services (DS) instance. You can use any LDAP-v3 compliant directory server.
In this sample, IDM is the source resource. Managed users in the
IDM repository maintain a list of the accounts to which they have
been linked on the local LDAP server. This list is stored in the
historicalAccounts field of the managed user entry. The
list contains a reference to all past and current LDAP accounts. Each LDAP
account in the list is represented as a relationship and
includes information about the date the accounts were linked or unlinked, and
whether the account is currently active. For more information about
relationship objects, see "Managing Relationships Between Objects" in the Integrator's Guide.
This sample includes the following custom scripts, in its
script directory:
onLink-managedUser_systemLdapAccounts.jsWhen a managed user object is linked to a target LDAP object, this script creates the relationship entry in the managed user's
historicalAccountsproperty. The script adds two relationship properties:linkDate— specifies the date that the link was created.active— boolean true/false. When set to true, this property indicates that the target object is currently linked to the managed user account.
onUnlink-managedUser_systemLdapAccounts.jsWhen a managed user object is unlinked from a target LDAP object, this script updates that relationship entry's properties with an
unlinkDatethat specifies when the target was unlinked, and sets theactiveproperty to false, indicating that the target object is no longer linked.check_account_state_change.jsDuring liveSync or reconciliation, this script checks if the LDAP account state has changed. If the state has changed, the script updates the historical account properties to indicate the new state (enabled or disabled), and the date that the state was changed. This date can only be approximated and is set to the time that the change was detected by the script.
ldapBackCorrelationQuery.jsThis script correlates entries in the LDAP directory with managed user identities in IDM.
15.1. Configuring the LDAP Server
This sample expects the configuration for the external LDAP server to be the same as described in "LDAP Server Configuration".
The following steps provide setup instructions for DS version 6.0. Adjust these instructions if you are using an older version of DS, or an alternative LDAP server.
The LDIF data for this sample is provided in the file
openidm/samples/historical-account-linking/data/Example.ldif.
Import this data during your DS setup.
Although there is only one LDAP server in this example, you must enable replication on that server, so that the server has an external change log. The change log is required for liveSync between DS and IDM.
Download DS from ForgeRock's BackStage site and extract the zip archive.
Set up DS and import the
Example.ldiffile for this sample:$ cd /path/to/opendj $ ./setup \ directory-server \ --hostname localhost \ --ldapPort 1389 \ --rootUserDN "cn=Directory Manager" \ --rootUserPassword password \ --adminConnectorPort 4444 \ --baseDN dc=com \ --ldifFile /path/to/openidm/samples/historical-account-linking/data/Example.ldif \ --acceptLicense .Validating parameters .....Done. Configuring Certificates .....Done. Configuring server .....Done. Importing data from /path/to/openidm/samples/historical-account-linking/data/Example.ldif ........Done. Starting Directory Server ............Done. To see basic server status and configuration, you can launch /path/to/opendj/bin/status
Enable replication:
$ cd /path/to/opendj/bin $ ./dsconfig create-replication-server \ --hostname localhost \ --port 4444 \ --bindDN "cn=Directory Manager" \ --bindPassword password \ --provider-name "Multimaster Synchronization" \ --set replication-port:8989 \ --set replication-server-id:2 \ --trustAll \ --no-prompt The Replication Server was created successfully
$ ./dsconfig create-replication-domain \ --hostname localhost \ --port 4444 \ --bindDN "cn=Directory Manager" \ --bindPassword password \ --provider-name "Multimaster Synchronization" \ --set base-dn:dc=example,dc=com \ --set replication-server:localhost:8989 \ --set server-id:3 \ --domain-name example.com\ --trustAll \ --no-prompt The Replication Domain was created successfully
15.2. Running the Historical Accounts Sample
This section walks you through each step of the sample to demonstrate how historical accounts are stored.
Prepare IDM as described in "Preparing IDM", then start the server with the configuration for the historical accounts sample:
$ cd /path/to/openidm $ ./startup.sh -p samples/historical-account-linking/ Executing ./startup.sh... Using OPENIDM_HOME: /path/to/openidm Using PROJECT_HOME: /path/to/openidm/samples/historical-account-linking Using OPENIDM_OPTS: -Xmx1024m -Xms1024m Using LOGGING_CONFIG: -Djava.util.logging.config.file= /path/to/openidm/samples/historical-account-linking/conf/logging.properties Using boot properties at /path/to/openidm/resolver/boot.properties -> OpenIDM version "6.0.0.7" OpenIDM readyCreate a user, Joe Smith, in IDM.
The following command creates the user over REST, and assigns the user the ID
joesmith:$ curl \ --header "X-OpenIDM-Username: openidm-admin" \ --header "X-OpenIDM-Password: openidm-admin" \ --header "Content-Type: application/json" \ --request POST \ --data '{ "userName": "joe.smith", "givenName": "Joe", "sn" : "Smith", "password" : "Passw0rd", "displayName" : "Joe Smith", "mail" : "joe.smith@example.com", "_id" : "joesmith" }' \ "http://localhost:8080/openidm/managed/user?_action=create" { "_id": "joesmith", "_rev": "00000000b8ea3183", "userName": "joe.smith", "givenName": "Joe", "sn": "Smith", "displayName": "Joe Smith", "mail": "joe.smith@example.com", "accountStatus": "active", "effectiveRoles": [], "effectiveAssignments": [] }Verify that the user Joe Smith was created in DS.
Because implicit synchronization is enabled by default, any change to the managed/user repository should be propagated to DS. For more information about implicit synchronization, see "Types of Synchronization" in the Integrator's Guide.
The following command returns all IDs in DS and shows that user joesmith was created successfully:
$ curl \ --header "X-OpenIDM-Username: openidm-admin" \ --header "X-OpenIDM-Password: openidm-admin" \ --request GET \ "http://localhost:8080/openidm/system/ldap/account?_queryId=query-all-ids" { "result": [ { "_id": "0da50512-79bb-3461-bd04-241ee4c785bf", "dn": "uid=jdoe,ou=People,dc=example,dc=com" }, { "_id": "887732e8-3db2-31bb-b329-20cd6fcecc05", "dn": "uid=bjensen,ou=People,dc=example,dc=com" }, { "_id": "0fa26f3f-55c1-4e0f-993b-dec7b9bc26d3", "dn": "uid=joe.smith0,ou=People,dc=example,dc=com" } ], ... }Note that Joe Smith's
uidin DS is appended with a0. TheonCreatescript, defined in the mapping (sync.json), increments theuideach time a new DS entry is linked to the same managed user object.Verify that the historical account relationship object that corresponds to this linked LDAP account was created in the IDM repository.
The following command returns all of the
historicalAccountsfor user joesmith:$ curl \ --header "X-OpenIDM-Username: openidm-admin" \ --header "X-OpenIDM-Password: openidm-admin" \ --request GET \ "http://localhost:8080/openidm/managed/user/joesmith/historicalAccounts?_queryId=query-all" { "result": [ { "_id": "2fe2f801-fbde-4c61-9b30-485e67ad08cc", "_rev": "000000002ec6cd4f", "_ref": "system/ldap/account/0fa26f3f-55c1-4e0f-993b-dec7b9bc26d3", "_refResourceCollection": "system/ldap/account", "_refResourceId": "0fa26f3f-55c1-4e0f-993b-dec7b9bc26d3", "_refProperties": { "active": true, "stateLastChanged": "Mon Feb 26 2018 12:09:46 GMT+0200 (SAST)", "state": "enabled", "linkDate": "Mon Feb 26 2018 12:09:46 GMT+0200 (SAST)", "_id": "2fe2f801-fbde-4c61-9b30-485e67ad08cc", "_rev": "000000002ec6cd4f" } } ], ... }At this stage, Joe Smith has only one historical account link — the link to
system/ldap/account/0fa26f3f-55c1-4e0f-993b-dec7b9bc26d3, which corresponds to the DN"dn": "uid=joe.smith0,ou=People,dc=example,dc=com". Note that the relationship properties (_refProperties) show the following information about the linked accounts:The date on which the accounts were linked
The fact that this link is currently active
The state of the account in DS (
enabled)
Enable the liveSync schedule to propagate changes made in DS to the managed user repository.
To start liveSync, set
enabledtotruein theconf/schedule-liveSync.jsonfile:$ cd /path/to/openidm $ more samples/historical-account-linking/conf/schedule-liveSync.json { "enabled" : true, "type" : "simple", "repeatInterval" : 15000, ...Use the
manage-accountcommand in theopendj/bindirectory to disable Joe Smith's account in DS:$ cd /path/to/opendj $ bin/manage-account set-account-is-disabled \ --port 4444 \ --bindDN "cn=Directory Manager" \ --bindPassword password \ --operationValue true \ --targetDN uid=joe.smith0,ou=people,dc=example,dc=com \ --trustAll Account Is Disabled: true
Within 15 seconds, according to the configured schedule, liveSync should pick up the change. IDM should then adjust the
stateproperty in Joe Smith's managed user account.Check Joe Smith's historical accounts again, to make sure that the state of this linked account has changed:
$ curl \ --header "X-OpenIDM-Username: openidm-admin" \ --header "X-OpenIDM-Password: openidm-admin" \ --request GET \ "http://localhost:8080/openidm/managed/user/joesmith/historicalAccounts?_queryId=query-all" { "result": [ { "_id": "2fe2f801-fbde-4c61-9b30-485e67ad08cc", "_rev": "00000000b535e3e6", "_ref": "system/ldap/account/0fa26f3f-55c1-4e0f-993b-dec7b9bc26d3", "_refResourceCollection": "system/ldap/account", "_refResourceId": "0fa26f3f-55c1-4e0f-993b-dec7b9bc26d3", "_refProperties": { "active": true, "stateLastChanged": "Mon Feb 26 2018 12:22:22 GMT+0200 (SAST)", "state": "disabled", "linkDate": "Mon Feb 26 2018 12:09:46 GMT+0200 (SAST)", "_id": "2fe2f801-fbde-4c61-9b30-485e67ad08cc", "_rev": "00000000b535e3e6" } } ], ... }Now, deactivate Joe Smith's managed user account by setting his
accountStatusproperty toinactive.You can deactivate the account over the REST interface, or by using the Admin UI.
To use the Admin UI, simply select Manage > User, select Joe Smith's account and change his Status to inactive, on his Details tab.
The following command deactivates Joe Smith's account over REST:
$ curl \ --header "X-OpenIDM-Username: openidm-admin" \ --header "X-OpenIDM-Password: openidm-admin" \ --header "Content-Type: application/json" \ --request PATCH \ --data '[ { "operation" : "replace", "field" : "accountStatus", "value" : "inactive" } ]' \ "http://localhost:8080/openidm/managed/user/joesmith" { "_id": "joesmith", "_rev": "00000000579f3324", "userName": "joe.smith", "givenName": "Joe", "sn": "Smith", "displayName": "Joe Smith", "mail": "joe.smith@example.com", "accountStatus": "inactive", ... }Request Joe Smith's historical accounts again:
$ curl \ --header "X-OpenIDM-Username: openidm-admin" \ --header "X-OpenIDM-Password: openidm-admin" \ --request GET \ "http://localhost:8080/openidm/managed/user/joesmith/historicalAccounts?_queryId=query-all" { "result": [ { "_id": "2fe2f801-fbde-4c61-9b30-485e67ad08cc", "_rev": "00000000f00cf26e", "_ref": "system/ldap/account/0fa26f3f-55c1-4e0f-993b-dec7b9bc26d3", "_refResourceCollection": "system/ldap/account", "_refResourceId": "0fa26f3f-55c1-4e0f-993b-dec7b9bc26d3", "_refProperties": { "active": false, "stateLastChanged": "Mon Feb 26 2018 12:22:22 GMT+0200 (SAST)", "state": "disabled", "linkDate": "Mon Feb 26 2018 12:09:46 GMT+0200 (SAST)", "unlinkDate": "Mon Feb 26 2018 12:29:35 GMT+0200 (SAST)", "_id": "2fe2f801-fbde-4c61-9b30-485e67ad08cc", "_rev": "00000000f00cf26e" } } ], ... }Activate Joe Smith's managed user account by setting his
accountStatusproperty to active. This action should create a new entry in DS (withuid=joe.smith1), and a new link from Joe Smith's managed user object to that DS entry.You can activate the account over the REST interface, or by using the Admin UI, as described previously.
The following command activates Joe Smith's account over REST:
$ curl \ --header "X-OpenIDM-Username: openidm-admin" \ --header "X-OpenIDM-Password: openidm-admin" \ --header "Content-Type: application/json" \ --request PATCH \ --data '[ { "operation" : "replace", "field" : "accountStatus", "value" : "active" } ]' \ "http://localhost:8080/openidm/managed/user/joesmith" { "_id": "joesmith", "_rev": "00000000c2cb3095", "userName": "joe.smith", "givenName": "Joe", "sn": "Smith", "displayName": "Joe Smith", "mail": "joe.smith@example.com", "accountStatus": "active", ... }Verify that a new LDAP entry for user Joe Smith was created in DS.
The following command returns all IDs in DS and shows that two entries now exist for Joe Smith -
uid=joe.smith0anduid=joe.smith1.$ curl \ --header "X-OpenIDM-Username: openidm-admin" \ --header "X-OpenIDM-Password: openidm-admin" \ --request GET \ "http://localhost:8080/openidm/system/ldap/account?_queryId=query-all-ids" { "result": [ { "_id": "0da50512-79bb-3461-bd04-241ee4c785bf", "dn": "uid=jdoe,ou=People,dc=example,dc=com" }, { "_id": "887732e8-3db2-31bb-b329-20cd6fcecc05", "dn": "uid=bjensen,ou=People,dc=example,dc=com" }, { "_id": "0fa26f3f-55c1-4e0f-993b-dec7b9bc26d3", "dn": "uid=joe.smith0,ou=People,dc=example,dc=com" }, { "_id": "30ca4ec1-9561-49d8-8199-ed52e66a66f2", "dn": "uid=joe.smith1,ou=People,dc=example,dc=com" } ], ... }Request Joe Smith's historical accounts again:
$ curl \ --header "X-OpenIDM-Username: openidm-admin" \ --header "X-OpenIDM-Password: openidm-admin" \ --request GET \ "http://localhost:8080/openidm/managed/user/joesmith/historicalAccounts?_queryId=query-all" { "result": [ { "_id": "2fe2f801-fbde-4c61-9b30-485e67ad08cc", "_rev": "00000000f00cf26e", "_ref": "system/ldap/account/0fa26f3f-55c1-4e0f-993b-dec7b9bc26d3", "_refResourceCollection": "system/ldap/account", "_refResourceId": "0fa26f3f-55c1-4e0f-993b-dec7b9bc26d3", "_refProperties": { "active": false, "stateLastChanged": "Mon Feb 26 2018 12:22:22 GMT+0200 (SAST)", "state": "disabled", "linkDate": "Mon Feb 26 2018 12:09:46 GMT+0200 (SAST)", "unlinkDate": "Mon Feb 26 2018 12:29:35 GMT+0200 (SAST)", "_id": "2fe2f801-fbde-4c61-9b30-485e67ad08cc", "_rev": "00000000f00cf26e" } }, { "_id": "dd8f895d-4b6e-4425-b92a-1963e1720987", "_rev": "000000008770cc38", "_ref": "system/ldap/account/30ca4ec1-9561-49d8-8199-ed52e66a66f2", "_refResourceCollection": "system/ldap/account", "_refResourceId": "30ca4ec1-9561-49d8-8199-ed52e66a66f2", "_refProperties": { "active": true, "stateLastChanged": "Mon Feb 26 2018 12:30:40 GMT+0200 (SAST)", "state": "enabled", "linkDate": "Mon Feb 26 2018 12:30:40 GMT+0200 (SAST)", "_id": "dd8f895d-4b6e-4425-b92a-1963e1720987", "_rev": "000000008770cc38" } } ], ... }Note that Joe Smith's entry now shows two DS accounts, but that only the link to
uid=joe.smith1("_ref": "system/ldap/account/30ca4ec1-9561-49d8-8199-ed52e66a66f2",) isenabledandactive.
Chapter 16. Provisioning With Roles
This sample demonstrates how attributes are provisioned to an external system (an LDAP directory), based on role membership. This sample uses ForgeRock Directory Services (DS) as the LDAP directory, but you can use any LDAP v3-compliant server.
IDM supports two types of roles:
Provisioning roles specify how objects are provisioned to an external system.
Authorization roles specify the authorization rights of a managed object internally, within IDM.
Both provisioning roles and authorization roles use the relationships mechanism to link the role object, and the managed object to which the role applies. For more information about relationships between objects, see "Managing Relationships Between Objects" in the Integrator's Guide. For information about managing roles, see "Working With Managed Roles" in the Integrator's Guide.
Important
Most of the commands in this sample can be run by using the command-line but it is generally much easier to use the Admin UI. In some cases, the command-line version makes it easier to explain what is happening in IDM. Therefore, in all steps, the sample first shows the command-line version, and then provides the equivalent method of running the command in the Admin UI.
16.1. Provisioning to an LDAP Server
The main purpose of IDM roles is to provision a set of attributes, based on a managed user's role membership.
The sample assumes a company, example.com. As an Employee of example.com, a user should be added to two groups in DS - the Employees group and the Chat Users group (presumably to access certain internal applications). As a Contractor, a user should be added only to the Contractors group in DS. A user's employee type must also be set correctly in DS, based on the role that is granted to the user.
16.1.1. External LDAP Configuration
Configure the LDAP server as shown in "LDAP Server Configuration".
The LDAP user must have write access to create users from IDM on
the LDAP server. When you set up the LDAP server, import the LDIF file for
this sample
(openidm/samples/provisioning-with-roles/data/Example.ldif).
16.1.2. Before You Start
This section sets up the scenario by performing the following tasks:
Start IDM with the configuration for this sample.
Create two managed roles, Employee and Contractor.
Reconcile the managed user repository with the user entries in the LDAP server.
Prepare IDM as described in "Preparing IDM", then start the server with the configuration for this sample:
$ cd /path/to/openidm
$ ./startup.sh -p samples/provisioning-with-roles
Create two managed roles, Employee and Contractor, either by using the Admin UI, or by running the following commands:
$ curl \ --header "Content-type: application/json" \ --header "X-OpenIDM-Username: openidm-admin" \ --header "X-OpenIDM-Password: openidm-admin" \ --request POST \ --data '{ "name" : "Employee", "description": "Role granted to workers on the payroll." }' \ "http://localhost:8080/openidm/managed/role?_action=create" { "_id": "19991736-eb6a-4d62-bc73-f149524e21f8", "_rev": "00000000292c6022", "name": "Employee", "description": "Role granted to workers on the payroll." }$ curl \ --header "Content-type: application/json" \ --header "X-OpenIDM-Username: openidm-admin" \ --header "X-OpenIDM-Password: openidm-admin" \ --request POST \ --data '{ "name" : "Contractor", "description": "Role granted to contract workers." }' \ "http://localhost:8080/openidm/managed/role?_action=create" { "_id": "f7da3805-50dd-4585-9bf6-e01658dece01", "_rev": "00000000f5ac5f89", "name": "Contractor", "description": "Role granted to contract workers." }Note the IDs of these two roles because you will use them in the commands that follow.
Reconcile the repository.
The
sync.jsonconfiguration file for this sample includes two mappings:systemLdapAccounts_managedUser, which synchronizes users from the source LDAP server with the target IDM repository; andmanagedUser_systemLdapAccounts, which synchronizes changes from the repository with the LDAP server.Run a reconciliation operation for the first mapping, either by using the Admin UI, or over the REST interface:
To use the Admin UI, select Configure > Mapping, click on the first mapping (System/Ldap/Account --> Managed User) and click Reconcile.
To use the REST interface, run the following command:
$ curl \ --header "X-OpenIDM-Username: openidm-admin" \ --header "X-OpenIDM-Password: openidm-admin" \ --request POST \ "http://localhost:8080/openidm/recon?_action=recon&mapping=systemLdapAccounts_managedUser&waitForCompletion=true" { "_id": "b5c535f8-5c1f-44dc-afa3-40d4f9984925-24", "state": "SUCCESS" }
The sample is now ready to demonstrate provisioning roles.
16.1.3. Run the Sample
This section assumes that you have reconciled the managed user repository to populate it with the users from the LDAP server, and that you have created the Employee and Contractor roles.
This part of the sample demonstrates the following features of the roles implementation:
16.1.3.1. Adding Assignments to a Role Definition
A role assignment is the logic that provisions a managed user to an external system, based on some criteria. The most common use case of a role assignment is the provisioning of specific attributes to an external system, based on the role or roles that the managed user has been granted. Assignments are sometimes called entitlements. For more information about assignments, see "Working With Role Assignments" in the Integrator's Guide.
In this section, you will create an assignment and add it to the Employee role that you created previously. This section assumes the following scenario:
example.com's policy requires that every employee has the correct value for
their employeeType in their corporate directory
(DS).
Display the roles that you created in the previous section:
$ curl \ --header "X-OpenIDM-Username: openidm-admin" \ --header "X-OpenIDM-Password: openidm-admin" \ --request GET \ "http://localhost:8080/openidm/managed/role?_queryFilter=true" { "result": [ { "_id": "19991736-eb6a-4d62-bc73-f149524e21f8", "_rev": "00000000292c6022", "name": "Employee", "description": "Role granted to workers on the payroll." }, { "_id": "f7da3805-50dd-4585-9bf6-e01658dece01", "_rev": "00000000f5ac5f89", "name": "Contractor", "description": "Role granted to contract workers." } ], ... }Tip
Display the roles in the Admin UI by selecting Manage > Role.
Create a new managed assignment named Employee.
The assignment is specifically for the mapping from the managed user repository to the LDAP server. The assignment sets the value of the
employeeTypeattribute on the LDAP server toEmployee:$ curl \ --header "X-OpenIDM-Username: openidm-admin" \ --header "X-OpenIDM-Password: openidm-admin" \ --header "Content-type: application/json" \ --request POST \ --data '{ "name" : "Employee", "description": "Assignment for employees.", "mapping" : "managedUser_systemLdapAccounts", "attributes": [ { "name": "employeeType", "value": [ "Employee" ], "assignmentOperation" : "mergeWithTarget", "unassignmentOperation" : "removeFromTarget" } ] }' \ "http://localhost:8080/openidm/managed/assignment?_action=create" { "_id": "8f2c3111-5d5a-4bed-abc8-810ec8b9278d", "_rev": "00000000b2369bf7", "name": "Employee", "description": "Assignment for employees.", "mapping": "managedUser_systemLdapAccounts", "attributes": [ { "name": "employeeType", "value": [ "Employee" ], "assignmentOperation": "mergeWithTarget", "unassignmentOperation": "removeFromTarget" } ] }Tip
Create the assignment in the Admin UI:
Select Manage > Assignment, and click New Assignment.
Enter a name and description for the assignment, and select the mapping for which the assignment is applied (managedUser_systemLdapAccounts).
Click Add Assignment.
Select the Attributes tab, and click Add an Attribute.
Select employeeType, click item, select string, and enter the value Employee.
Click Save.
Add the assignment to the Employee role that you created previously.
Assignments are implemented as relationship objects. This means that you add an assignment to a role by referencing the assignment in the role's
assignmentsfield:This command patches the Employee role to update its
assignmentsfield.$ curl \ --header "Content-type: application/json" \ --header "X-OpenIDM-Username: openidm-admin" \ --header "X-OpenIDM-Password: openidm-admin" \ --request PATCH \ --data '[ { "operation" : "add", "field" : "/assignments/-", "value" : { "_ref": "managed/assignment/8f2c3111-5d5a-4bed-abc8-810ec8b9278d"} } ]' \ "http://localhost:8080/openidm/managed/role/19991736-eb6a-4d62-bc73-f149524e21f8" { "_id": "19991736-eb6a-4d62-bc73-f149524e21f8", "_rev": "00000000292c6022", "name": "Employee", "description": "Role granted to workers on the payroll." }Tip
Add the assignment to the role in the Admin UI:
Select Manage > Role, and select the Employee role.
On the Managed Assignments tab, click Add Managed Assignments.
Select the Employee assignment and click Add.
16.1.3.2. Granting a Role to a User and Observing that User's Role Assignments
When a role is granted to a user (by updating the users
roles property), any assignments that are referenced by
the role are automatically referenced in the user's
assignments property.
In this section, we will grant the Employee role we created previously to the user Barbara Jensen, who was created in the managed/user repository during the reconciliation from DS.
Before you can update Barbara Jensen's entry, determine the identifier of her entry by querying her username,
bjensen, and requesting only her_idfield:$ curl \ --header "X-OpenIDM-Username: openidm-admin" \ --header "X-OpenIDM-Password: openidm-admin" \ --request GET \ "http://localhost:8080/openidm/managed/user?_queryFilter=/userName+eq+'bjensen'&_fields=_id" { "result": [ { "_id": "0728d860-1ac5-402d-8d6a-2bef98a15ebc", "_rev": "000000008a64fd25" } ], ... }From the output, you can see that bjensen's
_idis0728d860-1ac5-402d-8d6a-2bef98a15ebc. (This unique ID will obviously be different in your command output.)Update bjensen's entry by adding a reference to the ID of the Employee role as a value of her
rolesattribute:$ curl \ --header "X-OpenIDM-Username: openidm-admin" \ --header "X-OpenIDM-Password: openidm-admin" \ --header "Content-type: application/json" \ --request PATCH \ --data '[ { "operation" : "add", "field" : "/roles/-", "value" : { "_ref": "managed/role/19991736-eb6a-4d62-bc73-f149524e21f8" } } ]' \ "http://localhost:8080/openidm/managed/user/0728d860-1ac5-402d-8d6a-2bef98a15ebc" { "_id": "0728d860-1ac5-402d-8d6a-2bef98a15ebc", "_rev": "00000000e89de6f9", "displayName": "Barbara Jensen", "description": "Created for OpenIDM", "givenName": "Barbara", "mail": "bjensen@example.com", "telephoneNumber": "1-360-229-7105", "sn": "Jensen", "userName": "bjensen", "accountStatus": "active", "effectiveRoles": [ { "_ref": "managed/role/19991736-eb6a-4d62-bc73-f149524e21f8" } ], "effectiveAssignments": [ { "name": "Employee", "description": "Assignment for employees.", "mapping": "managedUser_systemLdapAccounts", "attributes": [ { "name": "employeeType", "value": [ "Employee" ], "assignmentOperation": "mergeWithTarget", "unassignmentOperation": "removeFromTarget" } ], "_rev": "00000000b2369bf7", "_id": "8f2c3111-5d5a-4bed-abc8-810ec8b9278d" } ] }Tip
Assign the role to bjensen by using the Admin UI:
Select Manage > User, and click on bjensen's entry.
On the Provisioning Roles tab, click Add Provisioning Roles.
Select the Employee role and click Add.
Take a closer look at bjensen's entry, specifically at her roles, effective roles and effective assignments:
$ curl \ --header "X-OpenIDM-Username: openidm-admin" \ --header "X-OpenIDM-Password: openidm-admin" \ --request GET \ "http://localhost:8080/openidm/managed/user?_queryFilter=/userName+eq+'bjensen'&_fields=_id,userName,roles,effectiveRoles,effectiveAssignments" { "_id": "0728d860-1ac5-402d-8d6a-2bef98a15ebc", "_rev": "00000000e89de6f9", "displayName": "Barbara Jensen", "description": "Created for OpenIDM", "givenName": "Barbara", "mail": "bjensen@example.com", "telephoneNumber": "1-360-229-7105", "sn": "Jensen", "userName": "bjensen", "accountStatus": "active", "effectiveRoles": [ { "_ref": "managed/role/19991736-eb6a-4d62-bc73-f149524e21f8" } ], "effectiveAssignments": [ { "name": "Employee", "description": "Assignment for employees.", "mapping": "managedUser_systemLdapAccounts", "attributes": [ { "name": "employeeType", "value": [ "Employee" ], "assignmentOperation": "mergeWithTarget", "unassignmentOperation": "removeFromTarget" } ], "_rev": "00000000b2369bf7", "_id": "8f2c3111-5d5a-4bed-abc8-810ec8b9278d" } ] }Note that bjensen now has the calculated property
effectiveAssignments, which includes the set of assignments that pertains to any user with the Employee role. Currently the assignment lists theemployeeTypeattribute.In the next section, you will see how the assignment is used to set the value of the
employeeTypeattribute in the LDAP server.
16.1.3.3. Propagating Assignments to an External System
This section provides a number of steps that show how effective assignments are propagated out to the external systems associated with their mappings.
Verify that bjensen's
employeeTypehas been set correctly in DS.Because implicit synchronization is enabled by default, any changes made to a managed user object are pushed out to all the external systems for which mappings are configured.
So, because bjensen has an effective assignment that sets an attribute in her LDAP entry, you should immediately see the resulting change in her LDAP entry.
To verify that her entry has changed, run an
ldapsearchon her entry and check the value of heremployeeTypeattribute.Note
This command assumes that you are using the ldapsearch command that is provided with DS (
opendj/bin/ldapsearch).$ ldapsearch \ --port 1389 \ --hostname localhost \ --baseDN "dc=example,dc=com" \ --bindDN "cn=Directory Manager" \ --bindPassword password \ --searchScope sub \ "(uid=bjensen)" dn uid employeeType dn: uid=bjensen,ou=People,dc=example,dc=com uid: bjensen employeeType: Employee
Note that bjensen's
employeeTypeattribute is correctly set toEmployee.To observe how a managed user's roles can be used to provision group membership in an external directory, we add the groups that an Employee and a Contractor should have in the corporate directory (DS) as assignment attributes of the respective roles.
First, look at the current
assignmentsof the Employee role again:$ curl \ --header "X-OpenIDM-Username: openidm-admin" \ --header "X-OpenIDM-Password: openidm-admin" \ --request GET \ "http://localhost:8080/openidm/managed/role/19991736-eb6a-4d62-bc73-f149524e21f8?_fields=assignments,name" { "_id": "19991736-eb6a-4d62-bc73-f149524e21f8", "_rev": "00000000292c6022", "name": "Employee", "assignments": [ { "_ref": "managed/assignment/8f2c3111-5d5a-4bed-abc8-810ec8b9278d", "_refResourceCollection": "managed/assignment", "_refResourceId": "8f2c3111-5d5a-4bed-abc8-810ec8b9278d", "_refProperties": { "_id": "62318c1c-4386-44dd-b9e8-f971cce9a4fa", "_rev": "00000000cd61a7bf" } } ] }To update the
groupsattribute in bjensen's LDAP entry, you do not need to create a new assignment. You simply need to add the attribute for LDAP groups to the Employee assignment (with ID8f2c3111-5d5a-4bed-abc8-810ec8b9278d):$ curl \ --header "Content-type: application/json" \ --header "X-OpenIDM-Username: openidm-admin" \ --header "X-OpenIDM-Password: openidm-admin" \ --request PATCH \ --data '[ { "operation" : "add", "field" : "/attributes/-", "value" : { "name": "ldapGroups", "value": [ "cn=Employees,ou=Groups,dc=example,dc=com", "cn=Chat Users,ou=Groups,dc=example,dc=com" ], "assignmentOperation" : "mergeWithTarget", "unassignmentOperation" : "removeFromTarget" } } ]' \ "http://localhost:8080/openidm/managed/assignment/8f2c3111-5d5a-4bed-abc8-810ec8b9278d" { "_id": "8f2c3111-5d5a-4bed-abc8-810ec8b9278d", "_rev": "000000003b22fb6d", "name": "Employee", "description": "Assignment for employees.", "mapping": "managedUser_systemLdapAccounts", "attributes": [ { "name": "employeeType", "value": [ "Employee" ], "assignmentOperation": "mergeWithTarget", "unassignmentOperation": "removeFromTarget" }, { "name": "ldapGroups", "value": [ "cn=Employees,ou=Groups,dc=example,dc=com", "cn=Chat Users,ou=Groups,dc=example,dc=com" ], "assignmentOperation": "mergeWithTarget", "unassignmentOperation": "removeFromTarget" } ] }So, the Employee assignment now sets two attributes on the LDAP system - the
employeeTypeattribute, and theldapGroupsattribute.Tip
To add more attributes to the Employee assignment in the Admin UI:
Select Manage > Assignment, and click on the Employee assignment.
On the Attributes tab, select Add an attribute and select the ldapGroups attribute.
Enter the values
cn=Employees,ou=Groups,dc=example,dc=com
and
cn=Chat Users,ou=Groups,dc=example,dc=com
and click Save.
With the implicit synchronization between the managed user repository and DS, bjensen should now be a member of the
cn=Employeesandcn=Chat Usersgroups in LDAP.You can verify this with the following
ldapsearchcommand. This command returns bjensen's group membership, in herisMemberOfattribute.$ ldapsearch \ --port 1389 \ --hostname localhost \ --baseDN "dc=example,dc=com" \ --bindDN "cn=Directory Manager" \ --bindPassword password \ --searchScope sub \ "(uid=bjensen)" dn uid employeeType isMemberOf dn: uid=bjensen,ou=People,dc=example,dc=com uid: bjensen employeeType: Employee isMemberOf: cn=openidm2,ou=Groups,dc=example,dc=com isMemberOf: cn=Chat Users,ou=Groups,dc=example,dc=com isMemberOf: cn=Employees,ou=Groups,dc=example,dc=com
You can also check bjensen's group membership by querying her object in the LDAP system, over the REST interface:
$ curl \ --header "X-OpenIDM-Username: openidm-admin" \ --header "X-OpenIDM-Password: openidm-admin" \ --request GET \ "http://localhost:8080/openidm/system/ldap/account?_queryFilter=/uid+sw+'bjensen'&_fields=dn,uid,employeeType,ldapGroups" { "result": [ { "_id": "887732e8-3db2-31bb-b329-20cd6fcecc05", "dn": "uid=bjensen,ou=People,dc=example,dc=com", "uid": "bjensen", "employeeType": [ "Employee" ], "ldapGroups": [ "cn=openidm2,ou=Groups,dc=example,dc=com", "cn=Employees,ou=Groups,dc=example,dc=com", "cn=Chat Users,ou=Groups,dc=example,dc=com" ] } ], ... }In the original LDIF file, bjensen was already a member of the openidm2 group. You can ignore this group for the purposes of this sample.
Tip
Use the Admin UI to see bjensen's LDAP groups as follows:
Select Manage > User, and select bjensen's entry.
On the Linked Systems tab, scroll down to the ldapGroups item.
Now, create a new assignment that will apply to Contract employees, and add that assignment to the Contractor role.
Create the Contractor assignment with the following command. This assignment sets the value of the
employeeTypeattribute toContractor, and updates the user'sldapGroupsattribute to include thecn=Contractorsgroup:$ curl \ --header "Content-type: application/json" \ --header "X-OpenIDM-Username: openidm-admin" \ --header "X-OpenIDM-Password: openidm-admin" \ --request POST \ --data '{ "name" : "Contractor", "description": "Contractor assignment for contract workers.", "mapping": "managedUser_systemLdapAccounts", "attributes": [ { "name": "ldapGroups", "value": [ "cn=Contractors,ou=Groups,dc=example,dc=com" ], "assignmentOperation" : "mergeWithTarget", "unassignmentOperation" : "removeFromTarget" }, { "name": "employeeType", "value": [ "Contractor" ], "assignmentOperation" : "mergeWithTarget", "unassignmentOperation" : "removeFromTarget" } ] }' \ "http://localhost:8080/openidm/managed/assignment?_action=create" { "_id": "10505bda-4415-4f85-a088-bbef47009210", "_rev": "0000000080badf28", "name": "Contractor", "description": "Contractor assignment for contract workers.", "mapping": "managedUser_systemLdapAccounts", "attributes": [ { "name": "ldapGroups", "value": [ "cn=Contractors,ou=Groups,dc=example,dc=com" ], "assignmentOperation": "mergeWithTarget", "unassignmentOperation": "removeFromTarget" }, { "name": "employeeType", "value": [ "Contractor" ], "assignmentOperation": "mergeWithTarget", "unassignmentOperation": "removeFromTarget" } ] }Note the ID of the Contractor assignment (10505bda-4415-4f85-a088-bbef47009210 in this example).
Tip
Create the assignment by using the Admin UI, as described in "Adding Assignments to a Role Definition").
Now, add the Contractor assignment to the Contractor role (ID f7da3805-50dd-4585-9bf6-e01658dece01 in this example):
$ curl \ --header "Content-type: application/json" \ --header "X-OpenIDM-Username: openidm-admin" \ --header "X-OpenIDM-Password: openidm-admin" \ --request PATCH \ --data '[ { "operation" : "add", "field" : "/assignments/-", "value" : { "_ref" : "managed/assignment/10505bda-4415-4f85-a088-bbef47009210" } } ]' \ "http://localhost:8080/openidm/managed/role/f7da3805-50dd-4585-9bf6-e01658dece01" { "_id": "f7da3805-50dd-4585-9bf6-e01658dece01", "_rev": "00000000f5ac5f89", "name": "Contractor", "description": "Role granted to contract workers." }Tip
Add the Contractor assignment to the Contractor role in the Admin UI, as follows:
Select Manage > Role, and select the Contractor role.
On the Managed Assignments tab, click Add Managed Assignment.
Select the Contractor assignment from the dropdown list, and click Add.
Next, we need to grant the Contractor role to user jdoe. Before we can patch jdoe's entry, we need to know their system-generated ID. To obtain the ID, query jdoe's entry as follows:
$ curl \ --header "X-OpenIDM-Username: openidm-admin" \ --header "X-OpenIDM-Password: openidm-admin" \ --request GET \ "http://localhost:8080/openidm/managed/user?_queryFilter=/userName+eq+'jdoe'&_fields=_id" { "result": [ { "_id": "d1397900-4b10-410b-a82f-4243b7d218c8", "_rev": "00000000a2f1f449" } ], ... }From the output, you can see that jdoe's
_idisd1397900-4b10-410b-a82f-4243b7d218c8. (This unique ID will obviously be different in your command output.)Update jdoe's entry by adding a reference to the ID of the Contractor role (f7da3805-50dd-4585-9bf6-e01658dece01) as a value of their
rolesattribute:$ curl \ --header "Content-type: application/json" \ --header "X-OpenIDM-Username: openidm-admin" \ --header "X-OpenIDM-Password: openidm-admin" \ --request PATCH \ --data '[ { "operation" : "add", "field" : "/roles/-", "value" : { "_ref": "managed/role/f7da3805-50dd-4585-9bf6-e01658dece01" } } ]' \ "http://localhost:8080/openidm/managed/user/d1397900-4b10-410b-a82f-4243b7d218c8" { "_id": "d1397900-4b10-410b-a82f-4243b7d218c8", "_rev": "00000000dc1163b4", "displayName": "John Doe", "description": "Created for OpenIDM", "givenName": "John", "mail": "jdoe@example.com", "telephoneNumber": "1-415-599-1100", "sn": "Doe", "userName": "jdoe", "accountStatus": "active", "effectiveRoles": [ { "_ref": "managed/role/f7da3805-50dd-4585-9bf6-e01658dece01" } ], "effectiveAssignments": [ { "name": "Contractor", "description": "Contractor assignment for contract workers.", "mapping": "managedUser_systemLdapAccounts", "attributes": [ { "name": "ldapGroups", "value": [ "cn=Contractors,ou=Groups,dc=example,dc=com" ], "assignmentOperation": "mergeWithTarget", "unassignmentOperation": "removeFromTarget" }, { "name": "employeeType", "value": [ "Contractor" ], "assignmentOperation": "mergeWithTarget", "unassignmentOperation": "removeFromTarget" } ], "_rev": "0000000080badf28", "_id": "10505bda-4415-4f85-a088-bbef47009210" } ] }Tip
Grant the Contractor role to jdoe by using the Admin UI, as follows:
Select Manage > User, and click on jdoe's entry.
On the Provisioning Roles tab, click Add Provisioning Roles.
Select the Contractor role and click Add.
Check jdoe's entry on the LDAP system.
With the implicit synchronization between the managed user repository and DS, jdoe should now be a member of the
cn=Contractorsgroup in LDAP. In addition, hisemployeeTypeshould have been set toContractor.You can verify this with the following REST query. This command returns jdoes's group membership, in his
isMemberOfattribute, and hisemployeeType:$ curl \ --header "X-OpenIDM-Username: openidm-admin" \ --header "X-OpenIDM-Password: openidm-admin" \ --request GET \ "http://localhost:8080/openidm/system/ldap/account?_queryFilter=/uid+sw+'jdoe'&_fields=dn,uid,employeeType,ldapGroups" { "result": [ { "_id": "0da50512-79bb-3461-bd04-241ee4c785bf", "dn": "uid=jdoe,ou=People,dc=example,dc=com", "uid": "jdoe", "employeeType": [ "Contractor" ], "ldapGroups": [ "cn=openidm,ou=Groups,dc=example,dc=com", "cn=Contractors,ou=Groups,dc=example,dc=com" ] } ], ... }Tip
Use the Admin UI to see jdoe's LDAP groups as follows:
Select Manage > User, and select jdoe's entry.
On the Linked Systems tab, scroll down to the ldapGroups item.
Note
When working with large groups in LDAP services such as DS, you should use dynamic groups instead of static groups. The steps laid out above for setting assignments and roles work with the exception of how you add a user to a group: in dynamic groups, membership is determined by whether a user has an attribute the group is configured to search for.
For example, if the Employees group was a dynamic group, membership might
be set based on the employeeType attribute directly, by
setting the memberURL in the group to
ldap:///ou=People,dc=example,dc=com??sub?(employeeType=Employee).
You would then remove the ldapGroups attribute from the
Employee assignment, since group membership is handled by employeeType.
This membership won't be listed in the ldapGroups
attribute in IDM (since it is no longer set there), but can
be verified by querying DS directly:
$ ldapsearch \ --port 1389 \ --hostname localhost \ --baseDN "dc=example,dc=com" \ --bindDN "cn=Directory Manager" \ --bindPassword password \ --searchScope sub \ "(uid=bjensen)" dn uid employeeType isMemberOf dn: uid=bjensen,ou=People,dc=example,dc=com uid: bjensen employeeType: Employee isMemberOf: cn=openidm2,ou=Groups,dc=example,dc=com isMemberOf: cn=Chat Users,ou=Groups,dc=example,dc=com isMemberOf: cn=Employees,ou=Groups,dc=example,dc=com
For more information about dynamic groups in DS, see Creating Dynamic Groups in the Developer's Guide for ForgeRock Directory Services.
16.1.3.4. Removing a Role Grant From a User and Observing That User's Role Assignments
In this section, you will remove the Contractor role from jdoe's managed user entry and observe the subsequent change to jdoe's managed assignments, and to the corresponding attributes in DS.
Before you change jdoe's roles, view his entry again to examine his current roles.
$ curl \ --header "X-OpenIDM-Username: openidm-admin" \ --header "X-OpenIDM-Password: openidm-admin" \ --request GET \ "http://localhost:8080/openidm/managed/user?_queryFilter=/userName+eq+'jdoe'&_fields=_id,roles" { "result": [ { "_id": "d1397900-4b10-410b-a82f-4243b7d218c8", "_rev": "00000000dc1163b4", "roles": [ { "_ref": "managed/role/f7da3805-50dd-4585-9bf6-e01658dece01", "_refResourceCollection": "managed/role", "_refResourceId": "f7da3805-50dd-4585-9bf6-e01658dece01", "_refProperties": { "_id": "ccc12e8f-c42b-4398-983a-db675ec5a472", "_rev": "000000009ebba40f" } } ] } ], ... }Note the following IDs in this output:
The ID of jdoe's user object is
d1397900-4b10-410b-a82f-4243b7d218c8The ID of the contractor role (
_refResourceId) isf7da3805-50dd-4585-9bf6-e01658dece01The ID of the relationship that expresses the role grant is
ccc12e8f-c42b-4398-983a-db675ec5a472.
You will need these IDs in the next step.
Tip
View jdoe's current roles in the Admin UI:
Select Manage > User, and select jdoe's entry.
The Provisioning Roles tab lists the current roles.
Remove the Contractor role from jdoe's entry by sending a DELETE request to his user entry, specifying the relationship ID:
$ curl \ --header "X-OpenIDM-Username: openidm-admin" \ --header "X-OpenIDM-Password: openidm-admin" \ --request DELETE \ "http://localhost:8080/openidm/managed/user/d1397900-4b10-410b-a82f-4243b7d218c8/roles/ccc12e8f-c42b-4398-983a-db675ec5a472" { "_id": "ccc12e8f-c42b-4398-983a-db675ec5a472", "_rev": "000000009ebba40f", "_ref": "managed/role/f7da3805-50dd-4585-9bf6-e01658dece01", "_refResourceCollection": "managed/role", "_refResourceId": "f7da3805-50dd-4585-9bf6-e01658dece01", "_refProperties": { "_id": "ccc12e8f-c42b-4398-983a-db675ec5a472", "_rev": "000000009ebba40f" } }The output shows that the relationship between the user and the role was deleted.
Tip
Use the Admin UI to remove the Contractor role from jdoe's entry as follows:
Select Manage > User, and select jdoe's entry.
On the Provisioning Roles tab, check the box next to the Contractor role and click Remove Selected Provisioning Roles.
Verify jdoe's
employeeTypeandldapGroups.The removal of the Contractor role causes a synchronization operation to be run on jdoe's entry. His
employeeTypeandldapGroupsattributes in DS should be reset to what they were before he was granted the Contractor role.You can check jdoe's attributes by querying his object in the LDAP directory, over the REST interface:
$ curl \ --header "X-OpenIDM-Username: openidm-admin" \ --header "X-OpenIDM-Password: openidm-admin" \ --request GET \ "http://localhost:8080/openidm/system/ldap/account?_queryFilter=/uid+sw+'jdoe'&_fields=dn,uid,employeeType,ldapGroups" { "result": [ { "_id": "0da50512-79bb-3461-bd04-241ee4c785bf", "dn": "uid=jdoe,ou=People,dc=example,dc=com", "uid": "jdoe", "employeeType": [], "ldapGroups": [ "cn=openidm,ou=Groups,dc=example,dc=com" ] } ], ... }Tip
Use the Admin UI to see jdoe's LDAP groups as follows:
Select Manage > User, and select jdoe's entry.
On the Linked Systems tab, scroll down to the ldapGroups item.
This concludes the provisioning with roles sample. For more information about roles, assignments, and how to manipulate them, see "Working With Managed Roles" in the Integrator's Guide.
Chapter 17. Using a Workflow to Provision User Accounts
This sample demonstrates a typical workflow use case — provisioning new users.
The sample shows how to use the Admin UI to set up the initial users and roles, then shows how end users can use the Self-Service UI to complete their registration process.
The sample simulates the following scenario:
An existing employee requests that an outside contractor be granted access to an organization's system.
The system in this case, is the IDM managed user repository and a remote HR data source, represented by a CSV file (
hr.csv).User roles are stored separately, in a second CSV file (
roles.csv).
The sample has three mappings — two for the bidirectional synchronization of the managed user repository and the HR data store, and one for the synchronization of the roles data to the managed repository.
17.1. Preparing IDM For the Provisioning Sample
In this section, you start IDM, configure the outbound email
service, and reconcile user and role data. The reconciliation operations
create two managed users, user1 and manager1,
and two managed roles, employee (assigned to
user1) and manager (assigned to
manager1).
Start IDM with the configuration for the provisioning sample:
$ cd /path/to/openidm $ ./startup.sh -p samples/provisioning-with-workflow
Log in to the Admin UI (
https://localhost:8443/admin) with the default username (openidm-adminand password (openidm-admin).Configure the outbound email service.
An email configuration is required to send a password reset email to the user, at the end of the sample.
Select Configure > Email Settings and provide the connection information for your email host.
Gmail is configured by default but you must still supply credentials to use Gmail.
Reconcile the role data, and the user data.
Select Configure > Mappings.
Choose the first mapping (
systemRolesFileRole_managedRole) and select Reconcile.This reconciliation operation creates two roles in the managed repository (
employeeandmanager). You can verify the result of the reconciliation by selecting Manage > Role.Go back to the Mappings page (Configure > Mappings), choose the second mapping (
systemCsvfileAccounts_managedUser) and select Reconcile.This reconciliation operation creates the top-level managers (users who do not have their own
managerproperty) in the managed user repository. In this sample, there is only one top-level manager (manager1).Select Reconcile a second time.
This reconciliation operation creates the employees of the managers that were created by the previous reconciliation. In this sample, there is only one employee (
employee1).Verify that the manager and employee entries were created correctly by selecting Manage > User. You should have two users —
manager1anduser1.
Verify the relationships between your new user and role objects:
Select
user1. Note that theManagerfield showsmanager1for this user.On the Authorization Roles tab, note that user1 has two roles—a
Basic minimum userrole and anemployeerole.Navigate back to the User List and select
manager1. Note that theManagerfield is empty for this user.On the Authorization Roles tab, note that manager1 has two roles—a
Basic minimum userrole and amanagerrole.
Verify the available workflows:
Select Manage > Processes > Definitions.
Select the Contractor onboarding process and look at the sequence diagram for this workflow.
Log out of the Admin UI by selecting Log Out from the top right drop-down menu.
IDM is now prepared and contains the users and roles required for the Provisioning sample. In the next section you will walk through the workflow whose sequence diagram you saw in the previous step.
17.2. Running the Provisioning Sample
During this part of the sample, an existing employee initiates a
Contractor Onboarding process. This process is a request
to add a contractor to the managed user repository, with an option to include
the contractor in the original HR data source (the hr.csv
file).
When the employee has completed the required form, the request is sent to the
manager for approval. Any user with the role manager can
claim the approval task. If the request is approved, an email is sent to the
address provided in the initial form, with a request for the contractor to
reset their password. When the password reset has been completed, the
contractor is created in the managed user repository. If a request was made
to add the contractor to the original HR data source, this is done when the
manager approves the request.
Log in to the Self-Service UI (
https://localhost:8443/) as the user you created in the previous section (user1), with passwordWelcome1.The user Dashboard is displayed.
Initiate the provisioning workflow as user1:
Scroll down to Processes and select Details next to the Contractor onboarding process.
Complete the form for the sample user you will be creating. You can use any sample data here but use an email address to which you have access because you will need the email that is sent to this address to complete the workflow.
In the Provision to CSV field, select Yes.
This selection enables implicit synchronization from the managed user repository to the
hr.csvfile.
Note that user1 does not provide a password for this user. A password reset request is sent to the email address provided on this form to ensure that only the actual contractor can log in with this account.
Select Start to initiate the process.
Log out of the Self-Service UI.
Approve the workflow task as manager1:
Log in to the Self-Service UI as
manager1, with passwordWelcome1.Under My Group's Tasks, locate the Approve Contractor task and select Assign to Me.
Approve Contractor is now listed under My Tasks.
Select Details next to the task name.
Review the form content. (It is the same content that you provided as
user1, along with a Decision field.)Select Accept, then Complete to finish the task.
Log out of the Self-Service UI.
Verify that the contractor has been created in the HR data source (
hr.csv):$ more /path/to/openidm/samples/provisioning-with-workflow/data/hr.csv "username","firstname","lastname","manager", "department","jobTitle", ...,"password",... "user1", "Ordinary", "Employee","manager1","dep1", "job1", ...,"Welcome1",... "manager1","Big", "Manager", "", "dep1", "Manager", ...,"Welcome1",... "bjensen", "Barbara", "Jensen", "user1", "Payroll", "Payroll clerk",...,,,...
Note the addition of the new contractor entry, in this case, bjensen. Note also that there is no value for the
passwordfield, and thatuser1is the manager of the new contractor.Complete the password reset process:
Verify the inbox of the email account that you provided when you completed the initial form.
You should have received two emails — one with the subject "Your account has been created" and one with the subject "Reset your password".
Open the password reset email and click
Password reset link.The link takes you to the Self-Service UI, with the option to Reset Your Password.
Enter a new password and confirmation password, submit the form.
The password that you enter here must comply with the default password policy for managed users, described in "Enforcing Password Policy" in the Integrator's Guide.
Select Return to Login Page and log in with the username that you provided when you completed the initial form, and the new password you have just set.
Notice the Welcome message under Notifications.
Verify that the password reset has been propagated to the HR data source:
Open
/path/to/openidm/samples/provisioning-with-workflow/data/hr.csvand note that the password for the contractor has been added to their entry.
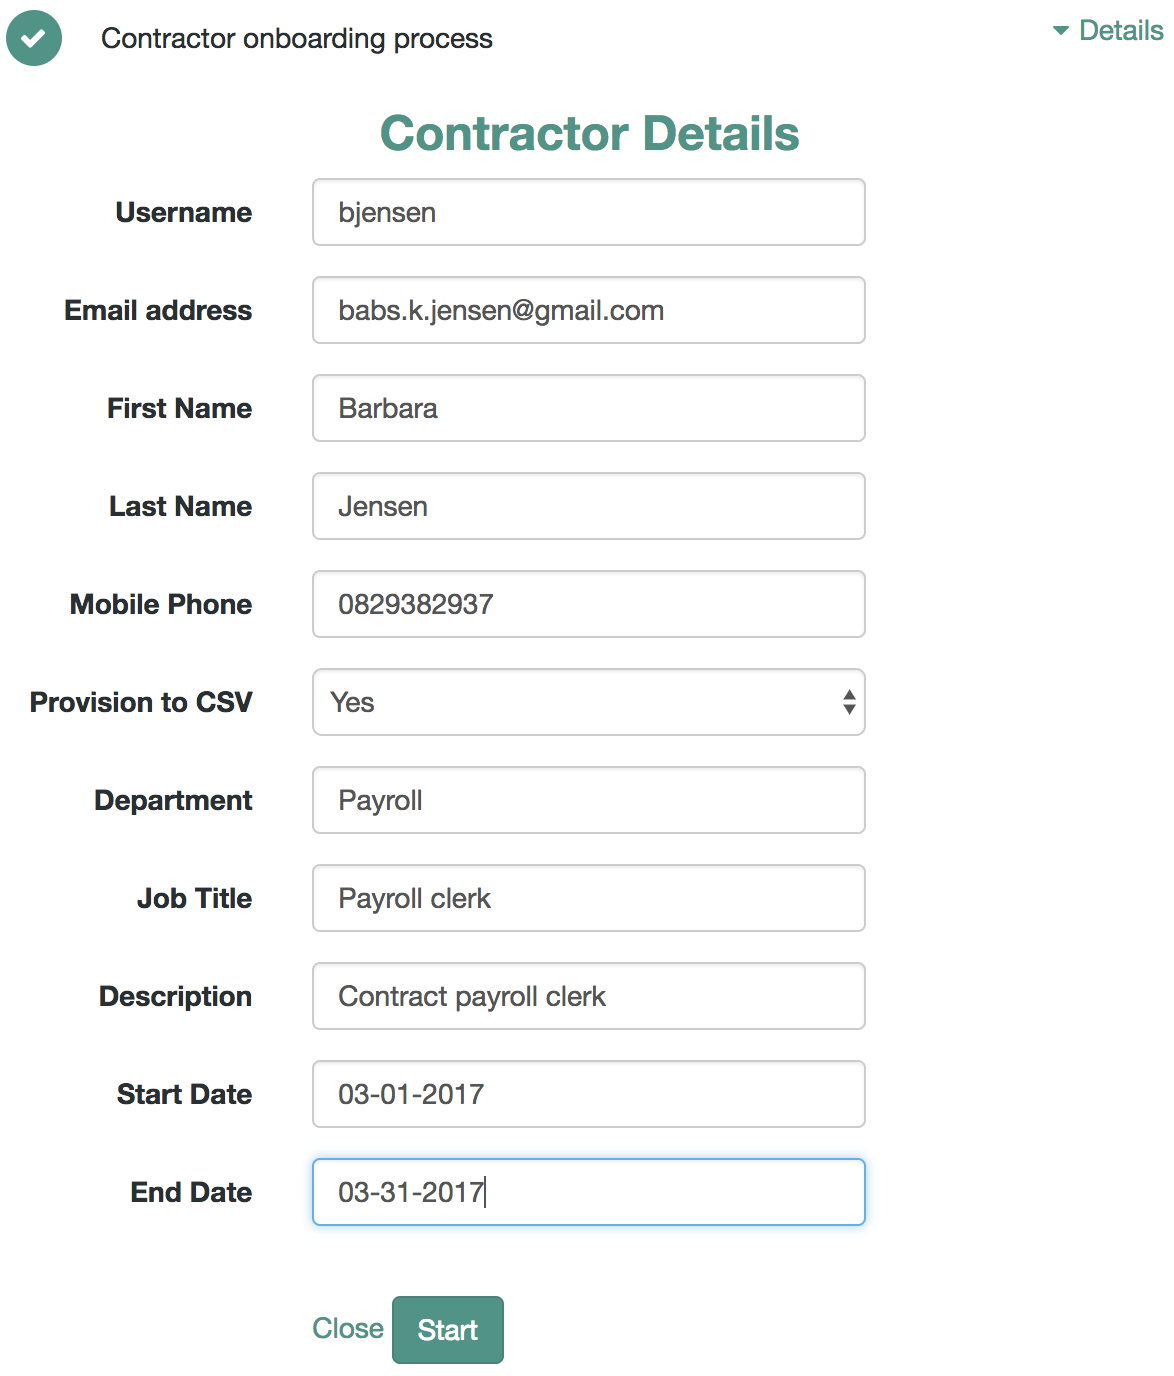
If you declined the approval request, the user is not created in the managed user repository, or in the HR CSV file.
Chapter 18. Connecting to DS With ScriptedREST
This sample uses the scripted REST connector to interact with the ForgeRock Directory Services (DS) REST API, using Groovy scripts. The sample demonstrates reconciliation, implicit sync, and liveSync between the IDM repository and a DS instance.
The scripted REST connector is bundled with IDM in the JAR
openidm/connectors/scriptedrest-connector-1.5.20.0.jar.
The Groovy scripts required for the sample are located in the
samples/scripted-rest-with-dj/tools directory. You must
customize these scripts to address the requirements of your specific
deployment, however, the sample scripts are a good starting point on which to
base your customization.
Important
The Rest2ldap HTTP endpoint provided with DS is an evolving interface. As such, compatibility between versions is not guaranteed. This sample was tested with DS 6.0.
18.1. Setting Up DS
This sample assumes a DS server, running on the localhost. Follow these steps to install and configure the DS instance.
Download and extract the DS zip archive from ForgeRock's BackStage site.
Set up DS as follows. Include the
--httpPortoption to enable HTTP access during the setup. This example uses port8090so that it does not conflict with the default IDM port:$ cd /path/to/opendj $ ./setup \ directory-server \ --rootUserDN "cn=Directory Manager" \ --rootUserPassword password \ --hostname localhost \ --ldapPort 1389 \ --adminConnectorPort 4444 \ --httpPort 8090 \ --addBaseEntry \ --baseDN dc=com \ --acceptLicense Validating parameters .....Done. Configuring Certificates .....Done. Configuring server .....Done. Creating Base Entry dc=com .....Done. Starting Directory Server ..............Done. To see basic server status and configuration, you can launch /path/to/opendj/bin/status
The sample assumes the following DS configuration:
The server is installed on the localhost.
The server listens for LDAP connections on port 1389.
The administration connector port is 4444.
The root user DN is
cn=Directory Manager.The root user password is
password.
Configure the DS server for replication.
To enable liveSync, this server must be configured for replication, even if it does not actually participate in a replication topology. The following commands configure the server for replication.
$ cd /path/to/opendj/bin $ ./dsconfig create-replication-server \ --hostname localhost \ --port 4444 \ --bindDN "cn=Directory Manager" \ --bindPassword password \ --provider-name "Multimaster Synchronization" \ --set replication-port:8989 \ --set replication-server-id:2 \ --trustAll \ --no-prompt $ ./dsconfig create-replication-domain \ --hostname localhost \ --port 4444 \ --bindDN "cn=Directory Manager" \ --bindPassword password \ --provider-name "Multimaster Synchronization" \ --domain-name "example.com" \ --set base-dn:dc=example,dc=com \ --set replication-server:localhost:8989 \ --set server-id:3 \ --trustAll \ --no-promptEnable the DS HTTP access log.
$ ./dsconfig \ set-log-publisher-prop \ --hostname localhost \ --port 4444 \ --bindDN "cn=Directory Manager" \ --bindPassword password \ --publisher-name "File-Based HTTP Access Logger" \ --set enabled:true \ --no-prompt \ --trustAll
Import the LDIF data required for the sample.
$ ./ldapmodify \ --bindDN "cn=Directory Manager" \ --bindPassword password \ --hostname localhost \ --port 1389 \ --filename /path/to/openidm/samples/scripted-rest-with-dj/data/ldap.ldif Processing ADD request for dc=example,dc=com ADD operation successful for DN dc=example,dc=com Processing ADD request for ou=Administrators,dc=example,dc=com ADD operation successful for DN ou=Administrators,dc=example,dc=com Processing ADD request for uid=idm,ou=Administrators,dc=example,dc=com ADD operation successful for DN uid=idm,ou=Administrators,dc=example,dc=com Processing ADD request for ou=People,dc=example,dc=com ADD operation successful for DN ou=People,dc=example,dc=com Processing ADD request for ou=Groups,dc=example,dc=com ADD operation successful for DN ou=Groups,dc=example,dc=comSet up the access control that enables the IDM administrator user to read the DS changelog:
$ ./dsconfig \ set-access-control-handler-prop \ --hostname localhost \ --port 4444 \ --bindDN "cn=Directory Manager" \ --bindPassword password \ --add global-aci:"(target=\"ldap:///cn=changelog\")(targetattr=\"*||+\") \ (version 3.0; acl \"IDM can access cn=changelog\"; \ allow (read,search,compare) \ userdn=\"ldap:///uid=idm,ou=Administrators,dc=example,dc=com\";)" \ --trustAll \ --no-prompt $ ./dsconfig \ set-access-control-handler-prop \ --hostname localhost \ --port 4444 \ --bindDN "cn=Directory Manager" \ --bindPassword password \ --add global-aci:"(targetcontrol=\"1.3.6.1.4.1.26027.1.5.4\") \ (version 3.0; acl \"IDM changelog control access\"; \ allow (read) \ userdn=\"ldap:///uid=idm,ou=Administrators,dc=example,dc=com\";)" \ --trustAll \ --no-prompt
Enable the default Rest2ldap HTTP endpoint:
$ ./dsconfig \ set-http-endpoint-prop \ --hostname localhost \ --port 4444 \ --bindDN "cn=Directory Manager" \ --bindPassword password \ --endpoint-name /api \ --set authorization-mechanism:"HTTP Basic" \ --set config-directory:config/rest2ldap/endpoints/api \ --set enabled:true \ --no-prompt \ --trustAll
For more information, see To Set Up REST Access to User Data in the DS Administration Guide.
Replace the default DS REST to LDAP configuration with the configuration for this sample:
$ cd /path/to/opendj $ cp /path/to/openidm/samples/scripted-rest-with-dj/data/example-v1.json config/rest2ldap/endpoints/api/
Restart DS for the configuration change to take effect.
$ cd /path/to/opendj/bin $ ./stop-ds --restart Stopping Server... ... The Directory Server has started successfully [07/Feb/2018:12:12:23 +0200] category=PROTOCOL severity=NOTICE msgID=276 msg=Started listening for new connections on HTTP Connection Handler 0.0.0.0 port 8090
DS is now configured for this sample.
18.2. Running the Sample
This section illustrates the basic CRUD operations on users and groups using the ScriptedREST connector and the DS REST API. Note that the power of the Groovy connector is in the associated Groovy scripts, and their application in your particular deployment. The scripts provided with this sample are specific to the sample and customization of the scripts is required.
Start IDM with the configuration for the ScriptedREST sample:
$ cd /path/to/openidm $ ./startup.sh -p samples/scripted-rest-with-dj/
Check that the scripted REST connector can reach the DS instance by obtaining the connector status over REST:
$ curl \ --header "X-OpenIDM-Username: openidm-admin" \ --header "X-OpenIDM-Password: openidm-admin" \ --request POST \ "http://localhost:8080/openidm/system/scriptedrest?_action=test" { "name": "scriptedrest", "enabled": true, "config": "config/provisioner.openicf/scriptedrest", "connectorRef": { "bundleVersion": "[1.5.0.0,1.6.0.0)", "bundleName": "org.forgerock.openicf.connectors.scriptedrest-connector", "connectorName": "org.forgerock.openicf.connectors.scriptedrest.ScriptedRESTConnector" }, "displayName": "Scripted REST Connector", "objectTypes": [ "__ALL__", "account", "group" ], "ok": true }Create a group entry on the DS server.
$ curl \ --header "X-OpenIDM-Username: openidm-admin" \ --header "X-OpenIDM-Password: openidm-admin" \ --header "Content-Type: application/json" \ --request POST \ --data '{ "cn" : "group1" }' \ "http://localhost:8080/openidm/system/scriptedrest/group?_action=create" { "_id": "group1", "displayName": "group1", "created": "2018-02-07T10:14:12Z", "members": null, "cn": "group1" }Create a user entry on the DS server. This command creates a user with
uidscarter:$ curl \ --header "X-OpenIDM-Username: openidm-admin" \ --header "X-OpenIDM-Password: openidm-admin" \ --header "Content-Type: application/json" \ --request POST \ --data '{ "givenName" : "Steven", "familyName" : "Carter", "emailAddress" : "scarter@example.com", "telephoneNumber" : "444-444-4444", "password" : "Passw0rd", "displayName" : "Steven.Carter", "uid" : "scarter" }' \ "http://localhost:8080/openidm/system/scriptedrest/account?_action=create" { "_id": "scarter", "familyName": "Carter", "givenName": "Steven", "created": "2018-02-07T10:14:31Z", "uid": "scarter", "groups": null, "emailAddress": "scarter@example.com", "displayName": "Steven.Carter", "telephoneNumber": "444-444-4444" }Notice that at this stage, the user is not a member of any group.
Reconcile the DS server with the managed user repository:
$ curl \ --header "X-OpenIDM-Username: openidm-admin" \ --header "X-OpenIDM-Password: openidm-admin" \ --header "Content-Type: application/json" \ --request POST \ "http://localhost:8080/openidm/recon?_action=recon&mapping=systemRestLdapUser_managedUser&waitForCompletion=true" { "_id": "ee7534bd-ccfd-4f6a-bdc3-49caa6d2043c-547", "state": "SUCCESS" }The reconciliation creates a managed user with a server-assigned ID. To retrieve the ID, run the following query:
$ curl \ --header "X-OpenIDM-Username: openidm-admin" \ --header "X-OpenIDM-Password: openidm-admin" \ --header "Content-Type: application/json" \ --request GET \ "http://localhost:8080/openidm/managed/user?_queryId=query-all-ids" { "result": [ { "_id": "4657a420-6608-410e-baa7-f64668cc500c", "_rev": "000000007995f006" } ], ... }To initialize liveSync set the sync token by running one liveSync operation over REST:
$ curl \ --header "X-OpenIDM-Username: openidm-admin" \ --header "X-OpenIDM-Password: openidm-admin" \ --request POST \ "http://localhost:8080/openidm/system/scriptedrest/account?_action=liveSync" { "connectorData": { "nativeType": "string", "syncToken": "9" }, "_rev": "00000000109353c9", "_id": "SYSTEMSCRIPTEDRESTACCOUNT" }Update Steven Carter's managed user entry, by modifying his telephone number. Specify the user ID that you retrieved previously:
$ curl \ --header "X-OpenIDM-Username: openidm-admin" \ --header "X-OpenIDM-Password: openidm-admin" \ --header "Content-Type: application/json" \ --request PATCH \ --data '[ { "operation" : "replace", "field" : "telephoneNumber", "value" : "555-555-5555" } ]' \ "http://localhost:8080/openidm/managed/user/4657a420-6608-410e-baa7-f64668cc500c" { "_id": "4657a420-6608-410e-baa7-f64668cc500c", "_rev": "0000000096edf021", "userName": "scarter", "mail": "scarter@example.com", "displayName": "Steven.Carter", "telephoneNumber": "555-555-5555", "givenName": "Steven", "sn": "Carter", "accountStatus": "active", "effectiveRoles": [], "effectiveAssignments": [] }The implicit synchronization mechanism between the managed user repository and DS propagates the change to DS. You can check this change by reading scarter's user entry in DS and noting the changed
telephoneNumber:$ curl \ --header "X-OpenIDM-Username: openidm-admin" \ --header "X-OpenIDM-Password: openidm-admin" \ --request GET \ "http://localhost:8080/openidm/system/scriptedrest/account/scarter" { "_id": "scarter", "familyName": "Carter", "givenName": "Steven", "created": "2018-02-07T10:14:31Z", "uid": "scarter", "groups": null, "emailAddress": "scarter@example.com", "displayName": "Steven.Carter", "telephoneNumber": "555-555-5555" }Now, update Steven Carter's entry on the DS server, by modifying his
givenName:$ curl \ --header "X-OpenIDM-Username: openidm-admin" \ --header "X-OpenIDM-Password: openidm-admin" \ --header "Content-Type: application/json" \ --request PATCH \ --data '[ { "operation" : "replace", "field" : "givenName", "value" : "Steve" } ]' \ "http://localhost:8080/openidm/system/scriptedrest/account/scarter" { "_id": "scarter", "familyName": "Carter", "givenName": "Steve", "created": "2018-02-07T10:14:31Z", "uid": "scarter", "groups": null, "emailAddress": "scarter@example.com", "displayName": "Steven.Carter", "telephoneNumber": "555-555-5555" }To propagate the change made on DS back to the managed user entry, launch a liveSync operation, either by defining a schedule, or directly over REST. The following command launches liveSync over REST:
$ curl \ --header "X-OpenIDM-Username: openidm-admin" \ --header "X-OpenIDM-Password: openidm-admin" \ --request POST \ "http://localhost:8080/openidm/system/scriptedrest/account?_action=liveSync" { "connectorData": { "nativeType": "string", "syncToken": "9" }, "_rev": "000000000a585336", "_id": "SYSTEMSCRIPTEDRESTACCOUNT" }Verify that the changes were propagated by reading scarter's managed user entry and noting the changed
givenName:$ curl \ --header "X-OpenIDM-Username: openidm-admin" \ --header "X-OpenIDM-Password: openidm-admin" \ --request GET \ "http://localhost:8080/openidm/managed/user/4657a420-6608-410e-baa7-f64668cc500c" { "_id": "4657a420-6608-410e-baa7-f64668cc500c", "_rev": "000000007937efb7", "userName": "scarter", "mail": "scarter@example.com", "displayName": "Steven.Carter", "telephoneNumber": "555-555-5555", "givenName": "Steve", "sn": "Carter", "accountStatus": "active", "effectiveRoles": [], "effectiveAssignments": [] }Add user scarter to the group you created previously, by updating the group entry:
$ curl \ --header "X-OpenIDM-Username: openidm-admin" \ --header "X-OpenIDM-Password: openidm-admin" \ --header "Content-Type: application/json" \ --header "If-Match: *" \ --request PUT \ --data '{ "_id" : "group1", "members" : [{"_id" : "scarter"}] }' \ "http://localhost:8080/openidm/system/scriptedrest/group/group1" { "_id": "group1", "displayName": "group1", "created": "2018-02-07T10:14:12Z", "members": [ { "_id": "scarter", "displayName": "Steven.Carter" } ], "cn": "group1", "lastModified": "2018-02-07T10:20:22Z" }Read Steven Carter's user entry in DS, to verify that he is now a member of group1:
$ curl \ --header "X-OpenIDM-Username: openidm-admin" \ --header "X-OpenIDM-Password: openidm-admin" \ --request GET \ "http://localhost:8080/openidm/system/scriptedrest/account/scarter" { "_id": "scarter", "familyName": "Carter", "givenName": "Steve", "created": "2018-02-07T10:14:31Z", "uid": "scarter", "groups": [ { "_id": "group1" } ], "emailAddress": "scarter@example.com", "displayName": "Steven.Carter", "telephoneNumber": "555-555-5555" }Read the group entry to verify its members:
$ curl \ --header "X-OpenIDM-Username: openidm-admin" \ --header "X-OpenIDM-Password: openidm-admin" \ --request GET \ "http://localhost:8080/openidm/system/scriptedrest/group/group1" { "_id": "group1", "displayName": "group1", "created": "2018-02-07T10:14:12Z", "members": [ { "_id": "scarter", "displayName": "Steven.Carter" } ], "cn": "group1", "lastModified": "2018-02-07T10:20:22Z" }Reconcile the DS groups with the managed group repository:
$ curl \ --header "X-OpenIDM-Username: openidm-admin" \ --header "X-OpenIDM-Password: openidm-admin" \ --request POST \ "http://localhost:8080/openidm/recon?_action=recon&mapping=systemRestLdapGroup_managedGroup&waitForCompletion=true" { "_id": "ee7534bd-ccfd-4f6a-bdc3-49caa6d2043c-1477", "state": "SUCCESS" }The reconciliation creates a managed group with a server-assigned ID. To retrieve the group ID, run the following query:
$ curl \ --header "X-OpenIDM-Username: openidm-admin" \ --header "X-OpenIDM-Password: openidm-admin" \ --header "Content-Type: application/json" \ --request GET \ "http://localhost:8080/openidm/managed/group?_queryId=query-all-ids" { "result": [ { "_id": "67b5ec50-d5a6-4bfa-bb19-17965447ad00", "_rev": "00000000b0e95e9b" } ], ... }Read the managed group to verify that the DS group has been added, and that its members have been reconciled to the managed group repository. Specify the ID that you retrieved in the previous step:
$ curl \ --header "X-OpenIDM-Username: openidm-admin" \ --header "X-OpenIDM-Password: openidm-admin" \ --request GET \ "http://localhost:8080/openidm/managed/group/67b5ec50-d5a6-4bfa-bb19-17965447ad00" { "_id": "67b5ec50-d5a6-4bfa-bb19-17965447ad00", "_rev": "00000000b0e95e9b", "members": [ { "_id": "scarter", "displayName": "Steven.Carter" } ], "displayName": "group1" }Delete the DS user and group entries, returning the DS server to its initial state.
$ curl \ --header "X-OpenIDM-Username: openidm-admin" \ --header "X-OpenIDM-Password: openidm-admin" \ --request DELETE \ "http://localhost:8080/openidm/system/scriptedrest/account/scarter" { "_id": "scarter", "familyName": "Carter", "givenName": "Steve", "created": "2018-02-07T10:14:31Z", "uid": "scarter", "groups": [ { "_id": "group1" } ], "emailAddress": "scarter@example.com", "displayName": "Steven.Carter", "telephoneNumber": "555-555-5555" } $ curl \ --header "X-OpenIDM-Username: openidm-admin" \ --header "X-OpenIDM-Password: openidm-admin" \ --request DELETE \ "http://localhost:8080/openidm/system/scriptedrest/group/group1" { "_id": "group1", "displayName": "group1", "created": "2018-02-07T10:14:12Z", "members": null, "cn": "group1", "lastModified": "2018-02-07T10:20:22Z" }
Chapter 19. Connecting to Active Directory With the PowerShell Connector
This chapter describes an implementation of the PowerShell Connector toolkit and provides a number of PowerShell scripts that enable you to perform basic CRUD (create, read, update, delete) operations on an Active Directory server.
The sample uses the MS Active Directory PowerShell module. For more information on this module, see the corresponding Microsoft documentation.
The generic PowerShell Connector Toolkit enables you to run PowerShell scripts on any external resource. The PowerShell Connector Toolkit is not a complete connector, in the traditional sense. Rather, it is a framework within which you must write your own PowerShell scripts to address the requirements of your Microsoft Windows ecosystem. You can use the PowerShell Connector Toolkit to create connectors that can provision any Microsoft system.
The PowerShell Connector Toolkit is available from ForgeRock's BackStage site.
This sample assumes that IDM is running on a Windows system on the localhost. It also assumes that Active Directory and the OpenICF .NET connector server run on a remote Windows server. The PowerShell connector runs on the .NET connector server.
To use this sample for IDM instances installed on UNIX systems, adjust the relevant commands shown with PowerShell prompts.
Note
By default, the Get-ADUser and Get-ADGroup
cmdlets are not thread safe. To avoid thread issues when you use this
connector with Active Directory, you must set the pooling configuration
properties as follows:
"UseInterpretersPool" : true, "MinInterpretersPoolSize" : 1, "MaxInterpretersPoolSize" : 10
For more information about these properties see "Configuring the PowerShell Connector" in the Connector Reference.
19.1. Setting Up the PowerShell Active Directory Sample
Run the commands in this procedure from the PowerShell command line. The continuation character used in the command is the back-tick (`).
Install, configure, and start the .NET connector server on the machine that is running an Active Directory Domain Controller or on a workstation on which the Microsoft Active Directory PowerShell module is installed.
For instructions on installing the .NET connector server, see "Installing the .NET Connector Server" in the Integrator's Guide.
Configure IDM to connect to the .NET connector server.
To do so, copy the remote connector server configuration file from the
openidm\samples\provisionersdirectory to your project'sconf\directory, and edit the file according to your configuration:PS C:\ cd \path\to\openidm PS C:\path\to\openidm cp samples\provisioners\provisioner.openicf.connectorinfoprovider.json conf
For instructions on editing this file, see "Configuring IDM to Connect to the .NET Connector Server" in the Integrator's Guide.
Download the PowerShell Connector Toolkit archive (
mspowershell-connector-1.4.5.0.zip) from ForgeRock's BackStage site.Extract the archive and move the
MsPowerShell.Connector.dllto the folder in which the connector server application (connectorserver.exe) is located.Copy the PowerShell scripts and the ADSISearch module from the
samples\scripted-powershell-with-ad\toolsdirectory, to the machine on which the connector server is installed.PS C:\path\to\openidm>dir samples\scripted-powershell-with-ad\tools Directory: C:\path\to\openidm\samples\scripted-powershell-with-ad\tools Mode LastWriteTime Length Name ---- ------------- ------ ---- -a---- 4/3/2018 3:26 AM 4279 ADAuthenticate.ps1 -a---- 4/3/2018 3:26 AM 9055 ADCreate.ps1 -a---- 4/3/2018 3:26 AM 3717 ADDelete.ps1 -a---- 4/3/2018 3:26 AM 10756 ADSchema.ps1 -a---- 4/3/2018 3:26 AM 4625 ADSearch.ps1 -a---- 4/3/2018 3:26 AM 8064 ADSISearch.psm1 -a---- 4/3/2018 3:26 AM 5918 ADSync.ps1 -a---- 4/3/2018 3:26 AM 2408 ADTest.ps1 -a---- 4/3/2018 3:26 AM 18406 ADUpdate.ps1 PS C:\path\to\openidm>
Copy the sample connector configuration for the PowerShell connector from the
samples\provisionersdirectory to your project'sconfdirectory.PS C:\ cd \path\to\openidm PS C:\ cp samples\provisioners\provisioner.openicf-adpowershell.json conf
The following excerpt of the sample connector configuration shows the configuration properties:
"configurationProperties" : { "AuthenticateScriptFileName" : "C:/openidm/samples/scripted-powershell-with-ad/tools/ADAuthenticate.ps1", "CreateScriptFileName" : "C:/openidm/samples/scripted-powershell-with-ad/tools/ADCreate.ps1", "DeleteScriptFileName" : "C:/openidm/samples/scripted-powershell-with-ad/tools/ADDelete.ps1", "SchemaScriptFileName" : "C:/openidm/samples/scripted-powershell-with-ad/tools/ADSchema.ps1", "SearchScriptFileName" : "C:/openidm/samples/scripted-powershell-with-ad/tools/ADSearch.ps1", "SyncScriptFileName" : "C:/openidm/samples/scripted-powershell-with-ad/tools/ADSync.ps1", "TestScriptFileName" : "C:/openidm/samples/scripted-powershell-with-ad/tools/ADTest.ps1", "UpdateScriptFileName" : "C:/openidm/samples/scripted-powershell-with-ad/tools/ADUpdate.ps1", "VariablesPrefix" : "Connector", "QueryFilterType" : "Ldap", "ReloadScriptOnExecution" : true, "UseInterpretersPool" : true, "SubstituteUidAndNameInQueryFilter" : true, "UidAttributeName" : "ObjectGUID", "NameAttributeName" : "DistinguishedName", "PsModulesToImport" : [ "ActiveDirectory", "C:/openidm/samples/scripted-powershell-with-ad/tools/ADSISearch.psm1" ], "Host" : "", "Port" : null, "Login" : "", "Password" : null, "CustomProperties" : ["baseContext = CN=Users,DC=example,DC=com" ], "MinInterpretersPoolSize" : 1, "MaxInterpretersPoolSize" : 10 },The sample connector configuration assumes that the scripts are located in
C:/openidm/samples/scripted-powershell-with-ad/tools/. If you copied your scripts to a different location, or are using a different base context for search and synchronization operations such asDC=example,DC=org, adjust your connector configuration file accordingly.Note that the OpenICF framework requires the path to use forward slash characters and not the backslash characters that you would expect in a Windows path.
The host, port, login and password of the machine on which Active Directory runs do not need to be specified here. By default the Active Directory cmdlets pick up the first available Domain Controller. In addition, the scripts are executed using the credentials of the .Net connector server.
Note
The
ReloadScriptOnExecutionproperty is set totruein this sample configuration. This setting causes script files to be reloaded each time the script is invoked. Having script files reloaded each time is suitable for debugging purposes. However, this property should be set tofalsein production environments, as the script reloading can have a negative performance impact.In addition, make sure that the value of the
connectorHostRefproperty in the connector configuration file matches the value that you specified in the remote connector configuration file, in step 2 of this procedure. For example:"connectorHostRef" : "dotnet",
19.2. Testing the PowerShell Active Directory Sample
Because you have copied all of the required configuration files into the
default IDM project, you can start IDM with the
default configuration (that is, without the -p option):
PS C:\ cd \path\to\openidm PS C:\ .\startup.bat
When IDM has started, test the sample by using the
curl command-line utility. The following examples test
the scripts that were provided in the tools directory.
Test the connector configuration, and whether IDM is able to connect to the .NET connector server with the following request:
PS C:\ curl ` --header "X-OpenIDM-Username: openidm-admin" ` --header "X-OpenIDM-Password: openidm-admin" ` --request POST ` "http://localhost:8080/openidm/system?_action=test" [ { "ok": true, "connectorRef": { "bundleVersion": "[1.4.2.0,1.5.0.0)", "bundleName": "MsPowerShell.Connector", "connectorName": "Org.ForgeRock.OpenICF.Connectors.MsPowerShell.MsPowerShellConnector" }, "objectTypes": [ "__ALL__", "group", "account" ], "config": "config/provisioner.openicf/adpowershell", "enabled": true, "name": "adpowershell" } ]Query the users in your Active Directory with the following request:
PS C:\ curl ` --header "X-OpenIDM-Username: openidm-admin" ` --header "X-OpenIDM-Password: openidm-admin" ` --request GET ` "http://localhost:8080/openidm/system/adpowershell/account?_queryId=query-all-ids" { "remainingPagedResults": -1, "pagedResultsCookie": null, "resultCount": 1257, "result": [ { "_id": "7c41496a-9898-4074-a537-bed696b6be92", "distinguishedName": "CN=Administrator,CN=Users,DC=example,DC=com" }, { "_id": "f2e08a5c-473f-4798-a2d5-d5cc27c862a9", "distinguishedName": "CN=Guest,CN=Users,DC=example,DC=com" }, { "_id": "99de98a3-c125-48dd-a7c2-e21f1488ab06", "distinguishedName": "CN=Ben Travis,CN=Users,DC=example,DC=com" }, { "_id": "0f7394cc-c66a-404f-ad6d-38dbb4b6526d", "distinguishedName": "CN=Barbara Jensen,CN=Users,DC=example,DC=com" }, { "_id": "3e6fa858-ed3a-4b58-9325-1fca144eb7c7", "distinguishedName": "CN=John Doe,CN=Users,DC=example,DC=com" }, { "_id": "6feef4a0-b121-43dc-be68-a96703a49aba", "distinguishedName": "CN=Steven Carter,CN=Users,DC=example,DC=com" }, ...To return the complete record of a specific user, include the ID of the user in the URL. The following request returns the record for Steven Carter.
PS C:\ curl ` --header "X-OpenIDM-Username: openidm-admin" ` --header "X-OpenIDM-Password: openidm-admin" ` --request GET ` "http://localhost:8080/openidm/system/adpowershell/account/6feef4a0-b121-43dc-be68-a96703a49aba" { "_id": "6feef4a0-b121-43dc-be68-a96703a49aba", "postalCode": null, "passwordNotRequired": false, "cn": "Steven Carter", "name": "Steven Carter", "trustedForDelegation": false, "uSNChanged": "47219", "manager": null, "objectGUID": "6feef4a0-b121-43dc-be68-a96703a49aba", "modifyTimeStamp": "11/27/2014 3:37:16 PM", "employeeNumber": null, "sn": "Carter", "userAccountControl": 512, "passwordNeverExpires": false, "displayName": "Steven Carter", "initials": null, "pwdLastSet": "130615726366949784", "scriptPath": null, "badPasswordTime": "0", "employeeID": null, "badPwdCount": "0", "accountExpirationDate": null, "userPrincipalName": "steve.carter@ad0.example.com", "sAMAccountName": "steve.carter", "mail": "steven.carter@example.com", "logonCount": "0", "cannotChangePassword": false, "division": null, "streetAddress": null, "allowReversiblePasswordEncryption": false, "description": null, "whenChanged": "11/27/2014 3:37:16 PM", "title": null, "lastLogon": "0", "company": null, "homeDirectory": null, "whenCreated": "6/23/2014 2:50:48 PM", "givenName": "Steven", "telephoneNumber": "555-2518", "homeDrive": null, "uSNCreated": "20912", "smartcardLogonRequired": false, "distinguishedName": "CN=Steven Carter,CN=Users,DC=example,DC=com", "createTimeStamp": "6/23/2014 2:50:48 PM", "department": null, "memberOf": [ "CN=employees,DC=example,DC=com" ], "homePhone": null }Test that you can authenticate as one of the users in your Active Directory. The username that you specify here can be either an ObjectGUID, UPN, sAMAccountname or CN.
$ PS C:\ curl ` --header "X-OpenIDM-Username: openidm-admin" ` --header "X-OpenIDM-Password: openidm-admin" ` --header "Content-Type: application/json" ` --request POST ` --data '{ \"username\" : \"Steven Carter\", \"password\" : \"Passw0rd\" } ` "http://localhost:8080/openidm/system/adpowershell/account?_action=authenticate" { "_id": "6feef4a0-b121-43dc-be68-a96703a49aba" }The request returns the ObjectGUID if the authentication is successful.
You can return the complete record for a specific user, using the query filter syntax described in "Constructing Queries" in the Integrator's Guide.
The following query returns the record for the guest user.
PS C:\ curl ` --header "X-OpenIDM-Username: openidm-admin" ` --header "X-OpenIDM-Password: openidm-admin" ` --request GET ` 'http://localhost:8080/openidm/system/adpowershell/account?_queryFilter=cn+eq+"guest"' { "remainingPagedResults": -1, "pagedResultsCookie": null, "resultCount": 1, "result": [ { "_id": "f2e08a5c-473f-4798-a2d5-d5cc27c862a9", "postalCode": null, "passwordNotRequired": true, "cn": "Guest", "name": "Guest", "trustedForDelegation": false, "uSNChanged": "8197", "manager": null, "objectGUID": "f2e08a5c-473f-4798-a2d5-d5cc27c862a9", "modifyTimeStamp": "6/9/2014 12:35:16 PM", "employeeNumber": null, "userAccountControl": 66082, "whenChanged": "6/9/2014 12:35:16 PM", "initials": null, "pwdLastSet": "0", "scriptPath": null, "badPasswordTime": "0", "employeeID": null, "badPwdCount": "0", "accountExpirationDate": null, "sAMAccountName": "Guest", "logonCount": "0", "cannotChangePassword": true, "division": null, "streetAddress": null, "allowReversiblePasswordEncryption": false, "description": "Built-in account for guest access to the computer/domain", "userPrincipalName": null, "title": null, "lastLogon": "0", "company": null, "homeDirectory": null, "whenCreated": "6/9/2014 12:35:16 PM", "givenName": null, "homeDrive": null, "uSNCreated": "8197", "smartcardLogonRequired": false, "distinguishedName": "CN=Guest,CN=Users,DC=example,DC=com", "createTimeStamp": "6/9/2014 12:35:16 PM", "department": null, "memberOf": [ "CN=Guests,CN=Builtin,DC=example,DC=com" ], "homePhone": null, "displayName": null, "passwordNeverExpires": true } ] }Test that you can create a user on the Active Directory server by sending a POST request with the
createaction.The following request creates the user
Jane Doeon the Active Directory server.PS C:\ curl ` --header "X-OpenIDM-Username: openidm-admin" ` --header "X-OpenIDM-Password: openidm-admin" ` --header "Content-Type: application/json" ` --request POST ` --data "{ \"distinguishedName\" : \"CN=Jane Doe,CN=Users,DC=example,DC=com\", \"sn\" : \"Doe\", \"cn\" : \"Jane Doe\", \"sAMAccountName\" : \"sample\", \"userPrincipalName\" : \"janedoe@example.com\", \"__ENABLE__\" : true, \"password\" : \"Passw0rd\", \"telephoneNumber\" : \"0052-611-091\" }" ` "http://localhost:8080/openidm/system/adpowershell/account?_action=create" { "_id": "42725210-8dce-4fdf-b0e0-393cf0377fdf", "title": null, "uSNCreated": "47244", "pwdLastSet": "130615892934093041", "cannotChangePassword": false, "telephoneNumber": "0052-611-091", "smartcardLogonRequired": false, "badPwdCount": "0", "department": null, "distinguishedName": "CN=Jane Doe,CN=Users,DC=example,DC=com", "badPasswordTime": "0", "employeeID": null, "cn": "Jane Doe", "division": null, "description": null, "userPrincipalName": "janedoe@example.com", "passwordNeverExpires": false, "company": null, "memberOf": [], "givenName": null, "streetAddress": null, "sn": "Doe", "initials": null, "logonCount": "0", "homeDirectory": null, "employeeNumber": null, "objectGUID": "42725210-8dce-4fdf-b0e0-393cf0377fdf", "manager": null, "lastLogon": "0", "trustedForDelegation": false, "scriptPath": null, "allowReversiblePasswordEncryption": false, "modifyTimeStamp": "11/27/2014 8:14:53 PM", "whenCreated": "11/27/2014 8:14:52 PM", "whenChanged": "11/27/2014 8:14:53 PM", "accountExpirationDate": null, "name": "Jane Doe", "displayName": null, "homeDrive": null, "passwordNotRequired": false, "createTimeStamp": "11/27/2014 8:14:52 PM", "uSNChanged": "47248", "sAMAccountName": "sample", "userAccountControl": 512, "homePhone": null, "postalCode": null }Test that you can update a user object on the Active Directory server by sending a PUT request with the complete object, and including the user ID in the URL.
The following request updates user
Jane Doe's entry, including her ID in the request. The update sends the same information that was sent in thecreaterequest, but adds anemployeeNumber.PS C:\ curl ` --header "X-OpenIDM-Username: openidm-admin" ` --header "X-OpenIDM-Password: openidm-admin" ` --header "Content-Type: application/json" ` --header "If-Match: *" ` --request PUT ` --data "{ \"distinguishedName\" : \"CN=Jane Doe,CN=Users,DC=example,DC=com\", \"sn\" : \"Doe\", \"cn\" : \"Jane Doe\", \"userPrincipalName\" : \"janedoe@example.com\", \"__ENABLE__\" : true, \"password\" : \"Passw0rd\", \"telephoneNumber\" : \"0052-611-091\", \"employeeNumber\": \"567893\" }" ` "http://localhost:8080/openidm/system/adpowershell/account/42725210-8dce-4fdf-b0e0-393cf0377fdf" { "_id": "42725210-8dce-4fdf-b0e0-393cf0377fdf", "title": null, "uSNCreated": "47244", "pwdLastSet": "130615906375709689", "cannotChangePassword": false, "telephoneNumber": "0052-611-091", "smartcardLogonRequired": false, "badPwdCount": "0", "department": null, "distinguishedName": "CN=Jane Doe,CN=Users,DC=example,DC=com", "badPasswordTime": "0", "employeeID": null, "cn": "Jane Doe", "division": null, "description": null, "userPrincipalName": "janedoe@example.com", "passwordNeverExpires": false, "company": null, "memberOf": [], "givenName": null, "streetAddress": null, "sn": "Doe", "initials": null, "logonCount": "0", "homeDirectory": null, "employeeNumber": "567893", "objectGUID": "42725210-8dce-4fdf-b0e0-393cf0377fdf", "manager": null, "lastLogon": "0", "trustedForDelegation": false, "scriptPath": null, "allowReversiblePasswordEncryption": false, "modifyTimeStamp": "11/27/2014 8:37:17 PM", "whenCreated": "11/27/2014 8:14:52 PM", "whenChanged": "11/27/2014 8:37:17 PM", "accountExpirationDate": null, "name": "Jane Doe", "displayName": null, "homeDrive": null, "passwordNotRequired": false, "createTimeStamp": "11/27/2014 8:14:52 PM", "uSNChanged": "47253", "sAMAccountName": "sample", "userAccountControl": 512, "homePhone": null, "postalCode": null }Test whether you are able to delete a user object on the Active Directory server by sending a DELETE request with the user ID in the URL.
The following request deletes user
Jane Doe's entry.PS C:\ curl ` --header "X-OpenIDM-Username: openidm-admin" ` --header "X-OpenIDM-Password: openidm-admin" ` --request DELETE ` "http://localhost:8080/openidm/system/adpowershell/account/42725210-8dce-4fdf-b0e0-393cf0377fdf"
The response includes the complete user object that was deleted.
You can you attempt to query the user object to confirm that it has been deleted.
PS C:\ curl ` --header "X-OpenIDM-Username: openidm-admin" ` --header "X-OpenIDM-Password: openidm-admin" ` --request GET ` "http://localhost:8080/openidm/system/adpowershell/account/42725210-8dce-4fdf-b0e0-393cf0377fdf" { "message": "", "reason": "Not Found", "code": 404 }
Chapter 20. Connecting to Azure AD With the PowerShell Connector
This sample uses the Microsoft Azure Active Directory (Azure AD) PowerShell module. For more information about this module, see https://docs.microsoft.com/en-us/powershell/module/Azuread/?view=azureadps-2.0.
The sample assumes that IDM runs on a local UNIX/Linux machine and that the PowerShell Connector Toolkit (and the OpenICF .NET connector server) run on a remote Windows host with access to an instance of AzureAD. Adjust the command-line examples if your IDM instance runs on Windows.
This sample demonstrates how you can synchronize managed object data such as users and groups with a Microsoft AzureAD deployment.
Note
This sample sets up a connection between three systems: IDM on UNIX/Linux, an OpenICF .NET connector server on Windows, and Azure AD "in the cloud". Internet connection times vary widely and performance is based on responses to external calls, including potential timeouts, if a command doesn't perform the first time, try again. IDM’s synchronization and reconciliation performance will be fully dependent on the performance of the system resource.
20.1. Before You Start
Before you can run this sample, your system must meet several prerequisites. This section describes each of the prerequisites, and how to install or test them.
You must have a Microsoft account, which gives you access to Microsoft Azure.
You can set up a Microsoft account at https://signup.live.com/.
With a Microsoft account, you can access the Azure portal at http://azure.microsoft.com.
You must have an Azure AD cloud directory.
If you do not have an existing Azure AD cloud, set one up as follows:
Navigate to https://account.windowsazure.com/signup. When you have logged in in with your Microsoft credentials, fill in the prompts and Microsoft will create an Azure subscription.
Navigate to http://portal.azure.com, log in with your Microsoft account.
In the Microsoft Azure screen, select New on the left hand menu.
From the New list, select Security + Identity > Active Directory.
Complete the Add Directory form with the details of your directory, and select the check mark at the bottom of the form to submit.

Your directory should now be created and listed.
Apart from your default Microsoft Azure account, you must have an administrative user account for your Azure AD.
By default your directory will have a single identity, your Microsoft Azure account. You cannot use this account to run the PowerShell Connector scripts that administer the Azure AD.
If your Azure AD does not already include other administrative accounts, create a local administrative identity that is native to your directory as follows:
Log in to https://portal.azure.com/ with your Microsoft Azure credentials.
From the left-hand menu, select Browse > Active Directory.
Select your cloud directory from the left-hand menu and select USERS in the top navigation bar.
At the bottom of the page select Add User and enter the details of the new administrative user.
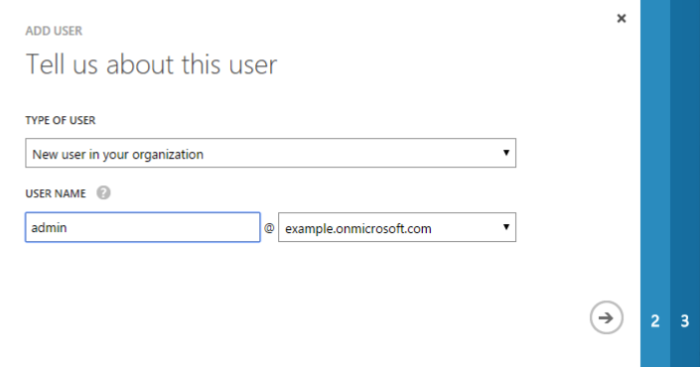
Select the arrow to continue.
On the User Profile screen, enter the details of this administrative user. Make sure that the user's Role is at least User Admin.
Select the arrow to continue.
On the final screen, select Create and note the temporary password that is assigned to the user.
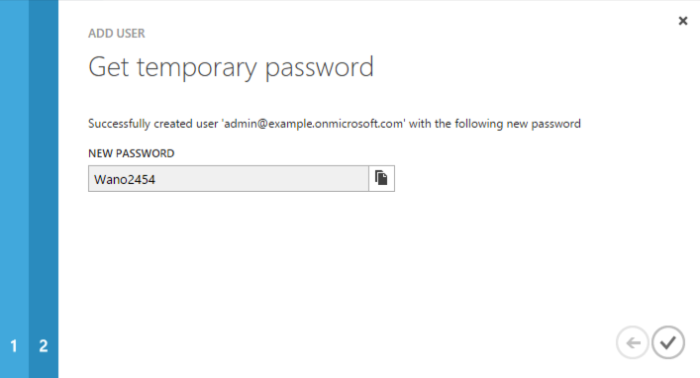
Because new administrative users are forced to change their password on first login, you should log in as this user to change the password.
Select the check mark to complete the new user creation process.
Select the username at the top right of the screen and select Sign-out to sign out of your Microsoft Azure account, then select SIGN IN > Use Another Account to sign in as your new administrative user.
Enter the email address of the new administrative user and select Continue.
Enter the temporary password that you received and select Sign In.
On the Update Your Password screen, enter a new password, then select Update password and sign in.
You now have a new administrative user account that the PowerShell scripts will use to access your Azure AD.
The Windows Azure AD Module for Windows PowerShell must be installed on the Windows host that connects to Azure.
If needed, install the Azure AD Module as described in the following Microsoft article.
Your Windows host must be able to contact your Azure AD deployment.
Verify the connection as follows:
Open a PowerShell window and type
Connect-Msolserviceat the command prompt.On the Enter Credentials screen, enter the credentials of the administrative account that you created for the Azure directory.

If the PowerShell command returns with no error, you have successfully connected to your remote Azure AD deployment.
The OpenICF .NET connector server must be installed on your Windows host.
If you have not yet installed the .NET connector server, follow the instructions in "Installing and Configuring a .NET Connector Server" in the Integrator's Guide.
The PowerShell Connector Toolkit must be installed on your Windows host.
If you have not yet installed the PowerShell Connector Toolkit, follow the instructions in "PowerShell Connector Toolkit" in the Connector Reference. In these instructions, you will use a command with a /setkey option to create a password key for your .NET connector server. You will use that key in "Setting Up the PowerShell Azure AD Sample".
Important
Before you continue, check that the OpenICF .NET connector server is still running. If it is not running, restart the connector server and check the logs. In some cases, Windows blocks the PowerShell connector dll. If the connector server fails to start, right-click on
MsPowerShell.Connector.dlland select Properties > Security. If you see the following text on that tab:This file came from another computer and might be blocked to help protect this computer.Select the Unblock button to unblock the connector dll. Then restart the connector server.

When all of the above elements are in place, you can proceed with running the sample, as described in "Setting Up the PowerShell Azure AD Sample".
20.2. Setting Up the PowerShell Azure AD Sample
This section assumes that IDM is installed on the local UNIX/Linux machine.
On the Windows host, create a directory for the PowerShell scripts.
The sample connector configuration expects the scripts in the directory
C:/openidm/samples/scripted-powershell-with-azure-ad/tools/. If you put them in a different location, adjust your connector configuration accordingly.PS C:\> mkdir -Path openidm\samples\scripted-powershell-with-azure-ad\azureADScripts Directory: C:\openidm\samples\scripted-powershell-with-azure-ad Mode LastWriteTime Length Name ---- ------------- ------ ---- d---- 5/4/2016 11:26 AM azureADScripts PS C:\>Copy the PowerShell sample scripts from the IDM instance on your UNIX/Linux host to the new directory on the remote Windows server.
One way to do this is to run an
scpclient, such aspscpin your Windows terminal. The following command copies the PowerShell scripts from the IDM installation to the Windows machine:PS C:\> cd openidm\samples\scripted-powershell-with-azure-ad\tools PS C:\> pscp -r username@openidm-host:path/to/openidm/samples/scripted-powershell-with-azure-ad/azureADScripts/*.ps .
The following scripts should now be in the
azureADScriptsdirectory on your Windows system:PS C:\openidm\samples\scripted-powershell-with-azure-ad\azureADScripts> ls Directory: C:\openidm\samples\scripted-powershell-with-azure-ad\azureADScripts Mode LastWriteTime Length Name ---- ------------- ------ ---- -a--- 5/4/2016 11:26 AM 7258 AzureADCreate.ps1 -a--- 5/4/2016 11:26 AM 3208 AzureADDelete.ps1 -a--- 5/4/2016 11:26 AM 6952 AzureADSchema.ps1 -a--- 5/4/2016 11:26 AM 8149 AzureADSearch.ps1 -a--- 5/4/2016 11:26 AM 2465 AzureADTest.ps1 -a--- 5/4/2016 11:26 AM 10840 AzureADUpdate.ps1Note
You need to set the execution policy, as Windows by default does not trust downloaded scripts. For more information, see the following article: Using the Set-ExecutionPolicy Cmdlet
You can then run the
Unblock-Filecmdlet to allow IDM to run the scripts on your Windows system. For more information, see the following article: Unblock-File.On the Linux/UNIX machine on which IDM is installed, navigate to the
path/to/openidm/samples/scripted-powershell-with-azure-addirectory, and open theprovisioner.openicf.connectorinfoprovider.json conffile.Edit the remote connector server configuration file to match the settings of the remote .NET connector server.
Change the port to
8760, and the password (key) that you configured for the .NET connector server.The following example assumes that the .NET connector server is running on the host
198.51.100.1, listening on the default port, and configured with a secret key ofPassw0rd:{ "remoteConnectorServers" : [ { "name" : "dotnet", "host" : "198.51.100.1", "port" : 8760, "useSSL" : false, "timeout" : 0, "key" : "Passw0rd" } ] }Open the sample Azure AD PowerShell connector configuration file,
provisioner.openicf-azureadpowershell.json, and edit it to match your deployment. In particular, set the following properties in that file:"Host" : "198.51.100.1", "Port" : 8760, "Login" : "admin@example.onmicrosoft.com", "Password" : "Passw0rd",
HostThe hostname or IP address on which the .NET connector server is running.
PortThe port on which the .NET connector server is listening.
LoginThe username of the administrative account you created for the Azure directory in the previous section.
PasswordThe password of the administrative account you created for the Azure directory in the previous section.
If you have placed the PowerShell scripts in a directory other than the default (
C:\openidm\samples\scripted-powershell-with-azure-ad\azureADScripts) you must also update those paths in the PowerShell connector configuration file.Start IDM with the PowerShell AzureAD sample configuration:
$ cd path/to/openidm $ ./startup.sh -p samples/scripted-powershell-with-azure-ad
20.3. Managing Users and Groups with the PowerShell Azure AD Sample
This section walks you through several REST commands that enable you to test the connector configuration, and perform basic CRUD operations in your Azure AD, through the PowerShell connector.
Test that the connector has been configured correctly and that the Azure AD resource can be reached:
$ curl \ --header "X-OpenIDM-Username: openidm-admin" \ --header "X-OpenIDM-Password: openidm-admin" \ --request POST \ "http://localhost:8080/openidm/system/azureadpowershell?_action=test" { "name": "azureadpowershell", "enabled": true, "config": "config/provisioner.openicf/azureadpowershell", "objectTypes": [ "__ALL__", "account", "group" ], "connectorRef": { "bundleName": "MsPowerShell.Connector", "connectorName": "Org.ForgeRock.OpenICF.Connectors.MsPowerShell.MsPowerShellConnector", "bundleVersion": "[1.4.2.0,1.5.0.0)" }, "displayName": "PowerShell Connector ", "ok": true }If you see no response from this connector test, review any changes that you made to the
provisioner-openicf*files in your project'sconf/subdirectory. If you've made changes appropriate for your deployment, wait a couple of minutes and try again.Query the IDs of the existing users in your Azure AD deployment:
$ curl \ --header "X-OpenIDM-Username: openidm-admin" \ --header "X-OpenIDM-Password: openidm-admin" \ --request GET \ "http://localhost:8080/openidm/system/azureadpowershell/account?_queryId=query-all-ids" { "result": [ { "_id": "51560d42-e60e-49a8-855b-42b6eca35ca6", "UserPrincipalName": "admin@example.onmicrosoft.com" }, { "_id": "5e63b42f-c93a-466f-af86-f0a8d00f2491", "UserPrincipalName": "scarter@example.onmicrosoft.com" } ], ... }Use a query filter to return all details of all existing users in your Azure AD:
$ curl \ --header "X-OpenIDM-Username: openidm-admin" \ --header "X-OpenIDM-Password: openidm-admin" \ --request GET \ "http://localhost:8080/openidm/system/azureadpowershell/account?_queryFilter=true" { "result": [ { "_id": "51560d42-e60e-49a8-855b-42b6eca35ca6", "LiveId": "10033FFF96C5186D", "FirstName": "Barbara", "LastName": "Jensen", "UserPrincipalName": "admin@example.onmicrosoft.com", "AlternateEmailAddress" : [ "bjensen@example.com" ], "LastPasswordChangeTimestamp": "3/15/2016 11:02:19 AM", "DisplayName": "Barbara Jensen", "PasswordNeverExpires": false, "MobilePhone" : "+1 3602297105" }, { "_id": "5e63b42f-c93a-466f-af86-f0a8d00f2491", "LiveId": "1003BFFD96A4CFBA", "FirstName": "Sam", "LastName": "Carter", "UserPrincipalName": "scarter@example.onmicrosoft.com" "AlternateEmailAddresses": [ "scarter@example.com" ], "LastPasswordChangeTimestamp": "3/7/2016 1:09:31 PM", "DisplayName": "Sam Carter", "PasswordNeverExpires": false, "MobilePhone" : "+1 3602297105" } ], ...}Return details for a specific user account, by its
_id$ curl \ --header "X-OpenIDM-Username: openidm-admin" \ --header "X-OpenIDM-Password: openidm-admin" \ --request GET \ "http://localhost:8080/openidm/system/azureadpowershell/account/51560d42-e60e-49a8-855b-42b6eca35ca6"
Create a new user in Azure AD. Substitute the domain for your Azure AD deployment for
example.onmicrosoft.com:$ curl \ --header "X-OpenIDM-Username: openidm-admin" \ --header "X-OpenIDM-Password: openidm-admin" \ --request POST \ --header "content-type: application/json" \ --data '{ "PasswordNeverExpires": false, "AlternateEmailAddresses": ["John.Bull@example.com"], "LastName": "Bull", "PreferredLanguage": "en-GB", "FirstName": "John", "UserPrincipalName": "Dev_John.Bull@example.onmicrosoft.com", "DisplayName": "John Bull" }' \ "http://localhost:8080/openidm/system/azureadpowershell/account?_action=create" { "_id" : "d4aac947-2037-4f29-b0f5-d404fd99938c", "LiveId" : "10037FFE979FB2C1", "FirstName" : "John", "LastName" : "Bull", "UserPrincipalName" : "Dev_John.Bull@example.onmicrosoft.com", "AlternateEmailAddresses" : [ "John.Bull@example.com" ], "LastPasswordChangeTimestamp" : "5/5/2016 3:52:43 PM", "DisplayName" : "John Bull", "PasswordNeverExpires" : false, "PreferredLanguage" : "en-GB" }Rerun the same command. You should see the following error:
{ "code" : 500, "reason" : "Internal Server Error", "message" : "Operation CREATE failed with ConnectorException on system object: Dev_John.Bull@example.onmicrosoft.com" }Update the user entry that you have just created with a patch request. Include the
_idof the new user in the URL. Save that_idvalue for a later step.The following example updates the user's display name:
$ curl \ --header "X-OpenIDM-Username: openidm-admin" \ --header "X-OpenIDM-Password: openidm-admin" \ --header "if-match: *" \ --header "content-type: application/json" \ --request PATCH \ --data '[ { "operation": "replace", "field": "DisplayName", "value": "John P. Bull" } ]' \ "http://localhost:8080/openidm/system/azureadpowershell/account/d4aac947-2037-4f29-b0f5-d404fd99938c" { "_id" : "d4aac947-2037-4f29-b0f5-d404fd99938c", "LiveId" : "10037FFE979FB2C1", "FirstName" : "John", "LastName" : "Bull", "UserPrincipalName" : "Dev_John.Bull@mikejangfr.onmicrosoft.com", "AlternateEmailAddresses" : [ "John.Bull@example.com" ], "LastPasswordChangeTimestamp" : "5/5/2016 3:52:43 PM", "DisplayName" : "John P. Bull", "PasswordNeverExpires" : false, "PreferredLanguage" : "en-GB" }Now create a group:
$ curl \ --header "X-OpenIDM-Username: openidm-admin" \ --header "X-OpenIDM-Password: openidm-admin" \ --header 'content-type: application/json' \ --request POST \ --data '{ "DisplayName" : "Dev Testers group", "Description" : "Description of a Dev Group" }' \ 'http://localhost:8080/openidm/system/azureadpowershell/group?_action=create' { "_id" : "9091be74-f37e-408d-9198-2d2b5f4b4cdd", "Members" : [ ], "DisplayName" : "Dev Testers Group", "GroupType" : "Security", "Description" : "Description of a Dev Group", "objectId" : "9091be74-f37e-408d-9198-2d2b5f4b4cdd" }Add your recently created user to this new group. Use the
_idof that user, as theObjectId. Use the_idof the newly created group in the endpoint:$ curl \ --header "X-OpenIDM-Username: openidm-admin" \ --header "X-OpenIDM-Password: openidm-admin" \ --header "Content-Type: application/json" \ --header "If-Match: *" \ --request PUT \ --data '{ "Members" : [ { "ObjectId" : "d4aac947-2037-4f29-b0f5-d404fd99938c" } ] }' \ "http://localhost:8080/openidm/system/azureadpowershell/group/9091be74-f37e-408d-9198-2d2b5f4b4cdd" { "_id" : "9091be74-f37e-408d-9198-2d2b5f4b4cdd", "Members" : [ { "ObjectId" : "d4aac947-2037-4f29-b0f5-d404fd99938c", "DisplayName" : "John P. Bull", "GroupMemberType" : "User", "EmailAddress" : "Dev_John.Bull@example.onmicrosoft.com" } ], "DisplayName" : "Testing Devs Group", "GroupType" : "Security", "Description" : "Description of a Dev Group", "objectId" : "9091be74-f37e-408d-9198-2d2b5f4b4cdd" }Confirm the result, by the
_idof the group:$ curl \ --header "X-OpenIDM-Username: openidm-admin" \ --header "X-OpenIDM-Password: openidm-admin" \ --request GET \ "http://localhost:8080/openidm/system/azureadpowershell/group/9091be74-f37e-408d-9198-2d2b5f4b4cdd"
Update a label for the group. Use the same group
_id:$ curl \ --header "X-OpenIDM-Username: openidm-admin" \ --header "X-OpenIDM-Password: openidm-admin" \ --header "Content-Type: application/json" \ --header "If-Match: *" \ --request PUT \ --data '{ "_id" : "9091be74-f37e-408d-9198-2d2b5f4b4cdd", "Description" : "Dev Masters Group", "Members" : [ { "ObjectId" : "d4aac947-2037-4f29-b0f5-d404fd99938c", "DisplayName" : "John P. Bull", "GroupMemberType" : "User", "EmailAddress" : "Dev_John.Bull@example.onmicrosoft.com" } ], "DisplayName" : "Testing Devs Group", "GroupType" : "Security", "objectId" : "9091be74-f37e-408d-9198-2d2b5f4b4cdd" }' \ "http://localhost:8080/openidm/system/azureadpowershell/group/9091be74-f37e-408d-9198-2d2b5f4b4cdd"You should see the new
Descriptionin the output.Remove the user from the new group. Use the same group
_idNote how theMembersin the--datablock, and the output, are blank:$ curl \ --header "X-OpenIDM-Username: openidm-admin" \ --header "X-OpenIDM-Password: openidm-admin" \ --header "Content-Type: application/json" \ --header "If-Match: *" \ --request PUT \ --data '{ "_id" : "9091be74-f37e-408d-9198-2d2b5f4b4cdd", "Description" : "Dev Masters Group", "Members" : [ ], "DisplayName" : "Testing Devs Group", "GroupType" : "Security", "objectId" : "9091be74-f37e-408d-9198-2d2b5f4b4cdd" }' \ "http://localhost:8080/openidm/system/azureadpowershell/group/9091be74-f37e-408d-9198-2d2b5f4b4cdd" { "_id" : "9091be74-f37e-408d-9198-2d2b5f4b4cdd", "Members" : [ ], "DisplayName" : "Testing Devs Group", "GroupType" : "Security", "Description" : "Dev Masters Group", "objectId" : "9091be74-f37e-408d-9198-2d2b5f4b4cdd" }Delete the user that you created earlier:
$ curl \ --header "X-OpenIDM-Username: openidm-admin" \ --header "X-OpenIDM-Password: openidm-admin" \ --request DELETE \ "http://localhost:8080/openidm/system/azureadpowershell/account/d4aac947-2037-4f29-b0f5-d404fd99938c"
To verify that the user was deleted, run the REST call to
query-all-idsshown earlier in this section. The ID associated with that user should have been removed.
20.4. Reconciling Users Between IDM and Azure AD
In this section, you'll run commands that demonstrate reconciliation mappings between IDM managed users and your remote instance of Azure AD.
In preparation, create a new user on the Azure AD system:
$ curl \
--header "X-OpenIDM-Username: openidm-admin" \
--header "X-OpenIDM-Password: openidm-admin" \
--request POST \
--header "content-type: application/json" \
--data '{
"UserPrincipalName": "CEO@example.onmicrosoft.com",
"LastName": "Officer",
"FirstName": "Chief",
"DisplayName": "Chief Executive Officer",
"PasswordNeverExpires": false
}' \
"http://localhost:8080/openidm/system/azureadpowershell/account?_action=create"In the steps that follow, you'll run reconciliations to see what happens to that user in the IDM respository.
Review the list of current managed users in the repository, filtered for the
userNamethat starts with (sw) CEO:$ curl \ --header "X-OpenIDM-Username: openidm-admin" \ --header "X-OpenIDM-Password: openidm-admin" \ --request GET \ "http://localhost:8080/openidm/managed/user?_queryFilter=userName+sw+'CEO'"
Until you reconcile Azure AD to IDM, the outputshould be empty:
{ "result" : [ ], "resultCount" : 0, "pagedResultsCookie" : null, "totalPagedResultsPolicy" : "NONE", "totalPagedResults" : -1, "remainingPagedResults" : -1 }Run a reconciliation from Azure AD to IDM:
$ curl \ --header "X-OpenIDM-Username: openidm-admin" \ --header "X-OpenIDM-Password: openidm-admin" \ --request POST \ "http://localhost:8080/openidm/recon?_action=recon&mapping=systemAzureadpowershellAccount_managedUser&waitForCompletion=true" { "_id" : "71811f1c-2ec0-47ae-ba47-d62c7094201b-1105", "state" : "SUCCESS" }Now rerun the command to list of current managed users in the IDM repository, filtered for the
userNamethat starts with (sw) CEO:$ curl \ --header "X-OpenIDM-Username: openidm-admin" \ --header "X-OpenIDM-Password: openidm-admin" \ --request GET \ "http://localhost:8080/openidm/managed/user?_queryFilter=userName+sw+'CEO'" { "result" : [ { "_id" : "3a012a60-19c2-4fb4-99cc-0bb82dc4588c", "_rev" : "1", "userName" : "CEO@example.onmicrosoft.com", "mail" : "CEO@example.onmicrosoft.com", "sn" : "Officer", "givenName" : "Chief", "accountStatus" : "active", "effectiveRoles" : [ ], "effectiveAssignments" : [ ] } ], "resultCount" : 1, "pagedResultsCookie" : null, "totalPagedResultsPolicy" : "NONE", "totalPagedResults" : -1, "remainingPagedResults" : -1 }Delete that CEO user from the Azure AD system, by the
_idshown earlier when you searched that system:$ curl \ --header "X-OpenIDM-Username: openidm-admin" \ --header "X-OpenIDM-Password: openidm-admin" \ --request DELETE \ "http://localhost:8080/openidm/system/azureadpowershell/account/3a012a60-19c2-4fb4-99cc-0bb82dc4588c"
If successful, you'll see the data for the CEO user one last time.
Run a second reconciliation from Azure AD to IDM
$ curl \ --header "X-OpenIDM-Username: openidm-admin" \ --header "X-OpenIDM-Password: openidm-admin" \ --request POST \ "http://localhost:8080/openidm/recon?_action=recon&mapping=systemAzureadpowershellAccount_managedUser&waitForCompletion=true"
Rerun the command to search the IDM repository for a
userNamethat starts with 'CEO' one more time, to confirm that user has been reconciled out of the IDM repository:$ curl \ --header "X-OpenIDM-Username: openidm-admin" \ --header "X-OpenIDM-Password: openidm-admin" \ --request GET \ "http://localhost:8080/openidm/managed/user?_queryFilter=userName+sw+'CEO'"
Chapter 21. Connecting to a MySQL Database With ScriptedSQL
This sample uses the Groovy Connector Toolkit to implement a ScriptedSQL connector that interacts with an external MySQL database (HRDB).
The Groovy Connector Toolkit is bundled with IDM in the JAR
openidm/connectors/groovy-connector-1.5.20.0.jar.
In addition, this sample demonstrates the following IDM functionality:
Complex data types
Complex data types can be stored, retrieved and synchronized like any other object property. They are stored in the managed data as JSON objects, represented as a string, but can be mapped to external resources in any format required. You can customize the mapping to do additional work with or transformations on the complex data types.
This sample defines one complex data type,
cars, discussed in more detail later in this section.Event hooks to perform actions
The mapping from the internal repository to the external
hrdbdatabase includes two script hooks. The first hook is for anonCreateevent and the second is for anonUpdateevent.For more information, see "Testing the Event Hooks".
Custom scripted endpoints
Custom scripted endpoints are configured in the provisioner configuration file and allow you to execute custom scripts over REST. This sample uses a custom scripted endpoint to reset the database and populate it with data. For more information about custom scripted endpoints, see "Creating Custom Endpoints to Launch Scripts" in the Integrator's Guide.
Caution
Because MySQL cannot "un-hash" user passwords there is no way for a reconciliation operation to retrieve the password from MySQL and store it in the managed user object. This issue might impact configurations that support multiple external resources in that passwords might not be synchronized immediately after reconciliation from MySQL to the managed user repository. Users who are missing in the repository will be created by reconciliation but their passwords will be empty. When those users are synchronized to other external resources, they will have empty passwords in those resources. Additional scripting might be required to handle this situation, depending on the requirements of your deployment.
The Groovy scripts required for the sample are located in the
samples/scripted-sql-with-mysql/tools directory. Note
that the power of the Groovy connector is in the associated Groovy scripts,
and their application in your particular deployment. The scripts provided with
this sample are specific to the sample. You must customize these scripts to
address the requirements of your specific deployment. The sample scripts are a
good starting point on which to base your customization.
21.1. Configuring the External MySQL Database
This sample assumes a MySQL database, running on the localhost. Follow these steps to install and configure the MySQL database:
Download MySQL Connector/J, version 5.1 or later from the MySQL website.
Extract the contents of the zip file, and copy the .jar into the
openidm/bundledirectory:$ cp mysql-connector-java-version-bin.jar /path/to/openidm/bundle/
Set up MySQL to listen on localhost, port 3306. IDM will connect to the
hrdbdatabase as userrootwith passwordpassword.If want to use an existing MySQL instance that runs on a different host or port, or you want to change the database credentials, adjust the
configurationPropertiesin the connector configuration file (samples/scripted-sql-with-mysql/conf/provisioner.openicf-hrdb.json) before you start the sample. The default configuration is as follows:"configurationProperties" : { "username" : "root", "password" : "password", "driverClassName" : "com.mysql.jdbc.Driver", "url" : "jdbc:mysql://localhost:3306/hrdb",Set up the
hrdbdatabase, with which IDM will synchronize its managed user repository:mysql -u root -p Enter password: Welcome to the MySQL monitor. Commands end with ; or \g. Your MySQL connection id is 3 Server version: 5.7.13 MySQL Community Server (GPL) Copyright (c) 2000, 2016, Oracle and/or its affiliates. All rights reserved. Oracle is a registered trademark of Oracle Corporation and/or its affiliates. Other names may be trademarks of their respective owners. Type 'help;' or '\h' for help. Type '\c' to clear the current input statement. mysql> CREATE DATABASE hrdb CHARACTER SET utf8 COLLATE utf8_bin; Query OK, 1 row affected (0.00 sec) mysql> quit Bye
21.2. Running the Sample
In this section, you will start IDM with the sample configuration, test the connection to the MySQL database, and populate the database with sample data.
The mapping configuration file (sync.json) for this
sample includes the mapping systemHrdb_managedUser. You
will use this mapping to synchronize users from the source hrdb
database with the target IDM repository.
Start IDM with the configuration for the ScriptedSQL sample:
$ cd /path/to/openidm $ ./startup.sh -p samples/scripted-sql-with-mysql
Run the custom script described in the previous section to reset the database and populate it with sample data.
You can run the script again, at any point, to reset the database.
$ curl \ --header "X-OpenIDM-Username: openidm-admin" \ --header "X-OpenIDM-Password: openidm-admin" \ --request POST \ "http://localhost:8080/openidm/system/hrdb?_action=script&scriptId=ResetDatabase" { "actions": [ { "result": "Database reset successful." } ] }The
hrdbdatabase should now be populated with sample data.Review the contents of the database as follows:
$ mysql -u root -p Enter password: ... mysql > use hrdb; Reading table information for completion of table and column names You can turn off this feature to get a quicker startup with -A Database changed mysql > select * from users; +----+--------+--------------+-----------+----------+---------------+--------... | id | uid | password | firstname | lastname | fullname | email ... +----+--------+------------------------------------------+-----------+-------... | 1 | bob | e38ad2149... | Bob | Fleming | Bob Fleming | Bob.Fle... | 2 | rowley | 2aa60a8ff... | Rowley | Birkin | Rowley Birkin | Rowley.... | 3 | louis | 1119cfd37... | Louis | Balfour | Louis Balfour | Louis.B... | 4 | john | a1d7584da... | John | Smith | John Smith | John.Sm... | 5 | jdoe | edba955d0... | John | Doe | John Doe | John.Do... +----+--------+------------------------------------------+-----------+-------... 5 rows in set (0.00 sec)Note
The passwords in the output shown above are hashed to the SHA-1 standard because as they cannot be read into IDM as clear text. The SHA-1 Hash function is used for compatibility reasons. Use a more secure algorithm in a production database.
Reconcile the hrdb database with the managed user repository.
To reconcile the repository by using the Administration UI:
Log in to the Admin UI at the URL
https://localhost:8443/adminas the default administrative user (openidm-admin) with passwordopenidm-admin.Select Configure > Mappings.
The Mappings page shows two mappings, one from the
hrdbdatabase to the IDM managed user repository (managed/user), and one in the opposite direction.Click Reconcile on the first mapping (systemHrdb_managedUser).
To reconcile the repository by using the command-line, launch the reconciliation operation with the following command:
$ curl \ --header "X-OpenIDM-Username: openidm-admin" \ --header "X-OpenIDM-Password: openidm-admin" \ --request POST \ "http://localhost:8080/openidm/recon?_action=recon&mapping=systemHrdb_managedUser&waitForCompletion=true" { "state": "SUCCESS", "_id": "f3c618aa-cc3b-49ed-9a3a-00b012db2513" }
The reconciliation operation creates the five users from the MySQL database in the IDM repository.
Retrieve the list of users from the repository.
To retrieve the users in the repository from the Admin UI:
Select Manage > User to display the User List.
The five users from the
hrdbdatabase have been reconciled to the OpenIDM repository.To retrieve the details of a specific user, click that user entry.
To retrieve the users from the repository by using the command-line, query the IDs in the repository as follows:
$ curl \ --header "X-OpenIDM-Username: openidm-admin" \ --header "X-OpenIDM-Password: openidm-admin" \ --request GET \ "http://localhost:8080/openidm/managed/user?_queryId=query-all-ids" { "result": [ { "_id": "1b379e4d-3b8d-47e7-93d5-a72c4b483e39", "_rev": "000000002d93e471" }, { "_id": "a658f751-d6e9-4b5d-af56-071a9b05c3af", "_rev": "000000003c83d48a" }, { "_id": "5b31027b-09f8-4c7f-abfa-c6bc86ae3943", "_rev": "00000000b042e559" }, { "_id": "1b3f6b06-1752-4c40-ba34-51d30b184b9d", "_rev": "0000000092bdda6d" }, { "_id": "9c62f0d2-47e2-4fc5-89d1-b50b782b1022", "_rev": "0000000025cdd3c6" } ], "resultCount": 5, "pagedResultsCookie": null, "totalPagedResultsPolicy": "NONE", "totalPagedResults": -1, "remainingPagedResults": -1 }To retrieve a complete user record, query the userName of the individual user entry. The following query returns the record for the user
Rowley Birkin:$ curl \ --header "X-OpenIDM-Username: openidm-admin" \ --header "X-OpenIDM-Password: openidm-admin" \ --request GET \ "http://localhost:8080/openidm/managed/user/?_queryId=for-userName&uid=rowley" "result": [ { "_id": "1b379e4d-3b8d-47e7-93d5-a72c4b483e39", "_rev": "000000002d93e471", "mail": "Rowley.Birkin@example.com", "userName": "rowley", "sn": "Birkin", "organization": "SALES", "givenName": "Rowley", "cars": [ { "year": "2013", "make": "BMW", "model": "328ci" }, { "year": "2010", "make": "Lexus", "model": "ES300" } ], "accountStatus": "active", "effectiveRoles": [], "effectiveAssignments": [] } ], ... }
Regardless of how you have retrieved Rowley Birkin's entry, note the
carsproperty in this user's entry. This property demonstrates a complex object, stored in JSON format in the user entry, as a list that contains multiple objects. In the MySQL database, thecartable joins to theuserstable through acars.users_idcolumn. The Groovy scripts read this data from MySQL and repackage it in a way that IDM can understand. With support for complex objects, the data is passed through to IDM as a list ofcarobjects. Data is synchronized from IDM to MySQL in the same way. Complex objects can also be nested to any depth.Group membership (not demonstrated here) is maintained with a traditional "join table" in MySQL (
groups_users). IDM does not maintain group membership in this way, so the Groovy scripts do the work to translate membership between the two resources.
21.3. Testing the Event Hooks
This sample uses the onCreate and onUpdate
hooks to log messages when a user is created or updated in the external
database.
The sample's conf/sync.json file defines these event
hooks as follows:
...
{
"name" : "managedUser_systemHrdb",
"source" : "managed/user",
"target" : "system/hrdb/account",
"links" : "systemHrdb_managedUser",
"correlationQuery" : {
"type" : "text/javascript",
"source" : "({'_queryFilter': 'uid eq \"' + source.userName + '\"'});"
},
"onCreate" : {
"type" : "text/javascript",
"source" : "logger.info(\"Creating new user in external repo\")"
},
"onUpdate" : {
"type" : "text/javascript",
"source" : "logger.info(\"Updating existing user in external repo\")"
},
...Using these event hooks, IDM logs a message when a user is created or updated in the external database. In this sample, the script source is included in the mapping. However, a script can also be called from an external file. For more information about event hooks, see "Places to Trigger Scripts" in the Integrator's Guide.
To test the event hooks, create a new managed user as follows:
$ curl \
--header "X-OpenIDM-Username: openidm-admin" \
--header "X-OpenIDM-Password: openidm-admin" \
--header "Content-Type: application/json" \
--request POST \
--data '{
"mail":"fdoe@example.com",
"sn":"Doe",
"telephoneNumber":"555-1234",
"userName":"fdoe",
"givenName":"Felicitas",
"description":"Felicitas Doe",
"displayName":"fdoe"}' \
"http://localhost:8080/openidm/managed/user?_action=create"
{
"_id": "2e5e9748-77e6-4019-90e1-abe9ab897343",
"_rev": "0000000015b2d4ba",
"mail": "fdoe@example.com",
"sn": "Doe",
"telephoneNumber": "555-1234",
"userName": "fdoe",
"givenName": "Felicitas",
"description": "Felicitas Doe",
"displayName": "fdoe",
"accountStatus": "active",
"effectiveRoles": [],
"effectiveAssignments": []
}The implicit synchronization between the managed user repository and the HRDB database creates that user in the database automatically.
Check the latest log file at
path/to/openidm/logs/openidm0.log.0. You should see the
following message at the end of the log:
INFO: Creating new user in external repo
Query the new user entry in the HRDB database:
$ curl \
--header "X-OpenIDM-Username: openidm-admin" \
--header "X-OpenIDM-Password: openidm-admin" \
--request GET \
"http://localhost:8080/openidm/system/hrdb/account?_queryFilter=uid+eq+'fdoe'"
{
"result": [
{
"_id": "6",
"cars": [],
"firstName": "Felicitas",
"uid": "fdoe",
"lastName": "Doe",
"organization": "IDM",
"fullName": "Felicitas Doe",
"email": "fdoe@example.com"
}
],
...
}
Update fdoe's entry in the HRDB database with a patch request. The following
request updates the user's organization field:
$ curl \
--header "X-OpenIDM-Username: openidm-admin" \
--header "X-OpenIDM-Password: openidm-admin" \
--header "Content-Type: application/json" \
--request PATCH \
--data '[ {
"operation" : "replace",
"field" : "organization",
"value" : "example.com"
} ]' \
"http://localhost:8080/openidm/system/hrdb/account/6"
{
"_id": "6",
"cars": [],
"firstName": "Felicitas",
"uid": "fdoe",
"lastName": "Doe",
"organization": "example.com",
"fullName": "Felicitas Doe",
"email": "fdoe@example.com"
}
Note that this update does not reference the onUpdate
script hook so this change is not logged in openidm0.log.0.
21.4. Using Paging With the ScriptedSQL Sample
All OpenICF connectors from version 1.4 onwards support the use of paging
parameters to restrict query results. The following command indicates that
only two records should be returned (_pageSize=2) and
that the records should be sorted according to their
timestamp and _id
(_sortKeys=timestamp,id). Including the
timestamp in the sort ensures that, as you page through
the set, changes to records that have already been visited are not lost.
Instead, those records are pushed onto the last page:
$ curl \
--header "X-OpenIDM-Username: openidm-admin" \
--header "X-OpenIDM-Password: openidm-admin" \
--request GET \
"http://localhost:8080/openidm/system/hrdb/account?_queryFilter=true&_pageSize=2&_sortKeys=timestamp,id"
{
"result": [
{
"_id": "1",
"firstName": "Bob",
"cars": [
{
"year": "1979",
"make": "Ford",
"model": "Pinto"
}
],
"fullName": "Bob Fleming",
"email": "Bob.Fleming@example.com",
"uid": "bob",
"lastName": "Fleming",
"organization": "HR"
},
{
"_id": "2",
"firstName": "Rowley",
"cars": [
{
"year": "2013",
"make": "BMW",
"model": "328ci"
}
],
"fullName": "Rowley Birkin",
"email": "Rowley.Birkin@example.com",
"uid": "rowley",
"lastName": "Birkin",
"organization": "SALES"
}
],
"resultCount": 2,
"pagedResultsCookie": "2018-04-05+16%3A30%3A22.0%2C2",
"totalPagedResultsPolicy": "NONE",
"totalPagedResults": -1,
"remainingPagedResults": -1
}
The pagedResultsCookie is used by the server to keep
track of the position in the search results. You can ignore the
"remainingPagedResults": -1 in the output. The real value
of this property is not returned because the scripts that the connector uses
do not do any counting of the records in the resource.
Using the pagedResultsCookie from the previous step, run
a similar query, to retrieve the following set of records in the database:
$ curl \
--header "X-OpenIDM-Username: openidm-admin" \
--header "X-OpenIDM-Password: openidm-admin" \
--request GET \
"http://localhost:8080/openidm/system/hrdb/account?_queryId=query-all-ids&_pageSize=2&_sortKeys=timestamp,id&_pagedResultsCookie=2018-04-05+16%3A30%3A22.0%2C2"
{
"result": [
{
"_id": "3",
"uid": "louis"
},
{
"_id": "4",
"uid": "john"
}
],
"resultCount": 2,
"pagedResultsCookie": "2018-04-05+16%3A30%3A22.0%2C4",
"totalPagedResultsPolicy": "NONE",
"totalPagedResults": -1,
"remainingPagedResults": -1
}For more information about paging support, see "Paging Query Results" in the Integrator's Guide.
Chapter 22. Directing Audit Information To a MySQL Database
This sample shows how to direct audit information to a MySQL database.
The sample includes an external CSV file and a mapping between objects in that file and the managed user repository. The reconciliations across this mapping generate the audit records that will be directed to the MySQL database. The connection to the MySQL database is through a ScriptedSQL implementation of the Groovy Connector Toolkit.
22.1. About the Configuration Files
The files that demonstrate the functionality of this sample are located
under /path/to/openidm/samples/audit-jdbc/, in the
conf/ and data/ directories.
The following files play important roles in this sample:
conf/provisioner.openicf-auditdb.jsonThis file provides the configuration for the Scripted SQL implementation of the Groovy Connector. The file specifies, among other things, the connection details to the MySQL database, the connector version information, and the object types that are supported for this connection. For more information, see "Groovy Connector Toolkit" in the Connector Reference.
conf/provisioner.openicf-csvfile.jsonThis file provides the configuration for this instance of the CSV connector. It includes, among other things, the location of the CSV file resource.
conf/sync.jsonProvides the mapping between managed users and the data set in the CSV file.
conf/audit.jsonThis file configures the router as the audit event handler, and routes logs to a remote system, identified as
auditdb. For information about configuring how audit logs are handled, see "Configuring the Audit Service" in the Integrator's Guide.data/csvConnectorData.csvThis file contains the sample data set that will be reconciled to the managed user repository.
data/sample_audit_db.mysqlThis file sets up the schema for the MySQL database that will contain the audit logs.
tools/*.groovyThe Groovy scripts in this directory allow the connector to perform operations on the MySQL database.
22.2. Configuring the MySQL Database
Before you start this sample, MySQL must be installed and running, and must include the database required for the sample. In addition, IDM must include the connector .jar required to connect to the MySQL database.
The sample assumes the following MySQL configuration:
You can connect to the MySQL database over the network, as user
rootwith passwordpassword.
Install and configure MySQL.
When MySQL is up and running, import the database schema to set up the database required for the sample:
$ mysql -u root -p < /path/to/openidm/samples/audit-jdbc/data/sample_audit_db.mysql Enter password: password $
This step sets up an
auditdatabase with six tables that correspond to the various audit events. You can view the tables in the audit database as follows:$ mysql -u root -p Enter password: password mysql> use audit Reading table information for completion of table and column names You can turn off this feature to get a quicker startup with -A Database changed mysql> show tables; +---------------------+ | Tables_in_audit | +---------------------+ | auditaccess | | auditactivity | | auditauthentication | | auditconfig | | auditrecon | | auditsync | +---------------------+ 6 rows in set (0.00 sec)
Download MySQL Connector/J, version 5.1 or later from the MySQL website. Unpack the delivery, and copy the .jar into the
openidm/bundledirectory:$ cp mysql-connector-java-version-bin.jar /path/to/openidm/bundle/
Edit the
urlproperty in the SQL connector configuration file (conf/provisioner.openicf-auditdb.json) to match the host and port of your MySQL instance. For example:"url" : "jdbc:mysql://localhost:3306/audit",
22.3. Running the Sample
In this section, you will start IDM, then run a reconciliation
between the CSV file and the managed user repository. After the
reconciliation, you should be able to read the audit logs in the
audit database on your MySQL instance.
Prepare IDM as described in "Preparing IDM", then start the server with the configuration for this sample:
$ cd /path/to/openidm $ ./startup.sh -p samples/audit-jdbc
Reconcile the two data sources, either over the command-line or by using the Admin UI.
To run the reconciliation over REST, use the following command:
$ curl \ --header "X-OpenIDM-Username: openidm-admin" \ --header "X-OpenIDM-Password: openidm-admin" \ --request POST \ "http://localhost:8080/openidm/recon?_action=recon&mapping=systemCsvfileAccounts_managedUser&waitForCompletion=true" { "_id": "a3664c26-bf82-4100-b411-19edc248c306-7", "state": "SUCCESS" }To run the reconciliation from the Admin UI, select Configure > Mappings, select the
systemCsvfileAccounts_managedUsermapping, then select Reconcile.Inspect the tables in the
auditdatabase to see how the logs have been routed to that location.The following example displays the reconciliation audit logs:
$ $ mysql -u root -p Enter password: password ... mysql> use audit; ... mysql> show tables; +---------------------+ | Tables_in_audit | +---------------------+ | auditaccess | | auditactivity | | auditauthentication | | auditconfig | | auditrecon | | auditsync | +---------------------+ 6 rows in set (0.01 sec) mysql> select * from auditrecon; | id | objectid | transactionid | activitydate | eventname | userid | ... | mapping... | 1 | a3664... | a3664c26-b... | 2017-02-1... | recon | openidm-admin | ... | systemCsvfile...
You can inspect the other audit logs in the same way.
By default, the audit configuration in this sample uses the router audit handler for queries, as indicated in the following line from the
conf/audit.jsonfile:"handlerForQueries" : "router",
With this configuration, when you query the audit logs over REST, the audit data is returned from the router handler (in this case the MySQL database). The following example shows how to query the reconciliation audit log:
$ curl \ --header "X-OpenIDM-Username: openidm-admin" \ --header "X-OpenIDM-Password: openidm-admin" \ --request GET \ "http://localhost:8080/openidm/audit/recon?_queryFilter=true" { "result": [ { "_id": "a3664c26-bf82-4100-b411-19edc248c306-16", "action": null, "trackingIds": null, "sourceObjectId": null, "timestamp": "2017-02-14T10:19:30.688Z", "ambiguousTargetObjectIds": null, "reconId": "a3664c26-bf82-4100-b411-19edc248c306-7", "status": null, "eventName": "recon", "mapping": "systemCsvfileAccounts_managedUser", "targetObjectId": null, "situation": null, "userId": "openidm-admin", "transactionId": "a3664c26-bf82-4100-b411-19edc248c306-7", "message": "Reconciliation initiated by openidm-admin", "reconAction": "recon", "messageDetail": null, "entryType": "start", "linkQualifier": null, "reconciling": null, "exception": null }, ... }You can query the other audit logs in the same way.
For more information about querying the audit logs, see "Querying Audit Logs Over REST" in the Integrator's Guide.
Chapter 23. Directing Audit Information To a JMS Broker
This sample shows how to configure a Java Message Service (JMS) audit event handler to direct audit information to a JMS broker.
23.1. About This Sample
JMS is an API that supports Java-based peer-to-peer messages between clients. The JMS API can create, send, receive, and read messages, reliably and asynchronously. You can set up a JMS audit event handler to publish messages that comply with the Java Message Service Specification Final Release 1.1.
This sample demonstrates the use of the JMS audit event handler. In the sample you will set up communication between IDM and an external JMS Message Broker, as well as Apache Active MQ as the JMS provider and message broker.
Note
JMS topics are not related to ForgeRock audit event topics. The ForgeRock implementation of JMS topics uses the publish/subscribe messaging domain to direct messages to the JMS audit event handler. In contrast, ForgeRock audit event topics specify categories of events.
23.2. Adding the Dependencies for JMS Messaging
The JMS audit event handler requires ActiveMQ, and a number of dependencies. This section lists the dependencies, where they can be downloaded, and where they must be installed in the OpenIDM instance.
This sample was tested with the versions of the files mentioned in this list. If you use a different ActiveMQ version, the dependency versions might differ.
Download the ActiveMQ binary from http://activemq.apache.org/download.html. This sample was tested with ActiveMQ 5.14.3.
Download the ActiveMQ Client that corresponds to your ActiveMQ version from https://repository.apache.org/content/repositories/releases/org/apache/activemq/activemq-client/.
Download the JmDNS JAR, version 3.4.1.
Download the bnd tool that allows you to create a JAR with OSGi meta data. This sample was tested with bnd version 2.4.0, downloaded from https://repo1.maven.org/maven2/biz/aQute/bnd/bnd/.
Download the Apache Geronimo J2EE management bundle (
geronimo-j2ee-management_1.1_spec-1.0.1.jar) from https://repo1.maven.org/maven2/org/apache/geronimo/specs/geronimo-j2ee-management_1.1_spec/1.0.1/.Download the hawtbuf Maven-based protocol buffer compiler (hawtbuf-1.11.jar).
Unpack the ActiveMQ binary. For example:
$ tar -zxvf ~/Downloads/apache-activemq-5.14.3-bin.tar.gz
Create a temporary directory, copy the Active MQ Client and
bndJAR files to that directory, then change to that directory:$ mkdir ~/Downloads/tmp $ mv activemq-client-5.14.3.jar ~/Downloads/tmp/ $ mv bnd-2.4.0.jar ~/Downloads/tmp/ $ cd ~/Downloads/tmp/
Create an OSGi bundle as follows:
In a text editor, create a BND file named
activemq.bndwith the following contents:version=5.14.3 Export-Package: *;version=${version} Bundle-Name: ActiveMQ :: Client Bundle-SymbolicName: org.apache.activemq Bundle-Version: ${version}Your
tmp/directory should now contain the following files:$ ls activemq-client-5.14.3.jar activemq.bnd bnd-2.4.0.jar
In that same directory, create the OSGi bundle archive file as follows:
$ java -jar bnd-2.4.0.jar \ wrap --properties activemq.bnd \ --output activemq-client-5.14.3-osgi.jar \ activemq-client-5.14.3.jar
Copy the resulting
activemq-client-5.14.3-osgi.jarfile to theopenidm/bundledirectory:$ cp activemq-client-5.14.3-osgi.jar /path/to/openidm/bundle/
Copy the Apache Geronimo, hawtbuf, and JmDNS JAR files to the
openidm/bundledirectory:$ cp ~/Downloads/geronimo-j2ee-management_1.1_spec-1.0.1.jar /path/to/openidm/bundle/ $ cp ~/Downloads/hawtbuf-1.11.jar /path/to/openidm/bundle/ $ cp ~/Downloads/jmdns-3.4.1.jar /path/to/openidm/bundle
Your OpenIDM instance is now ready for you to configure the JMS audit event handler.
23.3. Starting the ActiveMQ Broker and Running the Sample
With the appropriate bundles in the /path/to/openidm/bundle/
directory, you can start the ActiveMQ message broker, then start
IDM with the configuration for this sample.
Navigate to the directory where you unpacked the ActiveMQ binary, for example:
$ cd ~/Downloads/apache-activemq-5.14.3
If you need SSL protection for your audit data, edit the ActiveMQ configuration file,
activemq.xml, in theconf/subdirectory.Find the code block associated with
<transportConnectors>, and add the following (all on one line) within that block:<transportConnector name="ssl" uri="ssl://0.0.0.0:61617?transport.enabledCipherSuites= SSL_RSA_WITH_RC4_128_SHA,SSL_DH_anon_WITH_3DES_EDE_CBC_SHA &maximumConnections=1000&wireFormat.maxFrameSize=104857600&transport.daemon=true"/>Navigate to the directory where you unpacked the ActiveMQ binary and run the following command to start the ActiveMQ broker:
$ bin/activemq start INFO: Loading '/path/to/Downloads/apache-activemq-5.14.3//bin/env' INFO: Using java '/usr/bin/java' INFO: Starting - inspect logfiles specified in logging.properties and log4j.properties to get details INFO: pidfile created : '/path/to/Downloads/apache-activemq-5.14.3//data/activemq.pid' (pid '69627')
Start IDM with the configuration for this sample:
$ cd /path/to/openidm $ ./startup.sh -p samples/audit-jms
Note
If you see the following error in the OSGi console, make sure that you have installed all the dependencies described in "Adding the Dependencies for JMS Messaging" and that you have started the ActiveMQ broker.
SEVERE: Unable to create JmsAuditEventHandler 'jms': null
23.4. Configuring and Using a JMS Consumer Application
To take advantage of the Apache ActiveMQ event broker, the JMS audit sample
includes a Java consumer in the following directory:
/path/to/openidm/samples/audit-jms/consumer/
Assuming you have Apache Maven installed on the local system, you can compile that sample consumer with the following commands:
$ cd /path/to/openidm/samples/audit-jms/consumer/ $ mvn clean install
When the build process is complete, you'll see a BUILD SUCCESS message:
[INFO] ------------------------------------------------------------------------ [INFO] BUILD SUCCESS [INFO] ------------------------------------------------------------------------ [INFO] Total time: 22.852 s [INFO] Finished at: 2017-02-17T17:21:35+02:00 [INFO] Final Memory: 18M/148M [INFO] ------------------------------------------------------------------------
Note
You might see [WARNING] messages during the build. As
long as the messages end with BUILD SUCCESS, you can
proceed with the JMS consumer application.
When the consumer is compiled, run the following command in the same directory to output audit messages related to IDM actions:
$ mvn \ exec:java \ -Dexec.mainClass="consumer.src.main.java.SimpleConsumer" \ -Dexec.args="tcp://localhost:61616" [INFO] [INFO] ------------------------------------------------------------------------ [INFO] Building SimpleConsumer 1.0-SNAPSHOT [INFO] ------------------------------------------------------------------------ [INFO] [INFO] --- exec-maven-plugin:1.5.0:java (default-cli) @ SimpleConsumer --- Downloading: https://repo.maven.apache.org/maven2/org/apache/commons/commons-exec/... Downloaded: https://repo.maven.apache.org/maven2/org/apache/commons/commons-exec/... Downloading: https://repo.maven.apache.org/maven2/org/apache/commons/commons-exec/... Downloaded: https://repo.maven.apache.org/maven2/org/apache/commons/commons-exec/... Connection factory=org.apache.activemq.ActiveMQConnectionFactory READY, listening for messages. (Press 'Enter' to exit)
Look for the message READY, listening for messages.
If you've configured ActiveMQ on a secure port, as described in "Starting the ActiveMQ Broker and Running the Sample", you can run this alternative command:
$ mvn \
exec:java \
-Dexec.mainClass="consumer.src.main.java.SimpleConsumer" \
-Dexec.args="ssl://localhost:61617?daemon=true&socket.enabledCipherSuites=
SSL_RSA_WITH_RC4_128_SHA,SSL_DH_anon_WITH_3DES_EDE_CBC_SHA"
Try some actions on IDM, either in a different console or in the
Admin UI. Watch the output in the SimpleConsumer
console. For example, you might see output similar to the following
when you run a reconciliation on the data in this sample:
{
"auditTopic": "recon",
"event": {
"transactionId": "f3e108a9-eb75-4ec8-96c5-9dc2f5137d51-176",
"timestamp": "2017-02-17T15:25:34.899Z",
"eventName": "recon",
"userId": "openidm-admin",
"exception": null,
"linkQualifier": null,
"mapping": "systemCsvfileAccounts_managedUser",
"message": "SOURCE_IGNORED: 0 UNASSIGNED: 0 AMBIGUOUS: 0 CONFIRMED: ...",
"messageDetail": {
"_id": "f3e108a9-eb75-4ec8-96c5-9dc2f5137d51-176",
"mapping": "systemCsvfileAccounts_managedUser",
"state": "SUCCESS",
"stage": "COMPLETED_SUCCESS",
"stageDescription": "reconciliation completed.",
"progress": {
"source": {
"existing": {
"processed": 2,
"total": "2"
}
},
...
}
}Chapter 24. Synchronizing Data Between MongoDB and IDM
This sample uses the Groovy Connector Toolkit to implement a scripted connector that interacts with a MongoDB database. The connector can be used for provisioning MongoDB database users and roles from an IDM managed repository.
The Groovy Connector Toolkit is bundled with IDM in the JAR
openidm/connectors/groovy-connector-1.5.20.0.jar.
The Groovy scripts required for the sample are bundled within the MongoDB
connector. If you wish to customize these scripts, you can specify different
scripts by adjusting the scriptRoot property and
script names in provisioner.openicf-mongodb.json.
This sample allows you to synchronize from IDM Managed User to an external MongoDB database.
Note
There is currently no way to synchronize passwords from an external MongoDB database to IDM. Because of this, it is recommended that IDM be used for user creation and password management.
While not demonstrated in this sample, the MongoDB connector can also:
Synchronize from a dedicated store of IDM Managed MongoDB Roles to an external MongoDB database.
Synchronize from an external MongoDB database to a dedicated IDM store of Managed MongoDB Roles.
24.1. Configuring the MongoDB Database
This sample assumes a MongoDB database, running on the localhost system. Follow these steps to install and configure the MongoDB database:
Use the instructions for downloading and installing MongoDB in the MongoDB Manual. For the supported version of MongoDB, see "MongoDB Connector" in the Connector Reference.
Set up MongoDB, based on the
configurationPropertiesdiscussed in "MongoDB Connector" in the Connector Reference. By default, it listens on localhost, port 27017. For the purpose of this sample, we'll set up an administrative user ofmyUserAdminwith a password ofPassw0rdin theadmindatabase. We will then create a database in MongoDB namedhrdb.Note
The MongoDB administrative user must have the
userAdminAnyDatabaserole, or attempts to update users will fail.If want to use an existing MongoDB instance that runs on a different host or port, or you want to change the database credentials, adjust the
configurationPropertiesin the connector configuration file (samples/sync-with-mongodb/conf/provisioner.openicf-mongodb.json) before you start the sample, as described in "Configuring the MongoDB Connector" in the Connector Reference.Set up the MongoDB database, with which IDM will synchronize its managed user repository, by:
Enabling authentication, as described in the following MongoDB document: Enable Auth .
Setting up users and roles, as described in this MongoDB document: Manage Users and Roles .
24.2. Running the Sample
In this section, you will start IDM with the sample configuration, test the connection to the MongoDB database, and populate the database with sample data.
The mapping configuration file (sync.json) for this
sample includes one mapping:
managedUser_systemMongodbAccount. You will use this
mapping to synchronize users between the IDM repository and
the MongoDB database:
Update
samples/sync-with-mongodb/conf/provisioner.openicf-mongodb.jsonwith the credentials and database information you created when configuring MongoDB. In our example,databasewould be set tohrdb, whileuserwould bemyUserAdminwithuserDatabaseset toadmin.Start IDM with the configuration for the MongoDB sample:
$ cd /path/to/openidm $ ./startup.sh -p samples/sync-with-mongodb
Create at least one assignment and role to assign roles to users. In this example, we are creating a role to assign read privileges to users. The role created is conditional, and only assigned to active users:
$ curl \ --header "X-OpenIDM-Username: openidm-admin" \ --header "X-OpenIDM-Password: openidm-admin" \ --header "Content-type: application/json" \ --request POST \ --data '{ "name" : "MongoDB Read Access", "description": "Basic Read Access to HRDB", "mapping" : "managedUser_systemMongodbAccount", "attributes": [ { "name": "roles", "value": [ { "role": "read", "db": "hrdb" } ], "assignmentOperation" : "mergeWithTarget", "unassignmentOperation" : "removeFromTarget" } ] }' \ "http://localhost:8080/openidm/managed/assignment?_action=create" { "_id": "fb98f4a5-0f4d-4e22-9e17-79c45c11fe20", "_rev": "000000005c2da0eb", "name": "MongoDB Read Access", "description": "Basic Read Access to HRDB", "mapping": "managedUser_systemMongodbAccount", "attributes": [ { "name": "roles", "value": [ { "role": "read", "db": "hrdb" } ], "assignmentOperation": "mergeWithTarget", "unassignmentOperation": "removeFromTarget" } ] }$ curl \ --header "Content-type: application/json" \ --header "X-OpenIDM-Username: openidm-admin" \ --header "X-OpenIDM-Password: openidm-admin" \ --request POST \ --data '{ "name" : "MongoDB Read Access", "description": "Role for accounts with read access in MongoDB.", "condition": "/accountStatus eq \"active\"", "assignments": [ { "_ref": "managed/assignment/fb98f4a5-0f4d-4e22-9e17-79c45c11fe20", "_refResourceCollection": "managed/assignment", "_refResourceId": "fb98f4a5-0f4d-4e22-9e17-79c45c11fe20" } ] }' \ "http://localhost:8080/openidm/managed/role?_action=create" { "_id": "5f16238e-39e1-4f8c-8b16-27d39dc64dc3", "_rev": "0000000011e566a2", "name": "MongoDB Read Access", "description": "Role for accounts with read access in MongoDB.", "condition": "/accountStatus eq \"active\"" }Create new users in IDM. Note that MongoDB requires user name, password, and roles properties to successfully create a user. In this example, the
readrole is assigned to new users automatically.Reconcile the managed user repository with the external MongoDB database:
To reconcile the repository through the UI:
Log in to the Admin UI at the URL
https://localhost:8443/adminas the default administrative user (openidm-admin) with passwordopenidm-admin.Select Configure > Mappings.
The Mappings page shows one mapping: From the IDM Managed User repository to the MongoDB database (
managedUser_systemMongodbAccount).Select the
managedUser_systemMongodbAccountmapping, and choose the Reconcile option.
To reconcile the repository by using the command-line, launch the reconciliation operation with the following command:
$ curl \ --header "X-OpenIDM-Username: openidm-admin" \ --header "X-OpenIDM-Password: openidm-admin" \ --request POST \ "http://localhost:8080/openidm/recon?_action=recon&mapping=managedUser_systemMongodbAccount&waitForCompletion=true" { "_id": "e5bf074e-4da6-4ea7-8203-d4ec6f5a814a-24344", "state": "SUCCESS" }
The reconciliation operation creates MongoDB users from the users found in
managed/user.
Chapter 25. Subscribing to JMS Messages
IDM can subscribe to Java Messaging Service (JMS) messages using the Messaging Service's JMS Subscriber. In an event-driven architecture, also known as a message-driven architecture, there are publishers and subscribers. When a publisher sends a message over JMS, that message is broadcast. All active and subscribed clients receive that message. This sample shows how IDM can act as a JMS message subscriber, using the ActiveMQ JMS message broker.
For more information on how IDM can publish JMS messages, using the JMS Audit Event Handler, see "Directing Audit Information To a JMS Broker"
With the scripted message handler shown in this sample, you can configure scripts to parse the contents of JMS messages, and act on that content.
The script in this sample, crudpaqTextMessageHandler.js,
demonstrates how JMS can handle ForgeRock REST operations. If you customize
a script to manage JMS messages, you must also modify the
messaging.json file in the conf/
subdirectory.
This sample uses ActiveMQ, a JMS message broker. With the ActiveMQ UI, you can act as the JMS message provider. This sample demonstrates how you can input REST payloads through the ActiveMQ UI.
To set up ActiveMQ, you must download and process several files. For more information, see "Adding the Dependencies for JMS Messaging".
25.1. Starting the ActiveMQ Broker and IDM
With the appropriate bundles in the /path/to/openidm/bundles
directory, you're ready to start the ActiveMQ message broker, as well as
IDM with the JMS Audit Sample.
To start the ActiveMQ broker, navigate to the directory where you unpacked the ActiveMQ binary, and run the following command:
$ bin/activemq start INFO: Loading '/path/to/apache-activemq-5.13.0/bin/env' INFO: Using java '/usr/bin/java' INFO: Starting - inspect logfiles specified in logging.properties and log4j.properties to get details INFO: pidfile created : '/path/to/apache-activemq-5.13.0/data/activemq.pid' (pid '22671')
Now start IDM, with the configuration for this sample:
$ cd /path/to/openidm $ ./startup.sh -p samples/scripted-jms-subscriber
25.1.1. Configuring a Secure Port for JMS Messages
To set up SSL protection for your JMS messages, stop ActiveMQ and edit the following files:
activemq.xmlin the/path/to/apache-activemq-5.13.0/directory, typically where you unpacked the downloaded ActiveMQ binary.Find the code block associated with
<transportConnectors>, and add the following line within that block:<transportConnector name="ssl" uri="ssl://0.0.0.0:61617?transport.enabledCipherSuites= SSL_RSA_WITH_RC4_128_SHA,SSL_DH_anon_WITH_3DES_EDE_CBC_SHA &maximumConnections=1000&wireFormat.maxFrameSize=104857600&transport.daemon=true"/>messaging.jsonin theconf/subdirectory of the sample.Change the value of the
java.naming.provider.urlto:ssl://127.0.0.1:61617?daemon=true&socket.enabledCipherSuites= SSL_RSA_WITH_RC4_128_SHA,SSL_DH_anon_WITH_3DES_EDE_CBC_SHA
After making these changes, start ActiveMQ as described in "Starting the ActiveMQ Broker and IDM".
25.2. Access the REST Interface via the ActiveMQ UI
In this section, you will run REST calls through the ActiveMQ UI. This assumes you started ActiveMQ and IDM in "Starting the ActiveMQ Broker and IDM".
Access the ActiveMQ web console, at
http://localhost:8161/admin. Log in as an administrator; the default administrative user and password areadminandadmin.In the ActiveMQ web console, in the Queue Name text box, enter the value of
idmQfrom themessaging.jsonfile in theconf/subdirectory. The default value forqueue.idmQanddestinationNameisidmQ. Enter that value and select Create.In the Queues window for the
idmQqueue, select theSend Tolink under Operations.You should see a
Send a JMS Messagewindow, with aMessage bodytext box towards the bottom.Copy the following text, a payload to create a new user with a user ID of
mgr1, to theMessage bodytext box:{ "operation" : "CREATE", "resourceName" : "/managed/user", "newResourceId" : "mgr1", "content" : { "mail" : "mgr1@example.com", "sn" : "Sanchez", "givenName" : "Jane", "password" : "Password1", "employeenumber" : 100, "accountStatus" : "active", "telephoneNumber" : "", "roles" : [ ], "postalAddress" : "", "userName" : "mgr1", "stateProvince" : "" }, "params" : {}, "fields" : [ "*", "*_ref" ] }For comparison, note the following equivalent REST call to create the same user:
$ curl \ --header "X-OpenIDM-Username: openidm-admin" \ --header "X-OpenIDM-Password: openidm-admin" \ --header "Content-Type: application/json" \ --request POST \ --data '{ "mail" : "mgr1@example.com", "sn" : "Sanchez", "givenName" : "Jane", "password" : "Password1", "employeenumber" : 100, "accountStatus" : "active", "telephoneNumber" : "", "roles" : [ ], "postalAddress" : "", "userName" : "mgr1", "stateProvince" : "", "params" : {}, "fields" : [ "*", "*_ref" ] }' \ "http://localhost:8080/openidm/managed/user?_action=create"Observe the OSGi console. You should see output in two parts. The first part starts with:
*****request received****** Parsed JMS JSON = ...The first part should include a JSON-formatted replay of the request that you entered in the
Message bodytext box.The second part of the output includes information for that same user, as written to the managed user repository.
Confirm that user either in the Admin UI, or via the following REST call:
$ curl \ --header "X-OpenIDM-Username: openidm-admin" \ --header "X-OpenIDM-Password: openidm-admin" \ --request GET \ "http://localhost:8080/openidm/managed/user/mgr1"
Repeat the process to create additional users. Try a different REST function. For example, you can enter the following payload in the ActiveMQ UI
Message bodytext box, to change the first name (givenName) of themgr1user to Donna:{ "operation" : "PATCH", "resourceName" : "/managed/user/mgr1", "rev" : "", "value" : [ { "operation":"replace", "field":"/givenName", "value": "Donna" } ] }
25.3. Customizing the Scripted JMS Sample
If you set up a custom script to parse and process JMS messages, store that
script in the script/ subdirectory. Assume that script
is named myCustomScript.js.
Edit the messaging.json file in the
conf/ subdirectory, and point it to that file:
{
"subscribers" : [
{
"name" : "IDM CREST Queue Subscriber",
"instanceCount": 3,
"enabled" : true,
"type" : "JMS",
"handler" : {
"type" : "SCRIPTED",
"properties" : {
"script" : {
"type" : "text/javascript",
"file" : "myCustomScript.js"
}
}
},
"properties" : {
"sessionMode" : "CLIENT",
"jndi" : {
"contextProperties" : {
"java.naming.factory.initial" : "org.apache.activemq.jndi.ActiveMQInitialContextFactory",
"java.naming.provider.url" : "tcp://127.0.0.1:61616?daemon=true",
"queue.idmQ" : "idmQ"
},
"destinationName" : "idmQ",
"connectionFactoryName" : "ConnectionFactory"
}
}
}
]
}
You'll find some of these properties in "JMS Audit Event Handler Unique config Properties" in the Integrator's Guide. Despite the name of the table and the
different configuration file, the properties are the same.
Other properties of interest in the messaging.json file
are shown in the following table:
messaging.json Configuration Propertiesmessaging.json File Label | Description |
|---|---|
subscribers | Needed to subscribe to incoming JMS message requests |
name | Arbitrary name for the subscriber |
instanceCount | Each instanceCount manages a single connection
between IDM and the messaging channel. Supports multithreading
throughput. If subscribing to a queue, such as queue.idmQ,
the message is handled by a single instance. If subscribing to a topic,
all instances receive and handle the same message. |
handler | Parses the JMS message, then processes it, possibly through a script |
queue.idmQ | One of the JNDI context properties. Name of the JMS queue in the ActiveMQ UI. |
destinationName | JNDI lookup name for message delivery |
Chapter 26. Authenticating Using a Trusted Servlet Filter
This sample demonstrates how to use a custom servlet filter and the "Trusted Request Attribute Authentication Module" to allow IDM to authenticate through another service.
To configure authentication using ForgeRock Access Management, see "Integrating IDM With the ForgeRock Identity Platform".
26.1. Before You Start
Before you start this sample, complete the following steps:
Prepare a fresh IDM installation. (See "Preparing IDM").
Download and install the Apache Maven build tool.
Build the custom servlet filter bundle file:
$ cd /path/to/openidm/samples/trusted-servlet-filter/filter $ mvn clean install
Copy the newly built servlet bundle file to the
openidm/bundledirectory:$ cp target/sample-trusted-servletfilter-1.0.jar /path/to/openidm/bundle
26.2. The Sample Servlet Filter
In the previous step, you built a bundle file from a Java file in the
following trustedservletfilter/filter subdirectory:
src/main/java/org/forgerock/openidm/sample/trustedservletfilter.
The file is named SampleTrustedServletFilter.java.
The following line looks for the X-Special-Trusted-User
header, to identify a specific User ID as a "trusted" user.
final String specialHeader = ((HttpServletRequest) servletRequest).getHeader("X-Special-Trusted-User");
The next line sets the special Servlet attribute
X-ForgeRock-AuthenticationId to this trusted User ID.
servletRequest.setAttribute("X-ForgeRock-AuthenticationId", specialHeader);
The rest of the servlet filter chain continues request processing:
filterChain.doFilter(servletRequest, servletResponse);
This sample includes a servletfilter-trust.json file
that calls the compiled IDM trusted servlet
filterClass:
{
"classPathURLs" : [ ],
"systemProperties" : { },
"requestAttributes" : { },
"scriptExtensions" : { },
"initParams" : { },
"urlPatterns" : [
"/*"
],
"filterClass" : "org.forgerock.openidm.sample.trustedservletfilter.SampleTrustedServletFilter"
}26.3. Run the Sample
Start IDM with the configuration for the trusted filter sample.
$ cd /path/to/openidm $ ./startup.sh -p samples/trusted-servlet-filter Executing ./startup.sh... Using OPENIDM_HOME: /path/to/openidm Using PROJECT_HOME: /path/to/openidm Using OPENIDM_OPTS: -Xmx1024m -Xms1024m Using LOGGING_CONFIG: -Djava.util.logging.config.file=/path/to/openidm/samples/trusted-servlet-filter/conf/logging.properties Using boot properties at /path/to/openidm/resolver/boot.properties -> OpenIDM ready
26.4. Create a Trusted User
In this section, you will create a user, and then apply the special request
header X-Special-Trusted-User to authenticate that user.
Create user Barbara Jensen in IDM, with userName
bjensen:
$ curl \
--header "X-OpenIDM-Password: openidm-admin" \
--header "X-OpenIDM-Username: openidm-admin" \
--header "Content-Type: application/json" \
--request PUT \
--data '
{
"userName": "bjensen",
"telephoneNumber": "6669876987",
"givenName": "Barbara",
"sn": "Jensen",
"description": "Example User",
"mail": "bjensen@example.com",
"authzRoles" : [
{
"_ref" : "repo/internal/role/openidm-authorized"
}
]
}' \
"http://localhost:8080/openidm/managed/user/bjensen"Now you can demonstrate the servlet filter by configuring it with the noted special header. Normally, a servlet filter used for authentication does not allow a client to masquerade as any user. This sample demonstrates a basic use of a servlet filter by establishing the authentication ID.
$ curl \ --header "X-Special-Trusted-User: bjensen" \ --request GET \ "http://localhost:8080/openidm/info/login?_fields=authenticationId,authorization"
The output should include a JSON structure with the user's authentication
and authorization details. In this case, user bjensen is
authenticated with the "openidm-authorized" role.
{
"_id": "login",
"authenticationId": "bjensen",
"authorization": {
"component": "managed/user",
"roles": [
"openidm-authorized"
],
"id": "bjensen",
"moduleId": "TRUSTED_ATTRIBUTE"
}
}26.5. Customizing the Sample for an External System
To customize this sample for an external authentication/authorization system, you need a servlet filter which authenticates against that external system. You may use a third-party supplied filter, or develop your own filter, using the one in this sample as a model.
The filter you use should have at least the following capabilities:
Perform REST calls to another system.
Search through databases.
Inspect headers related to authentication and authorization requests.
This servlet filter must set the username of the authenticated user in a
special request attribute. You need to configure that same attribute name
in the TRUSTED_ATTRIBUTE authentication module,
specifically the value of authenticationIdAttribute.
It is helpful if you have a filter that returns an object with the
userRoles property. If your filter does not
support queries using the following parameter:
queryOnResource + "/" + authenticationId
You will need to provide a security context augmentation script that populates the following authorization properties in the "security" object:
security.authorization.componentsecurity.authorization.roles
The value for the security.authorization.component is
automatically set to the value specified in any exisitng
queryOnResource property.
Chapter 27. Integrating IDM With the ForgeRock Identity Platform
This sample demonstrates the integration of three products within the ForgeRock Identity Platform. The sample shows ForgeRock Access Management, (AM), ForgeRock Directory Services (DS), and IDM (IDM) working together to manage identities and authentication.
In this sample, you'll set up an OpenID Connect Authorization Code Flow, where IDM acts as the Relying Party, and AM takes the role of the OpenID Provider.
After you've demonstrated integration between the noted three ForgeRock products, you'll see how you can integrate customer identity and access management, in "Integrating Social Identity Providers".
Note
The authentication process used in this sample is fully compliant with the OpenID Connect Discovery specification. For more information, see "Standards-Based Integration" in the Integrator's Guide.
This sample provides the foundation for features such as User-Managed Access (UMA), Trusted Devices, and Privacy & Consent. For more information, see "Setting Up User-Managed Access (UMA), Trusted Devices, and Privacy" in the Integrator's Guide.
27.1. Preparing Your Systems
In this section, you'll prepare dedicated systems for the installation of IDM, AM, and DS.
Note
This sample assumes that you will install the latest version of each platform component (IDM, AM and DS).
AM requires the use of a Fully-Qualified Domain Name (FQDN). For
consistency, this sample includes FQDNs for IDM, AM
and, DS on either an appropriate DNS server or the
hosts file for each system.
This sample assumes that you have assigned the following FQDNs to the AM, DS, and IDM systems, respectively:
openam.example.comopendj.example.comopenidm.example.com
Note
The example.com domain is used in this sample, for
consistency with the Example.ldif file that you'll
find in the openidm/samples/full-stack/data
directory. If you want to use a different domain with this sample, change
the data in the Example.ldif file accordingly.
Refer to the following sections of each product document to prepare your systems.
For IDM, see "Before You Install" in the Installation Guide.
For AM, see Preparing for Installation in the Access Management Installation Guide. Pay particular attention to the following section on Enabling CORS Support. To support communication between IDM and AM, you must enable cross-origin resource sharing (CORS). To support this sample, you must edit the
web.xmlfile before deploying AM, as described in the following section of the AM Release Notes: Limitations.Note
For the full stack sample, the noted
web.xmlfile requires installation of AM in the Apache Tomcat web container.For DS, see Before You Install in the Directory Services Installation Guide.
27.2. Preparing an Instance of DS
In the full stack sample, there are two instances of DS:
An external user data store shared by IDM and AM, configured with an administrative port of 4444.
A configuration data store solely for AM, configured with an administrative port of 5444.
This section helps you set up the DS user data store.
To do so, configure the DS server as described in
"LDAP Server Configuration", with one exception. When you
import an Example.ldif file to DS, import the
following file:
openidm/samples/full-stack/data/Example.ldif.
After unpacking the DS binary, import the
Example.ldif file for this sample:
$ cd /path/to/opendj $ ./setup \ directory-server \ --rootUserDN "cn=Directory Manager" \ --rootUserPassword password \ --hostname localhost \ --ldapPort 1389 \ --adminConnectorPort 4444 \ --baseDN dc=com \ --ldifFile /path/to/openidm/samples/full-stack/data/Example.ldif \ --acceptLicense
Based on this DS configuration, you'd use the following information when installing AM to configure DS as an external user data store:
Access URL and port for the LDAP server; for this sample, we use opendj.example.com:1389.
LDAP Bind DN, in this case:
cn=Directory Manager.LDAP Bind Password, which should match the
rootUserPasswordconfigured this LDAP server.
You'll use this information when installing AM in the following section: "Installing AM for Integration".
27.3. Starting IDM
Prepare IDM, as described in "Preparing IDM", then start the server with the configuration for the full stack sample.
$ cd /path/to/openidm $ ./startup.sh -p samples/full-stack
Note
If you add features to the sample, it may increase the size of associated headers beyond the default limit of 8192 bytes. To prevent errors such as the following:
WARNING: Header is too large >8192
Edit the jetty.xml file in your project's
conf/ directory. Increase the
requestHeaderSize as shown:
<Set name="requestHeaderSize">16384</Set>
The jetty.xml file has been updated with this change
in IDM 6.5 and above.
27.4. Installing AM for Integration
This section is based on the following chapter in the AM Installation Guide, To Custom Configure an Instance.
In that chapter, you'll deploy the AM .war
file to the appropriate web application container directory. AM
supports multiple web application containers. For one example, see
Deploying
in the AM Installation Guide.
Note
This sample uses the default unencrypted web container port (8080) for convenience. In production, you should set up AM over a secure port, as described Securing Installations in the Access Management Installation Guide.
In production, AM also supports the use of regular accounts as administrators. For more information, see the discussion in the following section of the AM Maintenance Guide: Web-Based AM Console. For the corresponding IDM feature, see "Granting Internal Authorization Roles" in the Integrator's Guide.
If you followed the procedure associated with the AM .war
file, and configured the FQDNs described in "Preparing Your Systems",
point your browser to http://openam.example.com:8080/openam.
You should see a startup screen with two options. Select the following option:
Custom Configuration
Then take the following steps to install AM:
To install AM, read through the following procedure: To Custom Configure an Instance in the Access Management Installation Guide.
Enter a password. The password that you set during the AM installation process becomes the password for the AM administrative user,
amadmin. Once the full stack setup is complete, you'll useamadminand that password to log into IDM.When you see the
Server Settingsstep, verify that the server settings are valid for your configuration. Make sure these settings correspond to the FQDN for your instance of AM. For this sample, you'd specify:Server URL:http://openam.example.com:8080Cookie Domain:openam.example.com
Now you should see the Configuration Data Store Settings screen. The defaults allow AM to store configuration data in an embedded directory.
If you set up the external instance of DS as described in "Preparing an Instance of DS", the Admin Port should be
5444. You'll also need to change the Root Suffix to match the root domain for your instance of AM, in this case,dc=example,dc=com.Note
If your configuration of DS includes a different Root Suffix, modify your AM installation settings accordingly.
In the User Data Store Settings screen, configure where AM looks for user identities. In this case, select
Other User Data Storeand chooseDSas the User Data Store type. You can then point this installation to the DS server configured atopendj.example.com, on port 1389, with a root suffix ofdc=example,dc=com. Enter the password that you used in this section: "Preparing an Instance of DS".AM verifies what you enter in the User Data Store Settings screen with the instance of DS that you created. Once verified, AM then allows you to select Next:

For this sample, you're installing one instance of AM. So when you reach the Site Configuration screen, accept the default
No, and select Next to continue.Complete the AM installation process as directed, until you're logged into AM. For details, see To Custom Configure an Instance in the Access Management Installation Guide.
You'll be taken to an AM installation screen. The AM administrative user is
amadminand the password is what you set during the AM installation process.

Now proceed with the configuration of AM as an OpenID Connect provider for IDM, as described in the following section:
27.5. Configuring AM for Integration with IDM
To integrate AM and IDM, you need to configure AM as an OpenID Connect provider. OpenID Connect 1.0 is an authentication service built on OAuth 2.0. In the following sections, you'll configure OpenID Connect 1.0 and OAuth 2.0 settings, using information from IDM.
27.5.1. Configuring AM as an OAuth 2.0 Provider for IDM
In this section, you'll set up AM as an OAuth 2.0 provider. To do so, take the following steps:
Navigate to
http://openam.example.com:8080/openam. Log into AM as an administrator, with usernameamadmin, with the password you created during "Installing AM for This Sample".For the purpose of this sample, choose the default Top Level Realm.
Select Configure OAuth Provider.
Select Configure OpenID Connect. You should see a screen with the following title:
Configure OpenID Connect
Accept the default OpenID Connect options, which enable AM as an OpenID Connect authorization server.
Choose the Create button in the Configure OpenID Connect window.
You'll see the following message:
OAuth2 Configured for the given realm Successfully configured OAuth2 for realm /.
Select OK.
For detailed information on AM's OAuth 2.0 Provider configuration, see the Access Management OAuth 2.0 Guide.
27.5.2. Getting Information From IDM
IDM includes helpful information for the next step in the AM configuration process, "Configuring AM's OpenID Connect Agent". To see this information from the Admin UI, navigate to Configure > Authentication, and select ForgeRock Identity Provider.
The window that appears includes information that you'll need when configuring AM. Do not press Submit until you've worked through the following section: "Plugging IDM Into AM".
Redirection URIs
Scope
Post Logout Redirect URIs
Implied Consent
Allow Clients to Skip Consent
Authorized OIDC SSO Clients
For an explanation of the values you see in the window, refer to OAuth 2.0 and OpenID Connect 1.0 Client Settings in the Access Management OpenID Connect 1.0 Guide.
27.5.3. Configuring AM's OpenID Connect Agent
In this section, you'll configure an AM Client Agent that allows you to register your instance of IDM as an OpenID Connect 1.0 Client.
To proceed, navigate to the AM UI at
http://openam.example.com:8080/openam. Log into the UI
as the AM administrative user, amadmin, and the
password you created for that user earlier in this chapter.
Follow the guidance described in the following section of the Access Management OpenID Connect 1.0 Guide: Registering OAuth 2.0 Clients With the Authorization Service.
When you enter the Client ID and Client Secret,
save this information for the IDM Admin UI, when you navigate to
Configure > Authentication > ForgeRock Identity Provider.
For this sample, set a name (clientId)
of openidm and a password
(clientSecret) of openidm.
Use the other information from the IDM window that appears, as described in "Getting Information From IDM".
Limits on the Post Logout Redirect URI
The Post Logout Redirect URIs for this sample must match the URIs expected for IDM. In this case, for the Admin and Self-Service UIs, you'd include the following values:
http://openidm.example.com:8080/admin/ http://openidm.example.com:8080/
If you've configured connections over a secure port, modify the Post Logout Redirect URIs accordingly.
Save your changes. Scroll to the top of the screen, and select Save.
27.5.4. Integrating AM's OAuth2 Provider Service
Now that you've configured AM's OpenID Connect Agent, you can configure AM's OAuth2 Provider Service. To do so in AM, take the following steps:
Navigate to
http://openam.example.com:8080/openam/. Log into AM as an administrator, with usernameamadmin, and the password you created during "Installing AM for This Sample".Choose the default Top Level Realm.
Choose Services > OAuth2 Provider.
In the Authorized OIDC SSO Clients text box, enter
openidm; for more information, see the following section of the AM OAuth 2.0 Guide: Advanced OpenID Connect.Enable the Allow Clients to Skip Consent option; for more information, see the following section of the AM OAuth 2.0 Guide: Allowing Clients to Skip Consent
Select Save Changes.
27.6. Plugging IDM Into AM
Now that you've configured an OpenID Connect Client on AM, you can configure IDM as an OpenID Connect Relying Party to authenticate through AM. Return to the IDM Admin UI. Navigate to Configure > Authentication. In the window that appears, select ForgeRock Identity Provider.
The ForgeRock Identity Provider is also known as AM.
You'll need to modify three things before the UI allows you to tap Submit to implement your settings:
Well-Known EndpointAn AM endpoint with related configuration information.
For more information on the AM Well-Known Endpoint, see the Access Management OpenID Connect 1.0 Guide on Configuring for OpenID Connect Discovery.
Client IDUse the name for the OAuth 2.0/OpenID Connect Client agent that you configured in "Configuring AM's OpenID Connect Agent".
Client SecretUse the password for the OAuth 2.0/OpenID Connect Client agent that you configured in "Configuring AM's OpenID Connect Agent".
Note
You'll see one additional option: Route to AM User
Datastore. For this sample, the default should match the
repository for the external data store, in this case,
system/ldap/account.
Choose Submit to save your changes. If successful, you'll see the following message:
Your current session may be invalid. Click here to logout and re-authenticate.
When you select the link IDM takes you to the AM
Login Screen. You should now be able to connect as the AM
Administrative user, amadmin, with the password you set
when installing AM.
In this configuration, when you log into AM, you're taken to the Admin UI.
27.6.1. Changes to Session and Authentication Modules
When you activate the ForgeRock Identity Provider, IDM implements
the following changes to the session module, as shown in the
authentication.json file:
The maximum token lifetime of the
JWT_SESSIONis shortened from the IDM default of 120 minutes to 5 seconds.The token idle lifetime is reduced from the default of 30 minutes to 5 seconds.
Reducing the IDM-specific session token times in this way supports a rapid reaction when the AM session expires. In essence, this change means that sessions are governed by AM. For more information, see the About Sessions section of the Access Management Authentication and Single Sign-On Guide.
For more information on each module, see "Supported Authentication and Session Modules" in the Integrator's Guide.
27.7. Demonstrating Integration
Once this process is complete, navigate to the Admin UI. For this
sample, navigate to http://openidm.example.com:8080/admin.
The settings you changed in "Plugging IDM Into AM", along with
what you did to configure AM in this sample, will redirect you to
http://openam.example.com:8080/openamlongRedirectURI.
To see how this process works, see "Authorization Flow in the Full Stack Sample".
When you log into AM, with this longRedirectURI,
as the AM administrative user (amadmin), it connects
you to the Admin UI, as the IDM administrative user. To
understand why, read:
27.7.1. Authorization Flow in the Full Stack Sample
The full stack Authorization Code Flow specifies how IDM as a (Relying Party) interacts with AM, based on the OAuth 2.0 authorization grant. The following sequence diagram illustrates successful processing from the authorization request, through grant of the authorization code, and ID token from the authorization provider, AM.

The figure assumes that end users and administrators use different UI context URLs:
End users log into the IDM Self-Service UI at
http://openidm.example.com:8080Administrators log into the Admin UI at
http://openidm.example.com:8080/admin
As long as end users and administrators stay with their designated UI contexts, the authorization flow is the same.
The following list describes details of each item in the authorization flow:
A user navigates to the appropriate IDM browser UI context URL.
That user is redirected to the AM login screen, on the authorization endpoint, with a longRedirectURI, as described in "Analyzing the AM Redirect URI".
AM prepares an authentication request.
AM uses the ForgeRock Directory Services (DS) data store to review the authentication request.
DS confirms authentication to AM
AM sends a redirect message, with an authorization code, to the end user's browser. The redirect message goes to an
oauthReturnendpoint, configured inui.context-oauth.jsonin your project'sconf/directory.You'll find the endpoint in your project's
authentication.jsonfile with the following property:redirectUri.The browser transmits the redirect message, with the authorization code, to IDM.
IDM records the authorization code, and sends it to the AM Token Endpoint.
The AM token endpoint returns an ID token.
IDM validates the token, and proceeds with the login process.
If you're an administrator who started by accessing the Admin UI at
http://openidm.example.com:8080/admin, you'll be taken to the IDM Admin UI.If you're an end user who started by accessing the Self-Service UI at
http://openidm.example.com:8080/, you'll be taken to the IDM Self-Service UI.
For the URI and properties associated with each endpoint shown in the
associated diagram, find the Well-Known Endpoint URL shown in your
project's authentication.json file, and substitute it
for the URL shown in the following REST call:
$ curl \ --header "X-OpenIDM-Username: openidm-admin" \ --header "X-OpenIDM-Password: openidm-admin" \ --request GET \ "http://openam.example.com:8080/openam/oauth2/.well-known/openid-configuration"
The final browser context URL depends on AM, specifically what might be configured in the following section of the AM Authentication and Single Sign-On Guide section on Redirection URL Precedence and "Changing the UI Path" in the Integrator's Guide.
27.7.2. Analyzing the AM Redirect URI
To understand what happened when you configured AM and IDM, it may help to analyze the Redirect URI. When you do, you'll also discover other OpenID Connect-compliant information.
To find the Redirect URI for this sample, navigate to
http://openidm.example.com:8080/admin/. You'll be taken
to the AM login screen, with a Redirect URI that brings you back
to the IDM Admin UI after a successful login.
Based on the configuration described in this sample, you should see something similar to the following Redirect URI in the address text box for your browser:
http://openam.example.com:8080/openam/XUI/?realm=%2F&goto=
http%3A%2F%2Fopenam.example.com%3A8080%2Fopenam%2Foauth2%2Fauthorize
%3Fnonce%3Dhm60yqa565mq715yky8eci4gete08gk
%26response_type%3Dcode%26client_id%3Dopenidm
%26redirect_uri%3Dhttp%253A%252F%252Fopenidm.example.com%253A8080%252FoauthReturn
%252F%26scope%3Dopenid%26state%3Dqncvemm9nvas5hrxhl00clkeqk2cxp0#login/
If you analyze the full redirect URI, you should see several settings that you configured in AM in this sample:
oauth2: See "Configuring AM as an OAuth 2.0 Provider for IDM"scope: See OAuth 2.0 and OpenID Connect 1.0 Client Settings, from the Access Management OpenID Connect 1.0 Guideredirect_uri: See OAuth 2.0 and OpenID Connect 1.0 Client Settings, from the Access Management OpenID Connect 1.0 Guidenonce: See OpenID Connect Core 1.0 Specification, Nonce Implementation NotesclientId: See "Configuring AM's OpenID Connect Agent"
27.7.3. Understanding the Integrated AM Administrative User
If you've tried the integrated AM/IDM system, as
described in "Demonstrating Integration", you'll realize that you
used the AM Administrative account amadmin to
log into IDM. After logging in, you can confirm that the account
in use to administer IDM is the default,
openidm-admin.
To understand how that works, examine the amSessionCheck.js
file in the following directory:
/path/to/openidm/bin/defaults/script/auth. See the
following code block, and how it gives user amadmin
the IDM administrative user id, along with
the IDM user and administrative roles:
openidm-authorized and openidm-admin.
if (security.authenticationId === "amadmin") {
security.authorization = {
"id" : "openidm-admin",
"component" : "repo/internal/user",
"roles" : ["openidm-admin", "openidm-authorized"],
"moduleId" : security.authorization.moduleId
};
}
You can modify this script as desired. For example, you could limit
the IDM roles given to the AM administrative account.
Alternatively, if you set up a different AM administrative
account (other than amadmin), modify the value of
security.authenticationId accordingly.
27.8. The Integrated authentication.json File
When you configure this sample as described in this chapter, IDM adds
the following lines to the authentication.json file in
your project's conf/ subdirectory.
The following excerpt includes information that appears to go beyond what you
configured. IDM reads the wellKnownEndpoint that you included in
"Plugging IDM Into AM", and includes the following information
in the authentication.json file:
authorizationEndpointas described in the OpenID Connect Discovery 1.0 specification.tokenEndpointas described in the OpenID Connect Discovery 1.0 specification.endSessionEndpointas described in the OpenID Connect Session Management 1.0 specification.
{
"name" : "OAUTH_CLIENT",
"properties" : {
"augmentSecurityContext" : {
"type" : "text/javascript",
"globals" : {
"sessionValidationBaseEndpoint" : "http://openam.example.com:8080/openam/json/sessions/"
},
"file" : "auth/amSessionCheck.js"
},
"propertyMapping" : {
"authenticationId" : "uid",
"userRoles" : "authzRoles"
},
"defaultUserRoles" : [
"openidm-authorized"
],
"idpConfig" : {
"provider" : "OPENAM",
"icon" : "<button class=\"btn btn-lg btn-default btn-block btn-social-provider\"><img src=\"images/forgerock_logo.png\">Sign In</button>",
"scope" : [
"openid"
],
"authenticationIdKey" : "sub",
"clientId" : "openidm",
"clientSecret" : {
"$crypto" : {
"type" : "x-simple-encryption",
"value" : {
"cipher" : "AES/CBC/PKCS5Padding",
"salt" : "qLh7QjuBd8oNXhnriEDQPg==",
"data" : "Kj/j/gMFEqqOz22cTWkXQw==",
"iv" : "aposp8u/gputkf13KsIDVQ==",
"key" : "openidm-sym-default",
"mac" : "02D1KtxADUt9oVzcTcOfRg=="
}
}
},
"authorizationEndpoint" : "http://openam.example.com:8080/openam/oauth2/authorize",
"tokenEndpoint" : "http://openam.example.com:8080/openam/oauth2/access_token",
"endSessionEndpoint" : "http://openam.example.com:8080/openam/oauth2/connect/endSession",
"wellKnownEndpoint" : "http://openam.example.com:8080/openam/oauth2/.well-known/openid-configuration",
"redirectUri" : "http://openidm.example.com:8080/oauthReturn/",
"configClass" : "org.forgerock.oauth.clients.oidc.OpenIDConnectClientConfiguration",
"displayIcon" : "forgerock",
"enabled" : true
},
"queryOnResource" : "system/ldap/account"
},
"enabled" : true
}27.9. Reconciliation and AM
In this section, you'll see how reconciliation in IDM affects users seen in AM.
When you first integrated the three products (IDM, AM,
and DS), you included information from an
Example.ldif file from the
openidm/samples/full-stack/data/ subdirectory.
When you set up DS, you populated the directory with user data from
from the Example.ldif file in the
openidm/samples/fullStack/data/ directory. To get that
user data from DS into the IDM managed user repository, run
reconciliation. To do so, select Configure > Mappings. You'll see two
mappings:
systemLdapAccounts_managedUser, which maps information from the LDAP datastore (DS -systemLdapAccounts) to the managed user repository.managedUser_systemLdapAccounts, which maps information in the reverse direction.
Before running reconciliation, open the AM administrative interface.
Navigate to http://openam.example.com:8080/openam. Log in
as the AM administrative user, amadmin, with the
password you used when installing AM earlier in this sample, in
"Installing AM for Integration".
Select Top Level Realm > Identities. You should see four accounts:
Two default AM accounts:
amadminandanonymous.Two accounts from the aforementioned
Example.ldiffile, which have been loaded into the common user datastore, DS.
Now return to the Admin UI. Select Configure > Mappings. In the
systemLdapAccounts_managedUser mapping, choose
Reconcile.
Once reconciliation is complete, you'll see users from
Example.ldif when you select Manage > User.
Create a new IDM user as described in "To Add a User Account" in the Integrator's Guide. Add a password to that account.
Return to the AM administrative interface at
http://openam.example.com:8080/openam.
Select Top-Level Realm > Identities. The next time IDM synchronizes
the managed user to DS, you should see a list of users that
include the user that you created in IDM.
27.10. Integrating Social Identity Providers
This section assumes that you've configured the full stack sample, as described so far in this chapter.
To take advantage of the authorization features provided by AM, you can extend the features shown in this sample. This section demonstrates how you can integrate social identities, specifically Google and Facebook. It also assumes that you've configured the full stack sample, as described so far in this chapter.
Before you start this process, you may want to go through the social authentication process for both IDM and AM, as described in the following chapters:
For IDM, "Configuring Social Identity Providers" in the Integrator's Guide provides guidance for all IDM-supported social identity providers. For a list, see the subsections of that chapter.
For AM, refer to:
The following chapter of the AM Authentication and Single Sign-On Guide: Implementing Social Authentication.
The following procedure of the AM User Self Service Guide: To Delegate User Self Registration to IDM.
As this setup uses AM to manage authentication for social identities, you can ignore the associated IDM authentication module, described in "Configuring the Social Providers Authentication Module" in the Integrator's Guide. However, you still have to:
Set up desired social identity providers on both IDM and AM.
Change the following defaults when configuring social identity providers on AM, based on the following chapter of the AM Authentication and Single Sign-On Guide: Implementing Social Authentication. :
Disable the following option:
Use Basic Auth, to match the following setting inidentityProviders.json"basicAuth" : false
Enable the following account provisioning options:
Use IDM as Registration ServiceCreate account if it does not exist
In the AM administrative console, select Services > Add a Service, and add the
IDM Provisioningservice.The window that appears will include text boxes described in the following section of the AM Authentication and Single Sign-On Guide: IDM Provisioning
Enable the service.
Set an appropriate
Deployment URL. If you've configured an IDM Self-Service UI onhttp://openidm.example.com:8080/, enter it in theDeployment URLtext box.When IDM starts, it generates key aliases as described in "Displaying the Contents of the Keystore" in the Integrator's Guide. You'll need to incorporate the following IDM aliases into the AM keystore:
openidm-selfservice-keyselfservice
To incorporate these aliases in AM, see the following section of the AM Setup and Maintenance Guide: Copying Key Aliases
Note
AM includes default IDM key aliases, which you'll have to replace with the actual key aliases generated when IDM starts.
27.11. Registering Users Through IDM
You can now register users by their social identities through IDM. To do so, take the following steps:
Navigate to
http://openidm.example.com:8080/#register/. Be sure to enter the full URL, including the final forward slash/.In the Register Your Account screen that appears, you should see the following options:
Register with Google
Register with Facebook
Select one of these options, and proceed as prompted with either a Google or Facebook account.
Review the list of users in both IDM and AM. You should see the same social identity accounts in both systems. Since AM and IDM both use the same instance of DS, the lists of users (beyond the defaults for each system) should be identical.
In the Admin UI, select Manage > User.
In the AM Administrative Interface, select Realm > Identities.
Note
If you see the following error:
User requires profile to login
Follow the procedure at the beginning of this section. You need to register that user first.
Once you've registered users, you can navigate to
http://openidm.example.com:8080/. The configuration
of this sample means that your browser gets redirected to
http://openam.example.com:8080/openam/XUI/?realm<longURI>.
You'll see icons for the social identity providers that you configured, such as Google and Facebook. When you select one of these icons, what happens next depends:
If you have cleared the cache on the browser, you'll be prompted to log into your selected social identity provider.
If you have not cleared the cache, the full stack sample assumes that you want to log in with the social identity provider account that you just configured.
The result is the same; you're taken to the IDM end user dashboard.
Chapter 28. Creating a Custom Endpoint
Scriptable custom endpoints enable you to launch arbitrary scripts using the IDM REST URI. For information about how custom endpoints are configured, see "Creating Custom Endpoints to Launch Scripts" in the Integrator's Guide.
The example endpoint provided in
/path/to/openidm/samples/example-configurations/custom-endpoint illustrates the
configuration of a custom endpoint, and the structure of custom endpoint
scripts.
The purpose of this custom endpoint is to return a list of variables available to each method used in a script. The scripts show the complete set of methods that can be used. These methods map to the standard HTTP verbs - create, read, update, delete, patch, query, and action. A sample JavaScript and Groovy script is provided.
To run the sample:
Copy the endpoint configuration file (
samples/example-configurations/custom-endpoint/conf/endpoint-echo.json) to your project'sconfdirectory.Copy either the JavaScript file (
samples/example-configurations/custom-endpoint/script/echo.js) or Groovy script file (samples/example-configurations/custom-endpoint/script/echo.groovy) to your project'sscriptdirectory.Open the endpoint configuration file in a text editor:
{ "file" : "echo.groovy", "type" : "groovy", "_file" : "echo.js", "_type" : "text/javascript" }The configuration file contains nothing more than a reference to the endpoint scripts. In this case, the JavaScript script is commented out (with an underscore before the
fileandtypeproperties). If you want to use the JavaScript endpoint script, uncomment these lines and comment out the lines that correspond to the Groovy script in the same way.Endpoint configuration files can include a
contextproperty that specifies the route to the endpoint, for example:"context" : "endpoint/linkedView/*"
If no
contextis specified, the route to the endpoint is taken from the file name, in this caseendpoint/echo.Test each method in succession to return the expected request structure of that method. The following examples show the request structure of the read, create and patch methods. The configuration file has been edited to use the JavaScript file, rather than the Groovy file. The output shown in these examples has been cropped for legibility. For a description of each parameter, see "Writing Custom Endpoint Scripts" in the Integrator's Guide.
The following command performs a read on the echo endpoint and returns the request structure of a read request:
$ curl \ --header "X-OpenIDM-Username: openidm-admin" \ --header "X-OpenIDM-Password: openidm-admin" \ --request GET \ "http://localhost:8080/openidm/endpoint/echo { "_id": "", "method": "read", "resourceName": "", "parameters": {}, "context": { ... } }The following command performs a query on the echo endpoint and returns the request structure of a query request:
$ curl \ --header "X-OpenIDM-Username: openidm-admin" \ --header "X-OpenIDM-Password: openidm-admin" \ --request GET \ "http://localhost:8080/openidm/endpoint/echo?_queryId=query-all-ids" { "result": [ { "method": "query", "resourceName": "", "pagedResultsCookie": null, "pagedResultsOffset": 0, "pageSize": 0, "queryExpression": null, "queryId": "query-all-ids", "queryFilter": "null", "parameters": {}, "content": null, "context": { ... } } ], ... }The following command sends a create request to the echo endpoint. No user is actually created. The endpoint script merely returns the request structure of a create request. The
contentparameter in this case provides the JSON object that was sent with the request:$ curl \ --header "X-OpenIDM-Password: openidm-admin" \ --header "X-OpenIDM-Username: openidm-admin" \ --header "Content-Type: application/json" \ --data '{ "userName":"steve", "givenName":"Steve", "sn":"Carter", "telephoneNumber":"0828290289", "mail":"scarter@example.com", "password":"Passw0rd" }' \ --request POST \ "http://localhost:8080/openidm/endpoint/echo?_action=create" { "_id": "", "method": "create", "resourceName": "", "newResourceId": null, "parameters": {}, "content": { "userName": "steve", "givenName": "Steve", "sn": "Carter", "telephoneNumber": "0828290289", "mail": "scarter@example.com", "password": "Passw0rd" }, "context": { ... } }The following command sends a patch request to the echo endpoint.
$ curl \ --header "X-OpenIDM-Password: openidm-admin" \ --header "X-OpenIDM-Username: openidm-admin" \ --header "Content-Type: application/json" \ --data '[ { "operation":"replace", "field":"/givenName", "value":"Steven" } ]' \ --request PATCH \ "http://localhost:8080/openidm/endpoint/echo" { "_id": "", "method": "patch", "resourceName": "", "revision": null, "patch": [ { "operation": "replace", "field": "/givenName", "value": "Steven" } ], "parameters": {}, "context": { ... } }
IDM Glossary
- correlation query
A correlation query specifies an expression that matches existing entries in a source repository to one or more entries on a target repository. While a correlation query may be built with a script, it is not a correlation script.
As noted in "Correlating Source Objects With Existing Target Objects" in the Integrator's Guide, you can set up a query definition, such as
_queryId,_queryFilter, or_queryExpression, possibly with the help of alinkQualifier.- correlation script
A correlation script matches existing entries in a source repository, and returns the IDs of one or more matching entries on a target repository. While it skips the intermediate step associated with a
correlation query, a correlation script can be relatively complex, based on the operations of the script.- entitlement
An entitlement is a collection of attributes that can be added to a user entry via roles. As such, it is a specialized type of
assignment. A user or device with an entitlement gets access rights to specified resources. An entitlement is a property of a managed object.- JSON
JavaScript Object Notation, a lightweight data interchange format based on a subset of JavaScript syntax. For more information, see the JSON site.
- JSON Pointer
A JSON Pointer defines a string syntax for identifying a specific value within a JSON document. For information about JSON Pointer syntax, see the JSON Pointer RFC.
- JWT
JSON Web Token. As noted in the JSON Web Token draft IETF Memo, "JSON Web Token (JWT) is a compact URL-safe means of representing claims to be transferred between two parties." For IDM, the JWT is associated with the
JWT_SESSIONauthentication module.- managed object
An object that represents the identity-related data managed by IDM. Managed objects are configurable, JSON-based data structures that IDM stores in its pluggable repository. The default configuration of a managed object is that of a user, but you can define any kind of managed object, for example, groups or roles.
- mapping
A policy that is defined between a source object and a target object during reconciliation or synchronization. A mapping can also define a trigger for validation, customization, filtering, and transformation of source and target objects.
- OSGi
A module system and service platform for the Java programming language that implements a complete and dynamic component model. For more information, see What is OSGi? Currently, only the Apache Felix container is supported.
- reconciliation
During reconciliation, comparisons are made between managed objects and objects on source or target systems. Reconciliation can result in one or more specified actions, including, but not limited to, synchronization.
- resource
An external system, database, directory server, or other source of identity data to be managed and audited by the identity management system.
- REST
Representational State Transfer. A software architecture style for exposing resources, using the technologies and protocols of the World Wide Web. REST describes how distributed data objects, or resources, can be defined and addressed.
- role
IDM distinguishes between two distinct role types - provisioning roles and authorization roles. For more information, see "Working With Managed Roles" in the Integrator's Guide.
- source object
In the context of reconciliation, a source object is a data object on the source system, that IDM scans before attempting to find a corresponding object on the target system. Depending on the defined mapping, IDM then adjusts the object on the target system (target object).
- synchronization
The synchronization process creates, updates, or deletes objects on a target system, based on the defined mappings from the source system. Synchronization can be scheduled or on demand.
- system object
A pluggable representation of an object on an external system. For example, a user entry that is stored in an external LDAP directory is represented as a system object in IDM for the period during which IDM requires access to that entry. System objects follow the same RESTful resource-based design principles as managed objects.
- target object
In the context of reconciliation, a target object is a data object on the target system, that IDM scans after locating its corresponding object on the source system. Depending on the defined mapping, IDM then adjusts the target object to match the corresponding source object.
Index
A
- Authentication Module
- ForgeRock Identity Provider, Changes to Session and Authentication Modules
M
- Messaging, Customizing the Scripted JMS Sample