Quick introduction to OpenAM for new users and readers evaluating the product. OpenAM provides open source Authentication, Authorization, Entitlement and Federation software.
You can get started with OpenAM using this chapter. Follow the steps in this chapter to learn how to protect a web site with OpenAM.
Important
You need a Linux, Solaris, or Windows system that can run the web policy agent (see the Web Policy Agents Release Notes section, Web Agents Platform Requirements, if your system does not have an x86 or x64 based processor for example) with a minimum of 1 GB of free RAM memory, a few hundred MB of free disk space, a web browser and Internet connection to download software.
If you are running Mac OS X, set up a virtual machine running Linux to try these procedures because the web policy agent is not built for Apache HTTP Server on Mac OS X.
OpenAM provides a service called access management, which involves managing access to resources available over the network. Once you set up OpenAM to manage access, you have a centralized service to take control of who can access what resources, when, and under what conditions. In this chapter you manage access to a single web page. Yet, a resource can be just about anything accessible over the network from a web page, to an application, to a web service.
OpenAM centralizes access control by handling both authentication and also authorization. Authentication is confirming an identity, for example confirming that a user has successfully logged in. Authorization is determining whether to grant access to someone who has authenticated.
OpenAM centralizes authentication by using a variety of authentication modules. Authentication modules connect to identity repositories that store identities and provide authentication services. The identity repositories can be implemented as LDAP directories, relational databases, RADIUS, Windows authentication, one-time password services, other standards-based access management systems and much more. OpenAM lets you chain together the authentication services used. Authentication chains let you configure stronger authentication for more sensitive resources for example. They also let you set up modules that remember a device when the user logs in successfully. Or that evaluate the risk given the login circumstances and therefore can require more credentials when a user is logging in from an unusual location. This chapter uses OpenAM's built-in identity repository and authentication modules to make it easier to get started.
OpenAM centralizes authorization by letting you use OpenAM to manage access policies separate from applications and resources. Instead of building access policy into a web application, you install a policy agent with the web application to request policy decisions from OpenAM. This way you can avoid issues that could arise when developers must embed policy decisions into their applications. With OpenAM, if policy changes or an issue is found after the application is deployed, you have only to change the policy definition in OpenAM, not deploy a new version of the application. OpenAM makes the authorization decisions, and policy agents enforce the decisions on OpenAM's behalf.
The rest of this chapter has you demonstrate OpenAM access management by installing OpenAM, creating a policy, and installing a policy agent on a web server to enforce the policy for a web page.
In order to set up OpenAM to protect a web page, you install the following software, all of which is freely available. This chapter covers how to install the software, with the exception of the Java Development Kit.
Java Development Kit
OpenAM is a Java web application, and requires a Java Development Kit installed on the system where it runs.
The web policy agent installer is also a Java program.
Apache HTTP Server
Apache HTTP Server serves the web page to protect with OpenAM.
Apache Tomcat
As a Java web web application OpenAM runs inside a web container, in this case Apache Tomcat.
OpenAM core server with OpenAM Console
This is the main web application for OpenAM. OpenAM sets up an OpenDJ directory server at configuration time to use in this case both to hold OpenAM's configuration and also to serve as an identity store and authentication service.
OpenAM Apache Policy Agent
You install a policy agent in Apache HTTP Server. The policy agent intercepts requests from users, and enforces access policy decisions made by OpenAM. The policy agent enforces policy both by redirecting users to OpenAM for authentication and by contacting OpenAM to get authorization decisions for resources such as the web page to protect.
Follow the steps in the next sections of this chapter to see how OpenAM can protect a web site without changing the web site itself.
This section includes the following procedures that detail how to set up OpenAM to protect a web page.
The procedures in this section are written for use on a Linux system. If you are running Microsoft Windows, adapt the examples accordingly.
OpenAM requires that you use fully qualified domain names when protecting web resources. This is because OpenAM uses HTTP cookies to keep track of sessions for single sign on, and setting and reading cookies depends on the server name and domain.
You can get started with OpenAM however without setting up separate
systems for each fully qualified domain name. Instead, give your system
openam.example.com and www.example.com
aliases by editing your hosts file.
Alternatively, if you already have DNS set up, you can use that instead of using your hosts file.
Add the aliases to your hosts file using your preferred text editor.
$ sudo vi /etc/hosts
Password:

### Edit /etc/hosts ###

$ cat /etc/hosts | grep openam
127.0.0.1    localhost openam.example.com www.example.com
Apache HTTP Server is a popular web server, and one that is well supported by OpenAM's web policy agents. Apache HTTP Server might already be installed on your system, but since you are installing software only to get started with OpenAM, install the web server separately rather than modify any existing installations.
Full installation instructions are available online. The following steps are inspired by the Overview for the impatient for Apache HTTP Server 2.2 in the online documentation.
Make sure you have the tools installed to build Apache HTTP Server 2.2 from source.
On Linux distributions, you need development tools including the C compiler. How you install these depends on your distribution.
This might work for Red Hat and CentOS distributions:
# yum groupinstall 'Development Tools'
This might work for Ubuntu distributions:
$ sudo apt-get install build-essential checkinstall
Download Apache HTTP Server 2.2 sources from the Apache download page.
The OpenAM web policy agent requires Apache Portable Runtime 1.3 or later, so make sure you download Apache HTTP Server 2.2.9 or later.
Extract the download.
Configure the sources for compilation.
The
--prefixoption can be used so that the web server is installed in a location where you can write files.$ cd ~/Downloads/httpd-2.2.25 $ ./configure --prefix=/path/to/apache
Compile Apache HTTP Server.
$ make
Install Apache HTTP Server.
$ make install
Edit the configuration to set the server name to
www.example.comand the port to one such as 8000 that the web server process can use when starting with your user ID.$ vi /path/to/apache/conf/httpd.conf $ grep 8000 /path/to/apache/conf/httpd.conf Listen 8000 ServerName www.example.com:8000
Test that Apache HTTP Server is working.
Start the web server.
$ /path/to/apache/bin/apachectl -k start
Browse to the home page, such as
http://www.example.com:8000.
This is the page to protect with OpenAM. Make sure you have successfully gotten to this point before you proceed.

OpenAM runs as a Java web application inside an application container.
Apache Tomcat is one such application container that runs on a variety of
platforms. The following instructions are loosely based on the
RUNNING.txt file delivered with Tomcat.
Make sure you have a recent Java Development Kit release installed.
One way of checking the version of the Java Development Kit is to list the version of the javac compiler.
$ javac -version
If the javac compiler is not found, then either you do not have a Java Development Kit installed, or it is installed but not on your
PATH.The OpenAM Release Notes in the Release Notes indicate what versions of Java Development Kit are supported. Supported Java Development Kit versions also work for Apache Tomcat.
Download Apache Tomcat 7 from its download page.
Extract the download.
$ cd /path/to
$ unzip ~/Downloads/apache-tomcat-7.0.42.zip
$ mv apache-tomcat-7.0.42 tomcat
On UNIX-like systems, make the scripts in Tomcat's
bin/directory executable.$ chmod +x /path/to/tomcat/bin/*.sh
Set the
JAVA_HOMEenvironment variable to the file system location of the Java Development Kit.On Linux, you might set
JAVA_HOMEas follows.export JAVA_HOME=/path/to/jdk
Edit Tomcat's
catalina.shscript to set theJAVA_HOMEenvironment variable to the file system location of the Java Development Kit, and to set the heap and permanent generation size appropriately.$ vi /path/to/tomcat/bin/catalina.sh $ grep ^JAVA_HOME /path/to/tomcat/bin/catalina.sh JAVA_HOME=/path/to/jdk $ grep ^CATALINA /path/to/tomcat/bin/catalina.sh CATALINA_OPTS="-Xmx1024m -XX:MaxPermSize=256m"
Start Tomcat.
$ /path/to/tomcat/bin/startup.sh
It might take Tomcat several seconds to start. When Tomcat has successfully started, you should see an informational message indicating how long startup took in the
/path/to/tomcat/logs/catalina.outlog file:INFO: Server startup in 4655 ms
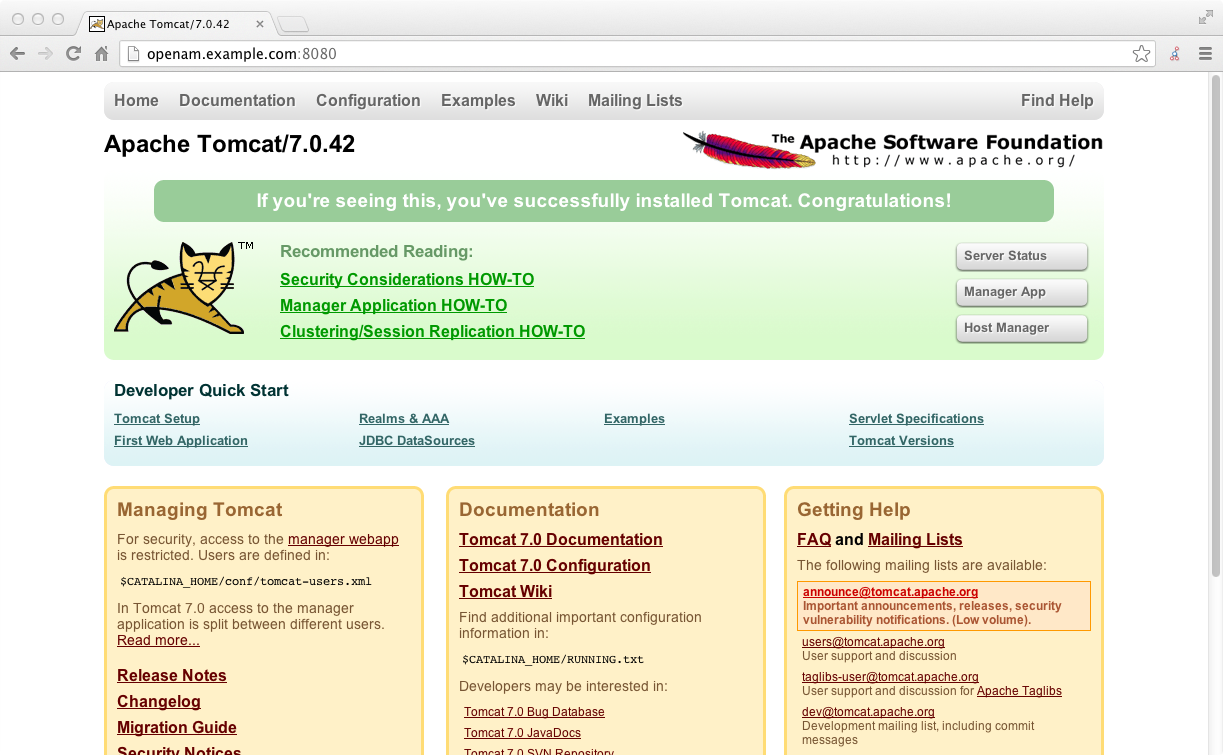
Browse to Tomcat's home page, such as
http://openam.example.com:8080.
Apache Tomcat is going to serve the OpenAM web application. Make sure you have successfully gotten to this point before you proceed.
OpenAM is a web application that you deploy into Apache Tomcat and then configure for use.
Download the OpenAM .war (web archive) file either from the ForgeRock Enterprise Downloads page, or from the project nightly Builds page.
Enterprise downloads are tested, stable releases.
Nightly builds include the very latest features, but are not thoroughly tested. Some functionality might not be finished.
Deploy the .war file in Tomcat as
openam.war.$ mv ~/Downloads/openam*.war /path/to/tomcat/webapps/openam.war
Tomcat deploys OpenAM under the
/path/to/tomcat/webapps/openam/directory, and you can access the web application in a browser athttp://openam.example.com:8080/openam/.Browse to OpenAM where it is deployed in Tomcat, for example
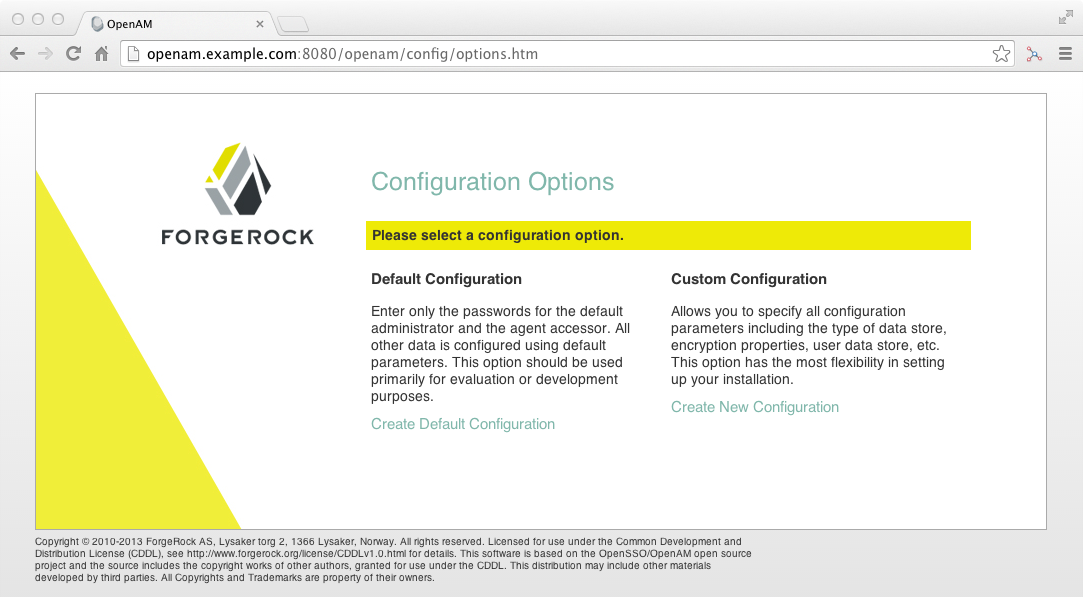
http://openam.example.com:8080/openam/, to configure the application.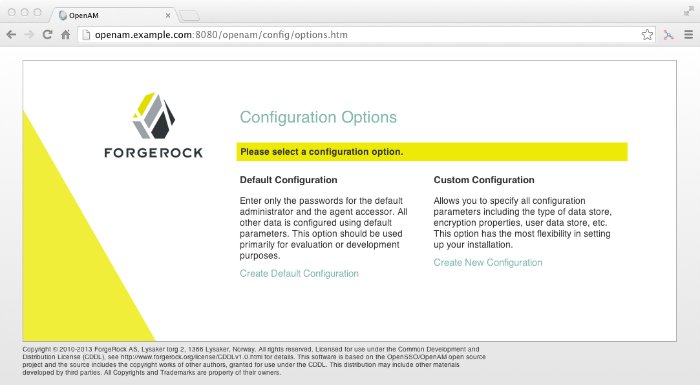
On the OpenAM home page, click the link to Create Default Configuration, set the Default User [amAdmin] password to
passwordand the Default Policy Agent [UrlAccessAgent] password tosecret12, and then click Create Configuration to configure OpenAM.
If you were configuring OpenAM for real-world use, you would not use either of those passwords, but this is only to get started with OpenAM. The
amadminuser is the OpenAM administrator, who is like a super user in thatamadminhas full control over the OpenAM configuration.The
UrlAccessAgentis not used in this guide.When you see the Configuration Complete! dialog, click the Proceed to Login link, and then log in as
amadminwith passwordpassword.After login, OpenAM should direct you to the console at
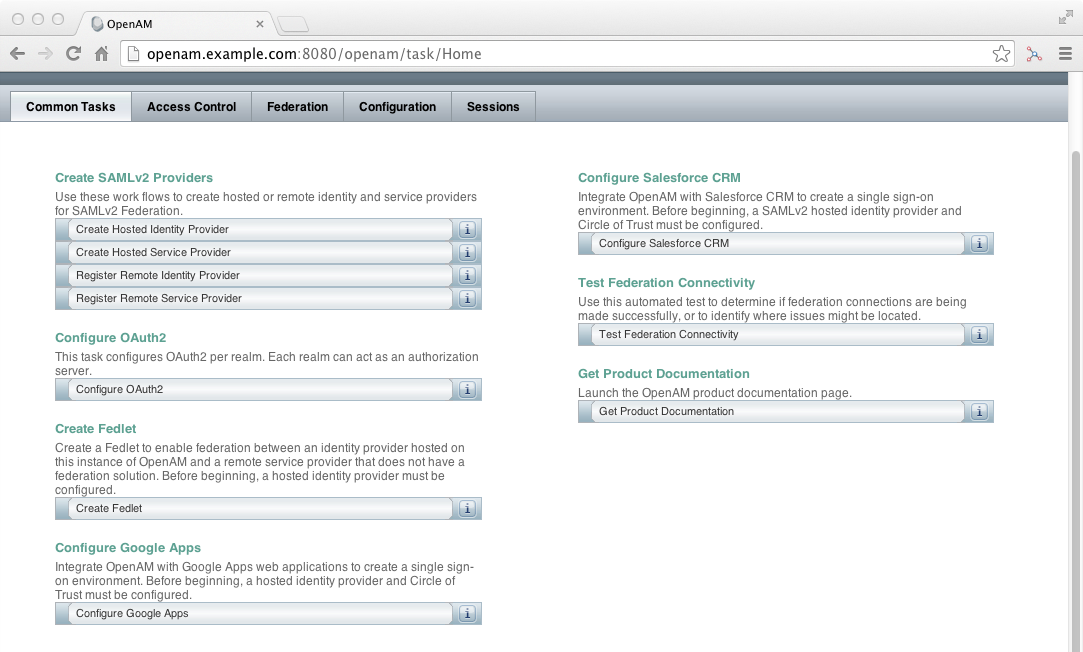
http://openam.example.com:8080/openam/consoleand then to the common tasks page.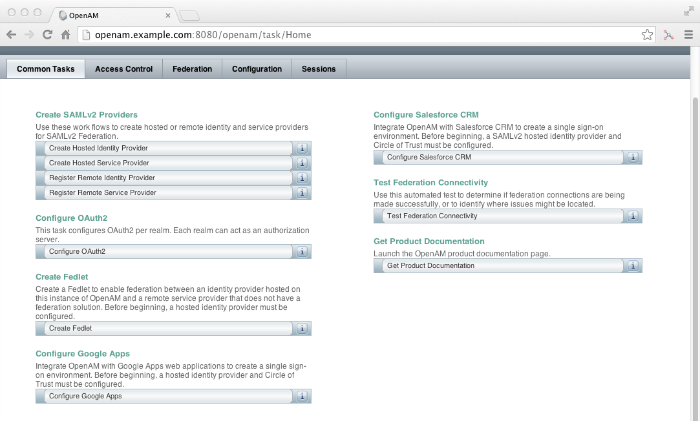
In your home directory, you find that OpenAM has stored its configuration, including the embedded OpenDJ directory server, in a folder named after the server instance,
~/openam/. It has also added a hidden folder,~/.openamcfg/, with a file used by OpenAM when it starts up. If you ruin your configuration of OpenAM somehow, the quickest way to start over is to stop Tomcat, delete these two folders, and configure OpenAM again.OpenAM core server and OpenAM Console is now configured. Make sure you have successfully logged in to OpenAM Console before you proceed.

OpenAM authenticates users and then makes authorization decisions. The authorization decisions are based on access policies that indicate who can do what, when, and under what conditions. Follow these steps to create a policy that allows all authenticated users to perform an HTTP GET (for example, to browse) the Apache HTTP home page that you set up earlier.
In OpenAM Console, click the Access Control tab, then in the Realms table click the link to / (Top Level Realm).
OpenAM allows you to organize identities, policies, and policy agent profiles into realms as described in the Administration Guide chapter, Configuring Realms in the Administration Guide. For now, use the default top level realm.
In the Console page for the top level realm, click the Policies tab, and then click New Policy.
Give your new policy the name
Authenticated users can get Apache HTTP home page.In the Rules table, click New, select URL Policy Agent (with resource name), click Next, and then create a rule for resource
http://www.example.com:8000/that allows HTTP GET, and then click Finish to save your work.
OpenAM applies this rule to subjects that you specify next.
In the Subjects table, click New, select Authenticated Users and click Next, then name your rule
All Authenticated Users, and click Finish to save your work.
Your policy now specifies who (subject) can perform what actions on what resources (rule). You can ignore Conditions and Response Providers for now.
On the Edit Policy page, click OK to save your policy.
Next you must create a web policy agent profile before installing the agent in Apache HTTP Server to enforce your new policy.


OpenAM stores profile information about policy agents centrally by default. You can then manage the policy agent profile through OpenAM Console. The policy agent can retrieve its configuration from its OpenAM profile at installation time and when it starts up, and OpenAM can notify the policy agent of changes to its configuration. Following these steps before installing the policy agent itself.
In OpenAM Console, browse to Access Control > / (Top Level Realm) > Agents > Web, and then click New in the Agents table.
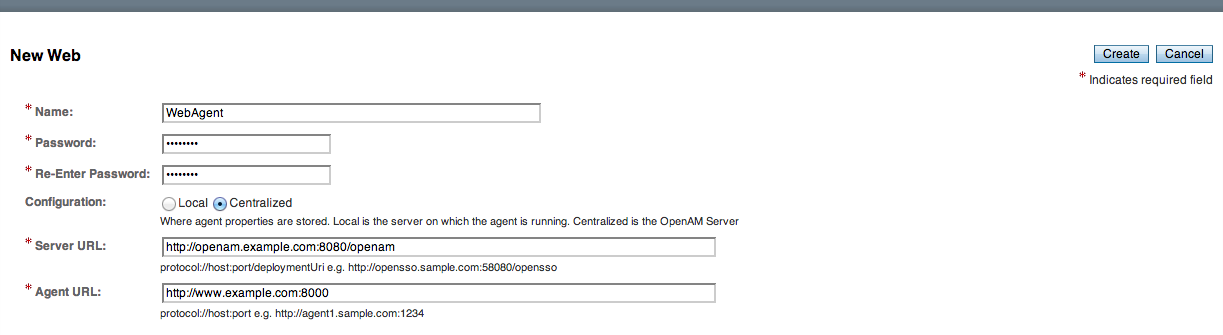
In the page to configure your new web policy agent, set the following values.
- Name
WebAgent- Password
password- Configuration
Keep the default,
Centralized- Server URL
http://openam.example.com:8080/openam- Agent URL
http://www.example.com:80008000 is the port number you set previously for Apache HTTP Server.
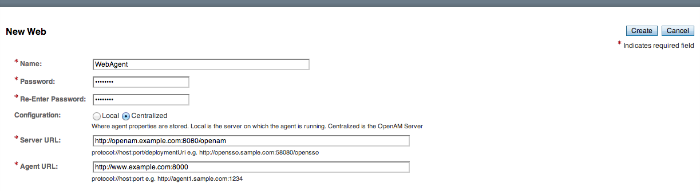
Click Create to save the new web policy agent profile in OpenAM.
Next you must install a policy agent in Apache HTTP Server to enforce your new policy.
OpenAM policy agents enforce policies defined in OpenAM. The agent's job is to make sure that users have the right to access resources they request. And yet the agent does not make the policy decisions. Instead, the agent calls on OpenAM for policy decisions, using the information presented by the user (or the user's client application), such as the single sign on token in the HTTP cookie that OpenAM uses to keep track of user sessions. In essence the agent is a gatekeeper for OpenAM.
The agent runs inside of Apache HTTP Server as a library that the server loads at startup time. When a request comes in, the agent redirects users to OpenAM for authentication and calls on OpenAM for policy decisions as necessary.
Download the OpenAM policy agent for your version of Apache HTTP Server either from the ForgeRock Enterprise Downloads page, or from the project nightly Builds page.
Create a password file that the agent installer reads when first connecting to OpenAM to read its profile.
The password file should be read-only by the user who installs the policy agent.
$ echo password > /tmp/pwd.txt
$ chmod 400 /tmp/pwd.txt
The password is stored encrypted after installation.
Make sure OpenAM is running.
You can check for example by logging into OpenAM Console.
Stop Apache HTTP Server while you install the policy agent.
$ /path/to/apache/bin/apachectl stop
Extract the download.
$ cd /path/to
$ unzip ~/Downloads/apache_v22_Linux_agent*.zip
Install the web policy agent in Apache HTTP Server, making sure that you provide the correct information to the installer as shown in the following example.
$ cd /path/to/web_agents/apache22_agent/bin
$ ./agentadmin --install
...

-----------------------------------------------
SUMMARY OF YOUR RESPONSES
-----------------------------------------------
Apache Server Config Directory : /path/to/apache/conf
OpenAM server URL : http://openam.example.com:8080/openam
Agent URL : http://www.example.com:8000
Agent Profile name : WebAgent
Agent Profile Password file name : /tmp/pwd.txt

...
Start Apache HTTP Server, and check that the web policy agent seems to be correctly configured.
$ /path/to/apache/bin/apachectl -k start
$ tail /path/to/apache/logs/error_log
...[notice] Apache/2.2.25 (Unix) Web Policy Agent/3.0 configured -- resuming
 normal operations
Assuming everything up to now has worked correctly, you can now try your installation to see OpenAM in action.
Now that you have completed Section 1.3, "Setting Up the Software", you can try accessing the protected web page to see OpenAM at work.
Log out of OpenAM Console so that you can see the need to login when you try to access the Apache "It works!" page.
Browse to
http://www.example.com:8000to attempt to access the Apache "It works!" page.At this point, the policy agent intercepts your request for the page. Your browser does not return a cookie indicating an OpenAM session, so the policy agent redirects you to OpenAM to authenticate.
Log in as the built-in default OpenAM demonstration user
demowith passwordchangeit.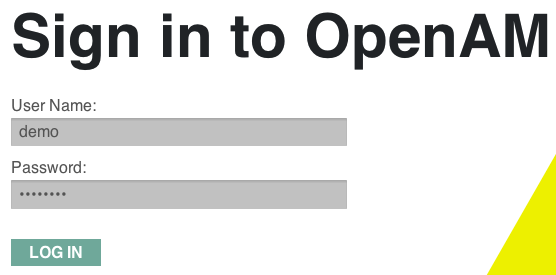
On successful login, OpenAM sets a session cookie named
iPlanetDirectoryProin your browser for the domain.example.com. The cookie is then returned to servers in theexample.comdomain such asopenam.example.comandwww.example.com.If you examine this cookie in your browser, you notice that it has a value such as
AQIC5wM2LY4SfcwciyfvJcQDUIB7kIWEH187Df_txqLdAVc.*AAJTSQACMDEAAlNLABMxMDYwNzY1MjQ0NTE0ODI2NTkx*. This is the SSO Token value. The value is in fact an encrypted reference to the session that is stored only by OpenAM. So only OpenAM can determine whether you are actually logged in, or instead that the session is no longer valid and you need to authenticate again.The OpenAM session is used for single sign on. When the browser presents the cookie to a server in the domain, the agent on the server can check with OpenAM using the SSO Token as a reference to the session. This allows OpenAM to make policy decisions based on who is authenticated, or to prompt for additional authentication as necessary.
Your single sign on session can end in a few ways. For example, when examining the cookie in your browser, you should notice that it expires when the browser session ends (when you shut down your browser). Alternatively, you can log out of OpenAM explicitly. Sessions can also expire. OpenAM sets two limits, one that causes your session to expire if it remains inactive for a configurable period of time (default: 30 minutes), and another that caps the session lifetime (default: 2 hours).
After successful login, notice that you are redirected to the Apache "It works!" page.
In the background, OpenAM redirected your browser again to the page you tried to access originally,
http://www.example.com:8000. This time the web policy agent intercepted the request and found the SSO Token, so it could request a policy decision from OpenAM regarding whether the user with the SSO Token has access to gethttp://www.example.com:8000/. OpenAM replied to the policy agent that it could allow access, and the policy agent allowed Apache HTTP Server to send back the web page.

Congratulations on protecting your first web site with OpenAM! Notice that you had only to install software and to configure things in OpenAM. You did not have to change your web site at all in order to add single sign on and to set up access policies.
OpenAM can do much more than protect web pages. Read the next chapter to learn more.
OpenAM can do much more than protect web pages. In addition to being the right foundation for building highly available, Internet-scale access management services, OpenAM has a rich set of features that make it the right choice for a variety of different deployments. This chapter describes some of the features of OpenAM and indicates where in the documentation you can find out more about them.
The easier it is for users to handle their own registration, to reset forgotten passwords, and to access the applications they need without a call to your help desk, the more you save when supporting them for these tasks.
OpenAM has access to the identity repositories where user profiles are stored. OpenAM is therefore well placed to help you manage self-service features that involve user profiles.
OpenAM provides user self-registration as an authentication module and also as a feature of OpenAM's REST APIs. New users can safely sign up in OpenAM without your administrators or help desk having to get involved.
For information on configuring self-registration as an authentication module, see the Administration Guide section, Hints For the Membership Authentication Module in the Administration Guide. You then specify the module in the link to your "sign up" page.
For details on building your own self-registration application using the REST API, see the Developer's Guide section, User Self-Registration in the Developer's Guide.
OpenAM can help users reset their passwords on their own. OpenAM handles both the case where a user knows their password and wants to change it, and also the case where the user has forgotten their password and needs to reset it, possibly after answering security questions.
For details on setting up password reset capabilities, see the Administration Guide chapter, Configuring Password Reset in the Administration Guide.
For details on building your own application to handle password reset using the REST API, see the Developer's Guide section, Resetting Forgotten Passwords in the Developer's Guide.
Users often have a number of applications assigned to them, especially if your organization has standardized on software as a service, for example for email, document sharing, support ticketing, customer relationship management, web conferencing, and so forth. It can be handy to present these applications on a user's web-based dashboard with the user's profile, and to assign applications to the user's dashboard automatically based on the user's profile.
The OpenAM cloud dashboard service makes this relatively easy to set up. For basic information on using the service, see the Administration Guide chapter, Configuring the Dashboard Service in the Administration Guide.
OpenAM's user-facing pages are fully customizable and easy to skin for your organization. The Installation Guide has details on how to customize user-facing pages.
Single sign on (SSO) is a core feature of OpenAM. Once you have set up OpenAM you protect as many applications in the network domain as you want. Simply install policy agents for the additional servers, and add policies for the resources served by the applications. Users can then authenticate to start a session on any site in the domain, and they remain authenticated for all sites in the domain. No need to log in again (unless the session ends, or unless a policy requires stronger authentication). See the Administration Guide chapter, Configuring Single Sign-On within One Domain in the Administration Guide for details.
Many organizations manage more than one domain. When you have multiple distinct domains in a single organization, cookies set in one domain are not returned to servers in another domain. Also in many organizations, sub-domains are controlled independently, leading to the need to protect against someone setting up a rogue sub-domain to hijack session cookies. OpenAM's cross domain single sign on (CDSSO) provides a safe mechanism for your OpenAM servers in one domain to work with policy agents from other domains, protecting against potential session cookie hijacking. CDSSO allows users to sign on in one of your domains and not have to sign on again when they visit another of your domains.
CDSSO works through cooperation between policy agents and the
CDCServlet in OpenAM. Together, the policy agents and
OpenAM use federation capabilities to translate from one domain to another.
For details on how to configure policy agents for CDSSO, see the
Administration Guide chapter, Configuring
Cross-Domain Single Sign On in the Administration Guide.
When you need to federate identities across not just different domains but instead across different organizations with separate access management solutions, then you need interoperable federation technologies. Perhaps your organization acts as an identity provider for other organizations providing services. Perhaps you provide the services and allow users to use their identity from another organization to access your services. Either way OpenAM has the capability to integrate well in federated access management scenarios.
OpenAM supports standards-based federation technologies.
Security Assertion Markup Language (SAML) 2.0 grew out of earlier work on SAML 1.x and in the Liberty Alliance. SAML defines XML-based, standard formats and profiles for federating identities. SAML 2.0 is supported by a wide range of applications including major software as a service (SaaS) offerings. OpenAM supports SAML 2.0 and earlier standards, and can function as a hub in deployments where different standards are used. For details on OpenAM's SAML 2.0 capabilities, see the Administration Guide chapter, Managing SAML 2.0 Federation in the Administration Guide.
When your deployment serves as an identity provider for a SAML federation, OpenAM makes it easy to develop applications called Fedlets that your service providers can easily deploy to participate in the federation. For details see the Developer's Guide chapters, Using Fedlets in Java Web Applications in the Developer's Guide and Using Fedlets in .NET Web Applications in the Developer's Guide.
OAuth 2.0 and OpenID Connect 1.0 are open standards for authorization using REST APIs to allow users to authorize third-party access to their resources. These standards make it easier to federate modern web applications. OAuth for example is widely used in social applications.
OpenAM offers support both for OAuth 2.0 and also for OpenID Connect 1.0. OpenAM can play the roles of authorization server and of client in OAuth 2.0, while managing the profiles of the resource owners. When acting as a client, OpenAM policy agents can be used on resource servers to enforce authorization. For details see the Administration Guide chapter, Managing OAuth 2.0 Authorization in the Administration Guide.
OpenAM can play the OpenID Connect 1.0 provider role as well, with support for Basic and Implicit client profiles as well as discovery, dynamic registration, and session management. For details see the Administration Guide chapter, Managing OpenID Connect 1.0 Authorization in the Administration Guide.
In the first chapter of this guide you created an OpenAM access policy and saw how it worked. OpenAM can handle large numbers of access policies, each of which gives you centralized control over who can access what resources, when, and under what circumstances. For details see the Administration Guide chapter, Defining Authorization Policies in the Administration Guide.
OpenAM also supports standards-based access policies defined using the eXtensible Access Control Markup Language (XACML). XACML defines an XML Attribute-Based Access Control (ABAC) language with Role-Based Access Control (RBAC) features as well. For details on using XACML policies with OpenAM see the Administration Guide chapter, Defining Entitlements in the Administration Guide.
In the first chapter of the guide you installed a web policy agent to enforce OpenAM's authorization decisions on Apache HTTP Server. That web policy agent is only one of many policy agents that work with OpenAM. As described in the Administration Guide chapter, Configuring Policy Agent Profiles in the Administration Guide, you find policy agents for different web servers, for a variety of Java EE web application containers, for protecting SOAP-based web services, and for OAuth 2.0 clients.
For details about web policy agents also see the Web Policy Agent Installation Guide.
For details about Java EE policy agents also see the Java EE Policy Agent Installation Guide.
Furthermore OpenIG Identity Gateway works with applications where you want to protect access, but you cannot install a policy agent. For example, you might have a web application running in a server for which no policy agent has been developed. Or you might be protecting an application where you simply cannot install a policy agent. In that case, OpenIG functions as a flexible reverse proxy with standard SAML 2.0 capabilities. For details see the OpenIG documentation.
For client application developers, OpenAM offers REST, Java, and C APIs.
OpenAM REST APIs make the common CRUD (create, read, update, delete) easy to use in modern web applications. They also offer extended actions and query capabilities for access management functionality.
To get started, see the Developer's Guide chapter, Using RESTful Web Services in the Developer's Guide.
OpenAM Java APIs provided through the OpenAM Java SDK let your Java and Java EE applications call on OpenAM for authentication and authorization in both OpenAM and federated environments.
To get started, see the Developer's Guide chapter, Using the OpenAM Java SDK in the Developer's Guide.
The OpenAM C SDK provides APIs for native applications, such as new web server policy agents. The C SDK is built for Linux, Solaris, and Windows platforms.
To get started, see the Developer's Guide chapter, Using the OpenAM C API in the Developer's Guide.
OpenAM provides built-in support for many identity repositories, web servers and web application containers, access management standards, and all the flexible, configurable capabilities mentioned in this chapter. Yet, for some deployments you might still need to extend what OpenAM can do. For such cases OpenAM defines Service Provider Interfaces (SPIs) where you can integrate your own plugins. See the Developer's Guide section, OpenAM SPIs in the Developer's Guide, for a list of extension points, and the related documentation in that guide for examples.
You can purchase OpenAM support subscriptions and training courses from ForgeRock and from consulting partners around the world and in your area. To contact ForgeRock, send mail to info@forgerock.com. To find a partner in your area, see http://forgerock.com/partners/find-a-partner/.