Register an OAuth 2.0 application in PingOne
OAuth 2.0 client application profiles define how applications connect to PingOne and obtain OAuth 2.0 tokens.
To allow the ForgeRock SDK for JavaScript to connect to PingOne and obtain OAuth 2.0 tokens, you must register a public OAuth 2.0 client application.
Register a public OAuth 2.0 client
To register a public OAuth 2.0 client application in PingOne for use with the ForgeRock SDK for JavaScript, follow these steps:
-
Log in to your PingOne administration console.
-
In the left panel, click Applications.
-
Next to the Applications label, click the plus icon ().
PingOne displays the Add Application panel.
-
In Application Name, enter a name for the profile, for example
sdkPublicClient -
Select OIDC Web App as the Application Type, and then click Save.
-
On the Configuration tab, click the pencil icon ().
-
In Grant Type, select the following values:
Authorization CodeRefresh Token -
In Redirect URIs, enter the following value:
Also add any other URLs where you host SDK applications.
Failure to add redirect URLs that exactly match your client app’s values can cause PingOne to display an error message such as `Redirect URI mismatch ` when attempting to end a session by redirecting from the SDK.
-
In Token Endpoint Authentication Method, select
None. -
In Signoff URLs, enter the following value:
Also add any other URLs that redirect users to PingOne to end their session.
Failure to add sign off URLs that exactly match your client app’s values can cause PingOne to display an error message such as
invalid post logout redirect URIwhen attempting to end a session by redirecting from the SDK. -
Click Save.
-
-
On the Resources tab, next to Allowed Scopes, click the pencil icon ().
-
In Scopes, select the following values:
emailphoneprofile
-
-
Optionally, on the Policies tab, click the pencil icon () to select the authentication policies for the application.
Applications that have no authentication policy assignments use the environment’s default authentication policy to authenticate users.
If you have a DaVinci license, you can select PingOne policies or DaVinci Flow policies, but not both. If you do not have a DaVinci license, the page only displays PingOne policies.
To use a PingOne policy:
-
Click Add policies and then select the policies that you want to apply to the application.
-
Click Save.
PingOne applies the policies in the order in which they appear in the list. PingOne evaluates the first policy in the list first. If the requirements are not met, PingOne moves to the next one.
For more information, see Authentication policies for applications.
To use a DaVinci Flow policy:
-
You must clear all PingOne policies. Click Deselect all PingOne Policies.
-
In the confirmation message, click Continue.
-
On the DaVinci Policies tab, select the policies that you want to apply to the application.
-
Click Save.
PingOne applies the first policy in the list.
-
-
Click Save.
-
Enable the OAuth 2.0 client application by using the toggle next to its name:
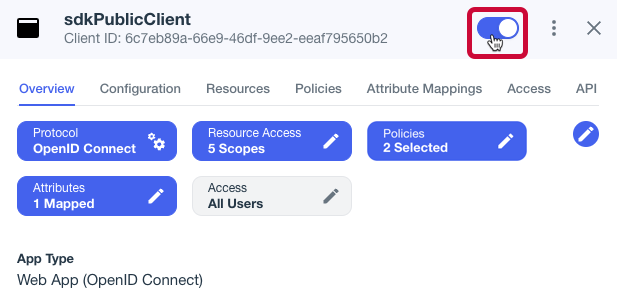 Figure 1. Enable the application using the toggle.
The application is now configured to accept client connections from and issue OAuth 2.0 tokens to the PingOne example applications and tutorials covered by this documentation.
Next steps
You can now configure the ForgeRock SDK for JavaScript to connect to PingOne and obtain OAuth 2.0 access tokens.
You will need some of the property values from the client profile you created to configure the JavaScript SDK:
-
Log in to your PingOne administration console.
-
In the left panel, click Applications.
-
Select the OAuth 2.0 application profile you created earlier. For example,
sdkPublicClient. -
On the Configuration tab, expand the URLs section, and make a note of the following values:
OIDC Discovery EndpointClient ID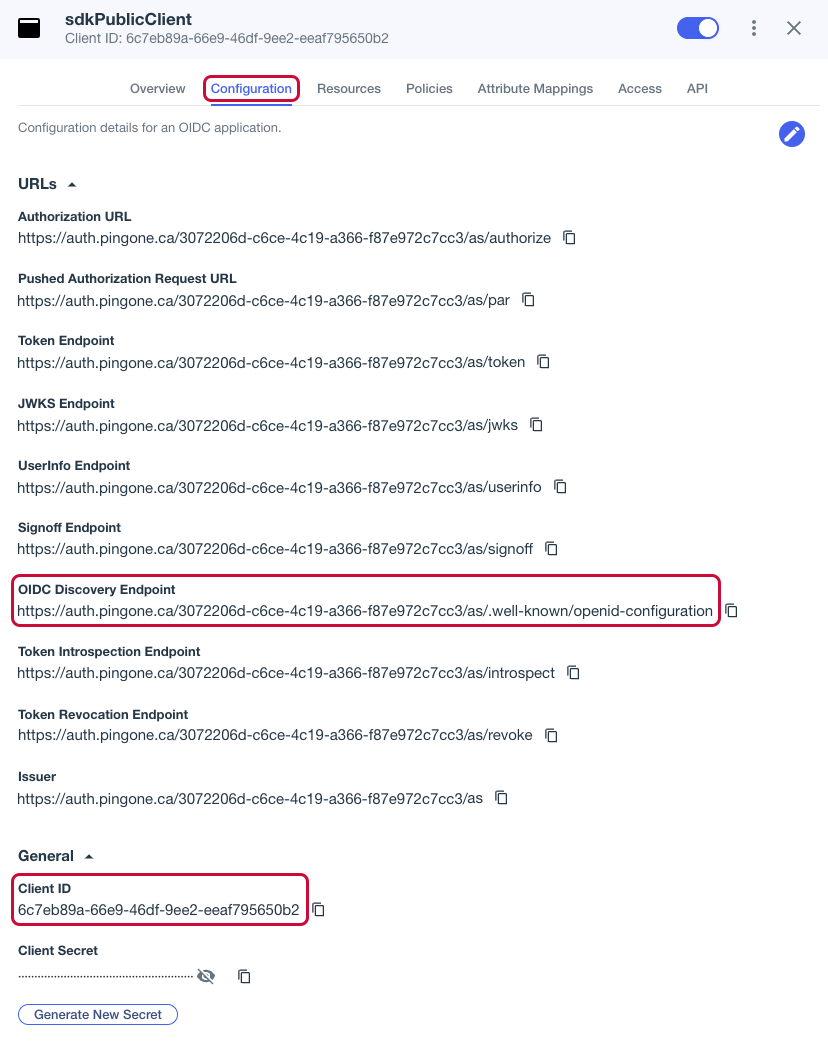 Figure 2. Obtaining values from the OIDC application profile in PingOne.
When you have obtained these values from your PingOne instance, continue with the JavaScript Tutorial for PingOne.
More information
For more information on applications in PingOne, refer to Adding an application.