Transactional Authorization
Transactional authorization makes use of the Session Upgrade functionality, applying it while authorization is in progress. It improves security by requiring a user to perform additional actions when trying to access a resource protected by an AM policy. For example, they must reauthenticate to an authentication module or respond to a push notification on their mobile device.
Performing the additional action successfully grants access to the protected resource, but only once. Additional attempts to access the resource will require the user to perform the configured actions again.
Transactional authorization is implemented as a new environment condition type that can be added to authorization policies.
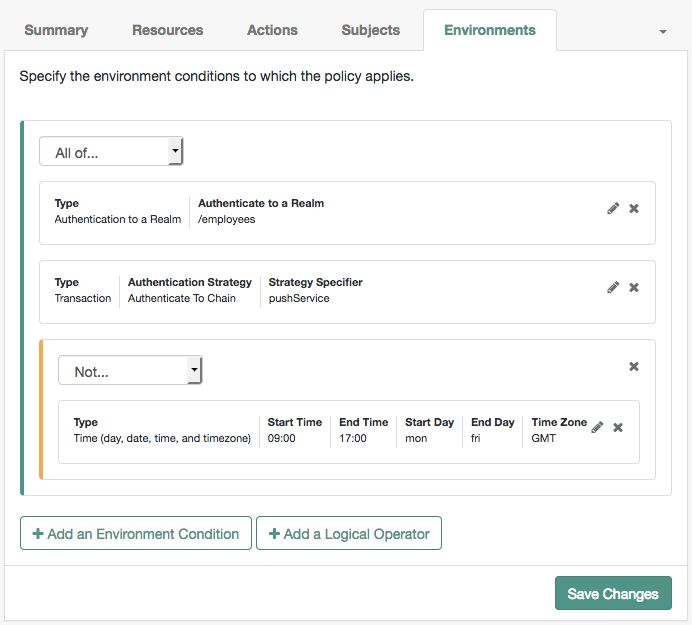
The transactional authorization environment condition can be combined in policies with the other conditions. For example, only requiring a push notification response when access is attempted to the employees subrealm but outside usual working hours, as shown below:
Related Information:
The following diagram describes the sequence of events that occur when accessing a resource that is protected by a REST application, and an AM policy containing a transactional environment condition:
The sequence of events for a transaction authorization is as follows:
An authenticated user attempts to access a resource that is protected by an AM server.
The resource server contacts AM to evaluate the policies that apply.
The resource server can be protected with ForgeRock's Web or Java Agents, which support transactional authorization natively, or a custom application that uses ForgeRock's REST API as per the diagram to manage the transactional authorization.
As the policy contains a transaction environment condition, AM creates a transaction token in the Core Token Service (CTS) store. The initial transaction token state is set to
CREATED.The transaction token contains information about the policy evaluation, including the:
Realm
Resource
Subject
Audit tracking ID
Authentication method
To protect against tampering, AM verifies that these details do not change and match those in the incoming requests for the duration of the transaction.
The transaction token has a time-to-live (default 180 seconds) defined in the Transaction Authentication Service. If the transaction is not completed in this time, the token is deleted, and the flow will need to be restarted. Alter the default if the transaction includes authentication actions that take more time to complete. For example, using the HOTP authentication module for one-time password over email.
The time-to-live can be configured globally, or per-realm. See "Transaction Authentication Service".
In the JSON response to the policy evaluation request, AM returns the transaction ID—the unique ID of the newly created transaction token—in the
TransactionConditionAdvicearray in theadvicesobject:{ "resource": "http://www.example.com:8000/index.html", "actions": {}, "attributes": {}, "advices": { "TransactionConditionAdvice": [ "7b8bfd4c-60fe-4271-928d-d09b94496f84" ] }, "ttl": 0 }As the JSON response to the evaluation does not grant any actions but does contain advices, the REST application on the resource server extracts the transaction ID and returns it to the authentication service to commence the authentication.
The transaction ID is included in the
TransactionConditionAdviceattribute value pair in the composite advice query parameters sent as part of the request for actions.ForgeRock web and Java agents manage this interaction natively. For information on using the REST API to handle
adviceselements in policy evaluations, see "Requesting Policy Decisions Using REST".AM extracts the transaction ID from the composite advice, verifies the corresponding transaction token, and changes the state to
IN_PROGRESS.If the transaction ID is not in the expected state or does not exist, a
401 Unauthorizederror is returned. For example:{ "code": 401, "reason": "Unauthorized", "message": "Unable to read transaction.", "detail": { "errorCode": "128" } }AM responds with the callbacks necessary to satisfy any environment conditions.
Note
The advices returned by transaction environment conditions have the lowest precedence when compared to the other condition advices. End users will have to complete the non-transactional condition advices before they can complete the transactional condition advices.
The REST application renders the callbacks and presents them to the user.
The user completes the required actions. For example, authenticates to the specified chain, or responds to the push notification on their registered mobile device.
Tip
If the user is unable to complete the actions, AM returns an HTTP 200 message and the user is redirected to the protected resource. Policy evaluation will fail since the transactional authorization process has failed.
To return an HTTP 401 message and redirect the user to the failure URL, configure the
org.forgerock.openam.auth.transactionauth.returnErrorOnAuthFailureadvanced server property.The REST app completes the callbacks and returns the result to AM.
AM verifies the transaction token, and changes the state to
COMPLETED.With the transaction now complete, AM returns the original token.
Note that the authentication performed as part of an authorization flow does not behave exactly the same as a standard authentication. The differences are:
The user's original session is not upgraded or altered in any way.
Failing the authentication during the authorization flow does not increment account lockout counters.
The web or Java agent or custom application on the resource server can reevaluate the policies applying to the protected resources again, but includes the ID of the completed transaction as a value in the
TxIdarray in theenvironmentobject:{ "resources" : ["http://www.example.com:8000/index.html"], "application" : "iPlanetAMWebAgentService", "subject" : { "ssoToken" : "AQIC5w....*AJTMQAA*" }, "environment": { "TxId": ["7b8bfd4c-60fe-4271-928d-d09b94496f84"] } }AM verifies the transaction was authorized and that the transaction token is in the
COMPLETEDstate.If the transaction was completed successfully, authorization continues. The transaction token is marked for deletion, so that it cannot be used to grant more than a single access.
As the authentication required to complete the transaction was successful, AM returns the result of the policy reevaluation. For example, the following response grants the
POSTandGETactions to the resourcehttp://www.example.com:8000/index.html:{ "resource": "http://www.example.com:8000/index.html", "actions": { "POST": true, "GET": true }, "attributes": {}, "advices": {}, "ttl": 0 }Important
Successful transactional authorization responses set the time-to-live (
ttl) value to zero to ensure that the policy decision is not cached and cannot be used more than once.ForgeRock agents prior to version 5 do not support a time-to-live value of zero and cannot be used for transactional authorization.
The user is able to access the protected resource once. Additional attempts to access a resource protected with a policy containing a transactional environment condition require a new transaction to be completed.
To configure transactional authorization, first configure the chains or trees you need for session upgrade, and then configure your policies. The following procedures demonstrate an example that uses push notifications:
Prerrequisites
Create an authentication chain containing the
ForgeRock Authenticator (PUSH) Registrationauthentication module. Log in to that chain as thedemouser and register a mobile device using the ForgeRock Authenticator application.See Procedure 4: "To Create a Chain for Push Registration and Passwordless Authentication" and "Registering the ForgeRock Authenticator for Multi-Factor Authentication".
Set up the Push Notification Service in AM with valid credentials.
For information on provisioning the credentials required by the Push Notification Service, see How To Configure Service Credentials (Push Auth, Docker) in Backstage in the ForgeRock Knowledge Base.
For detailed information about Push Notification Service properties, see "Push Notification Service".
Perform at least one of the following steps:
To use the AM console for the demonstration, set up a web agent to protect web resources. See the ForgeRock Web Agents User Guide.
To use the AM REST API for the demonstration, create a user account that has read access to the policy endpoints. By default, users do not have permissions to access the policy evaluation endpoints directly. To allow access to the policy REST endpoints, follow the steps in "To Allow a User to Evaluate Policies".
Perform the following steps to set up an authorization policy with a transaction environment condition, which requires users to respond to a push notification message on their registered mobile device to authorize access to a protected resource.
Add a ForgeRock Authenticator (Push) authentication module:
Log in as an AM administrator. For example,
amAdmin.Navigate to Realms > Top Level Realm > Authentication > Modules, and then select Add Module.
On the New Module page, name the module
pushAuth, select ForgeRock Authenticator (Push) as the module type, and then select Create.(Optional) Alter the Login Message. For example:
Authorize {{user}} at {{issuer}}?Select Save Changes
Add the module to an authentication chain:
Navigate to Realms > Top Level Realm > Authentication > Chains, and then select Add Chain.
On the Add Chain page, name the chain
pushAuthChain, and then select Create.On the Edit Chain tab, select Add a Module.
On the New Module dialog box, from the Select Module drop-down list, select the push module you created in the earlier step; for example,
pushAuth, from the Select Criteria drop-down list, select Required, and then select OK.On the Edit Chain tab, select Save Changes.
Create an authorization policy as described in Configuring Policies
Note
Ensure that there are not multiple policies which match the protected resource that is being authorized. If multiple policies have a matching subject or environment conditions with the protected resource, it may be incorrectly authorized.
Make the following changes to the policy:
Navigate to Realms > Top Level Realm > Authorization > Policy Sets, and then select Default Policy Set.
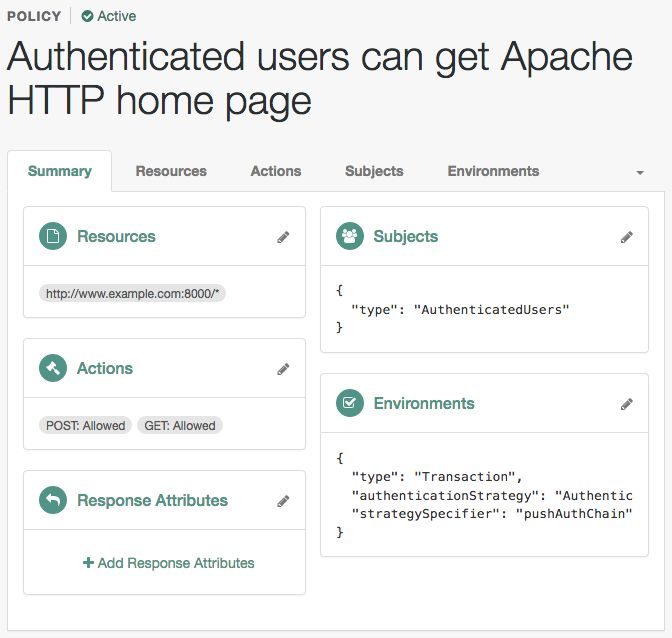
On the Default Policy Set page, select
Authenticated users can get Apache HTTP home page.On the Environments tab, select Add an Environment Condition, and then select Transaction.
From the Authentication Strategy drop-down list, select Authenticate to Chain.
In the Strategy Specifier field, enter the name of the push authorization chain created earlier, for example,
pushAuthChain.Note
The value entered must exactly match the name of the chain. The value is not validated by the UI, and an incorrect value will cause the authorization to fail.
Select the checkmark icon, and then select Save Changes.
Choose one of the following options to demo transactional authorization:
To use the AM console for the demonstration, proceed to the steps outlined in "To Perform Transactional Authorization (UI)".
To use the AM REST API for the demonstration, proceed to the steps outlined in "To Perform Transactional Authorization (REST)".
In a web browser, navigate to a URL that is protected by the policy you edited in "To Prepare AM for Transactional Authorization with Push Notifications", such as
http://www.example.com:8000/index.html.The web agent will redirect the browser to the AM login screen.
Log in to AM as user
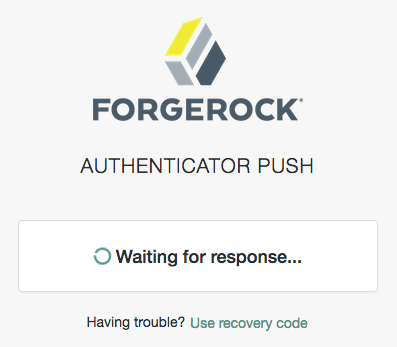
demowith passwordCh4ng31t.AM will display the authenticator push page:

The mobile device that was registered to the
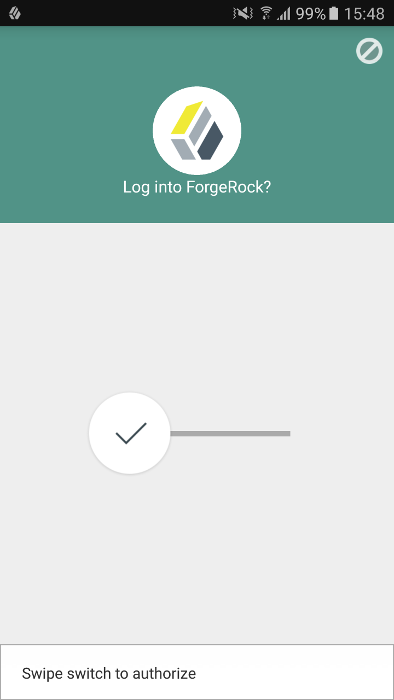
demouser will receive a push notification message:
On the registered mobile device, tap the notification.
The ForgeRock Authenticator app will open. Swipe the switch to authorize the access attempt.

After authorizing the request in the ForgeRock Authenticator app, the authenticator push page in the web browser redirects to the requested resource, completing the transactional authorization.
Note that refreshing the protected page in the web browser at this point starts a new transactional authorization flow, and send a new push notification.
Obtain a session token from AM for user
demowith passwordCh4ng31t:$
curl \ --request POST \ --header "Content-Type: application/json" \ --header "X-OpenAM-Username: demo" \ --header "X-OpenAM-Password: Ch4ng31t" \ --header "Accept-API-Version: resource=2.0, protocol=1.0" \ 'https://openam.example.com:8443/openam/json/realms/root/realms/alpha/authenticate'{ "tokenId":"AQIC5wM...TU3OQ*", "successUrl":"/openam/console", "realm":"/alpha" }Request a policy evaluation with the
tokenIdfrom the previous step as the subject, and a resource URL that is protected by the policy you edited in "To Prepare AM for Transactional Authorization with Push Notifications", such ashttp://www.example.com:8000/index.html.Note
The request requires authentication as a user with the privileges to access the policy endpoints, for example by specifying the SSO token ID in the
iPlanetDirectoryProcookie. See Authenticating (REST).$
curl \ --cookie "iPlanetDirectoryPro=AQIC5wM2L...zEAAA..*" \" \ --request POST \ --header "Content-Type: application/json" \ --header "Accept-API-Version: resource=2.0" \ --data '{ "resources" : ["http://www.example.com:8000/index.html"], "subject" : { "ssoToken" : "AQIC5w...NTcy*" }, "application": "iPlanetAMWebAgentService" }' \ https://openam.example.com:8443/openam/json/realms/root/realms/alpha/policies/?_action=evaluate{ "resource": "http://www.example.com:8000/index.html", "actions": {}, "attributes": {}, "advices": { "TransactionConditionAdvice": [ "9dae2c80-fe7a-4a36-b57b-4fb1271b0687" ] }, "ttl": 0 }Tip
Enter the name of your policy set in the
applicationparameter if you are not creating policies in the default,iPlanetAMWebAgentService.AM returns an empty
actionselement, and a transaction ID in theTransactionConditionAdviceproperty, because a transactional authorization is required to access the resource.Initiate authentication, and include the transaction ID in the composite advice. Note that the steps used for performing a transactional authorization are identical to performing a session upgrade. See Session Upgrade.
The transaction ID returned in the previous step must be returned as composite advice query parameters, wrapped in URL-encoded XML. The XML format is as follows:
<Advices>
    <AttributeValuePair>
        <Attribute name="TransactionConditionAdvice"/>
        <Value>Transaction Id</Value>
    </AttributeValuePair>
</Advices>
Use the SSO token of the
demouser for this request.Note that the following curl command URL-encodes the XML values, and the
-Gparameter appends them as query string parameters to the URL:$
curl -get \ --cookie "iPlanetDirectoryPro=AQIC5w...NTcy*" \" \ --request POST \ --header "Content-Type: application/json" \ --header "Accept-API-Version: resource=2.0, protocol=1.0" \ --data-urlencode 'authIndexType=composite_advice' \ --data-urlencode 'authIndexValue=<Advices> <AttributeValuePair> <Attribute name="TransactionConditionAdvice"/> <Value>9dae2c80-fe7a-4a36-b57b-4fb1271b0687</Value> </AttributeValuePair> </Advices>' \ 'https://openam.example.com:8443/openam/json/realms/root/realms/alpha/authenticate'{ "authId": "eyJ0eXAiOi...WLxJ-1d6ovYKHQ", "template": "", "stage": "AuthenticatorPush3", "header": "Authenticator Push", "callbacks": [ { "type": "PollingWaitCallback", "output": [ { "name": "waitTime", "value": "10000" } ] }, { "type": "ConfirmationCallback", "output": [ { "name": "prompt", "value": "" }, { "name": "messageType", "value": 0 }, { "name": "options", "value": [ "Use Emergency Code" ] }, { "name": "optionType", "value": -1 }, { "name": "defaultOption", "value": 0 } ], "input": [ { "name": "IDToken2", "value": 100 } ] } ] }At this point, the mobile device that was registered to the
demouser will receive a push notification message, that they should authorize in the ForgeRock Authenticator app.Ensure that the time specified in the
waitTimeproperty in the callbacks has passed, in this case at least 10 seconds, and then complete and return the requested callbacks.The value of the
authIdproperty must also be returned, as well as the URL-encoded transaction ID.Use the SSO token of the
demouser for this request.Note
In this example, the required XML parameters have been URL-encoded and added to the URL. The curl command is not able to use the
--data-urlencodeoption for query-string parameters and also send a JSON payload.$
curl \ --cookie "iPlanetDirectoryPro=AQIC5w...NTcy*" \" \ --request POST \ --header "Content-Type: application/json" \ --header "Accept-API-Version: resource=2.0, protocol=1.0" \ --data '{ "authId":"eyJ0eXAiOi...WLxJ-1d6ovYKHQ", "template":"", "stage":"AuthenticatorPush3", "header":"Authenticator Push", "callbacks":[ { "type":"PollingWaitCallback", "output":[ { "name":"waitTime", "value":"10000" } ] }, { "type":"ConfirmationCallback", "output":[ { "name":"prompt", "value":"" }, { "name":"messageType", "value":0 }, { "name":"options", "value":[ "Use Emergency Code" ] }, { "name":"optionType", "value":-1 }, { "name":"defaultOption", "value":0 } ], "input":[ { "name":"IDToken2", "value":100 } ] } ] }' \ "https://openam.example.com:8443/openam/json/realms/root/realms/alpha/authenticate\ ?authIndexType=composite_advice\ &authIndexValue=%3CAdvices%3E%0A\ %3CAttributeValuePair%3E%0A%3CAttribute%20name%3D\ %22TransactionConditionAdvice%22%2F%3E%0A\ %3CValue%3E9dae2c80-fe7a-4a36-b57b-4fb1271b0687\ %3C%2FValue%3E%0A%3C%2FAttributeValuePair\ %3E%0A%3C%2FAdvices%3E"{ "tokenId":"AQIC5w...NTcy*", "successUrl":"http://www.example.com:8000/index.html", "realm":"/" }If the callbacks were correctly completed, and the push notification was responded to in the ForgeRock Authenticator app, AM returns the original
tokenIdvalue.If the push notification has not yet been responded to in the ForgeRock Authenticator app, AM will return the required callbacks again, as in the previous step. Wait until the amount of time specified in the
waitTimeelement has passed and retry the request until thetokenIdreturns.Reevaluate the policy, including the transaction ID as the value of a
TxIdproperty in theenvironmentelement:$
curl \ --cookie "iPlanetDirectoryPro=AQIC5wM2L...zEAAA..*" \" \ --request POST \ --header "Content-Type: application/json" \ --header "Accept-API-Version: resource=1.0" \ --data '{ "resources" : ["http://www.example.com:8000/index.html"], "subject" : { "ssoToken" : "AQIC5w...NTcy*" }, "environment": { "TxId": ["9dae2c80-fe7a-4a36-b57b-4fb1271b0687"] } }' \ "https://openam.example.com:8443/openam/json/policies/?_action=evaluate"{ "resource":"http://www.example.com:8000/index.html", "actions":{ "POST":true, "GET":true }, "attributes":{ }, "advices":{ }, "ttl":0 }As the authentication required by the transaction was successful, the second policy evaluation returns the
POSTandGETactions as defined in the policy.Notice that the time-to-live (
ttl) value of the policy evaluation result is set to0, meaning that the policy must not be cached. The policy only allows a single access to the resource, which must be managed by the policy enforcement point.Performing the policy evaluation again with the same subject and resource at this point starts a new transactional authorization flow, requiring each of the steps above to be repeated in order to access the protected resource each time.

