Creating and Editing Routes in Freeform Designer
The following sections describe basic tasks for creating and deploying routes in the freeform designer of Studio:
Creating Simple Routes
This section describes how to create a simple route in the freeform designer, and add a chain and a filter. For examples of routes created with the freeform designer that can be tested with the examples in the Gateway Guide, see Example Routes Created With Freeform Designer.
-
In IG Studio, create a route:
-
Go to http://openig.example.com:8080/openig/studio, and select Create a route.
-
Select
Freeform to use the freeform designer.
-
-
Select Basic to create a route from a blank template.
-
Enter a URL for the application you want to protect, followed by a path condition to access the route. For example, enter
http://app.example.com:8081/my-basic-route.The route is displayed on the
Flow tab of the canvas.
-
On the top-right of the screen, select and Display to review the route.
{
  "name": "my-basic-route",
  "baseURI": "http://app.example.com:8081",
  "condition": "${find(request.uri.path, '^/my-basic-route')}",
  "handler": "ReverseProxyHandler",
  "heap": [
    {
      "name": "ReverseProxyHandler",
      "type": "ReverseProxyHandler"
    },
    {
      "type": "BaseUriDecorator",
      "name": "baseUri"
    },
    {
      "type": "TimerDecorator",
      "name": "timer",
      "config": {
        "timeUnit": "ms"
      }
    },
    {
      "type": "CaptureDecorator",
      "name": "capture",
      "config": {
        "captureEntity": false,
        "captureContext": false,
        "maxEntityLength": 524288
      }
    }
  ]
}
json -
Add a filter to the route:
-
Select the
Flow tab, and delete the connector between Start and ReverseProxyHandler.
-
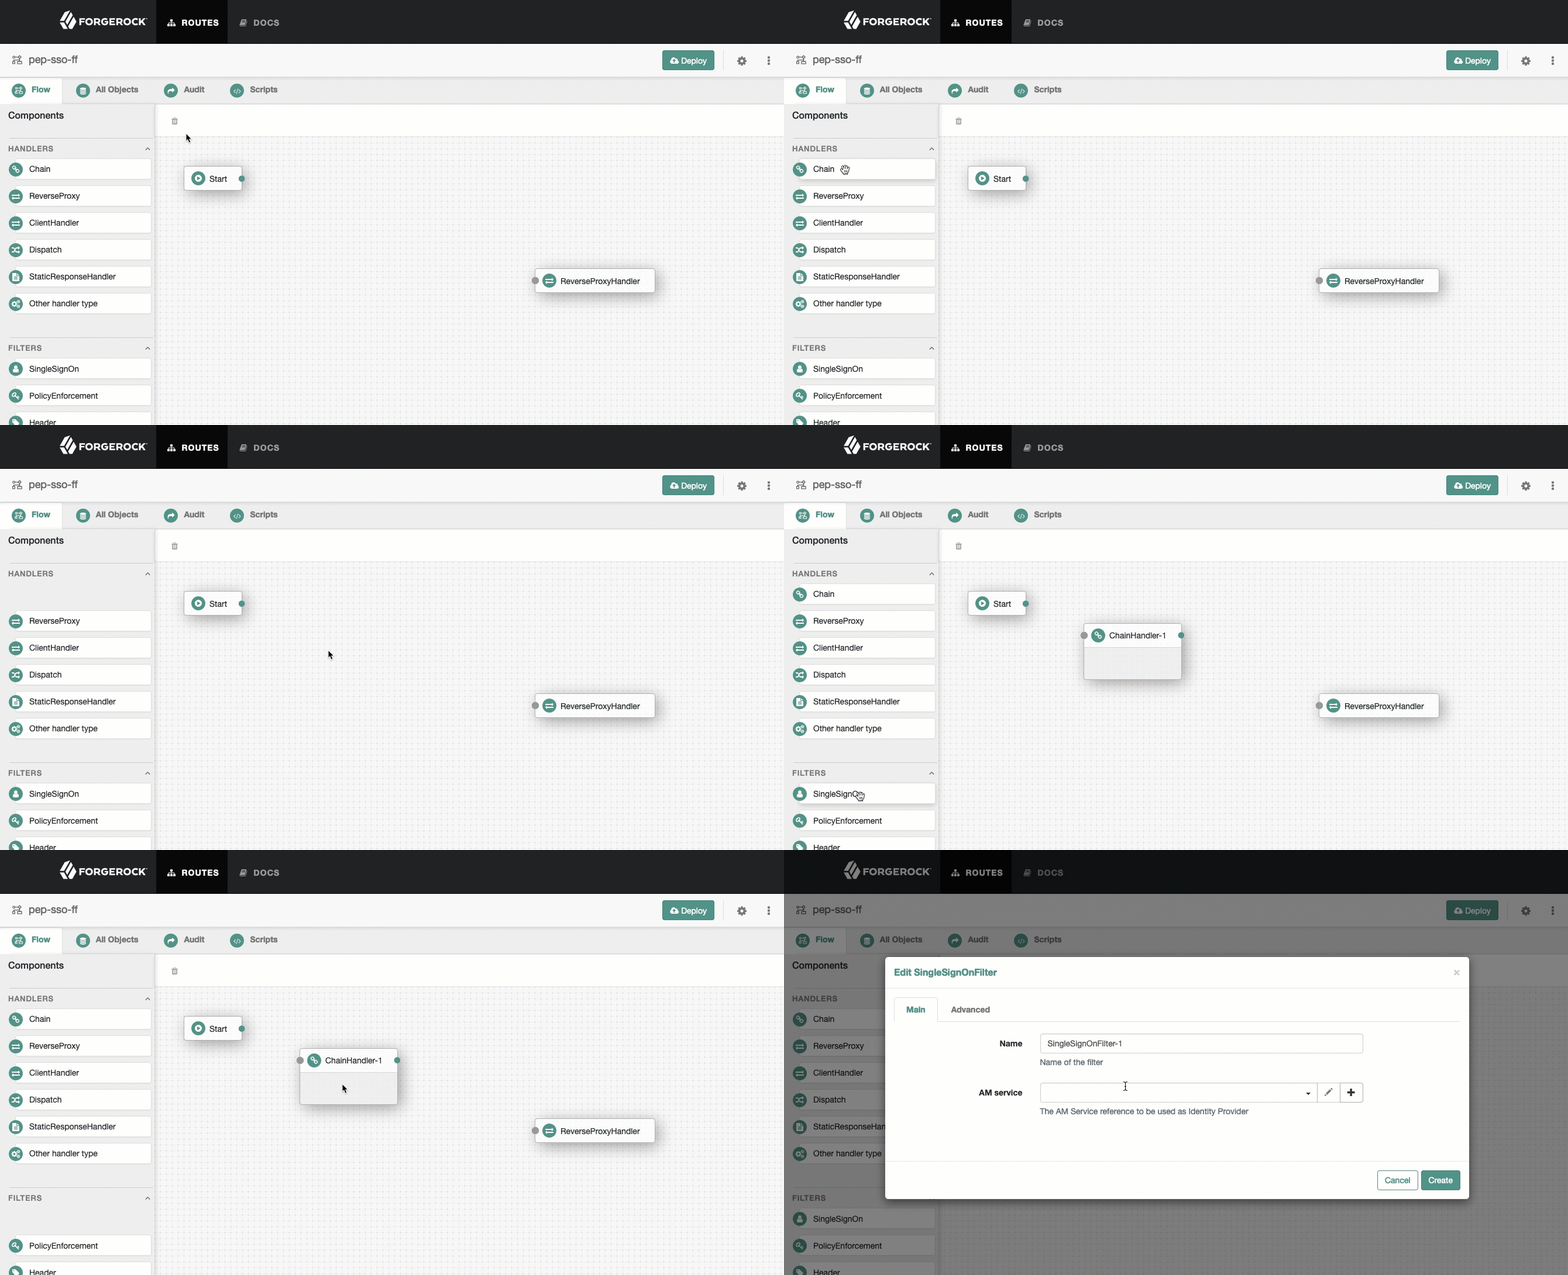
From the side bar, drag a Chain onto the canvas, and then drag a filter into the chain.
See how to add objects to the canvas.

A menu for the filter opens. Enter the required configuration properties, and then save.
-
-
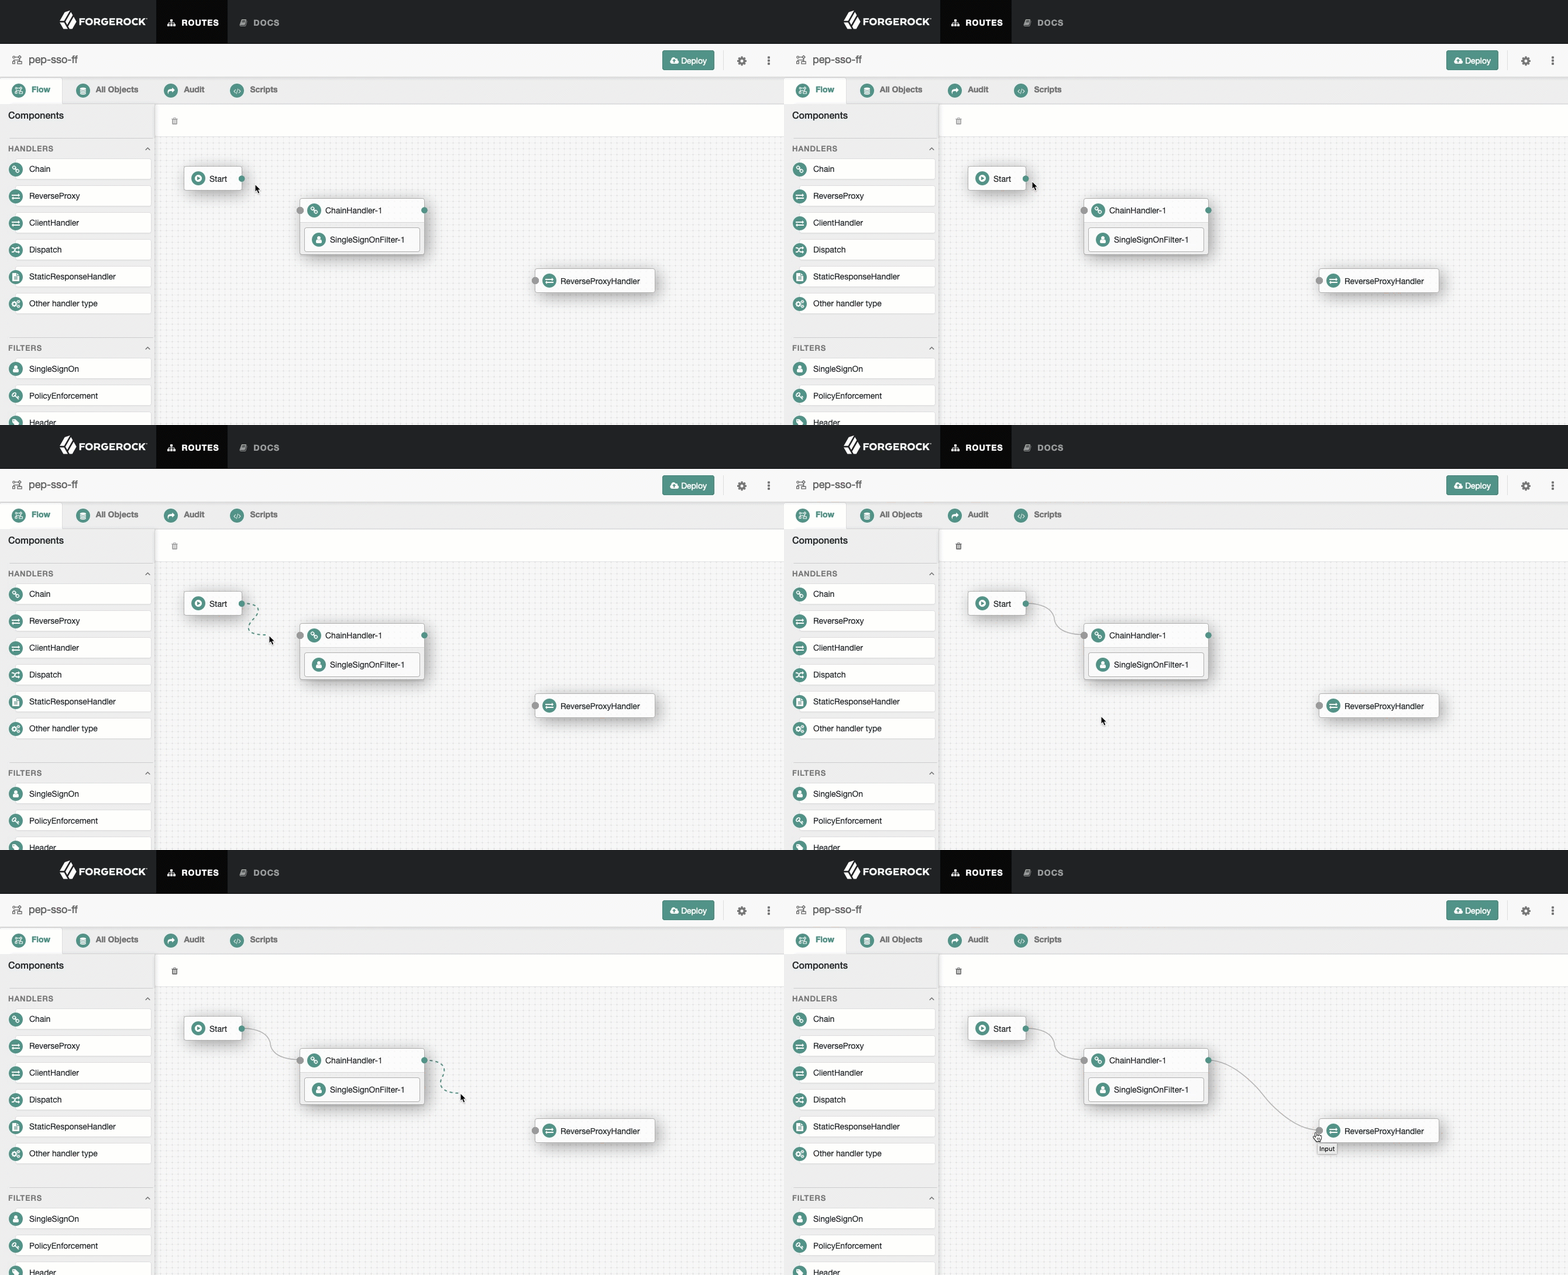
Connect Start to Chain-1, and Chain-1 to ReverseProxyHandler.
See how to connect components.

-
Decorate objects in the route:
-
Select the All Objects tab to view a list of objects in the route. By default, all available decorators are included in the route heap but do not decorate any objects.
-
For the ReverseProxyHandler or filter, select , select the Decorations tab, and then enable one or more of the decorators.
-
-
On the top-right of the screen, select and Display to review the route.
Changing the Basic Settings of a Route
-
In Studio, select ROUTES, and then select a route with the icon.
-
On the top-right of the screen select Route settings.
-
Using the on-screen hints for guidance, change the name, condition, or other features of the route, and save the changes.
-
On the top-right of the screen, select and Display to review the route.