Installing an Instance
You can customize several AM parameters during installation, such as the cookie domain and the settings of the configuration store.
Perform the steps in the following procedure to install a single AM instance, or to install the first instance on a site.
Installing the first instance creates the required configuration that the site will share.
You can specify the site configuration when you install the first instance or configure the site when the first instance is running.
By default, the cookie domain is set to the full URL of the first instance; for example,
server.west.example.com.You can change the cookie domain when you're installing the first instance or later.
You can use a load balancer layer to protect AM services. The load balancer can restrict access to AM services, throttle traffic, offload HTTPS encryption, and so forth.
As an alternative, or in addition, you can use a separate reverse proxy.
When you are protecting AM with a load balancer or proxy service, configure your container so that AM can trust the load balancer or proxy service.
The container for each instance in the site must trust any certificate authorities (CA) used to sign certificates used by other instances in the site in order to communicate using SSL.
AM authentication can depend on information about the user to authenticate, such as the IP address where the request originated. When AM is accessed through a load balancer or proxy layer, pass this information along using request headers. Also, configure AM to consume and to forward the headers as necessary. Refer to "Handling HTTP Request Headers" for details.
Navigate to your deployment URL. For example,
https://openam.example.com:8443/openam.In the initial configuration screen, click Create New Configuration under Custom Configuration.
Read the license agreement. If you agree to the license, click "I agree to the license agreement", and then click Continue.
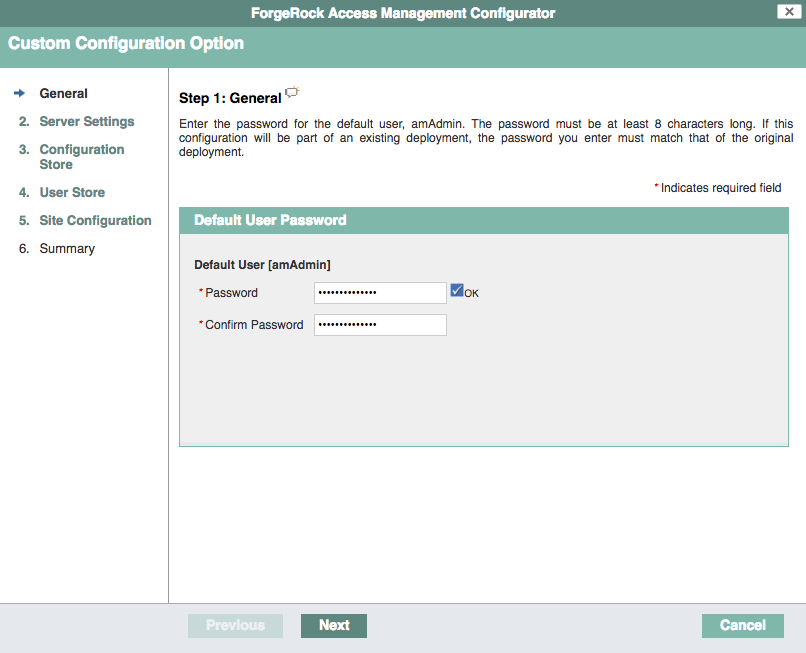
On the Default User Password page, provide a password with at least eight characters for the AM Administrator,
amAdmin.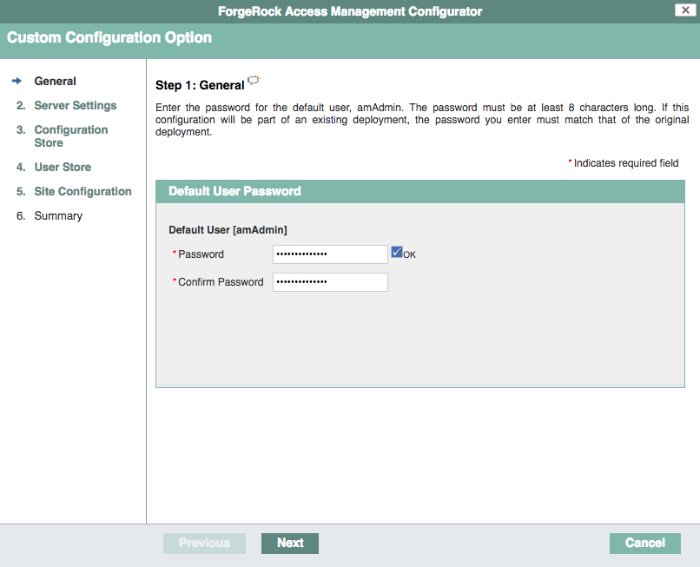
Verify that the server settings are valid for your configuration.
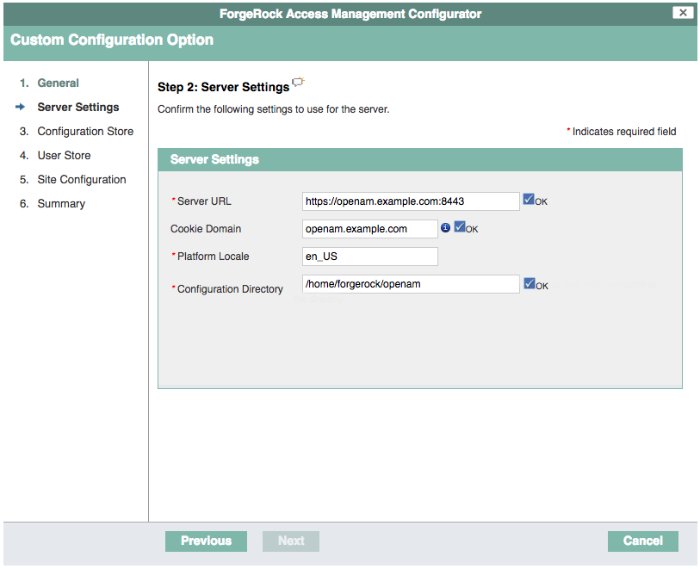
- Server URL
Provide a valid URL to the base of your AM web container, including an FQDN.
In a test or QA environment, you can simulate the FQDN by adding it to your
/etc/hostsas an alias. The following example shows lines from the/etc/hostsfile on a Linux system where AM is installed:127.0.0.1 localhost.localdomain localhost ::1 localhost6.localdomain6 localhost6 127.0.1.1 openam openam.example.com
- Cookie Domain
The domain for which created cookies will be valid; for example
example.com.- Platform Locale
Supported locales include en_US (English), de (German), es (Spanish), fr (French), ja (Japanese), ko (Korean), zh_CN (Simplified Chinese), and zh_TW (Traditional Chinese).
- Configuration Directory
Location on server for AM configuration files. AM must be able to write to this directory.
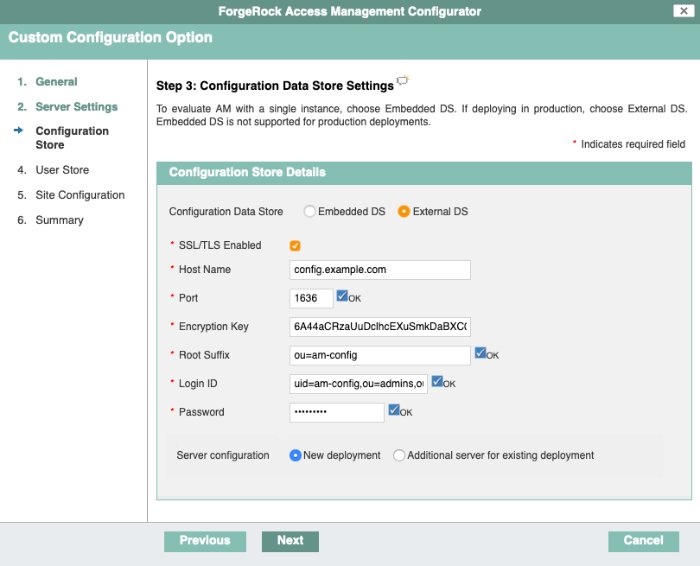
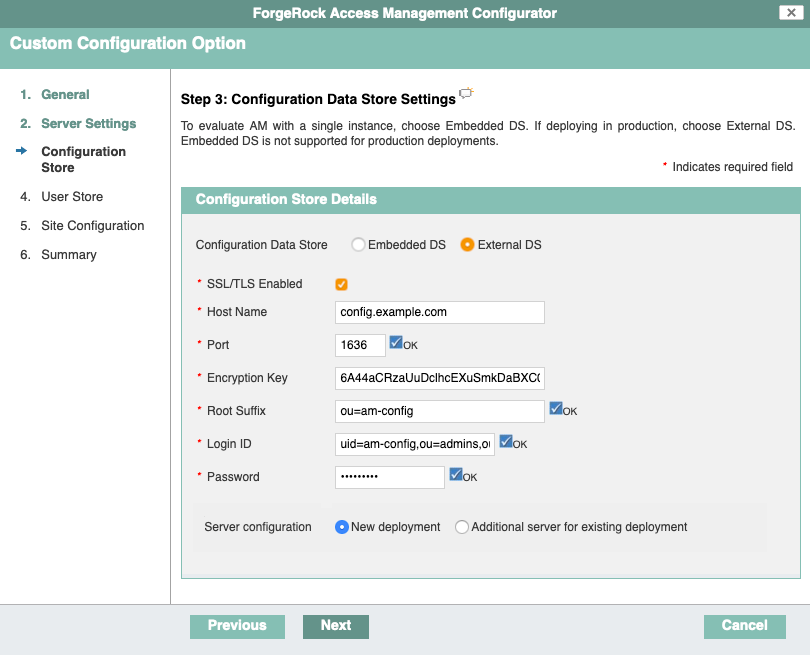
In the Configuration Data Store screen, you make choices related to AM configuration data.
- Configuration Store
Embedded DS
The configurator process spins an embedded DS instance to store AM configuration data, the default users, and the CTS store. Use on demo or test environments only.
Instances using the embedded DS server cannot be added to a site.
If you choose the embedded DS, you can leave the rest of the values by default.
External DS
The configurator process stores AM configuration data in an existing DS server. You must have prepared the server as explained in "Preparing Configuration Stores".
Choose this option if you intend to add this instance to an existing deployment.
An external DS instance is required in non-evaluation deployments.
If you choose the external DS, you must configure the rest of the fields.
- SSL/TLS Enabled
Whether AM must use LDAPS to communicate with the configuration store.
For security reasons, the configuration store should communicate with AM using LDAPs.
DS 7 is configured for LDAPS by default. If you are using this version, enable this option and share the DS certificate with the container where AM is running before continuing. For more information, refer to "Securing Directory Server Communication".
If you are using a different version, you can configure DS and AM to use LDAPS after the installation.
- Host Name
The FQDN of the external DS.
- Port
The LDAP or LDAPS port of the external DS. The default values are:
LDAP:
1389LDAPS:
1636
- Encryption Key
A randomly-generated key that AM uses for different purposes. All the servers in the site must have the same encryption key.
The installer creates a random key automatically; you can leave the value by default.
- Root Suffix
The root suffix of the external DS store.
The default base DN of an external DS store when you configure it with the
am_configprofile isou=am-config.- Login ID
The bind DN that AM should use to connect to the external DS store.
The default bind DN of an external DS store when you configure it with the
am_configprofile isuid=am-config,ou=admins,ou=am-config.Do not use
cn=adminas the bind account.- Password
The password of the bind DN.
- Server configuration
Note that this option only appears when you specify an external configuration store.
New deployment
Specifies that the installation is a new deployment, with its own configuration and identity stores.
If you choose this option, the next step is to configure the identity store.
Additional server for existing deployment
Specifies that the installation is an additional server for an existing deployment and will use the existing configuration and identity stores.
If you choose this option, you don't need to configure the identity store. The installation uses the same stores as those of the existing deployment.
For more information, refer to "To Add a Server to a Site".
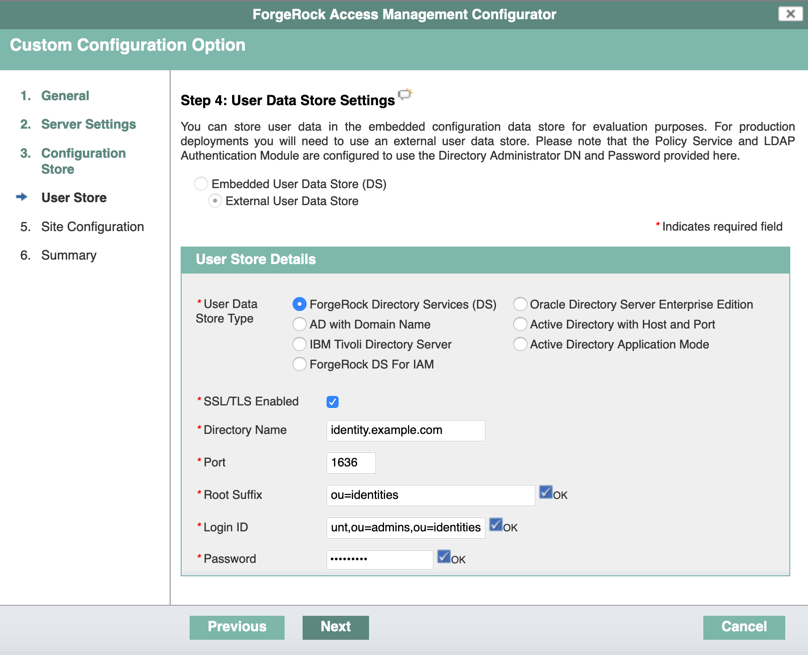
(Optional) If you specified New deployment in the previous step, the User Store screen appears as the next step. Use the page to configure where AM looks for user identities.
AM must have write access to the directory service you choose, as it adds to the directory schema needed to allow AM to manage access for users in the user store.
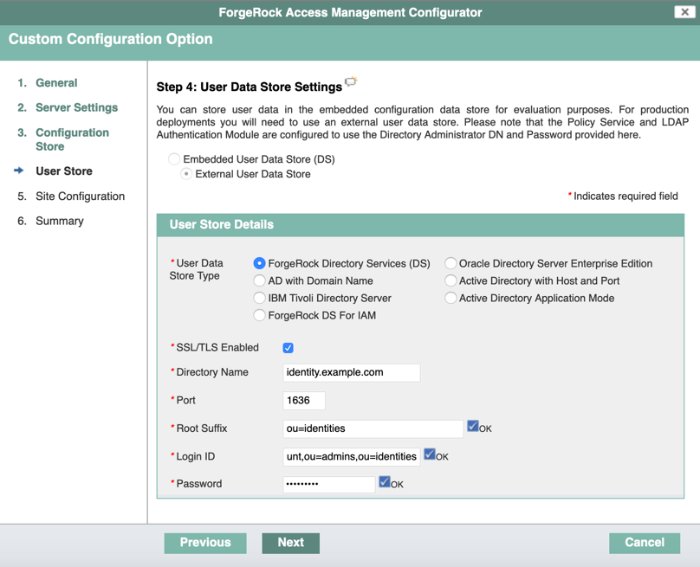
- User Data Store Type
If you have already provisioned a directory service with users in a supported user data store, then select that type of directory from the options available.
- SSL/TLS Enabled
To use a secure connection, check this box, then make sure the port you define corresponds to the port the directory server listens to for StartTLS or SSL connections. When using this option, you also need to make sure the trust store used by the JVM running AM has the necessary certificates installed.
- Directory Name
FQDN for the host housing the directory service.
- Port
LDAP directory port. The default for LDAP and LDAP with StartTLS to protect the connection is port 389. The default for LDAP over SSL is port 636. Your directory service might use a different port.
- Root Suffix
Base distinguished name (DN) where user data is stored.
- Login ID
Directory administrator user DN. The administrator must be able to update the schema and user data.
- Password
Password for the directory administrator user.
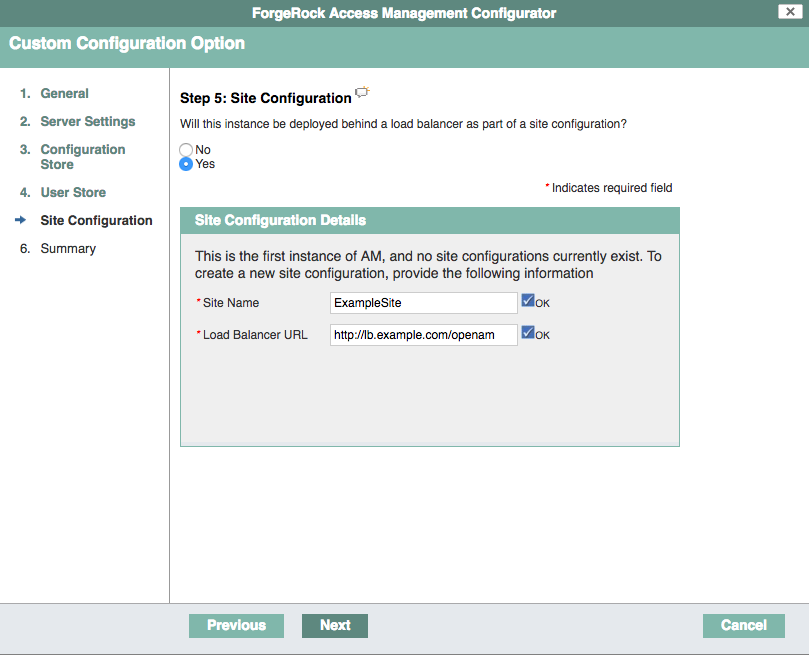
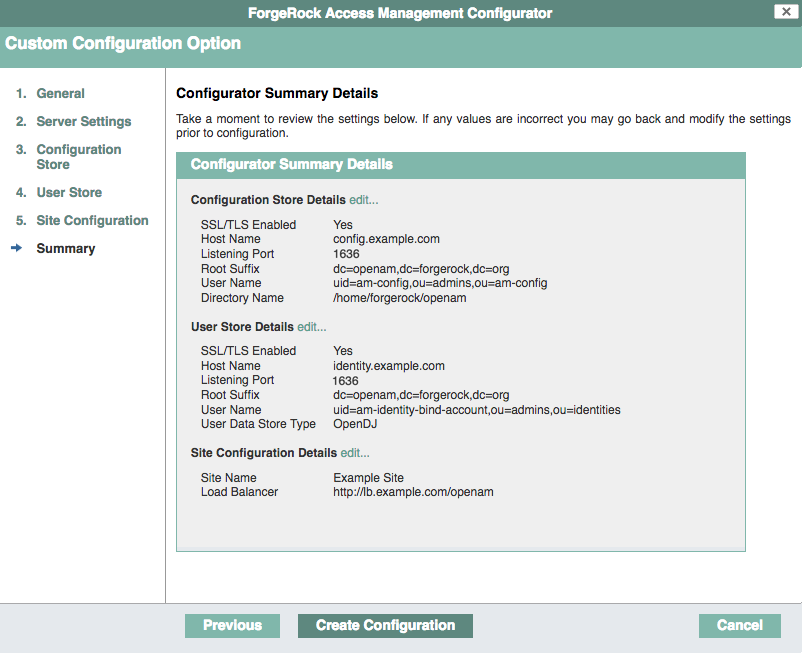
In the Site Configuration screen, you can set up AM as part of a site where the load is balanced across multiple AM servers.
When you deploy multiple servers, AM automatically enables session high availability.[2] AM stores session data in a directory service that is shared by multiple AM servers. The shared storage means that if an AM server fails, other AM servers in the deployment have access to the user's session data and can serve requests about that user. As a result, the user does not have to log in again.
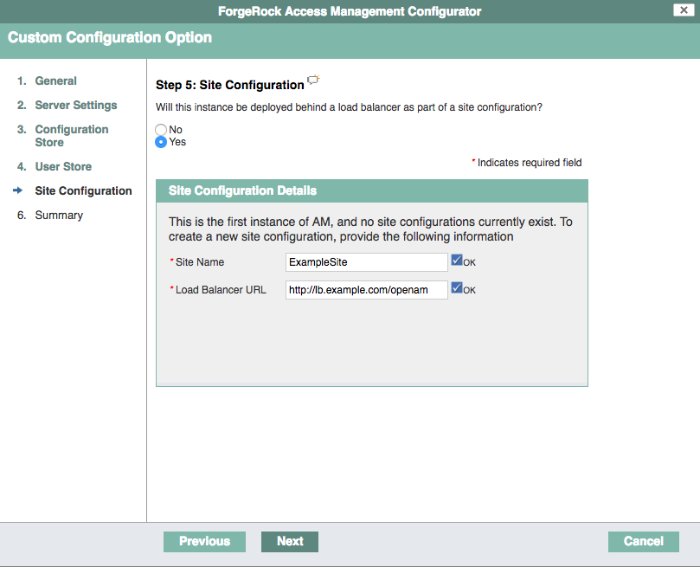
It is possible to set up a site after initial installation and configuration. See Deployment Configuration for more information.
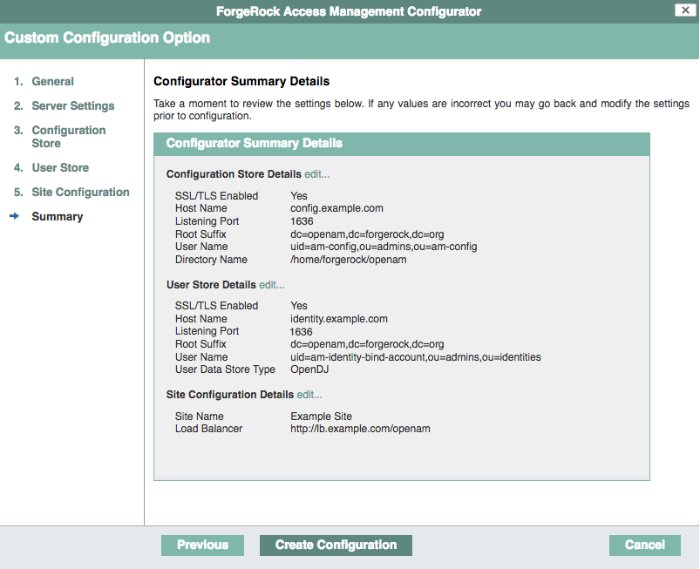
Check the summary screen, and if necessary, click Previous to return to earlier screens to fix any configuration errors as needed.
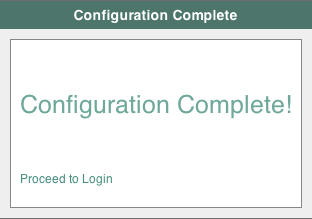
After you click Create Configuration in the summary screen, configuration proceeds, logging progress that you can read in your browser, and later, in the installation log. The process ends, and AM shows the Proceed to Login prompt.
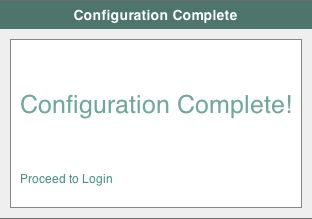
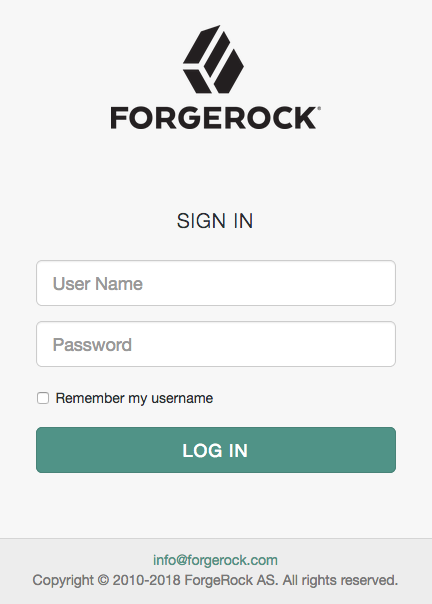
When the configuration completes, click Proceed to Login, and then log in as the AM administrator,
amAdmin.
After logging in, AM redirects you to the AM Realms page.

You can also access the AM console by going to the console URL; for example
https://openam.example.com:8443/openam/console.Restrict permissions to the configuration directory (by default,
$HOME/openam, where $HOME corresponds to the user who runs the web container). Prevent other users from accessing files in the configuration directory.The AM install wizard uses three libraries that should be removed after installation for security reasons.
When your installation is complete, remove the following .jar files from the
WEB-INF/libdirectory:click-extras-2.3.0.jarclick-nodeps-2.3.0.jarvelocity-1.7.jar
These files are used only by the install and upgrade wizards. Removing them will have no effect on your installed instance.
Review the suggested next steps after installing AM. See Next Steps.


[2] You can configure AM to store sessions in the Core Token Service (CTS) token store or on the client. Because client-based sessions reside in HTTP cookies, they do not need to be retrieved from a persistent data store. In the event of a server failure, they can be retrieved from the cookies. AM does not store client-based sessions in the CTS token store. For more information about sessions, see Introducing Sessions.