Authorization Code Grant
The Authorization Code grant is a two-step interactive process used when the client, for example, a Java application running on a server, requires access to protected resources.
The Authorization Code grant is the most secure of all the OAuth 2.0/OpenID Connect grants for the following reasons:
It is a two-step process. The user must authenticate and authorize the client to see the resources and the OpenID provider must validate the code again before issuing the access/ID tokens.
The OpenID provider delivers the tokens directly to the client, usually over HTTPS. The client secret is never exposed publicly, which protects confidential clients.

The steps in the diagram are described below:
The end user wants to use the services provided by the relying party. The relying party, usually a web-based service, requires an account to provide those services.
The end user issues a request to the relying party to access their information, which is stored in an OpenID provider.
To access the end user's information in the provider, the relying party requires authorization from the end user. Therefore, the relying party redirects the end user's user-agent...
... to the OpenID provider.
The OpenID provider authenticates the end user, confirms resource access, and gathers consent if not previously saved.
The OpenID provider redirects the end user's user agent to the relying party.
During the redirection process, the OpenID provider appends an authorization code.
The relying party receives the authorization code and authenticates to the OpenID provider to exchange the code for an access token and an ID token (and a refresh token, if applicable).
Note that this example assumes a confidential client. Public clients are not required to authenticate.
If the authorization code is valid, the OpenID provider returns an access token and an ID token (and a refresh token, if applicable) to the relying party.
The relying party validates the ID token and its claims.
Now, the relying party can use the ID token subject ID claim as the end user's identity.
The relying party may require more claims than those included in the ID token. In this case, it makes a request to the OpenID provider's
oauth2/userinfoendpoint with the access token.If the access token is valid, the
oauth2/userinfoendpoint returns additional claims, if any.Now, the relying party can use the subject ID and the additional retrieved claims as the end user's identity.
Perform the steps in the following procedures to obtain an authorization code and exchange it for an ID token and an access token:
This example shows how to obtain an ID token and an access token. It adds notes on how to obtain an ID token only, as well.
This procedure assumes the following configuration:
AM is configured as an OAuth 2.0/OpenID provider. Ensure that:
The
codeplugin is configured in the Response Type Plugins field.The
Authorization Codegrant type is configured in the Grant Types field.
A confidential client called
myClientis registered in AM with the following configuration:Client secret:
forgerockScopes:
openid profileResponse Types:
codeGrant Types:
Authorization CodeToken Endpoint Authentication Method:
client_secret_postConfidential OpenID Connect clients can use several methods to authenticate. For more information, see OpenID Connect Client Authentication.
For more information, see Dynamic Client Registration.
Perform the steps in this procedure to obtain an authorization code using a browser:
The client redirects the end user's user-agent to the authorization server's authorization endpoint specifying, at least, the following form parameters:
client_id=your_client_id
response_type=code
redirect_uri=your_redirect_uri
scope=openid profile
For information about the parameters supported by the
/oauth2/authorizeendpoint, see "/oauth2/authorize".If the OAuth 2.0/OpenID provider is configured for a subrealm rather than the Top Level Realm, you must specify it in the endpoint. For example, if the OAuth 2.0/OpenID provider is configured for the
/customersrealm, then use/oauth2/realms/root/realms/customers/authorize.For example:
https://openam.example.com:8443/openam/oauth2/realms/root/authorize \
?client_id=myClient \
&response_type=code \
&scope=openid%20profile \
&state=abc123 \
&nonce=123abc \
&redirect_uri=https://www.example.com:443/callback
Note that the URL is split and spaces have been added for readability purposes. The
stateandnonceparameters have been included to protect against CSRF and replay attacks.The end user authenticates to AM, for example, using the credentials of the
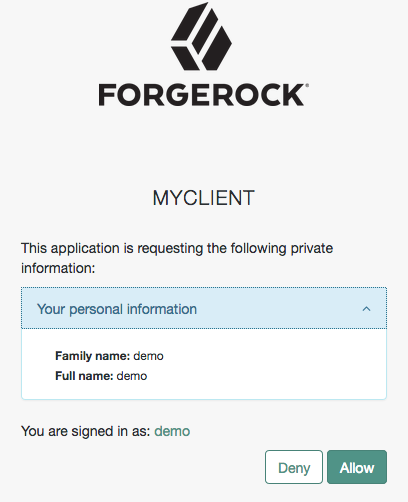
demouser. In this case, they log in using the default chain or tree configured for the realm.After logging in, AM presents its consent screen:
Note that requesting the
profilescope translates into requesting access to several claims. For more information about the specialprofilescope, see Claims.The end user selects the
Allowbutton to grant consent for theprofilescope.AM redirects the end user to the URL specified in the
redirect_uriparameter.Inspect the URL in the browser. It contains a
codeparameter with the authorization code AM has issued. For example:https://www.example.com:443/callback?code=g5B3qZ8rWzKIU2xodV_kkSIk0F4&iss=https://openam.example.com:8443/openam/oauth2&state=abc123&client_id=myClient
The client performs the steps in "To Exchange an Authorization Code for an ID/Access Token in the Authorization Code Grant Flow" to exchange the authorization code for an access token and an ID token.
This example shows how to obtain an ID token and an access token. It adds notes on how to obtain an ID token only, as well.
This procedure assumes the following configuration:
AM is configured as an OAuth 2.0/OpenID provider. Ensure that:
The
codeplugin is configured in the Response Type Plugins field.The
Authorization Codegrant type is configured in the Grant Types field.
A confidential client called
myClientis registered in AM with the following configuration:Client secret:
forgerockScopes:
openid profileResponse Types:
codeGrant Types:
Authorization CodeToken Endpoint Authentication Method:
client_secret_postConfidential OpenID Connect clients can use several methods to authenticate. For more information, see OpenID Connect Client Authentication.
For more information, see Dynamic Client Registration.
Perform the steps in this procedure to obtain an authorization code without using a browser:
The end user logs in to AM, for example, using the credentials of the
demouser. For example:$
curl \ --request POST \ --header "Content-Type: application/json" \ --header "X-OpenAM-Username: demo" \ --header "X-OpenAM-Password: Ch4ng31t" \ --header "Accept-API-Version: resource=2.0, protocol=1.0" \ 'https://openam.example.com:8443/openam/json/realms/root/authenticate'{ "tokenId":"AQIC5wM...TU3OQ*", "successUrl":"/openam/console", "realm":"/" }The client makes a POST call to AM's authorization endpoint, specifying the SSO token of the
demoin a cookie and, at least, the following parameters:client_id=your_client_id
response_type=code
redirect_uri=your_redirect_uri
scope=openid profile
You can configure the
openidscope as a default scope in the client profile or the OAuth 2.0/OpenID provider to avoid including the scope parameter in your calls, if required.However, since the
openidscope is required in OpenID Connect flows, the example specifies it.decision=allow
csrf=demo_user_SSO_token
For information about the parameters supported by the
/oauth2/authorizeendpoint, see "/oauth2/authorize".If the OAuth 2.0/OpenID provider is configured for a subrealm rather than the Top Level Realm, you must specify it in the endpoint. For example, if the OAuth 2.0/OpenID provider is configured for the
/customersrealm, then use/oauth2/realms/root/realms/customers/authorize.For example:
$ curl --dump-header - \
--request POST \
--Cookie "iPlanetDirectoryPro=AQIC5wM...TU3OQ*" \
--data "scope=openid profile" \
--data "response_type=code" \
--data "client_id=myClient" \
--data "csrf=AQIC5wM...TU3OQ*" \
--data "redirect_uri=https://www.example.com:443/callback" \
--data "state=abc123" \
--data "nonce=123abc" \
--data "decision=allow" \
"https://openam.example.com:8443/openam/oauth2/realms/root/authorize"
Note that the
stateandnonceparameters have been included to protect against CSRF and replay attacks.If AM is able to authenticate the user and the client, it returns an HTTP 302 response with the authorization code appended to the redirection URL:
HTTP/1.1 302 Found
Server: Apache-Coyote/1.1
X-Frame-Options: SAMEORIGIN
Pragma: no-cache
Cache-Control: no-store
Date: Mon, 30 Jul 2018 11:42:37 GMT
Accept-Ranges: bytes
Location: https://www.example.com:443/callback?code=g5B3qZ8rWzKIU2xodV_kkSIk0F4&iss=https%3A%2F%2Fopenam.example.com%3A8443%2Fopenam%2Foauth2&state=abc123&client_id=myClient
Vary: Accept-Charset, Accept-Encoding, Accept-Language, Accept
Content-Length: 0
Perform the steps in "To Exchange an Authorization Code for an ID/Access Token in the Authorization Code Grant Flow" to exchange the authorization code for an ID/access token.
Perform the steps in the following procedure to exchange an authorization code for an ID/access token:
Ensure the relying party has obtained an authorization code by performing the steps in either "To Obtain an Authorization Code Using a Browser in the Authorization Code Grant Flow" or "To Obtain an Authorization Code Without Using a Browser in the Authorization Code Grant Flow".
The relying party makes an HTTP POST request to the token endpoint in the OpenID provider specifying, at least, the following parameters:
grant_type=authorization_code
code=your_authorization_code
redirect_uri=your_redirect_uri
For information about the parameters supported by the
/oauth2/access_tokenendpoint, see "/oauth2/access_token".Confidential clients can authenticate to the OAuth 2.0 endpoints in several ways. This example uses the following form parameters:
client_id=your_client_id
client_secret=your_client_secret
For more information, see OAuth 2.0 Client Authentication.
If the OAuth 2.0/OpenID provider is configured for a subrealm rather than the Top Level Realm, you must specify it in the endpoint. For example, if the OAuth 2.0/OpenID provider is configured for the
/customersrealm, then use/oauth2/realms/root/realms/customers/access_token.For example:
$ curl --request POST \
--data "grant_type=authorization_code" \
--data "code=g5B3qZ8rWzKIU2xodV_kkSIk0F4" \
--data "client_id=myClient" \
--data "client_secret=forgerock" \
--data "redirect_uri=https://www.example.com:443/callback" \
"https://openam.example.com:8443/openam/oauth2/realms/root/access_token"
The
client_idand theredirection_uriparameters specified in this call must match those used as part of the authorization code request, or AM will not validate the code.AM returns an ID and an access token. For example:
{
   "access_token":"cnM3nSpF5ckCFZOaDem2vANUdqQ",
   "scope":"openid profile",
   "id_token":"eyJ0eXAiOiJKV1QiLCJra...7r8soMCk8A7QdQpg",
   "token_type":"Bearer",
   "expires_in":3599
}
If the client does not require the access token, revoke it.
Tip
AM can also issue refresh tokens at the same time the access tokens are issued. For more information, see Refresh Tokens.
(Optional) The relying party can request additional claims about the end user from AM.
For more information, see "/oauth2/userinfo".
Tip
For access to a sample JavaScript-based relying party to test the Authorization Code grant flow, see How do I access and build the sample code provided for AM (All versions)? in the ForgeRock Knowledge Base.
Clone the example project to deploy it in the same web container as AM. Edit the configuration at the outset of the .js files in the project, register a corresponding profile for the example relying party as described in Dynamic Client Registration, and browse the deployment URL to see the initial page.
The example relying party uses an authorization code to request an access token and an ID token. It shows the response to that request. It also validates the ID token signature using the default (HS256) algorithm, and decodes the ID token to validate its content and show it in the output. Finally, it uses the access token to request information about the end user who authenticated, and displays the result.