Self Service
Autonomous Identity provides a self service UI page for administrators to change their profile and password information. The page also lets administrators create time-based API keys for users to access the Autonomous Identity system.
Reset Your Password
-
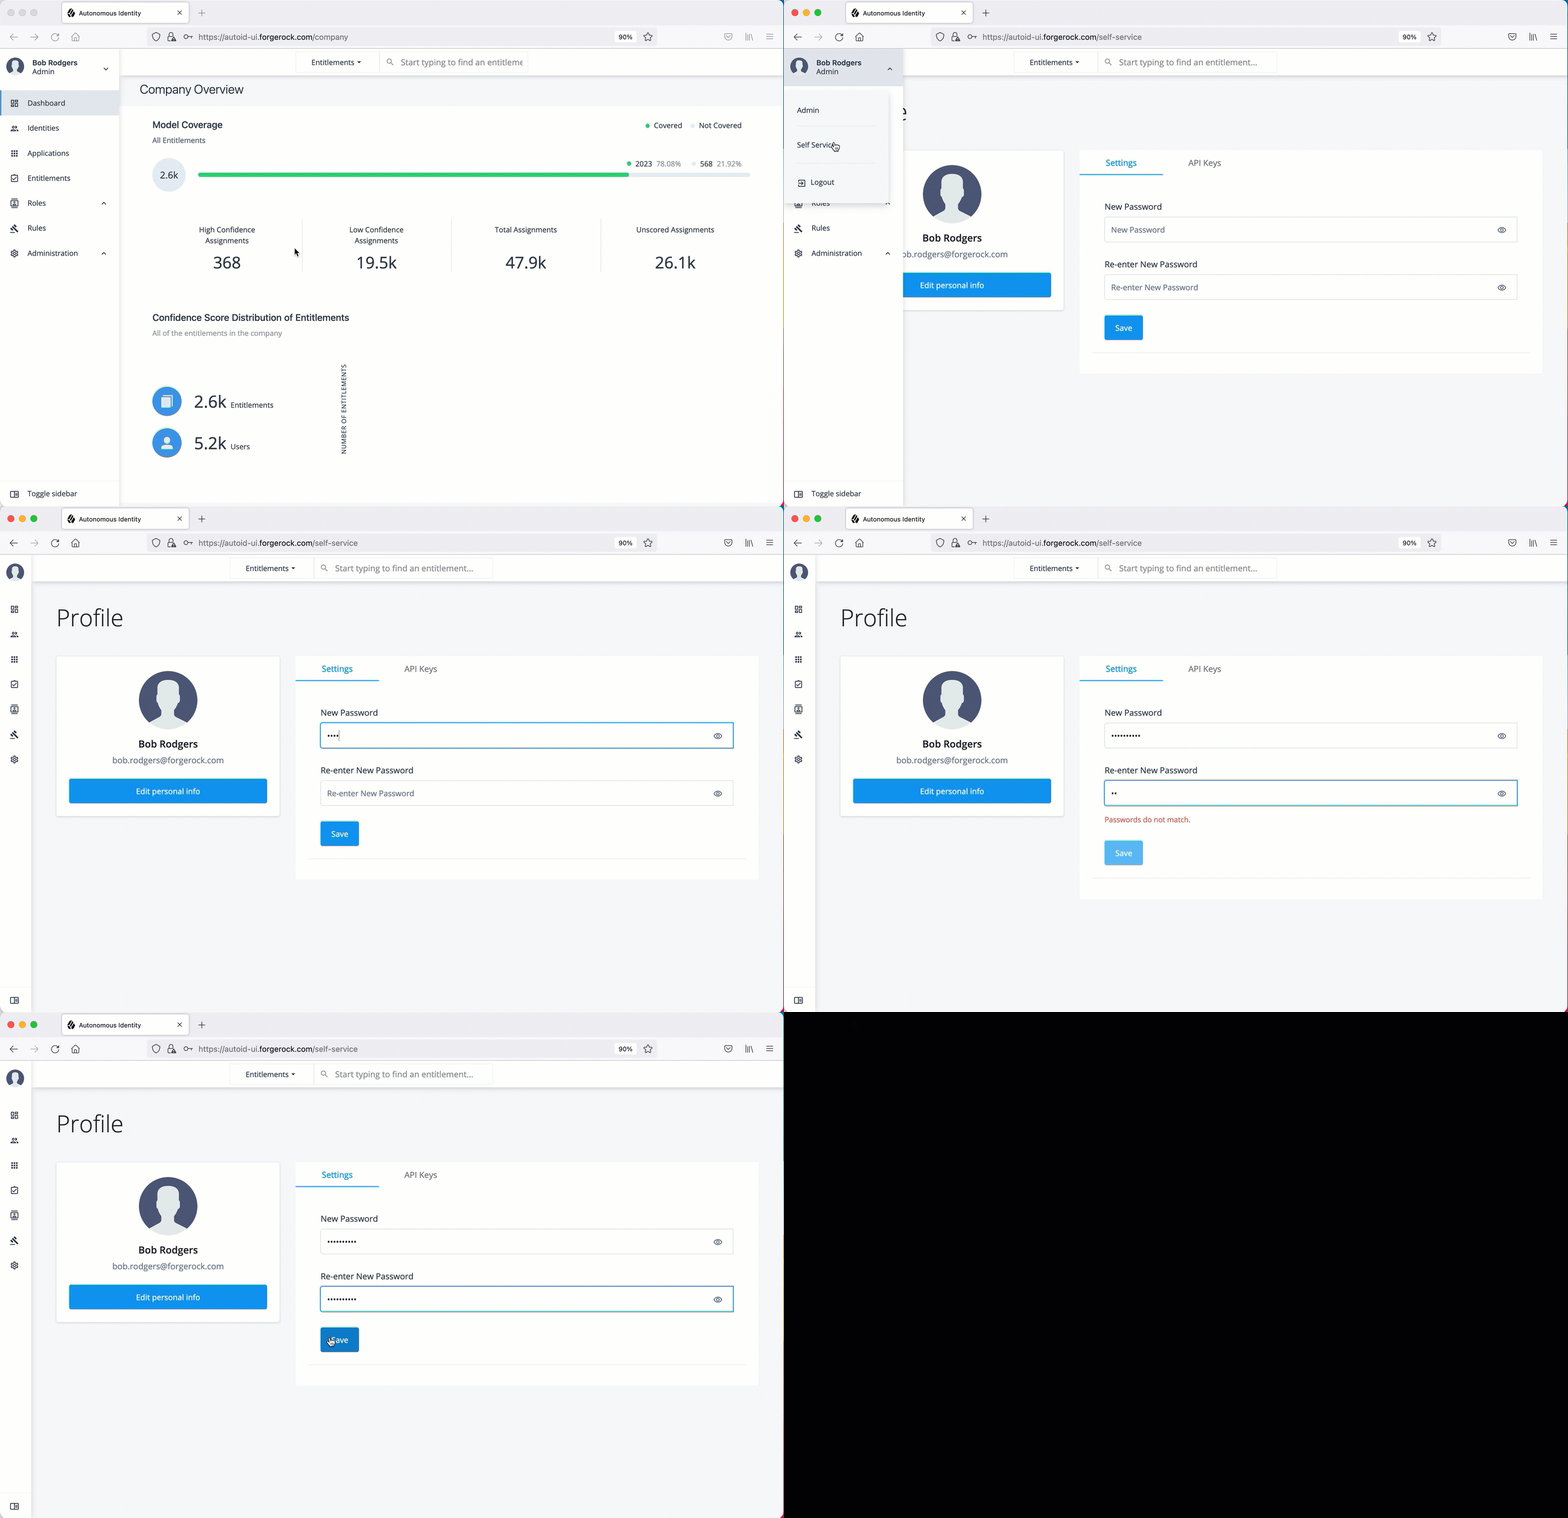
On the Autonomous Identity UI, click the admin drop-down on the top-left of the page.
-
Click Self Service.
-
On the Profile page, enter and re-enter a new password, and then click Save.
See it in action

Update Your Profile
-
On the Autonomous Identity UI, click the admin drop-down on the top-left of the page.
-
Click Self Service.
-
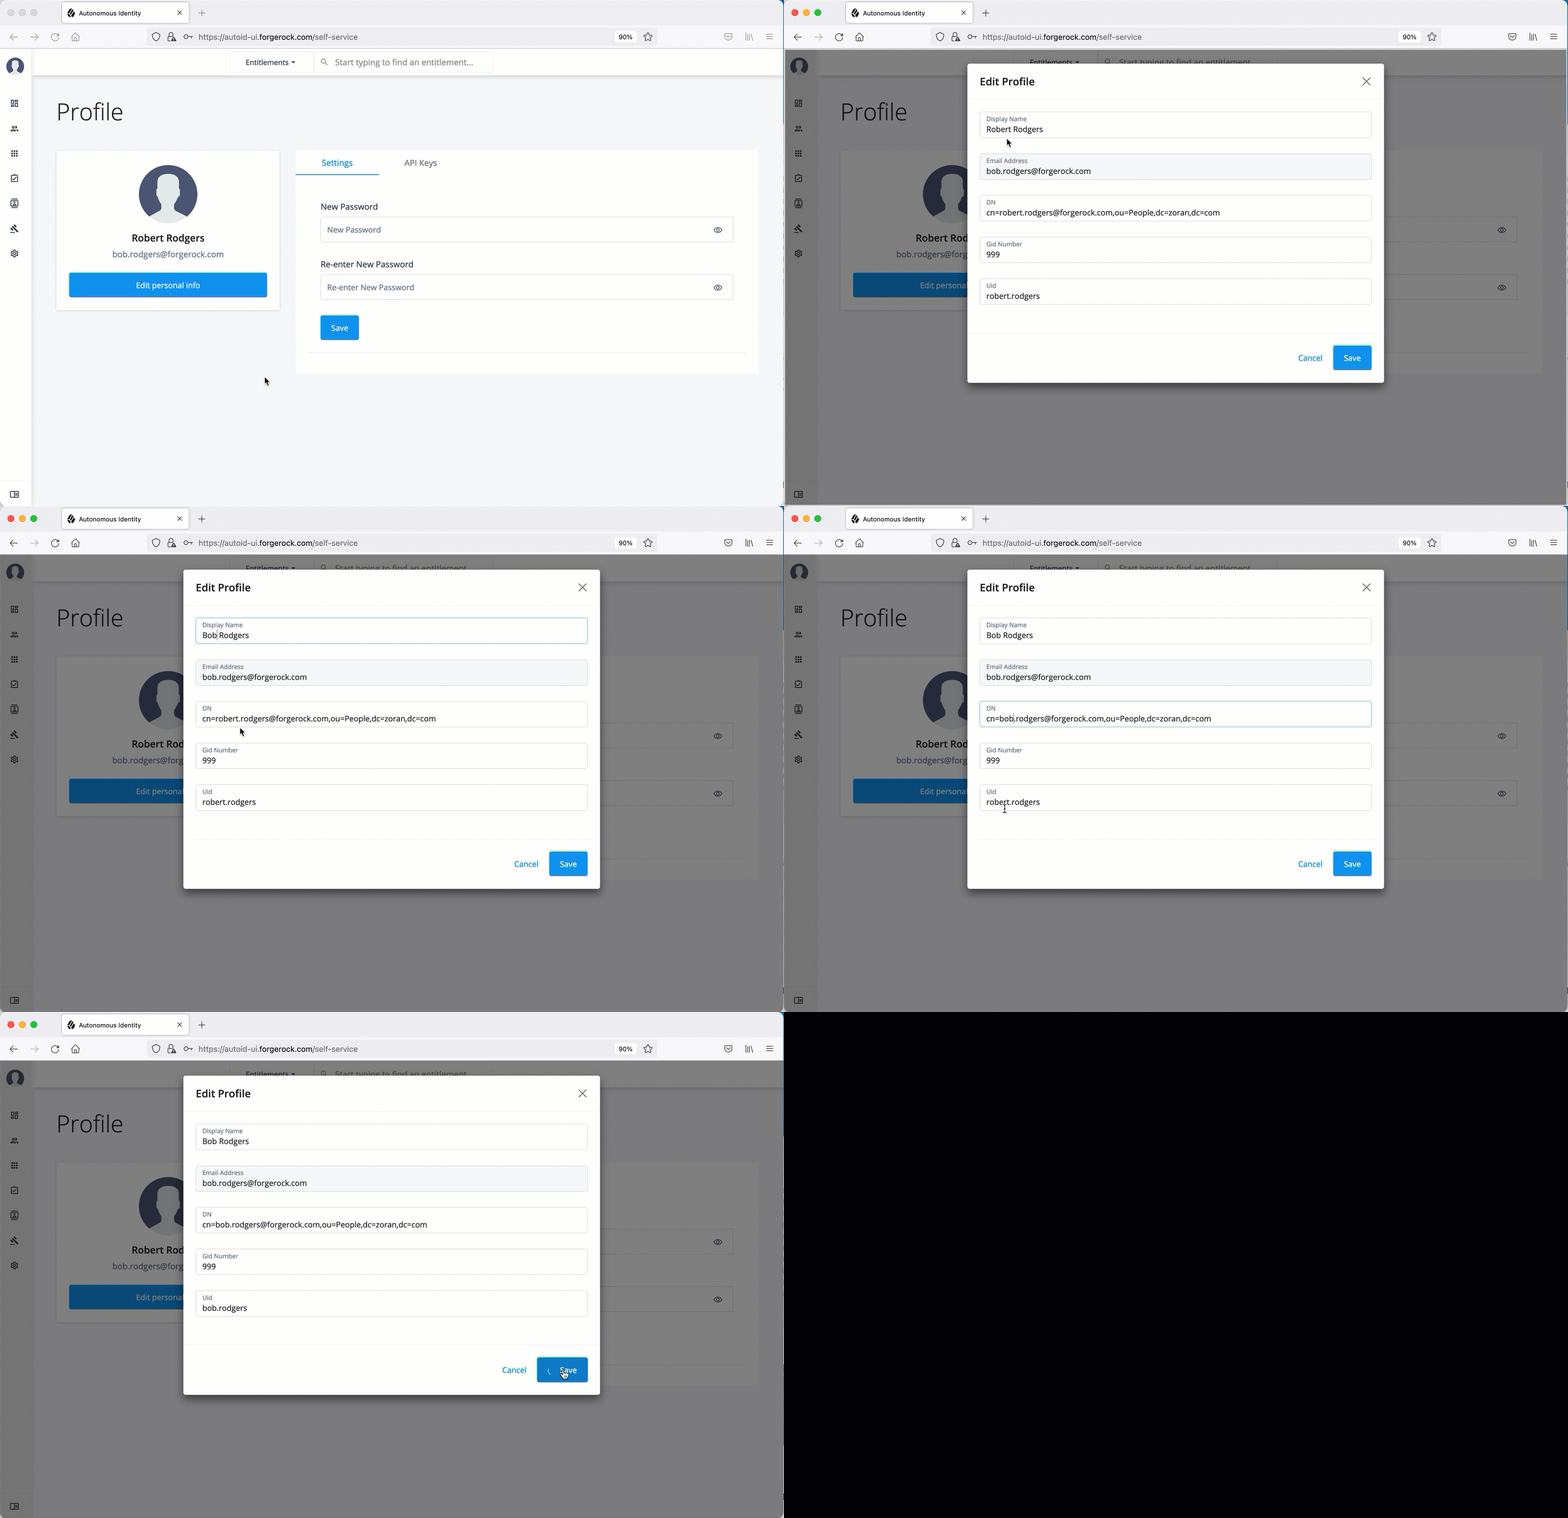
On the Profile page, click Edit personal info to update your profile details:
You cannot change your email address or group ID as these are used to identify each user. -
Update the display name.
-
Update your distinguished name (DN).
-
Update your uid.
-
-
Click Save to apply your changes.
See it in action

Create API Keys
-
On the Autonomous Identity UI, click the admin drop-down on the top-left of the page.
-
Click Self Service.
-
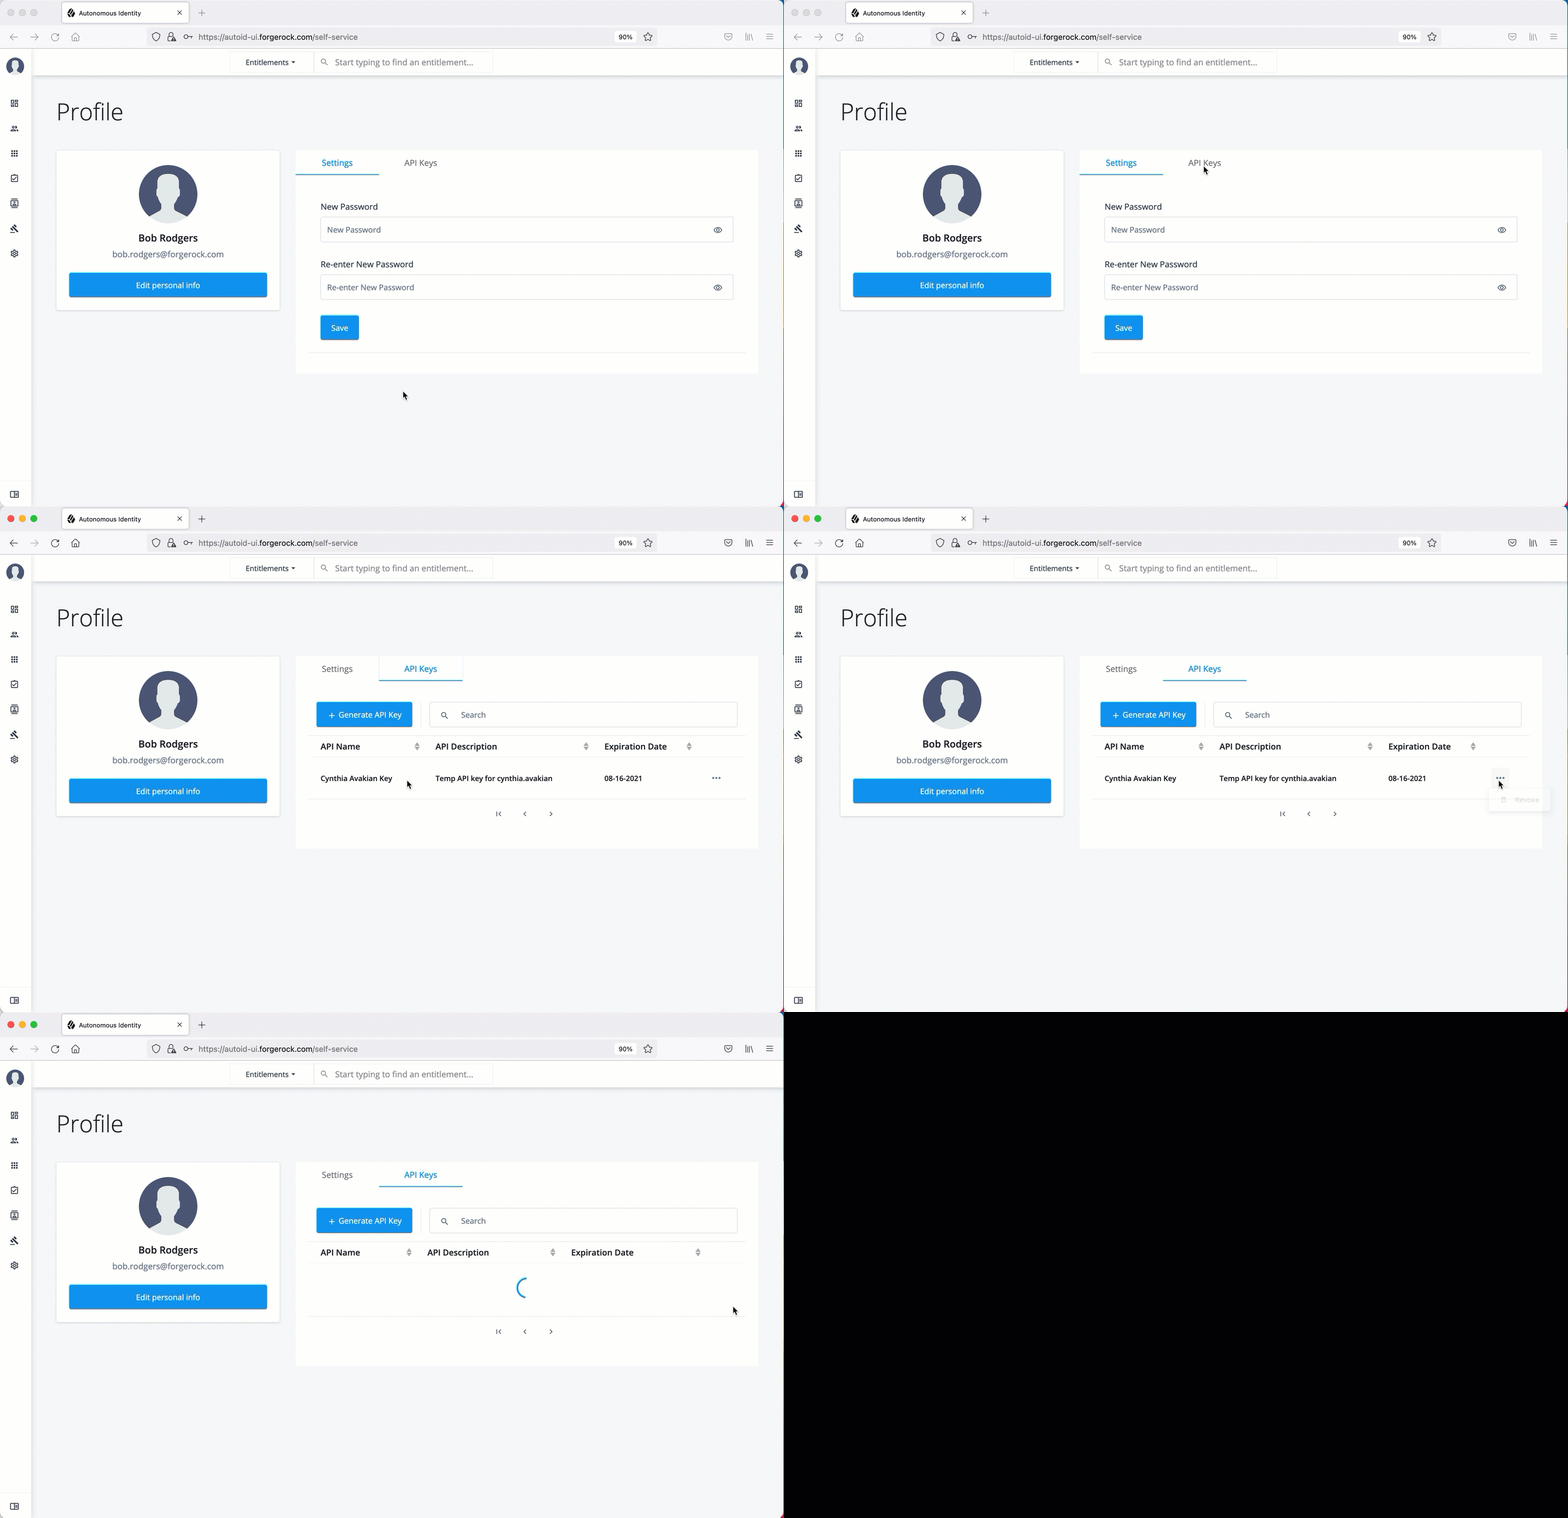
Click the API Keys tab.
-
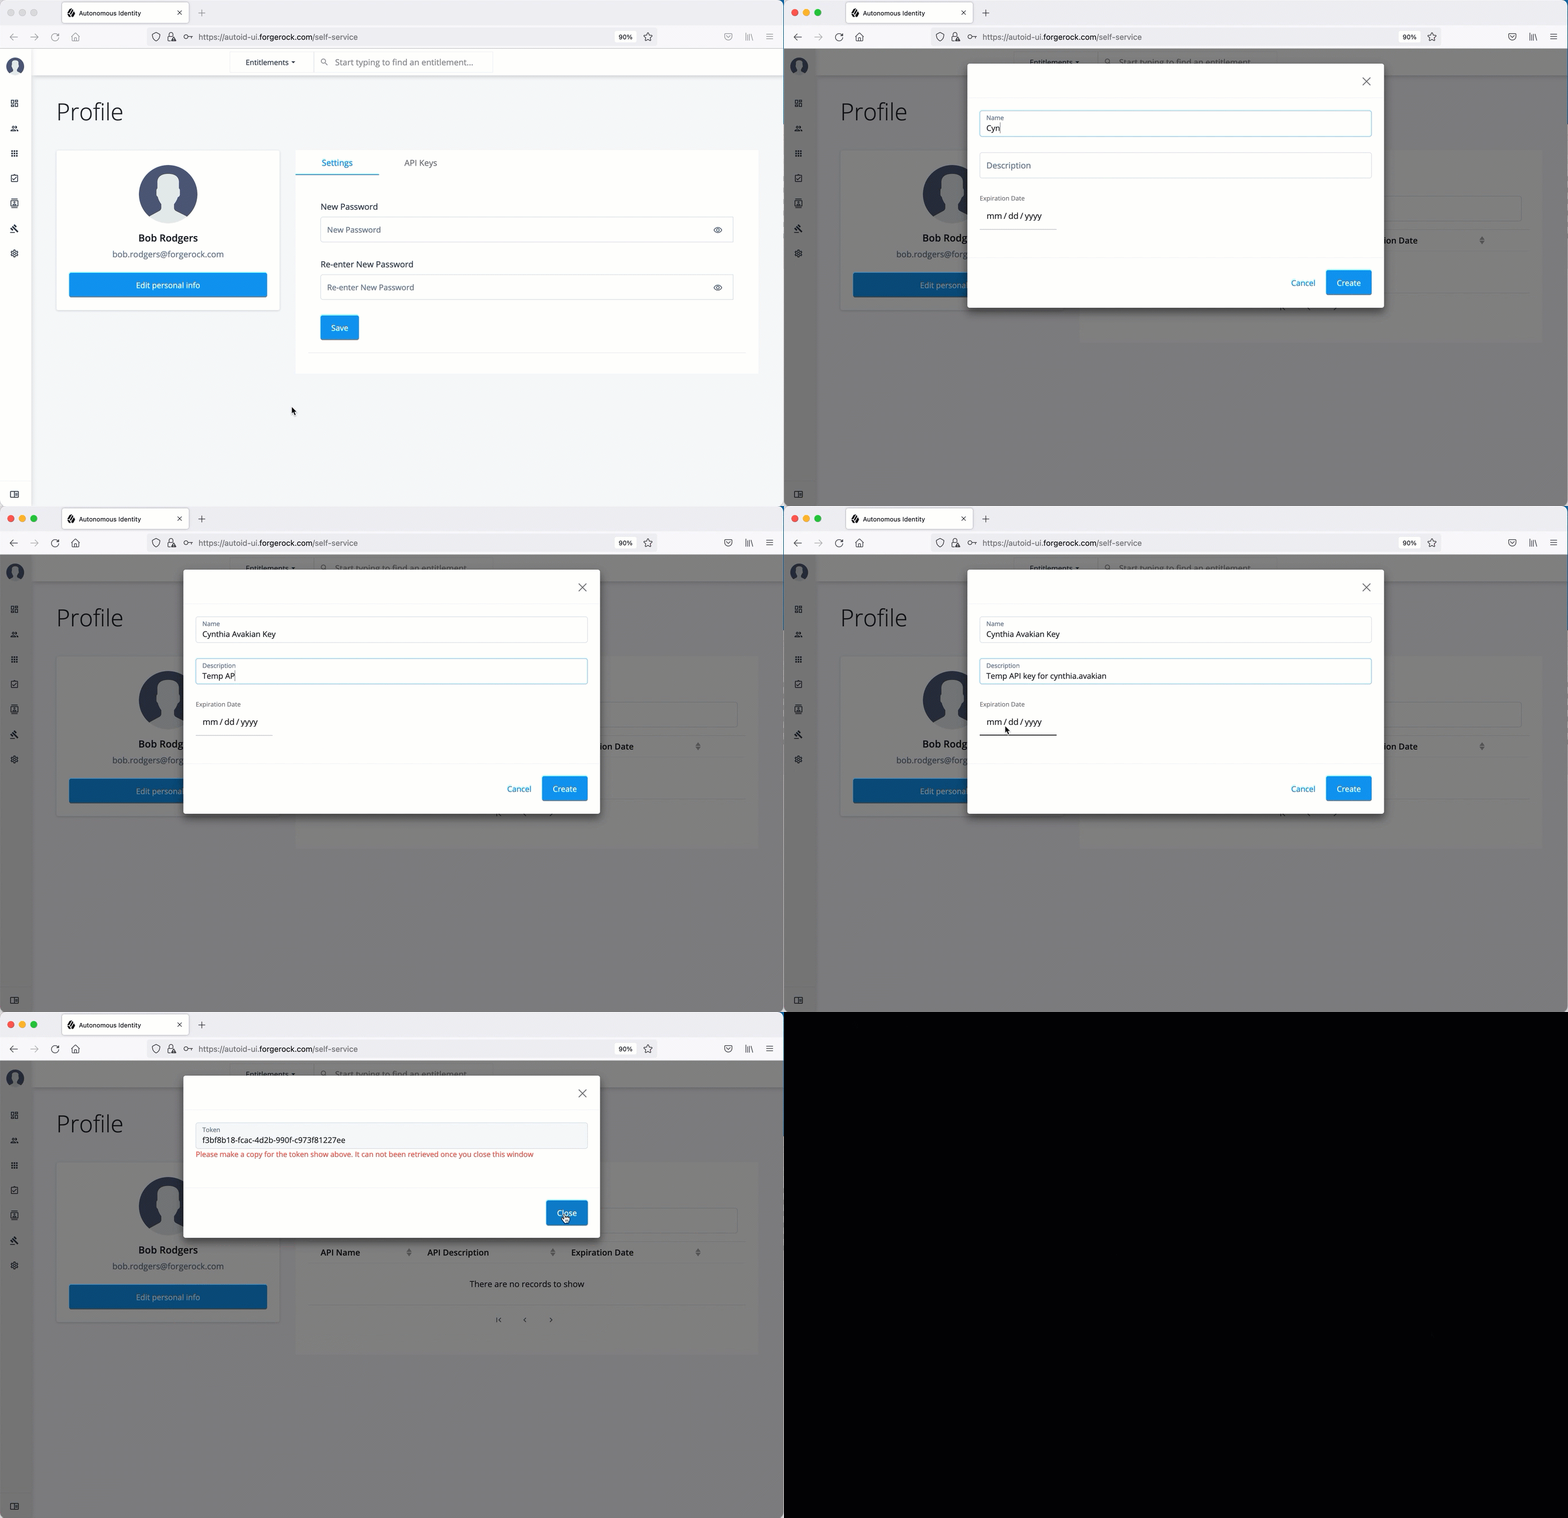
Click Generate API Key.
-
Set the name, description, and expiration date for API key, and then click Create.
-
Make sure to make a copy of the key in the box as it cannot be retrieved once the dialog box is closed. The new API key appears in the list of keys on the API Keys page.
See it in action

Deactivate API Keys
Administrators can revoke or delete API keys. Use the following procedure to revoke API key.
-
On the Autonomous Identity UI, click the admin drop-down on the top-left of the page.
-
Click Self Service.
-
Click the API Keys tab.
-
In the Search field, enter the API key.
-
In the list of API keys, click the three dots, and select Revoke. This action deletes the API key for use.
See it in action
