Microsoft SQL repository
|
These instructions are specific to Microsoft SQL Server 2017 Evaluation Edition, running on Windows Server 2019, and may require adjustments for other environments. |
Install Microsoft SQL Server and associated tools
-
Install Microsoft SQL Server:
-
On the Installation has completed successfully! page of the installer, click Customize to launch the SQL Server Setup application.
-
Select the server instance you just created, and continue through setup. On the Feature Selection step, select at least the following options:
-
SQL Server Replication
-
Full-Text and Semantic Extractions for Search
-
-
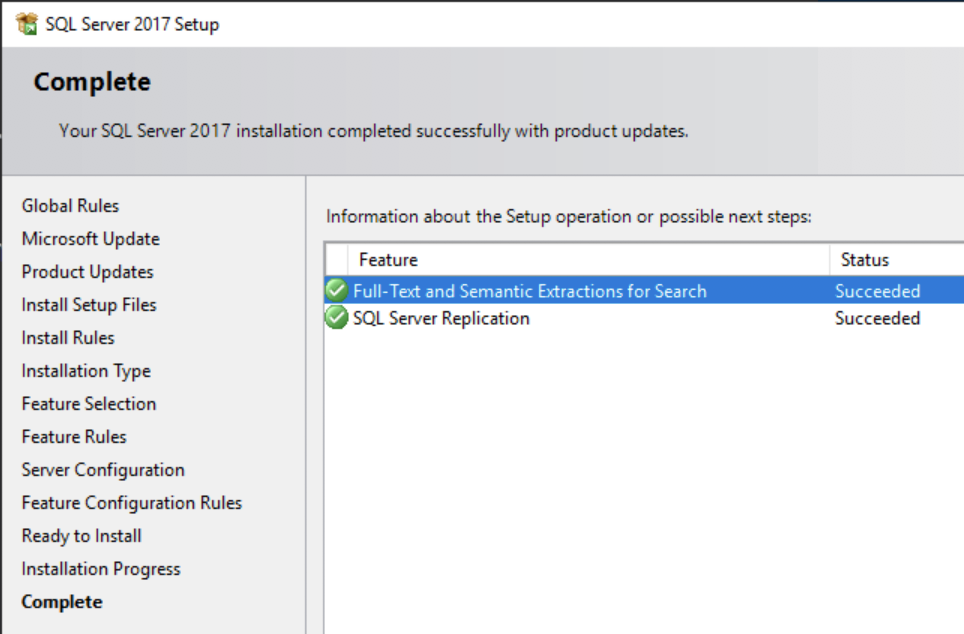
Continue through the setup and verify that the required options were successfully installed, as displayed on the Complete page.

-
-
Restart the server.
-
Launch SSMS, and connect to the SQL server instance.
-
From the Object Explorer , right-click the SQL server instance, and then click Properties .
-
On the Security page, in the Server authentication area, select SQL Server and Windows Authentication Mode, and then click OK.
-
From the Object Explorer, right-click the SQL server instance, and then click Restart.
-
Configure TCP/IP:
-
Launch SQL Server Configuration Manager .
-
From the left pane, expand the SQL Server Network Configuration node, and click Protocols for serverName.
-
Double-click TCP/IP.
-
In the TCP/IP Properties window, from the Protocol tab, click the Enable drop-down menu, and select Yes.
-
Click the IP Addresses tab, and make the following changes under IPAll, and then click OK:
-
In the TCP Dynamic Ports field, enter
0. -
In the TCP Port field, enter
1433.
-
-
From the left pane, click SQL Server Services, right-click SQL Server (serverName), and then click Restart.
-
Configure the firewall to allow IDM to access the SQL Server.
-
Configure IDM to Use the SQL Repository
-
Do not start IDM. -
Import the IDM data definition language script into Microsoft SQL:
-
Launch SSMS.
-
In the Connect to Server window, click Windows Authentication, and click Connect.
-
From the main menu, click File > Open > File, navigate to the data definition language script (
C:\path\to\openidm\db\mssql\scripts\openidm.sql), and click Open. -
Click Execute.
SSMS displays a message in the Messages tab:
Commands completed successfully.

Completion time: 2020-11-02709:26:39.1548666-08:00
Executing the
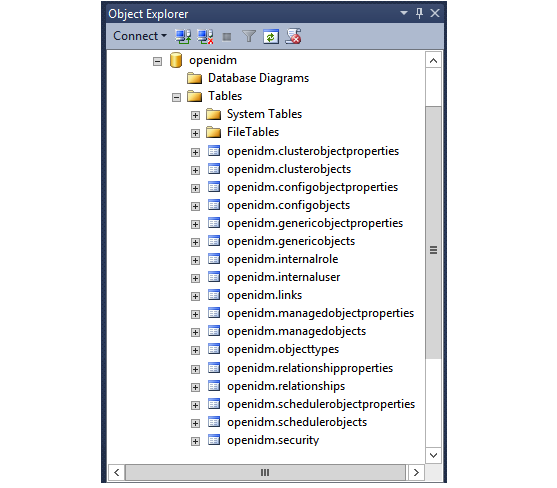
openidm.sqlscript creates anopenidmdatabase for use as the internal repository, and anopenidmuser with passwordopenidmwho has all the required privileges to update the database. You may need to refresh the view in SSMS to see theopenidmdatabase in the Object Explorer.If you expand Databases > openidm > Tables, you should see the IDM tables in the
openidmdatabase:
-
-
Execute the script that creates the tables required by the workflow engine. For example:
sqlcmd -S localhost -d openidm ^
-i C:\path\to\openidm\db\mssql\scripts\flowable.mssql.all.create.sql
(1 rows affected)
(1 rows affected)
(0 rows affected)
...
When you run the
flowable.mssql.all.create.sqlscript, you may see the following warning in the log:Warning! The maximum key length is 900 bytes. The index 'ACT_UNIQ_PROCDEF' has maximum length of 1024 bytes. For some combination of large values, the insert/update operation will fail.
It is very unlikely that the key length will be an issue in your deployment, and you can safely ignore this warning.
-
If you are going to direct audit logs to this repository, run the script that sets up the audit tables:
sqlcmd -S localhost -d openidm ^
-i C:\path\to\openidm\db\mssql\scripts\audit.sql
-
Download the Microsoft JDBC Drivers for SQL Server:
-
Download the JDBC Drivers from Microsoft’s download site. IDM requires at least version 7.2 of the driver, which supports OSGi by default.
-
Extract the driver JAR files.
-
Copy the JAR file that corresponds to your Java environment to the
C:\path\to\openidm\bundledirectory. For example:copy mssql-jdbc-7.4.1.jre11.jar C:\path\to\openidm\bundle
-
-
Download the JDBC OSGi Service Package JAR and place it in the
C:\path\to\openidm\bundledirectory.IDM was tested with version 1.0.0 of the service package. -
Remove the default DS repository configuration file (
repo.ds.json) from your project’sconf/directory. For example:cd C:\path\to\openidm\my-project\conf\ del repo.ds.json
-
Copy the database connection configuration file for Microsoft SQL (
datasource.jdbc-default.json) and the database table configuration file (repo.jdbc.json) to your project’s configuration directory. For example:cd C:\path\to\openidm copy db\mssql\conf\datasource.jdbc-default.json my-project\conf\ copy db\mssql\conf\repo.jdbc.json my-project\conf\
-
Update the connection configuration to reflect your Microsoft SQL deployment. The default connection configuration in the
datasource.jdbc-default.jsonfile is as follows:{ "driverClass" : "com.microsoft.sqlserver.jdbc.SQLServerDriver", "jdbcUrl" : "jdbc:sqlserver://&{openidm.repo.host}:&{openidm.repo.port};instanceName=default;databaseName=openidm;applicationName=OpenIDM", "databaseName" : "openidm", "username" : "openidm", "password" : "openidm", "connectionTimeout" : 30000, "connectionPool" : { "type" : "hikari", "minimumIdle" : 20, "maximumPoolSize" : 50 } }Specify the values for
openidm.repo.hostandopenidm.repo.portin one of the following ways:Set in an IDM Properties File
Set the values in
resolver/boot.propertiesor your project’sconf/system.propertiesfile. For example:openidm.repo.host=localhost openidm.repo.port=1433Set as an Environment Variable
Set the properties in the
OPENIDM_OPTSenvironment variable before startup. You must include the JVM memory options when you set this variable. For example:set:OPENIDM_OPTS="-Xmx1024m -Xms1024m -Dopenidm.repo.host=localhost -Dopenidm.repo.port=1433"