Manage Relationships Through the Admin UI
This section describes how to set up relationships between managed objects by using the Admin UI. You can set up a relationship between any object types. The examples in this section demonstrate how to set up a relationship between users and devices, such as IoT devices.
For illustration purposes, these examples assume that you have started IDM and already have some managed users. If this is not the case, start the server with the sample configuration described in Synchronize Data From a CSV File to IDM, and run a reconciliation to populate the managed user repository.
In the following procedures, you will:
Create a new managed object type named
Deviceand add a few devices, each with unique serial numbers (see "Create a New Device Object Type").Set up a bidirectional relationship between the Device object and the managed User object (see "Configure the Relationship Between a Device and a User").
Demonstrate the relationships, assign devices to users, and show relationship validation (see "Demonstrate the Relationship").
This procedure illustrates how to set up a new Device managed object type, adding properties to collect information such as model, manufacturer, and serial number for each device. In the next procedure, you will set up the relationship.
Click Configure > Managed Objects > New Managed Object.
Give the object an appropriate name and Readable Title. For this procedure, specify
Devicefor both these fields.Enter a description for the object, select an icon that represents the object, and click Save.
You should now see three tabs: Properties, Details, and Scripts. Select the Properties tab.
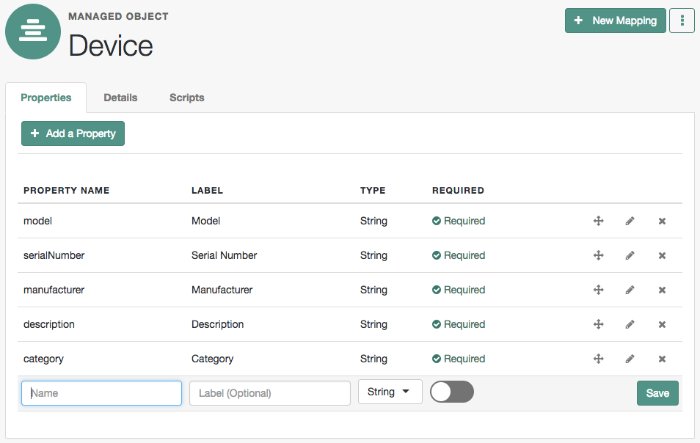
Click Add a Property to set up the schema for the device.
For each property, enter a Name, and Label, select the data Type for the property, and specify whether that property is required for an object of this type.
For the purposes of this example, include the properties shown in the following image: model, serialNumber, manufacturer, description, and category.
When you save the properties for the new managed object type, IDM saves those entries in your project's
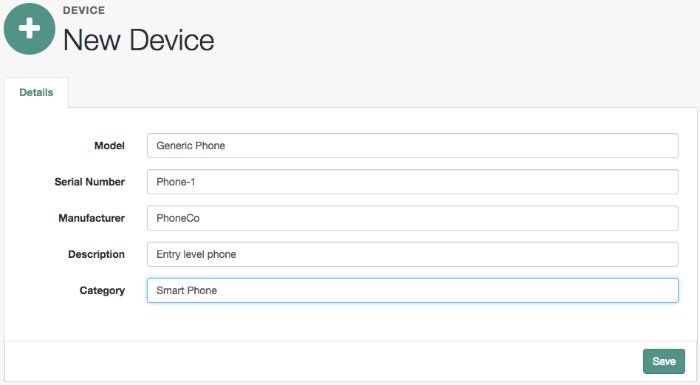
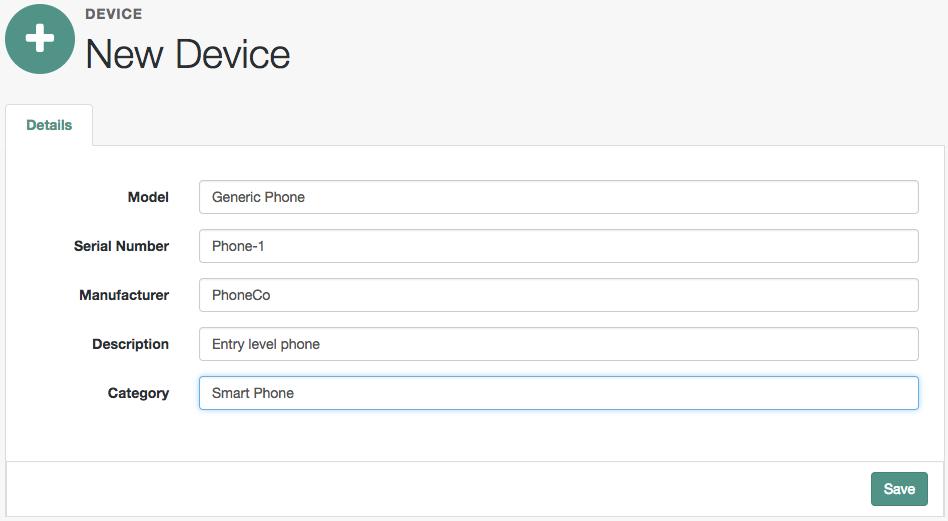
conf/managed.jsonfile.Now select Manage > Device > New Device and add a device as shown in the following image:
Continue adding new devices to the Device object.
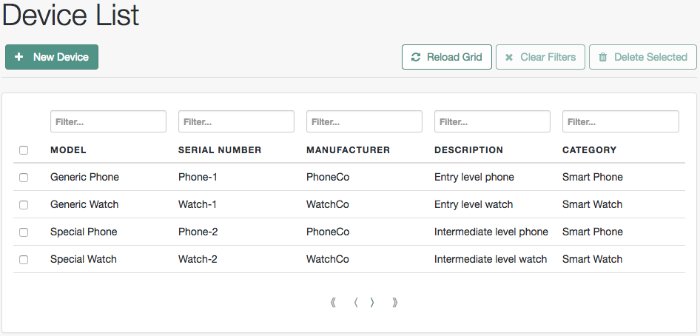
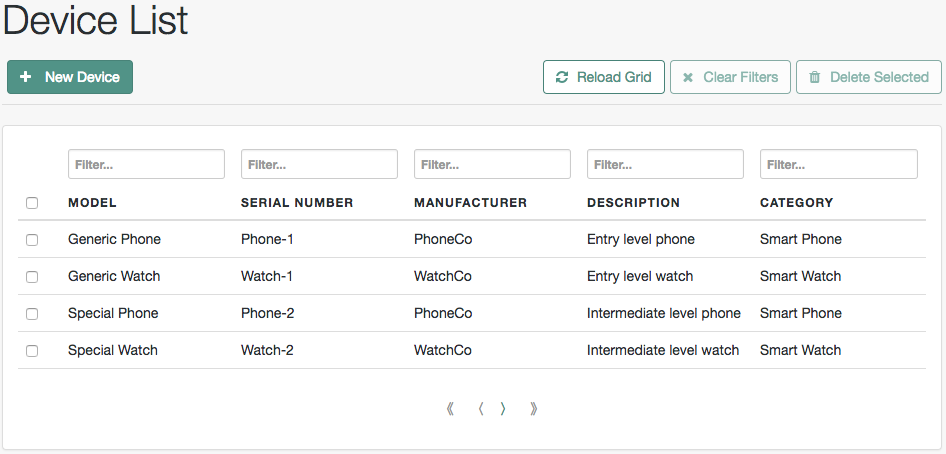
When you have finished, select Manage > Device to view the complete list of Devices.
The remaining procedures in this section assume that you have added devices similar to the following:
(Optional) To change the order in which properties of the Device managed object are displayed, select Configure > Managed Objects > Device. Select the property that you want to move and drag it up or down the list.
Alternatively, you can make the same changes to this schema (or any managed object schema) in your project's
conf/managed.jsonfile.
To set up a relationship between the Device object type and the User object type, you must identify the specific property on each object that will form the basis of the relationship. For example, a device must have an owner and a user can own one or more devices. The property type for each of these must be relationship.
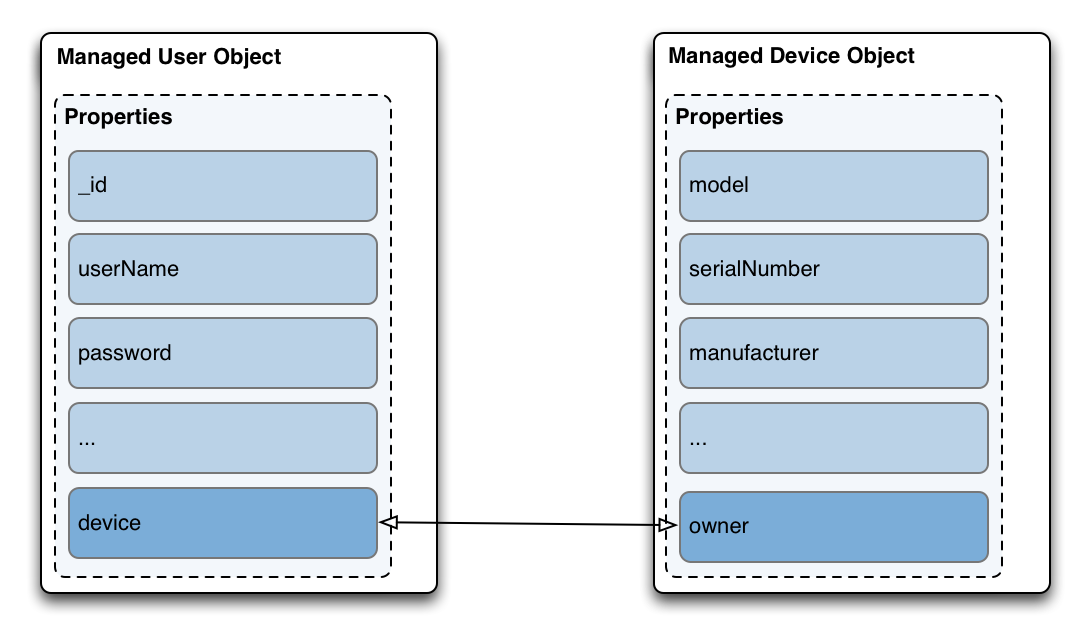
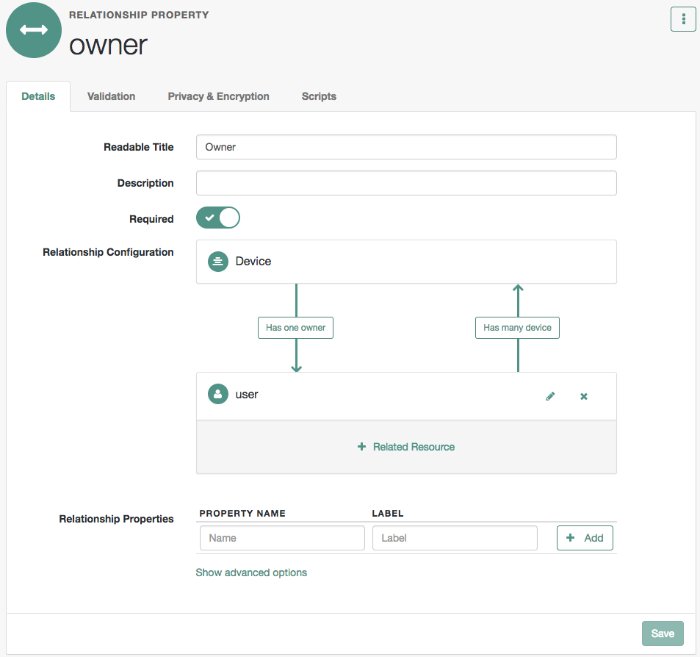
In this procedure, you will update the managed Device object type to add a new Relationship type property named owner. You will then link that property to a new property on the managed User object, named device. At the end of the procedure, the updated object types will look as follows:
Create a new relationship property on the Device object:
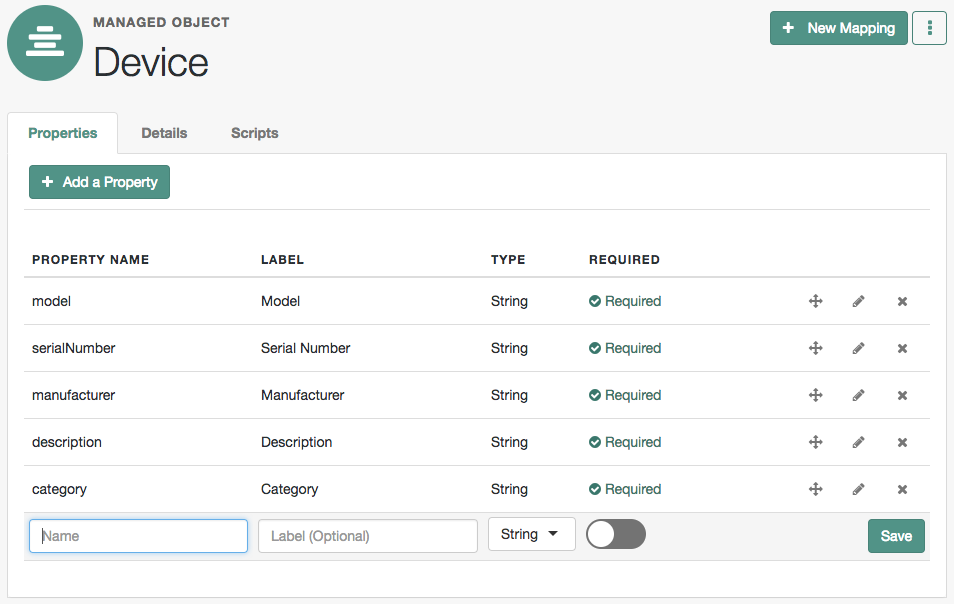
Select Configure > Managed Objects and select the Device object that you created previously.
On the Properties tab, add a new property named
owner. Select Relationship as the property Type. Select Required, as all device objects must have an owner:
Note
You cannot change the Type of a property after it has been created. If you create the property with an incorrect Type, you must delete the property and recreate it.
When you have saved the Owner property, select it to show the relationship on the Details tab:
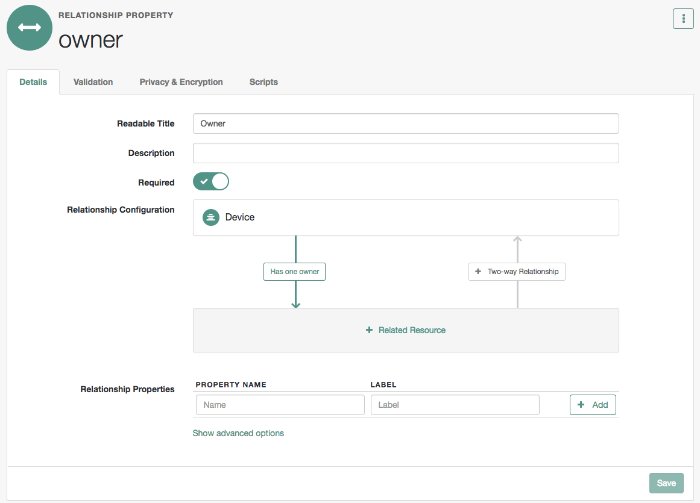
Click the + Related Resource item and select
useras the Resource.This sets up a relationship between the new Device object and the managed User object.
Under Display Properties, select all of the properties of the user object that should be visible when you display a user's devices in the UI. For example, you might want to see the user's name, email address and telephone number.
Note that this list of Display Properties also specifies how you can search for user objects when you are assigning a device to a user.
Click Show advanced options. Notice that the Query Filter field is set to
true. This setting allows you to search on any of the Display Properties that you have selected, when you are assigning a device to a user.Click Save to continue.
You now have a one-way relationship between a device and a user.
Click the + Two-way Relationship item to configure the reverse relationship:
Select Has Many to indicate that a single user can have more than one device.
In the Reverse property name field, enter the new property name that will be created in the managed User object type. As shown in "Relationship Properties on User and Device Objects", that property is
devicein this example.Under Display Properties, select all of the properties of the device object that should be visible when you display a user in the UI. For example, you might want to see the model and serial number of each device.
Click Show advanced options. Notice that the Query Filter field is set to
true. This setting allows you to search on any of the Display Properties that you have selected, when you are assigning a device to a user.Select Validate relationship.
This setting ensures that the relationship is valid when a device is assigned to a user. IDM verifies that both the user and device objects exist, and that that specific device has not already been assigned to user.
Click Save to continue.
You should now have the following reverse relationship configured between User objects and Device objects:
Select Configure > Managed Objects > User.
Scroll down to the end of the Properties tab and notice that the
deviceproperty was created automatically when you configured the relationship.


This procedure demonstrates how devices can be assigned to users, based on the relationship configuration that you set up in the previous two procedures.
Select Manage > User, click on a user entry and select the new Device tab.
Click Add Device and click in the Device field to display the list of devices that you added in the previous procedure.
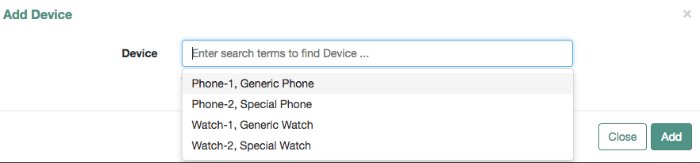
Select two devices and click Add.
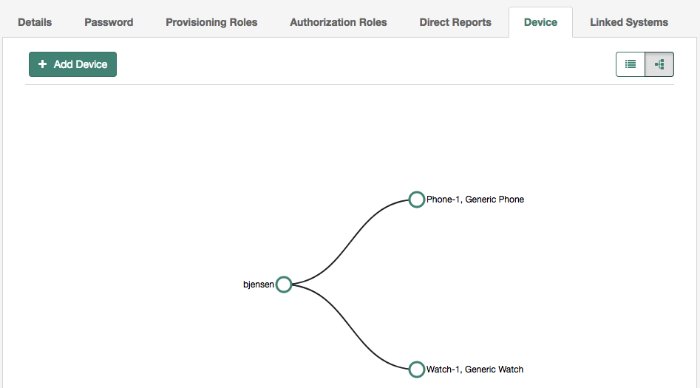
On the Device tab, click the Show Chart icon at the top right.
A graphical representation of the relationship between the user and her devices is displayed:
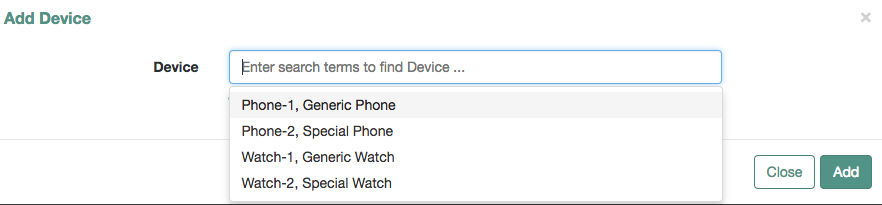
You can also assign an owner to a device.
Select Manage > Device, and select one of the devices that you did not assign in the previous step.
Click Add Owner and search for the user to whom the device should be assigned.
To demonstrate the relationship validation, try to assign a device that has already been assigned to a different user.
The UI displays the error:
Conflict with Existing Relationship.

The Managed Objects Relationship Diagram provides a visual display of the relationship configuration between managed objects. Unlike the Identity Relationships widget, described in "View Relationships in Graph Form", this widget does not show the actual relationship data, but rather shows the configured relationship types.
This widget is not displayed on any dashboard by default. You can add it as follows:
Log in to the Admin UI.
Select Dashboards, and choose the dashboard to which you want to add the widget.
For more information about managing dashboards in the UI, see "Manage Dashboards".
Select Add Widget.
In the Add Widget window, scroll down to the Utilities item and select Managed Objects Relationship Diagram.
There are no configurable settings for this widget.
The Preview button shows the current relationship configuration. The following image shows the relationship configuration for a basic IDM installation with no specific configuration:

The legend indicates which relationships are required, which are optional, and which are one to one or one to many. In the default relationship configuration shown in the previous image, you can see that a user can have one or more roles and a role can have one or more users. A manager can have one or more reports but a user can have only one manager. There are no mandatory relationships in this default configuration.
