Social Authentication
AM supports delegated authentication through third-party identity providers, such as Facebook, Google, and VKontakte. The following table summarizes the social authentication providers and standards that AM 7 supports:
| Provider/Standard | Authentication Node? | Authentication Module? |
|---|---|---|
| OpenID Connect 1.0 | Yes | Yes |
| OAuth 2.0 | Yes | Yes |
| Yes | Yes [a] | |
| Yes | Yes [a] | |
| No | Yes | |
| Microsoft | Yes [b] | Yes [c] |
| VKontakte | No | Yes |
| No | Yes | |
| WeChat Mobile | No | Yes |
[a] Configure a Social Auth OpenID authentication module. [b] Configure an OAuth 2.0 authentication node. [c] Configure a Social Auth OAuth2 authentication module. | ||
Configuring social authentication is a tree-step process:
Obtain a client ID and client secret from the social provider, as well as their implementation details.
Some modules and nodes are pre-configured for specific providers because of their implementation of OAuth 2.0/OpenId Connect, while you need the details for other providers, as shown in the preceding table.
To obtain a Client ID and Client Secret, register an application with the third party provider. For example:
Note
You must enable the Google+ API in order to authenticate with Google. To enable the Google+ API, login to the Google Developers Console, select your project, navigate to APIs and auth > APIs, and then set the status of the
Google+ APItoON.- VKontakte
If you need to use the generic OAuth 2.0 or OpenID Connect modules, you need at least, the following details from your provider:
Does it need an OAuth 2.0 or an OpenID Connect client?
What is the URL of their authentication endpoint?
What is the URL of their access token endpoint?
What is the URL of their user profile service?
Which scopes you need to request from them?
Configure a chain or tree that contains the module or node relevant for your social provider. See the preceding table for links to more information about each of them.
For general information about configuring modules and chains, and nodes and trees, see "Authentication Modules and Chains" and "Authentication Nodes and Trees".
Optionally, you can also integrate social authentication modules with IDM. See "To Integrate Social Authentication with Identity Management".
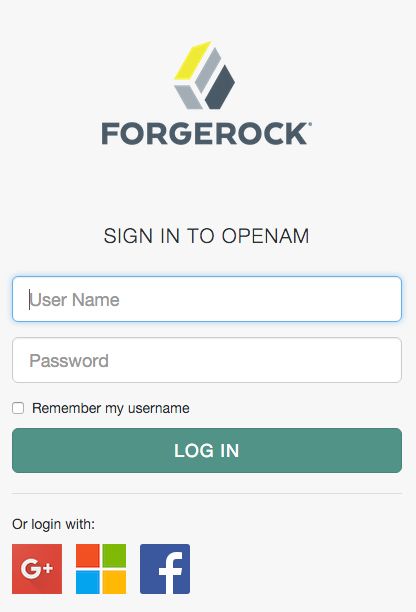
Configure the Social Authentication Implementation service to add social provider logos to the login page, if required. For example:
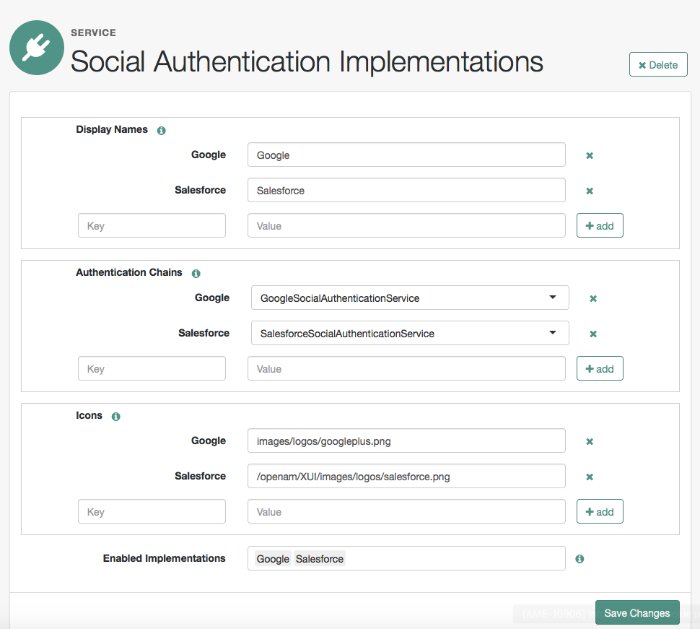
See "Configuring the Social Authentication Implementations Service".
Tip
To let AM contact Internet services through a proxy, see Configuring AM for Outbound Communication.
You can control the behavior of the connection factory that AM uses as a client of the social identity providers:
The following advanced server properties control different aspects of the connection factory:
org.forgerock.openam.httpclienthandler.system.clients.connection.timeoutorg.forgerock.openam.httpclienthandler.system.clients.max.connectionsorg.forgerock.openam.httpclienthandler.system.clients.pool.ttlorg.forgerock.openam.httpclienthandler.system.clients.response.timeoutorg.forgerock.openam.httpclienthandler.system.clients.retry.failed.requests.enabledorg.forgerock.openam.httpclienthandler.system.clients.reuse.connections.enabled
They have sensible defaults configured, but if you need to change them, see Advanced Properties.
Configuring the Social Authentication Implementations Service
You can add logos to the login page to allow users to authenticate using configured social authentication providers.
Perform the following steps to add a logo for the authentication provider to the AM login screen:
Go to Realms > Realm Name > Services, and perform one of the following actions:
If the
Social Authentication Implementations Serviceexists, click on it.
If the
Social Authentication Implementations Servicedoes not exist, add it as a service.
The social authentication implementations page appears.
In the Display Names section, enter a Map Key, enter the text to display as ALT text on the logo in the Corresponding Map Value field, and then click Add.
For example, add
Facebookas the key, andAuthenticate with Facebookas the text.Note
AM uses the value in the Map Key fields throughout the configuration to tie the various implementation settings to each other. The value is case-sensitive.
In the Authentication Chains section, re-enter the Map Key used in the previous step, and click Add.
Now, select the relevant authentication tree or chain from the drop-down list.
In the Icons section, re-enter the Map Key used in the previous steps, enter the path to a logo image to be used on the login screen in the Corresponding Map Value list, and then click Add.
In the Enabled Implementations field, re-enter the Map Key used in the previous steps.
Tip
Removing a Map Key from the Enabled Implementations list removes the associated logo from the login screen. There is no need to delete the Display Name, Authentication Chain or Icon configuration to remove the logo from the login screen.
Review your configuration, and save your changes.
An icon now appears on the AM login screen, allowing users to authenticate with the third party authentication provider.


After configuring the relevant node or module, perform the following additional steps to configure AM to work with an IDM deployment:
(Optional) (Google only) Navigate to the configuration of the node or module:
Go to Realms > Realm Name > Authentication > Modules, and click on the name of the module. For example,
GoogleSocialAuthentication.Go to Realms > Realm Name > Authentication > Trees, and click on the name of the tree that has the social node. For example,
GoogleSocialTree.Modify the configuration of the node or module as follows:
Add
sub=iplanet-am-user-alias-listto the Account Mapper Configuration property.The
iplanet-am-user-alias-listproperty defines one or more aliases for mapping a user's multiple profiles.Add
org.forgerock.openam.authentication.modules.common.mapping.JsonAttributeMapper|iplanet-am-user-alias-list|google-to the Attribute Mapper property.Add
org.forgerock.openam.authentication.modules.oidc.JwtAttributeMapper|iplanet-am-user-alias-list|google-to the Attribute Mapper property.(Optional) (Google only) Navigate to the configuration of the node or module:
Go to Realms > Realm Name > Authentication > Modules, and click on the name of the module. For example,
GoogleSocialAuthentication.Go to Realms > Realm Name > Authentication > Trees, and click on the name of the tree that has the social node. For example,
GoogleSocialTree.(Optional) (Facebook only) Navigate to the configuration of the node or module:
Realms > Realm Name > Authentication > Modules, and click on the name of the module For example, FacebookSocialAuthentication.
Go to Realms > Realm Name > Authentication > Trees, and click on the name of the tree that has the social node. For example,
FacebookSocialTree.Modify the configuration of the node or module as follows:
Add
id=iplanet-am-user-alias-listto the Account Mapper Configuration property.The
iplanet-am-user-alias-listproperty defines one or more aliases for mapping a user's multiple profiles.Add
org.forgerock.openam.authentication.modules.common.mapping.JsonAttributeMapper|iplanet-am-user-alias-list|facebook-to the Attribute Mapper property.Enable the Create account if it does not exist property.
Save your changes.