ForgeOps documentation
ForgeOps provides a number of resources to help you get started in the cloud. These resources demonstrate how to deploy the Ping Identity Platform on Kubernetes.
The Ping Identity Platform serves as the basis for our simple and comprehensive identity and access management solution. We help our customers deepen their relationships with their customers, and improve the productivity and connectivity of their employees and partners. Learn more about ForgeOps and the Ping Identity Platform in https://www.pingidentity.com/en/platform.html.
Start here
Ping Identity provides several resources to help you get started in the cloud. These resources demonstrate how to deploy the Ping Identity Platform on Kubernetes. Before you proceed, review the following precautions:
-
Deploying Ping Identity Platform software in a containerized environment requires advanced proficiency in many technologies. Learn more about required skills in Assess Your Skill Level.
-
If you don’t have experience with complex Kubernetes deployments, then either engage a certified Ping Identity Platform consulting partner or deploy the platform on traditional architecture.
-
Don’t deploy Ping Identity Platform software in Kubernetes in production until you have successfully deployed and tested the software in a non-production Kubernetes environment.
Learn more about getting support for Ping Identity Platform software at Support for ForgeOps.
|
Ping Identity only offers its software or services to legal entities that have entered into a binding license agreement with Ping Identity. When you install Docker images provided by ForgeOps, you agree either that: 1) you are an authorized user of a Ping Identity Platform customer that has entered into a license agreement with Ping Identity governing your use of the Ping Identity software; or 2) your use of the Ping Identity Platform software is subject to the Ping Identity Subscription Agreements. |
Introducing ForgeOps deployments
The forgeops repository and ForgeOps documentation address a range of typical business needs of our customers. The repository contains artifacts that let you get a sample Ping Identity Platform deployment up and running quickly. After you get the out-of-the-box deployment running, you can tailor it to explore how you might configure your Kubernetes cluster before you deploy the platform in production.
ForgeOps deployments have the following characteristics:
The ForgeOps documentation helps you work with ForgeOps deployments:
-
Tells you how you can quickly create a Kubernetes cluster on Google Cloud, Amazon Web Services (AWS), or Microsoft Azure, deploy the Ping Identity Platform, and and access components in the deployment.
-
Contains how-tos for preparing for production deployments by customizing monitoring, setting alerts, backing up and restoring directory data, modifying the default security configuration, and running lightweight benchmarks to test DS, AM, and IDM performance.
-
Tells you how to modify the AM and IDM configurations in ForgeOps deployments and create customized Docker images for the Ping Identity Platform.
-
Keeps you up-to-date with the latest changes to the
forgeopsrepository.
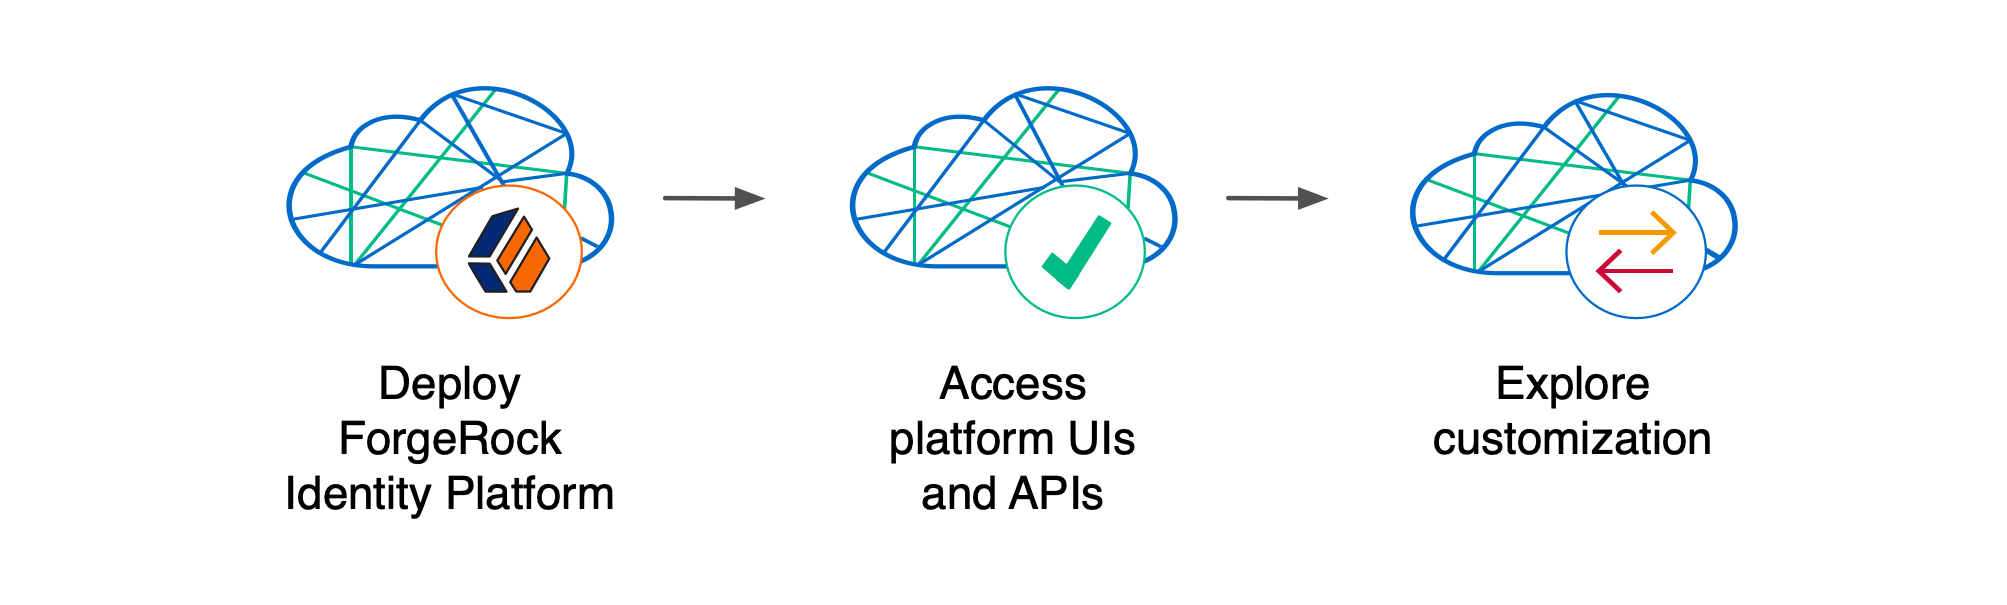
Try an out-of-the-box ForgeOps deployment
Before you start planning a production deployment, perform a ForgeOps deployment without any customizations. If you’re new to Kubernetes, or new to the Ping Identity Platform, it’s a great way to learn, and you’ll have a sandbox suitable for exploring the Ping Identity Platform in a cloud environment.
Perform a ForgeOps deployment on Google Cloud, AWS, or Microsoft Azure to quickly spin up the platform for demonstration purposes. You’ll get a feel for what it’s like to deploy the platform on a Kubernetes cluster in the cloud. When you’re done, you’ll have a robust starter deployment that you can use to test deployment customizations that you’ll need for your production environment. Examples of deployment customizations include, but are not limited to:
-
Running lightweight benchmark tests
-
Making backups of data and restoring the data
-
Securing TLS with a certificate that’s dynamically obtained from Let’s Encrypt
-
Using an ingress controller other than the NGINX ingress controller
-
Resizing the cluster to meet your business requirements
-
Configuring Alert Manager to issue alerts when usage thresholds have been reached
Prerequisite technologies and skills:
More information:
Build your own service
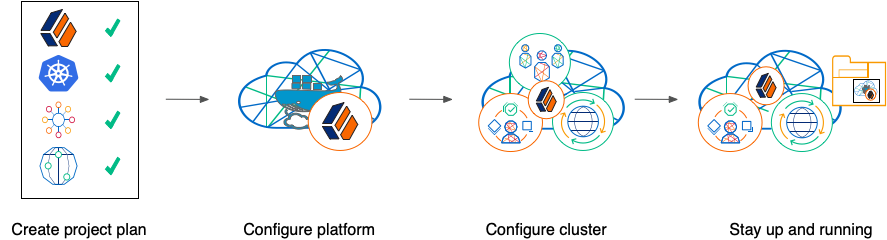
Perform the following activities to customize, deploy, and maintain a production Ping Identity Platform implementation in the cloud:
Create a project plan
After you’ve spent some time exploring a ForgeOps deployment, you’re ready to define requirements for your production deployment. Remember, an out-of-the-box ForgeOps deployment is not a production deployment. Use out-of-the-box ForgeOps deployments to explore deployment customizations. Then, incorporate the lessons you’ve learned as you build your own production service.
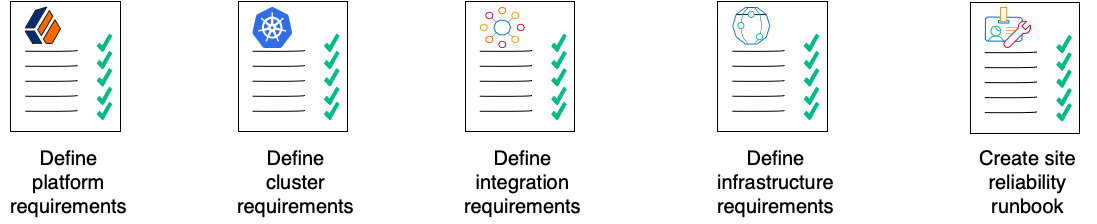
Analyze your business requirements and define how the Ping Identity Platform needs to be configured to meet your needs. Identify systems to be integrated with the platform, such as identity databases and applications, and plan to perform those integrations. Assess and specify your deployment infrastructure requirements, such as backup, system monitoring, Git repository management, CI/CD, quality assurance, security, and load testing.
Be sure to do the following when you transition to a production environment:
-
Obtain and use certificates from an established certificate authority.
-
Create and test your backup plan.
-
Use a working production-ready FQDN.
-
Implement monitoring and alerting utilities.
Prerequisite technologies and skills:
More information:
Configure the platform

With your project plan defined, you’re ready to configure the Ping Identity Platform to meet the plan’s requirements. Install single-instance ForgeOps deployments on your developers' computers. Configure AM and IDM. If needed, include integrations with external applications in the configuration. Iteratively unit test your configuration as you modify it. Build customized Docker images that contain the configuration.
Prerequisite technologies and skills:
More information:
Configure your cluster
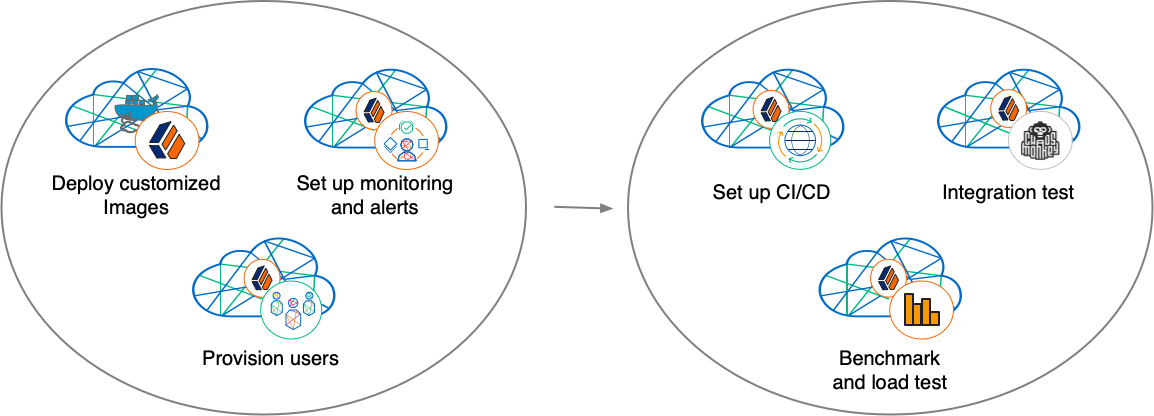
With your project plan defined, you’re ready to configure a Kubernetes cluster that meets the requirements defined in the plan. Install the platform using the customized Docker images developed in Configure the platform. Provision the identity repository with users, groups, and other identity data. Load test your deployment, and then size your cluster to meet service level agreements. Perform integration tests. Harden your deployment. Set up CI/CD for your deployment. Create monitoring alerts so that your site reliability engineers are notified when the system reaches thresholds that affect your SLAs. Implement database backup and test database restore. Simulate failures while under load to make sure your deployment can handle them.
Prerequisite technologies and skills:
More information:
Stay up and running

By now, you’ve configured the platform, configured a Kubernetes cluster, and deployed the platform with your customized configuration. Run your Ping Identity Platform deployment in your cluster, continually monitoring it for performance and reliability. Take backups as needed.
Prerequisite technologies and skills:
More information:
Assess your skill level
Benchmarking and load testing
I can:
-
Write performance tests, using tools such as Gatling and Apache JMeter, to ensure that the system meets required performance thresholds and service level agreements (SLAs).
-
Resize a Kubernetes cluster, taking into account performance test results, thresholds, and SLAs.
-
Run Linux performance monitoring utilities, such as top.
CI/CD for cloud deployments
I have experience:
-
Designing and implementing a CI/CD process for a cloud-based deployment running in production.
-
Using a cloud CI/CD tool, such as Tekton, Google Cloud Build, Codefresh, AWS CloudFormation, or Jenkins, to implement a CI/CD process for a cloud-based deployment running in production.
-
Integrating GitOps into a CI/CD process.
Docker
I know how to:
-
Write Dockerfiles.
-
Create Docker images, and push them to a private Docker registry.
-
Pull and run images from a private Docker registry.
I understand:
-
The concepts of Docker layers, and building images based on other Docker images using the FROM instruction.
-
The difference between the COPY and ADD instructions in a Dockerfile.
Git
I know how to:
-
Use a Git repository collaboration framework, such as GitHub, GitLab, or Bitbucket Server.
-
Perform common Git operations, such as cloning and forking repositories, branching, committing changes, submitting pull requests, merging, viewing logs, and so forth.
External application and database integration
I have expertise in:
-
AM policy agents.
-
Configuring AM policies.
-
Synchronizing and reconciling identity data using IDM.
-
Managing cloud databases.
-
Connecting Ping Identity Platform components to cloud databases.
Ping Identity Platform
I have:
-
Attended Ping Identity University training courses.
-
Deployed the Ping Identity Platform in production, and kept the deployment highly available.
-
Configured DS replication.
-
Passed the Certified Access and Identity Management exams from Ping Identity (highly recommended).
Google Cloud, AWS, or Azure (basic)
I can:
-
Use the graphical user interface for Google Cloud, AWS, or Azure to navigate, browse, create, and remove Kubernetes clusters.
-
Use the cloud provider’s tools to monitor a Kubernetes cluster.
-
Use the command user interface for Google Cloud, AWS, or Azure.
-
Administer cloud storage.
Google Cloud, AWS, or Azure (expert)
In addition to the basic skills for Google Cloud, AWS, or Azure, I can
-
Review Terraform artifacts in the
forgeops-extrasrepository to see how clusters that support ForgeOps deployments are configured. -
Create and manage a Kubernetes cluster using an infrastructure-as-code tool such as Terraform, AWS CloudFormation, or Pulumi.
-
Configure multi-zone and multi-region Kubernetes clusters.
-
Configure cloud-provider identity and access management (IAM).
-
Configure virtual private clouds (VPCs) and VPC networking.
-
Manage keys in the cloud using a service such as Google Key Management Service (KMS), Amazon KMS, or Azure Key Vault.
-
Configure and manage DNS domains on Google Cloud, AWS, or Azure.
-
Troubleshoot a deployment running in the cloud using the cloud provider’s tools, such as Google Stackdriver, Amazon CloudWatch, or Azure Monitor.
-
Integrate a deployment with certificate management tools, such as cert-manager and Let’s Encrypt.
-
Integrate a deployment with monitoring and alerting tools, such as Prometheus and Alertmanager.
I have obtained one of the following certifications (highly recommended):
-
Google Certified Associate Cloud Engineer Certification.
-
AWS professional-level or associate-level certifications (multiple).
-
Azure Administrator.
Integration testing
I can:
-
Automate QA testing using a test automation framework.
-
Design a chaos engineering test for a cloud-based deployment running in production.
-
Use chaos engineering testing tools, such as Chaos Monkey.
Kubernetes (basic)
I’ve gone through the tutorials at kubernetes.io, and am able to:
-
Use the kubectl command to determine the status of all the pods in a namespace, and to determine whether pods are operational.
-
Use the kubectl describe pod command to perform basic troubleshooting on pods that are not operational.
-
Use the kubectl command to obtain information about namespaces, secrets, deployments, and stateful sets.
-
Use the kubectl command to manage persistent volumes and persistent volume claims.
Kubernetes (expert)
In addition to the basic skills for Kubernetes, I have:
-
Configured role-based access to cloud resources.
-
Configured Kubernetes objects, such as deployments and stateful sets.
-
Configured Kubernetes ingresses.
-
Configured Kubernetes resources using Kustomize.
-
Passed the Cloud Native Certified Kubernetes Administrator exam (highly recommended).
Kubernetes backup and restore
I know how to:
-
Schedule backups of Kubernetes persistent volumes on volume snapshots.
-
Restore Kubernetes persistent volumes from volume snapshots.
I have experience with one or more of the following:
-
Volume snapshots on Google Kubernetes Engine (GKE), Amazon Elastic Kubernetes Service (EKS), or Azure Kubernetes Service (AKS)
-
A third-party Kubernetes backup and restore product, such as Velero, Kasten K10, TrilioVault, Commvault, or Portworx PX-Backup.
Project planning and management for cloud deployments
I have planned and managed:
-
A production deployment in the cloud.
-
A production deployment of Ping Identity Platform.
Security and hardening for cloud deployments
I can:
-
Harden a Ping Identity Platform deployment.
-
Configure TLS, including mutual TLS, for a multi-tiered cloud deployment.
-
Configure cloud identity and access management and role-based access control for a production deployment.
-
Configure encryption for a cloud deployment.
-
Configure Kubernetes network security policies.
-
Configure private Kubernetes networks, deploying bastion servers as needed.
-
Undertake threat modeling exercises.
-
Scan Docker images to ensure container security.
-
Configure and use private Docker container registries.
Site reliability engineering for cloud deployments
I can:
-
Manage multi-zone and multi-region deployments.
-
Implement DS backup and restore in order to recover from a database failure.
-
Manage cloud disk availability issues.
-
Analyze monitoring output and alerts, and respond should a failure occur.
-
Obtain logs from all the software components in my deployment.
-
Follow the cloud provider’s recommendations for patching and upgrading software in my deployment.
-
Implement an upgrade scheme, such as blue/green or rolling upgrades, in my deployment.
-
Create a Site Reliability Runbook for the deployment, documenting all the procedures to be followed and other relevant information.
-
Follow all the procedures in the project’s Site Reliability Runbook, and revise the runbook if it becomes out-of-date.
Support for ForgeOps
This appendix contains information about support options for ForgeOps deployments and the Ping Identity Platform.
ForgeOps support
Ping Identity ForgeOps team has developed artifacts in the forgeops and forgeops-extras Git repositories for deploying the Ping Identity Platform in the cloud. The companion ForgeOps documentation provides examples to help you get started.
These artifacts and documentation are provided on an "as is" basis. Ping Identity does not guarantee the individual success developers may have in implementing the code on their development platforms or in production configurations.
Licensing
Ping Identity only offers its software or services to legal entities that have entered into a binding license agreement with Ping Identity. When you install Docker images provided by ForgeOps, you agree either that: 1) you are an authorized user of a Ping Identity Platform customer that has entered into a license agreement with Ping Identity governing your use of the Ping Identity software; or 2) your use of the Ping Identity Platform software is subject to the Ping Identity Subscription Agreements.
Support
Ping Identity provides support for the following resources:
-
Artifacts in the forgeops Git repository:
-
Files used to build Docker images for the Ping Identity Platform:
-
Dockerfiles
-
Scripts and configuration files incorporated into the Docker images provided by ForgeOps
-
Canonical configuration profiles for the platform
-
-
Helm charts
-
Kustomize bases and overlays
-
For more information about support for specific directories and files in the
forgeops repository, refer to the
forgeops repository reference.
Ping Identity provides support for the Ping Identity Platform. For supported components, containers, and Java versions, refer to the following:
Support limitations
Ping Identity provides no support for the following:
-
Artifacts in the forgeops-extras repository. For more information about support for specific directories and files in the
forgeops-extrasrepository, refer to theforgeops-extrasrepository reference. -
Artifacts other than Dockerfiles, Helm charts, Kustomize bases, and Kustomize overlays in the forgeops Git repository. Examples include scripts, example configurations, and so forth.
-
Infrastructure outside Ping Identity. Examples include Docker, Kubernetes, Google Cloud Platform, Amazon Web Services, Microsoft Azure, and so forth.
-
Software outside Ping Identity. Examples include Java, Apache Tomcat, NGINX, Apache HTTP Server, Certificate Manager, Prometheus, and so forth.
-
Deployments that deviate from the published ForgeOps architecture. Deployments that do not include the following architectural features are not supported:
-
PingAM (AM) and PingIDM (IDM) are integrated and deployed together in a Kubernetes cluster.
-
IDM login is integrated with AM.
-
AM uses PingDS (DS) as its data repository.
-
IDM uses DS as its repository.
-
-
Ping Identity publishes reference Docker images for testing and development, but these images should not be used in production. For production deployments, it is recommended that customers build and run containers using a supported operating system and all required software dependencies. Additionally, to help ensure interoperability across container images and the ForgeOps tools, Docker images must be built using the Dockerfile templates as described here.
Third-party Kubernetes services
The ForgeOps reference tools are provided for use with Google Kubernetes Engine, Amazon Elastic Kubernetes Service, and Microsoft Azure Kubernetes Service. (ForgeOps is supported on IBM RedHat OpenShift but the reference tools for IBM RedHat OpenShift are not provided.)
Ping Identity supports running the platform on Kubernetes. Ping Identity does not support Kubernetes itself. You must have a support contract in place with your Kubernetes vendor to resolve infrastructure issues. To avoid any misunderstandings, it must be clear that Ping Identity cannot troubleshoot underlying Kubernetes issues.
Modifications to ForgeOps deployment assets may be required in order to adapt the platform to your Kubernetes implementation. For example, ingress routes, storage classes, NAT gateways, etc., might need to be modified. Making the modifications requires competency in Kubernetes, and familiarity with your chosen distribution.
Documentation access
Ping Identity publishes comprehensive documentation online:
-
The Knowledge Base offers a large and increasing number of up-to-date, practical articles that help you deploy and manage Ping Identity Platform software.
While many articles are visible to community members, Ping Identity customers have access to much more, including advanced information for customers using Ping Identity Platform software in a mission-critical capacity.
-
The developer documentation, such as this site, aims to be technically accurate with respect to the sample that is documented. It is visible to everyone.
Problem reports and information requests
If you are a named customer Support Contact, contact Ping Identity using the
Customer Support Portal to request
information, or report a problem with Dockerfiles, Helm charts, Kustomize bases,
or Kustomize overlays in the forgeops repository.
When requesting help with a problem, include the following information:
-
Description of the problem, including when the problem occurs and its impact on your operation.
-
Steps to reproduce the problem.
If the problem occurs on a Kubernetes system other than Minikube, GKE, EKS, or AKS, we might ask you to reproduce the problem on one of those.
-
HTML output from the debug-logs command. For more information, refer to Kubernetes logs and other diagnostics.
Suggestions for fixes and enhancements to artifacts
ForgeOps greatly appreciates suggestions for fixes and enhancements to ForgeOps-provided artifacts in the forgeops and forgeops-extras repositories.
If you would like to report a problem with or make an enhancement request for an artifact in either repository, create a GitHub issue on the repository.
Contact information
Ping Identity provides support services, professional services, training through Ping Identity training, and partner services to assist you in setting up and maintaining your deployments. For a general overview of these services, refer to https://www.pingidentity.com/en/platform.html.
Ping Identity has staff members around the globe who support our international customers and partners. Learn more about Ping Identity’s support offering, including support plans and service-level agreements (SLAs) at the Ping Identity Platform support page.
Repositories
The ForgeOps project provides two public GitHub repositories; the forgeops and
forgeops-extras repositories.
This page provides a high-level overview of the two repositories.
forgeops repository
The forgeops repository contains
files needed for customizing and deploying the Ping Identity Platform on a Kubernetes
cluster:
-
Files used to build Docker images for the Ping Identity Platform:
-
Dockerfiles
-
Scripts and configuration files incorporated into ForgeOps-provided Docker images
-
Canonical configuration profiles for the platform
-
-
Helm charts
-
Kustomize bases and overlays
In addition, the repository contains numerous utility scripts and sample files. The scripts and samples are useful for:
-
Performing ForgeOps deployments quickly and easily
-
Exploring monitoring, alerts, and security customization
Refer to forgeops repository reference for information about the files in the repository,
recommendations about how to work with them, and the support status for the
files.
forgeops repository updates
New forgeops repository features become available in the release/7.5-20240618
branch of the repository from time to time.
When you start working with the forgeops repository, clone the repository.
Depending on your organization’s setup, you’ll clone the repository either from
the public repository on GitHub, or from a fork. Refer to
Git clone or Git fork? for more information.
Then, check out the release/7.5-20240618 branch and create a working branch. For
example:
$ git checkout release/7.5-20240618
$ git checkout -b my-working-branch
ForgeOps team recommends that you regularly incorporate updates to the
release/7.5-20240618 into your working branch:
-
Get emails or subscribe to the ForgeOps RSS feed to be notified when there have been updates to ForgeOps 7.5.
-
Pull new commits in the
release/7.5-20240618branch into your clone’srelease/7.5-20240618branch. -
Rebase the commits from the new branch into your working branch in your
forgeopsrepository clone.
It’s important to understand the impact of rebasing changes from the forgeops
repository into your branches. forgeops repository reference provides advice about
which files in the forgeops repository to change, which files not to change,
and what to look out for when you rebase. Follow the advice in
forgeops repository reference to reduce merge conflicts, and to better understand
how to resolve them when you rebase your working branch with updates that
ForgeOps team has made to the release/7.5-20240618 branch.
forgeops repository reference
For more information about support for the forgeops repository, see
Support for ForgeOps.
Directories
Example scripts you can use or model for a variety of deployment tasks.
Recommendation: Don’t modify the files in this directory. If you want to add
your own scripts to the forgeops repository, create a subdirectory under
bin, and store your scripts there.
Support Status: Sample files. Not supported by Ping Identity.
Helm charts.
Recommendation: Don’t modify the files in this directory. If you want to update a values.yaml file, copy the file to a new file, and make changes there.
Support Status: Supported is available from Ping Identity.
Example script that automates Minikube cluster creation.
Recommendation: Don’t modify the files in this directory.
Support Status: Sample file. Not supported by Ping Identity.
Contains three types of files needed to build Docker images for the Ping Identity Platform: Dockerfiles, support files that go into Docker images, and configuration profiles.
Dockerfiles
Common deployment customizations require modifications to Dockerfiles in the docker directory.
Recommendation: Expect to encounter merge conflicts when you rebase changes from ForgeOps into your branches. Be sure to track changes you’ve made to Dockerfiles, so that you’re prepared to resolve merge conflicts after a rebase.
Support Status: Dockerfiles. Support is available from Ping Identity.
Support Files Referenced by Dockerfiles
When customizing ForgeOps default deployments, you might need to add files to the docker directory. For example, to customize the AM WAR file, you might need to add plugin JAR files, user interface customization files, or image files.
Recommendation: If you only add new files to the docker directory, you should not encounter merge conflicts when you rebase changes from ForgeOps into your branches. However, if you need to modify any files from ForgeOps, you might encounter merge conflicts. Be sure to track changes you’ve made to any files in the docker directory, so that you’re prepared to resolve merge conflicts after a rebase.
Support Status:
Scripts and other files from ForgeOps that are incorporated into Docker images for the Ping Identity Platform: Support is available from Ping Identity.
User customizations that are incorporated into custom Docker images for the Ping Identity Platform: Support is not available from Ping Identity.
Configuration Profiles
Add your own configuration profiles to the docker directory using the
export command. Do not modify the internal-use only
idm-only and ig-only configuration profiles provided by ForgeOps.
Recommendation: You should not encounter merge conflicts when you rebase changes from ForgeOps into your branches.
Support Status: Configuration profiles. Support is available from Ping Identity.
Files used to support ForgeOps deployments.
Recommendation: Don’t modify the files in this directory (or its subdirectories).
Support Status: Sample files. Not supported by Ping Identity.
Artifacts for orchestrating the Ping Identity Platform using Kustomize.
Recommendation: Common deployment customizations, such as changing the deployment namespace and providing a customized FQDN, require modifications to files in the kustomize/overlay directory. You’ll probably change, at minimum, the kustomize/overlay/all/kustomization.yaml file.
Expect to encounter merge conflicts when you rebase changes into your branches. Be sure to track changes you’ve made to files in the kustomize directory, so that you’re prepared to resolve merge conflicts after a rebase.
Support Status: Kustomize bases and overlays. Support is available from Ping Identity.
Documentation for performing ForgeOps deployments using older versions. Includes
documentation for supported and deprecated versions of the forgeops
repository.
Recommendation: Don’t modify the files in this directory.
Support Status:
Documentation for supported versions of the forgeops repository:
Support is available from Ping Identity.
Documentation for deprecated versions of the forgeops repository:
Not supported by Ping Identity.
forgeops-extras repository
Use the forgeops-extras repository to create sample Kubernetes clusters in which you can deploy the Ping Identity Platform.
forgeops-extras repository reference
For more information about support for the forgeops-extras repository, see
Support for ForgeOps.
Directories
Example Terraform artifacts that automate cluster creation and deletion.
Recommendation: Don’t modify the files in this directory. If you want to add
your own cluster creation support files to the forgeops repository, copy the
terraform.tfvars file to a new file and make changes there.
Support Status: Sample files. Not supported by Ping Identity.
Git clone or Git fork?
For the simplest use cases—a single user in an organization performing a ForgeOps deployment for a proof of concept, or exploration of the platform—cloning the ForgeOps public repositories from GitHub provides a quick and adequate way to access the repositories.
If, however, your use case is more complex, you might want to fork the repositories, and use the forks as your common upstream repositories. For example:
-
Multiple users in your organization need to access a common version of the repository and share changes made by other users.
-
Your organization plans to incorporate
forgeopsandforgeops-extrasrepository changes from ForgeOps. -
Your organization wants to use pull requests when making repository updates.
If you’ve forked the forgeops and forgeops-extras repositories:
-
You’ll need to synchronize your forks with ForgeOps repositories on GitHub when ForgeOps releases new branches.
-
Your users will need to clone your forks before they start working instead of cloning the public repositories from GitHub. Because procedures in the documentation tell users to clone the public repositories, you’ll need to make sure your users follow different procedures to clone the forks instead.
-
The steps for initially obtaining and updating your repository clones will differ from the steps provided in the documentation. You’ll need to let users know how to work with the forks as the upstream repositories instead of following the steps in the documentation.
Setup overview
Before performing a ForgeOps deployment, you must perform some setup tasks in your local computer, create a Kubernetes cluster (or have access to an existing cluster), and configure your local machine to access the cluster.
The specific tasks you’ll need to do vary depending on the platform on which you run Kubernetes:
Google Cloud
Before you can perform a ForgeOps deployment on a Kubernetes cluster running on Google Cloud, you must complete these prerequisite tasks:
forgeops and forgeops-extras repositories
Get the forgeops and forgeops-extras repositories:
-
Clone the repositories. For example:
$ git clone https://github.com/ForgeRock/forgeops.git
$ git clone https://github.com/ForgeRock/forgeops-extras.git
Both repositories are public; you do not need credentials to clone them.
-
Check out the
forgeopsrepository’srelease/7.5-20240618branch:$ cd /path/to/forgeops $ git checkout
release/7.5-20240618Depending on your organization’s repository strategy, you might need to clone the repository from a fork. You might also need to create a working branch from the
release/7.5-20240618branch of your fork. Learn more about Repository Updates here. -
Check out the
forgeops-extrasrepository’smasterbranch:$ cd /path/to/forgeops-extras $ git checkout
master
Third-party software
Before performing a ForgeOps deployment, obtain third-party software and install it on your local computer.
ForgeOps team recommends that you install third-party software using Homebrew on macOS and Linux[3] .
The versions listed in the following table have been validated for ForgeOps deployments on Google Cloud. Earlier and later versions will probably work. If you want to try using versions that are not in the table, it is your responsibility to validate them.
Install the following third-party software:
| Software | Version | Homebrew package |
|---|---|---|
Python 3 |
3.12.4 |
|
Bash |
5.2.26 |
|
Docker client |
26.1.4 |
|
Kubernetes client (kubectl) |
1.30.2 |
|
Kubernetes context switcher (kubectx) |
0.9.5 |
|
Kustomize |
5.4.2 |
|
Helm |
3.15.2 |
|
JSON processor jq |
1.7.1 |
|
Terraform |
1.5.7 |
|
Six (Python compatibility library) |
1.16.0 |
|
Setup tools (Python) |
70.1.1 |
|
Google Cloud SDK |
482.0.0 |
|
Docker engine
In addition to the software listed in the preceding table, you’ll need to start a virtual machine that runs Docker engine.
-
On macOS systems, use Docker Desktop or an alternative, such as Colima.
-
On Linux systems, use Docker Desktop for Linux, install Docker machine from your Linux distribution, or use an alternative, such as Colima.
For more information about using Colima when performing ForgeOps deployments, refer to this article.
The default configuration for a Docker virtual machine provides adequate resources for a ForgeOps deployment.
For users running Microsoft Windows
ForgeOps deployments are supported on macOS and Linux. If you have a Windows computer, you’ll need to create a Linux VM. We tested the following configurations:
-
Hypervisor: Hyper-V, VMWare Player, or VMWare Workstation
-
Guest OS: Current Ubuntu LTS release with 12 GB memory and 60 GB disk space
-
Nested virtualization enabled in the Linux VM.
Perform all the procedures in this documentation within the Linux VM. In this documentation, the local computer refers to the Linux VM for Windows users.
|
The Minikube implementation on Windows Subsystem for Linux (WSL2) has networking issues. As a result, consistent access to the ingress controller or the apps deployed on Minikube is not possible. This issue is tracked here. Do not attempt to perform ForgeOps deployments on WSL2 until this issue is resolved. |
Google Cloud project setup
Perform these steps to set up a Google Cloud project that meets the requirements for ForgeOps deployments:
-
Log in to the Google Cloud Console and create a new project.
-
Authenticate to the Google Cloud SDK to obtain the permissions you’ll need to create a cluster:
-
Configure the gcloud CLI to use your Google account. Run the following command:
$ gcloud auth application-default login
-
A browser window appears, prompting you to select a Google account. Select the account you want to use for cluster creation.
A second screen requests several permissions. Select Allow.
A third screen should appear with the heading, You are now authenticated with the gcloud CLI!
-
-
Assign the following roles to users who will be creating Kubernetes clusters and performing ForgeOps deployments:
-
Editor
-
Kubernetes Engine Admin
-
Kubernetes Engine Cluster Admin
-
Project IAM Admin
Remember, a ForgeOps deployment is a reference implementation, and is not for production use. The roles you assign in this step are suitable for ForgeOps deployments. When you create a project plan, you’ll need to determine which Google Cloud roles are required.
-
Kubernetes cluster creation
ForgeOps provides Terraform artifacts for GKE cluster creation. Use them to create a cluster that supports ForgeOps deployments. After performing a ForgeOps deployment, you can use your cluster as a sandbox to explore Ping Identity Platform customization.
When you create a project plan, you’ll need to identify your organization’s preferred infrastructure-as-code solution, and, if necessary, create your own cluster creation automation scripts.
Here are the steps the ForgeOps team follows to create a Kubernetes cluster on GKE:
-
Copy the file that contains default Terraform variables to a new file:
-
Change to the /path/to/forgeops-extras/terraform directory.
-
Copy the terraform.tfvars file to override.auto.tfvars [4].
Copying the terraform.tfvars file to a new file preserves the original content in the file.
-
-
Determine the deployment size: small, medium, or large.
-
Define your cluster’s configuration:
-
Open the override.auto.tfvars file.
-
Determine the location of your cluster’s configuration in the override.auto.tfvars file:
Cluster size Section containing the cluster configuration Small
cluster.tf_cluster_gke_smallMedium
cluster.tf_cluster_gke_mediumLarge
cluster.tf_cluster_gke_large -
Modify your cluster’s configuration by setting values in the section listed in the table:
-
Set the value of the
enabledvariable totrue. -
Set the value of the
auth.project_idvariable to your new Google Cloud project. Specify the project ID, not the project name. -
Set the value of the
meta.cluster_namevariable to the name of the GKE cluster you’ll create. -
Set the values of the
location.regionandlocation.zonesvariables to the region and zones where perform your ForgeOps deployment.Before continuing, go to Google’s Regions and Zones page and verify that the zones you have specified are available in your region you specified.
-
-
Save and close the override.auto.tfvars file.
-
-
Ensure your region has an adequate CPU quota for a ForgeOps deployment.
Locate these two variables in your cluster’s configuration in the override.auto.tfvars file:
-
node_pool.type: the machine type to be used in your cluster -
node_pool.max_count: the maximum number of machines to be used in your cluster
Your quotas must be large enough to let you allocate the maximum number of machines in your region. If your quotas are too low, request and wait for a quota increase from Google Cloud before attempting to create your cluster.
-
-
Create a cluster using Terraform artifacts in the
forgeops-extrasrepository:-
Change to the directory that contains Terraform artifacts:
$ cd /path/to/forgeops-extras/terraform
-
Run the tf-apply script to create your cluster:
$ ./tf-apply
Respond
yesto theDo you want to perform these actions?prompt.When the tf-apply script finishes, it issues a message that provides the path to a kubeconfig file for the cluster.
The script creates:
-
The GKE cluster
-
The
faststorage class -
The
ds-snapshot-classvolume snapshot class
The script deploys:
-
An ingress controller
-
Certificate manager
-
-
-
Set your Kubernetes context to reference the new cluster by setting the
KUBECONFIGenvironment variable as shown in the message from the tf-apply command’s output. -
To verify that the tf-apply script created the cluster, log in to the Google Cloud console. Select the Kubernetes Engine option. The new cluster should appear in the list of Kubernetes clusters.
Hostname resolution
Set up hostname resolution for the Ping Identity Platform servers you’ll deploy in your namespace:
-
Get the ingress controller’s external IP address:
$ kubectl get services --namespace ingress-nginx
NAME                                 TYPE           CLUSTER-IP   EXTERNAL-IP      PORT(S)                      AGE
ingress-nginx-controller             LoadBalancer   10.4.6.154   35.203.145.112   80:30300/TCP,443:30638/TCP   58s
ingress-nginx-controller-admission   ClusterIP      10.4.4.9     <none>           443/TCP                      58s
The ingress controller’s IP address should appear in the
EXTERNAL-IPcolumn. There can be a short delay while the ingress starts before the IP address appears in thekubectl get servicescommand’s output; you might need to run the command several times. -
Configure hostname resolution for the ingress controller:
-
Choose an FQDN (referred to as the deployment FQDN) that you’ll use when you deploy the Ping Identity Platform, and when you access its GUIs and REST APIs.
Examples in this documentation use
forgeops.example.comas the deployment FQDN. You are not required to useforgeops.example.com; you can specify any FQDN you like. -
If DNS does not resolve your deployment FQDN, add an entry to the /etc/hosts file that maps the ingress controller’s external IP address to the deployment FQDN. For example:
35.203.145.112 forgeops.example.com
-
AWS
Before you can perform a ForgeOps deployment on a Kubernetes cluster running on AWS, you must complete these prerequisite tasks:
forgeops and forgeops-extras repositories
Get the forgeops and forgeops-extras repositories:
-
Clone the repositories. For example:
$ git clone https://github.com/ForgeRock/forgeops.git
$ git clone https://github.com/ForgeRock/forgeops-extras.git
Both repositories are public; you do not need credentials to clone them.
-
Check out the
forgeopsrepository’srelease/7.5-20240618branch:$ cd /path/to/forgeops $ git checkout
release/7.5-20240618Depending on your organization’s repository strategy, you might need to clone the repository from a fork. You might also need to create a working branch from the
release/7.5-20240618branch of your fork. Learn more about Repository Updates here. -
Check out the
forgeops-extrasrepository’smasterbranch:$ cd /path/to/forgeops-extras $ git checkout
master
Third-party software
Before performing a ForgeOps deployment, obtain third-party software and install it on your local computer.
ForgeOps team recommends that you install third-party software using Homebrew on macOS and Linux[3] .
The versions listed in the following table have been validated for ForgeOps deployments on Amazon Web Services. Earlier and later versions will probably work. If you want to try using versions that are not in the table, it is your responsibility to validate them.
Install the following third-party software:
| Software | Version | Homebrew package |
|---|---|---|
Python 3 |
3.12.4 |
|
Bash |
5.2.26 |
|
Docker client |
26.1.4 |
|
Kubernetes client (kubectl) |
1.30.2 |
|
Kubernetes context switcher (kubectx) |
0.9.5 |
|
Kustomize |
5.4.2 |
|
Helm |
3.15.2 |
|
JSON processor jq |
1.7.1 |
|
Terraform |
1.5.7 |
|
Six (Python compatibility library) |
1.16.0 |
|
Setup tools (Python) |
70.1.1 |
|
Amazon AWS Command Line Interface |
2.17.1 |
|
AWS IAM Authenticator for Kubernetes |
0.6.20 |
|
Docker engine
In addition to the software listed in the preceding table, you’ll need to start a virtual machine that runs Docker engine.
-
On macOS systems, use Docker Desktop or an alternative, such as Colima.
-
On Linux systems, use Docker Desktop for Linux, install Docker machine from your Linux distribution, or use an alternative, such as Colima.
For more information about using Colima when performing ForgeOps deployments, refer to this article.
The default configuration for a Docker virtual machine provides adequate resources for a ForgeOps deployment.
For users running Microsoft Windows
ForgeOps deployments are supported on macOS and Linux. If you have a Windows computer, you’ll need to create a Linux VM. We tested the following configurations:
-
Hypervisor: Hyper-V, VMWare Player, or VMWare Workstation
-
Guest OS: Current Ubuntu LTS release with 12 GB memory and 60 GB disk space
-
Nested virtualization enabled in the Linux VM.
Perform all the procedures in this documentation within the Linux VM. In this documentation, the local computer refers to the Linux VM for Windows users.
|
The Minikube implementation on Windows Subsystem for Linux (WSL2) has networking issues. As a result, consistent access to the ingress controller or the apps deployed on Minikube is not possible. This issue is tracked here. Do not attempt to perform ForgeOps deployments on WSL2 until this issue is resolved. |
Setup for AWS
Perform these steps to set up an AWS environment that meets the requirements for ForgeOps deployments:
-
Create and configure an IAM group:
-
Create a group with the name
forgeops-users. -
Attach the following AWS preconfigured policies to the
forgeops-usersgroup:-
IAMUserChangePassword -
IAMReadOnlyAccess -
AmazonEC2FullAccess -
AmazonEC2ContainerRegistryFullAccess -
AWSCloudFormationFullAccess
-
-
Create two policies in the IAM service of your AWS account:
-
Create the
EksAllAccesspolicy using theeks-all-access.jsonfile in the /path/to/forgeops/etc/aws-example-iam-policies directory. -
Create the
IamLimitedAccesspolicy using theiam-limited-access.jsonfile in the /path/to/forgeops/etc/aws-example-iam-policies directory.
-
-
Attach the policies you created to the
forgeops-usersgroup.Remember, a ForgeOps deployment is a reference implementation, and is not for production use. The policies you create in this procedure are suitable for ForgeOps deployments. When you create a project plan, you’ll need to determine how to configure AWS permissions.
-
Assign one or more AWS users who will perform ForgeOps deployments to the
forgeops-usersgroup.
-
-
If you haven’t already done so, set up your aws command-line interface environment using the aws configure command.
-
Verify that your AWS user is a member of the
forgeops-usersgroup:$ aws iam list-groups-for-user --user-name my-user-name --output json { "Groups": [ { "Path": "/", "GroupName": "forgeops-users", "GroupId": "ABCDEFGHIJKLMNOPQRST", "Arn": "arn:aws:iam::048497731163:group/forgeops-users", "CreateDate": "2020-03-11T21:03:17+00:00" } ] } -
Verify that you are using the correct user profile:
$ aws iam get-user
{
    "User": {
        "Path": "/",
        "UserName": "my-user-name",
        "UserId": "...",
        "Arn": "arn:aws:iam::01...3:user/my-user-name",
        "CreateDate": "2020-09-17T16:01:46+00:00",
        "PasswordLastUsed": "2021-05-10T17:07:53+00:00"
    }
}
Kubernetes cluster creation
ForgeOps provides Terraform artifacts for Amazon EKS cluster creation. Use them to create a cluster that supports ForgeOps deployments. After performing a ForgeOps deployment, you can use your cluster as a sandbox to explore Ping Identity Platform customization.
When you create a project plan, you’ll need to identify your organization’s preferred infrastructure-as-code solution, and, if necessary, create your own cluster creation automation scripts.
Here are the steps the ForgeOps team follows to create a Kubernetes cluster on Amazon EKS:
-
Copy the file that contains default Terraform variables to a new file:
-
Change to the /path/to/forgeops-extras/terraform directory.
-
Copy the terraform.tfvars file to override.auto.tfvars [5].
Copying the terraform.tfvars file to a new file preserves the original content in the file.
-
-
Determine the cluster size: small, medium, or large.
-
Define your cluster’s configuration:
-
Open the override.auto.tfvars file.
-
Determine the location of your cluster’s configuration in the override.auto.tfvars file:
Cluster size Section containing the cluster configuration Small
cluster.tf_cluster_eks_smallMedium
cluster.tf_cluster_eks_mediumLarge
cluster.tf_cluster_eks_large -
Modify your cluster’s configuration by setting values in the section listed in the table:
-
Modify your cluster’s configuration by setting values in the section listed in the table:
-
Set the value of the
enabledvariable totrue. -
Set the value of the
meta.cluster_namevariable to the name of the Amazon EKS cluster you’ll create. -
Set the values of the
location.regionandlocation.zonesvariables to the region and zones where you’ll perform the ForgeOps deployment.Before continuing:
-
Go to the Amazon Elastic Kubernetes Service endpoints and quotas page and verify the region you’re specifying supports Amazon EKS.
-
Run the aws ec2 describe-availability-zones --region region-name command to identify three availability zones in your AWS region.
-
-
-
Save and close the override.auto.tfvars file.
-
-
Ensure your region has an adequate CPU quota for a ForgeOps deployment.
Locate these two variables in your cluster’s configuration in the override.auto.tfvars file:
-
node_pool.type: the machine type to be used in your cluster -
node_pool.max_count: the maximum number of machines to be used in your cluster
Your quotas must be large enough to let you allocate the maximum number of machines in your region. If your quotas are too low, request and wait for a quota increase from Amazon Web Services before attempting to create your cluster.
-
-
Create a cluster using Terraform artifacts in the
forgeops-extrasrepository:-
Change to the directory that contains Terraform artifacts:
$ cd /path/to/forgeops-extras/terraform
-
Run the tf-apply script to create your cluster:
$ ./tf-apply
Respond
yesto theDo you want to perform these actions?prompt.When the tf-apply script finishes, it issues a message that provides the path to a kubeconfig file for the cluster.
The script creates:
-
The EKS cluster
-
The
faststorage class -
The
ds-snapshot-classvolume snapshot class
The script deploys:
-
An ingress controller
-
Certificate manager
-
-
-
Set your Kubernetes context to reference the new cluster by setting the
KUBECONFIGenvironment variable as shown in the message from the tf-apply command’s output. -
To verify the tf-apply script created the cluster, log in to the AWS console. Access the console panel for the Amazon Elastic Kubernetes Service, and then list the EKS clusters. The new cluster should appear in the list of Kubernetes clusters.
Hostname resolution
Set up hostname resolution for the Ping Identity Platform servers you’ll deploy in your namespace:
-
Get the ingress controller’s FQDN from the
EXTERNAL-IPcolumn of the kubectl get services command output:$ kubectl get services --namespace ingress-nginx NAME TYPE CLUSTER-IP EXTERNAL-IP PORT(S) AGE ingress-nginx-controller LoadBalancer 10.100.43.88 k8s-ingress ...elb.us-east-1.amazonaws.com 80:30005/TCP,443:30770/TCP 62s ingress-nginx-controller-admission ClusterIP 10.100.2.215 <none> 443/TCP 62s -
Run the host command to get the ingress controller’s external IP addresses. For example:
$ host k8s-ingress ...elb.us-east-1.amazonaws.com
k8s-ingress ...elb.us-east-1.amazonaws.com has address 3.210.123.210
k8s-ingress ...elb.us-east-1.amazonaws.com has address 3.208.207.77
k8s-ingress ...elb.us-east-1.amazonaws.com has address 44.197.104.140
Depending on the state of the cluster, between one and three IP addresses appear in the host command’s output.
-
Configure hostname resolution for the ingress controller:
-
Choose an FQDN (referred to as the deployment FQDN) that you’ll use when you deploy the Ping Identity Platform, and when you access its GUIs and REST APIs.
Examples in this documentation use
forgeops.example.comas the deployment FQDN. You are not required to useforgeops.example.com; you can specify any FQDN you like. -
If DNS does not resolve your deployment FQDN, add an entry to the /etc/hosts file that maps the ingress controller’s external IP address to the deployment FQDN. For example:
3.210.123.210 forgeops.example.com
-
Azure
Before you can perform a ForgeOps deployment on a Kubernetes cluster running on Azure], you must complete these prerequisite tasks:
forgeops and forgeops-extras repositories
Get the forgeops and forgeops-extras repositories:
-
Clone the repositories. For example:
$ git clone https://github.com/ForgeRock/forgeops.git
$ git clone https://github.com/ForgeRock/forgeops-extras.git
Both repositories are public; you do not need credentials to clone them.
-
Check out the
forgeopsrepository’srelease/7.5-20240618branch:$ cd /path/to/forgeops $ git checkout
release/7.5-20240618Depending on your organization’s repository strategy, you might need to clone the repository from a fork. You might also need to create a working branch from the
release/7.5-20240618branch of your fork. Learn more about Repository Updates here. -
Check out the
forgeops-extrasrepository’smasterbranch:$ cd /path/to/forgeops-extras $ git checkout
master
Third-party software
Before performing a ForgeOps deployment, obtain third-party software and install it on your local computer.
ForgeOps team recommends that you install third-party software using Homebrew on macOS and Linux[3] .
The versions listed in the following table have been validated for ForgeOps deployments on Microsoft Azure. Earlier and later versions will probably work. If you want to try using versions that are not in the table, it is your responsibility to validate them.
Install the following third-party software:
| Software | Version | Homebrew package |
|---|---|---|
Python 3 |
3.12.4 |
|
Bash |
5.2.26 |
|
Docker client |
26.1.4 |
|
Kubernetes client (kubectl) |
1.30.2 |
|
Kubernetes context switcher (kubectx) |
0.9.5 |
|
Kustomize |
5.4.2 |
|
Helm |
3.15.2 |
|
JSON processor jq |
1.7.1 |
|
Terraform |
1.5.7 |
|
Six (Python compatibility library) |
1.16.0 |
|
Setup tools (Python) |
70.1.1 |
|
Azure Command Line Interface |
2.61.0 |
|
Docker engine
In addition to the software listed in the preceding table, you’ll need to start a virtual machine that runs Docker engine.
-
On macOS systems, use Docker Desktop or an alternative, such as Colima.
-
On Linux systems, use Docker Desktop for Linux, install Docker machine from your Linux distribution, or use an alternative, such as Colima.
For more information about using Colima when performing ForgeOps deployments, refer to this article.
The default configuration for a Docker virtual machine provides adequate resources for a ForgeOps deployment.
For users running Microsoft Windows
ForgeOps deployments are supported on macOS and Linux. If you have a Windows computer, you’ll need to create a Linux VM. We tested the following configurations:
-
Hypervisor: Hyper-V, VMWare Player, or VMWare Workstation
-
Guest OS: Current Ubuntu LTS release with 12 GB memory and 60 GB disk space
-
Nested virtualization enabled in the Linux VM.
Perform all the procedures in this documentation within the Linux VM. In this documentation, the local computer refers to the Linux VM for Windows users.
|
The Minikube implementation on Windows Subsystem for Linux (WSL2) has networking issues. As a result, consistent access to the ingress controller or the apps deployed on Minikube is not possible. This issue is tracked here. Do not attempt to perform ForgeOps deployments on WSL2 until this issue is resolved. |
Azure subscription setup
Perform these steps to set up an Azure subscription that meets the requirements for ForgeOps deployments:
-
Assign the following roles to users who will perform ForgeOps deployments:
-
Azure Kubernetes Service Cluster Admin Role
-
Azure Kubernetes Service Cluster User Role
-
Contributor
-
User Access Administrator
Remember, a ForgeOps deployment is a reference implementation, and is not for production use. The roles you assign in this step are suitable for ForgeOps deployments. When you create a project plan, you’ll need to determine which Azure roles are required.
-
-
Log in to Azure services as a user with the roles you assigned in the previous step:
$ az login --username my-user-name -
View your current subscription ID:
$ az account show
-
If necessary, set the current subscription ID to the one you will use to perform the ForgeOps deployment:
$ az account set --subscription my-subscription-id
Kubernetes cluster creation
ForgeOps team provides Terraform artifacts for AKS cluster creation. Use them to create a cluster that supports ForgeOps deployments. After performing a ForgeOps deployment, you can use your cluster as a sandbox to explore Ping Identity Platform customization.
When you create a project plan, you’ll need to identify your organization’s preferred infrastructure-as-code solution, and, if necessary, create your own cluster creation automation scripts.
Here are the steps the ForgeOps team follows to create a Kubernetes cluster on AKS:
-
Copy the file that contains default Terraform variables to a new file:
-
Change to the /path/to/forgeops-extras/terraform directory.
-
Copy the terraform.tfvars file to override.auto.tfvars [6].
Copying the terraform.tfvars file to a new file preserves the original content in the file.
-
-
Determine the cluster size: small, medium, or large.
-
Define your cluster’s configuration:
-
Open the override.auto.tfvars file.
-
Determine the location of your cluster’s configuration in the override.auto.tfvars file:
Cluster size Section containing the cluster configuration Small
cluster.tf_cluster_aks_smallMedium
cluster.tf_cluster_aks_mediumLarge
cluster.tf_cluster_aks_large -
Modify your cluster’s configuration by setting values in the section listed in the table:
-
Set the value of the
enabledvariable totrue. -
Set the value of the
meta.cluster_namevariable to the name of the AKS cluster you’ll create. -
Set the values of the
location.regionandlocation.zonesvariables to the region and zones where you’ll perform the ForgeOps deployment.Before continuing, go to Microsoft’s Products available by region page and verify that Azure Kubernetes Service is available in the region you specified.
-
-
Save and close the override.auto.tfvars file.
-
-
Ensure your region has an adequate CPU quota for a ForgeOps deployment.
Locate these two variables in your cluster’s configuration in the override.auto.tfvars file:
-
node_pool.type: the machine type to be used in your cluster -
node_pool.max_count: the maximum number of machines to be used in your cluster
Your quotas must be large enough to let you allocate the maximum number of machines in your region. If your quotas are too low, request and wait for a quota increase from Microsoft Azure before attempting to create your cluster.
-
-
Create a cluster using Terraform artifacts in the
forgeops-extrasrepository:-
Change to the directory that contains Terraform artifacts:
$ cd /path/to/forgeops-extras/terraform
-
Run the tf-apply script to create your cluster:
$ ./tf-apply
Respond
yesto theDo you want to perform these actions?prompt.When the tf-apply script finishes, it issues a message that provides the path to a kubeconfig file for the cluster.
The script creates:
-
The AKS cluster
-
The
faststorage class -
The
ds-snapshot-classvolume snapshot class
The script deploys:
-
An ingress controller
-
Certificate manager
-
-
-
Set your Kubernetes context to reference the new cluster by setting the
KUBECONFIGenvironment variable as shown in the message from the tf-apply command’s output. -
To verify that the tf-apply script created the cluster, log in to the Azure portal. Search for Kubernetes services and access the Kubernetes services page. The new cluster should appear in the list of Kubernetes clusters.
Hostname resolution
Set up hostname resolution for the Ping Identity Platform servers you’ll deploy in your namespace:
-
Get the ingress controller’s external IP address:
$ kubectl get services --namespace ingress-nginx
NAME                                 TYPE           CLUSTER-IP     EXTERNAL-IP     PORT(S)                      AGE
ingress-nginx-controller             LoadBalancer   10.0.166.247   20.168.193.68   80:31377/TCP,443:31099/TCP   74m
ingress-nginx-controller-admission   ClusterIP      10.0.40.40     <none>          443/TCP                      74m
The ingress controller’s IP address should appear in the
EXTERNAL-IPcolumn. There can be a short delay while the ingress starts before the IP address appears in thekubectl get servicescommand’s output; you might need to run the command several times. -
Configure hostname resolution for the ingress controller:
-
Choose an FQDN (referred to as the deployment FQDN) that you’ll use when you deploy the Ping Identity Platform, and when you access its GUIs and REST APIs.
Examples in this documentation use
forgeops.example.comas the deployment FQDN. You are not required to useforgeops.example.com; you can specify any FQDN you like. -
If DNS does not resolve your deployment FQDN, add an entry to the /etc/hosts file that maps the ingress controller’s external IP address to the deployment FQDN. For example:
20.168.193.68 forgeops.example.com
-
Minikube
Before you can perform a ForgeOps deployment on a Kubernetes cluster running on Minikube, you must complete these prerequisite tasks:
forgeops repository
Before you can perform a ForgeOps deployment, you must first get the
forgeops repository and check out the release/7.5-20240618 branch:
-
Clone the
forgeopsrepository. For example:$ git clone https://github.com/ForgeRock/forgeops.git
The
forgeopsrepository is a public Git repository. You do not need credentials to clone it. -
Check out the
release/7.5-20240618branch:$ cd forgeops $ git checkout
release/7.5-20240618
Depending on your organization’s repository strategy, you might need to clone
the repository from a fork. You might also need to create a working branch
from the release/7.5-20240618 branch. Learn more in
Repository Updates.
Third-party software
Before performing a ForgeOps deployment, obtain third-party software and install it on your local computer.
ForgeOps team recommends that you install third-party software using Homebrew on macOS and Linux[3] .
The versions listed in this section have been validated for ForgeOps deployments on Minikube. Earlier and later versions will probably work. If you want to try using versions that are not in the table, it is your responsibility to validate them.
| Software | Version | Homebrew package |
|---|---|---|
Python 3 |
3.12.4 |
|
Bash |
5.2.26 |
|
Docker client |
26.1.4 |
|
Kubernetes client (kubectl) |
1.30.2 |
|
Kubernetes context switcher (kubectx) |
0.9.5 |
|
Kustomize |
5.4.2 |
|
Helm |
3.15.2 |
|
JSON processor jq |
1.7.1 |
|
Six (Python compatibility library) |
1.16.0 |
|
Setup tools (Python) |
70.1.1 |
|
Minikube |
1.33.1 |
|
PyYaml |
6.0.1 |
|
Hyperkit |
0.20210107_1 |
|
Docker engine
In addition to the software listed in the preceding table, you’ll need to start a virtual machine that runs Docker engine.
-
On macOS systems, use Docker Desktop or an alternative, such as Colima.
-
On Linux systems, use Docker Desktop for Linux, install Docker machine from your Linux distribution, or use an alternative, such as Colima.
For more information about using Colima when performing ForgeOps deployments, refer to this article.
Minimum requirements for the virtual machine:
-
4 CPUs
-
10 GB RAM
-
60 GB disk space
For users running Microsoft Windows
ForgeOps deployments are supported on macOS and Linux. If you have a Windows computer, you’ll need to create a Linux VM. We tested the following configurations:
-
Hypervisor: Hyper-V, VMWare Player, or VMWare Workstation
-
Guest OS: Current Ubuntu LTS release with 12 GB memory and 60 GB disk space
-
Nested virtualization enabled in the Linux VM.
Perform all the procedures in this documentation within the Linux VM. In this documentation, the local computer refers to the Linux VM for Windows users.
|
The Minikube implementation on Windows Subsystem for Linux (WSL2) has networking issues. As a result, consistent access to the ingress controller or the apps deployed on Minikube is not possible. This issue is tracked here. Do not attempt to perform ForgeOps deployments on WSL2 until this issue is resolved. |
Minikube cluster
Minikube software runs a single-node Kubernetes cluster in a virtual machine.
The cluster/minikube/forgeops-minikube start command creates a Minikube cluster with a configuration that’s adequate for a ForgeOps deployment.
-
Determine which virtual machine driver you want Minikube to use. By default, the forgeops-minikube command, which you run in the next step, starts Minikube with:
-
The Hyperkit driver on Intel x86-based macOS systems
-
The Docker driver on ARM-based macOS systems[7]
-
The Docker driver on Linux systems
The default driver option is fine for most users. For more information about Minikube virtual machine drivers, refer to Drivers in the Minikube documentation.
If you want to use a driver other than the default driver, specify the
--driveroption when you run the forgeops-minikube command in the next step. -
-
Set up Minikube:
$ cd /path/to/forgeops/cluster/minikube $ ./forgeops-minikube start Running: "minikube start --cpus=3 --memory=9g --disk-size=40g --cni=true --kubernetes-version=stable --addons=ingress,volumesnapshots,metrics-server --driver=hyperkit" 😄 minikube v1.32.0 on Darwin 13.6 ✨ Using the hyperkit driver based on user configuration 💿 Downloading VM boot image … > minikube-v1.32.1-amd64.iso….: 65 B / 65 B [---------] 100.00% ? p/s 0s > minikube-v1.32.1-amd64.iso: 292.96 MiB / 292.96 MiB 100.00% 6.66 MiB p/ 👍 Starting control plane node minikube in cluster minikube 💾 Downloading Kubernetes v1.28.3 preload … > preloaded-images-k8s-v18-v1…: 403.35 MiB / 403.35 MiB 100.00% 8.60 Mi 🔥 Creating hyperkit VM (CPUs=3, Memory=9216MB, Disk=40960MB) … 🐳 Preparing Kubernetes v1.28.3 on Docker 24.0.7 … ▪ Generating certificates and keys … ▪ Booting up control plane … ▪ Configuring RBAC rules … 🔗 Configuring CNI (Container Networking Interface) … 🔎 Verifying Kubernetes components… ▪ Using image registry.k8s.io/ingress-nginx/kube-webhook-certgen:v20231011-8b53cabe0 ▪ Using image registry.k8s.io/sig-storage/snapshot-controller:v6.1.0 ▪ Using image registry.k8s.io/ingress-nginx/controller:v1.9.4 ▪ Using image registry.k8s.io/ingress-nginx/kube-webhook-certgen:v20231011-8b53cabe0 ▪ Using image registry.k8s.io/metrics-server/metrics-server:v0.6.4 ▪ Using image gcr.io/k8s-minikube/storage-provisioner:v5 🔎 Verifying ingress addon… 🌟 Enabled addons: storage-provisioner, metrics-server, default-storageclass, volumesnapshots, ingress 🏄 Done! kubectl is now configured to use "minikube" cluster and "default" namespace by default -
Verify that your Minikube cluster is using the expected driver. For example:
Running: "minikube start --cpus=3 --memory=9g --disk-size=40g --cni=true
--kubernetes-version=stable --addons=ingress,volumesnapshots --driver=hyperkit"
😄  minikube v1.32.0 on Darwin 13.6
✨  Using the hyperkit driver based on user configuration
...
If you are running Minikube on an ARM-based macOS system and the forgeops-minikube output indicates that you are using the qemu driver, you probably did not start the virtual machine that runs your Docker engine.
Hostname resolution
Set up hostname resolution for the Ping Identity Platform servers you’ll deploy in your namespace:
-
Determine the Minikube ingress controller’s IP address:
-
If Minikube is running on an ARM-based macOS system[7] , use
127.0.0.1as the IP address. -
If Minikube is running on an x86-based macOS system or on a Linux system, get the IP address by running the minikube ip command:
$ minikube ip
192.168.64.2
-
-
Choose an FQDN (referred to as the deployment FQDN) that you’ll use when you deploy the Ping Identity Platform, and when you access its GUIs and REST APIs. Ensure that the FQDN is unique in the cluster you will be deploying the Ping Identity Platform.
Examples in this documentation use
forgeops.example.comas the deployment FQDN. You are not required to useforgeops.example.com; you can specify any FQDN you like. -
Add an entry to the /etc/hosts file to resolve the deployment FQDN:
ingress-ip-address forgeops.example.comFor
ingress-ip-address, specify the IP address from step 1.
Deployment overview
A ForgeOps deployment is a deployment of the Ping Identity Platform on Kubernetes
based on Docker images, Helm charts, Kustomize bases and overlays, utility
programs, and other artifacts you can find in the forgeops repository on
GitHub.
You can get a ForgeOps deployment up and running on Kubernetes quickly. After performing a ForgeOps deployment, you can use it to explore how you might configure a Kubernetes cluster before you deploy the platform in production.
A ForgeOps deployment is a robust sample deployment for demonstration and exploration purposes only. It is not a production deployment.
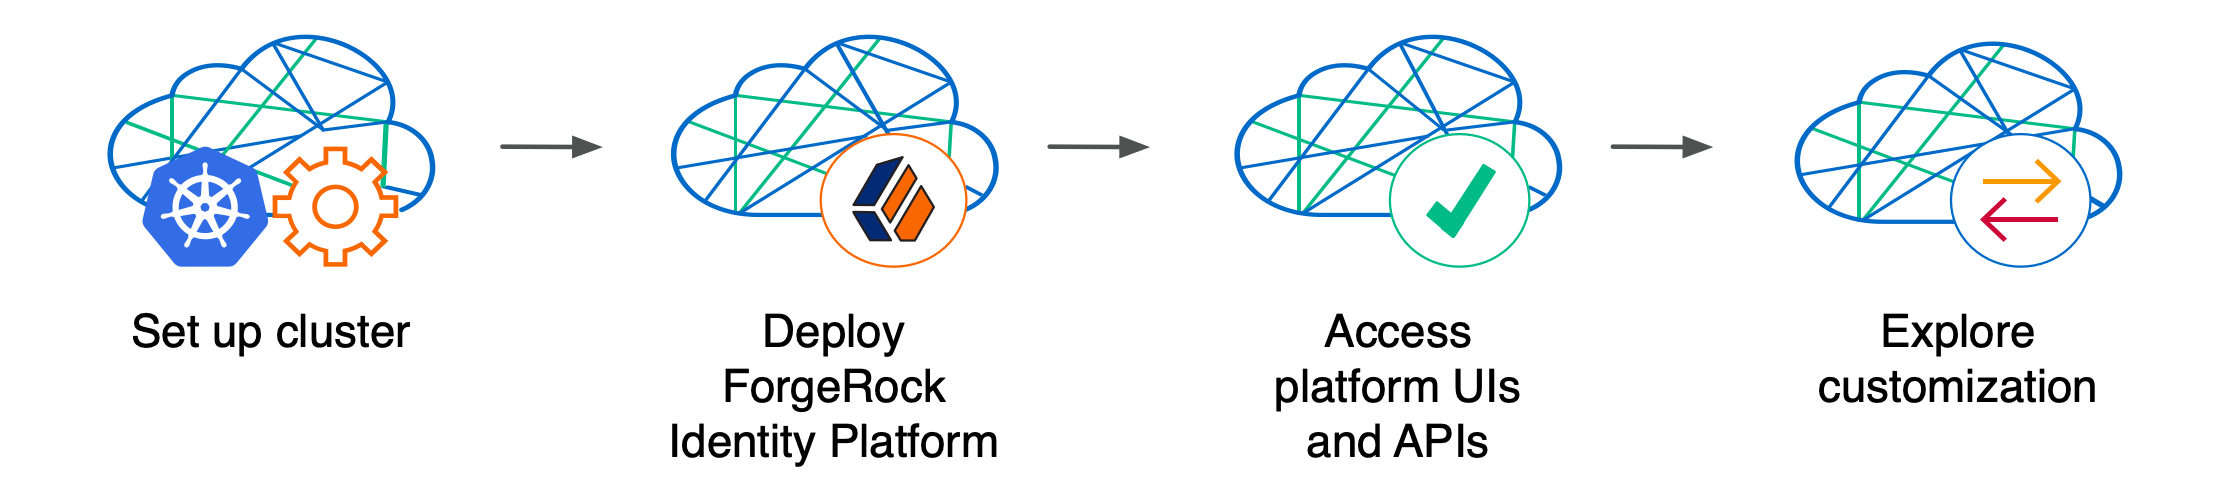
This section describes how to perform a ForgeOps deployment in a Kubernetes cluster and then access the platform’s GUIs and REST APIs. When you’re done, you can use ForgeOps deployment to explore deployment customizations.
Performing a ForgeOps deployment is a good learning and exploration exercise that helps prepare you to put together a project plan for deploying the platform in production. To better understand how this activity fits in to the overall deployment process, refer to Performing a ForgeOps deployment.
Using the ForgeOps artifacts and this documentation, you can quickly get the Ping Identity Platform running in a Kubernetes environment. You begin to familiarize yourself with some of the steps you’ll need to perform when deploying the platform in the cloud for production use:
Standardizes the process—The ForgeOps team’s mission is to standardize a process for deploying the Ping Identity Platform on Kubernetes. The team is made up of technical consultants and cloud software developers. We’ve had numerous interactions with our customers, and discussed common deployment issues. Based on our interactions, we developed the ForgeOps artifacts to make deployment of the platform easier in the cloud.
Simplifies baseline deployment—We then developed artifacts: Dockerfiles, Kustomize bases and overlays, Helm charts, and utility programs to simplify the deployment process. We deployed small-sized, medium-sized, and large-sized production-quality Kubernetes clusters, and kept them up and running 24x7. We conducted continuous integration and continuous deployment as we added new capabilities and fixed problems in the system. We maintained, benchmarked, and tuned the system for optimized performance. Most importantly, we documented the process so you could replicate it.
Eliminates guesswork—If you use our ForgeOps artifacts and follow the instructions in this documentation without deviation, you can successfully deploy the Ping Identity Platform in the cloud. ForgeOps deployments take the guesswork out of setting up a cloud environment. They bypass the deploy-test-integrate-test-repeat cycle many customers struggle through when spinning up the Ping Identity Platform in the cloud for the first time.
Prepares you to deploy in production—After you’ve performed a ForgeOps deployment you’ll be ready to start working with experts on deploying in production. We strongly recommend that you engage a Ping Identity technical consultant or partner to assist you with deploying the platform in production.
Next step
ForgeOps architecture
After you perform a ForgeOps deployment, the Ping Identity Platform is fully
operational in a Kubernetes cluster. forgeops artifacts provide preconfigured
JVM settings, memory, CPU limits, and other configurations.
Here are some of the characteristics of ForgeOps deployments:
- Cluster and deployment sizes
-
When you use the Terraform artifacts in the
forgeops-extrasrepository to create a Kubernetes cluster on Google Cloud, AWS, or Azure, you specify one of three sizes:-
A small cluster with capacity to handle 1,000,000 test users
-
A medium cluster with capacity to handle 10,000,000 test users
-
A large cluster with capacity to handle 100,000,000 test users
When you use the forgeops-minikube script to create a Kubernetes cluster on Minikube, you don’t specify a cluster size.
When you perform a ForgeOps deployment, you specify a deployment size. This deployment size should be the same as your cluster size, except when you perform single-instance ForgeOps deployments.
Single-instance deployments are special deployments that you use to configure AM and IDM and build custom Docker images for the Ping Identity Platform. They are called single-instance deployments because unlike small, medium, and large deployments, they have only single pods that run AM and IDM. They are only suitable for developing the AM and IDM configurations and must not be used for testing performance, monitoring, security, and backup requirements in production environments.
You can perform one or more single-instance deployments on small, medium, and large GKE, EKS, and AKS clusters. Each single-instance deployment resides in its own namespace.
You can perform one (and only one) single-instance deployment on a Minikube cluster.
-
- Multi-zone Kubernetes cluster
-
In small, medium, and large ForgeOps deployments, Ping Identity Platform pods are distributed across three zones for high availability.
(In single-instance deployments, Ping Identity Platform pods reside in a single zone.)
Go here for a diagram that shows the organization of pods in zones and node pools in small, medium, and large ForgeOps deployments.
- Third-party deployment and monitoring tools
-
-
NGINX Ingress Controller for Kubernetes ingress support.
-
HAProxy Ingress Controller for Kubernetes ingress support.[2]
-
Prometheus for monitoring and notifications.[2]
-
Prometheus Alertmanager for setting and managing alerts.[2]
-
Certificate Manager for obtaining and installing security certificates.
-
Helm for deploying Helm charts.
-
- Ready-to-use Ping Identity Platform components
-
-
Multiple DS instances are deployed for higher availability. Separate instances are deployed for Core Token Service (CTS) tokens and identities. The instances for identities also contain AM and IDM run-time data.
-
The AM configuration is file-based, stored at the path
/home/forgerock/openam/configinside the AM Docker container (and in the AM pods). -
Multiple AM instances are deployed for higher availability.[1]
-
AM instances are configured to access DS data stores.
-
Multiple IDM instances are deployed for higher availability.[1]
-
IDM instances are configured to access DS data stores.
-
- Highly available, distributed deployment[2] [1]
-
Deployment across three zones ensures that the ingress controller and all Ping Identity Platform components are highly available.
Pods that run DS are configured to use soft anti-affinity. Because of this, Kubernetes schedules DS pods to run on nodes that don’t have any other DS pods whenever possible.
The exact placement of all other ForgeOps pods is delegated to Kubernetes.
Pods are organized across three zones in a single node pool with six nodes. Pod placement among the nodes might vary, but the DS pods should run on nodes without any other DS pods.

- Ingress controller
-
The NGINX Ingress Controller provides load balancing services for ForgeOps deployments. Ingress controller pods run in the
nginxnamespace. Implementation varies by cloud provider.Optionally, you can deploy HAProxy Ingress as the ingress controller instead of NGINX Ingress Controller.[2]
- Secret generation and management
-
The open source Secret Agent operator generates Kubernetes secrets for Ping Identity Platform deployments. It also integrates with Google Cloud Secret Manager, AWS Secrets Manager, and Azure Key Vault, providing cloud backup and retrieval for secrets.
- Secured communication
-
The ingress controller is TLS-enabled. TLS is terminated at the ingress controller. Incoming requests and outgoing responses are encrypted.
Inbound communication to DS instances occurs over secure LDAP (LDAPS).
For more information, refer to Secure HTTP.
- Stateful sets
-
ForgeOps deployments use Kubernetes stateful sets to manage the DS pods. Stateful sets protect against data loss if Kubernetes client containers fail.
On small-, medium- and large- deployments, CTS data stores are configured for affinity load balancing for optimal performance.

AM policies, application data, and identities reside in the
idrepodirectory service. Small-, medium- and large- deployments use a singleidrepomaster configured to fail over to one of two secondary directory services.
- Authentication
-
IDM is configured to use AM for authentication.
- DS replication[1]
-
All DS instances are configured for full replication of identities and session tokens.
- Backup and restore[2]
-
Backup and restore can be performed using several techniques. You can:
-
Use the volume snapshot capability in GKE, EKS, or AKS. The cluster where the ForgeOps deployment resides must be configured with a volume snapshot class before you can take volume snapshots, and persistent volume claims must use a CSI driver that supports volume snapshots.
-
Use the ds-backup utility.
-
Use a "last mile" backup archival solutions, such as Amazon S3, Google Cloud Storage, and Azure Cloud Storage that is specific to the cloud provider.
-
Use a Kubernetes backup and restore product, such as Velero, Kasten K10, TrilioVault, Commvault, or Portworx PX-Backup.
For more information, refer to Backup and restore overview.
-
- Initial data loading
-
After the first AM instance in a ForgeOps deployment has started, an
amsterjob runs. This job loads application data, such as OAuth 2.0 client definitions, to theidrepoDS instance.
Next step
ForgeOps deployment
After you set up your deployment environment and your Kubernetes cluster, you’re ready to perform a ForgeOps deployment.
First, you’ll need to choose a deployment technology.
Deployment technologies
The preferred deployment technology for ForgeOps deployments is Helm. If you are not familiar with either of these two technologies, choose Helm.
Choose Kustomize as your deployment technology when:
-
You performed ForgeOps deployments before Helm charts were available in the
forgeopsrepository, and you want to continue to use Kustomize-based deployments. -
You want to generate Kustomize manifests for the platform, including custom manifests, using the forgeops generate command.
-
Kustomize is your organization’s preferred deployment technology for Kubernetes.
-
Kustomize offers needed features that are not available in Helm.
Deploy using Helm on GKE, EKS, or AKS
-
Verify that you have set up your environment and created a Kubernetes cluster as documented in the setup section.
-
Ensure that the
image.repositoryandimage.tagsettings for all the platform components are correct in your /path/to/forgeops/charts/identity-platform/values.yaml file. For example:-
The following lines pertain to the AM image:
… 149 am: 150 enabled: true 151 replicaCount: 1 152 153 image: 154 repository: us-docker.pkg.dev/forgeops-public/images/am 155 tag: "7.5.0" 156 pullPolicy: IfNotPresent 157 imagePullSecrets: [] 158 …
-
The following lines pertain to the IDM image:
… 319 idm: 320 enabled: true 321 replicaCount: 1 322 323 image: 324 repository: us-docker.pkg.dev/forgeops-public/images/idm 325 tag: "7.5.0" 326 pullPolicy: IfNotPresent 327 imagePullSecrets: [] …
-
-
Set up your Kubernetes context:
-
Set the
KUBECONFIGenvironment variable so that your Kubernetes context references the cluster in which you’ll perform the ForgeOps deployment. -
Create a Kubernetes namespace in the cluster for the Ping Identity Platform pods:
$ kubectl create namespace my-namespace -
Set the active namespace in your Kubernetes context to the Kubernetes namespace you just created:
$ kubens my-namespace
-
-
Run the install-prereqs command:
$ cd /path/to/forgeops/charts/scripts
$ ./install-prereqs
-
Run the helm-upgrade command:
$ cd ../identity-platform
$ helm upgrade --install identity-platform \
 oci://us-docker.pkg.dev/forgeops-public/charts/identity-platform \
 --version 7.5 --namespace my-namespace \
 --values values-deployment-size.yaml \
 --set 'platform.ingress.hosts={forgeops.example.com}'
For a single-instance deployment, omit the
--valuesargument.For small, medium, and large deployments, provide a
--valuesargument and specify deployment-size assmall,medium, orlarge.For more information about single-instance deployments and deployment sizes, refer to Cluster and deployment sizes.
When deploying the platform with Docker images other than the public evaluation images, you’ll also need to set additional Helm values such as
am.image.repository,am.image.tag,idm.image.repository, andidm.image.tag. For an example, refer to Redeploy AM: Helm deployments.Ping Identity only offers its software or services to legal entities that have entered into a binding license agreement with Ping Identity. When you install Docker images provided by ForgeOps, you agree either that: 1) you are an authorized user of a Ping Identity Platform customer that has entered into a license agreement with Ping Identity governing your use of the Ping Identity software; or 2) your use of the Ping Identity Platform software is subject to the Ping Identity Subscription Agreements.
-
Check the status of the pods in the namespace in which you deployed the platform until all the pods are ready:
-
Run the kubectl get pods command.
-
Review the output. Deployment is complete when:
-
All entries in the
STATUScolumn indicateRunningorCompleted. -
The
READYcolumn indicates all running containers are available. The entry in theREADYcolumn represents [total number of containers/number of available containers].
-
-
If necessary, continue to query your deployment’s status until all the pods are ready.
-
-
Back up and save the Kubernetes secrets that contain the master and TLS keys:
-
To avoid accidentally putting the backups under version control, change to a directory that is outside your
forgeopsrepository clone. -
The
ds-master-keypairsecret contains the DS master key. This key is required to decrypt data from a directory backup. Failure to save this key could result in data loss.Back up the Kubernetes secret that contains the DS master key:
$ kubectl get secret ds-master-keypair -o yaml > master-key-pair.yaml
-
The
ds-ssl-keypairsecret contains the DS TLS key. This key is needed for cross-environment replication topologies.Back up the Kubernetes secret that contains the DS TLS key pair:
$ kubectl get secret ds-ssl-keypair -o yaml > tls-key-pair.yaml
-
Save the two backup files.
-
-
(Optional) Deploy Prometheus, Grafana, and Alertmanager for monitoring and alerting[8]:
-
Deploy Prometheus, Grafana, and Alertmanager pods in your ForgeOps deployment:
$ /path/to/forgeops/bin/prometheus-deploy.sh

**This script requires Helm version 3.04 or later due to changes in the behaviour of 'helm repo add' command.**

namespace/monitoring created
"stable" has been added to your repositories
"prometheus-community" has been added to your repositories
Hang tight while we grab the latest from your chart repositories...
...Successfully got an update from the "ingress-nginx" chart repository
...Successfully got an update from the "codecentric" chart repository
...Successfully got an update from the "prometheus-community" chart repository
...Successfully got an update from the "stable" chart repository
Update Complete. ⎈Happy Helming!⎈
Release "prometheus-operator" does not exist. Installing it now.
NAME: prometheus-operator
LAST DEPLOYED: ...
NAMESPACE: monitoring
STATUS: deployed
REVISION: 1
NOTES:
kube-prometheus-stack has been installed. Check its status by running:
  kubectl --namespace monitoring get pods -l "release=prometheus-operator"

Visit https://github.com/prometheus-operator/kube-prometheus for instructions on how to create & configure Alertmanager and Prometheus instances using the Operator.
...
Release "forgerock-metrics" does not exist. Installing it now.
NAME: forgerock-metrics
LAST DEPLOYED: ...
NAMESPACE: monitoring
STATUS: deployed
REVISION: 1
TEST SUITE: None
-
Check the status of the pods in the
monitoringnamespace until all the pods are ready:$ kubectl get pods --namespace monitoring NAME READY STATUS RESTARTS AGE alertmanager-prometheus-operator-kube-p-alertmanager-0 2/2 Running 0 119s prometheus-operator-grafana-95b8f5b7d-nn65h 3/3 Running 0 2m4s prometheus-operator-kube-p-operator-7d54989595-pdj44 1/1 Running 0 2m4s prometheus-operator-kube-state-metrics-d95996bc4-wcf7s 1/1 Running 0 2m4s prometheus-operator-prometheus-node-exporter-67xq4 1/1 Running 0 2m4s prometheus-operator-prometheus-node-exporter-b4grn 1/1 Running 0 2m4s prometheus-operator-prometheus-node-exporter-cwhcn 1/1 Running 0 2m4s prometheus-operator-prometheus-node-exporter-h9brd 1/1 Running 0 2m4s prometheus-operator-prometheus-node-exporter-q8zrk 1/1 Running 0 2m4s prometheus-operator-prometheus-node-exporter-vqpt5 1/1 Running 0 2m4s prometheus-prometheus-operator-kube-p-prometheus-0 2/2 Running 0 119s
-
-
(Optional) Install a TLS certificate instead of using the default self-signed certificate in your ForgeOps deployment. Refer to TLS certificate for details.
Next step
Deploy using Helm on Minikube
-
Verify that you have set up your environment and created a Kubernetes cluster as documented in the setup section.
-
Ensure that the
image.repositoryandimage.tagsettings for all the platform components are correct in your /path/to/forgeops/charts/identity-platform/values.yaml file. For example:-
The following lines pertain to the AM image:
… 149 am: 150 enabled: true 151 replicaCount: 1 152 153 image: 154 repository: us-docker.pkg.dev/forgeops-public/images/am 155 tag: "7.5.0" 156 pullPolicy: IfNotPresent 157 imagePullSecrets: [] 158 …
-
The following lines pertain to the IDM image:
… 319 idm: 320 enabled: true 321 replicaCount: 1 322 323 image: 324 repository: us-docker.pkg.dev/forgeops-public/images/idm 325 tag: "7.5.0" 326 pullPolicy: IfNotPresent 327 imagePullSecrets: [] …
-
-
Set up your Kubernetes context:
-
Create a Kubernetes namespace in the cluster for the Ping Identity Platform pods:
$ kubectl create namespace my-namespace -
Set the active namespace in your Kubernetes context to the Kubernetes namespace you just created:
$ kubens my-namespace
-
-
Run the install-prereqs command:
$ cd /path/to/forgeops/charts/scripts
$ ./install-prereqs
-
Run the helm-upgrade command:
$ cd ../identity-platform
$ helm upgrade --install identity-platform \
 oci://us-docker.pkg.dev/forgeops-public/charts/identity-platform \
 --version 7.5 --namespace my-namespace \
 --set 'ds_idrepo.volumeClaimSpec.storageClassName=standard' \
 --set 'ds_cts.volumeClaimSpec.storageClassName=standard' \
 --set 'platform.ingress.hosts={forgeops.example.com}'
The preceding command creates a single-instance ForgeOps deployment. Only single-instance deployments are supported on Minikube.
For more information about single-instance deployments, refer to Cluster and deployment sizes.
Ping Identity only offers its software or services to legal entities that have entered into a binding license agreement with Ping Identity. When you install Docker images provided by ForgeOps, you agree either that: 1) you are an authorized user of a Ping Identity Platform customer that has entered into a license agreement with Ping Identity governing your use of the Ping Identity software; or 2) your use of the Ping Identity Platform software is subject to the Ping Identity Subscription Agreements.
-
Check the status of the pods in the namespace in which you deployed the platform until all the pods are ready:
-
Run the kubectl get pods command.
-
Review the output. Deployment is complete when:
-
All entries in the
STATUScolumn indicateRunningorCompleted. -
The
READYcolumn indicates all running containers are available. The entry in theREADYcolumn represents [total number of containers/number of available containers].
-
-
If necessary, continue to query your deployment’s status until all the pods are ready.
-
-
Perform this step only if you are running Minikube on an ARM-based macOS system[7] :
In a separate terminal tab or window, run the minikube tunnel command, and enter your system’s superuser password when prompted:
$ minikube tunnel ✅ Tunnel successfully started 📌 NOTE: Please do not close this terminal as this process must stay alive for the tunnel to be accessible … ❗ The service/ingress forgerock requires privileged ports to be exposed: [80 443] 🔑 sudo permission will be asked for it. ❗ The service/ingress ig requires privileged ports to be exposed: [80 443] 🏃 Starting tunnel for service forgerock. 🔑 sudo permission will be asked for it. 🏃 Starting tunnel for service ig. Password:
The tunnel creates networking that lets you access the Minikube cluster’s ingress on the localhost IP address (127.0.0.1). Leave the tab or window that started the tunnel open for as long as you run the ForgeOps deployment.
Refer to this post for an explanation about why a Minikube tunnel is required to access ingress resources when running Minikube on an ARM-based macOS system.
-
(Optional) Install a TLS certificate instead of using the default self-signed certificate in your ForgeOps deployment. Refer to TLS certificate for details.
Next step
Deploy using Kustomize on GKE, EKS, or AKS
-
Verify that you have set up your environment and created a Kubernetes cluster as documented in the setup section.
-
Identify Docker images to deploy:
-
If you want to use custom Docker images for the platform, update the image defaulter file with image names and tags generated by the forgeops build command. The image defaulter file is located at /path/to/forgeops/kustomize/deploy/image-defaulter/kustomization.yaml.
You can get the image names and tags from the image defaulter file on the system on which the customized Docker images were developed.
-
If you want to use ForgeOps-provided evaluation Docker images for the platform, do not modify the image defaulter file.
-
-
Set up your Kubernetes context:
-
Set the
KUBECONFIGenvironment variable so that your Kubernetes context references the cluster in which you’ll perform the ForgeOps deployment. -
Create a Kubernetes namespace in the cluster for the Ping Identity Platform pods:
$ kubectl create namespace my-namespace -
Set the active namespace in your Kubernetes context to the Kubernetes namespace you just created:
$ kubens my-namespace
-
-
Run the forgeops install command. For example, to install a small-sized deployment:
$ cd /path/to/forgeops/bin
$ ./forgeops install --deployment-size --fqdn forgeops.example.com --namespace my-namespace
The forgeops install command examines the image defaulter file to determine which Docker images to use.
For a single-instance deployment, specify --deployment-size as
--cdk.For small, medium, and large deployments, specify --deployment-size as
--small,--medium, or--large.For more information about single-instance deployments and deployment sizes, refer to Cluster and deployment sizes.
If you prefer not to deploy using a single forgeops install command, refer to Alternative deployment techniques when using Kustomize for more information.
Ping Identity only offers its software or services to legal entities that have entered into a binding license agreement with Ping Identity. When you install Docker images provided by ForgeOps, you agree either that: 1) you are an authorized user of a Ping Identity Platform customer that has entered into a license agreement with Ping Identity governing your use of the Ping Identity software; or 2) your use of the Ping Identity Platform software is subject to the Ping Identity Subscription Agreements.
-
Check the status of the pods in the namespace in which you deployed the platform until all the pods are ready:
-
Run the kubectl get pods command.
-
Review the output. Deployment is complete when:
-
All entries in the
STATUScolumn indicateRunningorCompleted. -
The
READYcolumn indicates all running containers are available. The entry in theREADYcolumn represents [total number of containers/number of available containers].
-
-
If necessary, continue to query your deployment’s status until all the pods are ready.
-
-
Back up and save the Kubernetes secrets that contain the master and TLS keys:
-
To avoid accidentally putting the backups under version control, change to a directory that is outside your
forgeopsrepository clone. -
The
ds-master-keypairsecret contains the DS master key. This key is required to decrypt data from a directory backup. Failure to save this key could result in data loss.Back up the Kubernetes secret that contains the DS master key:
$ kubectl get secret ds-master-keypair -o yaml > master-key-pair.yaml
-
The
ds-ssl-keypairsecret contains the DS TLS key. This key is needed for cross-environment replication topologies.Back up the Kubernetes secret that contains the DS TLS key pair:
$ kubectl get secret ds-ssl-keypair -o yaml > tls-key-pair.yaml
-
Save the two backup files.
-
-
(Optional) Deploy Prometheus, Grafana, and Alertmanager for monitoring and alerting[9]:
-
Deploy Prometheus, Grafana, and Alertmanager pods in your ForgeOps deployment:
$ /path/to/forgeops/bin/prometheus-deploy.sh

**This script requires Helm version 3.04 or later due to changes in the behaviour of 'helm repo add' command.**

namespace/monitoring created
"stable" has been added to your repositories
"prometheus-community" has been added to your repositories
Hang tight while we grab the latest from your chart repositories...
...Successfully got an update from the "ingress-nginx" chart repository
...Successfully got an update from the "codecentric" chart repository
...Successfully got an update from the "prometheus-community" chart repository
...Successfully got an update from the "stable" chart repository
Update Complete. ⎈Happy Helming!⎈
Release "prometheus-operator" does not exist. Installing it now.
NAME: prometheus-operator
LAST DEPLOYED: ...
NAMESPACE: monitoring
STATUS: deployed
REVISION: 1
NOTES:
kube-prometheus-stack has been installed. Check its status by running:
  kubectl --namespace monitoring get pods -l "release=prometheus-operator"

Visit https://github.com/prometheus-operator/kube-prometheus for instructions on how to create & configure Alertmanager and Prometheus instances using the Operator.
...
Release "forgerock-metrics" does not exist. Installing it now.
NAME: forgerock-metrics
LAST DEPLOYED: ...
NAMESPACE: monitoring
STATUS: deployed
REVISION: 1
TEST SUITE: None
-
Check the status of the pods in the
monitoringnamespace until all the pods are ready:$ kubectl get pods --namespace monitoring NAME READY STATUS RESTARTS AGE alertmanager-prometheus-operator-kube-p-alertmanager-0 2/2 Running 0 119s prometheus-operator-grafana-95b8f5b7d-nn65h 3/3 Running 0 2m4s prometheus-operator-kube-p-operator-7d54989595-pdj44 1/1 Running 0 2m4s prometheus-operator-kube-state-metrics-d95996bc4-wcf7s 1/1 Running 0 2m4s prometheus-operator-prometheus-node-exporter-67xq4 1/1 Running 0 2m4s prometheus-operator-prometheus-node-exporter-b4grn 1/1 Running 0 2m4s prometheus-operator-prometheus-node-exporter-cwhcn 1/1 Running 0 2m4s prometheus-operator-prometheus-node-exporter-h9brd 1/1 Running 0 2m4s prometheus-operator-prometheus-node-exporter-q8zrk 1/1 Running 0 2m4s prometheus-operator-prometheus-node-exporter-vqpt5 1/1 Running 0 2m4s prometheus-prometheus-operator-kube-p-prometheus-0 2/2 Running 0 119s
-
-
(Optional) Install a TLS certificate instead of using the default self-signed certificate in your ForgeOps deployment. Refer to TLS certificate for details.
Alternative deployment techniques when using Kustomize
Staged deployments
If you prefer not to perform a ForgeOps Kustomize deployment using a single forgeops install command, you can deploy the platform in stages, component by component, instead of deploying with a single command. Staging deployments can be useful if you need to troubleshoot a deployment issue.
Generating Kustomize manifests and using kubectl apply -k commands
You can generate Kustomize manifests, and then deploy the platform using the kubectl apply -k command.
The forgeops install command generates Kustomize manifests that let
you recreate your ForgeOps deployment. The manifests are written to the
/path/to/forgeops/kustomize/deploy directory of your forgeops
repository clone. Advanced users who prefer to work directly with Kustomize
manifests that describe their ForgeOps deployment can use the generated
content in the kustomize/deploy directory as an alternative to using
the forgeops command:
-
Generate an initial set of Kustomize manifests by running the forgeops install command. If you prefer to generate the manifests without installing the platform, you can run the forgeops generate command instead of the forgeops install command.
-
Run kubectl apply -k commands to deploy and remove platform components. Specify a manifest in the kustomize/deploy directory as an argument when you run kubectl apply -k commands.
-
Use GitOps to manage configuration changes to the kustomize/deploy directory instead of making changes to files in the kustomize/base and kustomize/overlay directories.
-
Next step
Deploy using Kustomize on Minikube
-
Verify that you have set up your environment and created a Kubernetes cluster as documented in the setup section.
-
Identify Docker images to deploy:
-
If you want to use custom Docker images for the platform, update the image defaulter file with image names and tags generated by the forgeops build command. The image defaulter file is located at /path/to/forgeops/kustomize/deploy/image-defaulter/kustomization.yaml.
You can get the image names and tags from the image defaulter file on the system on which the customized Docker images were developed.
-
If you want to use ForgeOps-provided evaluation Docker images for the platform, do not modify the image defaulter file.
-
-
Set up your Kubernetes context:
-
Create a Kubernetes namespace in the cluster for the Ping Identity Platform pods:
$ kubectl create namespace my-namespace -
Set the active namespace in your Kubernetes context to the Kubernetes namespace you just created:
$ kubens my-namespace
-
-
Run the forgeops install command:
$ cd /path/to/forgeops/bin
$ ./forgeops install --cdk --fqdn forgeops.example.com --namespace my-namespace
The forgeops install command examines the image defaulter file to determine which Docker images to use.
The preceding command creates a single-instance ForgeOps deployment. Only single-instance deployments are supported on Minikube.
If you prefer not to deploy using a single forgeops install command, refer to Alternative deployment techniques when using Kustomize for more information.
Ping Identity only offers its software or services to legal entities that have entered into a binding license agreement with Ping Identity. When you install Docker images provided by ForgeOps, you agree either that: 1) you are an authorized user of a Ping Identity Platform customer that has entered into a license agreement with Ping Identity governing your use of the Ping Identity software; or 2) your use of the Ping Identity Platform software is subject to the Ping Identity Subscription Agreements.
-
Check the status of the pods in the namespace in which you deployed the platform until all the pods are ready:
-
Run the kubectl get pods command.
-
Review the output. Deployment is complete when:
-
All entries in the
STATUScolumn indicateRunningorCompleted. -
The
READYcolumn indicates all running containers are available. The entry in theREADYcolumn represents [total number of containers/number of available containers].
-
-
If necessary, continue to query your deployment’s status until all the pods are ready.
-
-
Perform this step only if you are running Minikube on an ARM-based macOS system[7] :
In a separate terminal tab or window, run the minikube tunnel command, and enter your system’s superuser password when prompted:
$ minikube tunnel ✅ Tunnel successfully started 📌 NOTE: Please do not close this terminal as this process must stay alive for the tunnel to be accessible … ❗ The service/ingress forgerock requires privileged ports to be exposed: [80 443] 🔑 sudo permission will be asked for it. ❗ The service/ingress ig requires privileged ports to be exposed: [80 443] 🏃 Starting tunnel for service forgerock. 🔑 sudo permission will be asked for it. 🏃 Starting tunnel for service ig. Password:
The tunnel creates networking that lets you access the Minikube cluster’s ingress on the localhost IP address (127.0.0.1). Leave the tab or window that started the tunnel open for as long as you run the ForgeOps deployment.
Refer to this post for an explanation about why a Minikube tunnel is required to access ingress resources when running Minikube on an ARM-based macOS system.
-
(Optional) Install a TLS certificate instead of using the default self-signed certificate in your ForgeOps deployment. Refer to TLS certificate for details.
Alternative deployment techniques when using Kustomize
Staged deployments
If you prefer not to perform a ForgeOps Kustomize deployment using a single forgeops install command, you can deploy the platform in stages, component by component, instead of deploying with a single command. Staging deployments can be useful if you need to troubleshoot a deployment issue.
Generating Kustomize manifests and using kubectl apply -k commands
You can generate Kustomize manifests, and then deploy the platform using the kubectl apply -k command.
The forgeops install command generates Kustomize manifests that let
you recreate your ForgeOps deployment. The manifests are written to the
/path/to/forgeops/kustomize/deploy directory of your forgeops
repository clone. Advanced users who prefer to work directly with Kustomize
manifests that describe their ForgeOps deployment can use the generated
content in the kustomize/deploy directory as an alternative to using
the forgeops command:
-
Generate an initial set of Kustomize manifests by running the forgeops install command. If you prefer to generate the manifests without installing the platform, you can run the forgeops generate command instead of the forgeops install command.
-
Run kubectl apply -k commands to deploy and remove platform components. Specify a manifest in the kustomize/deploy directory as an argument when you run kubectl apply -k commands.
-
Use GitOps to manage configuration changes to the kustomize/deploy directory instead of making changes to files in the kustomize/base and kustomize/overlay directories.
-
Next step
Next steps
If you’ve followed the instructions for performing a ForgeOps deployment without modifying configurations, then the following indicates that you’ve been successful:
-
The Kubernetes cluster and pods are up and running.
-
DS, AM, and IDM are installed and running. You can access each ForgeOps component.
-
DS replication and failover work as expected.[1]
When you’re satisfied that all of these conditions are met, then you’ve successfully taken the first steps towards deploying the Ping Identity Platform on Kubernetes. Congratulations!
You can use the ForgeOps deployment to test deployment customizations—options that you might want to use in production but are not part of the base deployment. Examples[2] include, but are not limited to:
-
Running lightweight benchmark tests
-
Backing up and restoring your data
-
Securing TLS with a certificate that’s dynamically obtained from Let’s Encrypt
-
Using an ingress controller other than the NGINX ingress controller
-
Resizing the cluster to meet your business requirements
-
Configuring Alert Manager to issue alerts when usage thresholds have been reached
Now that you’re familiar with ForgeOps deployments, you’re ready to work with a project team to plan and configure your production deployment. You’ll need a team with expertise in the Ping Identity Platform, in your cloud provider, and in Kubernetes on your cloud provider. We strongly recommend that you engage a Ping Identity technical consultant or partner to assist you with deploying the platform in production.
You’ll perform these major activities:
Platform configuration—Ping Identity Platform experts configure AM and IDM using single-instance ForgeOps deployments and build custom Docker images for the Ping Identity Platform. The Customization overview provides information about platform configuration tasks.
Cluster configuration—Cloud technology experts configure the Kubernetes
cluster that will host the Ping Identity Platform for optimal performance and
reliability. Tasks include configuring your Kubernetes cluster to suit your
business needs, setting up monitoring and alerts to track site health and
performance, backing up configuration and user data for disaster preparedness,
and securing your deployment. The Prepare to deploy in production
and READMEs in the forgeops repository provide information about cluster
configuration.
Site reliability engineering—Site reliability engineers monitor the
Ping Identity Platform deployment and keep the deployment up and running based on your
business requirements. These could include use cases, service-level agreements,
thresholds, and load test profiles. The
Prepare to deploy in production, and READMEs in the forgeops
repository, provide information about site reliability.
Remove a ForgeOps deployment
This page provides instructions for removing ForgeOps deployments for the following scenarios:
Remove a Helm deployment from GKE, EKS, or AKS
-
Set up your Kubernetes context:
-
Set the
KUBECONFIGenvironment variable so that your Kubernetes context references the cluster in which you deployed the platform. -
Set the active namespace in your Kubernetes context to the Kubernetes namespace in which you deployed the platform:
$ kubens my-namespace
-
-
Remove the ForgeOps deployment:
$ cd /path/to/forgeops/charts/identity-platform
$ helm uninstall identity-platform
Running helm uninstall identity-platform does not delete PVCs and the
amsterjob from your namespace. -
(Optional) To delete PVCs, use the kubectl command. For example, to delete
data-ds-idrepo-0anddata-ds-cts-0:$ kubectl delete pvc data-ds-idrepo-0 data-ds-cts-0
-
(Optional) To delete the
amsterjob, use the kubectl command:$ kubectl delete job amster
-
(Optional) Delete your cluster:
-
Change to the directory in your
forgeops-extrasrepository clone that contains Terraform artifacts:$ cd /path/to/forgeops-extras/terraform
-
Run the tf-destroy script to create your cluster:
$ ./tf-destroy
Respond
yesto theDo you really want to destroy all resources?prompt.
-
Remove a Helm deployment from Minikube
-
Set the active namespace in your Kubernetes context to the Kubernetes namespace in which you deployed the platform:
$ kubens my-namespace -
Remove the ForgeOps deployment:
$ cd /path/to/forgeops/charts/identity-platform
$ helm uninstall identity-platform
Running helm uninstall identity-platform does not delete PVCs and the
amsterjob from your namespace. -
(Optional) To delete PVCs, use the kubectl command. For example, to delete
data-ds-idrepo-0anddata-ds-cts-0:$ kubectl delete pvc data-ds-idrepo-0 data-ds-cts-0
-
(Optional) To delete the
amsterjob, use the kubectl command:$ kubectl delete job amster
-
(Optional) Delete your cluster:
$ cd /path/to/forgeops/cluster/minikube
$ ./forgeops-minikube stop
$ ./forgeops-minikube delete
Remove a Kustomize deployment from GKE, EKS, or AKS
-
Set up your Kubernetes context:
-
Set the
KUBECONFIGenvironment variable so that your Kubernetes context references the cluster in which you deployed the platform. -
Set the active namespace in your Kubernetes context to the Kubernetes namespace in which you deployed the platform:
$ kubens my-namespace
-
-
Remove the ForgeOps deployment:
$ cd /path/to/forgeops/bin
$ ./forgeops delete
Respond
Yto all theOK to delete?prompts. -
(Optional) Delete your cluster:
-
Change to the directory in your
forgeops-extrasrepository clone that contains Terraform artifacts:$ cd /path/to/forgeops-extras/terraform
-
Run the tf-destroy script to create your cluster:
$ ./tf-destroy
Respond
yesto theDo you really want to destroy all resources?prompt.
-
Remove a Kustomize deployment from Minikube
-
Set the active namespace in your Kubernetes context to the Kubernetes namespace in which you deployed the platform:
$ kubens my-namespace -
Remove the ForgeOps deployment:
$ cd /path/to/forgeops/bin
$ ./forgeops delete
Respond
Yto all theOK to delete?prompts. -
(Optional) Delete your cluster:
$ cd /path/to/forgeops/cluster/minikube
$ ./forgeops-minikube stop
$ ./forgeops-minikube delete
Customization overview
This section covers how developers build custom Docker images for the Ping Identity Platform. It also contains important conceptual material that you need to understand before you start creating Docker images.
Additional setup
This page covers setup tasks that you’ll need to perform before you can develop custom Docker images for the Ping Identity Platform. Complete all of the tasks on this page before proceeding.
Use a single-instance ForgeOps deployment
You must use a single-instance ForgeOps deployment to develop custom Docker images for the Ping Identity Platform.
Use the following links for information about how to create single-instance ForgeOps deployments:
Set up your environment to push to your Docker registry
ForgeOps deployments support any container registry that supports Docker containers. You’ll need to set up your local environment to support your container registry. Here are setup steps for four commonly-used container registries:
Docker registry on Minikube
Set up your local environment to execute docker commands on Minikube’s Docker engine.
The ForgeOps team recommends using the built-in Docker engine when developing custom Docker images using Minikube. When you use Minikube’s Docker engine, you don’t have to build Docker images on a local engine and then push the images to a local or cloud-based Docker registry. Instead, you build images using the same Docker engine that Minikube uses. This streamlines development.
To set up your local computer to use Minikube’s Docker engine, run the docker-env command in your shell:
$ eval $(minikube docker-env)
For more information about using Minikube’s built-in Docker engine, refer to Use local images by re-using the Docker daemon in the Minikube documentation.
Google Cloud Artifact Registry or Container Registry
To set up your local computer to build and push Docker images:
-
If it’s not already running, start a virtual machine that runs Docker engine. Refer to Docker engine for more information.
-
Set up a Docker credential helper:
$ gcloud auth configure-docker
AWS Elastic Container Registry
To set up your local computer to push Docker images:
-
If it’s not already running, start a virtual machine that runs Docker engine. Refer to Docker engine for more information.
-
Log in to Amazon ECR:
$ aws ecr get-login-password | \
 docker login --username AWS --password-stdin my-docker-registry
Login Succeeded
ECR login sessions expire after 12 hours. Because of this, you’ll need to perform these steps again whenever your login session expires.[10]
Azure Container Registry
To set up your local computer to push Docker images:
-
If it’s not already running, start a virtual machine that runs Docker engine. Refer to Docker engine for more information.
-
Install the ACR Docker Credential Helper.
Identify the Docker repository to push to
When you execute the forgeops build command, you must specify the repository to push your Docker image to with the --push-to argument.
The forgeops build command appends a component name to the
destination repository. For example, the command
forgeops build am --push-to us-docker.pkg.dev/my-project
pushes a Docker image to the us-docker.pkg.dev/my-project/am
repository.
To determine how to specify the --push-to argument for four commonly-used container registries:
Docker registry on Minikube
Specify --push-to none with the forgeops build command to push the Docker image to the Docker registry embedded in the Minikube cluster.
Google Cloud Artifact Registry or Container Registry
Obtain the --push-to location from your cluster administrator. After it builds the Docker image, the forgeops build command pushes the Docker image to this repository.
AWS Elastic Container Registry
Obtain the --push-to location from your cluster administrator. After it builds the Docker image, the forgeops build command pushes the Docker image to this repository.
Azure Container Registry
Obtain the --push-to location from your cluster administrator. After it builds the Docker image, the forgeops build command pushes the Docker image to this repository.
Initialize deployment environments
Deployment environments let you manage deployment manifests and image defaulters
for multiple environments in a single forgeops repository clone.
By default, the forgeops build command updates the image defaulter in the kustomize/deploy directory.
When you specify a deployment environment, the forgeops build command updates the image defaulter in the kustomize/deploy-environment directory. For example, if you ran forgeops build --deploy-env production, the image defaulter in the kustomize/deploy-production/image-defaulter directory would be updated.
Before you can use a new deployment environment, you must initialize a directory based on the /path/to/forgeops/kustomize/deploy directory to support the deployment environment. Perform these steps to initialize a new deployment environment:
$ cd /path/to/forgeops/bin
$ ./forgeops clean
$ cd ../kustomize
$ cp -rp deploy deploy-my-environment
| If you need multiple deployment environments, you’ll need to initialize each environment before you can start using it. |
Next step
About custom images
In development
To develop customized Docker images, start with ForgeOps-provided images. Then, build your configuration profile iteratively as you customize the platform to meet your needs. Building Docker images from time to time integrates your custom configuration profile into new Docker images.
To develop a customized DS Docker image, refer to ds image.
To develop a customized AM Docker image, refer to am image.
To develop a customized IDM Docker image, refer to idm image.

In production
Before you deploy the platform in production, you can build your own base images and integrate your configuration profiles into them.
To create Docker images for production deployment of the platform, refer to Base Docker images.

Next step
ds image
The ds Docker image contains the DS
configuration. You can customize the DS image before deploying it in
your production environment.
|
The customization described here is for use in new Ping Identity Platform deployments. |
This section covers:
-
Customize LDAP configuration by including LDIF format LDAP configuration files in
ldif-extdirectory. -
Customize LDAP schema by including customized schema LDIF files in the
configdirectory. -
Customize DS setup behavior by updating the setup and post-init runtime scripts in the
default-scriptsdirectory. -
Build an updated DS Docker image that contains the above-mentioned customizations.
-
Redeploy DS.
-
Verify the changes you’ve made to the DS configuration are in the new Docker image.
Detailed steps
-
Verify that:
-
You have access to a single-instance ForgeOps deployment.
-
The namespace where the platform is deployed is set in your Kubernetes context.
-
All required third-party software is installed in your local environment (Minikube|GKE|EKS|AKS).
-
You have set up your environment to push to your Docker registry.
-
-
Perform version control activities on your
forgeopsrepository clone:-
Run the git status command.
-
(Optional) Run the git commit command to commit changes to files that have been modified.
-
-
Add your DS customizations:
-
Refer to custom LDAP configuration to add LDAP configuration.
-
Refer to custom LDAP schema to add LDAP schema.
-
Customize DS’s setup behavior in the /path/to/forgeops/docker/ds/ds-new directory:
-
To set up profiles and indexes, edit the
default-scripts/setupscript. For more information, refer tosetupscript details. -
To add custom configurations on a running deployment, edit the
default-scripts/post-initscript. In this case the existing directory data is not deleted. For more information, refer topost-initscript details. -
To prepare the DS docker image for setup, edit the
ds-setup.shscript. For more information, refer tods-setup.shscript details.
-
-
-
Identify the repository to which you’ll push the Docker image. You’ll use this location to specify the --push-to argument value in the build ds image step.
-
Decide on the DS image tag for each build of the image. You’ll use this tag to specify the
--tagargument value in the build DS image step. -
Build a new DS image that includes your customization:
$ cd /path/to/forgeops/bin
$ ./forgeops build ds --config-profile my-profile --push-to my-repo --tag my-ds-tag
-
Redeploy DS using your new DS image:
-
Deploy using the
forgeopscommand -
Deployment using Helm
The forgeops build command calls Docker to build a new ds Docker image and to push the image to your Docker repository. The new image includes your custom ldap and schema files. It also updates the image defaulter file so that the next time you install DS, the deployed DS server will include your custom DS image.
Perform version control activities on your forgeops repository clone:
-
Run the git status command.
Review the state of the kustomize/deploy/image-defaulter/kustomization.yaml file.
-
(Optional) Run the git commit command to commit changes to the image defaulter file.
-
Remove DS from your ForgeOps deployment:
$ ./forgeops delete ds
...
deployment.apps "ds" deleted
-
Delete the PVCs attached to DS pods using the kubectl delete pvc command.
-
Redeploy DS using the new Docker image:
$ ./forgeops install ds --single-instance
Checking cert-manager and related CRDs: cert-manager CRD found in cluster.
Checking secret-agent operator and related CRDs: secret-agent CRD found in cluster
-
Locate the repository and tag for the new DS Docker image from the forgeops build command output.
-
Delete the PVCs attached to DS pods using the kubectl delete pvc command.
If the attached DS pod is running, the PVC will not get deleted immediately. So you should stop the running DS pods.
In another terminal window, stop the DS pods using the kubectl delete pods command. This deletes the pods and attached PVCs.
-
Redeploy DS using the new Docker image:
$ cd /path/to/forgeops/charts/identity-platform
$ helm upgrade identity-platform \
oci://us-docker.pkg.dev/forgeops-public/charts/identity-platform \
--version 7.5 --namespace my-namespace \
--set ds.image.repository=my-repository' \
--set 'ds.image.tag=my-ds-tag'
Next step
am and idm images
AM and IDM configuration is organized and managed in two categories-- static configuration and dynamic configuration.
Static configuration
Static configuration consists of properties and settings used by the Ping Identity Platform. Examples of static configuration include AM realms, AM authentication trees, IDM social identity provider definitions, and IDM data mapping models for reconciliation.
Static configuration is stored in JSON configuration files. Because of this, static configuration is also referred to as file-based configuration.
You build static configuration into the am and
idm Docker images during development using the
following general process:
-
Change the AM or IDM configuration in a single-instance ForgeOps deployment using the UIs and APIs.
-
Export the changes to your
forgeopsrepository clone. -
Build a new AM or IDM Docker image that contains the updated configuration.
-
Restart Ping Identity Platform services using the new Docker images.
-
Test your changes. Incorrect changes to static configuration might cause the platform to become inoperable.
-
Promote your changes to your test and production environments as desired.
In Ping Identity Platform deployments, static configuration is immutable. Do not change static configuration in testing or production. Instead, if you need to change static configuration, return to the development phase, make your changes, and build new custom Docker images that include the changes. Then, promote the new images to your test and production environments.
Dynamic configuration
Dynamic configuration consists of access policies, applications, and data objects used by the Ping Identity Platform. Examples of dynamic configuration include AM access policies, AM agents, AM OAuth 2.0 client definitions, IDM identities, and IDM relationships.
Dynamic configuration can change at any time, including when the platform is running in production.
You’ll need to devise a strategy for managing AM and IDM dynamic configuration, so that you can:
-
Extract sample dynamic configuration for use by developers.
-
Back up and restore dynamic configuration.
Tips for managing AM dynamic configuration
You can use one or both of the following techniques to manage AM dynamic configuration:
-
Use the amster utility to manage AM dynamic configuration. For example:
-
Make modifications to AM dynamic configuration by using the AM admin UI.
-
Export the AM dynamic configuration to your local file system by using the amster utility. You might manage these files in a Git repository. For example:
$ cd /path/to/forgeops/bin
$ mkdir /tmp/amster
$ ./amster export /tmp/amster
Cleaning up amster components
Packing and uploading configs
configmap/amster-files created
configmap/amster-export-type created
configmap/amster-retain created
Deploying amster
job.batch/amster created

Waiting for amster job to complete. This can take several minutes.
pod/amster-r99l9 condition met
tar: Removing leading `/' from member names
Updating amster config.
Updating amster config complete.
Cleaning up amster components
job.batch "amster" deleted
configmap "amster-files" deleted
configmap "amster-export-type" deleted
configmap "amster-retain" deleted
-
If desired, import these files into another AM deployment by using the amster import command.
Note that the amster utility automatically converts passwords in AM dynamic configuration to configuration expressions. Because of this, passwords in AM configuration files will not appear in cleartext. For details about how to work with dynamic configuration that has passwords and other properties specified as configuration expressions, refer to Export Utilities and Configuration Expressions.
-
-
Write REST API applications to import and export AM dynamic configuration. For more information, refer to Rest API in the AM documentation.
Tips for managing IDM dynamic configuration
You can use one or both of the following techniques to manage IDM dynamic configuration:
-
Migrate dynamic configuration by using IDM’s Data Migration Service. For more information, refer to Migrate Data in the IDM documentation.
-
Write REST API applications to import and export IDM dynamic configuration. For more information, refer to the Rest API Reference in the IDM documentation.
Configuration profiles
A Ping Identity Platform configuration profile is a named set of configuration that describes the operational characteristics of a running ForgeOps deployment. A configuration profile consists of:
-
AM static configuration
-
IDM static configuration
Configuration profiles reside in the following paths in the forgeops
repository:
-
docker/am/config-profiles
-
docker/idm/config-profiles
User-customized configuration profiles are stored in subdirectories of these
paths. For example, a configuration profile named my-profile would be stored
in the paths docker/am/config-profiles/my-profile and
docker/idm/config-profiles/my-profile.
Use Git to manage the directories that contain configuration profiles.
Next step
About property value substitution
Many property values in ForgeOps deployments' canonical configuration profile are specified as configuration expressions instead of as hard-coded values. Fully-qualified domain names (FQDNs), passwords, and several other properties are all specified as configuration expressions.
Configuration expressions are property values in the AM and IDM configurations that are set when AM and IDM start up. Instead of being set to fixed, hard-coded values in the AM and IDM configurations, their values vary, depending on conditions in the run-time environment.
Using configuration expressions lets you use a single configuration profile that takes different values at run-time depending on the deployment environment. For example, you can use a single configuration profile for development, test, and production deployments.
In the Ping Identity Platform, configuration expressions are preceded by an ampersand
and enclosed in braces. For example, &{am.encryption.key}.
The statement, am.encryption.pwd=&{am.encryption.key} in the AM
configuration indicates that the value of the property, am.encryption.pwd, is
determined when AM starts up. Contrast this with a statement,
am.encryption.pwd=myPassw0rd, which sets the property to a hard-coded value,
myPassw0rd, regardless of the run-time environment.
How property value substitution works
This example shows how property value substitution works for a value specified as a configuration expression in the AM configuration:
-
Search the /path/to/forgeops/docker directory for the string
am.encryption.pwd.$ grep -Ri "am.encryption.pwd" ./am/.../server-default.json: "am.encryption.pwd=&{am.encryption.key}", -
Notice the line in your search results:
"am.encryption.pwd=&{am.encryption.key}",Because the property
am.encryption.pwdis being set to a configuration expression, its value will be determined when AM starts up. -
Search the
forgeopsrepository for the stringAM_ENCRYPTION_KEY. You’ll notice that the secret agent operator sets the environment variable,AM_ENCRYPTION_KEY. The property,am.encryption.pwd, will be set to the value of the environment variable,AM_ENCRYPTION_KEYwhen AM starts up.
Configuration expressions take their values from environment variables as follows:
-
Uppercase characters replace lowercase characters in the configuration expression’s name.
-
Underscores replace periods in the configuration expression’s name.
For more information about configuration expressions, refer to Property Value Substitution in the IDM documentation.
Export utilities and configuration expressions
This section covers differences in how forgeops repository utilities export
configuration that contains configuration expressions from a running ForgeOps
deployment.
In the IDM configuration
The IDM admin UI is aware of configuration expressions.
Passwords specified as configuration expressions in the IDM admin UI are stored in IDM’s JSON-based configuration files as configuration expressions.
The forgeops repository’s bin/config export idm command exports
IDM static configuration from running ForgeOps deployments to your
forgeops repository clone. The config utility makes no changes to
IDM static configuration; if properties are specified as configuration
expressions, the configuration expressions are preserved in the IDM
configuration.
In the AM configuration
The AM admin UI is not aware of configuration expressions.
Properties cannot be specified as configuration expressions in the AM admin UI; they must be specified as string values. The string values are preserved in the AM configuration.
AM supports specifying configuration expressions in both static and dynamic configuration.
The forgeops repository’s bin/config export am command exports
AM static configuration from running ForgeOps deployments to your
forgeops repository clone. All AM static configuration properties,
including passwords, have string values. However, after the config
utility copies the AM static configuration from the forgeops
repository, it calls the AM configuration upgrader. The upgrader
transforms the AM configuration, following rules in the
etc/am-upgrader-rules/placeholders.groovy file.
These rules tell the upgrader to convert a number of string values in AM static configuration to configuration expressions. For example, there are rules to convert all the passwords in AM static configuration to configuration expressions.
You’ll need to modify the etc/am-upgrader-rules/placeholders.groovy file if:
-
You add AM static configuration that contains new passwords.
-
You want to change additional properties in AM static configuration to use configuration expressions.
|
An alternative to modifying the etc/am-upgrader-rules/placeholders.groovy file is using the jq command to modify the output from the config utility. |
The forgeops repository’s bin/amster export command exports
AM dynamic configuration from running ForgeOps deployments to your
forgeops repository clone. When dynamic configuration is exported, it contains
properties with string values. The amster utility transforms the
values of several types of properties to configuration expressions:
-
Passwords
-
Fully-qualified domain names
-
The Amster version
The Secret Agent configuration computes and propagates passwords for AM
dynamic configuration. You’ll need to modify the
kustomize/base/secrets/secret_agent_config.yaml file if:
-
You add new AM dynamic configuration that contains passwords to be generated.
-
You want to hard code a specific value for an existing password, instead of using a generated password.
AM does not support property value substitution for several types of configuration properties. Refer to Property value substitution in the AM documentation for more information.
Next step
am image
The am Docker image contains the AM
configuration.
Customization overview
-
Customize AM’s configuration data by using the AM admin UI and REST APIs.
-
Capture changes to the AM configuration by exporting them from the AM service running on Kubernetes to the staging area.
-
Save the modified AM configuration to a configuration profile in your
forgeopsrepository clone. -
Build an updated
amDocker image that contains your customizations. -
Redeploy AM.
-
Verify that changes you’ve made to the AM configuration are in the new Docker image.
Detailed steps
-
Verify that:
-
You have access to a single-instance ForgeOps deployment.
-
The namespace where the platform is deployed is set in your Kubernetes context.
-
All required third-party software is installed in your local environment (Minikube|GKE|EKS|AKS).
-
You have set up your environment to push to your Docker registry.
-
-
Perform version control activities on your
forgeopsrepository clone:-
Run the git status command.
-
Review the state of the docker/am/config-profiles/my-profile directory.
-
(Optional) Run the git commit command to commit changes to files that have been modified.
-
-
Modify the AM configuration using the AM admin UI or the REST APIs.
Refer to AM Services for more information about how to access the AM admin UI or REST APIs.
Refer to About property value substitution for important information about configuring values that vary at run-time, such as passwords and host names.
-
Export the changes you made to the AM configuration in the running ForgeOps deployment to a configuration profile:
$ cd /path/to/forgeops/bin
$ ./config export am my-profile --sort
[INFO] Running export for am in am-6fb64659f-bmdhh
[INFO] Updating existing profile: /path/to/forgeops/docker/am/config-profiles/my-profile
[INFO] Clean profile: /path/to/forgeops/docker/am/config-profiles/my-profile
[INFO] Exported AM config
[INFO] Running AM static config through the am-config-upgrader to upgrade to the current version of forgeops.

+ docker run --rm --user 502:20 --volume /path/to/forgeops/docker/am/config-profiles/my-profile:/am-config gcr.io/forgerock-io/am-config-upgrader/pit1:7.5.0' locally
7.5.0-latest-postcommit: Pulling from gcr.io/forgerock-io/am-config-upgrader/pit1
...
Reading existing configuration from files in /am-config/config/services...
Modifying configuration based on rules in [/rules/latest.groovy]...
reading configuration from file-based config files
Writing configuration to new location at /am-config/config/services...
Upgrade Completed, modified configuration saved to /am-config/config/services
[INFO] Completed upgrading AM configuration
[INFO] Running AM static config through the am-config-upgrader to replace any missing default placeholders.

+ docker run --rm --user 502:20 --volume /path/to/forgeops/docker/am/config-profiles/my-profile:/am-config --volume /path/to/forgeops/etc/am-upgrader-rules:/rules gcr.io/forgerock-io/am-config-upgrader/pit1:7.5.0

...

Reading existing configuration from files in /am-config/config/services...
Modifying configuration based on rules in [/rules/placeholders.groovy]...
reading configuration from file-based config files
...
Writing configuration to new location at /am-config/config/services...
Upgrade Completed, modified configuration saved to /am-config/config/services
[INFO] Completed replacing AM placeholders
[INFO] Completed export
[INFO] Sorting configuration.
[INFO] Sorting completed.
If the configuration profile does not exist yet, the config export command creates it.
The config export am my-profile command copies AM static configuration from the ForgeOps deployment to the configuration profile:

-
Perform version control activities on your
forgeopsrepository clone:-
Review the differences in the files you exported to the configuration profile. For example:
$ git diff
diff --git a/docker/am/config-profiles/my-profile/config/services/realm/root/selfservicetrees/1.0/organizationconfig/default.json b/docker/am/config-profiles/my-profile/config/services/realm/root/selfservicetrees/1.0/organizationconfig/default.json
index 970c5a257..19f4f17f0 100644
--- a/docker/am/config-profiles/my-profile/config/services/realm/root/selfservicetrees/1.0/organizationconfig/default.json
+ b/docker/am/config-profiles/my-profile/config/services/realm/root/selfservicetrees/1.0/organizationconfig/default.json
@@ -9,6 +9,7 @@
     "enabled": true,
     "treeMapping": {
       "Test": "Test",
+      "Test1": "Test1",
       "forgottenUsername": "ForgottenUsername",
       "registration": "Registration",
       "resetPassword": "ResetPassword",
Note that if this is the first time that you have exported AM configuration changes to this configuration profile, the git diff command will not show any changes.
-
Run the git status command.
-
If you have new untracked files in your clone, run the git add command.
-
Review the state of the docker/am/config-profiles/my-profile directory.
-
(Optional) Run the git commit command to commit changes to files that have been modified.
-
-
Identify the repository to which you’ll push the Docker image. You’ll use this location to specify the --push-to argument value in the build am image step.
-
Decide on the image tag name to tag each build of the image. You’ll use this tag name to specify the --tag argument in the build am image step.
-
Build a new
amimage that includes your changes to AM static configuration:While the forgeops build command uses the Docker engine by default for ForgeOps deployments, it supports Podman as well. If you are using Podman engine instead of Docker in your environment, then set the
CONTAINER_ENGINEenvironment variable topodmanbefore running the forgeops build command, for example:$ export CONTAINER_ENGINE="podman"
$ ./forgeops build am --config-profile my-profile --push-to my-repo --tag my-am-tag
Flag --short has been deprecated, and will be removed in the future.
[+] Building 3.2s (10/10) FINISHED
...
⇒ [internal] load metadata for gcr.io/forgerock-io/am-cdk:7.5.0
 ⇒ [1/5] FROM gcr.io/forgerock-io/am-cdk:7.5.0@sha256:...
...
 ⇒ [5/5] WORKDIR /home/forgerock
 ⇒ exporting to image
 ⇒ ⇒ exporting layers
 ⇒ ⇒ writing image sha256:...
 ⇒ ⇒ naming to docker.io/library/am

What’s Next?
  View a summary of image vulnerabilities and recommendations → docker scout quickview
Updated the image_defaulter with your new image for am: "am".
-
Redeploy AM using your new AM image:
-
If you installed the platform using the forgeops command, follow the steps in Redeploy AM: Kustomize deployments.
-
If you installed the platform using Helm, follow the steps in Redeploy AM: Helm deployments.
-
Redeploy AM: Kustomize deployments
The forgeops build command calls Docker to build a new
am Docker image and to push the image to your Docker
repository. The new image includes your configuration profile. It also updates
the image defaulter file so that the next
time you install AM, the forgeops install command gets
AM static configuration from your new custom Docker image.

-
Perform version control activities on your
forgeopsrepository clone:-
Run the git status command.
-
Review the state of the kustomize/deploy/image-defaulter/kustomization.yaml file.
-
(Optional) Run the git commit command to commit changes to the image defaulter file.
-
-
Remove AM from your ForgeOps deployment:
$ ./forgeops delete am
"cdk" platform detected in namespace: "my-namespace".
Uninstalling component(s): ['am'] from namespace: "my-namespace".
OK to delete components? [Y/N] Y
service "am" deleted
deployment.apps "am" deleted
-
Redeploy AM:
$ ./forgeops install am --cdk Checking cert-manager and related CRDs: cert-manager CRD found in cluster. Checking secret-agent operator and related CRDs: secret-agent CRD found in cluster Installing component(s): ['am'] platform: "cdk" in namespace: "my-namespace" from deployment manifests in … service/am created deployment.apps/am created Enjoy your deployment! -
Validate that AM has the expected configuration:
-
Run the kubectl get pods command to monitor the status of the AM pod. Wait until the pod is ready before proceeding to the next step.
-
Describe the AM pod. Locate the tag of the Docker image that Kubernetes loaded, and verify that it’s your new custom Docker image’s tag.
-
Start the AM admin UI and verify that your configuration changes are present.
-
Redeploy AM: Helm deployments
-
Locate the
Successfully taggedmessage in the forgeops build output, which contains the new AM Docker image’s repository and tag. -
Redeploy AM using the new AM Docker image:
$ cd /path/to/forgeops/charts/identity-platform
$ helm upgrade identity-platform \
 oci://us-docker.pkg.dev/forgeops-public/charts/identity-platform \
 --version 7.5 --namespace my-namespace \
 --set 'am.image.repository=my-repository' \
 --set 'am.image.tag=my-am-tag'
-
Validate that AM has the expected configuration:
-
Run the kubectl get pods command to monitor the status of the AM pod. Wait until the pod is ready before proceeding to the next step.
-
Describe the AM pod. Locate the tag of the Docker image that Kubernetes loaded, and verify that it’s your new custom Docker image’s tag.
-
Start the AM admin UI and verify that your configuration changes are present.
-
Next step
idm image
The idm Docker image contains the IDM
configuration.
Customization overview
-
Customize IDM’s configuration data by using the IDM admin UI and REST APIs.
-
Capture changes to the IDM configuration by exporting them from the IDM service running on Kubernetes to the staging area.
-
Save the modified IDM configuration to a configuration profile in your
forgeopsrepository clone. -
Build an updated
idmDocker image that contains your customizations. -
Redeploy IDM.
-
Verify that changes you’ve made to the IDM configuration are in the new Docker image.
Detailed steps
-
Verify that:
-
You have access to a single-instance ForgeOps deployment.
-
The namespace where the platform is deployed is set in your Kubernetes context.
-
All required third-party software is installed in your local environment (Minikube|GKE|EKS|AKS).
-
You have set up your environment to push to your Docker registry.
-
-
Perform version control activities on your
forgeopsrepository clone:-
Run the git status command.
-
Review the state of the docker/idm/config-profiles/my-profile directory.
-
(Optional) Run the git commit command to commit changes to files that have been modified.
-
-
Modify the IDM configuration using the IDM admin UI or the REST APIs.
For information about how to access the IDM admin UI or REST APIs, refer to IDM Services.
Refer to About property value substitution for important information about configuring values that vary at run-time, such as passwords and host names.
-
Export the changes you made to the IDM configuration in the running ForgeOps deployment to a configuration profile:
$ cd /path/to/forgeops/bin
$ ./config export idm my-profile --sort
[.cyan][INFO] Running export for idm in idm-6b9db8cd7c-s7d46
[INFO] Updating existing profile: /path/to/forgeops/docker/idm/config-profiles/my-profile/conf
[INFO] Creating a new profile: /path/to/forgeops/docker/idm/config-profiles/my-profile/ui/admin/default/config#
tar: Removing leading `/' from member names
[INFO] Completed export
[INFO] Sorting configuration.
[INFO] Sorting completed.
If the configuration profile does not exist yet, the config export command creates it.
The config export idm my-profile command copies IDM static configuration from the ForgeOps deployment to the configuration profile:

-
Perform version control activities on your
forgeopsrepository clone:-
Review the differences in the files you exported to the configuration profile. For example:
$ git diff
diff --git a/docker/idm/config-profiles/my-profile/conf/audit.json b/docker/idm/config-profiles/my-profile/conf/audit.json
index 0b3dbeed6..1e5419eeb 100644
--- a/docker/idm/config-profiles/my-profile/conf/audit.json
+ b/docker/idm/config-profiles/my-profile/conf/audit.json
@@ -135,7 +135,9 @@
   },
   "exceptionFormatter": {
     "file": "bin/defaults/script/audit/stacktraceFormatter.js",
-    "globals": {},
+    "globals": {
+      "Test": "Test value"
+    },
     "type": "text/javascript"
   }
 }
Note that if this is the first time that you have exported IDM configuration changes to this configuration profile, the git diff command will not show any changes.
-
Run the git status command.
-
If you have new untracked files in your clone, run the git add command.
-
Review the state of the docker/idm/config-profiles/my-profile directory.
-
(Optional) Run the git commit command to commit changes to files that have been modified.
-
-
Identify the repository to which you’ll push the Docker image. You’ll use this location to specify the --push-to argument value in the build idm image step.
-
Decide on the image tag name so you can tag each build of the image. You’ll use this tag name to specify the --tag argument value in the build idm image step.
-
Build a new
idmimage that includes your changes to IDM static configuration:While the forgeops build command uses the Docker engine by default for ForgeOps deployments, it supports Podman as well. If you are using Podman engine instead of Docker in your environment, then set the
CONTAINER_ENGINEenvironment variable topodmanbefore running the forgeops build command, for example:$ export CONTAINER_ENGINE="podman"
$ ./forgeops build idm --config-profile my-profile --push-to my-repo --tag my-idm-tag

Flag --short has been deprecated, and will be removed in the future.

[+] Building 3.3s (12/12) FINISHED                             docker:default
 ⇒ [internal] load build definition from Dockerfile
 ⇒ ⇒ transferring dockerfile: 1.09kB
...
 ⇒ [internal] load metadata for gcr.io/forgerock-io/idm-cdk:7.5.0                                                    2.0s
 ⇒ [internal] load build context                                                                                     0.1s
 ⇒ ⇒ transferring context: 563.76kB                                                                                 0.0s
 ⇒ [1/7] FROM gcr.io/forgerock-io/idm-cdk:7.5.0@sha256:...
 ⇒ ⇒ resolve gcr.io/forgerock-io/idm-cdk:7.5.0@sha256:...
 ...
 ⇒ [7/7] COPY --chown=forgerock:root  /opt/openidm
 ⇒ exporting to image
 ⇒ ⇒ exporting layers
 ⇒ ⇒ writing image
 ⇒ ⇒ naming to docker.io/library/idm

What’s Next?
  View a summary of image vulnerabilities and recommendations → docker scout quickview
Updated the image_defaulter with your new image for idm: "idm".
-
Redeploy IDM using your new IDM image:
-
If you installed the platform using the forgeops command, follow the steps in Redeploy IDM: Kustomize deployments.
-
If you installed the platform using Helm, follow the steps in Redeploy IDM: Helm deployments.
-
Redeploy IDM: Kustomize deployments
The forgeops build command calls Docker to build a new
idm Docker image and to push the image to your Docker
repository. The new image includes your configuration profile. It also updates
the image defaulter file so that the next
time you install IDM, the forgeops install command gets
IDM static configuration from your new custom Docker image.
-
Perform version control activities on your
forgeopsrepository clone:-
Run the git status command.
-
Review the state of the kustomize/deploy/image-defaulter/kustomization.yaml file.
-
(Optional) Run the git commit command to commit changes to the image defaulter file.
-
-
Remove IDM from your ForgeOps deployment:
$ ./forgeops delete idm
"cdk" platform detected in namespace: "my-namespace".
Uninstalling component(s): ['idm'] from namespace: "my-namespace".
OK to delete components? [Y/N] Y
service "idm" deleted
deployment.apps "idm" deleted
-
Redeploy IDM:
$ ./forgeops install idm --cdk Checking cert-manager and related CRDs: cert-manager CRD found in cluster. Checking secret-agent operator and related CRDs: secret-agent CRD found in cluster Installing component(s): ['idm'] platform: "cdk" in namespace: "my-namespace" from deployment manifests in … configmap/idm created configmap/idm-logging-properties created service/idm created deployment.apps/idm created Enjoy your deployment! -
Validate that IDM has the expected configuration:
-
Run the kubectl get pods command to monitor the status of the IDM pod. Wait until the pod is ready before proceeding to the next step.
-
Describe the IDM pod. Locate the tag of the Docker image that Kubernetes loaded, and verify that it’s your new custom Docker image’s tag.
-
Start the IDM admin UI and verify that your configuration changes are present.
-
Redeploy IDM: Helm deployments
-
Locate the
Successfully taggedmessage in the forgeops build output, which contains the new IDM Docker image’s repository and tag. -
Redeploy IDM using the new IDM Docker image:
$ cd /path/to/forgeops/charts/identity-platform
$ helm upgrade identity-platform \
 oci://us-docker.pkg.dev/forgeops-public/charts/identity-platform \
 --version 7.5 --namespace my-namespace \
 --set 'idm.image.repository=my-repository' \
 --set 'idm.image.tag=my-idm-tag'
-
Validate that IDM has the expected configuration:
-
Run the kubectl get pods command to monitor the status of the AM pod. Wait until the pod is ready before proceeding to the next step.
-
Describe the IDM pod. Locate the tag of the Docker image that Kubernetes loaded, and verify that it’s your new custom Docker image’s tag.
-
Start the IDM admin UI and verify that your configuration changes are present.
-
Next step
Prepare to deploy in production
After you get your ForgeOps deployment up and running, you can add deployment customizations—options that are not part of an out-of-the-box ForgeOps deployment, but which you may need when you deploy in production.
Production Deployment Overview
Customize, deploy, and maintain a production ForgeOps deployment.
Base Docker Images
Create Docker images for deploying the platform in production.
Identity Gateway
Add PingGateway to your deployment.
Monitoring
Customize Prometheus monitoring and alerts.
Security
Customize the security features built into ForgeOps deployments.
Benchmarks
Run the lightweight benchmarks.
Backup
Back up and restore data, such as identities and tokens.
Base Docker images
ForgeOps provides 13 Docker images for deploying the Ping Identity Platform:
-
Eight component base images:
Base image Available at amsteram-cdkam-config-upgraderdsidm-cdkForgeOps container registry at
gcr.io/forgerock-io/idm-cdk:7.5.0igjava-17Provided in the
forgeops-extrasrepositoryldif-importerProvided in the /path/to/forgeops/docker/ldif-importer directory
-
Five base images that implement the platform’s user interface elements and ForgeOps operators:
Base image Available at ds-operatorus-docker.pkg.dev/forgeops-public/imagesplatform-admin-uigcr.io/forgerock-ioplatform-enduser-uigcr.io/forgerock-ioplatform-login-uigcr.io/forgerock-iosecret-agentus-docker.pkg.dev/forgeops-public/images
|
Before you begin building custom images, ensure that you are using Java version 17 on your computer. For example: $ java --version openjdk 17.0.10 2024-01-16 OpenJDK Runtime Environment Temurin-17.0.10+7 (build 17.0.10+7) OpenJDK 64-Bit Server VM Temurin-17.0.10+7 (build 17.0.10+7, mixed mode) |
Which Docker images do I deploy?
-
I am a developer using a single-instance ForgeOps deployment.
-
UI elements. Deploy the supported images from ForgeOps.
-
Other platform elements. Deploy either:
-
The ForgeOps-provided images.
-
Customizied Docker images that are based on ForgeOps-provided images and contain customized configuration profile.
-
-
-
I am doing a proof-of-concept ForgeOps deployment.
-
UI elements. Deploy the supported images from ForgeOps.
-
Other platform elements. Deploy either:
-
The ForgeOps-provided images.
-
Customizied Docker images that are based on ForgeOps-provided images and contain customized configuration profile.
-
-
-
I am deploying the platform in production.
-
UI elements. Deploy the supported images from ForgeOps.
-
Other platform elements. Deploy Docker images that are based on your own base images, but contain a customized configuration profile.
-
Your own base Docker images
|
While the procedures here show the use of Docker container engine, you can use Podman container engine to create images for ForgeOps deployment. |
Perform the following steps to build base images. After you’ve built your own base images, push them to your Docker repository:
-
Download the latest versions of the AM, Amster, IDM, and DS
.zipfiles from the ForgeRock Download Center. Optionally, you can also download the latest version of the PingGateway.zipfile. -
If you haven’t already done so, clone the
forgeopsandforgeops-extrasrepositories. For example:$ git clone https://github.com/ForgeRock/forgeops.git $ git clone https://github.com/ForgeRock/forgeops-extras.git
Both repositories are public; you do not need credentials to clone them.
-
Check out the
forgeopsrepository’srelease/7.5-20240618branch:$ cd /path/to/forgeops $ git checkout
release/7.5-20240618 -
Check out the
forgeops-extrasrepository’smasterbranch:$ cd /path/to/forgeops-extras $ git checkout
master -
Build the Java base image, which is required by several of the other Dockerfiles:
$ cd /path/to/forgeops-extras/images/java-17
$ docker build --tag my-repo/java-17 .

⇒ [internal] load build definition from Dockerfile                                                                                                       0.0s
 ⇒ ⇒ transferring dockerfile: 2.38kB                                                                                                                     0.0s
 ⇒ [internal] load .dockerignore                                                                                                                         0.0s
 ⇒ ⇒ transferring context: 2B                                                                                                                            0.0s
 ⇒ [internal] load metadata for docker.io/library/debian:bullseye-slim                                                                                   1.1s
 ⇒ [internal] load metadata for docker.io/azul/zulu-openjdk-debian:17                                                                                    1.3s
 ⇒ [jdk 1/3] FROM docker.io/azul/zulu-openjdk-debian:17@sha256:420a137d0576e3fd0d6f6332f5aa1aef85314ed83b3797d7f965e0b9169cbc57                         17.7s
...
⇒ exporting to image                                                                                                                                     0.3s
 ⇒ ⇒ exporting layers                                                                                                                                    0.3s
 ⇒ ⇒ writing image sha256:cc52e9623b3cd411682ca221a6722e83610b6b7620f126d3f7c4686e79ff1797                                                               0.0s
 ⇒ ⇒ naming to my-repo/java-17                                                                                                                 0.0s
-
Build the base image for Amster. This image must be available in order to build the base image for AM in the next step:
-
Unzip the Amster
.zipfile. -
Change to the amster/samples/docker directory in the expanded
.zipfile output. -
Run the setup.sh script:
$ ./setup.sh + mkdir -p build + find ../.. '!' -name .. '!' -name samples '!' -name docker -maxdepth 1 -exec cp -R '{}' build/ ';' + cp ../../docker/amster-install.sh ../../docker/docker-entrypoint.sh ../../docker/export.sh ../../docker/tar.sh build -
Edit the Dockerfile in the samples/docker directory. Change the line:
FROM gcr.io/forgerock-io/java-17:latest
to:
FROM my-repo/java-17 -
Build the
amsterDocker image:$ docker build --tag amster:7.5.0 . ⇒ [internal] load build definition from Dockerfile 0.0s ⇒ ⇒ transferring dockerfile: 1.67kB 0.0s ⇒ [internal] load .dockerignore 0.0s ⇒ ⇒ transferring context: 2B 0.0s ⇒ [internal] load metadata for docker.io/my-repo/java-17:latest 1.1s ⇒ [1/8] FROM docker.io/my-repo/java-17 ... ⇒ exporting to image ⇒ ⇒ exporting layers ⇒ ⇒ writing image sha256:bc47...f9e52 0.0s ⇒ ⇒ naming to docker.io/library/amster:7.5.0
-
-
Build the empty AM image:
-
Unzip the AM
.zipfile. -
Change to the openam/samples/docker directory in the expanded
.zipfile output. -
Run the setup.sh script:
$ chmod +x ./setup.sh
./setup.sh
-
Change to the images/am-empty directory.
-
Build the
am-emptyDocker image:$ docker build --tag am-empty:7.5.0 . ⇒ [internal] load build definition from Dockerfile 0.0s ⇒ ⇒ transferring dockerfile: 3.60kB 0.0s ⇒ [internal] load .dockerignore 0.0s ⇒ ⇒ transferring context: 2B 0.0s ⇒ [internal] load metadata for docker.io/library/tomcat:9-jdk17-openjdk-slim-bullseye 1.8s ⇒ [internal] load build context 5.6s ⇒ ⇒ transferring context: 231.59MB 5.6s ⇒ [base 1/14] FROM docker.io/library/tomcat:9-jdk17-openjdk-slim-bullseye@... ... ⇒ exporting to image 1.7s ⇒ ⇒ exporting layers 1.6s ⇒ ⇒ writing image sha256:9784a73...1d36018c9 0.0s ⇒ ⇒ naming to docker.io/library/am-empty:7.5.0
-
-
Build the base image for AM:
-
Change to the ../am-base directory.
-
Edit the Dockerfile in the ../am-base directory and change the line:
FROM ${docker.push.repo}/am-empty:${docker.tag}to:
FROM am-empty:7.5.0
-
Build the
am-baseDocker image:$ docker build --build-arg docker_tag=7.5.0 --tag am-base:7.5.0 . ⇒ [internal] load build definition from Dockerfile 0.0s ⇒ ⇒ transferring dockerfile: 2.72kB 0.0s ⇒ [internal] load .dockerignore 0.0s ⇒ ⇒ transferring context: 2B 0.0s ⇒ [internal] load metadata for docker.io/library/amster:7.5.0 0.0s ⇒ [internal] load metadata for docker.io/library/am-empty:7.5.0 0.0s ⇒ [internal] load build context 0.4s ⇒ ⇒ transferring context: 35.66MB 0.4s ⇒ [generator 1/15] FROM docker.io/library/am-empty:7.5.0 0.4s ⇒ [amster 1/1] FROM docker.io/library/amster:7.5.0 0.2s ⇒ [generator 2/15] RUN apt-get update -y && apt-get install -y git jq unzip ... ⇒ [am-base 7/11] COPY --chown=forgerock:root docker-entrypoint.sh /home/forgerock/ 0.0s ⇒ [am-base 8/11] COPY --chown=forgerock:root scripts/import-pem-certs.sh /home/forgerock/ 0.0s ⇒ [am-base 9/11] RUN rm "/usr/local/tomcat"/webapps/am/WEB-INF/lib/click-extras-*.jar 0.2s ⇒ [am-base 10/11] RUN rm "/usr/local/tomcat"/webapps/am/WEB-INF/lib/click-nodeps-*.jar 0.3s ⇒ [am-base 11/11] RUN rm "/usr/local/tomcat"/webapps/am/WEB-INF/lib/velocity-*.jar 0.2s ⇒ exporting to image 0.2s ⇒ ⇒ exporting layers 0.2s ⇒ ⇒ writing image sha256:2c06...87c6c 0.0s ⇒ ⇒ naming to docker.io/library/am-base:7.5.0
-
Change to the ../am-cdk directory.
-
Edit the Dockerfile in the ../am-cdk directory. Change the line:
FROM ${docker.push.registry}/forgerock-io/am-base/${docker.promotion.folder}:${docker.tag}to:
FROM am-base:7.5.0
-
Build the
amDocker image:$ docker build --build-arg docker_tag=7.5.0 --tag my-repo/am:7.5.0 . [+] Building 5.1s (10/10) FINISHED docker:desktop-linux ⇒ [internal] load build definition from Dockerfile 0.0s ⇒ ⇒ transferring dockerfile: 1.71kB 0.0s ⇒ [internal] load .dockerignore 0.0s ⇒ ⇒ transferring context: 2B 0.0s ⇒ [internal] load metadata for docker.io/library/am-base:7.5.0 0.0s ⇒ [1/5] FROM docker.io/library/am-base:7.5.0 0.2s ⇒ [internal] load build context 0.2s ⇒ ⇒ transferring context: 403.07kB 0.1s ⇒ [2/5] RUN apt-get update && apt-get install -y git && apt-get clean && rm -r /var/lib 3.9s ⇒ [3/5] RUN cp -R /usr/local/tomcat/webapps/am/XUI /usr/local/tomcat/webapps/am/OAuth2_XUI 0.3s ⇒ [4/5] COPY --chown=forgerock:root /config /home/forgerock/cdk/config 0.0s ⇒ [5/5] RUN rm -rf /home/forgerock/openam/config/services && mkdir /home/forgerock/openam/config/services 0.5s ⇒ exporting to image 0.1s ⇒ ⇒ exporting layers 0.1s ⇒ ⇒ writing image sha256:14b43fb5121cee08341130bf502b7841429b057ff406bbe635b23119a74dec45 0.0s ⇒ ⇒ naming to my-repo/am:7.5.0 0.0s
-
-
Now that the AM image is built, tag the base image for Amster in advance of pushing it to your private repository:
$ docker tag amster:7.5.0 my-repo/amster:7.5.0 -
Build the
am-config-upgraderbase image:-
Change to the
openamdirectory in the expanded AM.zipfile output. -
Unzip the
Config-Upgrader-7.5.0.zipfile. -
Change to the
amupgrade/samples/dockerdirectory in the expandedConfig-Upgrader-7.5.0.zipfile output. -
Edit the Dockerfile in the amupgrade/samples/docker directory and change line 16 from:
FROM gcr.io/forgerock-io/java-17:latest
to:
FROM my-repo/java-17 -
Run the setup.sh script:
$ ./setup.sh + mkdir -p build/amupgrade + find ../.. '!' -name .. '!' -name samples '!' -name docker -maxdepth 1 -exec cp -R '{}' build/amupgrade ';' + cp ../../docker/docker-entrypoint.sh . -
Create the base
am-config-upgraderimage:$ docker build --tag my-repo/am-config-upgrader:7.5.0 . [+] Building 8.5s (9/9) FINISHED docker:desktop-linux ⇒ [internal] load build definition from Dockerfile 0.0s ⇒ ⇒ transferring dockerfile: 1.10kB 0.0s ⇒ [internal] load .dockerignore 0.0s ⇒ ⇒ transferring context: 2B 0.0s ⇒ [internal] load metadata for my-repo/java-17:latest 0.0s ⇒ CACHED [1/4] FROM my-repo/java-17 0.0s ⇒ [internal] load build context 0.3s ⇒ ⇒ transferring context: 20.58MB 0.3s ⇒ [2/4] RUN apt-get update && apt-get upgrade -y 8.3s ⇒ [3/4] COPY --chown=forgerock:root docker-entrypoint.sh /home/forgerock/ 0.0s ⇒ [4/4] COPY build/ /home/forgerock/ 0.0s ⇒ exporting to image 0.1s ⇒ ⇒ exporting layers 0.1s ⇒ ⇒ writing image sha256:3f6845…44011 0.0s ⇒ ⇒ naming to my-repo/am-config-upgrader:7.5.0 0.0s
-
-
Build the base image for DS:
-
Unzip the DS
.zipfile. -
Change to the opendj directory in the expanded
.zipfile output. -
Run the samples/docker/setup.sh script to create a server:
$ ./samples/docker/setup.sh

+ rm -f template/config/tools.properties
+ cp -r samples/docker/Dockerfile samples/docker/README.md ...
+ rm -rf — README README.md bat '*.zip' opendj_logo.png setup.bat upgrade.bat setup.sh
+ ./setup --serverId docker --hostname localhost
...

Validating parameters... Done
Configuring certificates... Done
...
-
Edit the Dockerfile in the opendj directory. Change the line:
FROM gcr.io/forgerock-io/java-17:latest
to:
FROM my-repo/java-17 -
Build the
ds-emptybase image:$ docker build --tag my-repo/ds-empty:7.5.0 . [+] Building 11.0s (9/9) FINISHED ⇒ [internal] load build definition from Dockerfile 0.0s ⇒ ⇒ transferring dockerfile: 1.23kB 0.0s ⇒ [internal] load .dockerignore 0.0s ⇒ ⇒ transferring context: 2B 0.0s ⇒ [internal] load metadata for my-repo/java-17:latest 1.7s ⇒ [internal] load build context 1.2s ⇒ ⇒ transferring context: 60.85MB 1.2s ⇒ CACHED [1/4] FROM my-repo/java-17:latest ... ⇒ [4/4] WORKDIR /opt/opendj 0.0s ⇒ exporting to image 0.4s ⇒ ⇒ exporting layers 0.3s ⇒ ⇒ writing image sha256:713ac...b107e0f 0.0s ⇒ ⇒ naming to my-repo/ds-empty:7.5.0
-
-
Build the
ldif-importerbase image:-
Change to the /path/to/forgeops/docker/ldif-importer directory.
-
Open the file, Dockerfile.
-
Change the FROM statement—the first line in the file—to reference the
ds-emptybase image you created in the previous step:FROM my-repo/ds-empty:7.5.0 -
Save and close the updated file.
-
Create the base
ldif-importerimage:$ docker build . --tag my-repo/ldif-importer:7.5.0 [+] Building 7.9s (10/10) FINISHED ⇒ [internal] load build definition from Dockerfile 0.0s ⇒ ⇒ transferring dockerfile: 325B 0.0s ⇒ [internal] load .dockerignore 0.0s ⇒ ⇒ transferring context: 2B 0.0s ⇒ [internal] load metadata for my-repo/ds-empty:7.5.0 0.0s ⇒ [internal] load build context 0.1s ⇒ ⇒ transferring context: 3.08kB 0.0s ⇒ [1/5] FROM my-repo/ds-empty:7.5.0 0.0s ⇒ [2/5] COPY debian-buster-sources.list /etc/apt/sources.list 0.0s ⇒ [3/5] RUN apt-get update -y && apt-get install -y curl 7.5s ⇒ [4/5] COPY --chown=forgerock:root start.sh /opt/opendj 0.0s ⇒ [5/5] COPY --chown=forgerock:root ds-passwords.sh /opt/opendj 0.0s ⇒ exporting to image 0.2s ⇒ ⇒ exporting layers 0.2s ⇒ ⇒ writing image sha256:bdc5e75854c8015d0b5bd6d2a54c6c044cf0fd23ce6ea828b4ae1a9d04517515 0.0s ⇒ ⇒ naming to my-repo/ldif-importer:7.5.0 0.0s
-
-
-
Create a new shell script file named build-idm-image.sh and copy the following lines into it:
#!/bin/bash if [ $# -lt 3 ]; then echo "$0 <source image> <new base image> <result image>" exit 0 fi sourceImage="$1" javaImage="$2" resultImage="$3" container_id=$(docker create $sourceImage) docker export $container_id -o image.tar docker rm $container_id tar xvf image.tar opt/openidm rm -f image.tar cd opt/openidm # use | separators because image names often have / and : sed -i.bak 's|^FROM.*$|FROM '$javaImage'|' bin/Custom.Dockerfile rm bin/Custom.Dockerfile.bak docker build . --file bin/Custom.Dockerfile --tag "$resultImage" rm -rf opt -
Change the mode of the file to be executable and run it.
$ chmod +x build-idm-image.sh
$ ./build-idm-image.sh gcr.io/forgerock-io/idm-cdk:7.5.0 my-repo/java-17  my-repo/idm:7.5.0
The build-idm-image.sh script expands the IDM Docker image, rebuilds the image, and cleans up afterward.
-
-
(Optional) Build the base image for PingGateway:
-
Unzip the PingGateway
.zipfile. -
Change to the identity-gateway directory in the expanded
.zipfile output. -
Edit the Dockerfile in the identity-gateway/docker directory. Change the line:
FROM gcr.io/forgerock-io/java-17:latest
to:
FROM my-repo/java-17 -
Build the
igbase image:$ docker build . --file docker/Dockerfile --tag my-repo/ig:2024.3.0 [+] Building 2.1s (8/8) FINISHED ⇒ [internal] load build definition from Dockerfile 0.0s ⇒ ⇒ transferring dockerfile: 1.43kB 0.0s ⇒ [internal] load .dockerignore 0.0s ⇒ ⇒ transferring context: 2B 0.0s ⇒ [internal] load metadata for my-repo/java-17:latest 0.3s ⇒ [internal] load build context 2.2s ⇒ ⇒ transferring context: 113.60MB 2.2s ⇒ CACHED [1/3] FROM my-repo/java-17:latest ⇒ [2/3] COPY --chown=forgerock:root . /opt/ig 0.7s ⇒ [3/3] RUN mkdir -p "/var/ig" && chown -R forgerock:root "/var/ig" "/opt/ig" && -R g+rwx "/var/ig" "/opt/ig" 0.9s ⇒ exporting to image 0.6s ⇒ ⇒ exporting layers 0.6s ⇒ ⇒ writing image sha256:77fc5...6e63 0.0s ⇒ ⇒ naming to my-repo/ig:2024.3.0
-
-
Run the docker images command to verify that you built the base images:
$ docker images | grep my-repo

REPOSITORY                   TAG      IMAGE ID        CREATED        SIZE
my-repo/am                   7.5.0    552073a1c000    1 hour ago     795MB
my-repo/am-config-upgrader   7.5.0    d115125b1c3f    1 hour ago     795MB
my-repo/amster               7.5.0    d9e1c735f415    1 hour ago     577MB
my-repo/ds-empty             7.5.0    ac8e8ab0fda6    1 hour ago     196MB
my-repo/idm                  7.5.0    0cc1b7f70ce6    1 hour ago     387MB
my-repo/ig                   2024.3.0 cc52e9623b3c    1 hour ago     249MB
my-repo/java-17              latest   a504925c2672    1 hour ago     144MB
my-repo/ldif-importer        7.5.0    c206941dd672    1 hour ago     227MB
-
Push the new base Docker images to your Docker repository.
Refer to your registry provider documentation for detailed instructions. For most Docker registries, you run the docker login command to log in to the registry. Then, you run the docker push command to push a Docker image to the registry.
Be sure to configure your Docker registry so that you can successfully push your Docker images. Each cloud-based Docker registry has its own specific requirements. For example, on Amazon ECR, you must create a repository for each image.
Push the following images to your repository:
-
my-repo/am:7.5.0 -
my-repo/am-config-upgrader:7.5.0 -
my-repo/amster:7.5.0 -
my-repo/ds-empty:7.5.0 -
my-repo/idm:7.5.0 -
my-repo/java-17 -
my-repo/ldif-importer:7.5.0
If you’re deploying your own PingGateway base image, also push the
my-repo/ig:2024.3.0image. -
Create Docker images for use in production
After you’ve built and pushed your own base images to your Docker registry, you’re ready to build customized Docker images that can be used in a production deployment of the Ping Identity Platform. These images:
-
Contain customized configuration profiles for AM, IDM, and, optionally, PingGateway.
-
Must be based on your own base Docker images.
-
Must not be based on ForgeRock’s evaluation Docker images.
Create your production-ready Docker images, create a Kubernetes cluster to test them, and delete the cluster when you’ve finished testing the images:
-
Clone the
forgeopsrepository. -
Obtain custom configuration profiles that you want to use in your Docker images from your developer, and copy them into your
forgeopsrepository clone:-
Obtain the AM configuration profile from the /path/to/forgeops/docker/am/config-profiles directory.
-
Obtain the IDM configuration profile from the /path/to/forgeops/docker/idm/config-profiles directory.
-
(Optional) Obtain the PingGateway configuration profile from the /path/to/forgeops/docker/ig/config-profiles directory.
-
-
Change the
FROMlines of Dockerfiles in theforgeopsrepositories to refer to your own base Docker images:In the forgeopsrepository file:Change the FROMline to:docker/am/Dockerfile
FROM my-repo/am:7.5.0[11]docker/amster/Dockerfile
FROM my-repo/amster:7.5.0docker/ds/ds-new/Dockerfile
FROM my-repo/ds-empty:7.5.0docker/idm/Dockerfile
FROM my-repo/idm:7.5.0[12](Optional) docker/ig/Dockerfile
FROM my-repo/ig:2024.3.0 -
If necessary, log in to your Docker registry.
-
Build Docker images that are based on your own base images.
While the forgeops build command uses the Docker engine by default for ForgeOps deployments, it supports Podman as well. If you are using Podman engine instead of Docker in your environment, then set the
CONTAINER_ENGINEenvironment variable topodmanbefore running the forgeops build command, for example:$ export CONTAINER_ENGINE="podman"
The AM and IDM images contain your customized configuration profiles:
$ cd /path/to/forgeops/bin
$ ./forgeops build ds --push-to my-repo
$ ./forgeops build amster --push-to my-repo
$ ./forgeops build am --push-to my-repo --config-profile my-profile
$ ./forgeops build idm --push-to my-repo --config-profile my-profile
The forgeops build command:
-
Builds Docker images. The AM and IDM images incorporate customized configuration profiles.
-
Pushes Docker images to the repository specified in the --push-to argument.
-
Updates the image defaulter file, which the forgeops install command uses to determine which Docker images to run.
-
-
(Optional) Build and push an PingGateway Docker image that’s based on your own base image and contains your customized configuration profile:
$ ./forgeops build ig --config-profile my-profile --push-to my-repo
-
Prepare a Kubernetes cluster to test your images:
-
Create the cluster. This example assumes that you create a cluster suitable for a small-sized ForgeOps deployment.
-
Make sure your cluster can access and pull Docker images from your repository.
-
Create a namespace in the new cluster, and then make the new namespace the active namespace in your local Kubernetes context.
-
-
Perform a ForgeOps deployment in your cluster:
$ ./forgeops install --small --fqdn forgeops.example.com
-
Access the AM admin UI and the IDM admin UI, and verify that your customized configuration profiles are active.
-
Delete the Kubernetes cluster that you used to test images.
At the end of this process, the artifacts that you’ll need to deploy the Ping Identity Platform in production are available:
-
Docker images for the Ping Identity Platform, in your Docker repository
-
An updated image defaulter file, in your
forgeopsrepository clone
You’ll need to copy the image defaulter file to your production deployment, so that when you run the forgeops install command, it will use the correct Docker images.
Typically, you model the image creation process in a CI/CD pipeline. Then, you run the pipeline at milestones in the development of your customized configuration profile.
Identity Gateway
Deploy PingGateway
ForgeOps deployments do not include PingGateway by default.
To deploy PingGateway after you have performed a ForgeOps deployment:
-
Verify that the ForgeOps deployment is up and running.
-
Set the active namespace in your local Kubernetes context to the namespace in which you have deployed the platform components.
-
Deploy PingGateway:
$ /path/to/forgeops/bin/forgeops install ig --cdk
Checking secret-agent operator and related CRDs: secret-agent CRD found in cluster.
Checking ds-operator and related CRDs: ds-operator CRD found in cluster.

Installing component(s): ['ig']

secret/openig-secrets-env created
service/ig created
deployment.apps/ig created

Enjoy your deployment!
By default, the forgeops install ig --cdk command uses the evaluation-only Docker images for release 7.5.0 of the platform, available from Ping Identity’s public registry.
However, if you have built a custom PingGateway image, the forgeops install ig --cdk command uses your custom image.
-
Run the kubectl get pods command to check the status of the PingGateway pod. Wait until the pod is ready before proceeding to the next step.
-
Verify that PingGateway is running:
$ curl --insecure -L -X GET https://forgeops.example.com/ig/openig/ping -v
Note: Unnecessary use of -X or --request, GET is already inferred.
*   Trying ...
* TCP_NODELAY set
...
> GET /ig/openig/ping HTTP/2
> Host: forgeops.example.com
> User-Agent: curl/7.64.1
> Accept: /
* Connection state changed (MAX_CONCURRENT_STREAMS == 128)!
< HTTP/2 200
< date: Thu, 29 Jul 2021 21:07:44 GMT
<
* Connection #0 to host forgeops.example.com left intact
* Closing connection 0
-
Verify that the reverse proxy to the IDM pod is running:
$ curl --insecure -L -X GET https://forgeops.example.com/ig/openidm/info/ping -v
Note: Unnecessary use of -X or --request, GET is already inferred.
*   Trying 192.168.99.155...
* TCP_NODELAY set
* Connected to forgeops.example.com (192.168.99.155) port 443 (#0)
* ALPN, offering h2
* ALPN, offering http/1.1
* successfully set certificate verify locations:
*   CAfile: /etc/ssl/cert.pem
  CApath: none
* TLSv1.2 (OUT), TLS handshake, Client hello (1):
...
* Using HTTP2, server supports multi-use
* Connection state changed (HTTP/2 confirmed)
* Copying HTTP/2 data in stream buffer to connection buffer after upgrade: len=0
...
* Connection state changed (MAX_CONCURRENT_STREAMS == 128)!
< HTTP/2 200
...
<
* Connection #0 to host forgeops.example.com left intact
{"_id":"","_rev":"","shortDesc":"OpenIDM ready","state":"ACTIVE_READY"}* Closing connection 0
Custom PingGateway image
The default PingGateway configuration provided for use with ForgeOps deployments is an example and is not meant for use in production. Replace this configuration with your own routes before using PingGateway in your environment.
Refer to the PingGateway Deployment Guide for configuring routes.
To build a custom PingGateway image and deploy PingGateway:
-
Verify that your ForgeOps deployment is up and running.
-
Configure PingGateway by creating, modifying, or deleting rules in the /path/to/forgeops/docker/ig/config-profiles/my-profile/config/routes-service directory.
-
Identify the repository to which you’ll push the Docker image. You’ll use this location in the next step to specify the --push-to argument’s value.
-
Build a new
igimage that includes your changes to PingGateway static configuration:$ cd /path/to/forgeops/bin $ ./forgeops build ig --config-profile my-profile --push-to my-repo Generating tags... - ig → ig:0a27bdfea Checking cache... - ig: Not found. Building Starting build... Found [minikube] context, using local docker daemon. Building [ig]... Sending build context to Docker daemon 55.81kB Step 1/5 : FROM gcr.io/forgerock-io/ig:2024.3.0 --→ ba6f8150204e Step 2/5 : ARG CONFIG_PROFILE=cdk ... Step 5/5 : COPY --chown=forgerock:root . /var/ig --→ c173995218a3 Successfully built c173995218a3 Successfully tagged ig:0a27bdfea Updated the image_defaulter with your new image for ig: "ig:c173995218a3c55dbca76fff08588153db0693a51ff0904e6adee34b7163340a"
-
Uninstall the previously deployed PingGateway from your ForgeOps deployment:
-
Set the active namespace in your local Kubernetes context to the namespace in which you have deployed the PingGateway.
-
Delete PingGateway:
$ ./forgeops delete ig
"cdk" platform detected in namespace: "my-namespace".
Uninstalling component(s): ['ig'] from namespace: "my-namespace".
OK to delete components? [Y/N] Y
secret "openig-secrets-env" deleted
service "ig" deleted
deployment.apps "ig" deleted
-
-
Deploy PingGateway using your customized PingGateway image:
$ ./forgeops install ig --cdk
Checking secret-agent operator and related CRDs: secret-agent CRD found in cluster.
Checking ds-operator and related CRDs: ds-operator CRD found in cluster.

Installing component(s): ['ig']

secret/openig-secrets-env created
service/ig created
deployment.apps/ig created

Enjoy your deployment!
-
Run the kubectl get pods command to check the status of the PingGateway pod. Wait until the PingGateway pod is ready before proceeding to the next step.
-
Verify that your PingGateway routes work.
ForgeOps deployment monitoring
ForgeOps deployments optionally use Prometheus to monitor Ping Identity Platform components and Kubernetes objects, Prometheus Alertmanager to send alert notifications, and Grafana to analyze metrics using dashboards.
This topic describes the use of monitoring tools in ForgeOps deployments:
Overview
Monitoring installation and architecture.
Monitoring Pods
Prometheus and Grafana pods that monitor ForgeOps deployments and provide reporting services.
Grafana Dashboards
Grafana dashboards for the platform that are available in ForgeOps deployments.
Prometheus Alerts
Prometheus alerts for the platform that are available in ForgeOps deployments.
About ForgeOps deployment monitoring
Prometheus, Alertmanager, and Grafana, used for monitoring ForgeOps deployments,
are deployed if you run the prometheus-deploy.sh script after performing a
ForgeOps deployment. This script installs Helm charts from the
prometheus-operator project into
the monitoring namespace of a ForgeOps deployment. The Prometheus operator
project provides monitoring definitions for Kubernetes services and deployment,
and management of Prometheus instances.
The Helm charts deploy Kubernetes pods that run the Prometheus and Grafana services. The Prometheus operator then watches for service monitor CRDs—Kubernetes custom resource definitions. CRDs are Kubernetes class types that you manage with the kubectl command. The service monitor CRDs define targets to be scraped.
In ForgeOps deployments, the Prometheus operator configuration is defined in the
prometheus-operator.yaml
file in the forgeops repository. For information about how to customize
Prometheus, Alertmanager, and Grafana, refer to the
Prometheus
README file in the forgeops repository.
After a ForgeOps deployment is done, you can access the monitoring dashboards. For details, refer to ForgeOps deployment monitoring.
|
Out-of-the-box ForgeOps deployments use Prometheus, Grafana, and Alertmanager for monitoring, reporting, and sending alerts. If you prefer to use different tools, deploy infrastructure in Kubernetes to support those tools. Prometheus and Grafana are evolving technologies. Descriptions of these technologies were accurate at the time of this writing, but might differ when you deploy them. |
Monitoring pods
The following Prometheus and Grafana pods from the prometheus-operator project
run in the monitoring namespace:
| Pod | Description |
|---|---|
|
Handles Prometheus alerts by grouping them together, filtering them, and then routing them to a receiver, such as a Slack channel. |
|
Generates Prometheus metrics for cluster node resources, such as CPU, memory, and disk usage. One pod is deployed for each node in a ForgeOps deployment. |
|
Generates Prometheus metrics for Kubernetes objects, such as deployments and nodes. |
|
Provides the Grafana service. |
|
Provides the Prometheus service. |
|
Runs the Prometheus operator. |
See the prometheus-operator Helm chart README file for more information about the pods in the preceding table.
Custom Grafana dashboards
In addition to the pods from the prometheus-operator project,
ForgeOps deployments include a set of Grafana dashboards. The
import-dashboards-... pod from the forgeops repository runs after Grafana
starts up. This pod imports Grafana dashboards for the Ping Identity Platform and
terminates after importing has completed.
You can customize, export and import Grafana dashboards using the Grafana UI or HTTP API.
For information about importing custom Grafana dashboards, refer to the
Import Custom Grafana Dashboards
section of the Prometheus and Grafana Deployment README file in the forgeops
repository.
Alerts
Alerts for ForgeOps deployments are defined in the
fr-alerts.yaml
file in the forgeops repository.
To configure additional alerts, refer to the
Configure Alerting Rules
section of the Prometheus and Grafana Deployment README file in the forgeops
repository.
Security
This topic describes several options for securing a ForgeOps deployment:
Secret Agent
Kubernetes operator that generates secrets and provides cloud secret management.
Secure Communications
Secure HTTP and certificate management.
IP Address Restriction
Access restriction by incoming IP address, enforced by the NGINX ingress controller.
Network Policies
Secure cross-pod communications, enforced by Kubernetes network policies.
Cluster Access on AWS
User entries in the Amazon EKS authorization configuration map.
Secret Agent operator
The open source Secret Agent operator generates all the secrets needed for ForgeOps deployments except for the DS master key and TLS key. When directory instances are created, certificate manager is called to generate these two keys.
In addition to generating secrets, the operator also integrates with Google Cloud Secret Manager, AWS Secrets Manager, and Azure Key Vault to manage secrets, providing cloud backup and retrieval for secrets.
The Secret Agent operator runs as a Kubernetes deployment that must be available before you can install AM, IDM, and DS.
Secret generation
By default, the operator examines your namespace to determine whether it contains all the secrets that it manages for Ping Identity Platform deployments. If any of the secrets it manages are not present, the operator generates them.
Refer to the Secret Agent project README for information about:
Cloud secret management
Configuring the Secret Agent operator to integrate with a cloud secret manager, such as Google Cloud Secret Manager, AWS Secret Manager, or Azure Key Vault, changes the operator’s behavior:
-
First, the operator examines your namespace to determine whether it contains all the secrets it manages for Ping Identity Platform deployments.
-
If any of the secrets it manages are not in your namespace, the operator checks to refer to if the missing secrets are available in the cloud secret manager:
-
If any of the secrets missing from your namespace are available in the cloud secret manager, the operator gets them from the cloud secret manager and adds them to your namespace.
-
If missing secrets are not available in the cloud secret manager, the Secret Agent operator generates them.
-
Configure cloud secret management when you have multiple Ping Identity Platform deployments that need to use the same secrets.
Refer to the Secret Agent project README for information about how to configure the Secret Agent operator for cloud secret management using these cloud secret managers:
Administration password changes
ForgeOps deployments use these administration passwords:
-
The AM and IDM administration user,
amadmin -
The AM application store service account,
uid=am-config,ou=admins,ou=am-config -
The AM CTS service account,
uid=openam_cts,ou=admins,ou=famrecords,ou=openam-session,ou=tokens -
The shared identity repository service account,
uid=am-identity-bind-account,ou=admins,ou=identities -
The DS root user,
uid=admin
Some organizations have a requirement to change administration passwords from time to time. Follow these steps if you need to change the administration passwords:
-
Set the value of the
secretsManagerPrefixkey toprodin your Secret Agent configuration.You can set the value of the
secretsManagerPrefixkey to any prefix you like. These steps useprodas an example prefix. -
Change the
amadminuser’s password:-
Change to the bin directory in your
forgeopsrepository clone. -
Run the forgeops info command. Note the current password for the
amadminuser. -
If you have enabled cloud secret management, delete the entry that contains the
amadminuser’s password from the cloud secret manager:Google Cloud
List the secrets managed by the cloud secret manager, locate the URI for the secret that contains the
AM-PASSWORDS-AMADMIN-CLEARpassword, and delete it. For example:$ gcloud secrets list --uri $ gcloud secrets delete \ https://secretmanager.googleapis.com/.../prod-am-env-secrets-AM-PASSWORDS-AMADMIN-CLEAR
AWS
List the secrets managed by the cloud secret manager, locate the ARN for the secret that contains the
AM-PASSWORDS-AMADMIN-CLEARpassword, and delete it. For example:$ aws secretsmanager list-secrets --region=my-region $ aws secretsmanager delete-secret --region=my-region \ --force-delete-without-recovery \ --secret-id arn:aws:secretsmanager:...:prod-am-env-secrets-AM-PASSWORDS-AMADMIN-CLEAR-c3KfsL
Azure
Soft delete the secret that contains the
AM-PASSWORDS-AMADMIN-CLEARpassword from Azure Key Vault. For example:$ az keyvault secret delete --vault-name my-key-vault --name prod-am-env-secrets-AM-PASSWORDS-AMADMIN-CLEARPurge the soft deleted secret from Azure Key Vault. For example:
$ az keyvault secret purge --vault-name my-key-vault --name prod-am-env-secrets-AM-PASSWORDS-AMADMIN-CLEAR -
Make the namespace where the platform is deployed the active namespace in your local Kubernetes context.
-
Delete the Kubernetes secret that contains the
amadminuser’s password from the namespace in which the platform is deployed:$ kubectl patch secrets am-env-secrets --type=json \ --patch='[{"op":"remove", "path": "/data/AM_PASSWORDS_AMADMIN_CLEAR"}]' -
Restart AM by deleting all active AM pods: list all the pods in the namespace where you deployed the platform and then delete all the pods running AM.
-
After AM comes up, run the forgeops info command again to get the current administration passwords.
Verify that the
amadminuser’s password has changed by comparing its previous value to its current value. -
Verify that you can log in to the platform UI using the new password.
-
-
Change the AM application store service account’s password:
-
Change to the bin directory in your
forgeopsrepository clone. -
Run the forgeops info command. Note the current password for the AM application store service account.
-
If you have enabled cloud secret management, delete the entry that contains this account’s password from the cloud secret manager:
Google Cloud
List the secrets managed by the cloud secret manager, locate the URI for the secret that contains the
AM_STORES_APPLICATION_PASSWORDpassword, and delete it. For example:$ gcloud secrets list --uri $ gcloud secrets delete \ https://secretmanager.googleapis.com/.../prod-ds-env-secrets-AM_STORES_APPLICATION_PASSWORD
AWS
List the secrets managed by the cloud secret manager, locate the ARN for the secret that contains the
AM_STORES_APPLICATION_PASSWORDpassword, and delete it. For example:$ aws secretsmanager list-secrets --region=my-region $ aws secretsmanager delete-secret --region=my-region \ --force-delete-without-recovery \ --secret-id arn:aws:secretsmanager:...:prod-ds-env-secrets-AM_STORES_APPLICATION_PASSWORD-1d4432
Azure
Soft delete the secret that contains the
AM_STORES_APPLICATION_PASSWORDpassword from Azure Key Vault. For example:$ az keyvault secret delete --vault-name my-key-vault --name prod-ds-env-secrets-AM_STORES_APPLICATION_PASSWORDPurge the deleted secret from Azure Key Vault. For example:
$ az keyvault secret purge --vault-name my-key-vault --name prod-ds-env-secrets-AM_STORES_APPLICATION_PASSWORD -
Make the namespace where the platform is deployed the active namespace in your local Kubernetes context.
-
Delete the Kubernetes secret that contains the service account’s password from the namespace where the platform is deployed:
$ kubectl patch secrets ds-env-secrets --type=json \ --patch='[{"op":"remove", "path": "/data/AM_STORES_APPLICATION_PASSWORD"}]' -
Remove your ForgeOps deployment. Be sure to reply
Nwhen you’re prompted to delete PVCs, volume snapshots, and secrets:$ cd /path/to/forgeops/bin $ ./forgeops delete "small" platform detected in namespace: "my-namespace". Uninstalling component(s): ['all'] from namespace: "my-namespace". OK to delete components? [Y/N] Y OK to delete PVCs? [Y/N] N OK to delete volume snapshots? [Y/N] N OK to delete secrets? [Y/N] N service "admin-ui" deleted ...
-
Redeploy the platform:
$ forgeops install --small --fqdn forgeops.example.com
-
Review the administration passwords listed in the forgeops install command’s' output.
Verify that the AM application store service account’s password has changed by comparing its previous value to its current value.
-
-
Change the CTS service account’s password:
-
Change to the bin directory in your
forgeopsrepository clone. -
Run the forgeops info command. Note the current password for the identity repository service account.
-
If you have enabled cloud secret management, delete the entry that contains this account’s password from the cloud secret manager:
Google Cloud
List the secrets managed by the cloud secret manager, locate the URI for the secret that contains the
AM_STORES_CTS_PASSWORDpassword, and delete it. For example:$ gcloud secrets list --uri $ gcloud secrets delete \ https://secretmanager.googleapis.com/.../prod-ds-env-secrets-AM_STORES_CTS_PASSWORD
AWS
List the secrets managed by the cloud secret manager, locate the ARN for the secret that contains the
AM_STORES_CTS_PASSWORDpassword, and delete it. For example:$ aws secretsmanager list-secrets --region=my-region $ aws secretsmanager delete-secret --region=my-region \ --force-delete-without-recovery \ --secret-id arn:aws:secretsmanager:...:prod-ds-env-secrets-AM_STORES_CTS_PASSWORD-1d4432
Azure
Soft delete the secret that contains the
AM_STORES_CTS_PASSWORDpassword from Azure Key Vault. For example:$ az keyvault secret delete --vault-name my-key-vault --name prod-ds-env-secrets-AM_STORES_CTS_PASSWORDPurge the deleted secret from Azure Key Vault. For example:
$ az keyvault secret purge --vault-name my-key-vault --name prod-ds-env-secrets-AM_STORES_CTS_PASSWORD -
Make the namespace where the platform is deployed the active namespace in your local Kubernetes context.
-
Delete the Kubernetes secret that contains the service account’s password from the namespace where the platform is deployed:
$ kubectl patch secrets ds-env-secrets --type=json \ --patch='[{"op":"remove", "path": "/data/AM_STORES_CTS_PASSWORD"}]' -
Remove your ForgeOps deployment. Be sure to reply
Nwhen you’re prompted to delete PVCs, volume snapshots, and secrets:$ cd /path/to/forgeops/bin $ ./forgeops delete "small" platform detected in namespace: "my-namespace". Uninstalling component(s): ['all'] from namespace: "my-namespace". OK to delete components? [Y/N] Y OK to delete PVCs? [Y/N] N OK to delete volume snapshots? [Y/N] N OK to delete secrets? [Y/N] N service "admin-ui" deleted ...
-
Redeploy the platform:
$ forgeops install --small --fqdn forgeops.example.com
-
Review the administration passwords listed in the forgeops install command’s' output.
Verify that the CTS service account’s password has changed by comparing its previous value to its current value.
-
-
Change the identity repository service account’s password:
-
Change to the bin directory in your
forgeopsrepository clone. -
Run the forgeops info command. Note the current password for the the identity repository service account.
-
If you have enabled cloud secret management, delete the entry that contains this account’s password from the cloud secret manager:
Google Cloud
List the secrets managed by the cloud secret manager, locate the URI for the secret that contains the
AM_STORES_USER_PASSWORDpassword, and delete it. For example:$ gcloud secrets list --uri $ gcloud secrets delete \ https://secretmanager.googleapis.com/.../prod-ds-env-secrets-AM_STORES_USER_PASSWORD
AWS
List the secrets managed by the cloud secret manager, locate the ARN for the secret that contains the
AM_STORES_USER_PASSWORDpassword, and delete it. For example:$ aws secretsmanager list-secrets --region=my-region $ aws secretsmanager delete-secret --region=my-region \ --force-delete-without-recovery \ --secret-id arn:aws:secretsmanager:...:prod-ds-env-secrets-AM_STORES_USER_PASSWORD-1d4432
Azure
Soft delete the secret that contains the
AM_STORES_USER_PASSWORDpassword from Azure Key Vault. For example:$ az keyvault secret delete --vault-name my-key-vault --name prod-ds-env-secrets-AM_STORES_USER_PASSWORDPurge the deleted secret from Azure Key Vault. For example:
$ az keyvault secret purge --vault-name my-key-vault --name prod-ds-env-secrets-AM_STORES_USER_PASSWORD -
Make the namespace where the platform is deployed the active namespace in your local Kubernetes context.
-
Delete the Kubernetes secret that contains the service account’s password from the namespace where the platform is deployed:
$ kubectl patch secrets ds-env-secrets --type=json \ --patch='[{"op":"remove", "path": "/data/AM_STORES_USER_PASSWORD"}]' -
Remove your ForgeOps deployment. Be sure to reply
Nwhen you’re prompted to delete PVCs, volume snapshots, and secrets:$ cd /path/to/forgeops/bin $ ./forgeops delete "small" platform detected in namespace: "my-namespace". Uninstalling component(s): ['all'] from namespace: "my-namespace". OK to delete components? [Y/N] Y OK to delete PVCs? [Y/N] N OK to delete volume snapshots? [Y/N] N OK to delete secrets? [Y/N] N service "admin-ui" deleted ...
-
Redeploy the platform:
$ forgeops install --small --fqdn forgeops.example.com
-
Review the administration passwords listed in the forgeops install command’s' output.
Verify that the identity repository service account’s password has changed by comparing its previous value to its current value.
-
-
Change the DS root user’s password:
-
Change to the bin directory in your
forgeopsrepository clone. -
Run the forgeops info command. Note the current password for the
uid=adminaccount. -
If you have enabled cloud secret management, delete the entry that contains this account’s password from the cloud secret manager:
Google Cloud
List the secrets managed by the cloud secret manager, locate the URI for the secret that contains the
dirmanager-pwpassword, and delete it. For example:$ gcloud secrets list --uri $ gcloud secrets delete \ https://secretmanager.googleapis.com/.../prod-ds-passwords-dirmanager-pw
AWS
List the secrets managed by the cloud secret manager, locate the ARN for the secret that contains the
dirmanager-pwpassword, and delete it. For example:$ aws secretsmanager list-secrets --region=my-region $ aws secretsmanager delete-secret --region=my-region \ --force-delete-without-recovery \ --secret-id arn:aws:secretsmanager:...:prod-ds-passwords-dirmanager-pw-2eeaa0
Azure
Soft delete the secret that contains the
dirmanager-pwpassword from Azure Key Vault. For example:$ az keyvault secret delete --vault-name my-key-vault --name prod-ds-passwords-dirmanager-pwPurge the deleted secret from Azure Key Vault. For example:
$ az keyvault secret purge --vault-name my-key-vault --name prod-ds-passwords-dirmanager-pw -
Make the namespace where the platform is deployed the active namespace in your local Kubernetes context.
-
Delete the Kubernetes secret that contains the service account’s password from the namespace where the platform is deployed:
$ kubectl patch secrets ds-passwords --type=json \ --patch='[{"op":"remove", "path": "/data/dirmanager.pw"}]' -
Remove your ForgeOps deployment. Be sure to reply
Nwhen you’re prompted to delete PVCs, volume snapshots, and secrets:$ cd /path/to/forgeops/bin $ ./forgeops delete "small" platform detected in namespace: "my-namespace". Uninstalling component(s): ['all'] from namespace: "my-namespace". OK to delete components? [Y/N] Y OK to delete PVCs? [Y/N] N OK to delete volume snapshots? [Y/N] N OK to delete secrets? [Y/N] N service "admin-ui" deleted ...
-
Redeploy the platform:
$ forgeops install --small --fqdn forgeops.example.com
-
Review the administration passwords listed in the forgeops install command’s' output.
Verify that the password for the
uid=adminaccount has changed by comparing its previous value to its current value.
-
Secure HTTP
ForgeOps deployments use a TLS-enabled ingress controller to enable secure communication to the cluster[13]. Incoming requests and outgoing responses are encrypted. TLS is terminated at the ingress controller.
ForgeOps deployments install the NGINX ingress controller[14]. The /path/to/forgeops/kustomize/base/ingress/ingress.yaml
file contains an annotation—cert-manager.io/cluster-issuer—that
configures the NGINX ingress controller to use
cert-manager software for certificate
management[15].
The forgeops install command installs the cert-manager utility in
the cert-manager namespace and configures cert-manager to generate
self-signed certificates for securing communication into the ingress.
When self-signed certificates are used, communication is encrypted, but users receive warnings about insecure communication from some browsers. Because of this, self-signed certificates are suitable for test environments only.
For all other environments, reconfigure certificate management. Two common configurations are:
-
Using a certificate with a trust chain that starts at a trusted root certificate—Communication is encrypted, and users do not receive warnings from their browsers.
TLS certificate contains a simple example of how to deploy a certificate from a trusted authority in a ForgeOps deployment. The steps in the example:
-
Remove the cert-manager annotation from the ingress.
-
Create a secret named
sslcertthat contains the certificate you want to use in your deployment.
-
-
Using a dynamically obtained certificate from Let’s Encrypt—Communication is encrypted and users do not receive warnings from their browsers.
You reconfigure cert-manager to use a cluster issuer that calls Let’s Encrypt to obtain a certificate and installs the certificate as a Kubernetes secret.
There are many options for certificate management in a Ping Identity Platform deployment. For more information about configuring certificate manager, refer to the cert-manager documentation.
TLS certificate
The forgeops install command installs cert-manager software.
By default, cert-manager configures the ingress controller in ForgeOps
deployments with a self-signed certificate[16].
This is the simplest encryption option—you don’t have to
make any changes to your deployment to get encryption.
However, when you access one of the Ping Identity web applications from your browser, you’ll get a "Not Secure" message from your browser. Users will need to bypass the message.
If you have a certificate from a CA, or a certificate generated by the mkcert utility, you can use your certificate for TLS encryption instead of the default self-signed certificate:
-
Obtain the certificate:
-
Make sure that the certificate is PEM-encoded.
-
A best practice is to include the entire chain of trust with your certificate.
-
-
Make sure that the deployment FQDN (that you specified in your /etc/hosts file) works with your certificate. Refer to the hostname resolution page for your cluster provider: Google Cloud | AWS | Azure | Minikube.
-
Remove cert-manager’s annotation from the ingress definition:
-
If you are using Kustomize, run the kubectl annotate command:
$ kubectl annotate ingress forgerock cert-manager.io/cluster-issuer-
-
If you are using Helm, edit the charts/identity-platform/value.yaml file and set
cert_manager.enabledto false:... cert_manager: enabled: false
-
-
Delete the certificate resource originally created by cert-manager:
$ kubectl delete certificate sslcert
-
Update the secret named
sslcertwith your certificate. For example:$ kubectl create secret tls sslcert --cert=/path/to/my-cert.crt --key=/path/to/my-key.key \ --dry-run=client -o yaml | kubectl replace -f -
Certificate generated by the mkcert utility
If you don’t have a certificate from a CA, you can use the mkcert utility to generate a locally trusted certificate. In many cases, it’s acceptable to use mkcert certificates for development purposes.
To use a certificate generated by the mkcert utility in a ForgeOps deployment
that uses forgeops.example.com as the deployment FQDN:
-
If you don’t have mkcert software installed locally, install it. Firefox users must install certutil software. Refer to the mkcert installation instructions for more information.
-
If you haven’t ever done so, run the mkcert -install command to create a local certificate authority (CA) and install it in your system root store. Restart your browser after creating the local CA.
-
Create a wildcard certificate for the
example.comdomain:$ cd $ mkcert "*.example.com"
The mkcert utility generates the certificate file as _wildcard.example.com.pem and the private key file as _wildcard.example.com-key.pem. Use these two file names when you create the Kubernetes
sslcertsecret.
Access restriction by IP address
When installing the ingress controller in production environments, you should consider configuring a CIDR block in the Helm chart for the ingress controller so that you restrict access to worker nodes from a specific IP address or a range of IP addresses.
To specify a range of IP addresses allowed to access resources controlled by the
ingress controller, specify the
--set controller.service.loadBalancerSourceRanges=your IP range option
when you install your ingress controller.
For example:
$ helm install --namespace nginx --name nginx \
 --set rbac.create=true \
 --set controller.publishService.enabled=true \
 --set controller.stats.enabled=true \
 --set controller.service.externalTrafficPolicy=Local \
 --set controller.service.type=LoadBalancer \
 --set controller.image.tag="0.21.0" \
 --set controller.service.annotations."service\.beta\.kubernetes\.io/aws-load-balancer-type"="nlb" \
 --set controller.service.loadBalancerSourceRanges="{81.0.0.0/8,3.56.113.4/32}" \
 stable/nginx-ingress
Network policies
Kubernetes network policies let you specify specify how pods are allowed to communicate with other pods, namespaces, and IP addresses.
The forgeops repository contains two sets of example network policies for the
Ping Identity Platform:
Customize the example policies to meet your security needs, or use them to help you better understand how network policies can make Kubernetes deployments more secure.
All the example policies have the value Ingress in the spec.policyTypes key:
spec:
  policyTypes:
  - Ingress
Network policies with this policy type are called ingress policies, because they limit ingress traffic in a deployment.
deny-all policy
By default, if no network policies exist in a namespace, then all ingress and egress traffic is allowed to and from pods in that namespace.
The deny-all policy modifies the default network policy for ingress. If a pod
isn’t selected by another network policy in the namespace, ingress is not
allowed.
For information about how Kubernetes controls pod ingress when pods are selected by multiple network policies in a namespace, refer to the Kubernetes documentation.
ds-idrepo-ldap policy
The ds-idrepo-ldap policy limits access to ds-idrepo pods. Access can only
be requested over port 1389, 1636, or 8080, and must come from an am, idm,
or amster pod.
This part of the network policy specifies that access must be requested over port 1389, 1636, or 8080:
ingress:
- from:
  ...
  ports:
  - protocol: TCP
    port: 1389
  - protocol: TCP
    port: 1636
  - protocol: TCP
    port: 8080
This part of the network policy specifies that access must be from an am,
idm, or amster pod:
ingress:
- from:
  - podSelector:
      matchExpressions:
      - key: app
        operator: In
        values:
        - am
        - idm
        - amster
Understanding the example network policies and how to customize them requires
some knowledge about labels defined in ForgeOps deployments. For example,
am pods are defined with a label, app, that has the value am. You’ll
find this label in
/path/to/forgeops/kustomize/base/am/kustomization.yaml file:
commonLabels:
  app.kubernetes.io/name: am
  app.kubernetes.io/instance: am
  app.kubernetes.io/component: am
  app.kubernetes.io/part-of: forgerock
  tier: middle
  app: am
ds-cts-ldap policy
The ds-cts-ldap policy limits access to ds-cts pods. Access can only
be requested over port 1389, 1636, or 8080, and must come from an am or
amster pod.
ds-replication policy
ds pods in ForgeOps deployments are labeled with tier: ds; they’re said to
reside in the ds tier of the deployment.
The ds-replication policy limits access to the pods on the ds tier. This
policy specifies that access to ds tier pods over port 8989 can only come from
other pods in the same tier.
Note that port 8989 is the default DS replication port. This network policy ensures that only DS pods can access the replication port.
backend-http-access policy
The backend-http-access policy limits access to the pods in the middle tier,
which contains the am, idm, and ig pods. Access can only be requested over
port 8080.
front-end-http-access policy
The front-end-http-access policy limits access to the pods in the ui tier:
the login-ui, admin-ui, and end-user-ui pods. Access can only be requested
over port 8080.
Note that users send HTTPS requests for the Ping Identity Platform UIs to the ingress controller over port 443. The ingress controller terminates TLS, and then forwards requests to the UI pods over port 8080.
Cluster access for multiple AWS users
It’s common for team members to share the use of a cluster. For team members to share a cluster, the cluster owner must grant access to each user:
-
Get the ARNs and names of users who need access to your cluster.
-
Set the Kubernetes context to your Amazon EKS cluster.
-
Edit the authorization configuration map for the cluster using the kubectl edit command:
$ kubectl edit -n kube-system configmap/aws-auth
-
Under the
mapRolessection, insert themapUsersection. An example is shown here with the following parameters:-
The user ARN is
arn:aws:iam::012345678901:user/new.user. -
The user name registered in AWS is new.user.
... mapUsers: |
    - userarn: arn:aws:iam::012345678901:user/new.user
      username: new.user
      groups:
        - system:masters
...
-
-
For each additional user, insert the
- userarn:entry in themapUsers:section:... mapUsers: | - userarn: arn:aws:iam::012345678901:user/new.user username: new.user groups: - system:masters - userarn: arn:aws:iam::901234567890:user/second.user username: second.user groups: - system:masters ... -
Save the configuration map.
ForgeOps benchmarks
The benchmarking instructions in this part of the documentation give you a method to validate performance of your ForgeOps deployment.
The benchmarking techniques we present are a lightweight example, and are not a substitute for load testing a production deployment. Use our benchmarking techniques to help you get started with the task of constructing your own load tests.
Remember, a ForgeOps deployment is a reference implementation and not for production use. When you create a project plan, you’ll need to think about how you’ll put together production-quality load tests that accurately measure your own deployment’s performance.
About ForgeOps benchmarking
ForgeOps benchmarks provides instructions for running lightweight benchmarks to give you a means for validating your own ForgeOps deployment.
The ForgeOps team runs the same benchmark tests. Our results are available upon request. To get them, contact your Ping Identity sales representative.
We conduct our tests using the configurations specified for small, medium, and large clusters. We create our clusters using the techniques described in the Setup documentation.
Next, we generate test users:
-
1,000,000 test users for a small cluster.
-
10,000,000 test users for a medium cluster.
-
100,000,000 test users for a large cluster.
Finally, we run tests that measure authentication rates and OAuth 2.0 authorization code flow performance.
If you follow the same method of performing a ForgeOps deployment and running benchmarks, the results you obtain similar results. However, factors beyond the scope of ForgeOps deployment or a failure to use our documented sizing and configuration may affect your benchmark test results. These factors might include (but are not limited to) updates to cloud platform SDKs, changes to third-party software required for Kubernetes, and changes you have made to sizing or configuration to suit your business needs.
ForgeOps deployments are designed to:
-
Conform to DevOps best practices
-
Facilitate continuous integration and continuous deployment
-
Scale and deploy on any Kubernetes environment in the cloud
If you require higher performance than the benchmarks reported here, you can scale your deployment horizontally and vertically. Vertically scaling Ping Identity Platform works particularly well in the cloud. For more information about scaling your deployment, contact your qualified Ping Identity partner or technical consultant.
Next step
Third-party software
The ForgeOps team uses Gradle 6.8.3 to benchmark ForgeOps deployments. Before you start running benchmarks, install this version of Gradle in your local environment.
Earlier and later versions will probably work. If you want to try using another version, it is your responsibility to validate it.
In addition to Gradle, you’ll need all the third-party software required to perform a ForgeOps deployment
Next step
Test user generation
Running the Authentication rate and OAuth 2.0 authorization code flow benchmarks requires a set of test users. This page provides instructions for generating a set of test users suitable for these two lightweight AM benchmarks. Note that these test users are not necessarily suitable for other benchmarks or load tests, and that they can’t be used with IDM.
For small and medium clusters
Follow these steps to generate test users for lightweight AM benchmarks, provision the user stores, and prime the directory servers:
-
Set up your Kubernetes context:
-
Set the
KUBECONFIGenvironment variable so that your Kubernetes context references the cluster where you’ll perform the ForgeOps deployment. -
Set the active namespace in your Kubernetes context to the Kubernetes namespace where you deployed the platform.
-
-
Obtain the password for the directory superuser,
uid=admin:$ cd /path/to/forgeops/bin $ ./forgeops info | grep uid=admin
Make a note of this password. You’ll need it for subsequent steps in this procedure.
-
Change to the directory that contains the source for the
dsutilDocker container:$ cd /path/to/forgeops/docker/ds/dsutil
You’ll generate test users from a pod you create from the
dsutilcontainer. -
Build and push the
dsutilDocker container to your container registry, and then run the container.The my-registry parameter varies, depending on the location of your registry:
$ docker build --tag=my-registry/dsutil .
$ docker push my-registry/dsutil
$ kubectl run -it dsutil --image=my-registry/dsutil --restart=Never -- bash
The kubectl run command creates the
dsutilpod, and leaves you in a shell that lets you run commands in the pod. -
Generate the test users—1,000,000 users for a small cluster and 10,000,000 for a medium cluster:
Run these substeps from the
dsutilpod’s shell:-
Make an LDIF file that has the number of user entries for your cluster size:
For example, for a small cluster:
$ /opt/opendj/bin/makeldif -o data/entries.ldif \
 -c numusers=1000000 config/MakeLDIF/ds-idrepo.template
Processed 1000 entries
Processed 2000 entries
Processed 3000 entries
...
Processed 1000000 entries
LDIF processing complete. 1000003 entries written
When the ForgeOps team ran the makeldif script, it took approximately:
-
30 seconds to run on a small cluster.
-
4 minutes to run on a medium cluster.
-
-
Create the user entries in the directory:
$ /opt/opendj/bin/ldapmodify \
 -h ds-idrepo-0.ds-idrepo -p 1389 --useStartTls --trustAll \
 -D "uid=admin" -w directory-superuser-password --noPropertiesFile \
 --no-prompt --continueOnError --numConnections 10 data/entries.ldif
ADD operation successfulmessages appear as user entries are added to the directory.When the ForgeOps team ran the ldapmodify command, it took approximately:
-
15 minutes to run on a small cluster.
-
2 hours 35 minutes to run on a medium cluster.
-
-
-
Prime the directory servers:
-
Open a new terminal window or tab.
Use this new terminal window—not the one running the
dsutilpod’s shell—for the remaining substeps in this step. -
Prime the directory server running in the
ds-idrepo-0pod:-
Start a shell that lets you run commands in the
ds-idrepo-0pod:$ kubectl exec ds-idrepo-0 -it -- bash
-
Run the following command:
$ ldapsearch -D "uid=admin" -w directory-superuser-password \ -p 1389 -b "ou=identities" uid=user.* | grep dn: | wc -l 10000000 -
Exit from the
id-dsrepo-0pod’s shell:$ exit
-
-
Prime the directory server running in the
ds-idrepo-1pod.
-
For large clusters
Here are some very general steps you can follow if you want to generate test users for benchmarking or load testing a large cluster:
-
Install DS in a VM in the cloud.
-
Run the
makeldifandldapmodifycommands, as described above. -
Back up your directory.
-
Upload the backup files to cloud storage.
-
Restore an
idrepopod from your backup following steps similar to the procedure in Restore.
Next step
Authentication rate
The AMRestAuthNSim.scala simulation tests authentication rates using the REST
API. It measures the throughput and response times of an AM server
performing REST authentications when AM is configured to use CTS-based
sessions.
To run the simulation:
-
Make sure the userstore is provisioned, and the PingDS cache is primed.
Refer to Test user generation.
-
Set environment variables that specify the host on which to run the test, the number of concurrent threads to spawn when running the test, the duration of the test (in seconds), the first part of the user ID, and the user password, and the number of users for the test:
$ export TARGET_HOST=forgeops.example.com
$ export CONCURRENCY=100
$ export DURATION=60
$ export USER_PREFIX=user.
$ export USER_PASSWORD=T35tr0ck123
$ export USER_POOL=n-users
where n-users is
1000000for a small cluster,10000000for a medium cluster, and100000000for a large cluster. -
Configure AM for CTS-based sessions:
-
Log in to the Identity Platform admin UI as the
amadminuser. For details, refer to AM Services. -
Access the AM admin UI.
-
Select the top level realm.
-
Select Properties.
-
Make sure the Use Client-based Sessions option is disabled.
If it’s not disabled, disable it, and then select Save Changes.
-
-
Change to the /path/to/forgeops/docker/gatling directory.
-
Run the simulation:
$ gradle clean; gradle gatlingRun-am.AMRestAuthNSim
When the simulation is complete, the name of a file containing the test results appears near the end of the output.
-
Open the file containing the test results in a browser to review the results.
Next step
OAuth 2.0 authorization code flow
The AMAccessTokenSim.scala simulation tests OAuth 2.0 authorization code flow
performance. It measures the throughput and response time of an AM server
performing authentication, authorization, and session token management when
AM is configured to use client-based sessions, and OAuth 2.0 is
configured to use client-based tokens. In this test, one transaction includes
all three operations.
To run the simulation:
-
Make sure the userstore is provisioned, and the PingDS cache is primed.
Refer to Test user generation.
-
Set environment variables that specify the host on which to run the test, the number of concurrent threads to spawn when running the test, the duration of the test (in seconds), the first part of the user ID, and the user password, and the number of users for the test:
$ export TARGET_HOST=forgeops.example.com
$ export CONCURRENCY=100
$ export DURATION=60
$ export USER_PREFIX=user.
$ export USER_PASSWORD=T35tr0ck123
$ export USER_POOL=n-users
where n-users is
1000000for a small cluster,10000000for a medium cluster, and100000000for a large cluster. -
Configure AM for CTS-based sessions:
-
Log in to the Identity Platform admin UI as the
amadminuser. For details, refer to AM Services. -
Access the AM admin UI.
-
Select the top level realm.
-
Select Properties.
-
Make sure the Use Client-based Sessions option is disabled.
If it’s not disabled, disable it, and then select Save Changes.
-
-
Configure AM for CTS-based OAuth2 tokens:
-
Select Realms > Top Level Realm.
-
Select Services > OAuth2 Provider.
-
Make sure the Use Client-based Access & Refresh Tokens option is disabled.
If it’s not disabled, disable it, and then select Save Changes.
-
-
Change to the /path/to/forgeops/docker/gatling directory.
-
Run the simulation:
$ gradle clean; gradle gatlingRun-am.AMAccessTokenSim
When the simulation is complete, the name of a file containing the test results appears near the end of the output.
-
Open the file containing the test results in a browser to review the results.
Congratulations!
You’ve successfully run the lightweight benchmark tests on a ForgeOps deployment.
Ingress
By default, ForgeOps deployments use NGINX Ingress Controller.
For deployments on GKE, EKS, and AKS, the tf-apply cluster creation script deploys NGINX Ingress Controller when it creates new Kubernetes clusters. Alternatively, you can deploy HAProxy Ingress as your ingress controller.
For deployments on Minikube, the forgeops-minikube start command installs the ingress add-on in your Minikube cluster.
HAProxy Ingress
This section lists adjustments you’ll need to make if you want to perform a ForgeOps deployment that uses HAProxy Ingress as the ingress controller instead of NGINX Ingress Controller.
-
Before you run the tf-apply script, configure Terraform to deploy HAProxy Ingress in your cluster.
Modify these values under
cluster.tf_cluster_gke_smallin the override.auto.tfvars file:-
Set the value of the
helm.ingress-nginx.deployvariable tofalse. -
Set the value of the
helm.ingress-haproxy.deployvariable tofalse.
-
-
After you have run the tf-apply script, deploy HAProxy Ingress Controller by running the bin/ingress-controller-deploy.sh script.
Be sure to specify the
-i haproxyoption when you run the script. -
To get the ingress controller’s external IP address on your GKE, EKS, or AKS cluster, specify --namespace haproxy-ingress (instead of --namespace nginx-ingress) when you run the kubectl get services command. For example:
$ kubectl get services --namespace haproxy-ingress
NAME              TYPE           CLUSTER-IP   EXTERNAL-IP  PORT(S)                      AGE
haproxy-ingress   LoadBalancer   10.84.6.68   34.82.11.221 80:32288/TCP,443:32325/TCP   38s
...
When you perform your ForgeOps deployment:
-
Specify the --ingress-class haproxy argument. For example:
$ cd /path/to/forgeops/bin
$ ./forgeops install --small --ingress-class haproxy --fqdn forgeops.example.com --namespace my-namespace
Backup and restore overview
In ForgeOps deployments, identity and configuration data is mainly contained in DS services.
ForgeOps deployments include two directory services:
-
The
ds-idreposervice, which stores identities, application data, and AM policies -
The
ds-ctsservice, which stores AM Core Token Service data
Before deploying the Ping Identity Platform in production, create and test a backup plan that lets you recover these two directory services should you experience data loss.
Choose a backup solution
There are numerous options to implement data backup. ForgeOps deployments provide two solutions:
-
Kubernetes volume snapshots
You can also use backup products from third-party vendors. For example:
-
Backup tooling from your cloud provider. For example, Google backup for GKE.
-
Third-party utilities, such as Velero, Kasten K10, TrilioVault, Commvault, and Portworx Backup. These third-party products are cloud-platform agnostic, and can be used across cloud platforms.
Your organization might have specific needs for its backup solution. Some factors to consider include:
-
Does your organization already have a backup strategy for Kubernetes deployments? If it does, you may want to use the same backup strategy for your Ping Identity Platform deployment.
-
Do you plan to deploy the platform in a hybrid architecture, where part of your deployment is on-premises and another part of it is in the cloud? If you do, then you might want to employ a backup strategy that lets you move around DS data most easily.
-
When considering how to store your backup data, is cost or convenience more important to you? If cost is more important, then you might need to take into account that archival storage in the cloud is much less expensive than snapshot storage—ten times less expensive, as of this writing.
-
If you’re thinking about using snapshots for backup, are there any limitations imposed by your cloud provider that are unacceptable to you? Historically, cloud providers have placed quotas on snapshots. Check your cloud provider’s documentation for more information.
Secrets back up and restore
You should consider backing up and restoring secrets and keys in addition to directory data. Learn more at Backup and restore secrets.
Backup and restore using volume snapshots
Kubernetes volume snapshots provide a standardized way to create copies of persistent volumes at a point in time without creating new volumes. Backing up your directory data with volume snapshots lets you perform rapid recovery from the last snapshot point. Volume snapshot backups also facilitate testing by letting you initialize DS with sample data.
In ForgeOps deployments, the DS data, changelog, and configuration are stored in the same persistent volume. This ensures the volume snapshot captures DS data and changelog together.
|
The backup and restore procedures using volume snapshots described here are meant for use with ForgeOps deployments where the DS operator is not used. |
Backup
Set up backup
Kustomize overlays and Helm values necessary for configuring volume snapshots
are already provided, but they have not been enabled to take backup. The default volume snapshot setup takes snapshots of the data-ds-idrepo-0 and
data-ds-cts-0 PVCs once a day.
To enable volume snapshots of DS data from the my-namespace namespace using the default settings, perform the following steps:
-
In a Kustomize-based deployment
-
In a Helm-based deployment
The default Kustomize overlays are provided in the kustomize/overlay/ds-snapshot directory of the forgeops repository.
-
In a terminal window, change to the ds-snapshot subdirectory under the kustomize/overlay directory:
$ cd /path/to/forgeops/kustomize/overlay/ds-snapshot
-
Copy the content of the
proddirectory to a new directory with the name of the namespace where you have performed a ForgeOps deployment:$ cp -rp ./prod ./my-namespace -
Change to the my-namespace directory.
-
Edit the rbac/namespace.yaml file and change the last line to specify the namespace where you performed the ForgeOps deployment.
-
Set up the configuration map and enable volume snapshot backup using the kubectl apply commands:
$ kubectl apply --kustomize configmap --namespace my-namespace
$ kubectl apply --kustomize rbac --namespace my-namespace
$ kubectl apply --kustomize idrepo --namespace my-namespace
-
(Optional) If you want to back up the
ctsas well, then run the following:$ kubectl apply --kustomize cts --namespace my-namespace
The default Helm values are provided in the charts/identity-platform/values.yaml file of the forgeops repository.
-
In a terminal window, change to the charts/identity-platform directory:
$ cd /path/to/forgeops/charts/identity-platform
-
Copy the values.yaml file, so you can restore it if required:
$ cp values.yaml /tmp/values.yaml
-
Edit the values.yaml file and enable volume snapshot:
-
Enable snapshot for
ds-idrepoby setting theds-idrepo.snapshot.enabledparameter to true.For example, change line 760 from
enabled: falsetoenabled: true:... 759 snapshot: 760 enabled: true 761 name: ds-idrepo-snapshot 762 pvcName: data-ds-idrepo-0 ...
-
Enable snapshot for
ds-ctsby setting theds-cts.snapshot.enabledparameter to true.For example, change line 834 from
enabled: falsetoenabled: true:... 833 snapshot: 834 enabled: true 835 name: ds-cts-snapshot 836 pvcName: data-ds-cts-0 ...
-
-
Apply the changed value.yaml file:
$ helm upgrade -i
You can view the volume snapshots that are available for restore, using this command:
$ kubectl get volumesnapshots --namespace my-namespace

NAME                               READYTOUSE   SOURCEPVC          SOURCESNAPSHOTCONTENT   RESTORESIZE   SNAPSHOTCLASS       SNAPSHOTCONTENT
          CREATIONTIME   AGE
ds-idrepo-snapshot-20231117-1320   true         data-ds-idrepo-0                           100Gi         ds-snapshot-class   snapcontent-be3f4a44-cfb2-4f68-aa2b-60902
bb44192   3h29m          3h29m
ds-idrepo-snapshot-20231117-1330   true         data-ds-idrepo-0                           100Gi         ds-snapshot-class   snapcontent-7bcf6779-382d-40e3-9c9f-edf31
c54768e   3h19m          3h19m
ds-idrepo-snapshot-20231117-1340   true         data-ds-idrepo-0                           100Gi         ds-snapshot-class   snapcontent-c9c88332-ad05-4880-bda7-48616
ec13579   3h9m           3h9m
ds-idrepo-snapshot-20231117-1401   true         data-ds-idrepo-0                           100Gi         ds-snapshot-class   snapcontent-1f3f4ce9-0083-447f-9803-f6b45
e03ac27   167m           167m
ds-idrepo-snapshot-20231117-1412   true         data-ds-idrepo-0                           100Gi         ds-snapshot-class   snapcontent-4c39c095-0891-4da8-ae61-fac78
c7147ff   156m           156m
Customize the backup schedule
When enabled, volume snapshots are created once every day by default and purged after three days. You can customize the backup schedules as required in your environment.
-
In a Kustomize-based deployment
-
In a Helm-based deployment
To modify the default schedule and purge delay for the idrepo
repository[17]:
-
In a terminal window, change to the path/to/idrepo directory.
-
Copy the schedule.yaml file to a temporary location, so you can restore if needed.
-
Edit the schedule.yaml file and set the
scheduleandpurge-delayparameters as needed. -
Run the kubectl apply command.
- Examples for scheduling snapshots
-
-
To schedule snapshots twice a day, at noon and midnight:
... spec: schedule: "0 0/12 * * *" ... -
To schedule snapshots every 8 hours:
...
  spec:
    schedule: "0 */8 * * *"
...
-
- Examples for purging schedule
-
-
To schedule purge after 4 days:
... env: - name: PURGE_DELAY value: "-4 day" -
To schedule purge after a week:
...
         env:
           - name: PURGE_DELAY
             value: "-7 day"
-
To modify the default schedule and purge delay:
-
In a terminal window, change to the identity-platform subdirectory under the charts directory:
$ cd /path/to/forgeops/charts/identity-platform
-
Copy the values.yaml file, so you can restore it if required:
$ cp values.yaml /tmp/values.yaml
-
Edit the charts/identity-platform/values.yaml file and set the
scheduleandpurge-delayparameters as needed. -
Run the helm upgrade command.
- Examples for scheduling snapshots for the
idreporepository[18] -
-
To schedule snapshots twice a day, at noon and midnight:
... ds-idrepo: ... snapshot: ... schedule: "0 0/12 * * *" ... -
To schedule snapshots every 8 hours:
...
ds-idrepo:
  ...
  snapshot:
     ...
     schedule: "0 */8 * * *"
...
-
- Examples for purging schedule for the
idreporepository[18] -
-
To schedule purge after 4 days:
... ds-idrepo: ... snapshot: ... purgeDelay: "-4 day" ... -
To schedule purge after a week:
...
ds-idrepo:
  ...
  snapshot:
     ...
     purgeDelay: "-7 day"
...
-
- Examples for scheduling snapshots for the
Restore from volume snapshot
The snapshot-restore.sh script lets you restore DS instances in a ForgeOps deployment. By default, this script restores a DS instance from the latest available snapshot.
There are two options when using the snapshot-restore.sh script to restore a DS from a volume snapshot:
-
Full—Use the full option to fully restore a DS instance from a volume snapshot. When you specify this option, the DS is scaled down to 0 pods before restoring data. The data is restored to an existing PVC from a snapshot. This operation requires downtime.
-
Selective—Use the selective option to restore a portion of DS data from volume snapshot. The selective restore creates a new temporary DS instance with a new DS pod. You can selectively export from the temporary DS pod and import into your functional DS instance. After restoring data, you can clean up the temporary resources.
The snapshot-restore.sh command is available in the bin
directory of the forgeops repository. To learn more about the
snapshot-restore.sh command and its options, run
snapshot-restore.sh --help.
Restore examples
- Trial run without actually restoring DS data
-
-
In a terminal window, change to the /path/to/forgeops/bin directory.
-
Set your Kubernetes context to the correct cluster and namespace.
-
Run the snapshot-restore.sh command with the
--dryrunoption:$ ./snapshot-restore.sh --dryrun --namespace my-namespace full idrepo ./snapshot-restore.sh --dryrun --namespace my-namespace full idrepo /usr/local/bin/kubectl apply -f /tmp/snapshot-restore-idrepo.20231121T23:03:15Z/sts-restore.json -n my-namespace /usr/local/bin/kubectl delete pvc data-ds-idrepo-0 -n my-namespace /usr/local/bin/kubectl apply -f /tmp/snapshot-restore-idrepo.20231121T23:03:15Z/data-ds-idrepo-0.json -n my-namespace /usr/local/bin/kubectl apply -f /tmp/snapshot-restore-idrepo.20231121T23:03:15Z/sts.json -n my-namespace
-
- Full restore of the
idrepoinstance from the latest available volume snapshot -
-
In a terminal window, change to the /path/to/forgeops/bin directory.
-
Set your Kubernetes context to the correct cluster and namespace.
-
Get a list of available volume snapshots:
$ kubectl get volumesnapshots --namespace my-namespace -
Restore the full DS instance:
$ ./snapshot-restore.sh --namespace my-namespace full idrepo -
Verify that DS data has been restored.
-
- Selective restore from a specific volume snapshot and storing data in a user-defined storage path
-
-
In a terminal window, change to the /path/to/forgeops/bin directory.
-
Set your Kubernetes context to the correct cluster and namespace.
-
Get a list of available volume snapshots:
$ kubectl get volumesnapshots --namespace my-namespace -
Perform a selective restore trial run:
$ ./snapshot-restore.sh --dryrun --path /tmp/ds-restore --snapshot ds-idrepo-snapshot-20231121-2250 --namespace my-namespace selective idrepo

VolumeSnapshot ds-idrepo-snapshot-20231121-2250 is ready to use
/usr/local/bin/kubectl apply -f /tmp/ds-rest/sts-restore.json -n my-namespace
/usr/local/bin/kubectl apply -f /tmp/ds-rest/svc.json -n my-namespace
-
Perform a selective restore using a specific snapshot:
$ ./snapshot-restore.sh --path /tmp/ds-restore --snapshot ds-idrepo-snapshot-20231121-2250 --namespace my-namespace selective idrepo

statefulset.apps/ds-idrepo-restore created
service/ds-idrepo configured
-
Verify that a new
ds-idrepo-restore-0pod was created:$ kubectl get pods NAME READY STATUS RESTARTS AGE admin-ui-656db67f54-2brbf 1/1 Running 0 3h17m am-7fffff59fd-mkks5 1/1 Running 0 107m amster-hgkv9 0/1 Completed 0 3h18m ds-idrepo-0 1/1 Running 0 39m ds-idrepo-restore-0 1/1 Running 0 2m40s end-user-ui-df49f79d4-n4q54 1/1 Running 0 3h17m idm-fc88578bf-lqcdj 1/1 Running 0 3h18m login-ui-5945d48fc6-ljxw2 1/1 Running 0 3h17m
The
ds-idrepo-restore-0pod is temporary and not to be used as a complete DS instance. You can export required data from the temporary pod, and import data into your functional DS instance. -
Clean up resources from the selective restore:
$ ./snapshot-restore.sh clean idrepo

statefulset.apps "ds-idrepo-restore" deleted
persistentvolumeclaim "data-ds-idrepo-restore-0" deleted
-
dsbackup utility
This page provides instructions for backing up and restoring DS data in a ForgeOps deployment using the dsbackup utility.
Back up using the dsbackup utility
Before you can back up DS data using the dsbackup utility, you must set up a cloud storage container in Google Cloud Storage, Amazon S3, or Azure Blob Storage and configure a Kubernetes secret with the container’s credentials in your ForgeOps deployment. Then, you schedule backups by running the ds-backup.sh script.
Set up cloud storage
Cloud storage setup varies depending on your cloud provider. Expand one of the following sections for provider-specific setup instructions:
Google Cloud
Set up a Google Cloud Storage (GCS) bucket for the DS data backup and configure the ForgeOps deployment with the credentials for the bucket:
-
Create a Google Cloud service account with sufficient privileges to write objects in a GCS bucket. For example, Storage Object Creator.
-
Add a key to the service account, and then download the JSON file containing the new key.
-
Configure a multi-region GCS bucket for storing DS backups:
-
Create a new bucket, or identify an existing bucket to use.
-
Note the bucket’s Link for gsutil value.
-
Grant permissions on the bucket to the service account you created in step 1.
-
-
Make sure your current Kubernetes context references the cluster and namespace where the DS pods are running.
-
Create secrets that contain credentials to write to cloud storage. The DS pods use these when performing backups.
For
my-sa-credential.json, specify the JSON file containing the service account’s key:-
Create the
cloud-storage-credentials-ctssecret:$ kubectl create secret generic cloud-storage-credentials-cts \ --from-file=GOOGLE_CREDENTIALS_JSON=/path/to/my-sa-credential.json -
Create the
cloud-storage-credentials-idreposecret:$ kubectl create secret generic cloud-storage-credentials-idrepo \ --from-file=GOOGLE_CREDENTIALS_JSON=/path/to/my-sa-credential.json
-
-
Restart the pods that perform backups so that DS can obtain the credentials needed to write to the backup location:
$ kubectl delete pods ds-cts-0
$ kubectl delete pods ds-idrepo-0
After the pods have restarted, you can schedule backups.
AWS
Set up an S3 bucket for the DS data backup and configure the ForgeOps deployment with the credentials for the bucket:
-
Create or identify an existing S3 bucket for storing the DS data backup and note the S3 link of the bucket.
-
Make sure your current Kubernetes context references the cluster and namespace where the DS pods are running.
-
Create secrets that contain credentials to write to cloud storage. The DS pods use these when performing backups:
-
Create the
cloud-storage-credentials-ctssecret:$ kubectl create secret generic cloud-storage-credentials-cts \ --from-literal=AWS_ACCESS_KEY_ID=my-access-key \ --from-literal=AWS_SECRET_ACCESS_KEY=my-secret-access-key
-
Create the
cloud-storage-credentials-idreposecret:$ kubectl create secret generic cloud-storage-credentials-idrepo \ --from-literal=AWS_ACCESS_KEY_ID=my-access-key \ --from-literal=AWS_SECRET_ACCESS_KEY=my-secret-access-key
-
-
Restart the pods that perform backups so that DS can obtain the credentials needed to write to the backup location:
$ kubectl delete pods ds-cts-0
$ kubectl delete pods ds-idrepo-0
After the pods have restarted, you can schedule backups.
Azure
Set up an Azure Blob Storage container for the DS data backup and configure the ForgeOps deployment with the credentials for the container:
-
Create or identify an existing Azure Blob Storage container for the DS data backup. For more information on how to create and use Azure Blob Storage, refer to Quickstart: Create, download, and list blobs with Azure CLI.
-
Log in to Azure Container Registry:
$ az acr login --name my-acr-name -
Get the full Azure Container Registry ID:
$ ACR_ID=$(az acr show --name my-acr-name --query id | tr -d '"')With the full registry ID, you can connect to a container registry even if you are logged in to a different Azure subscription.
-
Add permissions to connect your AKS cluster to the container registry:
$ az aks update --name my-aks-cluster-name --resource-group my-cluster-resource-group --attach-acr $ACR_ID
-
Make sure your current Kubernetes context references the cluster and namespace where the DS pods are running.
-
Create secrets that contain credentials to write to cloud storage. The DS pods use these when performing backups:
-
Get the name and access key of the Azure storage account for your storage container[19].
-
Create the
cloud-storage-credentialssecret:
$ kubectl create secret generic cloud-storage-credentials \
 --from-literal=AZURE_STORAGE_ACCOUNT_NAME=my-storage-account-name \
 --from-literal=AZURE_ACCOUNT_KEY=my-storage-account-access-key
-
-
Restart the pods that perform backups so that DS can obtain the credentials needed to write to the backup location:
$ kubectl delete pods ds-cts-0
$ kubectl delete pods ds-idrepo-0
After the pods have restarted, you can schedule backups.
Schedule backups
-
Make sure you’ve set up cloud storage for your cloud provider platform.
-
Make sure your current Kubernetes context references the cluster and namespace where the DS pods are running.
-
Make sure you’ve backed up and saved the shared master key and TLS key for the ForgeOps deployment.
-
Set variable values in the /path/to/forgeops/bin/ds-backup.sh script:
Variable Name Default Notes HOSTSds-idrepo-2The
ds-idrepoords-ctsreplica or replicas to back up. Specify a comma-separated list to back up more than one replica. For example, to back up theds-idrepo-2andds-cts-2replicas, specifyds-idrepo-2,ds-cts-2.BACKUP_SCHEDULE_IDREPOOn the hour and half hour
How often to run backups of the
ds-idrepodirectory. Specify using cron job format.BACKUP_DIRECTORY_IDREPOn/a
Where the
ds-idrepodirectory is backed up. Specify:-
gs://bucket/pathto back up to Google Cloud Storage -
s3://bucket/pathto back up to Amazon S3 -
az://container/pathto back up to Azure Blob Storage
BACKUP_SCHEDULE_CTSOn the hour and half hour
How often to run backups of the
ds-ctsdirectory. Specify using cron job format.BACKUP_DIRECTORY_CTSn/a
Where the
ds-ctsdirectory is backed up. Specify:-
gs://bucket/pathto back up to Google Cloud Storage -
s3://bucket/pathto back up to Amazon S3 -
az://container/pathto back up to Azure Blob Storage
-
-
Run the ds-backup.sh create command to schedule backups:
$ /path/to/forgeops/bin/ds-backup.sh create
The first backup is a full backup; all subsequent backups are incremental from the previous backup.
By default, the ds-backup.sh create command configures:
-
The backup task name to be
recurringBackupTask -
The backup tasks to back up all DS backends
If you want to change either of these defaults, configure variable values in the ds-backup.sh script.
To cancel a backup schedule, run the ds-backup.sh cancel command. -
Restore
This section covers three options to restore data from dsbackup backups:
New ForgeOps deployment using DS backup
Creating new instances from previously backed up DS data is useful when a system disaster occurs or when directory services are lost. It is also useful when you want to port test environment data to a production deployment.
To create new DS instances with data from a previous backup:
-
Make sure your current Kubernetes context references the new ForgeOps cluster. Also make sure that the namespace of your Kubernetes context contains the DS pods into which you plan to load data from backup.
-
Create Kubernetes secrets containing your cloud storage credentials:
On Google Cloud
$ kubectl create secret generic cloud-storage-credentials \
 --from-file=GOOGLE_CREDENTIALS_JSON=/path/to/my-sa-credential.json
In this example, specify the path and file name of the JSON file containing the Google service account key for my-sa-credential.json.
On AWS
$ kubectl create secret generic cloud-storage-credentials \
 --from-literal=AWS_ACCESS_KEY_ID=my-access-key \
 --from-literal=AWS_SECRET_ACCESS_KEY=my-secret-access-key \
 --from-literal=AWS_REGION=my-region
On Azure
$ kubectl create secret generic cloud-storage-credentials \
 --from-literal=AZURE_STORAGE_ACCOUNT_NAME=my-storage-account-name \
 --from-literal=AZURE_ACCOUNT_KEY=my-storage-account-access-key
-
Configure the backup bucket location and enable the automatic restore capability:
-
In a Kustomize-based deployment
-
In a Helm-based deployment
-
Change to the /path/to/forgeops/kustomize/base/kustomizeConfig directory.
-
Open the kustomization.yaml file.
-
Set the
DSBACKUP_DIRECTORYparameter to the location of the backup bucket. For example:On Google Cloud
DSBACKUP_DIRECTORY="gs://my-backup-bucket"On AWS
DSBACKUP_DIRECTORY="s3://my-backup-bucket"On Azure
DSBACKUP_DIRECTORY="az://my-backup-bucket" -
Set the
HOSTSparameter tods-idrepo-2. -
Set the
AUTORESTORE_FROM_DSBACKUPparameter to"true".
-
Change to the /path/to/forgeops/charts/identity-platform directory.
-
Edit values.yaml file and set up
autoRestore,backupLocation, andbackupHostsparameters fords-idrepoandds-cts. For example to restoreds-idrepo-2:On Google Cloud
...
ds_restore:
  autoRestore: true
  backupLocation: "gs://my-backup-bucket"
  backupHosts: "ds-idrepo-2"
...
On AWS
...
ds_restore:
  autoRestore: true
  backupLocation: "s3://my-backup-bucket"
  backupHosts: "ds-idrepo-2"
...
On Azure
...
ds_restore:
  autoRestore: true
  backupLocation: "az://my-backup-bucket"
  backupHosts: "ds-idrepo-2"
...
-
Then Deploy the platform.
When the platform is deployed, new DS pods are created, and the data is automatically restored from the most recent backup available in the cloud storage location you configured.
To verify that the data has been restored:
-
Use the IDM UI or platform UI.
-
Review the logs for the DS pods'
initcontainer. For example:$ kubectl logs --container init ds-idrepo-0
Restore all DS directories
To restore all the DS directories in your ForgeOps deployment from backup:
-
Delete all the PVCs attached to DS pods using the kubectl delete pvc command.
-
Because PVCs might not get deleted immediately when the pods to which they’re attached are running, stop the DS pods.
Using separate terminal windows, stop every DS pod using the kubectl delete pod command. This deletes the pods and their attached PVCs.
Kubernetes automatically restarts the DS pods after you delete them. The automatic restore feature of ForgeOps deployments recreates the PVCs as the pods restart by retrieving backup data from cloud storage and restoring the DS directories from the latest backup.
-
After the DS pods come up, restart IDM pods to reconnect IDM to the restored PVCs:
-
List all the pods in the namespace.
-
Delete all the pods running IDM.
-
Restore one DS directory
In a ForgeOps deployment with automatic restore enabled, you can recover a failed DS pod if the latest backup is within the replication purge delay:
-
Delete the PVC attached to the failed DS pod using the kubectl delete pvc command.
-
Because the PVC might not get deleted immediately if the attached pod is running, stop the failed DS pod.
In another terminal window, stop the failed DS pod using the kubectl delete pod command. This deletes the pod and its attached PVC.
Kubernetes automatically restarts the DS pod after you delete it. The automatic restore feature recreates the PVC as the pod restarts by retrieving backup data from cloud storage and restoring the DS directory from the latest backup.
-
If the DS instance you restored was the
ds-idrepoinstance, restart IDM pods to reconnect IDM to the restored PVC:-
List all the pods in the namespace.
-
Delete all the pods running IDM.
-
For information about manually restoring DS where the latest available backup is older than the replication purge delay, refer to the Restore section in the DS documentation.
Best practices for restoring directories
-
Use a backup newer than the last replication purge.
-
When you restore a DS replica using backups older than the purge delay, that replica can no longer participate in replication.
Reinitialize the replica to restore the replication topology.
-
If the available backups are older than the purge delay, then initialize the DS replica from an up-to-date master instance. For more information on how to initialize a replica, refer to Manual Initialization in the DS documentation.
Upgrade the platform from version 7.4 to 7.5
If you’ve already installed Ping Identity Platform version 7.4 using artifacts
from the forgeops repository, follow the steps provided on this page to
upgrade to version 7.5.
Use these steps to upgrade the platform in place.
This upgrade methodology has been tested against a deployment based on ForgeOps-provided evaluation Docker images with basic configuration settings.
| Because the Ping Identity Platform is highly customizable, it is challenging to test all possible upgrade scenarios. It is your responsibility to validate that these upgrade steps work correctly in a test environment with your customized configuration before you upgrade a production environment. |
Prerequisites and assumptions
To upgrade the platform from version 7.4 to 7.5, you’ll need:
-
A running version 7.4 single-instance deployment with your current AM and IDM configurations.
-
A running version 7.4 small, medium, or large ForgeOps deployment.
-
A
forgeopsrepository clone with a branch that contains 7.4 artifacts. -
A
forgeopsrepository clone with a branch that contains 7.5 artifacts.
Example commands in the steps on this page assume:
-
7.4-profileis the name of the 7.4 configuration profile. -
Your 7.4 small, medium, or large ForgeOps deployment is a small cluster.
-
Your 7.4 small, medium, or large ForgeOps deployment does not include PingGateway.
When you perform the upgrade:
-
Choose a different name for the configuration profile if you prefer.
-
Specify a different cluster size, if applicable.
-
Add commands to upgrade PingGateway, if applicable.
Subscribe to release note updates
Get updates from ForgeOps when there are changes to ForgeOps 7.5.
For more information about getting notifications or subscribing to the ForgeOps 7.5 RSS feed, refer to ForgeOps 7.5 release notes.
Back up critical data
Before upgrading, back up all critical data, including:
-
Directory data stored in the
ds-idrepoandds-ctsbackends -
AM and IDM configuration data
-
Customized artifacts in your
forgeopsrepository clone
After you’ve started to upgrade, you may not be able to roll back directory data easily because the data is upgraded in place. If you need to roll back directory data, you’ll have to redeploy DS and restore directory data from a backup.
Export the version 7.4 AM and IDM configurations
-
Locate a branch of your
forgeopsrepository clone that contains version 7.4 artifacts and check out the branch. -
(Optional) Check out a new branch based on the branch that contains version 7.4 artifacts.
-
Locate a namespace running version 7.4 of the single-instance deployment that contains your current AM and IDM configurations.
-
Export the AM and IDM configurations from the 7.4 single-instance deployment:
$ cd /path/to/forgeops
$ ./bin/config export am 7.4-profile --sort
$ ./bin/config export idm 7.4-profile --sort
-
Run the git add . and git commit commands.
Upgrade the exported configuration profiles to version 7.5
-
Locate the branch of your
forgeopsrepository clone that contains version 7.5 artifacts and check out the branch.The latest branch with 7.5 artifacts is the
release/7.5-20240618branch. -
(Optional) Check out a new branch based on the branch that contains version 7.5 artifacts.
-
Copy the configuration profiles you exported from your 7.4 single-instance deployment into the 7.5 branch:
-
Copy the AM 7.4 configuration profile into the /path/to/forgeops/docker/am/config-profiles directory.
-
Copy the IDM 7.4 configuration profile into the /path/to/forgeops/docker/idm/config-profiles directory.
-
-
Upgrade the AM configuration in the 7.5 branch.
Run the am-config-upgrader utility:
$ cd /path/to/forgeops $ ./bin/am-config-upgrader docker/am/config-profiles/7.4-profile -
Upgrade the IDM configuration in the 7.5 branch.
Follow the steps in Migrate your configuration in the IDM documentation.
-
Run the git add . and git commit commands.
Upgrade the 7.4 pods to 7.5 and build custom 7.5 Docker images
-
Set your Kubernetes context so that you can access the cluster on which you deployed the version 7.4 small, medium, or large ForgeOps deployment
-
Check out the branch of your
forgeopsrepository clone that contains version 7.5 artifacts.If you’ve checked out a branch that contains version 7.4 artifacts, the forgeops install command reinstalls version 7.4 instead of upgrading your pods to version 7.5.
-
(Optional) If your 7.4 ForgeOps deployment uses the deprecated DS operator and you want to continue using it, skip this step.
Remove the deprecated DS operator from your small, medium, or large ForgeOps deployment:
$ kubectl delete --ignore-not-found=true \
-f https://github.com/ForgeRock/ds-operator/releases/latest/download/ds-operator.yaml
After you remove the DS operator, your deployment is not available until after you upgrade the ds-idrepoandds-ctspods in the next two steps. Do not remove the DS operator from your ForgeOps deployment if you need the deployment to remain continuously up and running. -
Remove
ldif-importerandamsterjobs if they exist:$ kubectl delete job ldif-importer amster
-
Install the ForgeOps 7.5 base components:
$ cd /path/to/forgeops/bin
$ ./forgeops install base --small --fqdn my-fqdn
-
Upgrade the
ds-ctspods from 7.4 to 7.5:$ cd /path/to/forgeops $ ./bin/forgeops install ds-cts --smallThis command updates one
ds-ctspod at a time. Run thekubectl get pods --watchcommand to observe the pod upgrades.After all the
ds-ctspods have been upgraded, run the ds-debug.sh command to verify that directory replication is working correctly. Run commands similar to the following for eachds-ctspod:$ ./bin/ds-debug.sh -p podname rstatus -
Upgrade the
ds-idrepopods from 7.4 to 7.5:$ cd /path/to/forgeops $ ./bin/forgeops install ds-idrepo --smallThis command updates one
ds-idrepopod at a time. Run thekubectl get pods --watchcommand to observe the pod upgrades.After all the
ds-idrepopods have been upgraded, run the ds-debug.sh command to verify that directory replication is working correctly. Run commands similar to the following for eachds-idrepopod:$ ./bin/ds-debug.sh -p podname rstatus -
Check out the branch of your
forgeopsrepository clone that contains version 7.5 artifacts.This branch should contain the
7.4-profileconfiguration profile you upgraded to work with version 7.5. -
Build Docker images for version 7.5 that contain the
7.4-profileconfiguration profile:$ cd /path/to/forgeops $ ./bin/forgeops build am --config-profile 7.4-profile --push-to my-repo $ ./bin/forgeops build idm --config-profile 7.4-profile --push-to my-repo
The newly-built Docker images are based on ForgeOps-provided evaluation Docker images.
-
Upgrade the Ping Identity Platform pods from 7.4 to 7.5:
$ ./bin/forgeops install ui --small
$ ./bin/forgeops install am --small
$ ./bin/forgeops install idm --small
Wait for the pod upgrades to complete. Run the
kubectl get pods --watchcommand to observe the pod upgrades. -
Start the AM and IDM admin UIs in your upgraded small, medium, or large ForgeOps deployment. Verify that:
-
The start page for each admin UI indicates the component version is 7.5, not 7.4.
-
AM and IDM use your custom configuration.
-
-
If you are using a Kubernetes-based Ping Identity Platform deployment in production, you must rebuild base Docker images for version 7.5, and then build custom Docker images based on those images:
-
Build your own Docker base images. Refer to Your own base Docker images for more information.
-
Rebuild your custom Docker images, basing them on the images you built in the previous step. Refer to Create Docker images for use in production for more information.
-
Upgrade the platform to a newer 7.5 patch release
If you’ve installed version 7.5 of the Ping Identity Platform using
artifacts from the forgeops repository, follow the steps provided on this page
to upgrade to a new patch release of Ping Identity Platform 7.5.
Use these steps to upgrade the platform in place, with no downtime.
This upgrade methodology has been tested against a deployment based on ForgeOps-provided evaluation Docker images with basic configuration settings.
| Because the Ping Identity Platform is highly customizable, it is challenging to test all possible upgrade scenarios. It is your responsibility to validate that these upgrade steps work correctly in a test environment with your customized configuration before you upgrade a production environment. |
Prerequisites and assumptions
To upgrade the platform to a newer patch release, you’ll need:
-
A running version 7.5 small, medium, or large ForgeOps deployment.
-
A
forgeopsrepository clone with a branch that contains the artifacts for the newer patch release.
Example commands in the steps on this page assume:
-
Your 7.5 ForgeOps deployment is a small cluster.
-
Your 7.5 ForgeOps deployment does not include PingGateway.
When you perform the upgrade:
-
Specify a different cluster size, if applicable.
-
Add commands to upgrade PingGateway, if applicable.
Back up critical data
Before upgrading, back up all critical data, including:
-
Directory data stored in the
ds-idrepoandds-ctsbackends -
AM and IDM configuration data
-
Customized artifacts in your
forgeopsrepository clone
After you’ve started to upgrade, you may not be able to roll back directory data easily because the data is upgraded in place; to roll back directory data, you must redeploy DS and restore directory data. Consider backing up directory data on volume snapshots for a simpler restore scenario.
Upgrade the ForgeOps deployment to the new patch release
-
If you have AM or IDM configuration changes that you haven’t already exported to a configuration profile:
-
Locate a branch of your
forgeopsrepository clone that contains version 7.5 artifacts and check out the branch. -
Locate the namespace running a single-instance deployment of version 7.5 of the platform that has the AM and IDM configuration changes.
-
Export the AM and IDM configurations from the running 7.5 single-instance ForgeOps deployment:
$ cd /path/to/forgeops
$ ./bin/config export am my-config-profile --sort
$ ./bin/config export idm my-config-profile --sort
-
Run the am-config-upgrader utility to upgrade the AM configuration:
$ cd /path/to/forgeops
$ ./bin/am-config-upgrader docker/am/config-profiles/my-config-profile
-
-
Run the git add . and git commit commands.
-
Set your Kubernetes context so that you can access the cluster on which the small, medium, or large ForgeOps deployment resides.
-
Upgrade the
ds-ctspods to the new patch release:$ cd /path/to/forgeops $ ./bin/forgeops install ds-cts --smallThis command updates one
ds-ctspod at a time. Run thekubectl get pods --watchcommand to observe the pod upgrades.After all the
ds-ctspods have been upgraded, run the ds-debug.sh command to verify that directory replication is working correctly. Run commands similar to the following for eachds-ctspod:$ ./bin/ds-debug.sh rstatus podname -
Upgrade the
ds-idrepopods to the new patch release:$ cd /path/to/forgeops $ ./bin/forgeops install ds-idrepo --smallThis command updates one
ds-idrepopod at a time. Run thekubectl get pods --watchcommand to observe the pod upgrades.After all the
ds-idrepopods have been upgraded, run the ds-debug.sh command to verify that directory replication is working correctly. Run commands similar to the following for eachds-idrepopod:$ ./bin/ds-debug.sh rstatus podname -
Build Docker images for the newer patch release that contain your configuration profile:
$ cd /path/to/forgeops
$ ./bin/forgeops build am --config-profile my-config-profile --push-to my-repo
$ ./bin/forgeops build idm --config-profile my-config-profile --push-to my-repo
The newly-built Docker images are based on ForgeOps-provided evaluation Docker images.
-
Upgrade the Ping Identity Platform pods to the new patch release:
$ ./bin/forgeops install ui --small
$ ./bin/forgeops install am --small
$ ./bin/forgeops install idm --small
Wait for the pod upgrades to complete. Run the
kubectl get pods --watchcommand to observe the pod upgrades. -
Start the AM and IDM admin UIs in your upgraded small, medium, or large ForgeOps deployment. Verify that:
-
The start page for each admin UI displays the expected component version for the newer patch release.
-
AM and IDM use your custom configuration.
-
-
If you are using a Kubernetes-based Ping Identity Platform deployment in production, you must rebuild Docker images based on the newer patch release, and then build custom Docker images based on those images:
-
Build your own Docker base images. Refer to Your own base Docker images for more information.
-
Rebuild your custom Docker images, and base them on your new base Docker images. Refer to Create Docker images for use in production for more information.
-
Troubleshooting
Kubernetes deployments are multi-layered and often complex.
Errors and misconfigurations can crop up in a variety of places. Performing a logical, systematic search for the source of a problem can be daunting.
Here are some techniques you can use to troubleshoot problems with ForgeOps deployments:
| Problem | Troubleshooting Technique |
|---|---|
Some pods don’t start. |
Review Kubernetes logs and other diagnostics.
|
All the pods have started, but you can’t reach the services running in them. |
Make sure you don’t have any ingress issues. |
AM doesn’t work as expected. |
Set
the AM logging level, recreate the issue, and analyze the AM log
files.
|
IDM doesn’t work as expected. |
Set
the IDM logging level, recreate the issue, and analyze the IDM
log files.
|
Your JVM crashed with an out of memory error, or you suspect that you have a memory leak. |
|
Changes you’ve made to ForgeOps’s Kustomize files don’t work as expected. |
Fully expand the Kustomize output, and then examine the output for unintended effects. |
Your Minikube deployment doesn’t work. |
Make sure that you don’t have a problem with virtual hardware requirements. |
You’re having name resolution or other DNS issues. |
Use diagnostic tools in the debug tools container. |
You want to run DS utilities without disturbing a DS pod. |
Use the bin/ds-debug.sh script or DS tools in the debug tools container. |
You want to keep the |
Use the amster command. |
You want to troubleshoot AM configuration upgrade issues. |
Use the config --no-upgrade option. |
The |
Enable kubectl tab autocompletion. |
Kubernetes logs and other diagnostics
Look at pod descriptions and container log files for irregularities that indicate problems.
Pod descriptions contain information about active Kubernetes pods, including their configuration, status, containers (including containers that have finished running), volume mounts, and pod-related events.
Container logs contain startup and run-time messages that might indicate
problem areas. Each Kubernetes container has its own log that contains all
output written to stdout by the application running in the container. The am
container logs are especially important for troubleshooting AM issues in
Kubernetes deployments. AM writes its debug logs to stdout.
Therefore, the am container logs include all the AM debug logs.
debug-logs utility
The debug-logs utility generates the following HTML-formatted output, which you can view in a browser:
-
Descriptions of all the Kubernetes pods running the Ping Identity Platform in your namespace
-
Logs for all of the containers running in these pods
-
Descriptions of the PVCs running in your cluster
-
Operator logs
-
Information about your local environment, including:
-
The Kubernetes context
-
Third-party software versions
-
CRDs installed in your cluster
-
Kubernetes storage classes
-
The most recent commits in your forgeops repository clone’s commit log
-
Details about a variety of Kubernetes objects on your cluster
-
Example troubleshooting steps
Suppose you performed a ForgeOps deployment but noticed that one of the pods
had an ImagePullBackOff error at startup. Here’s an example of how you can
use pod descriptions and container logs to troubleshoot the problem:
-
Make sure the active namespace in your local Kubernetes context is the one that contains the component you are debugging.
-
Make sure you’ve checked out the release/7.5-20240618 branch of the
forgeopsrepository. -
Change to the /path/to/forgeops/bin directory in your
forgeopsrepository clone. -
Run the debug-logs command:
$ ./debug-logs
Writing environment information
Writing pod descriptions and container logs
  admin-ui-5ff5c55bd9-vrvrq
  am-7cd8f55b87-nt9hw
  ds-idrepo-0
  end-user-ui-59f84666fb-wzw59
  idm-6db77b6f47-vw9sm
  login-ui-856678c459-5pjm8
Writing PVC descriptions
  data-ds-idrepo-0
Writing operator logs
  secret-agent
  ds-operator
Writing information about various Kubernetes objects
Open /tmp/forgeops/log.html in your browser.
-
In a browser, go to the URL shown in the debug-logs output. In this example, the URL is file:///tmp/forgeops/log.html. The browser displays a screen with a link for each Ping Identity Platform pod in your namespace:
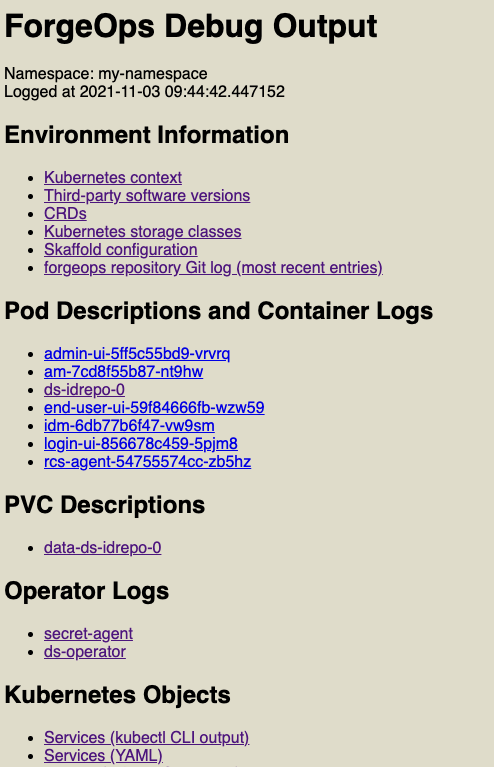
-
Access the information for the pod that didn’t start correctly by selecting its link from the Pod Descriptions and Container Logs section of the debug-logs output.
Selecting the link takes you to the pod’s description. Logs for each of the pod’s containers follow the pod’s description.
After you’ve obtained the pod descriptions and container logs, here are some actions you might take:
-
Examine each pod’s event log for failures.
-
If a Docker image could not be pulled, verify that the Docker image name and tag are correct. If you are using a private registry, verify that your image pull secret is correct.
-
Examine the init containers. Did each init container complete with a zero (success) exit code? If not, examine the logs from that failed init container using the
kubectl logs pod-xxx -c init-container-namecommand. -
Look at the pods' logs to check if the main container entered a crashloop.
DS diagnostic tools
Debug script
The bin/ds-debug.sh script lets you obtain diagnostic information for any DS pod running in your cluster. It also lets you perform several cleanup and recovery operations on DS pods.
Run bin/ds-debug.sh -h to refer to the command’s syntax.
The following bin/ds-debug.sh subcommands provide diagnostic information:
| Subcommand | Diagnostics |
|---|---|
status |
Server details, connection handlers, backends, and disk space |
rstatus |
Replication status |
idsearch |
All the DNs in the |
monitor |
All the directory entries in the |
list-backups |
A list of the backups associated with a DS instance |
The following bin/ds-debug.sh subcommands are operational:
| Subcommand | Action |
|---|---|
purge |
Purges all the backups associated with a DS instance |
disaster |
Performs a disaster recovery operation by executing the dsrepl start-disaster-recovery -X command, and then the the dsrepl end-disaster-recovery -X command |
Debug tools container
The ds-util debug tools container provides a suite of diagnostic tools that
you can execute inside of a running Kubernetes cluster.
The container has two types of tools:
-
DS tools—A DS instance is installed in the /opt/opendj directory of the
ds-utilcontainer. DS tools, such as the ldapsearch and ldapmodify commands, are available in the /opt/opendj/bin directory. -
Miscellaneous diagnostic tools—A set of diagnostic tools, including
dig,netcat,nslookup,curl, andvi, have been installed in the container. The file, /path/to/forgeops/docker/ds/dsutil/Dockerfile, has the list of operating system packages that have been installed in the debug tools container.
To start the debug tools container:
$ kubectl run -it ds-util --image=gcr.io/forgeops-public/ds-util -- bash
After you start the tools container, a command prompt appears:
root@ds-util:/opt/opendj#
You can access all the tools available in the container from this prompt. For example:
root@ds-util:/opt/opendj# nslookup am
Server:		10.96.0.10
Address:	10.96.0.10#53

Name:	am.my-namespace.svc.cluster.local
Address: 10.100.20.240
The amster pod
When ForgeOps deployments start, the amster pod starts and imports
AM dynamic configuration. Once dynamic configuration is imported, the
amster pod is stopped and remains in Completed status.
$ kubectl get pods
NAME                          READY   STATUS      RESTARTS   AGE
admin-ui-b977c857c-2m9pq      1/1     Running     0          10m
am-666687d69c-94thr           1/1     Running     0          12m
amster-4prdg                  0/1     Completed   0          12m
ds-idrepo-0                   1/1     Running     0          13m
end-user-ui-674c4f79c-h4wgb   1/1     Running     0          10m
idm-869679958c-brb2k          1/1     Running     0          12m
login-ui-56dd46c579-gxrtx     1/1     Running     0          10m
Start the amster pod
After you install AM, use the amster run command to start the amster pod for manually interacting with AM using the amster run command line interface and perform tasks such as exporting and importing AM configuration and troubleshooting:
$ ./bin/amster run
starting...
Cleaning up amster components
job.batch "amster" deleted
configmap "amster-files" deleted
configmap "amster-retain" deleted
configmap/amster-files created
Deploying amster
job.batch/amster created

Waiting for amster pod to be running. This can take several minutes.
pod/amster-852fj condition met

$ kubectl get pods
NAME                          READY   STATUS    RESTARTS   AGE
admin-ui-b977c857c-2m9pq      1/1     Running   0          22m
am-666687d69c-94thr           1/1     Running   0          24m
amster-852fj                  1/1     Running   0          12s
ds-idrepo-0                   1/1     Running   0          25m
end-user-ui-674c4f79c-h4wgb   1/1     Running   0          22m
idm-869679958c-brb2k          1/1     Running   0          24m
login-ui-56dd46c579-gxrtx     1/1     Running   0          22m
Export and import AM configuration
To export AM configuration, use the amster export command.
Similarly, use the amster import command to import AM configuration.
At the end of the export or import session, the amster pod is stopped by default. To keep the amster pod running, use the --retain option. You can specify the time (in seconds) to keep the amster running. To keep it running indefinitely, specify --retain infinity.
In the following example, the amster pod is kept running for 300 seconds after completing export:
$ ./bin/amster export --retain 300 /tmp/myexports
Cleaning up amster components
job.batch "amster" deleted
configmap "amster-files" deleted
Packing and uploading configs
configmap/amster-files created
configmap/amster-export-type created
configmap/amster-retain created
Deploying amster
job.batch/amster created

Waiting for amster job to complete. This can take several minutes.
pod/amster-d6vsv condition met
tar: Removing leading `/' from member names
Updating amster config.
Updating amster config complete.
$ kubectl get pods
NAME                          READY   STATUS    RESTARTS   AGE
admin-ui-b977c857c-2m9pq      1/1     Running   0          27m
am-666687d69c-94thr           1/1     Running   0          29m
amster-d6vsv                  1/1     Running   0          53s
ds-idrepo-0                   1/1     Running   0          30m
end-user-ui-674c4f79c-h4wgb   1/1     Running   0          27m
idm-869679958c-brb2k          1/1     Running   0          29m
login-ui-56dd46c579-gxrtx     1/1     Running   0          27m
After 300 seconds notice that the amster pod is in Completed status:
$ kubectl get pods
NAME                          READY   STATUS      RESTARTS   AGE
admin-ui-b977c857c-2m9pq      1/1     Running     0          78m
am-666687d69c-94thr           1/1     Running     0          80m
amster-d6vsv                  0/1     Completed   0          51m
ds-idrepo-0                   1/1     Running     0          81m
end-user-ui-674c4f79c-h4wgb   1/1     Running     0          78m
idm-869679958c-brb2k          1/1     Running     0          80m
login-ui-56dd46c579-gxrtx     1/1     Running     0          78m
The no-upgrade option of config export
When you export AM configuration using the config export am command, the config export command exports the configuration from the AM pod and runs the configuration rules twice:
-
First, run rules to reapply any placeholders.
-
Next, to run rules to upgrade to the current version of AM.
If you need to troubleshoot issues with the config export am command, then you can separate the steps for applying placeholder rules from the steps for applying upgrade rules.
An example, with no-upgrade option:
$ config export am my-profile --no-upgrade
[INFO] Running export for am in am-54c87b86cb-rr8mm
[INFO] Updating existing profile: /path/to/forgeops/docker/am/config-profiles/my-profile
[INFO] Clean profile: /path/to/forgeops/docker/am/config-profiles/my-profile
[INFO] Exported AM config
[INFO] Completed export
Staged installation
By default, the forgeops install command installs the entire Ping Identity Platform.
You can also install the platform in stages to help troubleshoot deployment issues.
To install the platform in stages:
-
Verify that the namespace in which the Ping Identity Platform is to be installed is set in your Kubernetes context.
-
Identify the size of the cluster you’re deploying the platform on. You’ll specify the cluster size as an argument to the forgeops install command:
-
--cdk for a single-instance deployment
-
--small, --medium, or --large, for other ForgeOps deployments
-
-
Install the
baseanddscomponents first. Other components have dependencies on these two components:-
Install the platform
basecomponent:$ cd /path/to/forgeops/bin $ ./forgeops install base --size --fqdn myfqdn.example.com Checking secret-agent operator and related CRDs: secret-agent CRD not found. Installing secret-agent. namespace/secret-agent-system created ... Waiting for secret agent operator... customresourcedefinition.apiextensions.k8s.io/secretagentconfigurations.secret-agent.secrets.forgerock.io condition met deployment.apps/secret-agent-controller-manager condition met pod/secret-agent-controller-manager-694f9dbf65-52cbt condition met Checking ds-operator and related CRDs: ds-operator CRD not found. Installing ds-operator. namespace/fr-system created customresourcedefinition.apiextensions.k8s.io/directoryservices.directory.forgerock.io created ... Waiting for ds-operator... customresourcedefinition.apiextensions.k8s.io/directoryservices.directory.forgerock.io condition met deployment.apps/ds-operator-ds-operator condition met pod/ds-operator-ds-operator-f974dd8fc-55mxw condition met Installing component(s): ['base'] configmap/dev-utils created configmap/platform-config created Warning: networking.k8s.io/v1beta1 Ingress is deprecated in v1.19+, unavailable in v1.22+; use networking.k8s.io/v1 Ingress ingress.networking.k8s.io/end-user-ui created ingress.networking.k8s.io/forgerock created ingress.networking.k8s.io/ig-web created ingress.networking.k8s.io/login-ui created ingress.networking.k8s.io/platform-ui created secretagentconfiguration.secret-agent.secrets.forgerock.io/forgerock-sac created Waiting for K8s secrets Waiting for secret: am-env-secrets ...done Waiting for secret: idm-env-secrets ...done Waiting for secret: rcs-agent-env-secrets ...done Waiting for secret: ds-passwords ...done Waiting for secret: ds-env-secrets ...done Relevant passwords: ... Relevant URLs: https://myfqdn.example.com/platform https://myfqdn.example.com/admin https://myfqdn.example.com/am https://myfqdn.example.com/enduser Enjoy your deployment! -
After you’ve installed the
basecomponent, install thedscomponent:$ ./forgeops install ds --size Checking secret-agent operator and related CRDs: secret-agent CRD found in cluster. Checking ds-operator and related CRDs: ds-operator CRD found in cluster. Installing component(s): ['ds'] directoryservice.directory.forgerock.io/ds-idrepo created Enjoy your deployment!
-
-
Install the other Ping Identity Platform components. You can either install all the other components by using the forgeops install apps command, or install them separately:
-
Install AM:
$ ./forgeops install am --size Checking secret-agent operator and related CRDs: secret-agent CRD found in cluster. Checking ds-operator and related CRDs: ds-operator CRD found in cluster. Installing component(s): ['am'] service/am created deployment.apps/am created Enjoy your deployment! -
Install Amster:
$ ./forgeops install amster --size Checking secret-agent operator and related CRDs: secret-agent CRD found in cluster. Checking ds-operator and related CRDs: ds-operator CRD found in cluster. Installing component(s): ['amster'] job.batch/amster created Enjoy your deployment! -
Install IDM:
$ ./forgeops install idm --size
Checking secret-agent operator and related CRDs: secret-agent CRD found in cluster.
Checking ds-operator and related CRDs: ds-operator CRD found in cluster.

Installing component(s): ['idm']

configmap/idm created
configmap/idm-logging-properties created
service/idm created
deployment.apps/idm created

Enjoy your deployment!
-
-
Install the user interface components. You can either install all the applications by using the forgeops install ui command, or install them separately:
-
Install the administration UI:
$ ./forgeops install admin-ui --size Checking secret-agent operator and related CRDs: secret-agent CRD found in cluster. Checking ds-operator and related CRDs: ds-operator CRD found in cluster. Installing component(s): ['admin-ui'] service/admin-ui created deployment.apps/admin-ui created Enjoy your deployment! -
Install the login UI:
$ ./forgeops install login-ui --size Checking secret-agent operator and related CRDs: secret-agent CRD found in cluster. Checking ds-operator and related CRDs: ds-operator CRD found in cluster. Installing component(s): ['login-ui'] service/login-ui created deployment.apps/login-ui created Enjoy your deployment! -
Install the end user UI:
$ ./forgeops install end-user-ui --size
Checking secret-agent operator and related CRDs: secret-agent CRD found in cluster.
Checking ds-operator and related CRDs: ds-operator CRD found in cluster.

Installing component(s): ['end-user-ui']

service/end-user-ui created
deployment.apps/end-user-ui created

Enjoy your deployment!
-
-
In a separate terminal tab or window, run the kubectl get pods command to monitor status of the deployment. Wait until all the pods are ready.
Ingress issues
If the pods in a ForgeOps deployment are starting successfully, but you can’t reach the services in those pods, you probably have ingress issues.
To diagnose ingress issues:
-
Use the
kubectl describe ingandkubectl get ing ingress-name -o yamlcommands to view the ingress object. -
Describe the service using the
kubectl get svc; kubectl describe svc xxxcommand. Does the service have anEndpoint:binding? If the service endpoint binding is not present, the service did not match any running pods.
Third-party software versions
The ForgeOps team recommends installing tested versions of third-party software in environments where you’ll run ForgeOps deployments.
Refer to the tables that list the tested versions of third-party software for your deployment:
You can use the debug-logs utility to get the versions of third-party software installed in your local environment. After you’ve performed a ForgeOps deployment:
-
Run the /path/to/forgeops/bin/debug-logs utility.
-
Open the log file in your browser.
-
Select Environment Information > Third-party software versions.
Expanded Kustomize output
If you’ve modified any of the Kustomize bases and overlays that come with the
cdk canonical configuration, you might want to consider how your changes affect
deployment. Use the kustomize build command to assess how Kustomize
expands your bases and overlays into YAML files.
For example:
$ cd /path/to/forgeops/kustomize/overlay
$ kustomize build all
apiVersion: v1
data:
  IDM_ENVCONFIG_DIRS: /opt/openidm/resolver
  LOGGING_PROPERTIES: /var/run/openidm/logging/logging.properties
  OPENIDM_ANONYMOUS_PASSWORD: anonymous
  OPENIDM_AUDIT_HANDLER_JSON_ENABLED: "false"
  OPENIDM_AUDIT_HANDLER_STDOUT_ENABLED: "true"
  OPENIDM_CLUSTER_REMOVE_OFFLINE_NODE_STATE: "true"
  OPENIDM_CONFIG_REPO_ENABLED: "false"
  OPENIDM_ICF_RETRY_DELAYSECONDS: "10"
  OPENIDM_ICF_RETRY_MAXRETRIES: "12"
  PROJECT_HOME: /opt/openidm
  RCS_AGENT_CONNECTION_CHECK_SECONDS: "5"
  RCS_AGENT_CONNECTION_GROUP_CHECK_SECONDS: "900"
  RCS_AGENT_CONNECTION_TIMEOUT_SECONDS: "10"
  RCS_AGENT_HOST: rcs-agent
  RCS_AGENT_IDM_PRINCIPAL: idmPrincipal
  RCS_AGENT_PATH: idm
  RCS_AGENT_PORT: "80"
  RCS_AGENT_USE_SSL: "false"
  RCS_AGENT_WEBSOCKET_CONNECTIONS: "1"
kind: ConfigMap
metadata:
  labels:
    app: idm
    app.kubernetes.io/component: idm
    app.kubernetes.io/instance: idm
    app.kubernetes.io/name: idm
    app.kubernetes.io/part-of: forgerock
    tier: middle
  name: idm
---
apiVersion: v1
data:
  logging.properties: |
...
Minikube hardware resources
Cluster configuration
The forgeops-minikube command example in Minikube provides a good default virtual hardware configuration for a Minikube cluster running a single-instance ForgeOps deployment.
Disk space
When the Minikube cluster runs low on disk space, it acts unpredictably. Unexpected application errors can appear.
Verify that adequate disk space is available by logging in to the Minikube cluster and running a command to display free disk space:
$ minikube ssh
$ df -h
Filesystem      Size  Used Avail Use% Mounted on
devtmpfs        3.9G     0  3.9G   0% /dev
tmpfs           3.9G     0  3.9G   0% /dev/shm
tmpfs           3.9G  383M  3.6G  10% /run
tmpfs           3.9G     0  3.9G   0% /sys/fs/cgroup
tmpfs           3.9G   64K  3.9G   1% /tmp
/dev/sda1        25G  7.7G   16G  33% /mnt/sda1
/Users          465G  219G  247G  48% /Users
$ exit
logout
In the preceding example, 16 GB of disk space is available on the Minikube cluster.
kubectl shell autocompletion
The kubectl shell autocompletion extension lets you extend the Tab key completion feature of Bash and Zsh shells to the kubectl commands. While not a troubleshooting tool, this extension can make troubleshooting easier, because it lets you enter kubectl commands more easily.
For more information about the Kubernetes autocompletion extension, see Enabling shell autocompletion in the Kubernetes documentation.
Note that to install the autocompletion extension in Bash, you must be running version 4 or later of the Bash shell. To determine your bash shell version, run the bash --version command.
Technology Preview
The forgeops-ng command
The forgeops-ng command, the next generation of the forgeops command isnow available in the technical preview status. The forgeops-ng command simplifies ForgeOps deployment, makes it more deterministic, and helps in managing the ForgeOps deployment life-cycle.
It lets you:
-
Use Kustomize natively so users can update and use overlays as expected
-
Generate a Kustomize overlay manually when you need the overlay
-
Build and manage Docker images per overlay to allow different images in an environment
-
Create and manage each ForgeOps deployment configuration
-
Apply the environment configuration changes using either Kustomize or Helm
|
In the technology preview, the name forgeops-ng is used. In the next
major ForgeOps release, the |
Features in forgeops-ng
- Discrete overlays
-
The current forgeops command has the following limitations:
-
It generates a Kustomize overlay every time it runs.
-
It overwrites any post-deployment changes in Kustomize overlays.
-
It ignores the customizations in
kustomization.yamlfile during deployment. Instead, it uses the preconfigured patch files.
-
When using forgeops-ng, the overlay management is not automated, and needs to be manually triggered by an administrator.
It is recommended to create an overlay for each environment, such as test,
stage, and prod. It is also recommended to create an overlay for each
single-instance environment, such as test-single, stage-single, and
prod-single. The single-instance overlays help you develop file-based
configuration changes, export them, and build new images.
- Per overlay image-defaulter
-
Each overlay includes an
image-defaultercomponent. When using Kustomize, you can develop and build your images in your single-instance environment. Once you are happy with it, you can copy the image-defaulter’skustomization.yamlfile into your running overlay. - Sub-overlays
-
The overlays are composed of sub-overlays to install or delete individual components. Each platform product has its own sub-overlay, and there are sub-overlays to handle shared pieces. You can run kubectl apply -k or kubectl delete -k to apply or delete an overlay or a sub-overlay.
- Require specifying the overlay
-
Another benefit of discrete overlays is the ability to target a specific overlay when running the forgeops-ng commands. If you forget to specify the overlay, the forgeops-ng command exits with a prompt to specify an overlay.
Setup
The forgeops-ng command is developed using Python. Run the forgeops-ng configure command to ensure the required packages are set up:
$ cd /path/to/forgeops/bin
$ ./forgeops-ng configure
Workflow
The workflow of forgeops-ng is designed to be production first. The previous
forgeops tool is designed as a demonstration, and is not intended
to be used in production. The field was seeking a production workflow and
tooling to support it.
The new workflow has three distinct steps:
-
This step is used to manage the overlay and values files on an ongoing basis. Only the requested changes are incorporated, so the customizations are not impacted.
-
2. Build images for an environment:
The
buildstep assembles the file-based configuration changes into container images, and updates theimage-defaulterandvaluesfiles for the targeted environment. -
The
applystep lets you deploy the image you configured.
|
It is recommended that you start with a single-instance deployment to develop your AM and IDM configuration, so you can export them and build your custom container images. |
1. Create an environment
The first thing you do is create an environment using the
forgeops-ng env command. You need to specify an FQDN (--fqdn) and an environment name (--env-name).
Previously, the t-shirt sized overlays called small, medium, and large
were provided, along with the default overlay cdk. With forgeops-ng, a single-instance overlay replaces cdk and is provided in the kustomize-ng/overlay/default directory.
You can use --small, --medium, and --large flags to configure your
overlay, and the forgeops-ng env command populates your environment
with the size you requested.
For example, the following command creates a medium-sized stage deployment with an FQDN of stage.iam.example.com:
$ cd /path/to/forgeops
$ ./bin/forgeops-ng env --fqdn stage.iam.example.com --medium --env-name stage
The default deployment size is single-instance.
The following example command creates a single-instance environment:
[Notice that --single-instance is not specified.]:
$ cd /path/to/forgeops
$ ./bin/forgeops-ng env --fqdn stage.iam.example.com --env-name stage-single
You will find the environment specification files in the ENV_NAME specific files. For example, in kustomize-ng/overlay/small and helm/small directories.
2. Build images for an environment
Use the forgeops-ng build command to create a new container
image. The forgeops-ng build command applies the config profile
from the build docker/am/config-profiles/profile and docker/idm/config-profiles/profile to build AM and
IDM container images and push the images to your container registry.
It also updates the image-defaulter and values files for the targeted
environment.
To build new AM and IDM images for our stage environment using the stage-cfg profile, run the command:
$ ./bin/forgeops-ng build --env-name stage \
 --config-profile stage-cfg \
 --push-to my.registry.com/my-repo/stage am idm
You can then use forgeops apply or helm install to apply the environment via Helm or Kustomize to deploy.
3. Apply an environment
Use the overlay created with forgeops env command to deploy your environment:
-
In a Helm-based deployment, you specify the Helm values file in the helm install or helm upgrade command:
$ helm upgrade --install ...
-
In a Kustomize-based deployment, you have two options:
-
Using the kubectl apply command, for example:
$ kubectl apply -k /path/to/forgops/kustomize-ng/overlay/my-overlay -
Using the forgeops-ng apply command, for example:
$ ./bin/forgeops-ng apply --env-name stage
-
Command reference
The forgeops-ng command is a Bash wrapper script that calls
appropriate scripts in bin/commands. These scripts are written in either
Bash or Python. All the bash scripts support the new --dryrun flag which
display the command that would be run and enable you to inspect it before
actually running the command. The Python scripts env and info do not
support --dryrun.
Helm Support
Both Kustomize and Helm are supported by the forgeops-ng command.
Use the forgeops-ng env command to generate Helm values file and
Kustomize overlays for each environment. The forgeops-ng build
command updates the Helm values file and the Kustomize image-defaulter
overlay file for the specified environment.
The values.yaml file contains all the Helm values. The other files group the
different values so that you can use them individually if you need to.
References
This section includes:
-
A command-line reference for the forgeops command
-
A glossary of terminology used in this documentation
-
Links to pertinent articles and knowledge base entries that are not part of the official ForgeOps documentation
forgeops command reference
forgeops — Manage Ping Identity Platform components in a Kubernetes cluster
Description
-
Use Kustomize to install Ping Identity Platform components in a Kubernetes cluster.
-
Delete platform components from a Kubernetes cluster.
-
Build custom Docker images for the Ping Identity Platform.
Options
The forgeops command takes the following option:
--help | -h-
Display command usage information.
Subcommands
forgeops build
forgeops build components options
Build a custom Docker image for one or more Ping Identity Platform components, and update the image defaulter file.
For components, specify:
-
am,ds,idm, orig, to build a custom Docker image for a single Ping Identity Platform component.[20] -
More than one component, to build multiple Docker images by running a single forgeops build command. Separate multiple components with a space. For example, forgeops build am idm.
-
all, to build Docker images for all the Ping Identity Platform components[21] by running a single forgeops build command.
Options
In addition to the global forgeops command options, the forgeops build subcommand takes the following options:
--config-profile | -p configuration profile path-
Path that contains the configuration for
am,idm, orig. The forgeops build command incorporates the configuration files located at this path in the custom Docker image it builds.Configuration profiles reside in subdirectories of one of these paths in a
forgeopsrepository clone:-
docker/am/config-profiles
-
docker/idm/config-profiles
-
docker/ig/config-profiles
For more information, refer to Configuration profiles.
The default value for the --config-profile option is cdk:
-
The docker/ig/config-profiles/cdk directory contains a starter configuration that you can use when you begin customizing the
igDocker image. -
The docker/am/config-profiles/cdk and docker/idm/config-profiles/cdk directories are intentionally empty. The base images for the customized
amandidmDocker images already contain starter configurations, so a starter configuration in a configuration profile is not needed.
Customized
dsimages do not use configuration profiles. To customize thedsimage, add customizations to the docker/ds directory before running the forgeops build ds command. -
--debug-
Display debug information when executing the command.
--deploy-env environment-
The deployment environment.
Deployment environments let you manage deployment manifests and image defaulters for multiple environments in a single
forgeopsrepository clone.By default, the forgeops build command updates the image defaulter in the kustomize/deploy directory.
When you specify a deployment environment, the forgeops build command updates the image defaulter in the kustomize/deploy-environment directory. For example, if you ran forgeops build --deploy-env production, the image defaulter in the kustomize/deploy-production/image-defaulter directory would be updated.
You must initialize new deployment environments before using them for the first time. Refer to Initialize deployment environments.
--push-to | -r registry-
Docker registry to which the Docker image being built is pushed. Required unless you have set the
PUSH_TOenvironment variable.For deployments on Minikube, specify
--push-to noneto push the Docker image to the Docker instance running within Minikube.If you specify both the
--push-tooption and thePUSH_TOenvironment variable, the value of the--push-totakes precedence. --reset-
Revert all the tags and new image names in the image defaulter file to their original values.
--tag | -t tag-
Tag to apply to the Docker image being built.
forgeops clean
forgeops clean
Remove Kustomize manifests for a Ping Identity Platform deployment from a forgeops
repository clone.
The forgeops clean command removes Kustomize manifests from:
-
The kustomize/deploy directory, if you do not specify the
--deploy-envoption when you run the command. -
The kustomize/deploy-environment directory, if you specify the
--deploy-envoption when you run the command.
Options
In addition to the global forgeops command options, the forgeops clean subcommand takes the following option:
--deploy-env environment-
Deployment environment to remove.
Specify this option if you specified a deployment environment when you ran the forgeops install or forgeops generate command. Note that by default, these two commands generate Kustomize manifests in the kustomize/deploy directory, but when you run them with the
--deploy-envoption, they generate the manifests in the kustomize/deploy-environment directory.
forgeops delete
forgeops delete components options
Delete Ping Identity Platform components or sets of components, PVCs, volume snapshots, and Kubernetes secrets from a running Kustomize-based ForgeOps deployment. Do not use the forgeops delete command with Helm-based ForgeOps deployments.
By default, the forgeops delete command prompts you to verify whether you want to delete Ping Identity Platform components, PVCs, volume snapshots, and Kubernetes secrets. You can modify the default behavior to suppress confirmation prompts as necessary.
For components, specify:
-
admin-ui,am,amster,ds-cts,ds-idrepo,end-user-ui,idm,ig, orlogin-ui, to delete a single Ping Identity Platform component. -
secrets, to delete the Kubernetes secrets from the deployment. -
A named set of components:
-
apps, to delete theam,amster,idm, andigcomponents. -
base, to delete thedev-utilsandplatform-configconfigmaps, Kubernetes ingress resources, and Kubernetes secrets. Secrets generated by cert-manager are not deleted. -
ds, to delete all the DS components. -
ui, to delete theadmin-ui,end-user-ui, andlogin-uicomponents.
-
-
all, to delete all the Ping Identity Platform components. -
More than one component or set of components, to delete multiple Ping Identity Platform components by running a single forgeops delete command. Separate multiple components with a space. For example, forgeops delete ui am.
The default value for components is all.
Options
In addition to the global forgeops command options, the forgeops delete subcommand takes the following options:
--debug-
Display debug information when executing the command.
--force | -f-
When deleting Ping Identity Platform components, also delete PVCs, volume snapshots, and Kubernetes secrets.
When you specify this option, you still receive the
OK to delete components?confirmation prompt. Specify the --yes option together with --force to suppress this confirmation prompt. --namespace | -n namespace-
The namespace from which to delete Ping Identity Platform components.
Defaults to the active namespace in your local Kubernetes context.
--yes | -y-
Suppress all confirmation prompts.
When you specify this option, PVCs, volume snapshots, and Kubernetes secrets are not deleted. Specify the --force option together with --yes to delete PVCs, volume snapshots, and Kubernetes secrets.
forgeops generate
forgeops generate components options
Generate Kustomize manifests for a Ping Identity Platform deployment.
By default, the forgeops generate command places manifests in the kustomize/deploy directory. You can alter this location by specifying a deployment environment.
The forgeops generate and forgeops install commands are similar, except that the forgeops generate command does not deploy Ping Identity Platform components after generating Kustomize manifests. If you generate manifests for Ping Identity Platform components by running the forgeops generate command, you can then deploy them by running kubectl apply -k commands. For more information, refer to the deployment documentation.
For components, specify:
-
admin-ui,am,amster,ds-cts,ds-idrepo,end-user-ui,idm,ig, orlogin-ui, to generate a manifest for a single Ping Identity Platform component. -
secrets, to generate a manifest for Kubernetes secrets. -
A named set of components:
-
apps, to generate a manifest for theam,amster,idm, andigcomponents. -
base, to generate a manifest for thedev-utilsandplatform-configconfigmaps, Kubernetes ingress resources, and another manifest for Kubernetes secrets. -
ds, to generate a manifest for all the DS components. -
ui, to generate a manifest for theadmin-ui,end-user-ui, andlogin-uicomponents.
-
-
all, to generate manifests for all the Ping Identity Platform components. -
More than one component or set of components, to generate manifests for multiple Ping Identity Platform components by running a single forgeops generate command. Separate multiple components with a space. For example, forgeops generate ui am.
The default value for components is all.
Options
In addition to the global forgeops command options, the forgeops generate subcommand takes the following options:
--cdk|--custom overlay path|--large|--medium|--mini|--small-
Deployment size. References a Kustomize overlay that contains YAML patch files that alter the behavior of the related base Kustomize files. Kustomize overlays provided by ForgeRock reside in the kustomize/overlay directory. Base Kustomize files reside in the kustomize/base directory.
If none of these options are specified, the deployment size option defaults to
--cdk.Refer to ForgeOps architecture for information about deployment sizing and contents options for ForgeOps deployments.
About the
--customoption:Specify the
--customoption if you want to provide your own overlay that specifies Kubernetes deployment environment characteristics rather than using one of the deployment sizes provided by ForgeRock. For overlay path, specify the full path where the patch files are located.The names of the patch files residing in overlay path must align with the names expected by the forgeops generate command:
-
am.yaml for the
am,apps, andallcomponents -
idm.yaml for the
idm,apps, andallcomponents -
ig.yaml for the
igandallcomponents -
ingress.yaml and/or secret_agent_config.yaml for the
baseandallcomponents
-
--debug-
Display debug information when executing the command.
--deploy-env environment-
The deployment environment.
Deployment environments let you manage deployment manifests and image defaulters for multiple environments in a single
forgeopsrepository clone.By default, the forgeops generate command generates Kustomize manifests in the kustomize/deploy directory.
When you specify a deployment environment, the forgeops generate command generates the manifests in the kustomize/deploy-environment directory. For example, if you ran forgeops generate --deploy-env production, Kustomize manifests would be placed in the kustomize/deploy-production directory.
You must initialize new deployment environments before using them for the first time. Refer to Initialize deployment environments.
--fqdn | -n fqdn-
The fully-qualified hostname to use in the deployment.
Defaults to
namespace.iam.example.com, where namespace is the active namespace in your local Kubernetes context.Relevant only for the forgeops generate all and forgeops generate base commands; ignored for other forgeops generate commands.
--ingress-class | -i-
The type of ingress controller used in the deployment.
Possible values are
nginxandhaproxy. The default value isnginx.Relevant only for the forgeops generate all and forgeops generate base commands; ignored for other forgeops generate commands.
--operator | -o-
Generate artifacts needed for deployment with the DS operator.
Use this option only if your deployments use the deprecated DS operator.
forgeops info
forgeops info options
Write administrative passwords and URLs for accessing Ping Identity Platform admin UIs to standard output.
Options
In addition to the global forgeops command options, the forgeops info subcommand takes the following options:
--debug-
Display debug information when executing the command.
--json-
Display output in JSON format.
--namespace | -n namespace-
The namespace that contains Ping Identity Platform components.
Defaults to the active namespace in your local Kubernetes context.
forgeops install
forgeops install components options
Generate Kustomize manifests for a Ping Identity Platform deployment, and then deploy the components in a Kubernetes cluster.
By default, the forgeops install command places manifests in the kustomize/deploy directory. You can alter this location by specifying a deployment environment.
The forgeops generate and forgeops install commands are similar, except that the forgeops generate command does not deploy Ping Identity Platform components.
For components, specify:
-
admin-ui,am,amster,ds-cts,ds-idrepo,end-user-ui,idm,ig, orlogin-ui, to deploy a single Ping Identity Platform component. -
secrets, to deploy Kubernetes secrets. Secrets generated by cert-manager are not deployed. -
A named set of components:
-
apps, to deploy theam,amster,idm, andigcomponents. -
base, to deploy thedev-utilsandplatform-configconfigmaps, Kubernetes ingress resources, and Kubernetes secrets. Secrets generated by cert-manager are not deployed. -
ds, to deploy all the DS components. -
ui, to deploy theadmin-ui,end-user-ui, andlogin-uicomponents.
-
-
all, to deploy all the Ping Identity Platform components. -
More than one component or set of components, to deploy multiple Ping Identity Platform components by running a single forgeops install command. Separate multiple components with a space. For example, forgeops install ui am.
The default value for components is all.
Options
In addition to the global forgeops command options, the forgeops install subcommand takes the following options:
--amster-retain | -a seconds-
Amount of time, in seconds, to leave the Amster pod up and running after the Amster job to restore dynamic configuration finishes.
Specify either a number of seconds to retain the Amster pod, or
infinityif you want the pod to run indefinitely. The default value is10. --cdk|--custom overlay path|--large|--medium|--mini|--small-
Deployment size. References a Kustomize overlay that contains YAML patch files that alter the behavior of the related base Kustomize files. Kustomize overlays provided by ForgeRock reside in the kustomize/overlay directory. Base Kustomize files reside in the kustomize/base directory.
If none of these options are specified, the deployment size option defaults to
--cdk.Refer to ForgeOps architecture for information about deployment sizing and contents options for ForgeOps deployments.
About the
--customoption:Specify the
--customoption if you want to provide your own overlay that specifies Kubernetes deployment environment characteristics rather than using one of the deployment sizes provided by ForgeRock. For overlay path, specify the full path where the patch files are located.The names of the patch files residing in overlay path must align with the names expected by the forgeops install command:
-
am.yaml for the
am,apps, andallcomponents -
idm.yaml for the
idm,apps, andallcomponents -
ig.yaml for the
igandallcomponents -
ingress.yaml and/or secret_agent_config.yaml for the
baseandallcomponents
-
--debug-
Display debug information when executing the command.
--deploy-env environment-
The deployment environment.
Deployment environments let you manage deployment manifests and image defaulters for multiple environments in a single
forgeopsrepository clone.By default, the forgeops install command generates Kustomize manifests in the kustomize/deploy directory and runs Docker images defined in the image defaulter in the kustomize/deploy/image-defaulter directory.
When you specify a deployment environment, the forgeops install command generates the manifests in the kustomize/deploy-environment directory. For example, if you ran forgeops generate --deploy-env production, Kustomize manifests would be placed in the kustomize/deploy-production directory.
It then runs Docker images specified in the environment’s image defaulter, located in the kustomize/deploy-production/image-defaulter directory.
You must initialize new deployment environments before using them for the first time. Refer to Initialize deployment environments.
--fqdn | -n fqdn-
The fully-qualified hostname to use in the deployment.
Defaults to
namespace.iam.example.com, where namespace is the active namespace in your local Kubernetes context.Relevant only for the forgeops install all and forgeops install base commands; ignored for other forgeops install commands.
--ingress-class | -i-
The type of ingress controller used in the deployment.
Possible values are
nginxandhaproxy. The default value isnginx.Relevant only for the forgeops install all and forgeops install base commands; ignored for other forgeops install commands.
--operator | -o-
Install DS pods using the DS operator.
If you specify this option, the forgeops install command determines whether you have deployed the DS operator. If you haven’t deployed the operator, the forgeops install command deploys it before attempting to install DS pods.
Use this option only if your deployments use the deprecated DS operator.
--timeout | -t seconds-
The maximum number of seconds to pause before terminating the forgeops install command if an intermediate process does not complete.
The default value for the --timeout option is
600.
forgeops wait
forgeops wait component options
Wait for Ping Identity Platform components to fully start up.
Use the forgeops wait command to pause further execution until a Ping Identity Platform component is fully deployed. For example:
-
When deploying components using a technique other than the forgeops install command, such as deploying Kustomize manifests by using the kubectl apply -k command.
-
When deploying components in one shell while performing another operation that depends on deployment completion in another shell.
Because the forgeops install command waits for completion of component deployment before proceeding, it is generally not necessary to use the forgeops wait command when you deploy the platform by using the forgeops install command.
For component, specify:
-
am,amster,ds-cts,ds-idrepo,idm,ig, to wait for a single Ping Identity Platform component to be deployed. -
A named set of components:
-
apps, to wait for theam,amster,idm, andigcomponents to be deployed. -
ds, to wait for all the DS components to be deployed.
-
You must specify a single component or set of components as an argument to the forgeops wait command. You cannot specify multiple components, and there is no default component.
Options
In addition to the global forgeops command options, the forgeops wait subcommand takes the following options:
--debug-
Display debug information when executing the command.
--namespace | -n namespace-
The namespace that contains Ping Identity Platform components.
Defaults to the active namespace in your local Kubernetes context.
--timeout | -t seconds-
The maximum number of seconds to pause before terminating the forgeops wait command.
The default value for the --timeout option is
600.
Glossary
- affinity (AM)
-
AM affinity deployment lets AM spread the LDAP reqests load over multiple directory server instances. Once a CTS token is created and assigned to a session, AM sends all subsequent token operations to the same token origin directory server from any AM node. This ensures that the load of CTS token management is spread across directory servers.
Source: CTS Affinity Deployment in the Core Token Service (CTS) documentation
- Amazon EKS
-
Amazon Elastic Container Service for Kubernetes (Amazon EKS) is a managed service that makes it easy for you to run Kubernetes on Amazon Web Services without needing to set up or maintain your own Kubernetes control plane.
Source: What is Amazon EKS in the Amazon EKS documentation
- ARN (AWS)
-
An Amazon Resource Name (ARN) uniquely identifies an Amazon Web Service (AWS) resource. AWS requires an ARN when you need to specify a resource unambiguously across all of AWS, such as in IAM policies and API calls.
Source: Amazon Resource Names (ARNs) in the AWS documentation
- AWS IAM Authenticator for Kubernetes
-
The AWS IAM Authenticator for Kubernetes is an authentication tool that lets you use Amazon Web Services (AWS) credentials for authenticating to a Kubernetes cluster.
Source: AWS IAM Authenticator for Kubernetes README file on GitHub
- Azure Kubernetes Service (AKS)
-
AKS is a managed container orchestration service based on Kubernetes. AKS is available on the Microsoft Azure public cloud. AKS manages your hosted Kubernetes environment, making it quick and easy to deploy and manage containerized applications.
Source: Azure Kubernetes Service in the Microsoft Azure documentation
- cloud-controller-manager
-
The
cloud-controller-managerdaemon runs controllers that interact with the underlying cloud providers. Thecloud-controller-managerdaemon runs provider-specific controller loops only.Source: cloud-controller-manager in the Kubernetes Concepts documentation
- ForgeOps deployment
-
A ForgeOps deployment is a deployment of the Ping Identity Platform on Kubernetes based on Docker images, Helm charts, Kustomize bases and overlays, utility programs, and other artifacts you can find in the
forgeopsrepository on GitHub.A single-instance ForgeOps deployment is a special ForgeOps deployment that you use to configure AM and IDM and build custom Docker images for the Ping Identity Platform. They are called single-instance deployments because unlike small, medium, and large deployments, they have only single pods that run AM and IDM. They are only suitable for developing the AM and IDM configurations and must not be used for testing performance, monitoring, security, and backup requirements in production environments.
Source: Deployment overview
- CloudFormation (AWS)
-
CloudFormation is a service that helps you model and set up your AWS resources. You create a template that describes all the AWS resources that you want. AWS CloudFormation takes care of provisioning and configuring those resources for you.
Source: What is AWS CloudFormation? in the AWS documentation
- CloudFormation template (AWS)
-
An AWS CloudFormation template describes the resources that you want to provision in your AWS stack. AWS CloudFormation templates are text files formatted in JSON or YAML.
Source: Working with AWS CloudFormation Templates in the AWS documentation
- cluster
-
A container cluster is the foundation of Kubernetes Engine. A cluster consists of at least one control plane and multiple worker machines called nodes. The Kubernetes objects that represent your containerized applications all run on top of a cluster.
Source: Standard cluster architecture in the Google Kubernetes Engine (GKE) documentation
- ConfigMap
-
A configuration map, called
ConfigMapin Kubernetes manifests, binds the configuration files, command-line arguments, environment variables, port numbers, and other configuration artifacts to the assigned containers and system components at runtime. The configuration maps are useful for storing and sharing non-sensitive, unencrypted configuration information.Source: ConfigMap in the Google Kubernetes Engine (GKE) documentation
- container
-
A container is an allocation of resources such as CPU, network I/O, bandwidth, block I/O, and memory that can be "contained" together and made available to specific processes without interference from the rest of the system. Containers decouple applications from underlying host infrastructure.
Source: Containers in the Kubernetes Concepts documentation
- control plane
-
A control plane runs the control plane processes, including the Kubernetes API server, scheduler, and core resource controllers. The lifecycle of the control plane is managed by GKE when you create or delete a cluster.
Source: Control plane in the Google Kubernetes Engine (GKE) documentation
- DaemonSet
-
A set of daemons, called
DaemonSetin Kubernetes manifests, manages a group of replicated pods. Usually, the daemon set follows a one-pod-per-node model. As you add nodes to a node pool, the daemon set automatically distributes the pod workload to the new nodes as needed.Source: DaemonSet in the Google Cloud documentation
- deployment
-
A Kubernetes deployment represents a set of multiple, identical pods. Deployment runs multiple replicas of your application and automatically replaces any instances that fail or become unresponsive.
Source: Deployments in the Kubernetes Concepts documentation
- deployment controller
-
A deployment controller provides declarative updates for pods and replica sets. You describe a desired state in a deployment object, and the deployment controller changes the actual state to the desired state at a controlled rate. You can define deployments to create new replica sets, or to remove existing deployments and adopt all their resources with new deployments.
Source: Deployments in the Google Cloud documentation
- Docker container
-
A Docker container is a runtime instance of a Docker image. The container is isolated from other containers and its host machine. You can control how isolated your container’s network, storage, or other underlying subsystems are from other containers or from the host machine.
Source: Containers in the Docker Getting Started documentation
- Docker daemon
-
The Docker daemon (
dockerd) listens for Docker API requests and manages Docker objects such as images, containers, networks, and volumes. A Docker daemon can also communicate with other Docker daemons to manage Docker services.Source: The Docker daemon section in the Docker Overview documentation
- Docker Engine
-
Docker Engine is an open source containerization technology for building and containerizing applications. Docker Engine acts as a client-server application with:
-
A server with a long-running daemon process,
dockerd. -
APIs, which specify interfaces that programs can use to talk to and instruct the Docker daemon.
-
A command-line interface (CLI) client,
docker. The CLI uses Docker APIs to control or interact with the Docker daemon through scripting or direct CLI commands. Many other Docker applications use the underlying API and CLI. The daemon creates and manage Docker objects, such as images, containers, networks, and volumes.
Source: Docker Engine overview in the Docker documentation
-
- Dockerfile
-
A Dockerfile is a text file that contains the instructions for building a Docker image. Docker uses the Dockerfile to automate the process of building a Docker image.
Source: Dockerfile reference in the Docker documentation
- Docker Hub
-
Docker Hub provides a place for you and your team to build and ship Docker images. You can create public repositories that can be accessed by any other Docker Hub user, or you can create private repositories you can control access to.
Source: Docker Hub Quickstart section in the Docker Overview documentation
- Docker image
-
A Docker image is an application you would like to run. A container is a running instance of an image.
An image is a read-only template with instructions for creating a Docker container. Often, an image is based on another image, with some additional customization.
An image includes the application code, a runtime engine, libraries, environment variables, and configuration files that are required to run the application.
Source: Docker objects section in the Docker Overview documentation
- Docker namespace
-
Docker namespaces provide a layer of isolation. When you run a container, Docker creates a set of namespaces for that container. Each aspect of a container runs in a separate namespace and its access is limited to that namespace.
The
PIDnamespace is the mechanism for remapping process IDs inside the container. Other namespaces such as net, mnt, ipc, and uts provide the isolated environments we know as containers. The user namespace is the mechanism for remapping user IDs inside a container.Source: The underlying technology section in the Docker Overview documentation
- Docker registry
-
A Docker registry stores Docker images. Docker Hub and Docker Cloud are public registries that anyone can use, and Docker is configured to look for images on Docker Hub by default. You can also run your own private registry.
Source: Docker registries section in the Docker Overview documentation
- Docker repository
-
A Docker repository is a public, certified repository from vendors and contributors to Docker. It contains Docker images that you can use as the foundation to build your applications and services.
Source: Manage repositories in the Docker documentation
- dynamic volume provisioning
-
The process of creating storage volumes on demand is called dynamic volume provisioning. Dynamic volume provisioning lets you create storage volumes on demand. It automatically provisions storage when it is requested by users.
Source: Dynamic Volume Provisioning in the Kubernetes Concepts documentation
- egress
-
An egress controls access to destinations outside the network from within a Kubernetes network. For an external destination to be accessed from a Kubernetes environment, the destination should be listed as an allowed destination in the whitelist configuration.
Source: Network Policies in the Kubernetes Concepts documentation
- firewall rule
-
A firewall rule lets you allow or deny traffic to and from your virtual machine instances based on a configuration you specify. Each Kubernetes network has a set of firewall rules controlling access to and from instances in its subnets. Each firewall rule is defined to apply to either incoming (ingress) or outgoing (egress) traffic, not both.
Source: VPC firewall rules in the Google Cloud documentation
- garbage collection
-
Garbage collection is the process of deleting unused objects. Kubelets perform garbage collection for containers every minute, and garbage collection for images every five minutes. You can adjust the high and low threshold flags and garbage collection policy to tune image garbage collection.
Source: Garbage Collection in the Kubernetes Concepts documentation
- Google Kubernetes Engine (GKE)
-
The Google Kubernetes Engine (GKE) is an environment for deploying, managing, and scaling your containerized applications using Google infrastructure. The GKE environment consists of multiple machine instances grouped together to form a container cluster.
Source: GKE overview in the Google Cloud documentation
- horizontal pod autoscaler
-
The horizontal pod autoscaler lets a Kubernetes cluster to automatically scale the number of pods in a replication controller, deployment, replica set, or stateful set based on observed CPU utilization. Users can specify the CPU utilization target to enable the controller to adjust athe number of replicas.
Source: Horizontal Pod Autoscaler in the Kubernetes documentation
- ingress
-
An ingress is a collection of rules that allow inbound connections to reach the cluster services.
Source: Ingress in the Kubernetes Concepts documentation
- instance group
-
An instance group is a collection of instances of virtual machines. The instance groups lets you easily monitor and control the group of virtual machines together.
Source: Instance groups in the Google Cloud documentation
- instance template
-
An instance template is a global API resource to create VM instances and managed instance groups. Instance templates define the machine type, image, zone, labels, and other instance properties. They are very helpful in replicating the environments.
Source: Instance templates in the Google Cloud documentation
- kubectl
-
The kubectl command-line tool supports several different ways to create and manage Kubernetes objects.
Source: Kubernetes Object Management in the Kubernetes Concepts documentation
- kube-controller-manager
-
The Kubernetes controller manager is a process that embeds core controllers shipped with Kubernetes. Each controller is a separate process. To reduce complexity, the controllers are compiled into a single binary and run in a single process.
Source: kube-controller-manager in the Kubernetes Reference documentation
- kubelet
-
A kubelet is an agent that runs on each node in the cluster. It ensures that containers are running in a pod.
Source: kubelet in the Kubernetes Concepts documentation
- kube-scheduler
-
The
kube-schedulercomponent is on the master node. It watches for newly created pods that do not have a node assigned to them, and selects a node for them to run on.Source: kube-scheduler in the Kubernetes Concepts documentation
- Kubernetes
-
Kubernetes is an open source platform designed to automate deploying, scaling, and operating application containers.
Source: Overview in the Kubernetes Concepts documentation
- Kubernetes DNS
-
A Kubernetes DNS pod is a pod used by the kubelets and the individual containers to resolve DNS names in the cluster.
Source: DNS for Services and Pods in the Kubernetes Concepts documentation
- Kubernetes namespace
-
Kubernetes supports multiple virtual clusters backed by the same physical cluster. A Kubernetes namespace is a virtual cluster that provides a way to divide cluster resources between multiple users. Kubernetes starts with three initial namespaces:
-
default: The default namespace for user created objects which don’t have a namespace -
kube-system: The namespace for objects created by the Kubernetes system -
kube-public: The automatically created namespace that is readable by all users
Source: Namespaces in the Kubernetes Concepts documentation
-
- Let’s Encrypt
-
Let’s Encrypt is a free, automated, and open certificate authority.
Source: Let’s Encrypt web site
- Microsoft Azure
-
Microsoft Azure is the Microsoft cloud platform, including infrastructure as a service (IaaS) and platform as a service (PaaS) offerings.
Source: What is Azure? in the Microsoft Azure documentation
- network policy
-
A Kubernetes network policy specifies how groups of pods are allowed to communicate with each other and with other network endpoints.
Source: Network Policies in the Kubernetes Concepts documentation
- node (Kubernetes)
-
A Kubernetes node is a virtual or physical machine in the cluster. Each node is managed by the master components and includes the services needed to run the pods.
Source: Nodes in the Kubernetes documentation
- node controller (Kubernetes)
-
A Kubernetes node controller is a Kubernetes master component that manages various aspects of the nodes, such as: lifecycle operations, operational status, and maintaining an internal list of nodes.
Source: Node Controller in the Kubernetes Concepts documentation
- node pool (Kubernetes)
-
A Kubernetes node pool is a collection of nodes with the same configuration. At the time of creating a cluster, all the nodes created in the
defaultnode pool. You can create your custom node pools for configuring specific nodes that have a different resource requirements such as memory, CPU, and disk types.Source: About node pools in the Google Kubernetes Engine (GKE) documentation
- persistent volume
-
A persistent volume (PV) is a piece of storage in the cluster that has been provisioned by an administrator. It is a resource in the cluster just like a node is a cluster resource. PVs are volume plugins that have a lifecycle independent of any individual pod that uses the PV.
Source: Persistent Volumes in the Kubernetes Concepts documentation
- persistent volume claim
-
A persistent volume claim (PVC) is a request for storage by a user. A PVC specifies size, and access modes such as:
-
Mounted once for read and write access
-
Mounted many times for read-only access
Source: Persistent Volumes in the Kubernetes Concepts documentation
-
- pod anti-affinity (Kubernetes)
-
Kubernetes pod anti-affinity constrains which nodes can run your pod, based on labels on the pods that are already running on the node, rather than based on labels on nodes. Pod anti-affinity lets you control the spread of workload across nodes and also isolate failures to nodes.
Source: Assigning Pods to Nodes in the Kubernetes Concepts documentation
- pod (Kubernetes)
-
A Kubernetes pod is the smallest, most basic deployable object in Kubernetes. A pod represents a single instance of a running process in a cluster. Containers within a pod share an IP address and port space.
Source: Pods in the Kubernetes Concepts documentation
- region (Azure)
-
An Azure region, also known as a location, is an area within a geography, containing one or more data centers.
Source: region in the Microsoft Azure glossary
- replication controller (Kubernetes)
-
A replication controller ensures that a specified number of Kubernetes pod replicas are running at any one time. The replication controller ensures that a pod or a homogeneous set of pods is always up and available.
Source: ReplicationController in the Kubernetes Concepts documentation
- resource group (Azure)
-
A resource group is a container that holds related resources for an application. The resource group can include all of the resources for an application, or only those resources that are logically grouped together.
Source: resource group in the Microsoft Azure glossary
- secret (Kubernetes)
-
A Kubernetes secret is a secure object that stores sensitive data, such as passwords, OAuth 2.0 tokens, and SSH keys in your clusters.
Source: Secrets in the Kubernetes Concepts documentation
- security group (AWS)
-
A security group acts as a virtual firewall that controls the traffic for one or more compute instances.
Source: Amazon EC2 security groups for Linux instances in the AWS documentation
- service (Kubernetes)
-
A Kubernetes service is an abstraction which defines a logical set of pods and a policy by which to access them. This is sometimes called a microservice.
Source: Service in the Kubernetes Concepts documentation
- service principal (Azure)
-
An Azure service principal is an identity created for use with applications, hosted services, and automated tools to access Azure resources. Service principals let applications access resources with the restrictions imposed by the assigned roles instead of accessing resources as a fully privileged user.
Source: Create an Azure service principal with Azure PowerShell in the Microsoft Azure PowerShell documentation
- shard
-
Sharding is a way of partitioning directory data so that the load can be shared by multiple directory servers. Each data partition, also known as a shard, exposes the same set of naming contexts, but only a subset of the data. For example, a distribution might have two shards. The first shard contains all users whose names begins with A-M, and the second contains all users whose names begins with N-Z. Both have the same naming context.
Source: Class Partition in the DS Javadoc
- single-instance ForgeOps deployment
-
Refer to ForgeOps deployment.
- stack (AWS)
-
A stack is a collection of AWS resources that you can manage as a single unit. You can create, update, or delete a collection of resources by using stacks. All the resources in a stack are defined by the AWS template.
Source: Working with stacks in the AWS documentation
- stack set (AWS)
-
A stack set is a container for stacks. You can provision stacks across AWS accounts and regions by using a single AWS template. All the resources included in each stack of a stack set are defined by the same template.
Source: StackSets concepts in the AWS documentation
- subscription (Azure)
-
An Azure subscription is used for pricing, billing, and payments for Azure cloud services. Organizations can have multiple Azure subscriptions, and subscriptions can span multiple regions.
Source: subscription in the Microsoft Azure glossary
- volume (Kubernetes)
-
A Kubernetes volume is a storage volume that has the same lifetime as the pod that encloses it. Consequently, a volume outlives any containers that run within the pod, and data is preserved across container restarts. When a pod ceases to exist, the Kubernetes volume also ceases to exist.
Source: Volumes in the Kubernetes Concepts documentation
- volume snapshot (Kubernetes)
-
In Kubernetes, you can copy the content of a persistent volume at a point in time, without having to create a new volume. You can efficiently backup your data using volume snapshots.
Source: Volume Snapshots in the Kubernetes Concepts documentation
- VPC (AWS)
-
A virtual private cloud (VPC) is a virtual network dedicated to your AWS account. It is logically isolated from other virtual networks in the AWS Cloud.
Source: What Is Amazon VPC? in the AWS documentation
- worker node (AWS)
-
An Amazon Elastic Container Service for Kubernetes (Amazon EKS) worker node is a standard compute instance provisioned in Amazon EKS.
Source: Self-managed nodes in the AWS documentation
- workload (Kubernetes)
-
A Kubernetes workload is the collection of applications and batch jobs packaged into a container. Before you deploy a workload on a cluster, you must first package the workload into a container.
Source: Workloads in the Kubernetes Concepts documentation
Beyond the docs
Useful links that cover topics beyond the scope of this documentation.
Deployment topics
Troubleshooting
-
Enable and modify the AM logging level (applies to ForgeOps 7.5)
-
Enable and modify the IDM logging level (applies to ForgeOps 7.5)
-
Enable and modify the audit logging level (applies to ForgeOps 7.5)
ForgeOps 7.5 release notes
Get an email when there’s an update to ForgeOps 7.5. Go to the Notification Settings page in your Backstage profile and select ForgeOps 7.5 Changes in the Documentation Digests section.
Or subscribe to the ForgeOps 7.5 RSS feed.
Important information for this ForgeOps release:
Validated Kubernetes, NGINX Ingress Controller, HAProxy Ingress, cert-manager, and operator versions for deploying Ping Identity Platform 7.5 |
|
Limitations when deploying Ping Identity Platform 7.5 on Kubernetes |
|
More information about the rapidly evolving nature of the |
|
Legal notices |
|
Archive of release notes prior to October 13, 2023 |
2024
November 6, 2024
Documentation updates
- Procedure to build
ldif-importerDocker image -
We’ve added steps to build
ldif-importerDocker image. Learn more about building ldif-importer Docker image here.
September 6, 2024
Documentation updates
- New section on customizing DS image
-
We’ve added a section on customizing DS image. Learn more about customizing DS image here.
July 12, 2024
Documentation updates
- Added Bash version 4 or above to the required third-party software
-
Bash version 4 or above is required to run
mapfileused by the snapshot-restore.sh and stdlib.sh scripts. snapshot-restore.sh is used when restoring DS from snapshot backup. stdlib.sh contains general functions that are used by other Bash scripts.
July 2, 2024
- Updates to the required third-party software
-
The required third-party software table has been updated.
May 28, 2024
Documentation updates
- Technology preview with the forgeops-ng command
-
Added a new technology preview section with the description of the forgeops-ng command. Refer to the
forgeops-ngcommand for further information.
May 13, 2024
Changes
- Updated
ds-operatorto version 0.3.0 -
The DS Operator is updated to version v0.3.0 with security updates. Refer to the DS operator release notes for full details.
May 09, 2024
Documentation updates
- Backup and restore steps in Helm-based deployments
-
Added steps to set up and customize backup using volume snapshot backup in Helm-based deployments. Also added steps to restore from backup taken with dsbackup utility in Helm-based deployments.
Refer to Backup and restore using volume snapshots and dsbackup utility.
- References to articles on logging
-
Added links to AM and IDM logging articles in the Troubleshooting page.
April 17, 2024
Documentation updates
- Link to DS scripts
-
Added a link to community articles on DS scripts.
April 3, 2024
Highlights
- Updates to the
forgeopsrepository -
Updates for Ping Identity Platform version 7.5 are available in the
release/7.5-20240618branch of theforgeopsrepository. - Terminology change: removal of the terms CDK and CDM
-
The ForgeOps documentation has been revised to no longer use the terms CDK and CDM. Deployments based on
forgeopsrepository artifacts are now referred to simply as ForgeOps deployments.When they were initially developed, there were significant difference between the CDK and CDM deployments. This is no longer the case. Because of this, the documentation now uses a single name for all deployments.
Developers who configure AM and IDM are still required to use ForgeOps deployments that have single instances of AM and IDM. This type of ForgeOps deployment is now referred to in documentation as a single-instance ForgeOps deployment. For more information, refer to Cluster and deployment sizes on the ForgeOps architecture page.
- Perform ForgeOps deployments using Helm
-
In version 7.5, you can perform ForgeOps deployments using Helm.
Helm deployments are available as an alternative to using the forgeops install command, which uses Kustomize bases and overlays. Performing ForgeOps deployments with the forgeops install command continues to be supported.
For more information and example commands, refer to the following pages:
If you perform ForgeOps deployments with Helm, you’ll still need to use the forgeops command for several use cases:
-
forgeops build to build custom Docker images
-
forgeops info to write administrative passwords and URLs for accessing Ping Identity Platform admin UIs to standard output
Helm deployment does not support Kustomize manifest generation using the forgeops generate command. Continue deploying the platform with the forgeops command if you use Kustomize manifest generation.
Existing Kustomize-based deployments can’t be changed to be Helm-based. If you want to use Helm, create a new deployment separate from any existing Kustomize-based deployments.
-
- forgeops-minikube command replaces cdk-minikube
-
The forgeops-minikube command is used for setting up a Minikube cluster locally instead of cdk-minikube. The forgeops-minikube command requires the
PyYamlPython 3 package.
Changes
- Updated
ds-operatorto version 0.2.9 -
The DS Operator is updated to version v0.2.9 with security updates and patches, and to fix a bug that prevented kubectl rollout restart from working properly. Refer to the DS operator release notes for full details.
This is the new minimum
ds-operatorversion supported by the forgeops command. - Support for annotations and labels in the
directoryservicecustom resource -
The
directoryservicecustom resource now supports annotations and labels.
Documentation updates
- New layout of documentation
-
The layout of the ForgeOps documentation has been revised to make it easier to navigate through the documentation and search for topics of interest.
- Updated the steps to build custom IDM base image
-
The procedure to build custom IDM base image has been revised. Refer to the steps to build IDM base image for more information.
- New backup and restore procedures using volume snapshots
-
A new Backup and restore using volume snapshots section has been added which describes how to use Kubernetes volume snapshots to back up and restore DS data.
- Docker images for Helm installs
-
Instructions about how to specify Docker images for Helm installs have been added.
- New task to initialize deployment environments
-
A new task to initialize deployment environments has been added to the instructions for developing custom Docker images.
Before you can use a new deployment environment, you must initialize a directory that supports the environment.
- Clarification about support for environments that deviate from the published ForgeOps architecture
-
The Support for ForgeOps page has been updated to state that environments that deviate from the published ForgeOps architecture are not supported. For details, refer to Support limitations.
Validated software versions
Kubernetes
The following Kubernetes versions have been validated for use with Ping Identity Platform 7.5:
| Cloud provider | Kubernetes version |
|---|---|
Google Kubernetes Engine (GKE) |
1.30 |
Amazon Elastic Kubernetes Service (EKS) |
1.30 |
Azure Kubernetes Service (AKS) |
1.30 |
Minikube |
Earlier and later Kubernetes versions might also work. If you want to try using other Kubernetes versions, it is your responsibility to validate them.
NGINX Ingress Controller
The NGINX Ingress Controller has been validated for use with Ping Identity Platform 7.5 validated version 1.9.0[22].
The ingress controller deployment script installs this version. If you install NGINX Ingress Controller using a technique other than running the script, be sure to install this version. Earlier versions of NGINX Ingress Controller might not work with Ping Identity Platform 7.5 deployments on Kubernetes.
Newer versions might work but have not been tested with Ping Identity Platform 7.5.
HAProxy Ingress
The following HAProxy has been validated HAProxy Ingress version 0.14.5 for use with Ping Identity Platform 7.5.
The ingress controller deployment script installs this version. If you install the HAProxy Ingress using a technique other than running the script, be sure to install this version. Earlier versions of the HAProxy Ingress might not work with Ping Identity Platform 7.5 deployments on Kubernetes.
Newer versions might work but have not been tested with Ping Identity Platform 7.5.
cert-manager
The version 1.13.0 of cert-manager has been validated for use with Ping Identity Platform 7.5.
The cert-manager deployment script installs this version. If you install cert-manager using a technique other than running the script, be sure to install this version. Earlier versions of cert-manager might not work with Ping Identity Platform 7.5 deployments on Kubernetes.
Newer versions might work but have not been tested with Ping Identity Platform 7.5.
ForgeRock operators
ForgeRock has validated the following operator versions for use with Ping Identity Platform 7.5:
-
Secret Agent operator — version 1.2.1
-
DS operator — version 0.3.0
Limitations
This page documents limitations on the Ping Identity Platform when deployed on a Kubernetes cluster in the cloud.
On all Ping Identity Platform components
- Docker images are not available for use in production deployments.
-
Before deploying the Ping Identity Platform in production, you must build Docker images suitable to your environment. Learn more about building images for the platform in Base Docker images.
- Instructions are not available for building the
ldif-importerDocker image -
Use the evaluation
ldif-importerDocker image from ForgeOps temporarily until instructions are available for building this image. They will be added to the documentation soon. - The bin/config export command does not handle object deletion correctly.
-
Deletion of configuration objects, such as AM authentication trees and service definitions, is not handled correctly by the bin/config export command. If you have deleted one or more objects from your Ping Identity Platform configuration in the CDK, and then you export the configuration from the CDK, the deleted objects will be still present in your configuration profile.
To work around this problem, locate the deleted objects in your configuration profile after you’ve run the bin/config export command. Then, delete the objects that should have been deleted from the JSON configuration files. After deleting the objects, if you build a new Docker image based on your configuration profile, the image will not contain the deleted objects.
On DS
- DS live data and logs should reside on fast disks.
-
DS data requires high performance, low latency disks. Use external volumes on solid-state drives (SSDs) for directory data when running in production. Do not use network file systems such as NFS.
- Adding DS pods to a cluster should be done in advance of anticipated additional load.
-
When you increase the number of DS pods in a cluster, they’re automatically provisioned with the same directory data in existing pods. You must allow time for the data provisioning to complete and new pods to become available.
- Database encryption is not supported.
-
The
ds-emptyDocker image—the image deployed by the DS operator—does not support database encryption. DS fails to start if it detects that any data was encrypted during the Docker build process. - DS starts successfully even when it cannot decrypt a backend.
-
When the DS master key is not available, DS starts up successfully even though is unable to decrypt a backend.
- Root file system write access is required to run the DS Docker image.
-
The DS Docker image will not run without root file system write access.
On AM
- AM must be reconfigured and restarted if the number of DS pods changes.
-
In DS 7.5, you can elastically scale the number of DS pods in Kubernetes. However, the AM configuration does not automatically respond to changes in the number of DS pods.
Because of this, you must modify the AM configuration after you scale the number of
idrepoorctspods in a running AM deployment. - Using subrealms in CDM and CDK deployments requires additional considerations.
-
If you decide to deploy AM with subrealms, you’ll need to configure the subrealms in the DS repository before starting AM. For more information, refer to the comments in the DS Dockerfile.
- Session stickiness is recommended for all deployments.
-
ForgeOps recommends that you configure your load balancer to use sticky sessions to achieve better performance.
- Session stickiness is required for some deployments.
-
Two AM features are stateful, and require you to configure your load balancer to use sticky sessions:
-
SAML v2.0 single logout.
-
Browser-based authentication using authentication chains, which is deprecated in AM 7.5. Note that AM authentication trees are not stateful, and do not have this limitation.
-
- Property value substitution in is not supported for all configuration properties.
-
AM does not support property value substitution for several types of configuration properties. Refer to Property value substitution in the AM documentation for more information.
- The SOAP binding is not supported for SAML v2.0 single logout.
-
When deploying SAML v2.0 single logout, use the HTTP-POST or HTTP-Redirect bindings. The SOAP binding is not supported when AM runs in a container.
- The shared identity repository is not preconfigured for UMA deployments.
-
The shared identity repository deployed with the CDK and the CDM is not preconfigured to store UMA objects, such as resources, labels, audit messages, and pending requests.
In order to use UMA in the CDK or the CDM, you’ll need to customize your deployment. For more information, refer to the User-Managed Access (UMA) 2.0 Guide.
On IDM
- The IDM repository is deployed in a single master topology.
-
IDM can actively use only a single instance of DS as its repository. Should the DS instance fail, IDM can fail over to another DS instance; the limitation that only a single instance can be active applies. Using multiple DS replicas at the same time is not supported.
- The CDM and CDK are not preconfigured to support IDM’s workflow engine.
-
The CDK and the CDM use DS as the IDM repository. Because of this, the CDK and the CDM do not support IDM’s workflow engine, and workflow features are disabled.
Adding workflow support to the CDK and the CDM requires substantial, complex configuration changes, including:
-
Adding a JDBC repository to the CDK or CDM deployment.
-
Enabling workflow features in IDM.
-
forgeops repository feature evolution
All the features demonstrated in the forgeops repository evolve continuously,
and should be expected to change, potentially in backwards-incompatible ways.
Specific changes are documented in the ForgeOps 7.5 release notes, and might go through
the following stages:
| Stage | Definition |
|---|---|
Technology Preview |
Technology previews provide access to new technology that is not yet
supported. Technology preview features may be functionally incomplete, and the
function as implemented is subject to change without notice.
|
Evolving |
All features that are not in technology preview, legacy, deprecated, or removed
status are considered to be evolving. Evolving features might change at any
time, even in backwards-incompatible ways.
|
Legacy |
Features in legacy status have been replaced with improved versions, and are
no longer being developed by ForgeOps.
|
Deprecated |
Deprecated features are likely to be removed in future versions of the
repository.
|
Removed |
Removed features were previously deprecated, and have now been removed.
|
Legal notices
Click here for legal information about product documentation published by Ping Identity.
About Ping Identity Platform software
The Ping Identity Platform serves as the basis for our simple and comprehensive identity and access management solution. We help our customers deepen their relationships with their customers, and improve the productivity and connectivity of their employees and partners. Learn more about ForgeOps and about the platform in https://www.pingidentity.com/en/platform.html.
The platform includes the following components:
-
PingAM, previously ForgeRock® Access Management (AM)
-
PingIDM, previously ForgeRock® Identity Management (IDM)
-
PingDS, previously ForgeRock® Directory Services (DS)
-
PingGateway, previously ForgeRock® Identity Gateway (IG)
FontAwesome copyright
Copyright © 2017 by Dave Gandy, https://fontawesome.com/. This Font Software is licensed under the SIL Open Font License, Version 1.1. Refer to https://opensource.org/license/openfont-html/.
forgerock that adds labels required for clusters created by Ping Identity employees. If you’re a Ping Identity employee creating a cluster, set values for these variables.
forgerock that adds labels required for clusters created by Ping Identity employees. If you’re a Ping Identity employee creating a cluster, set values for these variables.
forgerock that adds labels required for clusters created by Ping Identity employees. If you’re a Ping Identity employee creating a cluster, set values for these variables.
cron utility.
FROM statement originally contained am-cdk as part of the repository name. Be sure to use am, not am-cdk, in the revised statement.
FROM statement originally contained idm-cdk as part of the repository name. Be sure to use idm, not idm-cdk, in the revised statement.
sslcert.
cts repository
amster component is deprecated.
amster component.