Guide to performing setup and maintenance tasks in ForgeRock® Access Management, such as backing up and restoring, managing keystores, tuning the environment, monitoring, and others. ForgeRock Access Management provides authentication, authorization, entitlement, and federation software.
This guide covers how to set up and maintain core functionality such as realms, data stores and auditing and others, and also how to perform maintenance tasks in ForgeRock Access Management such as backing up and restoring, tuning, and others.
This guide is written for anyone that sets up and maintains Access Management services for their organizations. This guide covers tasks and configurations you might repeat throughout the life cycle of a deployment in your organization.
ForgeRock Identity Platform™ serves as the basis for our simple and comprehensive Identity and Access Management solution. We help our customers deepen their relationships with their customers, and improve the productivity and connectivity of their employees and partners. For more information about ForgeRock and about the platform, see https://www.forgerock.com.
This chapter provides a brief introduction to the web-based UI console. It also lists and describes each command-line interface (CLI) administration tool.
After you install AM, log in to the web-based AM console as AM
administrator, amadmin with the password you set during
installation. Navigate to a URL, such as
http://openam.example.com:8080/openam. In this case,
communications proceed over the HTTP protocol to a FQDN
(openam.example.com), over a standard Java web container
port number (8080), to a specific deployment URI (/openam).
When you log in as the AM administrator, amadmin,
you have access to the complete AM console. In addition, AM has set a
cookie in your browser that lasts until the session expires, you logout, or
you close your browser.[1]
The amadmin account is a special user built-in to AM. The amadmin
account does not have a user profile and is not present in the configured identity data store, so cannot use
functionality that requires a user profile, such as Device Match or Push notifications. You should create
users or groups, and delegate administrator privileges to them, as described in "Delegating Realm Administration Privileges".
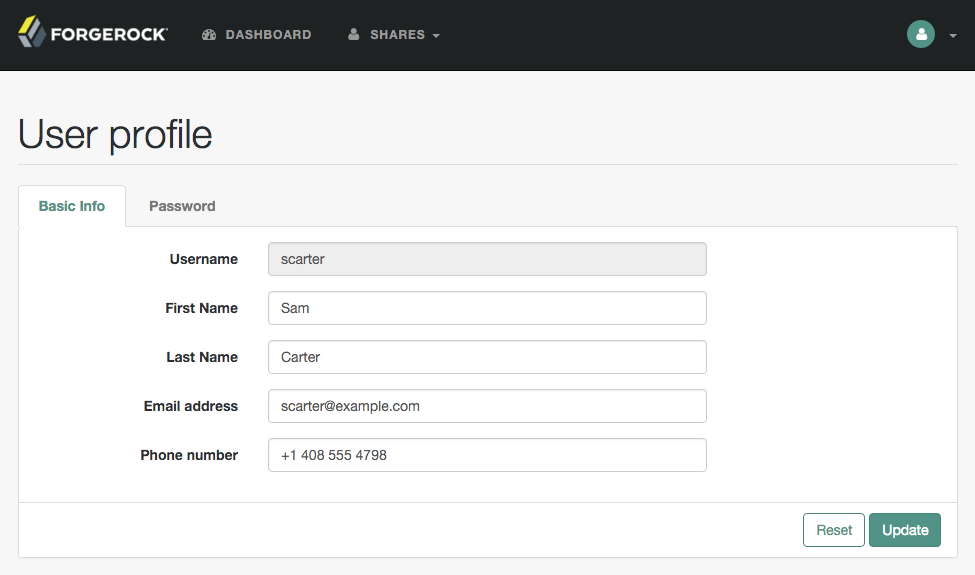
If you configure AM to grant administrative capabilities to users that do have a user profile and appear in the configured identity data store, then that user is able to access both the administration console in the realms they can administrate, and their self-service profile pages:
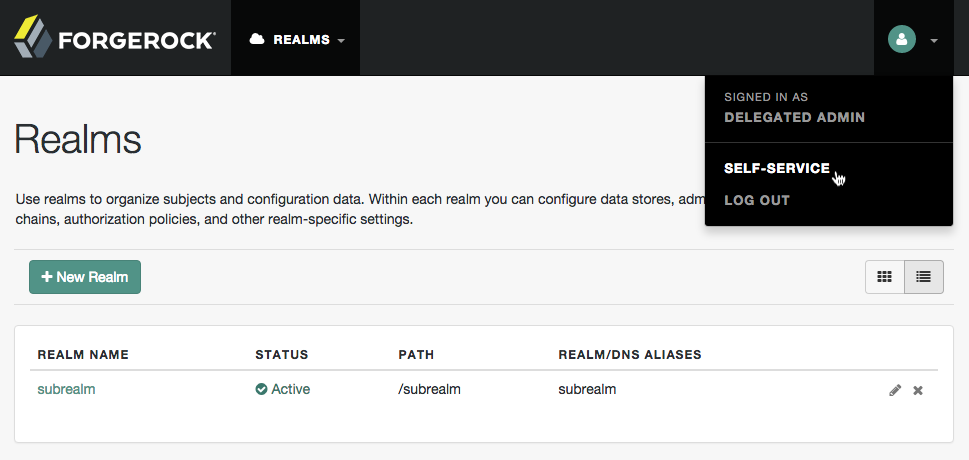
When you log in to the AM console as a non-administrative end user, you do not have access to the administrative console. Your access is limited to self-service profile pages and user dashboard.
The web-based console is a responsive website, which means it would resize some of its features to fit the size of your screen and the layout design.
For example, the header menu would change into a dropdown menu, and those pages with many tabs would shed most of them for a dropdown menu to the left-hand side.
Use the search box to find any configuration attribute on the section you are in. It can autocomplete the word you are typing, or you can click on the box and display the list of available attributes for you.

The amster tool provides a lightweight command-line interface, ideal for use in DevOps processes, such as continuous integration and deployment. The amster tool manages an AM configuration over REST, so you can store AM server configuration as an artifact and import a stored configuration to set up an AM server.
For details, see the amster documentation.
The agentadmin tool, installed with AM web and Java agents, lets you manage agent installations.
For details, see the documentation for your web or Java agent.
The script tools in the following list have .bat
versions for use on Microsoft Windows.
You can install the following command-line tools:
- ampassword
This tool lets you change Administrator passwords, and display encrypted password values.
Install this from the
SSOAdminTools-5.1.1.5.zip.- amverifyarchive
This tool checks log archives for tampering.
Install this from
SSOAdminTools-5.1.1.5.zip.- openam-configurator-tool-14.1.1.5.jar
This executable
.jarfile lets you perform a silent installation of an AM server with a configuration file. For example, the java -jar configurator.jar -f config.file command couples theconfigurator.jararchive with the config.file. Thesampleconfigurationfile provided with the tool is set up with the format for theconfig.file, and it must be adapted for your environment.Install this from
SSOConfiguratorTools-5.1.1.5.zip.- ssoadm
This tool provides a rich command-line interface for the configuration of core services.
Install this from
SSOAdminTools-5.1.1.5.zip.To translate settings applied in the AM console to service attributes for use with ssoadm, log in to the AM console as
amadminand access the services page, in a URL, such ashttp://openam.example.com:8080/openam/services.jsp.
The commands access the AM configuration over HTTP (or HTTPS). When using the administration commands in a site configuration, the commands access the configuration through the front end load balancer.
Sometimes a command cannot access the load balancer because:
Network routing restrictions prevent the tool from accessing the load balancer.
For testing purposes, the load balancer uses a self-signed certificate for HTTPS, and the tool does not have a way of trusting the self-signed certificate.
The load balancer is temporarily unavailable.
In such cases you can work around the problem by adding an option for each node, such as the following to the java command in the tool's script.
Node 1:
   -D"com.iplanet.am.naming.map.site.to.server=https://lb.example.com:443/openam=
   http://server1.example.com:8080/openam"
Node 2:
   -D"com.iplanet.am.naming.map.site.to.server=https://lb.example.com:443/openam=
   http://server2.example.com:8080/openam"
In the above example the load balancer is on the lb
host, https://lb.example.com:443/openam is the site name,
and the AM servers in the site are on server1 and
server2.
The ssoadm command will only use the latest value in the map, so if you have a mapping like:
   -D"com.iplanet.am.naming.map.site.to.server=https://lb.example.com:443/openam=
   http://server1.example.com:8080/openam, https://lb.example.com:443/openam=
   http://server2.example.com:8080/openam"
The ssoadm command will always talk to:
http://server2.example.com:8080/openam
[1] Persistent cookies can remain valid when you close your browser. This section reflects AM default behavior before you configure additional functionality.
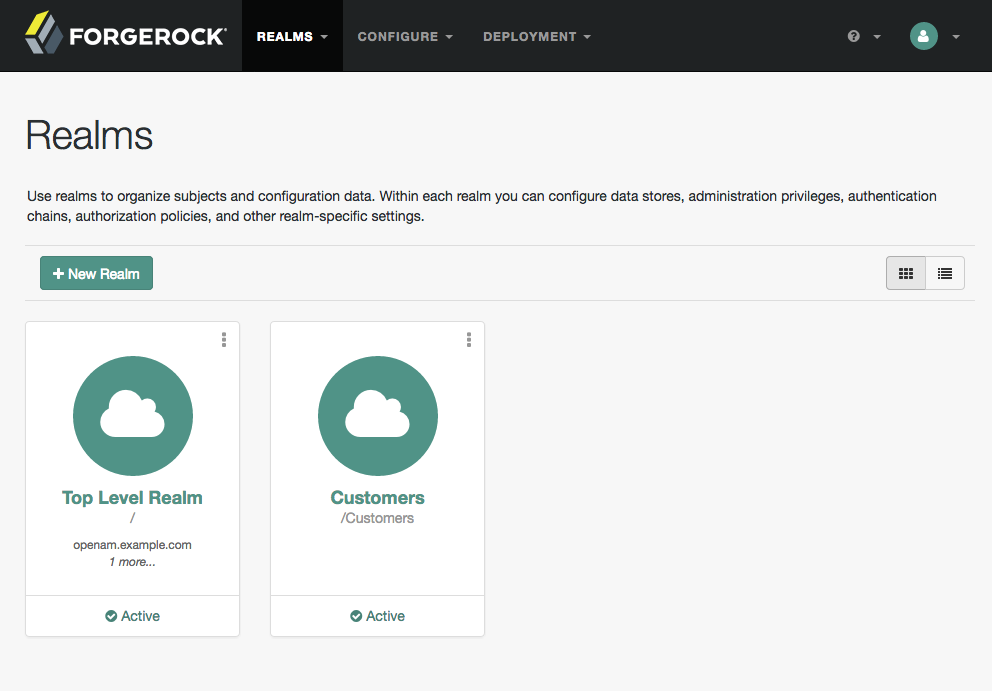
This chapter explains what realms are and how to configure and customize them.
AM realms, are used to group configuration and identities together. For example, you might have one realm for AM administrators and agents, and another realm for users. In this two-realm setup, the AM administrator can log in to the administrative realm to manage the services, but cannot authenticate as AM administrator to the realm that protects web sites with HR and financial information.
AM associates a realm with at least one identity repository and authentication chain. AM also associates the realm with authorization applications and their policies, and with privileges for administrators. Each realm has its own configuration for the services it provides.
When you first configure AM,
AM sets up the default Top Level Realm, sometimes referred to as the
/ realm or root realm. The Top Level Realm
contains AM configuration data and allows authentication using the
identity repository that you choose during initial configuration.
The Top Level Realm might hold the overall configuration
for Example.com, for instance.
You create new realms to subdivide authentication and authorization, and to delegate management of subrealms. For example, your organization might require separate realms for payroll, human resources, and IT management domains and their applications.
When a new realm is created, AM copies the configuration of the parent realm to the new realm. For example, authentication chains, authentication trees, policies, and identity store configuration are copied over.
Once the realm is created, its configuration is completely separate from that of the parent realm. Configuration changes done to the parent realm or to the new realm will not be shared.
Note
Identities, identity groups, and privileges are linked to identity stores. If two realms share the same identity store, they will also share identity groups and any privileges granted to them.
To redirect users to a specific realm using the browser, either use the
realm=realm-path query string parameter, for example,
https://openam.example.com:8443/openam/XUI/?realm=/realm1/subrealm1#login,
or create FQDN aliases for the realm.
To make REST requests to a specific realm, see "Specifying Realms in REST API Calls".
See the following sections to configure realms and realm FQDNs:
You create and configure realms through the AM console, starting from the Realms page.
Note
AM requires cookies for all configured realms when using
DNS aliases. For example, if you install AM in the domain,
openam.example.net and have realms,
identity.example.org and security.example.com
then you must configure cookie domains for
example.net, example.org, and
example.com.
You can set up the cookie domains for each realm by following the
procedure in "To Configure DNS Aliases for Accessing a Realm".
This section has the following procedures:
You can create a new realm through the AM console as described below, or by using the ssoadm create-realm command:
Log in to the AM console as administrator,
amadmin.On the Realms page, click New Realm. The New Realm page appears. Complete the form to configure the realm.
In the Name field, enter a descriptive name for the realm.
Note
Realm names must not match any of the following:
Existing realm names.
Existing realm aliases.
Names of AM REST endpoints.
For example
users,groups,realms,policiesorapplications.
The Active button is enabled by default.
Warning
If you configure the realm to be inactive, then users cannot use it to authenticate or be granted access to protected resources.
In the Parent field, enter the parent of your realm.
Default: the top level realm (/).
In the Realm Aliases field, enter a simple text alias to represent the realm.
In the DNS Aliases field, enter fully-qualified domain names (FQDN) that can be used to represent the realm.
A DNS alias is not related to the CNAME record used in DNS database zones. In other words, the option shown in the AM console does not conform to the definition of DNS aliases described in RFC 2219.
Tip
Entering a DNS alias in the AM console also applies required changes to the advanced server property
com.sun.identity.server.fqdnMap.For more information, see "To Configure DNS Aliases for Accessing a Realm".
To enable client-based sessions for the realm, toggle the Use Client-based Sessions switch. For more information on sessions, see "About Sessions" in the Authentication and Single Sign-On Guide.
Click Create to save your configuration.
You can configure realms to be associated with specific fully-qualified domain names (FQDN).
For example, consider a deployment with the following characteristics:
The FQDN for AM and the top level realm is
openam.example.com.AM also services
realm1.example.com, andrealm2.example.com. In other words, AM receives all HTTP(S) connections for these host names. Perhaps they share an IP address, or AM listens on all interfaces.
Without applying DNS aliases to the relevant realm, when a user visits
http://realm1.example.com:8080/openam, AM redirects that user
to the top level realm, http://openam.example.com:8080/openam. If the
authenticating user is present only in realm1, then authentication fails
even with correct credentials.
If no DNS alias is configured for a realm, realm1 users must visit URLs
such as http://openam.example.com:8080/openam/XUI/?realm=/realm1#login.
This format of URL reveals the top level realm, and exposes extra information about the
service.
Configure DNS aliases for realms to prevent redirection and having to expose the top level realm domain by performing the following steps:
Note
Realm aliases must be unique within an AM instance, and cannot contain the
characters ",
#,
$,
%,
&,
+,
,,
/,
:,
;,
<,
=,
>,
?,
@,
\, or spaces.
Add the domains that AM services to the list of domains that created cookies will be applicable to, as follows:
Log in to the AM console as an AM administrator, for example,
amadmin.Navigate to Configure > Global Services > Platform.
In Cookie Domains, enter the domains that AM will service.
For example, if you installed AM at
openam.example.net, and intend to have realms associated with FQDNsrealm1.example.organdrealm2.example.com, then the Cookie Domains list would includeexample.net,example.org, andexample.com.
Set the FQDN for each realm as follows:
Navigate to Realms > Realm Name, and then click Properties.
In DNS Aliases, enter one or more FQDN values for the realm.
Save your changes.
(Optional) Adding DNS aliases by using the AM console also adds FQDN mappings to the AM server.
To verify these have been created perform the following steps:
Navigate to Deployment > Servers > Server Name > Advanced.
For each FQDN DNS alias configured, verify the existence of a property named
com.sun.identity.server.fqdnMap[Realm FQDN]with a property value of Realm FQDN.For example, the property may be called
com.sun.identity.server.fqdnMap[realm1.example.com]with a value ofrealm1.example.com.If the property does not exist or needs to be changed, manually create the property for each FQDN DNS alias.
Save your changes.
The new realm aliases take effect immediately, it is not necessary to restart AM. You can now use a URL such as
http://realm1.example.com:8080/openamto accessrealm1, rather thanhttp://openam.example.com:8080/openam/XUI/?realm=/realm1#login.
This section shows how to use the AM RESTful interfaces for identity and realm management.
In this section, long URLs are wrapped to fit the printed page, as some of the output is formatted for easier reading.
Before making a REST API call to manage an identity, make sure that you have:
Authenticated successfully to AM as a user with sufficient privileges to make the REST API call
Obtained the session token returned after successful authentication
When making the REST API call, pass the session token in the HTTP header. For more information about the AM session token and its use in REST API calls, see "Using the Session Token After Authentication". For general information about the REST API, see "About the REST API".
This section shows how to create, read, update, delete, and list identities using the RESTful APIs.
Important
AM is not primarily an identity data store, nor is it provisioning software. For storing identity data, consider ForgeRock Directory Services. For provisioning, consider ForgeRock Identity Management. Both of these products provide REST APIs as well.
AM has the /json/agents,
/json/groups, and /json/users
JSON-based APIs for managing identities. These APIs follow the ForgeRock
common REST pattern for creating, reading, updating, deleting, and querying
resources.
Examples in this section do not repeat the authentication shown
in "Authentication and Logout".
For browser-based clients, you
can rely on AM cookies rather than construct the header in your
application. Managing agent profiles, groups, and users with
these APIs requires authentication. The examples shown in this
section were performed with the token ID gained after authenticating
as an AM administrator, for example amAdmin.
Although the examples here show user management, you can use
/json/agents and /json/groups
in similar fashion. See
"Realm Management" for examples related to realms.
The following sections cover this JSON-based API:
AM lets administrators create a user profile with
an HTTP POST of the JSON representation of the profile to
/json/subrealm/users/?_action=create.
To add a user to the Top Level Realm, you do not need to specify the realm.
The following example shows an administrator creating a new user. The
only required fields are username and
userpassword. If no other name is provided, the entry
you make for username defaults to both the user id and the
user's last name:
$ curl \
--request POST \
--header "Accept-API-Version: protocol=2.1,resource=3.0" \
--header "Content-Type: application/json" \
--header "iplanetDirectoryPro: AQIC5w...2NzEz*" \
--data \
'{
    "username": "bjensen",
    "userpassword": "secret12",
    "mail": "bjensen@example.com"
}' \
https://openam.example.com:8443/openam/json/realms/root/users/?_action=create
{
    "_id": "bjensen",
    "_rev": "-588258934",
    "username": "bjensen",
    "realm": "/",
    "uid": [
        "bjensen"
    ],
    "mail": [
        "bjensen@example.com"
    ],
    "universalid": [
        "id=bjensen,ou=user,dc=openam,dc=forgerock,dc=org"
    ],
    "objectClass": [
        "iplanet-am-managed-person",
        "inetuser",
        "sunFederationManagerDataStore",
        "sunFMSAML2NameIdentifier",
        "inetorgperson",
        "sunIdentityServerLibertyPPService",
        "devicePrintProfilesContainer",
        "iplanet-am-user-service",
        "iPlanetPreferences",
        "pushDeviceProfilesContainer",
        "forgerock-am-dashboard-service",
        "organizationalperson",
        "top",
        "kbaInfoContainer",
        "person",
        "sunAMAuthAccountLockout",
        "oathDeviceProfilesContainer",
        "iplanet-am-auth-configuration-service"
    ],
    "inetUserStatus": [
        "Active"
    ],
    "dn": [
        "uid=bjensen,ou=people,dc=openam,dc=forgerock,dc=org"
    ],
    "cn": [
        "bjensen"
    ],
    "sn": [
        "bjensen"
    ],
    "createTimestamp": [
        "20180426120642Z"
    ]
}
Alternatively, administrators can create user profiles with specific
user IDs by doing an HTTP PUT of the JSON representation of the changes to
/json/users/user-id, as
shown in the following example:
$ curl \
--request PUT \
--header "Accept-API-Version: protocol=2.1,resource=3.0" \
--header "iplanetDirectoryPro: AQIC5w...2NzEz*" \
--header "Content-Type: application/json" \
--header "If-None-Match: *" \
--data \
'{
    "username": "janedoe",
    "userpassword": "secret12",
    "mail": "janedoe@example.com"
}' \
https://openam.example.com:8443/openam/json/realms/root/users/janedoe
{
    "_id": "janedoe",
    "_rev": "-1686380958",
    "username": "janedoe",
    "realm": "/",
    "uid": [
        "janedoe"
    ],
    "mail": [
        "janedoe@example.com"
    ],
    "universalid": [
        "id=janedoe,ou=user,dc=openam,dc=forgerock,dc=org"
    ],
    "objectClass": [
        "iplanet-am-managed-person",
        "inetuser",
        "sunFederationManagerDataStore",
        "sunFMSAML2NameIdentifier",
        "inetorgperson",
        "sunIdentityServerLibertyPPService",
        "devicePrintProfilesContainer",
        "iplanet-am-user-service",
        "iPlanetPreferences",
        "pushDeviceProfilesContainer",
        "forgerock-am-dashboard-service",
        "organizationalperson",
        "top",
        "kbaInfoContainer",
        "person",
        "sunAMAuthAccountLockout",
        "oathDeviceProfilesContainer",
        "iplanet-am-auth-configuration-service"
    ],
    "dn": [
        "uid=janedoe,ou=people,dc=openam,dc=forgerock,dc=org"
    ],
    "inetUserStatus": [
        "Active"
    ],
    "cn": [
        "janedoe"
    ],
    "sn": [
        "janedoe"
    ],
    "createTimestamp": [
        "20180426121152Z"
    ]
}
As shown in the examples, AM returns the JSON representation of
the profile on successful creation. On failure, AM returns a JSON
representation of the error including the
HTTP status code. For example,
version 2.0 of the CREST /json/users,
/json/groups,
and /json/agents endpoints return 403 if the user making
the request is not authorized to do so.
The same HTTP POST and PUT mechanisms also work for other objects, such as web or Java agent profiles and groups:
$ curl \
--request POST \
--header "Accept-API-Version: protocol=2.0,resource=1.0" \
--header "Content-Type: application/json" \
--header "iplanetDirectoryPro: AQIC5w...2NzEz*" \
--data \
'{
    "username":"myAgent",
    "com.sun.identity.agents.config.fqdn.default":[
        "www.example.com"
    ],
    "com.sun.identity.agents.config.repository.location":[
        "centralized"
    ],
    "agenttype":[
        "WebAgent"
    ],
    "serverurl":[
        "https://openam.example.com:8443/openam/"
    ],
    "agenturl":[
        "http://www.example.com:80/"
    ],
    "userpassword":[
        "password"
    ],
    "com.sun.identity.agents.config.login.url":[
        "[0]=https://openam.example.com:8443/openam/XUI/?realm=/#login"
    ],
    "com.sun.identity.agents.config.logout.url":[
        "[0]=https://openam.example.com:8443/openam/XUI/?realm=/#logout"
    ],
    "sunidentityserverdevicestatus":[
        "Active"
    ]
}' \
https://openam.example.com:8443/openam/json/realms/root/agents/?_action=create
 {
    "username": "myAgent",
    "realm": "/",
    "com.sun.identity.agents.config.fqdn.default": [
        "www.example.com"
    ],
    "com.sun.identity.agents.config.repository.location": [
        "centralized"
    ],
    "AgentType": [
        "WebAgent"
    ],
    "userpassword": [
        "{SHA-1}W6ph5Mm5Pz8GgiULbPgzG37mj9g="
    ],
    "com.sun.identity.agents.config.login.url": [
        "[0]=https://openam.example.com:8443/openam/XUI/?realm=/#login"
    ],
    "com.sun.identity.agents.config.logout.url":
        ["[0]=https://openam.example.com:8443/openam/XUI/?realm=/#logout"
    ],
    "sunIdentityServerDeviceStatus": [
        "Active"
    ]
}
Note
The command output above has been truncated to be more readable. When you create an agent profile, AM returns the full profile in JSON format.
$ curl \
--request POST \
--header "Content-Type: application/json" \
--header "iplanetDirectoryPro: AQIC5w...2NzEz*" \
--data '{
    "username":"newGroup"
}' \
https://openam.example.com:8443/openam/json/realms/root/groups?_action=create
{
    "username":"newGroup",
    "realm":"/",
    "uniqueMember":[
        "uid=demo,ou=people,dc=openam,dc=forgerock,dc=org"
    ],
    "cn":[
        "newGroup"
    ],
    "dn":[
        "cn=newGroup,ou=groups,dc=openam,dc=forgerock,dc=org"
    ],
    "objectclass":[
        "groupofuniquenames",
        "top"
    ],
    "universalid":[
        "id=newGroup,ou=group,dc=openam,dc=forgerock,dc=org"
    ]
}
$ curl \
--request PUT \
--header "If-None-Match: *" \
--header "iPlanetDirectoryPro: AQIC5w...2NzEz*" \
--header "Content-Type: application/json" \
--data '{
"username":"anotherGroup",
"uniquemember":["uid=demo,ou=people,dc=openam,dc=forgerock,dc=org"]
}' \
https://openam.example.com:8443/openam/json/realms/root/groups/anotherGroup
{
"username":"anotherGroup",
"realm":"/",
"uniqueMember":[
"uid=demo,ou=people,dc=openam,dc=forgerock,dc=org"
],
"cn":[
"anotherGroup"
],
"dn":[
"cn=anotherGroup,ou=groups,dc=openam,dc=forgerock,dc=org"
],
"objectclass":[
"groupofuniquenames",
"top"
],
"universalid":[
"id=anotherGroup,ou=group,dc=openam,dc=forgerock,dc=org"
]
}
AM lets users and administrators read profiles by requesting an HTTP
GET on /json/subrealm/users/user-id.
This allows users and administrators to verify user data, status, and directory.
If users or administrators see missing or incorrect information, they can write
down the correct information and add it using
"Updating Identities using the REST API".
To read a profile on the Top Level Realm, you do not need to specify the realm.
Users can review the data associated with their own accounts, and administrators can also read other user's profiles.
Note
If an administrator user is reading their own profile,
an additional roles element, with a value of
ui-admin is returned in the JSON response.
The XUI verifies this element to grant or deny access to the AM
Console.
The following example shows an administrator
accessing user data belonging to demo:
$ curl \
--header "iplanetDirectoryPro: AQIC5w...2NzEz*" \
https://openam.example.com:8443/openam/json/realms/root/users/demo
{
    "_id":"demo",
    "_rev":"-320505756",
    "username":"demo",
    "realm":"/",
    "uid":[
        "demo"
    ],
    "universalid":[
        "id=demo,ou=user,dc=openam,dc=forgerock,dc=org"
    ],
    "objectClass":[
        "iplanet-am-managed-person",
        "inetuser",
        "sunFederationManagerDataStore",
        "sunFMSAML2NameIdentifier",
        "devicePrintProfilesContainer",
        "inetorgperson",
        "sunIdentityServerLibertyPPService",
        "iPlanetPreferences",
        "pushDeviceProfilesContainer",
        "iplanet-am-user-service",
        "forgerock-am-dashboard-service",
        "organizationalperson",
        "top",
        "kbaInfoContainer",
        "sunAMAuthAccountLockout",
        "person",
        "oathDeviceProfilesContainer",
        "iplanet-am-auth-configuration-service"
    ],
    "dn":[
        "uid=demo,ou=people,dc=openam,dc=forgerock,dc=org"
    ],
    "inetUserStatus":[
        "Active"
    ],
    "sn":[
        "demo"
    ],
    "cn":[
        "demo"
    ],
    "createTimestamp":[
        "20170105101638Z"
    ],
    "modifyTimestamp":[
        "20170110102632Z"
    ]
}
Use the _fields query string parameter to restrict
the list of attributes returned. This parameter takes a comma-separated list
of JSON object fields to include in the result:
$ curl \
--header "iPlanetDirectoryPro: AQIC5w...2NzEz*" \
https://openam.example.com:8443/openam/json/realms/root/users/demo?_fields=username,uid
{
    "username":"demo",
    "uid":[
        "demo"
    ]
}
As shown in the examples, AM returns the JSON representation of the profile on success. On failure, AM returns a JSON representation of the error including the HTTP status code.
Using HTTP GET to read also works for other objects such as agent profiles and groups:
$ curl \
--header "iplanetDirectoryPro: AQIC5w...2NzEz*" \
https://openam.example.com:8443/openam/json/realms/root/agents/myAgent
{
    "username":"myAgent",
    "realm":"/",
    "com.sun.identity.agents.config.fqdn.default":[
        "www.example.com"
    ],
    "com.sun.identity.agents.config.repository.location":[
        "centralized"
    ],
    "AgentType":[
        "WebAgent"
    ],
    "userpassword":[
        "{SHA-1}W6ph5Mm5Pz8GgiULbPgzG37mj9g="
    ],
    "com.sun.identity.agents.config.login.url":[
        "[0]=https://openam.example.com:8443/openam/XUI/?realm=/#login"
    ],
    "com.sun.identity.agents.config.logout.url":[
        "[0]=https://openam.example.com:8443/openam/XUI/?realm=/#logout"
    ],
    "sunIdentityServerDeviceStatus":[
        "Active"
    ]
}
Note
The command output above has been truncated to be more readable. When you read an agent profile, AM returns the full profile in JSON format.
Tip
Append the _prettyPrint=true query string parameter to make the returned JSON easier to read.
AM lets users update their own profiles, and lets administrators
update other users' profiles. To update an identity do an HTTP PUT of the JSON
representation of the changes to /json/subrealm/users/user-id.
To update a profile on the Top Level Realm, you do not need to specify the realm.
The following example shows how users can update their own profiles:
$ curl \
--request PUT \
--header "iplanetDirectoryPro: AQIC5...Y3MTAx*" \
--header "Content-Type: application/json" \
--header "Accept-API-Version: protocol=2.1,resource=3.0" \
--header "If-Match: *" \
--data '{ "mail": "demo@example.com" }' \
https://openam.example.com:8443/openam/json/realms/root/users/demo
{
    "username":"demo",
    "realm":"/",
    "uid":[
        "demo"
    ],
    "mail":[
        "demo@example.com"
    ],
    "universalid":[
        "id=demo,ou=user,dc=openam,dc=forgerock,dc=org"
    ],
    "objectClass":[
        "iplanet-am-managed-person",
        "inetuser",
        "sunFederationManagerDataStore",
        "sunFMSAML2NameIdentifier",
        "devicePrintProfilesContainer",
        "inetorgperson",
        "sunIdentityServerLibertyPPService",
        "iPlanetPreferences",
        "pushDeviceProfilesContainer",
        "iplanet-am-user-service",
        "forgerock-am-dashboard-service",
        "organizationalperson",
        "top",
        "kbaInfoContainer",
        "sunAMAuthAccountLockout",
        "person",
        "oathDeviceProfilesContainer",
        "iplanet-am-auth-configuration-service"
    ],
    "dn":[
        "uid=demo,ou=people,dc=openam,dc=forgerock,dc=org"
    ],
    "inetUserStatus":[
        "Active"
    ],
    "sn":[
        "demo"
    ],
    "cn":[
        "demo"
    ],
    "createTimestamp":[
        "20170105101638Z"
    ],
    "modifyTimestamp":[
        "20170110105038Z"
    ],
    "roles":[
        "ui-self-service-user"
    ]
}
As shown in the example, AM returns the JSON representation of the profile on success. On failure, AM returns a JSON representation of the error including the HTTP status code.
You can use HTTP PUT to update other objects as well, such as web or Java agent profiles and groups.
The following example updates a web agent profile:
$ curl \
--request PUT \
--header "iPlanetDirectoryPro: AQIC5...Y3MTAx*" \
--header "Accept-API-Version: protocol=2.0,resource=1.0" \
--header "If-Match: *" \
--header "Content-Type: application/json" \
--data '{
    "sunIdentityServerDeviceStatus" : [ "Inactive" ]
}' \
https://openam.example.com:8443/openam/json/realms/root/agents/myAgent
{
    "username":"myAgent",
    "realm":"/",
    "com.sun.identity.agents.config.fqdn.default":[
        "www.example.com"
    ],
    "com.sun.identity.agents.config.repository.location":[
        "centralized"
    ],
    "AgentType":[
        "WebAgent"
    ],
    "userpassword":[
        "{SHA-1}W6ph5Mm5Pz8GgiULbPgzG37mj9g="
    ],
    "com.sun.identity.agents.config.login.url":[
        "[0]=https://openam.example.com:8443/openam/XUI/?realm=/#login"
    ],
    "com.sun.identity.agents.config.logout.url":[
        "[0]=https://openam.example.com:8443/openam/XUI/?realm=/#logout"
    ],
    "sunIdentityServerDeviceStatus":[
        "Inactive"
    ]
}
Note
The command output above has been truncated to be more readable. When you update an agent profile, AM returns the full profile in JSON format.
Notice in the following example, which updates newGroup,
the object class value is not included in the JSON sent to AM:
$ curl \
--request PUT \
--header "iPlanetDirectoryPro: AQIC5...Y3MTAx*" \
--header "Content-Type: application/json" \
--data '{
    "uniquemember":[
        "uid=newUser,ou=people,dc=openam,dc=forgerock,dc=org",
        "uid=demo,ou=people,dc=openam,dc=forgerock,dc=org"
    ]
}' \
https://openam.example.com:8443/openam/json/realms/root/groups/newGroup
{
    "name":"newGroup",
    "realm":"/",
    "uniqueMember":[
        "uid=newUser,ou=people,dc=openam,dc=forgerock,dc=org",
        "uid=demo,ou=people,dc=openam,dc=forgerock,dc=org"
    ],
    "cn":[
        "newGroup"
    ],
    "dn":[
        "cn=newGroup,ou=groups,dc=openam,dc=forgerock,dc=org"
    ],
    "objectclass":[
        "groupofuniquenames",
        "top"
    ],
    "universalid":[
        "id=newGroup,ou=group,dc=openam,dc=forgerock,dc=org"
    ]
}
AM lets administrators delete a user profile by making an HTTP DELETE
call to
/json/subrealm/users/user-id.
To delete a user from the Top Level Realm, you do not need to specify the realm.
The following example removes a user from the top level realm. Only administrators should delete users. The user id is the only field required to delete a user:
$ curl \
--request DELETE \
--header "Accept-API-Version: protocol=2.1,resource=3.0" \
--header "iplanetDirectoryPro: AQIC5w...2NzEz*" \
https://openam.example.com:8443/openam/json/realms/root/users/bjensen
{
    "_id": "bjensen",
    "_rev": "-1870449267",
    "success": "true"
}
On success, AM returns a JSON object indicating success. On failure, AM returns a JSON representation of the error including the HTTP status code.
You can use this same logic for other resources such as performing an HTTP DELETE of an agent profile or of a group:
$ curl \
--request DELETE \
--header "Accept-API-Version: protocol=2.0,resource=1.0" \
--header "iplanetDirectoryPro: AQIC5w...2NzEz*" \
https://openam.example.com:8443/openam/json/realms/root/agents/myOAuth2ClientAgent
{
    "_id": "myOAuth2ClientAgent",
    "_rev": "-1870449267",
    "success": "true"
}
$ curl \
--request DELETE \
--header "iPlanetDirectoryPro: AQIC5w...2NzEz*" \
https://openam.example.com:8443/openam/json/realms/root/groups/newGroup
{
"success":"true"
}Important
Deleting a user does not automatically remove any of the user's sessions. If you are using CTS-based sessions, you can remove a user's sessions by checking for any sessions for the user and then removing them using the console's Sessions page. If you are using client-based sessions, you cannot remove users' sessions; you must wait for the sessions to expire.
AM lets administrators list identities by making an HTTP GET
call to
/json/subrealm/users/?_queryId=*. To query the Top Level Realm, you do not need
to specify the realm:
$ curl \
--header "iPlanetDirectoryPro: AQIC5w...2NzEz*" \
"https://openam.example.com:8443/openam/json/realms/root/users?_queryId=*"
{
    "result":[
        {
            "username":"amAdmin",
            "realm":"dc=openam,dc=forgerock,dc=org",
            "sunIdentityMSISDNNumber":[

            ],
            "mail":[

            ],
            "sn":[
                "amAdmin"
            ],
            "givenName":[
                "amAdmin"
            ],
            "universalid":[
                "id=amAdmin,ou=user,dc=openam,dc=forgerock,dc=org"
            ],
            "cn":[
                "amAdmin"
            ],
            "iplanet-am-user-success-url":[

            ],
            "telephoneNumber":[

            ],
            "roles":[
                "ui-global-admin",
                "ui-realm-admin"
            ],
            "iplanet-am-user-failure-url":[

            ],
            "inetuserstatus":[
                "Active"
            ],
            "postalAddress":[

            ],
            "dn":[
                "uid=amAdmin,ou=people,dc=openam,dc=forgerock,dc=org"
            ],
            "employeeNumber":[

            ],
            "iplanet-am-user-alias-list":[

            ]
        },
        {
            "username":"demo",
            "realm":"dc=openam,dc=forgerock,dc=org",
            "uid":[
                "demo"
            ],
            "createTimestamp":[
                "20160108155628Z"
            ],
            "inetUserStatus":[
                "Active"
            ],
            "mail":[
                "demo.user@example.com"
            ],
            "sn":[
                "demo"
            ],
            "cn":[
                "demo"
            ],
            "objectClass":[
                "devicePrintProfilesContainer",
                "person",
                "sunIdentityServerLibertyPPService",
                "sunFederationManagerDataStore",
                "inetorgperson",
                "oathDeviceProfilesContainer",
                "iPlanetPreferences",
                "iplanet-am-auth-configuration-service",
                "sunFMSAML2NameIdentifier",
                "organizationalperson",
                "inetuser",
                "kbaInfoContainer",
                "forgerock-am-dashboard-service",
                "iplanet-am-managed-person",
                "iplanet-am-user-service",
                "sunAMAuthAccountLockout",
                "top"
            ],
            "kbaInfo":[
                {
                    "questionId":"2",
                    "answer":{
                        "$crypto":{
                            "value":{
                                "algorithm":"SHA-256",
                                "data":"VXGtsnjJMC...MQJ/goU5hkfF"
                            },
                            "type":"salted-hash"
                        }
                    }
                },
                {
                    "questionId":"1",
                    "answer":{
                        "$crypto":{
                            "value":{
                                "algorithm":"SHA-256",
                                "data":"cfYYzi9U...rVfFl0Tdw0iX"
                            },
                            "type":"salted-hash"
                        }
                    }
                }
            ],
            "dn":[
                "uid=demo,ou=people,dc=openam,dc=forgerock,dc=org"
            ],
            "universalid":[
                "id=demo,ou=user,dc=openam,dc=forgerock,dc=org"
            ],
            "modifyTimestamp":[
                "20160113010610Z"
            ]
        }
    ],
    "resultCount":2,
    "pagedResultsCookie":null,
    "totalPagedResultsPolicy":"NONE",
    "totalPagedResults":-1,
    "remainingPagedResults":-1
}
The users endpoint also supports the _queryFilter
parameter to alter the returned results.
For more information, see "Query".
The _queryId=* parameter also works for other types of
objects, such as agent profiles and groups:
$ curl \
--header "iPlanetDirectoryPro: AQIC5w...2NzEz*" \
"https://openam.example.com:8443/openam/json/realms/root/agents?_queryId=*"
{
   "result":[
      {
         "_id":"myAgent",
         "_rev":"-1078786086",
         "username":"myAgent",
         "realm":"/"
      }
   ],
   "resultCount":1,
   "pagedResultsCookie":null,
   "remainingPagedResults":-1
}
$ curl \
--header "iPlanetDirectoryPro: AQIC5w...2NzEz*" \
--header "Accept-API-Version: resource=1.0" \
"https://openam.example.com:8443/openam/json/realms/root/groups?_queryId=*"
{
"result" : [ "newGroup", "anotherGroup" ],
"resultCount" : 2,
"pagedResultsCookie" : null,
"remainingPagedResults" : -1
}As the result lists include all objects, this capability to list identity names is mainly useful in testing.
As shown in the examples, AM returns the JSON representation of the resource list if successful. On failure, AM returns a JSON representation of the error including the HTTP status code.
If you only have access to the iPlanetDirectoryPro
session cookie, you can retrieve the user ID by performing an HTTP POST
operation on the /json/users
endpoint using the idFromSession action:
$ curl \
--verbose \
--request POST \
--header "Content-Type: application/json" \
--header "Accept-API-Version: protocol=2.1,resource=3.0" \
--header "iplanetDirectoryPro: AQIC5wM2LY4Sfcz...c5ODk4MjYzMzA2MQ..*" \
https://openam.example.com:8443/openam/json/realms/root/users?_action=idFromSession
{
    "id":"demo",
    "realm":"/",
    "dn":"id=demo,ou=user,dc=openam,dc=forgerock,dc=org",
    "successURL":"/openam/console",
    "fullLoginURL":"/openam/UI/Login?realm=%2F"
}
Users other than the top-level administrator
can change their own passwords with an HTTP POST to
/json/subrealm/users/username?_action=changePassword
including the new password as the value of userpassword
in the request data.
Note
Changing the top-level administrator's password requires a more complex procedure. See "Changing the amadmin User's Password" for more information.
Users must provide the current password, which is set in the request
as the value of the currentpassword.
For cases where users have forgotten their password, see "Retrieving Forgotten Usernames" in the User Self-Service Guide instead.
The following example shows a successful request to change the
demo user's password to password:
$ curl \
--request POST \
--header "Content-Type: application/json" \
--header "Accept-API-Version: protocol=2.1,resource=3.0" \
--header "iPlanetDirectoryPro: AQIC5w...NTcy*" \
--data '{
    "currentpassword":"changeit",
    "userpassword":"password"
}' \
https://openam.example.com:8443/openam/json/realms/root/users/demo?_action=changePassword
{}
On success, the response is an empty JSON object {} as shown in the example.
On failure, AM returns a JSON representation of the error including the HTTP status code. See also "HTTP Status Codes" for more information.
Administrators can change non-administrative users'
passwords with an HTTP PUT to
/json/subrealm/users/username
including the new password as the value of userpassword
in the request data.
Unlike users, administrators do not provide users' current passwords when changing passwords.
The following example shows a successful request by an administrator to
change the demo user's password to cangetin:
$ curl \
--request PUT \
--header "iPlanetDirectoryPro: AQIC5w...NTcy*" \
--header "Accept-API-Version: protocol=2.1,resource=3.0" \
--header "Content-Type: application/json" \
--data '{
    "userpassword":"cangetin"
}' \
https://openam.example.com:8443/openam/json/realms/root/users/demo
{
    "_id":"demo",
    "_rev":"-1942782480",
    "username":"demo",
    "realm":"/",
    "uid":[
        "demo"
    ],
    "mail":[
        "demo@example.com"
    ],
    "universalid":[
        "id=demo,ou=user,dc=openam,dc=forgerock,dc=org"
    ],
    "objectClass":[
        "iplanet-am-managed-person",
        "inetuser",
        "sunFederationManagerDataStore",
        "sunFMSAML2NameIdentifier",
        "devicePrintProfilesContainer",
        "inetorgperson",
        "sunIdentityServerLibertyPPService",
        "iPlanetPreferences",
        "pushDeviceProfilesContainer",
        "iplanet-am-user-service",
        "forgerock-am-dashboard-service",
        "organizationalperson",
        "top",
        "kbaInfoContainer",
        "sunAMAuthAccountLockout",
        "person",
        "oathDeviceProfilesContainer",
        "iplanet-am-auth-configuration-service"
    ],
    "dn":[
        "uid=demo,ou=people,dc=openam,dc=forgerock,dc=org"
    ],
    "inetUserStatus":[
        "Active"
    ],
    "sn":[
        "demo"
    ],
    "cn":[
        "demo"
    ],
    "modifyTimestamp":[
        "20170110105705Z"
    ],
    "createTimestamp":[
        "20170105101638Z"
    ]
}
As shown in the example, AM returns the JSON representation of the profile on success. On failure, AM returns a JSON representation of the error including the HTTP status code. See also "HTTP Status Codes" for more information.
AM lets administrators create a group with
an HTTP POST of the JSON representation of the group to the
/json/subrealm/groups?_action=create
endpoint.
The following example shows how to create a group called newGroup
in the top level realm using the REST API after authenticating to AM:
$ curl \
--request POST \
--header "Content-Type: application/json" \
--header "iplanetDirectoryPro: AQIC5w...2NzEz*" \
--data '{
    "username":"newGroup"
}' \
https://openam.example.com:8443/openam/json/realms/root/groups?_action=create
{
    "username":"newGroup",
    "realm":"/",
    "uniqueMember":[
        "uid=demo,ou=people,dc=openam,dc=forgerock,dc=org"
    ],
    "cn":[
        "newGroup"
    ],
    "dn":[
        "cn=newGroup,ou=groups,dc=openam,dc=forgerock,dc=org"
    ],
    "objectclass":[
        "groupofuniquenames",
        "top"
    ],
    "universalid":[
        "id=newGroup,ou=group,dc=openam,dc=forgerock,dc=org"
    ]
}
AM lets administrators add a user to an existing group with
an HTTP PUT to the JSON representation of the group to the
/json/subrealm/groups/groupName
endpoint.
The following example shows how to add users to an existing group by using the REST API. The
example assumes that the DS backend is in use. Make sure to
use the uniquemember attribute to specify the user using
the DS server:
$ curl \
--request PUT \
--header "iPlanetDirectoryPro: AQIC5...Y3MTAx*" \
--header "Content-Type: application/json" \
--data '{
    "uniquemember":[
        "uid=newUser,ou=people,dc=openam,dc=forgerock,dc=org",
        "uid=demo,ou=people,dc=openam,dc=forgerock,dc=org"
    ]
}' \
https://openam.example.com:8443/openam/json/realms/root/groups/newGroup
{
    "name":"newGroup",
    "realm":"/",
    "uniqueMember":[
        "uid=newUser,ou=people,dc=openam,dc=forgerock,dc=org",
        "uid=demo,ou=people,dc=openam,dc=forgerock,dc=org"
    ],
    "cn":[
        "newGroup"
    ],
    "dn":[
        "cn=newGroup,ou=groups,dc=openam,dc=forgerock,dc=org"
    ],
    "objectclass":[
        "groupofuniquenames",
        "top"
    ],
    "universalid":[
        "id=newGroup,ou=group,dc=openam,dc=forgerock,dc=org"
    ]
}
Note
For Active Directory implementations, use the member
attribute when adding a user to a group using the REST API:
$ curl \
--request PUT \
--header "iPlanetDirectoryPro: AQIC5...Y3MTAx*" \
--header "Content-Type: application/json" \
--data '{
    "member":[
        "cn=newUser,cn=users,dc=forgerock,dc=org",
        "cn=demo,cn=users,dc=forgerock,dc=org"
    ]
}' \
https://openam.example.com:8443/openam/json/realms/root/groups/newGroup
{
    "username": "newGroup",
    "realm": "/",
    "sAMAccountName": ["$FL2000-EP4RN8LPBKUS"],
    "universalid": ["id=newGroup,ou=group,dc=forgerock,dc=org"],
    "sAMAccountType": ["268435456"],
    "member": ["cn=newUser,cn=users,dc=forgerock,dc=org", "cn=demo,cn=users,dc=forgerock,dc=org"],
    "name": ["newGroup"],
    "objectClass":    [
        "top",
        "group"
    ],
    "distinguishedName": ["CN=newGroup,CN=Users,DC=forgerock,DC=org"],
    "dn": ["CN=newGroup,CN=Users,DC=forgerock,DC=org"],
    "cn": ["newGroup"],
    "objectCategory": ["CN=Group,CN=Schema,CN=Configuration,DC=forgerock,DC=org"]
}
This section shows how to create, read, update, and delete realms
using the /json/global-config/realms endpoint.
Tip
You can use the AM API Explorer for detailed information about this endpoint and to test it against your deployed AM instance.
In the AM console, click the Help icon, and then navigate to API Explorer > /global-config > /realms.
The following sections cover managing realms with the JSON-based RESTful API:
The following table shows the required properties when managing realms using the REST API:
| Realm Property | Purpose |
|---|---|
name |
The name of the realm. Do not use the names of AM REST endpoints as the name of a realm.
Names that should not be used include
|
active | Whether the realm is to be active, or not. Specify either |
parentPath |
The path of the parent realm. |
aliases |
An array of any applicable aliases associated with the realm. Be aware that an alias can only be used once. Entering an alias used by another realm will remove the alias from that realm and you will lose configuration. |
The following shows an example JSON payload when managing a realm:
{
    "name": "mySubRealm",
    "active": true,
    "parentPath": "/",
    "aliases": [ "payroll.example.com" ]
}
AM lets administrators create a realm by performing
an HTTP POST of the JSON representation of the realm to
/json/global-config/realms.
The following example creates a new, active subrealm in the top level
realm, named mySubRealm:
$ curl \
--request POST \
--header "Content-Type: application/json" \
--header "iplanetDirectoryPro: AQIC5w...2NzEz*" \
--header  "Accept-API-Version: resource=1.0" \
--data '{
    "name": "mySubRealm",
    "active": true,
    "parentPath": "/",
    "aliases": [ "payroll.example.com" ]
}' \
https://openam.example.com:8443/openam/json/global-config/realms
{
    "_id": "L2Fub3RoZXJSZWFsbQ",
    "_rev": "-1054013208",
    "parentPath": "/",
    "active": true,
    "name": "mySubRealm",
    "aliases": [ "payroll.example.com" ]
}
AM returns a 201 HTTP status code and a JSON representation of the
realm on success. The value returned in the _id
field is used in subsequent REST calls relating to the realm.
On failure, AM returns a JSON representation of the
error including the HTTP status code. For more information, see "HTTP Status Codes".
To list and query realms, perform an HTTP GET on the
/json/global-config/realms endpoint, and
set the _queryFilter query string parameter
to true as in the following example, which lists all available
realms:
$ curl \
--header "iPlanetDirectoryPro: AQIC5..." \
--header  "Accept-API-Version: resource=1.0, protocol=2.1" \
https://openam.example.com:8443/openam/json/global-config/realms?_queryFilter=true
{
    "result":[
        {
            "_id":"Lw",
            "_rev":"252584985",
            "parentPath":null,
            "active":true,
            "name":"/",
            "aliases":[
                "openam.example.com",
                "openam"
            ]
        },
        {
            "_id":"L215U3ViUmVhbG0",
            "_rev":"949061198",
            "parentPath":"/",
            "active":true,
            "name":"mySubRealm",
            "aliases":[
                "payroll.example.com"
            ]
        }
    ],
    "resultCount":2,
    "pagedResultsCookie":null,
    "totalPagedResultsPolicy":"NONE",
    "totalPagedResults":-1,
    "remainingPagedResults":-1
}
For more information about using the _queryString parameter in REST
calls, see "Query".
To read a realm's details, perform an HTTP GET on the
/json/global-config/realms/realm-id
endpoint, where realm-id is the value of
_id for the realm.
The following example shows an administrator receiving information about
a realm called mySubRealm, which has an _id value
of L215U3ViUmVhbG0:
$ curl \
--header "iplanetDirectoryPro: AQIC5w...2NzEz*" \
--header "Accept-API-Version: resource=1.0" \
https://openam.example.com:8443/openam/json/global-config/realms/L215U3ViUmVhbG0
{
    "_id": "L215U3ViUmVhbG0",
    "_rev": "949061698",
    "parentPath": "/",
    "active": true,
    "name": "mySubRealm",
    "aliases": [
        "payroll.example.com"
    ]
}
AM returns a 200 HTTP status code and a JSON representation of the realm on success. On failure, AM returns a JSON representation of the error including the HTTP status code. For more information, see "HTTP Status Codes".
To update a realm's aliases or to toggle between active and inactive, perform an HTTP PUT on
the /json/global-config/realms/realm-id
endpoint, where realm-id is the value of
_id for the realm.
The request should include an updated JSON
representation of the complete realm. Note that you cannot alter the
name or parent properties of a realm.
The following example shows how to update a realm called
mySubRealm, which has an _id value
of L215U3ViUmVhbG0. The example changes the realm
status to inactive:
$ curl \
--request PUT \
--header "iplanetDirectoryPro: AQIC5...Y3MTAx*" \
--header "Content-Type: application/json" \
--header  "Accept-API-Version: resource=1.0, protocol=1.0" \
--data '{
    "parentPath": "/",
    "active": false,
    "name": "mySubRealm",
    "aliases": [
        "payroll.example.com"
    ]
}' \
https://openam.example.com:8443/openam/json/global-config/realms/L215U3ViUmVhbG0
{
    "_id": "L215U3ViUmVhbG0",
    "_rev": "94906213",
    "parentPath": "/",
    "active": false,
    "name": "mySubRealm",
    "aliases": [
        "payroll.example.com"
    ]
}
AM returns a 200 HTTP status code and a JSON representation of the realm on success. On failure, AM returns a JSON representation of the error including the HTTP status code. For more information, see "HTTP Status Codes".
To delete a realm, perform an HTTP DELETE on
the /json/global-config/realms/realm-id
endpoint, where realm-id is the value of
_id for the realm.
The following example shows how to delete a realm called
mySubRealm, which has an _id value
of L215U3ViUmVhbG0.
Caution
Make sure that you do not have any information you need within a realm before deleting it. Once a realm is deleted, the only way to restore it is to return to a previously backed up deployment of AM.
$ curl \
--request DELETE \
--header "iplanetDirectoryPro: AQIC5w...2NzEz*" \
--header  "Accept-API-Version: resource=1.0" \
https://openam.example.com:8443/openam/json/global-config/realms/L215U3ViUmVhbG0
{
    "_id": "L215U3ViUmVhbG0",
    "_rev": "949061708",
    "parentPath": "/",
    "active": false,
    "name": "mySubRealm",
    "aliases": [
        "payroll.example.com"
    ]
}
AM returns a 200 HTTP status code and a JSON representation of the deleted realm on success. On failure, AM returns a JSON representation of the error including the HTTP status code. For more information, see "HTTP Status Codes".
This section shows how to delegate realm administration privileges to users or groups of users and how to configure a web or Java agent to be directed to a realm and application when requesting policy decisions:
You assign administration privileges to groups of users.
You can grant privileges through the AM console. See "To Delegate Privileges using the AM Console". Alternatively, use the ssoadm add-privileges command. See "ssoadm add-privileges" in the Reference.
On the Realms page, click the realm for which you want to delegate administration to view the realm configuration.
Delegating administration privileges in the top level realm allows members of the group full administration access to the OpenAm instance. Administration privileges in any other realm allows the group to administrate only in that realm, and any child realms.
Navigate to Identities, and on the Groups tab, click the name of the group to which you intend to grant access.
Select the administrative privileges to delegate for the realm:
(Optional) To grant users in the group access to the administration console for the realm, select Realm Admin.
In AM 6, administrators can use the AM administration console as follows:
Delegated administrators with the
Realm Adminprivilege can access full administration console functionality within the realms they can administer.Administrators with lesser privileges, such as the
Policy Adminprivilege, can not access the AM administration console.Both the top level administrator (such as
amadmin) and delegated administrators in the Top Level Realm with theRealm Adminprivilege have access to full console functionality in all realms and can access AM's global configuration.
(Optional) To grant users in the group access to REST endpoints, select them from the list.
For information about the available AM privileges, see "Realm Privileges Configuration Reference".
Save your work.
To enable delegated subrealm administrators to invalidate sessions, you must add an attribute to their entry in the data store, as described in the following procedure:
Create an LDIF file that modifies the distinguished name entry of the subrealm administrator, adds the
iplanet-am-session-destroy-sessionsattribute, and sets its value to the subrealm's DN.In the following example, the delegated administrator is named
subRealmAdminand the subrealm is calledmySubRealm:dn: uid=subrealmadmin,ou=people,dc=openam,dc=forgerock,dc=org changetype: modify add: objectClass objectClass: iplanet-am-session-service - add: iplanet-am-session-destroy-sessions iplanet-am-session-destroy-sessions: o=mysubrealm,ou=services,dc=openam,dc=forgerock, dc=orgNote
All values in the LDIF must be in lowercase, even if the subrealm or administrator name is not.
Run the ldapmodify command included with DS to apply the LDIF file to the user data store. For example:
$ ./ldapmodify -h opendj.example.com -p 1389 -D "cn=Directory Manager" \
  -w myBindPassword -f /path/to/ldif.file
# Processing MODIFY request for uid=subrealmadmin,ou=people,dc=openam,dc=forgerock,dc=org
# MODIFY operation successful for DN uid=subrealmadmin,ou=people,dc=openam,dc=forgerock,dc=org
The delegated realm administrator will now be able to invalidate sessions created in the subrealm.
You can configure a web or Java agent to be directed to a realm and application when requesting policy decisions, or to log users into a different realm than the agent's realm:
By default, web or Java agents request policy decisions
in the Top Level Realm (/) from the default policy set,
iPlanetAMWebAgentService.
When the realm and policy set differ for your web or Java agent,
you can specify the realm and policy set in the agent profile.
AM then directs requests from the agent
to the specified realm and policy set,
so this is backwards compatible with existing web or Java agents.
In the AM console, browse to Realms > Realm Name > Applications > Agents > Web or Java > Agent Name > OpenAM Services > Policy Client Service.
Set the Realm and Policy Set.
Note that Policy Sets are labelled as "Application" in some parts of the user interface.
For example, if the realm is
/hrand the policy set ismyHRApp:Realm:
/hrApplication:
myHRApp
Save your work.
You might choose to configure your agent in one realm, yet have your real users authenticate through another realm. In this case, you want your web or Java agents to redirect users to authenticate to their realm, rather than the agent realm.
In the AM console, navigate to Realms > Realm Name > Applications > Agents > Web or Java > Agent Name > AM Services.
Configure the OpenAM Conditional Login URL property. For more information, see the ForgeRock Web Agents User Guide and the ForgeRock Java Agents User Guide.
Save your work.
You might choose to configure your agent in one realm, yet have your real users authenticate through another realm. In this case, you want your web or Java agents to redirect users to authenticate to their realm, rather than the agent realm.
In the AM console, navigate to Realms > Realm Name > Applications > Agents > Web or Java > Agent Name > AM Services.
Add login and logout URLs, including the top level realms and the subrealm in the query string.
For example, if your Realm Name is
hr, and you access AM athttps://openam.example.com:8443/openam:OpenAM Login URL (
com.sun.identity.agents.config.login.url):https://openam.example.com:8443/openam/XUI/?realm=/hr#login/OpenAM Logout URL (
com.sun.identity.agents.config.logout.url):https://openam.example.com:8443/openam/XUI/?realm=/hr#logout/
Save your work.
This chapter shows what is an identity data store and how to configure and customize them.
An identity data store, or an identity repository, is a persistent repository of user data. For example, DS or Microsoft Active Directory. At install time you can configure AM to create an embedded DS server that works as an identity data store among other uses, but you can also consider to configure an external identity data store at install time or afterwards.
AM uses other types of data stores, like the configuration data store, the UMA data store, and the Core Token Service (CTS) data store, but those are not being discussed in this chapter.
When you first set up a realm, the new realm inherits the data store from the parent realm. For example, in an installation where the Top Level Realm has the embedded DS server as the identity data store, any new realm created would have the embedded DS server as the identity data store by default.
Yet, if your administrators are in one realm and your users in another, your new child realm might retrieve users from a different data store.
To see and modify the embedded DS identity data store server configuration, navigate to Realms > Realm Name > Data Stores > embedded.
Before configuring an AM data store as an external identity data store, make sure that you have prepared the external identity data store for AM. For more information, see "Preparing an External Identity Repository" in the Installation Guide.
To configure an external identity data store, see "To Configure an Identity Data Store".
In the AM console, browse to Realms > Realm Name > Data Stores.
Click Add Data Store to create a data store profile, and to provide the information needed to connect to the data store.
In the first screen, enter the data store ID and select the type of data store.
In the second screen, provide information on how to connect to your data store, and then click Save Changes to save your work.
See the following sections for hints depending on the type of data store.
(Optional) If you have not applied the schema configuration to your identity data, but your bind account has permission to alter schema, enable the Load Schema option.
To test the connection, navigate to Realms > Realm Name > Identities. The identities stored in the external directory server will appear.
If you no longer need the connection to the inherited, embedded data store in this realm, then you can delete its entry in the Identity Stores list.
Also, once you change the data store for a realm, you might opt to change the authentication module configuration to use your realm data store, rather than the inherited settings. See "Configuring Authentication Modules" in the Authentication and Single Sign-On Guide.
Follow this section to create custom attributes to store additional information in your identity data stores, or to create identity repository plugins to customize how AM maps users and groups to a realm if your deployment require different functionality than the already built-in AM:
You can extend user profiles by adding custom attributes. This section demonstrates how to add a custom attribute to a user profile when storing user profiles in the LDAP directory.
Adding a custom attribute involves both updating the identity repository schema to hold the new attribute and updating the XUI. Furthermore, to give users write permissions to the custom attribute, you must also update the AM configuration store.
This section uses DS 5 or later in the examples and includes the following procedures:
Perform the following steps to update the identity repository schema for the custom attribute, and then update AM to use the custom attribute and object class.
If you intend to use an existing attribute that is already allowed on user profile entries, you can skip this procedure.
Prepare the attribute type object class definitions in LDIF format. For example:
$ cat custom-attr.ldif
dn: cn=schema
changetype: modify
add: attributeTypes
attributeTypes: ( temp-custom-attr-oid NAME 'customAttribute' EQUALITY case
 IgnoreMatch ORDERING caseIgnoreOrderingMatch SUBSTR caseIgnoreSubstrings
 Match SYNTAX 1.3.6.1.4.1.1466.115.121.1.15 USAGE userApplications )
-
add: objectClasses
objectClasses: ( temp-custom-oc-oid NAME 'customObjectclass' SUP top AUXILIARY
  MAY customAttribute )
In the example, the attribute type is called
customAttributeand the object class is calledcustomObjectclass.Add the schema definitions to the directory.
$ /path/to/opendj/bin/ldapmodify \
 --port 1389 \
 --hostname openam.example.com \
 --bindDN "cn=Directory Manager" \
 --bindPassword password \
 custom-attr.ldif
Processing MODIFY request for cn=schema
MODIFY operation successful for DN cn=schema
In the AM console, browse to Realms > Realm Name > Data Stores > Data Store Name > User Configuration.
Add the object class, for example
customObjectclass, to the LDAP User Object Class list.Add the attribute type, for example
customAttribute, to the LDAP User Attributes list.Save your work.
Perform the following steps to update AM configuration store to give users write permission to the custom attribute.
This procedure assumes you use an LDAP browser, for example Apache Directory Studio. Alternatively, you can follow "To Allow Users to Update the New Attribute Using the Command Line" if you use the command line.
Connect to the AM configuration store. You can see the configuration store details by navigating to Deployment > Servers > Directory Configuration > Server.
Search for
ou=SelfWriteAttributes. You should find DNs similar to the following:dn:ou=SelfWriteAttributes,ou=Policies,ou=default,ou=OrganizationConfig,ou=1.0,ou=iPlanetAMPolicyService,ou=services,o=sunamhiddenrealmdelegationservicepermissions,ou=services,dc=openam,dc=forgerock,dc=orgdn:ou=SelfWriteAttributes,ou=default,ou=default,ou=OrganizationConfig,ou=1.0,ou=sunEntitlementIndexes,ou=services,o=sunamhiddenrealmdelegationservicepermissions,ou=services,dc=openam,dc=forgerock,dc=org
In the entry under
iPlanetAMPolicyService, edit thesunKeyValueattribute to add the custom attribute to the list of self-writable attributes. For example,<Value>customAttribute</Value>.In the entry under
sunEntitlementIndexes, edit thesunKeyValueattribute to add the custom attribute to the list of self-writable attributes. The following is an example of the custom attribute as the first element of the list:\"attributes\": [\n \"customAttribute\",\n ....Restart AM or the web container where it runs.
Perform the following steps to update the AM configuration store to give users write permission to the custom attribute.
This procedure assumes you use the command line. Alternatively, you can follow "To Allow Users To Update the New Attribute Using an LDAP Browser" if you use an LDAP browser.
Search for the value of
sunKeyValueinou=SelfWriteAttributesby running the following command:$ /path/to/opendj/bin/ldapsearch --hostname openam.example.com --port 1389 \ --bindDn "cn=Directory Manager" --bindPassword forgerock \ --baseDn "dc=openam,dc=forgerock,dc=org" "(ou=SelfWriteAttributes)" sunKeyValue dn: ou=SelfWriteAttributes,ou=Policies,ou=default,ou=OrganizationConfig,ou=1.0,ou=iPlanetAMPolicyService,ou=services,o=sunamhiddenrealmdelegationservicepermissions,ou=services,dc=openam,dc=forgerock,dc=org sunKeyValue:: eG1scG9saWN5PTw........ dn: ou=SelfWriteAttributes,ou=default,ou=default,ou=OrganizationConfig,ou=1.0,ou=sunEntitlementIndexes,ou=services,o=sunamhiddenrealmdelegationservicepermissions,ou=services,dc=openam,dc=forgerock,dc=org sunKeyValue: serializable={"eCondition":{"className":"com.sun.....Note that the command returns two DNs, and the value of
sunKeyValuein the first one is base64-encoded.Decode the base64 string of the
iPlanetAMPolicyServiceDN. For example:$ ./base64 decode --encodedData eG1scG9saWN5PTw........ xmlpolicy=<?xml version="1.0" encoding="UTF-8"?> <Policy name="SelfWriteAttributes" createdby="cn=dsameuser,ou=DSAME Users,dc=openam,dc=forgerock,dc=org" lastmodifiedby="cn=dsameuser,ou=DSAME Users,dc=openam,dc=forgerock,dc=org" creationdate="1528296269883" lastmodifieddate="1528296269883" referralPolicy="false" active="true" > <Rule name="user-read-rule"> <ServiceName name="sunAMDelegationService" /> <ResourceName name="sms://*dc=openam,dc=forgerock,dc=org/sunIdentityRepositoryService/1.0/application/*" /> <AttributeValuePair> <Attribute name="MODIFY" /> <Value>allow</Value> </AttributeValuePair> </Rule> <Subjects name="Subjects" description=""> <Subject name="delegation-subject" type="AuthenticatedUsers" includeType="inclusive"> </Subject> </Subjects> <Conditions name="AttrCondition" description=""> <Condition name="condition" type="UserSelfCheckCondition"> <AttributeValuePair><Attribute name="attributes"/><Value>givenname</Value><Value>sn</Value><Value>cn</Value><Value>userpassword</Value><Value>mail</Value><Value>telephonenumber</Value><Value>postaladdress</Value><Value>preferredlocale</Value><Value>iplanet-am-user-password-reset-options</Value><Value>iplanet-am-user-password-reset-question-answer</Value><Value>description</Value><Value>oath2faEnabled</Value><Value>sunIdentityServerDeviceKeyValue</Value><Value>sunIdentityServerDeviceStatus</Value> </AttributeValuePair> </Condition> </Conditions> </Policy>
Create a file with the decoded string. Then, add the custom attribute to the
<AttributeValuePair>list. For example:$ vi to-encode.xml .... <Attribute name="attributes"/><Value>customAttribute</Value><Value>givenname</Value>...</AttributeValuePair> ....
Base64-encode the content of the file. For example:
$ ./base64 encode -f to-encode.xml
EG1scG9saWN5PTw22.....
Create an LDIF file, for example,
change.ldif, containing the following:The LDIF properties and rules required to modify the value of the
sunKeyValueattribute for both DNs.The newly base64-encoded string as the value of the
sunKeyValueattribute of theiPlanetAMPolicyServiceDN. The string already contains the custom attribute.The value of the
sunKeyValueattribute of thesunEntitlementIndexesDN. You must add the custom attribute inside theattributeslist.
The following excerpt is an example of LDIF file:
dn: ou=SelfWriteAttributes,ou=Policies,ou=default,ou=OrganizationConfig,ou=1.0,ou=iPlanetAMPolicyService,ou=services,o=sunamhiddenrealmdelegationservicepermissions,ou=services,dc=openam,dc=forgerock,dc=org
changetype: modify
replace: sunKeyValue
sunKeyValue: EG1scG9saWN5PTw22.....

dn: ou=SelfWriteAttributes,ou=default,ou=default,ou=OrganizationConfig,ou=1.0,ou=sunEntitlementIndexes,ou=services,o=sunamhiddenrealmdelegationservicepermissions,ou=services,dc=openam,dc=forgerock,dc=org
changetype: modify
replace: sunKeyValue
sunKeyValue: serializable={"eCondition":{"className": ...  \"properties\": {\"attributes\": [\n    \"customAttribute\",\n    \"givenname\",\n    \"sn\",\n  ... \"values\": []\n}"}}
Apply the changes in the LDIF file to the LDAP configuration store, as follows:
$ /path/to/opendj/bin/ldapmodify --hostname openam.example.com --port 50389 --bindDn "cn=Directory Manager" --bindPassword forgerock --filename change.ldif
# MODIFY operation successful for DN ou=SelfWriteAttributes,ou=Policies,ou=default,ou=OrganizationConfig,ou=1.0,ou=iPlanetAMPolicyService,ou=services,o=sunamhiddenrealmdelegationservicepermissions,ou=services,dc=openam,dc=forgerock,dc=org
# MODIFY operation successful for DN ou=SelfWriteAttributes,ou=default,ou=default,ou=OrganizationConfig,ou=1.0,ou=sunEntitlementIndexes,ou=services,o=sunamhiddenrealmdelegationservicepermissions,ou=services,dc=openam,dc=forgerock,dc=org
Restart AM or the web container where it runs.
To allow the XUI to show the new attribute in the user profile, you need to download the XUI source, edit it, and then rebuild the XUI.
Perform the following steps to configure the XUI to show the new attribute:
Download the XUI source as explained in "Downloading the XUI" in the UI Customization Guide.
Modify the XUI as follows:
Edit the
src/main/resources/locales/en/translation.jsonfile and add a new line with the description for the custom attribute. This description will show in the XUI user's profile page. For example:... "profile": "Profile", "username" : "Username", "emailAddress" : "Email address", "givenName" : "First Name", "customAttribute" : "My Custom Attribute", "sn" : "Last Name", "changePassword" : "Change password", ...Note that the example adds the custom attribute under the
common.userJSON path.Tip
If you have translated the XUI pages, remember to edit all the
translation.jsonfiles in your installation.Edit the
src/main/resources/templates/user/UserProfileTemplate.htmlfile and add a new line for the custom attribute. Consider the following points:propertymust contain the name of the custom attribute created in the LDAP. For example,customAttribute.labelmust contain the path to the label created in thetranslation.jsonfile. In this case,common.user.customAttribute.
For example:
{{#user}}
  {{> form/_basicInput property="username" label="common.user.username" readonly=true}}
  {{> form/_basicInput property="givenName" label="common.user.givenName"}}
  {{> form/_basicInput property="sn" label="common.user.sn" required="true"}}
  {{> form/_basicInput type="email" property="mail" label="common.user.emailAddress"
  extraAttributes='data-validator="validEmailAddressFormat" data-validator-event="keyup"' }}
  {{> form/_basicInput type="tel" property="telephoneNumber" label="common.user.phoneNumber"
  extraAttributes='data-validator="validPhoneFormat" data-validator-event="keyup"'}}
  {{> form/_basicInput property="customAttribute" label="common.user.customAttribute"}}
{{/user}}
Edit the
src/main/js/org/forgerock/openam/ui/user/UserModel.jsfile and add the custom attribute on theServiceInvoker.restCallfunction.Consider the following constraints when modifying this file:
The file does not support tab indentation. You must use space indentation.
The file does not support lines longer than 120 characters. If the line you are modifying exceeds this limit, break it in multiple lines.
For example:
return ServiceInvoker.restCall(_.extend(
                            {
                                type: "PUT",
                                data: JSON.stringify(
                                    _.chain(this.toJSON())
                                        .pick(["givenName", "sn", "mail", "postalAddress", "telephoneNumber",
                                            "customAttribute"])
                                        .mapValues((val) => {
                                        ...
}
Rebuild the XUI by running the yarn build command.
Test the XUI pages by following the steps detailed in "To Test XUI Pages in a Development Server" in the UI Customization Guide.
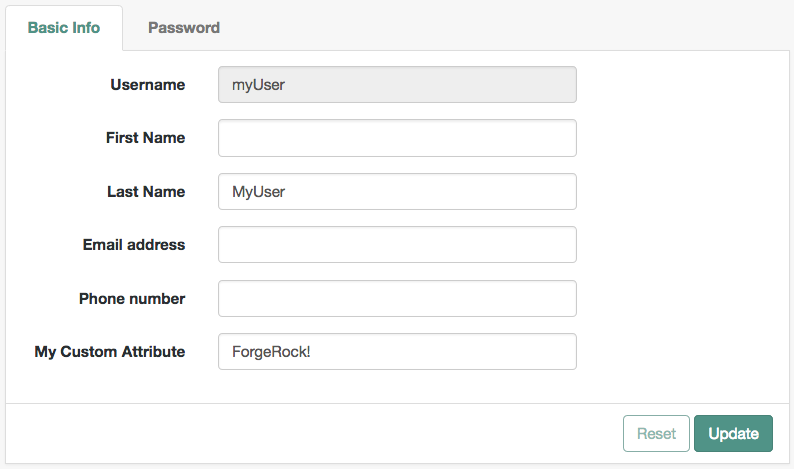
The XUI user profile page now shows the custom attribute, and users are able to read and write its values:
Once you are satisfied with the changes, deploy the output in the
builddirectory to the/path/to/tomcat/webapps/openam/XUI/directory of your AM instances.There is no need to restart the AM instance. Subsequent visits to the XUI pages will use the rebuilt files.
AM maps user and group identities into a realm using data stores. An AM data store relies on a Java identity repository (IdRepo) plugin to implement interaction with the identity repository where the users and groups are stored.
This section describes how to create a custom identity repository plugin. AM includes built-in support for LDAP identity repositories. For most deployments, you therefore do not need to create your own custom identity repository plugin. Only create custom identity repository plugins for deployments with particular requirements not met by built-in AM functionality.
Tip
Before creating your own identity repository plugin, start by reading
the AM source code for the FilesRepo or
DatabaseRepo plugins under
com.sun.identity.idm.plugins.
Your identity repository plugin class must extend the
com.sun.identity.idm.IdRepo abstract class, and must
include a constructor method that takes no arguments.
When AM instantiates your IdRepo plugin, it calls the
initialize() method.
public void initialize(Map configParams)The configParams are service configuration
parameters for the realm where the IdRepo plugin is configured. The
configParams normally serve to set up communication with
the underlying identity data store. AM calls the
initialize() method once, and considers the identity
repository ready for use.
If you encounter errors or exceptions during initialization, catch and store them in your plugin for use later when AM calls other plugin methods.
After initialization, AM calls the addListener()
and removeListener() methods to register listeners that
inform AM client code of changes to identities managed by your
IdRepo.
public int addListener(SSOToken token, IdRepoListener listener)
public void removeListener()
You must handle listener registration in your IdRepo plugin, and also
return events to AM through the IdRepoListener.
When stopping, AM calls your IdRepo plugin
shutdown() method.
public void shutdown()You are not required to implement shutdown() unless
your IdRepo plugin has shut down work of its own to do, such as close
connections to the underlying identity data store.
Your IdRepo plugin provides AM with a generic means to manage identities—including users and groups but also special types such as roles, realms, and agents— and to create, read, update, delete, and search identities. In order for AM to determine your plugin's capabilities, it calls the methods described in this section.
public Set getSupportedTypes()The getSupportedTypes() method returns a set of
IdType objects, such as IdType.USER
and IdType.GROUP. You can either hard-code the supported
types into your plugin, or make them configurable through the IdRepo
service.
public Set getSupportedOperations(IdType type)The getSupportedOperations() method returns a set
of IdOperation objects, such as
IdOperation.CREATE and
IdOperation.EDIT. You can also either hard-code these, or
make them configurable.
public boolean supportsAuthentication()The supportsAuthentication() method returns true if
your plugin supports the authenticate() method.
Your IdRepo plugin implements operational methods depending on what you support. These methods perform the operations in your data store.
- Create
AM calls
create()to provision a new identity in the repository, wherenameis the new identity's name, andattrMapholds the attributes names and values.public String create(SSOToken token, IdType type, String name, Map attrMap) throws IdRepoException, SSOException- Read
AM calls the following methods to retrieve identities in the identity repository, and to check account activity. If your data store does not support binary attributes, return an empty
MapforgetBinaryAttributes().public boolean isExists( SSOToken token, IdType type, String name ) throws IdRepoException, SSOException public boolean isActive( SSOToken token, IdType type, String name ) throws IdRepoException, SSOException public Map getAttributes( SSOToken token, IdType type, String name ) throws IdRepoException, SSOException public Map getAttributes( SSOToken token, IdType type, String name, Set attrNames ) throws IdRepoException, SSOException public Map getBinaryAttributes( SSOToken token, IdType type, String name, Set attrNames ) throws IdRepoException, SSOException public RepoSearchResults search( SSOToken token, IdType type, String pattern, Map avPairs, boolean recursive, int maxResults, int maxTime, Set returnAttrs ) throws IdRepoException, SSOException public RepoSearchResults search( SSOToken token, IdType type, String pattern, int maxTime, int maxResults, Set returnAttrs, boolean returnAllAttrs, int filterOp, Map avPairs, boolean recursive ) throws IdRepoException, SSOException- Edit
AM calls the following methods to update a subject in the identity repository.
public void setAttributes( SSOToken token, IdType type, String name, Map attributes, boolean isAdd ) throws IdRepoException, SSOException public void setBinaryAttributes( SSOToken token, IdType type, String name, Map attributes, boolean isAdd ) throws IdRepoException, SSOException public void removeAttributes( SSOToken token, IdType type, String name, Set attrNames ) throws IdRepoException, SSOException public void modifyMemberShip( SSOToken token, IdType type, String name, Set members, IdType membersType, int operation ) throws IdRepoException, SSOException public void setActiveStatus( SSOToken token, IdType type, String name, boolean active )- Authenticate
AM calls
authenticate()with the credentials from theDataStoreauthentication module.public boolean authenticate(Callback[] credentials) throws IdRepoException, AuthLoginException- Delete
The
delete()method removes the subject from the identity repository. Thenamespecifies the subject.public void delete(SSOToken token, IdType type, String name) throws IdRepoException, SSOException- Service
The
IdOperation.SERVICEoperation is rarely used in recent AM deployments.
When you build your IdRepo plugin,
include openam-core-6.0.0.7.jar in the classpath.
This file is found under WEB-INF/lib/
where AM is deployed.
You can either package your plugin as a .jar,
and then add it to WEB-INF/lib/,
or add the classes under WEB-INF/classes/.
To register your plugin with AM, you add a
SubSchema to the
sunIdentityRepositoryService using the
ssoadm command. First, you create the
SubSchema document having the following structure.
<SubSchema i18nKey="x4000" inheritance="multiple" maintainPriority="no"
           name="CustomRepo" supportsApplicableOrganization="no" validate="yes">
 <AttributeSchema cosQualifier="default" isSearchable="no"
                  name="RequiredValueValidator" syntax="string"
                  type="validator" >
  <DefaultValues>
   <Value>com.sun.identity.sm.RequiredValueValidator</Value>
  </DefaultValues>
 </AttributeSchema>
 <AttributeSchema any="required" cosQualifier="default"
                  i18nKey="x4001" isSearchable="no"
                  name="sunIdRepoClass" syntax="string"
                  type="single" validator="RequiredValueValidator" >
  <DefaultValues>
   <Value>org.test.CustomRepo</Value>
  </DefaultValues>
 </AttributeSchema>
 <AttributeSchema cosQualifier="default" i18nKey="x4002" isSearchable="no"
                  name="sunIdRepoAttributeMapping" syntax="string" type="list">
  <DefaultValues>
    <Value></Value>
  </DefaultValues>
 </AttributeSchema>
</SubSchema>
Also include the AttributeSchema required to
configure your IdRepo plugin.
Notice the i18nKey attributes
on SubSchema elements.
The i18nKey attribute values correspond to properties in
the amIdRepoService.properties file
under WEB-INF/classes/ where AM is deployed.
The AM console displays the label for the configuration user interface
that it retrieves from the value of the i18nKey property
in the amIdRepoService.properties file.
To make changes to the properties,
first extract amIdRepoService.properties
and if necessary the localized versions of this file
from openam-core-6.0.0.7.jar
to WEB-INF/classes/ where AM is deployed.
For example, if AM is deployed under
/path/to/tomcat/webapps/openam,
then you could run the following commands.
$ cd /path/to/tomcat/webapps/openam/WEB-INF/classes/
$ jar -xvf ../lib/openam-core-6.0.0.7.jar amIdRepoService.properties
inflated: amIdRepoService.properties
Register your plugin using the ssoadm command after copy the files into place.
$ ssoadm \
 add-sub-schema \
 --adminid amadmin \
 --password-file /tmp/pwd.txt \
 --servicename sunIdentityRepositoryService \
 --schematype Organization \
 --filename customIdRepo.xml
Log in to the AM console as administrator, then browse to Realms > Realm Name > Data Stores. In the Data Stores table, click Add Data Store to create a Data Store corresponding to your custom IdRepo plugin. In the first screen of the wizard, name the Data Store and select the type corresponding to your plugin. In the second screen of the wizard, add the configuration for your plugin.
After creating the Data Store, create a new identity in the realm to check that your plugin works as expected. You can do this under Realms > Realm Name > Identities.
If your plugin supports authentication, then users should now be able
to authenticate using the DataStore module for the
realm, by using a URL similar to the following:
http://openam.example.com:8080/openam/XUI/?realm=/myrealm#login&module=DataStore
You install web or Java agents in web servers and web application containers to enforce access policies AM applies to protected web sites and web applications. Web and Java agents depend on AM for all authentication and authorization decisions. Their primary responsibility consists of enforcing what AM decides in a way that is unobtrusive to the user. In organizations with many servers, you might well install many web or Java agents.
Web or Java agents can have local configurations where they are installed. Typically, you store all agent configuration information in the AM configuration store, defining agent profiles for each, and then you let the web or Java agents access their profiles through AM. In this way, you manage all agent configuration changes centrally. This chapter describes how to set up agent profiles in AM for centralized configuration.
ForgeRock Identity Gateway and the AM web and Java agents can both enforce policy, redirecting users to authenticate when necessary, and controlling access to protected resources. IG runs as a self-contained reverse proxy located between the users and the protected applications. Web and Java agents are installed into the servers where applications run, intercepting requests in that context.
Use IG to protect access to applications not suited for a web or Java agent, for example, those applications deployed on operating systems or web servers or containers not supported by the agents.
Web and Java agents have the advantage of sitting within your existing server infrastructure. Once you have agents installed into the servers with web applications or sites to protect, then you can manage their configurations centrally from AM.
For organizations with both servers on which you can install web and Java agents and also applications that you must protect without touching the server, you can use agents on the former and IG for the latter.
You can configure a number of different types of agents.
Each agent type requires an agent profile in AM. The agent profile contains essential configuration for agent operation, such as a password to authenticate the agent, and the URL the agent resides at. For agents that support it, the agent profile can store all agent configuration centrally, rather than locally on the agent server.
Web and Java agents are the most common, requiring the least integration effort. The available agent types are:
- Web
You install web agents in web servers to protect web sites.
- Java
You install Java agents in web application containers to protect web applications.
- Agent Authenticator
The agent authenticator can read agent profiles by connecting to AM with a user name, password combination, but unlike the agent profile administrator, cannot change agent configuration.
- SOAP STS Agent
Secure requests from a SOAP STS deployment to AM using this type of agent profile.
A web or Java agent requires a profile to connect to and communicate with AM, regardless of whether it is stored centrally in AM or on the agent server.
Create an agent profile using the AM console by performing the following steps:
In the AM console, navigate to Realms > Realm Name > Applications > Agents > Agent Type, and then select the
Add
    Agent Type Agent
button in the Agent tab.Complete the web form using the following hints:
- Agent ID
The ID of the agent profile. This ID is used during the agent installation.
- Agent URL
The URL the web or Java agent protects. For example, for web agents:
http://www.example.com:80, and for java agents:http://www.example.com:80/agentapp.In centralized configuration mode, the Agent URL is used to populate the agent profile for services, such as notifications.
- Server URL
The full URL to an AM instance. If AM is deployed in a site configuration (behind a load balancer), enter the site URL.
In centralized configuration mode, Server URL is used to populate the agent profile for use with login, logout, naming, and cross-domain SSO.
- Password
The password the agent uses to authenticate to AM. Use this password when installing an agent.

You can create a web or Java agent profile in AM using the ssoadm command-line tool. You do so by specifying the agent properties either as a list of attributes, or by using an agent properties file as shown below. Export an existing agent configuration before you start to see what properties you want to set when creating the agent profile.
Perform the following steps to create a web or Java agent profile using the ssoadm command:
Make sure the ssoadm command is installed. See "Setting Up Administration Tools" in the Installation Guide.
Determine the list of properties to set in the agent profile.
The following properties file shows a minimal configuration for an agent profile:
$ cat myAgent.properties
com.iplanet.am.server.port=8443
com.sun.identity.agents.config.agenturi.prefix=http://www.example.com:80/amagent
com.sun.identity.agents.config.cdsso.cdcservlet.url[0]= \
https://openam.example.com:8443/openam/cdcservlet
com.sun.identity.agents.config.fqdn.default=www.example.com
com.sun.identity.agents.config.login.url[0]= \
http://openam.example.com:8443/openam/XUI/#login
com.sun.identity.agents.config.logout.url[0]= \
http://openam.example.com:8443/openam/XUI/#logout
com.sun.identity.agents.config.remote.logfile=amAgent_www_example_com_80.log
com.sun.identity.agents.config.repository.location=centralized
com.sun.identity.client.notification.url= \
http://www.example.com:80/UpdateAgentCacheServlet?shortcircuit=false
sunIdentityServerDeviceKeyValue[0]=agentRootURL=http://www.example.com:80/
sunIdentityServerDeviceStatus=Active
userpassword=password
Create a password file, for example
$HOME/.pwd.txt. The file should only contain the password string, on a single line.The password file must be read-only for the user who creates the agent profile, and must not be accessible to other users:
$ chmod 400 $HOME/.pwd.txt
Create the agent profile, specifying
--agenttype JavaAgentfor Java agents or--agenttype WebAgentfor web agents:$ ssoadm create-agent \ --realm / \ --agentname myAgent \ --agenttype JavaAgent | WebAgent \ --adminid amadmin \ --password-file $HOME/.pwd.txt \ --datafile myAgent.properties Agent configuration was created.
Review the new profile in the AM console under Realms > Realm Name > Applications > Agents > Agent Type > Agent Name.
Agent profile groups let you set up multiple agents to inherit settings from the group. To create a new agent profile group, perform the following steps:
In the AM console, navigate to Realms > Realm Name > Applications > Agents > Agent Type.
Select Add Group from the Groups tab, and provide an ID for the group and the URL to the AM server in which to store the profile.
After creating the group profile, you can select the link to the new group profile to fine-tune or export the configuration.
Inherit group settings by selecting your agent profile, and then selecting the group name from the Group drop-down list near the top of the profile page.
You can then adjust inheritance by clicking Inheritance Settings on the OpenAM Services agent profile tab.
If you want to create agent profiles when installing web or Java agents, then you need the credentials of an AM user who can read and write agent profiles.
You can use the AM administrator account when creating agent profiles. If you delegate web or Java agent installation, then you might not want to share AM administrator credentials with everyone who installs agents.
Follow these steps to create agent administrator users for a realm:
In the AM console, browse to Realms > Realm Name > Identities.
On the Groups tab, click Add Group and create a group for agent administrators.
On the Privileges tab, select Realm Admin, and Save your changes.
Navigate to Realms > Realm Name > Identities. On the Identities tab, create as many agent administrator users as needed.
For each agent administrator user, edit the user profile.
On the Groups tab of the user profile, add the user to agent profile administrator group, and then Save your work.
Provide each system administrator who installs web or Java agents with their agent administrator credentials.
When installing Java agents with the
--custom-installoption, the system administrator can choose the option to create the profile during installation, and then provide the agent administrator user name and the path to a read-only file containing the agent administrator password. For silent installs, you can add the--acceptLicenseoption to auto-accept the software license agreement.
When you create a web agent profile and install the agent, you can choose to store the agent configuration centrally and configure the agent through the AM console. Alternatively, you can choose to store the agent configuration locally and configure the agent by changing values in the properties file. For information on the properties used in a centralized configuration, and the corresponding properties for use in a local configuration file where applicable, see Configuring Web Agent Properties in the ForgeRock Access Management Web Agents User Guide.
When you create a Java agent profile and install the agent, you can choose to store the agent configuration centrally and configure the agent through the AM console. Alternatively, you can store the agent configuration locally and configure the agent by changing values in the properties file. For information on the properties used in a centralized configuration, and the corresponding properties for use in a local configuration file where applicable, see Creating Agent Profiles in the ForgeRock Access Management Java Agent User Guide.
An agent authenticator has read-only access to multiple agent profiles defined in the same realm, typically allowing an agent to read web service agent profiles.
After creating the agent profile, you access agent properties in the AM console under Realms > Realm Name > Applications > Agents > Agent Authenticator > Agent Name.
- Password
Specifies the password the agent uses to connect to AM.
- Status
Specifies whether the agent profile is active, and so can be used.
- Agent Profiles allowed to Read
Specifies which agent profiles in the realm the agent authenticator can read.
- Agent Root URL for CDSSO
Specifies the list of agent root URLs for CDSSO. The valid value is in the format
protocol://hostname:port/where protocol represents the protocol used, such ashttporhttps, hostname represents the host name of the system where the agent resides, and port represents the port number on which the agent is installed. The slash following the port number is required.If your agent system also has virtual host names, add URLs with the virtual host names to this list as well. AM checks that
gotoURLs match one of the agent root URLs for CDSSO.
A SOAP STS deployment accesses AM using a SOAP STS agent.
After creating the agent profile, you access agent properties in the AM console under Realms > Realm Name > Applications > Agents > SOAP STS Agent > Agent Name. For information on the available properties, see "Creating a SOAP STS Agent" in the Security Token Service Guide.
This chapter shows how to work with keys and keystores, which are used to protect network communication and to sign and encrypt information.
A keystore is a file that serves as a repository of certificates and keys used in SSL/TSL encryption. AM uses them for two purposes: To store keys and certificates used for federation, token signatures, and others, and to store the passwords required during AM's startup process.
Most features that require storing key aliases for signing or encryption use AM's keystore, which is configured by navigating to Configure > Server Defaults > Security > Key Store. However, some features may require or support different configurations:
During installation, AM deploys a JKS and a JCEKS keystore with several self-signed key aliases for demo and test purposes only. For production deployments, you should generate your own key aliases and configure AM to use them.
- Features that only use AM's keystore, configured by default as described in "JCEKS and JKS Keystore Comparison":
SAML v1.x
Requires one key pair alias for signing XML files. For more information, see "Preparing To Secure SAML v1.x Communications" in the SAML v1.x Guide.
User self-service
Requires a JCEKS keystore with a key pair alias for encryption and a key alias for signing. For more information, see "Creating a User Self-Service Service Instance" in the User Self-Service Guide.
Persistent Cookie module
Requires a key pair alias for encryption. For more information, see "Persistent Cookie Module" in the Authentication and Single Sign-On Guide.
Client-based sessions
Require an RSA key pair alias for encryption and an RSA/ECDSA key pair alias for signing. For more information, see "Configuring Client-Based Session and Authentication Session Security" in the Authentication and Single Sign-On Guide.
OAuth2 and OIDC providers
Require configuring RSA or ECDSA key aliases for signing tokens. For more information, see "Configuring Digital Signatures" in the OAuth 2.0 Guide.
Also require a key alias for direct authentication encryption of stateless OAuth 2.0 access and refresh tokens. For information on the specific key requirements, see AES_128_CBC_HMAC_SHA_256 in RFC 7518. For more information on enabling encryption, see "Configuring Stateless OAuth 2.0 Token Encryption" in the OAuth 2.0 Guide.
Amster
Requires a
sms.transport.keykey alias to export and import encrypted passwords. For more information, see the Amster Command-line Interface Guide.Web and Java agents
Web Agents 5.x and Java Agents 5.x communicate with AM using a built-in OAuth2 provider configured globally in AM. This communication requires an RSA key alias for signing tokens. For more information, see the ForgeRock Access Management Web Agents User Guide and the ForgeRock Access Management Java Agents User Guide.
Remote Consent Service
Requires an RSA key pair alias for signing consent responses, and another RSA key pair alias for encrypting consent responses. For more information, see "Configuring Remote Consent Services" in the OAuth 2.0 Guide.
IDM user self-registration
Requires copying signing and encryption keys from the IDM installation into the AM keystore. For more information, see "To Delegate User Self-Registration to IDM" in the User Self-Service Guide.
- Features that support different keystore configurations:
ForgeRock Authenticator (OATH) and ForgeRock Authenticator (PUSH) modules
Supports configuring a different keystore to encrypt device profiles. They also support different keystore types that are not available to other features. For more information, see "Implementing Multi-Factor Authentication" in the Authentication and Single Sign-On Guide.
SAML v2.0 providers
Requires key pairs in AM's keystore to configure signing or encryption. However, they support setting up a specific password for the key pair instead of using AM's keystore password file. For more information, see "SAML v2.0 Configuration Properties" in the SAML v2.0 Guide.
Also requires a key pair in AM's keystore to sign entity metadata when using the
exportmetadata.jsppage or the ssoadm command. The key pair can have a password different from that stored in the AM's keystore password file.AM's startup process
Requires the default JCEKS keystore created during AM installation or upgrade, since it stores the passwords of the special
dsameuseruser, which cannot be recreated.The startup process supports changing the name and path of the keystore from the defaults configured in the
/path/to/openam/boot.jsonfile. For more information, see "Starting Servers" in the Installation Guide.
- Features that require different keystore configurations:
Java Fedlets
Require a keystore containing a key pair to sign and verify XML assertions and to encrypt and decrypt SAML assertions. Keystore and key information are configurable in the
FederationConfig.propertiesfile. For more information, see "Configuring Java Fedlet Properties" in the SAML v2.0 Guide.Security Token Service
Requires configuring a JKS keystore for encrypting SAML v2.0 and OpenID Connect tokens. It does not require files to store the keystore password or the key aliases' passwords. For more information, see "About the STS" in the Security Token Service Guide.
CSV audit logging handler
Requires configuring a JKS keystore file called
Logger.jksfor tamper-proofing. It does not require a file to store the keystore password; the password is configured in the AM console. For more information, see "Configuring CSV Audit Event Handlers".
During installation, AM deploys a JKS and a JCEKS keystore with several self-signed key aliases for demo and test purposes only. For production deployments, you should generate your own key aliases and configure AM to use them.
For a comparison between the default configuration of the JCEKS and the JKS keystores in AM, see the following table:
| JCEKS | JKS | |
|---|---|---|
| Used by default in AM? | Yes [a] | No |
| In which path is it? | /path/to/openam/openam/keystore.jceks | /path/to/openam/openam/keystore.jks |
| Where is its password stored? [b] |
/path/to/openam/openam/.storepass
| /path/to/openam/openam/.storepass
|
| Which test aliases does it contain? |
|
test
[e]
|
| Which password strings does it contain? |
|
None |
| Where is the private key password file? [i] |
/path/to/openam/openam/.keypass
|
/path/to/openam/openam/.keypass
|
[a] New AM installations use the JCEKS keystore as the default keystore. For more information about upgraded configurations, see "Keystore Configuration After Upgrade". [b] The password of the JCEKS and JKS keystores is a random-generated string stored in cleartext. [c] ECDSA key. [d] Symmetric HMAC key. [e] Asymmetric RSA key. [f] Symmetric secret signing key. [g]
The value of the [h]
The value of the [i]
The password for all the key aliases in the JCEKS and JKS keystores
is | ||
After an upgrade to AM 6, keystores are deployed and configured depending on the circumstances at the time of the upgrade:
Upgrading from OpenAM 13 or earlier
A
keystore.jceksfile is deployed with the configuration described in "JCEKS and JKS Keystore Comparison". This keystore is used by AM's startup process. AM's keystore is still JKS, and contains the key aliases it had before the upgrade.Upgrading from OpenAM 13.5
If OpenAM 13.5 had a JCEKS keystore configured in Configure > Server Defaults > Security > Key Store at the time of the upgrade, the password strings described in "JCEKS and JKS Keystore Comparison" are appended to the existing JCEKS keystore.
If OpenAM 13.5 had a JKS keystore configured in Configure > Server Defaults > Security > Key Store at the time of the upgrade, the behavior is the same as noted in Upgrading from OpenAM 13 or earlier.
Important
To save the passwords required to start AM, the upgrade process must be able to unlock the
keystore.jceksfile using the password stored in the.storepassfile.If the upgrade process is unable to store the passwords in the keystore, it will not create the
boot.jsonfile and AM will not be able to start.Upgrading from AM 5 or later
No keystore changes are required.
The upgrade does not convert keys from an old keystore to a new one. For example, if you upgrade from OpenAM 13 or earlier and you want to use the user self-service features, you need to create a JCEKS keystore with suitable replacements of the keys in the old JKS keystore.
Keystores and keys protect credentials, tokens, and other sensitive information your environment needs to both send and receive. Therefore, ensure that keys are protected and only shared when required.
When dealing with keys and keystores in AM, ForgeRock recommends to avoid sharing certificates among features when possible, which may result in configuring multiple keystores. Keystores should also have different passwords to reduce the amount of compromised keys in case a malicious user is able to leverage one of the keystore passwords.
To set up the keys and keystores required in an AM site, perform the tasks listed in the following table:
| Task | Steps |
|---|---|
|
Review the list of features that use keys in AM, and their possible keystore configurations. | See "Features in AM That Use Key Aliases". |
|
Configure AM's bootstrap keystore from the default
| |
|
Create a new AM keystore for the site and as many keystores and key aliases as required in your environment based on the information you learned reviewing the list on the first task. | |
|
Configure the new AM keystore for the site. | See "Configuring AM's Keystore". |
|
Change the pre-configured key aliases with those created in the previous tasks. | See "Changing Default Key Aliases". |
Tip
In a site environment, you must manage the keystores and across all of the instances in the site. A good practice would be to create them in the same directory or the same mount point, so they can be easily made available to new instances.
AM startup process checks a file, called boot.json,
that contains the settings AM requires to bootstrap[2]. Among these settings
are the path to a keystore file and the files containing the keystore and keys
passwords.
During the startup process, AM needs the following aliases
inside the keystore configured in the /path/to/openam/openam/boot.json
file:
- configstorepwd
An alias for the password of the AM configuration store. The alias is password-protected, with the password specified by default in the
/path/to/openam/openam/.keypassfile.To update the value of this alias, navigate to Deployment > Servers > Server Name > Directory Configuration and modify the configuration store bind password. Every time you change the bind alias, AM modifies the content of the key alias in the keystore file.
If you need to change the password manually or recreate the key alias, see "To Recreate the configstorepwd Password String Alias".
- dsameuserpwd
An alias for the password of a special user required at AM startup time. The alias is password-protected, with the password specified by default in the
/path/to/openam/openam/.keypassfile.The password string for
dsameuserpwdcannot be recreated in a new keystore.
Since the special
dsameuserpwd password string cannot be recreated and the
default JCEKS keystore contains several test keys which you should not
use in production environments, the recommended approach is to delete
any key in this keystore, leaving only the password string aliases
configstorepwd and dsameuserpwd.
The following procedure illustrates how to change AM's bootstrap keystore file while retaining the required keys:
Perform the steps in this procedure to duplicate the default keystore, and reconfigure bootstrap keystore:
Copy and rename the files specified under the
keystoresobject in the/path/to/openam/boot.jsonfile. For example:$ cp /path/to/openam/openam/.storepass /path/to/openam/openam/.bootstrap_storepass $ cp /path/to/openam/openam/.keypass /path/to/openam/openam/.bootstrap_keypass $ cp /path/to/openam/openam/keystore.jceks /path/to/openam/openam/bootstrap_keystore.jceks
Stop the container where AM runs, if it is not already stopped.
Edit the
/path/to/openam/boot.jsonfile and replace the keystore file paths with the ones you just created. For example:"keystores" : { "default" : { "keyStorePasswordFile" : "/path/to/openam/openam/.bootstrap_storepass", "keyPasswordFile" : "/path/to/openam/openam/.bootstrap_keypass", "keyStoreType" : "JCEKS", "keyStoreFile" : "/path/to/openam/openam/bootstrap_keystore.jceks" } }Delete any key in the newly created
/path/to/openam/openam/bootstrap_keystore.jcekskeystore, leaving only the password string aliasesconfigstorepwdanddsameuserpwd:List all the keys contained in the new keystore. For example:
$ keytool -list -keystore bootstrap_keystore.jceks -storetype JCEKS

Enter keystore password:

Keystore type: JCEKS
Keystore provider: SunJCE

Your keystore contains 10 entries

dsameuserpwd, 04-Feb-2019, SecretKeyEntry,
test, 03-Apr-2018, PrivateKeyEntry,
Certificate fingerprint (SHA1): 25:1C:58:E2:12:51:2F:7B:08:FD:D0:14:59:41:28:B0:21:10:27:70
configstorepwd, 04-Feb-2019, SecretKeyEntry,
....
Delete all the keys, leaving only the
SecretKeyEntrypassword string aliases. For example, the following command deletes thees384testkey:$ keytool -delete -alias es384test -keystore bootstrap_keystore.jceks -storetype JCEKS
List the keys in the new keystore. The output should resemble the following:
$ keytool -list -keystore bootstrap_keystore.jceks -storetype JCEKS
Keystore type: JCEKS
Keystore provider: SunJCE

Your keystore contains 2 entries

dsameuserpwd, 04-Feb-2019, SecretKeyEntry,
configstorepwd, 04-Feb-2019, SecretKeyEntry,
(Optional) To change the keystore's password, perform the following steps:
Use the keytool command to change the password:
$ keytool -storepasswd -storetype JCEKS -keystore bootstrap_keystore.jceks
Enter keystore password: Enter the password in the .bootstrap_storepass file.
New keystore password:
Re-enter new keystore password:
Replace the old password in the
.bootstrap_storepassfile with the new password:$ echo -n newpassword > .bootstrap_storepass
Important
Use echo -n to avoid inserting hidden trailing newline characters. Even if the keytool command is able to use the password in the file, AM may not boot if there are hidden trailing newline characters.
Ensure that the
.bootstrap_storepassfile has read-only permissions for its owner:$ chmod 400 .bootstrap_storepass
(Optional) To change the password strings' passwords, perform the following steps:
Replace the old password in the
.bootstrap_keypassfile with the new password:$ echo -n newpassword > .bootstrap_keypass
Important
Use echo -n to avoid inserting hidden trailing newline characters. Even if the keytool command is able to use the password in the file, AM may not boot if there are hidden trailing newline characters.
Ensure that the
.bootstrap_keypassfile has read-only permissions for its owner:$ chmod 400 .bootstrap_keypass
Use the keytool command to change the password of the
configstorepwdanddsameuserpwdpassword string aliases. For example:$ keytool -keypasswd -storetype JCEKS -keystore bootstrap_keystore.jceks -alias configstorepwd Enter keystore password: New key password for <configstorepwd> Enter the password in the .bootstrap_keypass file. Re-enter new key password for <configstorepwd>
Start the container where AM is installed.
Tip
Note that the bootstrap keystore does not need to be shared among the AM instances. However, consider sharing the keystore and the bootstrap configuration to make deploying new instances easier.
AM updates the content of the configstorepwd alias
when the bind password of the configuration store is modified. Perform
the steps in the following procedure only if you need to change the content of the
configstorepwd key alias manually:
Change directories to the keystore location, for example
/path/to/openam/openam.Back up the keystore file specified in the
/path/to/openam/boot.jsonfile.Delete the
configstorepwdalias using the keytool command:$ keytool -delete -storetype JCEKS -keystore bootstrap_keystore.jceks -alias configstorepwd Enter the keystore password: Enter the password in the .bootstrap_storepass file.
Use the keytool command to create the new
configstorepwdalias in the keystore:$ keytool -importpassword -storetype JCEKS -keystore bootstrap_keystore.jceks -alias configstorepwd Enter keystore password: Enter the password in the .bootstrap_storepass file. Enter the password to be stored: See NOTE below. Re-enter password: Enter key password for <configstorepwd> (RETURN if same as keystore password): Enter the password in the .bootstrap_keypass file. Re-enter new password:
Note
The password to specify in the
configstorepwdalias is the password that is configured in Deployment > Servers > Server Name > Directory Configuration as the configuration store binding. That means you need to store the DScn=Directory Serveruser's password:If the AM installation uses the embedded DS instance as the configuration store, the password to specify in the
configstorepwdalias is the password of theamAdminuser. For more information, see "To Change the amadmin User's Password: Embedded Configuration Store".If the AM installation uses an external configuration store, refer to the configuration store administrator for the password.
Whether you need to create new key aliases because you are using more AM features or because you are installing a new environment, consider the following points:
Do not use the bootstrap keystore to store key aliases for AM features.
For more information, see "Configuring the Bootstrap Keystore".
Review the list of features in AM to understand which features use AM's keystore and which ones do not, then manage your aliases accordingly. You should avoid sharing certificates among features when possible, which may result in configuring different keystores.
For more information, see "Features in AM That Use Key Aliases".
Make sure keystores, key aliases, and certificates are maintained on every instance; in a site environment, every instance has its own keystore files.
The following table contains a list of the tasks you may need to perform when managing key aliases in your environment:
| Task | Steps |
|---|---|
| Create new key alias in an existing keystore or in a new keystore | See "Creating Key Aliases" |
| Copy key aliases between keystores; for example, when configuring IDM's provisioning. | See "Copying Key Aliases" |
| Change key alias passwords. | See "Changing Key Alias Passwords" |
| Change keystore passwords. | See "Changing Keystore Passwords". |
Several AM features require key aliases for signing and encryption. New AM installations pre-configure default key aliases for all of the features, but you should create new key aliases for each of them.
You can create key aliases in a new keystore that, for example, will be configured later as the AM keystore, or you can create key aliases in the existing AM keystore:
Note
To create and change user self-service key aliases, see "Changing User Self-Service Key Aliases".
This procedure assumes the AM bootstrap keystore and the AM keystore are not the same. You should not create key aliases for AM features in the bootstrap keystore. For more information, see "To Reconfigure the Bootstrap Keystore".
Perform the following steps to create key aliases in a new keystore, for example, when creating the new AM keystore:
Change directories to the keystore location, for example
/path/to/openam/openam.Create two files, each containing only the password in cleartext. For example:
.am_keystore_storepasscontains the cleartext keystore password.$ echo -n newstorepassword > .am_keystore_storepass
.am_keystore_keypasscontains the cleartext password for the key aliases that reside in the keystore.$ echo -n newkeypassword > .am_keystore_keypass
Important
Use echo -n to avoid inserting hidden trailing newline characters. Even if the keytool command is able to use the password in the file, AM may not be able to open the keystore or the key aliases.
Make sure the password files have read-only permission for their owner. For example:
$ chmod 400 .am_keystore_storepass
$ chmod 400 .am_keystore_keypass
Acquire a new key from your certificate authority and add it to a new keystore, or generate a new self-signed key in a new keystore.
This example creates a self-signed key alias in a new keystore file,
am_keystore.jceks, with a new asymmetric RSA key alias,newkey. For an example of how to create ECDSA keys, see "Configuring Elliptic Curve Digital Signature Algorithms" in the Authentication and Single Sign-On Guide.$ cd /path/to/openam/openam $ keytool \ -genkeypair \ -alias newkey \ -keyalg RSA \ -keysize 2048 \ -validity 730 \ -storetype JCEKS \ -keystore am_keystore.jceks Enter keystore password: Enter the password in the .am_keystore_storepass file. Reenter new password: Enter the password in the .am_keystore_storepass file. What is your first and last name? [Unknown]: openam.example.com What is the name of your organizational unit? [Unknown]: Eng What is the name of your organization? [Unknown]: ForgeRock.com What is the name of your City or Locality? [Unknown]: Grenoble What is the name of your State or Province? [Unknown]: Isere What is the two-letter country code for this unit? [Unknown]: FR Is CN=openam.example.com, OU=Eng, O=ForgeRock.com, L=Grenoble, ST=Isere, C=FR correct? [no]: yes Enter key password for <newkey> (RETURN if same as keystore password): Enter the password in the .am_keystore_keypass file. Reenter new password: Enter the password in the .am_keystore_keypass file.
(Optional) If needed, share new self-signed key aliases as described in "To Share Self-Signed Certificates" in the Installation Guide. Note that self-signed keys are not automatically recognized by other entities.
Create any other keys and keystores required by your environment by repeating the steps in this procedure and/or following the steps in "To Create Key Aliases In an Existing Keystore".
Ensure that password files and keystores are maintained on every instance in your environment. Every AM instance has its own keystores and password files.
Configure the new keystore in AM:
To configure it as the new AM keystore, see "Configuring AM's Keystore".
To configure it as a keystore for any other feature, see "Features in AM That Use Key Aliases".
Perform the following steps to create new key aliases in an existing keystore, for example, the AM keystore:
Change directories to the keystore location, for example,
/path/to/openam/openam.Back up the existing keystore files, for example,
/path/to/openam/openam/am_keystore.jceks,/path/to/openam/openam/.am_keystore_storepass, and/path/to/openam/openam/.am_keystore_keypass.Acquire a new key from your certificate authority, or generate a new self-signed key.
When you create or import a new key, the keytool command adds the new alias to the specified keystore if it exists, or creates a new keystore if it does not exist.
This example creates a self-signed key alias in AM's keystore,
am_keystore.jceks, with a new asymmetric RSA key alias calledsaml2key. For an example of how to create ECDSA key aliases, see "Configuring Elliptic Curve Digital Signature Algorithms" in the Authentication and Single Sign-On Guide.$ cd /path/to/openam/openam $ keytool \ -genkeypair \ -alias saml2key \ -keyalg RSA \ -keysize 2048 \ -validity 730 \ -storetype JCEKS \ -keystore am_keystore.jceks Enter keystore password: Enter the password in the .am_keystore_storepass file. What is your first and last name? [Unknown]: openam.example.com What is the name of your organizational unit? [Unknown]: Eng What is the name of your organization? [Unknown]: ForgeRock.com What is the name of your City or Locality? [Unknown]: Grenoble What is the name of your State or Province? [Unknown]: Isere What is the two-letter country code for this unit? [Unknown]: FR Is CN=openam.example.com, OU=Eng, O=ForgeRock.com, L=Grenoble, ST=Isere, C=FR correct? [no]: yes Enter key password for <saml2key> (RETURN if same as keystore password): Enter the password in the .am_keystore_keypass file. Reenter new password: Enter the password in the .am_keystore_keypass file.
(Optional) If needed, share new self-signed key aliases as described in "To Share Self-Signed Certificates" in the Installation Guide. Note that self-signed keys are not automatically recognized by other entities.
Ensure that password files and keystores are maintained on every instance in your environment. Every AM instance has its own keystores and password files.
Restart the AM instances affected by the configuration changes to use the new key aliases.
Configure the new key aliases in AM. For a list of features that use key aliases and links to their relevant sections, see "Features in AM That Use Key Aliases".
AM requires a JCEKS keystore to configure user self-service features. The JCEKS keystore deployed with AM has two keys already configured (one for signing, one for encrypting) that can be used for testing or evaluation purposes. You should replace these keys in your production environment.
User self-service requires a key pair for encryption and a signing secret
key to be available before configuring any of its features. AM provides
the demo selfserviceenctest key alias
for encrypting, and the demo selfservicesigntest
secret key alias for signing.
Follow the steps in this procedure to create new key aliases for the user self-service features in the AM keystore:
Back up the keystore file. For example, make a copy of the
/path/to/openam/openam/am_keystore.jceksfile.Acquire a new key from your certificate authority, or generate new self-signed keys. The password of the new keys for the user self-service features must match the passwords of those keys already present in the keystore, and configured in the
/path/to/openam/openam/.am_keystore_keypassfile.This example generates a self-signed key for encryption and a new signing secret key in the
am_keystore.jcekskeystore, but you could also import CA-provided keys to the keystore.Create the new self-signed encryption key alias:
$ cd /path/to/openam/openam
$ keytool \
-genkeypair \
-alias newenckey \
-keyalg RSA \
-keysize 2048 \
-validity 730 \
-storetype JCEKS \
-keystore am_keystore.jceks
Enter keystore password: Enter the password in the .am_keystore_storepass file.
What is your first and last name?
[Unknown]:  openam.example.com
What is the name of your organizational unit?
[Unknown]:  Eng
What is the name of your organization?
[Unknown]:  ForgeRock.com
What is the name of your City or Locality?
[Unknown]:  Grenoble
What is the name of your State or Province?
[Unknown]:  Isere
What is the two-letter country code for this unit?
[Unknown]:  FR
Is CN=openam.example.com, OU=Eng, O=ForgeRock.com, L=Grenoble, ST=Isere,
C=FR correct?
[no]:  yes
Enter key password for <newenckey>
(RETURN if same as keystore password): Enter the password in the .am_keystore_keypass file.
Reenter new password: Enter the password in the .am_keystore_keypass file.
Create the new signing secret key alias:
$ cd /path/to/openam/openam
$ keytool \
-genseckey \
-alias newsigkey \
-keyalg HmacSHA256 \
-keysize 256 \
-storetype JCEKS \
-keystore am_keystore.jceks
Enter keystore password: Enter the password in the .am_keystore_storepass file.
Enter key password for <newsigkey>
(RETURN if same as keystore password): Enter the password in the .am_keystore_keypass file.
Reenter new password: Enter the password in the .am_keystore_keypass file.
Ensure that password files and keystores are maintained on every instance in your environment. Every AM instance has its own keystores and password files.
Restart the AM instances affected by the configuration changes.
Configure user self-service to use the new keys. For more information, see "Creating a User Self-Service Service Instance" in the User Self-Service Guide.
Some AM features require access to the key aliases used by other components of the ForgeRock Identity Platform. For example, the IDM Provisioning feature requires access to the key aliases IDM uses for signing and encrypting data.
This section covers copying key aliases from the keystore of a ForgeRock Identity Platform component to AM's default keystore.
Use the keytool command to export the key from the source component's keystore. Install the result in AM's keystore, by performing the following steps:
From the source keystore, export the required key into a temporary keystore that can be transported to AM by executing the following keytool command:
$ keytool -importkeystore -srcstoretype jceks -srcalias "myKeyAlias" \
-deststoretype jceks -destalias "myKeyAlias" \
-srckeystore "/path/to/openidm/security/keystore.jceks" \
-destkeystore "/path/to/openidm/security/temp_keystore.jceks" \
-srckeypass "changeit" \
-srcstorepass "changeit" \
-destkeypass "myT3mPK3yP4ssword" \
-deststorepass "myT3mPK3yP4ssword"
This command exports the
myKeyAliaskey alias, specified by thesrcaliasargument, to a temporary keystore file/path/to/openidm/security/temp_keystore.jceks. The store and key password is set tomyT3mPK3yP4ssword. You need to use the temporary passwords when importing to the AM instance.Move the temporary keystore file created in the previous step, in this example
temp_keystore.jceks, to the filesystem of the target AM server.On the target AM server, import the key alias into the AM keystore by executing the following keytool command:
$ keytool -importkeystore -srcstoretype jceks -srcalias "myKeyAlias" \
-deststoretype jceks -destalias "myKeyAlias" \
-srckeystore "/path/to/openam/openam/temp_keystore.jceks" \
-destkeystore "/path/to/openam/openam/am_keystore.jceks" \
-srckeypass "myT3mPK3yP4ssword" \
-srcstorepass "myT3mPK3yP4ssword" \
-destkeypass:file "/path/to/openam/openam/.am_keystore_keypass" \
-deststorepass:file "/path/to/openam/openam/.am_keystore_storepass"
This command imports the key alias from the temporary keystore file
/path/to/openam/openam/temp_keystore.jceksinto the AM keystore, and sets the key password to match the password used by the default AM keystore.(Optional) Repeat the previous steps to copy any additional key aliases from the source keystore to the destination keystore.
Restart the AM instance for the key change to take effect.
The AM instance will now be able to correctly encrypt, decrypt, sign or verify data and share it with the source ForgeRock Identity Platform component.
Decrypting a key alias in a keystore requires a password. This password is initially specified when you generate the key, or when you import the key into a keystore, but you might need to update the password at a later time.
This procedure assumes the AM bootstrap keystore and the AM keystore are not the same. For more information about changing the passwords of the strings contained in the bootstrap keystore, see "To Reconfigure the Bootstrap Keystore".
Change directories to the keystore location, for example,
/path/to/openam/openam.Back up the keystore files. For example, make a copy of the
/path/to/openam/openam/am_keystore.jceksand/path/to/openam/openam/.am_keystore_keypassfiles.Replace the old password in the
.am_keystore_keypassfile with the new one:$ echo -n newpassword > .am_keystore_keypass
Important
Use echo -n to avoid inserting hidden trailing newline characters. Even if the keytool command is able to use the password in the file, AM may not be able to use the key aliases if there are hidden trailing newline characters in the password file.
Make sure the
.am_keystore_keypassfile has read-only permissions for its owner:$ chmod 400 .am_keystore_keypass
List the keys and password strings contained in the keystore:
$ keytool -list -storetype JCEKS -keystore am_keystore.jceks>
Use the keytool command to change the password of each of the key aliases, for example:
$ keytool -keypasswd -storetype JCEKS -keystore am_keystore.jceks -alias test
Enter keystore password: Enter the password in the .am_keystore_storepass file
New key password for <test> Enter the password in the .am_keystore_keypass file
Re-enter new key password for <test> Enter the password in the .am_keystore_keypass file
Important
Most of the key aliases in the AM keystore must have the same password. You need to change the passwords of all the key aliases in the keystore file to match the content of the
.am_keystore_keypassfile. For more information about features that may not use this password file, see "Features in AM That Use Key Aliases".(Optional) If you also need to change the keystore password, see "To Change the Keystore Password".
(Optional) The name and path of the
.am_keystore_keypassfile is configured in the AM console for several features. If you have changed the name or the path to this file, you may need to adjust the configuration. For information about different configurations, see "Introducing Keystores".Ensure that password files and keystores are maintained on every instance in your environment. Every AM instance has its own keystores and password files.
Restart the AM instances affected by the configuration changes.
Decrypting and viewing the contents of a keystore requires a password. This password is specified by the user at the time the keystore is created, but you might need to update the password at a later time.
This procedure assumes the AM bootstrap keystore and the AM keystore are not the same. If you need to change the bootstrap keystore's password, see "To Reconfigure the Bootstrap Keystore".
Change directories to the keystore location, for example
/path/to/openam/openam.Back up the keystore and keystore password files. For example, make a copy of the
/path/to/openam/openam/am_keystore.jceksand/path/to/openam/openam/.am_keystore_storepassfiles.Use the keytool command to change the password:
$ keytool -storepasswd -storetype JCEKS -keystore am_keystore.jceks
Enter keystore password:Enter the password in the .am_keystore_storepass file.
New keystore password:Enter the new password.
Re-enter new keystore password:
Replace the old password in the
.am_keystore_storepassfile with the new one:$ echo -n newpassword > .am_keystore_storepass
Important
Use echo -n to store the keystore's password to avoid inserting hidden trailing newline characters. Even if the keytool command is able to use the password in the file, AM may not be able to open the keystore if there are hidden trailing newline characters in the password file.
Ensure the
.am_keystore_storepassfile has read-only permissions for its owner:$ chmod 400 .am_keystore_storepass
(Optional) If you also need to change the key aliases' password, see "To Change Key Alias Passwords".
Ensure that password files and keystores are maintained on every instance in your environment. Each AM instance has its own keystores and password files.
Restart the AM instance or instances affected by the configuration changes.
By default, AM installations provide a JCEKS keystore containing several test-only key aliases that are preconfigured in AM.
For production deployments, you should generate your own key aliases and configure AM to use them.
When modifying the default keystore in your setup, consider the following points:
Different AM features support different keystore configurations, and some features do not use the default keystore to store their key aliases. For more information, see "Features in AM That Use Key Aliases".
Key aliases are not migrated from one keystore to another when changing the keystore configuration in AM. You must prepare the new keystore as required before configuring it. For more information about creating a new keystore and new keys, see the "Managing Key Aliases and Passwords".
You must restart AM if you make any changes to the keystore. Changes are, for example, adding or removing keys or changing key or keystore passwords.
To modify the AM default keystore configuration, perform the following steps:
Determine whether you want to configure the keystore for all of the instances or configure the keystore for a single instance:
To configure the keystore for all your instances, navigate to Configure > Server Defaults > Security > Key Store.
ForgeRock recommends that you configure the keystore globally, such that all of the instances in the site inherit the configuration [3].
To configure the keystore on a single instance, navigate to Deployment > Servers > Server Name > Security > Key Store.
Enter the keystore file name and path in the Keystore File field. For example,
/path/to/openam/openam/am_keystore.jceks.Set the Keystore Type to
JKSorJCEKS.In the Keystore Password File field, enter the location of the keystore password file. For example,
/path/to/openam/openam/.am_keystore_storepass.In the Private Key Password File field, enter the location of the private key password file. For example,
/path/to/openam/openam/.am_keystore_keypass.In the Certificate Alias field, enter the alias of the private key to sign SAML v1.x XML files. If you do not require SAML v1.x functionality, you can leave the default
testalias.Save your changes.
At this point, AM still holds the old keystore configuration in memory and cannot use key aliases contained in the new keystore.
Ensure that password files and keystores are maintained on every instance in your environment. Every AM instance has its own keystores and password files.
(Optional) If you need to change key aliases in the AM configuration, decide whether to change them before or after restarting the AM instances in the next step.
If you are using client-based sessions, ensure the signing key exists in the new keystore. You can check the configuration for client-based sessions by navigating to Realms > Realm Name > Authentication > Settings > Security.
To configure the rest of the features that need key aliases before or after the restart, see "Changing Default Key Aliases".
Restart the AM instance or instances affected by the configuration changes.
The new default keystore and its keys are ready to use.
For demo and test purposes, AM configures different demo key aliases for several features. You can keep the demo key aliases configured in those features you are not using, but you may decide to remove them completely from your production environment.
To replace the default key aliases:
Create the required key aliases following the procedures in "Creating Key Aliases".
Change default key aliases in AM:
- SAML v1.x
Navigate to Configure > Server Defaults > Security > Key Store and replace the
testkey alias in the Certificate Alias field.- Web Agents 5.x and Java Agents 5.x
Navigate to Configure > Global Services > OAuth2 Provider and replace the
testkey alias in the ID Token Signing Key Alias for Agent Clients field.- Persistent Cookie Module
Navigate to Realms > Realm Name > Authentication > Settings > Security and replace the
testkey alias in the Persistent Cookie Encryption Certificate Alias field.- OAuth2 Providers
Navigate to Configure > Global Services > OAuth2 Provider > Advanced, and replace:
The
testkey alias in the Token Signing RSA public/private key pair.The
ES512|es512test,ES384|es384test, andES256|es256key aliases in the Token Signing ECDSA public/private key pair alias field.
- OpenID Connect Providers
Navigate to Configure > Global Services > OAuth2 Provider > OpenID Connect and replace the
RSA1|test,RSA-OAEP|test, andRSA-OAEP-256|testkey aliases in the Token Encryption RSA public/private key pair alias field.- SAML v2.0 Service Configuration
Navigate to Configure > Global Services > SAML v2.0 Service Configuration > Realm Defaults and replace the
testkey alias in the Metadata signing key alias field.- Client-Based Sessions
Navigate to Configure > Global Services > Session > Client-based Sessions and replace the
testkey alias in the Signing RSA/ECDSA Certificate Alias field and in the Encryption RSA Certificate Alias field.- User Self-Service
Replace the user self-service key aliases following the procedure in "Changing User Self-Service Key Aliases".
Note
When possible, the preceding list includes the Global Services or Server Default paths where the demo key aliases are configured. If you already have configured any of the features in a realm, ensure that the key alias is replaced in the realm configuration as well.
[2] For more information about the startup process and how you can configure it, see "Starting Servers" in the Installation Guide.
[3] For more information about inherited properties, see "Configuring Servers" in the Reference
AM supports a comprehensive Audit Logging Service that captures key auditing events, critical for system security, troubleshooting, and regulatory compliance.
Audit logs gather operational information about events occurring within an AM deployment to track processes and security data, such as authentication mechanisms, system access, user and administrator activity, error messages, and configuration changes.
This chapter describes the common REST-based Audit Logging Service available in AM 6. AM 6 also supports a legacy Logging Service, based on a Java SDK. The legacy Logging Service will be deprecated in a future release of AM.
The Audit Logging Service uses a structured message format that adheres to a consistent log structure common across the ForgeRock Identity Platform. This common structure allows correlation between log messages of the different components of the Platform once the transaction IDs are trusted by enabling the ForgerRock trust transaction header system property.
For more information, see Configuring the Trust Transaction Header System Property.
Important
The DS JSON logger is enabled by default. However, the
ForgeRock transaction IDs are not trusted initially. You must set
trust-transaction-ids:true to correlate log messages in
DS with log messages in AM.
For more information, see
To Enable LDAP JSON Access Logs
in the ForgeRock Directory Services Administration Guide.
AM writes log messages generated from audit events triggered by its instances, web or Java agents, the ssoadm tool, and connected ForgeRock Identity Platform implementations.
AM's Audit Logging Service provides a versatile and rich feature set as follows:
Global and Realm-Based Log Configuration. You can configure audit logging globally, which ensures that all realms inherit your global log settings. You can also configure audit logging by realm, which allows you to set different log settings for each realm.
Audit Event Handlers. The Audit Logging Service supports a variety of audit event handlers that allow you to write logs to different types of data stores. See "Configuring Audit Event Handlers" for a list of event handlers available in AM 6.
Audit Event Buffering. By default, AM writes each log message separately as they are generated. AM supports message buffering, a type of batch processing, that stores log messages in memory and flushes the buffer after a preconfigured time interval or after a certain number of log messages reaches the configured threshold value.
Tamper-Evident Logging. You can digitally sign your audit logs to ensure no unauthorized tampering of your logs has taken place. To configure this feature, you must deploy a preconfigured logger certificate and store it at
/path/to/openam/openam/Logger.jks.Log Rotation and Retention Policies. AM rotates JSON and CSV audit logs when it reaches a specified maximum size. You can also configure a time-based rotation policy, which disables the max-size rotation policy and implements log rotation based on a preconfigured time sequence. AM also provides the option to disable log rotation completely for these file types. AM does not support external log rotation for JSON and CSV audit logs.
For Syslog, JDBC, ElasticSearch, JMS, and Splunk handlers, AM does not control log rotation and retention as they are handled by each respective service.
Blacklisting Sensitive Fields. The Audit Logging Service supports blacklisting, a type of filtering to hide sensitive values or fields, such as HTTP headers, query parameters, cookies, or the entire field value.
Reverse DNS Lookup. The Audit Logging Service supports a reverse DNS lookup feature for network troubleshooting purposes. Reverse DNS lookup is disabled by default as it enacts a performance hit in operation throughput.
AM integrates log messages based on four different audit topics. A topic is a category of audit log event that has an associated one-to-one mapping to a schema type. Topics can be broadly categorized as access details, system activity, authentication operations, and configuration changes. The following table shows the basic event topics and associated audit log files for AM's default audit logging configuration, which uses a JSON audit event handler:
| Event Topic | File Name | Description |
|---|---|---|
| Access | access.audit.json |
Captures who, what, when, and output for every access request. |
| Activity | activity.audit.json |
Captures state changes to objects that have been created, updated, or deleted by end users (that is, non-administrators). For this release, only session changes are captured in the logs. Future releases may also record changes to user trusted devices, UMA policies, OAuth 2.0 tokens and others. |
| Authentication |
authentication.audit.json
|
Captures when and how a subject is authenticated and related events. |
| Configuration | config.audit.json |
Captures configuration changes to the product with a timestamp and
by whom. Note that the |
Web and Java agents log audit events for security, troubleshooting, and regulatory compliance. You can store web or Java agent audit event logs in the following ways:
Remotely. Log audit events to the audit event handler configured in the AM realm.
Locally. Log audit events to a file in the web or Java agent installation directory.
For more information about audit logs in agents, see the ForgeRock Access Management Web Agents User Guide and the ForgeRock Access Management Java Agents User Guide.
When implementing the Audit Logging Service, decide whether you require specific audit systems per realm, or if a global configuration suits your deployment. Next, determine which event handlers suit your needs from those supported by AM. See the following sections for more information:
To configure the Audit Logging Service, see "Configuring Audit Logging".
To configure the audit event handlers, see "Configuring Audit Event Handlers".
To configure the propagation of the transaction ID across the ForgeRock Identity Platform, see "Configuring the Trust Transaction Header System Property".
AM 6 also supports the classic Logging Service, based on Java SDK, that will be deprecated in a future release. For more information, see "Implementing the Classic Logging Service".
AM's default audit event handler is the JSON audit event handler, which comes configured and enabled for the global Audit Logging Service. The global configuration is used to control audit logging in realms that do not have the Audit Logging Service added to them. AM also supports configuring an Audit Logging Service on a per-realm basis.
The JSON audit event handler stores its JSON log files under
/path/to/openam/openam/log.
To modify the global audit logging configuration, see "To Configure Global Audit Logging".
To override the global audit logging configuration for a realm, see "To Configure Audit Logging in a Realm".
Log in to the AM console as an administrator, for example
amadmin.Navigate to Configure > Global Services > Audit Logging.
Configure the following options on the Global Attributes tab:
Activate Audit logging to start the audit logging feature.
In the Field exclusion policies list, enter any values to exclude from your audit events, or change the default exclusions for items that need to be included. To specify a field or value within a field to be filtered out of the event, start the pointer with the event topic (access, activity, authentication, or configuration) followed by the field name or the path to the value in the field.
This feature allows two types of filtering:
Filter fields from the event. You may not be interested in capturing HTTP headers, query parameters, or potentially sensitive data like passwords in the access logs. For example, to filter out the
useridfield in an access event, specify the pointer as:/access/userid
Filter specific values from within fields that store key-value pairs as JSON, such as the HTTP headers, query parameters, and cookies. For example, to filter out the content type value in the
http.request.headersfield, specify the pointer as:/access/http/request/headers/content-type
Save your changes.
On the Secondary Configurations tab, you can edit the configuration of the Global JSON Handler, or you can create new audit event handlers. For more information, see "Configuring Audit Event Handlers".
Restart AM.
You can configure the Audit Logging Service for realms, allowing you to configure realm-specific log locations and handler types.
When the Audit Logging Service is added to a realm, it inherits the configuration defined under Configure > Global Services > Audit Logging > Realm Defaults. Properties configured explicitly in the realm-level service override the realm defaults.
To configure the Audit Logging Service in a realm, perform the following steps:
Navigate to Realms > Realm Name > Services.
Select Add a Service.
From the Choose a service type drop-down list, select Audit Logging.
Select Create.
The Audit Logging Service page appears. Configure the Audit Logging Service as follows:
Ensure audit logging is Enabled.
In the Field exclusion policies list, enter any values to exclude from your audit events, or delete the ones by default that you do not need. To specify a field or value within a field to be filtered out of the event, start the pointer with the event topic (access, activity, authentication, or configuration) followed by the field name or the path to the value in the field.
This feature allows two types of filtering:
Filter fields from the event. You may not be interested in capturing HTTP headers, query parameters, or potentially sensitive data like passwords in the access logs. For example, to filter out the
useridfield in an access event, specify the pointer as:/access/userid
Filter specific values from within fields that store key-value pairs as JSON. For example, the HTTP headers, query parameters, and cookies. For example, to filter out the content type value in the
http.request.headersfield, specify the pointer as:/access/http/request/headers/content-type
Save your changes.
On the Secondary Configurations tab, select Add a Secondary Configuration. Choose an event handler from the list.
For more information about supported event handlers and how to configure then, see "Configuring Audit Event Handlers".
AM supports the following types of audit event handlers:
| Audit Event Handler Type | Publishes to | How to Configure |
|---|---|---|
| JSON | JSON files | "Configuring JSON Audit Event Handlers" |
| CSV | CSV files | "Configuring CSV Audit Event Handlers" |
| Syslog | The syslog daemon | "Configuring Syslog Audit Event Handlers" |
| JDBC | A relational database | "Implementing JDBC Audit Event Handlers" |
| Elasticsearch | An Elasticsearch store | "Implementing Elasticsearch Audit Event Handlers" |
| JMS | JMS topics | "Implementing JMS Audit Event Handlers" |
| Splunk | A Splunk server | "Implementing Splunk Audit Event Handlers" |
This section provides procedures for configuring each type of audit handler.
The following procedure describes how to configure a JSON audit event handler:
Log in to the AM console as an administrator, for example
amadmin.Determine whether to create the event handler in a realm or use the default global event handler, then take one of the following actions:
To create the event handler in the global configuration, navigate to to Configure > Global Services > Audit Logging.
Note that the JSON audit event handler is already configured in the global configuration. Select it to change its properties.
To create the event handler in a realm, navigate to Realms > Realm Name > Services > Audit Logging.
On the Secondary Configurations tab, click Global JSON Handler or the Edit icon on the right if present. If no handler is present, click Add a Secondary Configuration, and select JSON.
Under the New JSON configuration page, enter a name for the event handler. For example,
JSON Audit Event Handler.(Optional) In the Rotation Times field, enter a time duration after midnight to trigger file rotation, in seconds. For example, you can provide a value of
3600to trigger rotation at 1:00 AM. Negative durations are not supported.Click Create.
After the JSON audit event handler is created, several configuration tabs appear. To configure the event handler, perform the following steps:
On the General Handler Configuration tab, enable the event handler and configure the topics for your audit logs:
Select Enabled to activate the event handler, if disabled.
Choose the topics for your audit logs. For a description of each topic, see "Audit Log Topics".
Click Save Changes.
On the JSON Configuration tab, configure JSON options:
Override the default location of your logs if necessary, and save your changes. The default value is
%BASE_DIR%/%SERVER_URI%/log/.Important
Make sure to configure a different log directory for each JSON audit event handler instance. If two instances are writing to the same file, it can interfere with log rotation and tamper-evident logs.
Select ElasticSearch JSON Format Compatible to direct AM to generate JSON formats that are compatible with the ElasticSearch format.
In the File Rotation Retention Check Interval field, edit the time interval (seconds) to check the time-base file rotation policies.
Click Save Changes.
On the File Rotation tab, configure how files are rotated when they reach a specified file size or time interval:
Select Rotation Enabled to activate file rotation. If file rotation is disabled, AM ignores log rotation and appends to the same file.
In the Maximum File Size field, enter the maximum size of an audit file before rotation.
(Optional). In the File Rotation Prefix field, enter an arbitrary string that will be prefixed to every audit log to identify it. This parameter is used when time-based or size-based rotation is enabled.
In the File Rotation Suffix field, enter a timestamp suffix based on the Java SimpleDateFormat that will be added to every audit log. This parameter is used when time-based or size-based log rotation is enabled. The default value is
-yyyy.MM.dd-kk.mm.ss.In the Rotation Interval field, enter a time interval to trigger audit log file rotation in seconds. A negative or zero value disables this feature.
(Optional) In the Rotation Times field, enter a time duration after midnight to trigger file rotation, in seconds. For example, you can provide a value of
3600to trigger rotation at 1:00 AM. Negative durations are not supported.Click Save Changes.
On the File Retention tab, configure how long log files should be retained in your system:
In the Maximum Number of Historical Files field, enter a number for allowed backup audit files. A value of
-1indicates an unlimited number of files and disables the pruning of old history files.In the Maximum Disk Space field, enter the maximum amount of disk space that the audit files can use. A negative or zero value indicates that this policy is disabled.
In the Minimum Free Space Required field, enter the minimum amount of disk space required to store audit files. A negative or zero value indicates that this policy is disabled.
Click Save Changes.
On the Buffering tab, configure whether log events should be buffered in memory before they are written to the JSON file:
In the Batch Size field, enter the maximum number of audit log events that can be buffered.
In the Write interval field, enter the time interval in milliseconds at which buffered events are written to a file.
Click Save Changes.
The following procedure describes how to configure a comma-separated values (CSV) audit event handler:
Log in to the AM console as an administrator, for example
amadmin.Determine whether to create the event handler in a realm or use the default global event handler, then take one of the following actions:
To create the event handler in the global configuration, navigate to to Configure > Global Services > Audit Logging.
Note that the CSV audit event handler is already configured in the global configuration. Select it to change its properties.
To create the event handler in a realm, navigate to Realms > Realm Name > Services > Audit Logging.
On the Secondary Configurations tab, select Add a Secondary Configuration. Choose CVS from the list.
The New CVS page appears. Enter the basic configuration for the new handler by performing the following actions:
Enter a name for the event handler. For example,
CSV Audit Event Handler.(Optional) In the Rotation Times field, enter a time duration after midnight to trigger file rotation, in seconds. For example, you can provide a value of
3600to trigger rotation at 1:00 AM. Negative durations are not supported.Enable or disable the Buffering option.
Select Create.
After the CSV audit event handler is created, several configuration tabs appear. To configure the event handler, perform the following steps:
On the General Handler Configuration tab, enable the event handler and configure the topics for your audit logs:
Select Enabled to activate the event handler, if disabled.
Choose the topics for your audit logs. For a description of each topic, see "Audit Log Topics".
Save your changes.
On the CSV Configuration tab, override the default location of your logs if necessary, and save your changes. The default value is
%BASE_DIR%/%SERVER_URI%/log/.Important
Configure a different log directory for each CVS audit event handler instance. If two instances are writing to the same file, it can interfere with log rotation and tamper-evident logs.
On the File Rotation tab, configure how files are rotated when they reach a specified file size or time interval:
Select Rotation Enabled to activate file rotation. If file rotation is disabled, AM ignores log rotation and appends to the same file.
In the Maximum File Size field, enter the maximum size of an audit file before rotation.
(Optional). In the File Rotation Prefix field, enter an arbitrary string that will be prefixed to every audit log to identify it. This parameter is used when time-based or size-based rotation is enabled.
In the File Rotation Suffix field, enter a timestamp suffix based on the Java SimpleDateFormat that will be added to every audit log. This parameter is used when time-based or size-based log rotation is enabled. The default value is
-yyyy.MM.dd-kk.mm.ss.In the Rotation Interval field, enter a time interval to trigger audit log file rotation in seconds. A negative or zero value disables this feature.
(Optional) In the Rotation Times field, enter a time duration after midnight to trigger file rotation, in seconds. For example, you can provide a value of
3600to trigger rotation at 1:00 AM. Negative durations are not supported.Save your changes.
On the File Retention tab, configure how long log files should be retained in your system:
In the Maximum Number of Historical Files field, enter a number for allowed backup audit files. A value of
-1indicates an unlimited number of files and disables the pruning of old history files.In the Maximum Disk Space field, enter the maximum amount of disk space that the audit files can use. A negative or zero value indicates that this policy is disabled.
In the Minimum Free Space Required field, enter the minimum amount of disk space required to store audit files. A negative or zero value indicates that this policy is disabled.
Save your changes.
On the Buffering tab, configure whether log events should be buffered in memory before they are written to the CSV file:
Select Buffering Enabled to activate buffering.
When buffering is enabled, all audit events are put into an in-memory buffer (one per handled topic), so that the original thread that generated the event can fulfill the requested operation, rather than wait for I/O to complete. A dedicated thread (one per handled topic) constantly pulls events from the buffer in batches and writes them to the CSV file. If the buffer becomes empty, the dedicated thread goes to sleep until a new item gets added. The default buffer size is
5000bytes.Enable Flush Each Event Immediately to write all buffered events before flushing.
When the dedicated thread accesses the buffer, it copies the contents to an array to reduce contention, and then iterates through the array to write to the CSV file. The bytes written to the file can be buffered again in Java classes and the underlying operating system.
When Flush Each Event Immediately is enabled, AM flushes the bytes after each event is written. If the feature is disabled (default), the Java classes and underlying operation system determine when to flush the bytes.
Save your changes.
On the Tamper Evident Configuration tab, configure whether to detect audit log tampering:
Select Is Enabled to activate the tamper evident feature for CSV logs.
When tamper evident logging is enabled, AM generates an HMAC digest for each audit log event and inserts it into each audit log entry. The digest detects any addition or modification to an entry.
AM also supports another level of tamper evident security by periodically adding a signature entry to a new line in each CSV file. The entry signs the preceding block of events, so that verification can establish if any of these blocks have been added, removed, or edited by some user.
In the Certificate Store Location field, enter the location of the
Logger.jkskeystore, by default%BASE_DIR%/%SERVER_URI%/Logger.jks. You must manually create the keystore and place it in this location. You can use a simple script to create your Java keystore: create-keystore.sh.In the Certificate Store Password field, enter the password of the keystore.
In the Signature Interval field, enter a value in seconds for AM to generate and add a new signature to the audit log entry.
Save your changes.
AM can publish audit events to a syslog server, which is based on a widely-used logging protocol. You can configure your syslog settings on the AM console.
The following procedure describes how to configure a Syslog audit event handler:
Log in to the AM console as an administrator, for example
amadmin.Determine whether to create the event handler in a realm or use the default global event handler, then take one of the following actions:
To create the event handler in the global configuration, navigate to to Configure > Global Services > Audit Logging.
To create the event handler in a realm, navigate to Realms > Realm Name > Services > Audit Logging.
On the Secondary Configurations tab, select Add a Secondary Configuration. Choose Syslog from the list.
The New Syslog page appears. Enter the basic configuration for the new handler by performing the following actions:
Enter a name for the event handler. For example,
Syslog Audit Event Handler.In the Server hostname field, enter the hostname or IP address of the receiving syslog server.
In the Server port field, enter the port of the receiving syslog server.
In the Connection timeout field, enter the number of seconds to connect to the syslog server. If the server has not responded in the specified time, a connection timeout occurs.
Enable or disable the Buffering option.
Select Create.
After the syslog audit event handler is created, several configuration tabs appear. To configure the event handler, perform the following steps:
On the General Handler Configuration tab, enable the event handler and configure the topics for your audit logs:
Select Enabled to activate the event handler, if disabled.
Choose the topics for your audit logs. For a description of each topic, see "Audit Log Topics".
Save your changes.
On the Audit Event Handler Factory tab, keep the default class name for the audit event handler.
On the Syslog Configuration tab, configure the main syslog event handler properties:
In the Server hostname field, enter the hostname or IP address of the receiving syslog server.
In the Server port field, enter the port of the receiving syslog server.
In the Connection timeout field, enter the number of seconds to connect to the syslog server. If the server has not responded in the specified time, a connection timeout occurs.
From the Transport Protocol drop-down list, select TCP or UDP.
Choose the facility.
A syslog message includes a PRI field that is calculated from the facility and severity values. All topics set the severity to
INFORMATIONALbut you can choose the facility from the Facility drop-down list:Facility Description AUTH Security or authorization messages AUTHPRIV Security or authorization messages CLOCKD Clock daemon CRON Scheduling daemon DAEMON System daemons FTP FTP daemon KERN Kernel messages LOCAL0 Local use 0 (local0) LOCAL1 Local use 1 (local1) LOCAL2 Local use 2 (local2) LOCAL3 Local use 3 (local3) LOCAL4 Local use 4 (local4) LOCAL5 Local use 5 (local5) LOCAL6 Local use 6 (local6) LOCAL7 Local use 7 (local7) LOGALERT Log alert LOGAUDT Log audit LPR Line printer subsystem MAIL Mail system NEWS Network news subsystem NTP Network time protocol SYSLOG Internal messages generated by syslogd USER User-level messages UUCP Unix-to-unix-copy (UUCP) subsystem Save your changes.
On the Buffering tab, configure whether you want buffering or not:
Select Buffering Enabled to activate it.
When buffering is enabled, all audit events that get generated are formatted as syslog messages and put into a queue. A dedicated thread constantly pulls events from the queue in batches and transmits them to the syslog server. If the queue becomes empty, the dedicated thread goes to sleep until a new item gets added. The default queue size is 5000.
Save your changes.
You can configure AM to write audit logs to Oracle, MySQL, or other
databased. AM writes audit log records to the following tables:
am_auditaccess, am_auditactivity,
am_auditauthentication, and am_auditconfig.
For more information on the JDBC table formats for each of the logs, see
"JDBC Audit Log Tables".
Before configuring the JDBC audit event handler, you must perform several steps to allow AM to log to the database:
Create tables in the relational database in which you will write the audit logs. The SQL for Oracle and MySQL table creation is in the
audit.sqlfile under/path/to/tomcat/webapps/openam/WEB-INF/template/sql/db-type.If you are using a different relational database, tailor the Oracle or MySQL
audit.sqlfile to conform to your database's SQL syntax.JDBC audit logging requires a database user with read and write privileges for the audit tables. Do one of the following:
Identify an existing database user and grant that user privileges for the audit tables.
Create a new database user with read and write privileges for the audit tables.
Obtain the JDBC driver from your database vendor. Place the JDBC driver
.zipor.jarfile in the container'sWEB-INF/libclasspath. For example, place the JDBC driver in/path/to/tomcat/webapps/openam/WEB-INF/libif you use Apache Tomcat.
The following procedure describes how to configure a JDBC audit event handler. Perform the following steps after you have created audit log tables in your database and installed the JDBC driver in the AM web container:
Log in to the AM console as an administrator, for example
amadmin.Determine whether to create the event handler in a realm or use the default global event handler, then take one of the following actions:
To create the event handler in the global configuration, navigate to to Configure > Global Services > Audit Logging.
To create the event handler in a realm, navigate to Realms > Realm Name > Services > Audit Logging.
On the Secondary Configurations tab, select Add a Secondary Configuration. Choose JDBC from the list.
The New JDBC page appears. Enter the basic configuration for the new handler by performing the following actions:.
Enter a name for the event handler. For example,
JDBC Audit Event Handler.In the JDBC Database URL field, enter the URL for your database server. For example,
jdbc:oracle:thin@//host.example.com:1521/ORCL.In the JDBC Drive field, enter the classname of the driver to connect to the datbase. For example,
oracle.jdbc.driver.OracleDriverorcom.mysql.jdbc.Driver.In the Database Username field, enter the username to authenticate to the database server.
This user must have read and write privileges for the audit tables.
In the Database Password field, enter the password used to authenticate to the database server.
Enable or disable the Buffering option.
Select the Create button.
After the JDBC audit event handler is created, several configuration tabs appear. To configure the event handler, perform the following steps:
On the General Handler Configuration tab, enable the handler and configure the topics for your audit logs:
Select Enabled to activate the event handler, if disabled.
Select the topics for your audit logs. For a description of each topic, see "Audit Log Topics".
Save your changes.
On the Audit Event Handler Factory tab, enter the fully qualified class name of your custom JDBC audit event handler and save your changes.
On the Database Configuration tab, configure the main JDBC event handler properties:
From the Database Type drop-down list, select the audit database type. The default value is
oracle.In the JDBC Database URL field, enter the URL for your database server. For example,
jdbc:oracle:thin@//host.example.com:1521/ORCL.In the JDBC Drive field, enter the classname of the driver to connect to the database. For example,
oracle.jdbc.driver.OracleDriverorcom.mysql.jdbc.Driver.In the Database Username field, enter the username to authenticate to the database server.
This user must have read and write privileges for the audit tables.
In the Database Password field, enter the password used to authenticate to the database server.
In the Connection Timeout (seconds) field, enter the maximum wait time before failing the connection.
In the Maximum Connection Idle Timeout (seconds) field, enter the maximum idle time in seconds before the connection is closed.
In the Maximum Connection Time (seconds) field, enter the maximum time in seconds for a connection to stay open.
In the Minimum Idle Connections field, enter the minimum number of idle connections allowed in the connection pool.
In the Maximum Connections field, enter the maximum number of connections in the connection pools.
Save your changes.
On the Buffering tab, configure the buffering settings:
Select Buffering Enabled to start audit event buffering.
In the Buffer Size (number of events) field, set the size of the event buffer queue where events should queue up before being written to the database.
If the queue reaches full capacity, the process will block until a write occurs.
In the Write Interval field, set the interval in seconds in which buffered events are written to the database.
In the Writer Threads field, set the number of threads used to write the buffered events.
In the Max Batched Events field, set the maximun number of batched statements the database can support per connection.
Save your changes.
AM supports audit logging to Elasticsearch 5.0. When you store AM's audit logs in an Elasticsearch data store, you can use Kibana to perform data discovery and visualization on your logs.
You can experiment with an Elasticsearch audit handler without enabling any Elasticsearch security features. However, for a more secure deployment, ForgeRock recommends that you use Elasticsearch Shield to require authentication to Elasticshield. Depending on your network topology, you might also want to configure SSL for Elasticsearch Shield.
Before configuring the Elasticsearch audit event handler, you must configure an Elasticsearch index with AM's audit schema:
Perform the following steps to prepare an Elasticsearch instance for storing AM audit events.
Note
These steps apply to Elasticsearch 5.0 only. Breaking changes in Elasticsearch 6.0 make it incompatible with the schemas provided in this version of AM.
For more information, see Breaking Changes in 6.0 in the Elasticsearch Reference Docs.
Review the JSON file containing AM's audit schema. You can find the JSON file for the audit schema at the path
/path/to/tomcat/webapps/openam/WEB-INF/template/elasticsearch/audit.json.Copy the
audit.jsonfile to the system where you will create the Elasticsearch index for AM auditing.In this example, you create an Elasticsearch index by executing an Elasticsearch REST API call using the curl command. Copy the
audit.jsonfile to a location that is accessible to the curl command you will run in the next step.Create an Elasticsearch index for AM auditing as follows:
$ curl \
 --request POST \
 --header "Content-Type: application/json" \
 --data @audit.json \
 http://elasticsearch.example.com:9200/my_openam_audit_index
In this example, note the following:
elasticsearch.example.comis the name of the host on which Elasticsearch runs.9200is the port number that you use to access Elasticsearch's REST API.my_openam_audit_indexis the name of the Elasticsearch index that you want to create.
Tip
For more information on connecting to Elasticsearch, see Talking to Elasticsearch in the Elasticsearch documentation.
The following procedure describes how to configure an Elasticsearch audit event handler. Perform the following steps after you have created an Elasticsearch index for AM audit logging:
If your Elasticsearch deployment uses Elasticsearch Shield configured for SSL, import the CA certificate used to sign Elasticsearch node certificates into the Java keystore on the host that runs AM. For example:
$ keytool \
 -import \
 -trustcacerts \
 -alias elasticsearch \
 -file /path/to/cacert.pem \
 -keystore $JAVA_HOME/jre/lib/security/cacerts
If you are running an AM site, import the CA certificate on all the servers in your site.
Log in to the AM console as an administrator, for example
amadmin.Determine whether to create the event handler in a realm or use the default global event handler, then take one of the following actions:
To create the event handler in the global configuration, navigate to to Configure > Global Services > Audit Logging.
To create the event handler in a realm, navigate to Realms > Realm Name > Services > Audit Logging.
On the Secondary Configurations tab, select Add a Secondary Configuration. Choose Elasticsearch from the list.
The New Elasticsearch page appears. Enter the basic configuration for the new handler by performing the following actions:
Enter a name for the event handler. For example,
Elasticsearch Audit Event Handler.In the Server Hostname field, enter the hostname or IP address of the Elasticsearch server to which AM should connect when writing audit events.
In the Server Port field, enter the port number to access Elasticsearch's REST API.
In the Elasticsearch Index field, specify the name of the index to be used for AM audit logging. The index you specify in this field must be identical to the index you created in "To Prepare for Elasticsearch Audit Logging".
Specify the name and password of an Elasticsearch user if you have configured Elasticsearch Shield for user authentication:
In the Username field, enter the username to authenticate into the Elascticsearch server.
In the Password field, enter the password of the user that authenticates into the Elasticsearch server.
Save your changes.
If you are not using Elasticsearch Shield for user authentication, you can leave these fields with their default values.
Enable or disable the Buffering option.
Select Create.
After the Elasticsearch audit event handler is created, several configuration tabs appear. To configure the event handler, perform the following steps:
On the General Handler Configuration tab, enable the handler and configure the topics for your audit logs:
Select Enabled to activate the event handler, if disabled.
Select the topics for your audit logs. For a description of each topic, see "Audit Log Topics".
Save your changes.
On the Audit Event Handler Factory, keep the default class name for the audit event handler.
On the Elasticsearch Configuration tab, configure the main Elasticsearch event handler properties:
In the Server Hostname field, enter the hostname or IP address of the Elasticsearch server to which AM should connect when writing audit events.
In the Server Port field, enter the port number to access Elasticsearch's REST API.
If SSL is enabled in your Elasticsearch deployment, select SSL Enabled.
In the Elasticsearch Index field, specify the name of the index to be used for AM audit logging. The index you specify in this field must be identical to the index you created in "To Prepare for Elasticsearch Audit Logging".
Save your changes.
On the Authentication tab, specify the name and password of an Elasticsearch user if you have configured Elasticsearch Shield for user authentication:
In the Username field, enter the username to authenticate into the Elascticsearch server.
In the Password field, enter the password of the user that authenticates into the Elasticsearch server.
Save your changes.
If you are not using Elasticsearch Shield for user authentication, you can leave these fields with their default values.
On the Buffering tab, configure whether log events should be buffered in memory before they are written to the Elasticsearch data store:
Activate Buffering Enabled to start buffering audit messages.
When buffering is enabled, all audit events are put into an in-memory buffer (one per handled topic), so that the original thread that generated the event can fulfill the requested operation, rather than wait for I/O to complete. A dedicated thread (one per handled topic) constantly pulls events from the buffer in batches and writes them to Elasticsearch. If the buffer becomes empty, the dedicated thread goes to sleep until a new item gets added.
In the Batch Size field, specify the number of audit events that AM pulls from the audit buffer when writing a batch of events to Elasticsearch.
In the Queue Capacity field, specify the maximum number of audit events that AM can queue in this audit handler's buffer.
If the number of events to queue exceeds the queue capacity, AM raises an exception and the excess audit events are dropped, and therefore not written to Elasticsearch.
In the Write interval (in millis) field, specify how often AM should write buffered events to Elasticsearch.
Save your changes.
AM supports audit logging to a JMS message broker. JMS is a Java API for sending messages between clients using a publish and subscribe model as follows:
AM audit logging to JMS requires that the JMS message broker supports using JNDI to locate a JMS connection factory. See your JMS message broker documentation to verify that you can make connections to your broker by using JNDI before attempting to implement an AM JMS audit handler.
AM acts as a JMS publisher client, publishing JMS messages containing audit events to a JMS topic. [4]
A JMS subscriber client, which is not part of the AM software and must be developed and deployed separately from AM, subscribes to the JMS topic to which AM publishes audit events. The client then receives the audit events over JMS and processes them as desired.
Before configuring the JMS audit event handler, you must perform several steps to allow AM to publish audit events as a JMS client:
Obtain JNDI connection properties that AM requires to connect to your JMS message broker. The specific connection properties vary depending on the broker. See your JMS message broker documentation for details.
For example, connecting to an Apache ActiveMQ message broker requires the following properties:
Property Name Example Value java.naming.factory.initialorg.apache.activemq.jndi.ActiveMQInitialContextFactoryjava.naming.provider.urltcp://localhost:61616topic.auditauditObtain the JNDI lookup name of the JMS connection factory for your JMS message broker.
For example, for Apache ActiveMQ, the JNDI lookup name is
ConnectionFactory.Obtain the JMS client
.jarfile from your JMS message broker vendor. Add the.jarfile to AM's classpath by placing it in theWEB-INF/libdirectory.For example, place the JMS client
.jarfile in/path/to/tomcat/webapps/openam/WEB-INF/libif you use Apache Tomcat.
The following procedure describes how to configure a JMS audit event handler.
If your JMS message broker requires an SSL connection, you might need to perform additional, broker-dependent configuration tasks. For example, you might need to import a broker certificate into AM's keystore, or provide additional JNDI context properties.
See your JMS message broker's documentation for specific requirements for making SSL connections to your broker, and implement them as needed in addition to the steps in the following procedure.
Perform the following steps after you have installed the JMS client
.jar file in the AM web container:
Log in to the AM console as an administrator, for example
amadmin.Determine whether to create the event handler in a realm or use the default global event handler, then take one of the following actions:
To create the event handler in the global configuration, navigate to to Configure > Global Services > Audit Logging.
To create the event handler in a realm, navigate to Realms > Realm Name > Services > Audit Logging.
On the Secondary Configurations tab, select Add a Secondary Configuration. Choose JMS from the list.
The New JMS page appears. Enter the basic configuration for the new handler by performing the following actions:
Enter a name for the event handler. For example,
JMS Audit Event Handler.Select Create.
After the JMS audit event handler is created, several configuration tabs appear. To configure the event handler, perform the following steps:
On the General Handler Configuration tab, enable the handler and configure the topics for your audit logs:
Select Enabled to activate the event handler, if disabled.
Select the topics for your audit logs. For a description of each topic, see "Audit Log Topics".
Save your changes.
On the Audit Event Handler Factory tab, keep the default class name for the audit event handler.
On the JMS Configuration tab, configure the main JMS event handler properties:
From the Delivery Mode drop-down list, specify the JMS delivery mode.
With persistent delivery, the JMS provider ensures that messages are not lost in transit in case of a provider failure by logging messages to storage when they are sent. Therefore, persistent delivery mode guarantees JMS message delivery, while non-persistent mode provides better performance.
The default delivery mode is
NON-PERSISTENTdelivery. Therefore, if your deployment requires delivery of every audit event to JMS subscriber clients, be sure to set the configuration toPERSISTENTdelivery.From the Session Mode drop-down list, leave the default setting,
AUTO, unless your JMS broker implementation requires otherwise. See your broker documentation for more information.Specify properties that AM will use to connect to your JMS message broker as key-value pairs in the JNDI Context Properties field.
AM is configured for the
auditJNDI lookup name and JMS topic, but you can modify or delete this configuration, or add new key-value pairs. To add new key-value pairs, fill the Key and Value fields and select the +add button.In the JMS Topic field, specify the name of the JMS topic to which AM will publish messages containing audit events.
Subscriber clients that process AM audit events must subscribe to this topic.
In the JMS Connection Factory Name, specify the JNDI lookup name of the JMS connection factory.
Save your changes.
On the Batch Events tab, configure whether log events should be batched before they are published to the JMS message broker:
Activate Batch Enabled to start batch publishing of audit events. Audit events will be queued and published to the JMS message broker in batches.
If batch publishing is not enabled, AM publishes audit events to the JMS message broker individually.
In the Capacity field, specify the maximum capacity of the publishing queue. Execution is blocked if the queue size reaches capacity.
In the Max Batched field, specify the maximum number of events to be delivered when AM publishes the events to the JMS message broker.
In the Thread Count field, specify the number of worker threads AM should use to process the batch queue.
Specify the batching timeout configuration as follows:
In the Insert Timeout field, specify the amount of time in seconds for queued events to be transmitted to the JMS message broker.
In the Polling Timeout field, specify the amount of time in seconds that worker threads wait for new audit events before becoming idle.
In the Shutdown Timeout field, specify the amount of time in seconds that worker threads wait for new audit events before shutting down.
Save your changes.
AM supports sending audit logging data to a Splunk HTTP event collector REST endpoint. This endpoint requires an authentication token created in Splunk and configured in the AM event handler.
Before configuring the Splunk audit event handler in AM, configure the endpoint in Splunk:
Perform the following steps in Splunk:
Create a source type to match AM audit logs. Consider the following configuration tips:
It must be a structured type.
It must not have indexed extractions.
It must have event breaks on every line.
Timestamp extraction must be automatic.
Create an HTTP event collector token that uses the source type you just created.
Obtain the HTTP event collector token value for the token you just created. For example,
AD565CB5-BB8A-40FD-8A7C-94F549CEDECF.This token, which allows AM to log data to Splunk, is required for the AM audit event handler configuration.
Obtain the HTTP event collector port. For example,
8088.Ensure that the HTTP event collector and its tokens are enabled.
The following procedure describes how to configure a Splunk audit event handler in AM. Perform the following steps after you have created a Splunk HTTP event collector token:
Log in to the AM console as an administrator, for example
amadmin.Determine whether to create the event handler in a realm or use the default global event handler, then take one of the following actions:
To create the event handler in the global configuration, navigate to to Configure > Global Services > Audit Logging.
To create the event handler in a realm, navigate to Realms > Realm Name > Services > Audit Logging.
On the Secondary Configurations tab, select Add a Secondary Configuration. Choose Splunk from the list.
The New Splunk configuration page appears. Enter the basic configuration for the new handler by performing the following actions:
Enter a name for the event handler. For example,
Splunk Audit Event Handler.In the Server Hostname field, enter the hostname or IP address of the Splunk HTTP event collector to which AM should connect when writing audit events.
In the Server Port field, enter the port number to access the Splunk HTTP event collector.
In the Authorization Token field, enter the authorization token for the Splunk HTTP event collector REST endpoint.
Select Create.
After the Splunk audit event handler is created, several configuration tabs appear. To configure the event handler, perform the following steps:
On the General Handler Configuration tab, enable the handler and configure the topics for your audit logs:
Select Enabled to activate the event handler, if disabled.
Select the topics for your audit logs. For a description of each topic, see "Audit Log Topics".
Save your changes.
On the Audit Event Handler Factory tab, keep the default class name for the audit event handler.
On the Splunk Configuration tab, configure the main Splunk event handler properties:
In the Server Hostname field, enter the hostname or IP address of the Splunk server to which AM should connect when writing audit events.
In the Server Port field, enter the port number to access the Splunk HTTP event collector REST endpoint.
If SSL is enabled and configured between AM and the Splunk server, select SSL Enabled.
In the Authorization Token field, enter the authorization token for the Splunk HTTP event collector REST endpoint.
Save your changes.
On the Buffering tab, configure options about how log events should be buffered in memory before they are written to the Splunk data store:
In the Batch Size field, specify the number of audit events that AM pulls from the audit buffer when writing a batch of events to Splunk.
When buffering is enabled, all audit events are put into an in-memory buffer (one per handled topic), so that the original thread that generated the event can fulfill the requested operation, rather than wait for I/O to complete. A dedicated thread (one per handled topic) constantly pulls events from the buffer in batches and writes them to Splunk. If the buffer becomes empty, the dedicated thread goes to sleep until a new item gets added.
In the Queue Capacity field, specify the maximum number of audit events that AM can queue in this audit handler's buffer.
If the number of events to queue exceeds the queue capacity, AM raises an exception and the excess audit events are dropped, and therefore not written to Splunk.
In the Write interval (in milliseconds) field, specify how often AM should write buffered events to Splunk.
Save your changes.
AM supports the propagation of the transaction ID across the ForgeRock
platform, such as from DS or IDM to AM,
using the HTTP header X-ForgeRock-TransactionId.
The X-ForgeRock-TransactionId header is automatically
set in all outgoing HTTP calls from one ForgeRock product to another.
Customers can also set this header themselves from their own applications
or scripts calling into the ForgeRock platform.
You can set a new property org.forgerock.http.TrustTransactionHeader
to true, which will trust any incoming
X-ForgeRock-TransactionId headers.
By default, the org.forgerock.http.TrustTransactionHeader
is set to false, so that a malicious actor cannot
flood the system with requests using the same transaction ID header to hide
their tracks.
Log in to the AM console.
Navigate to Configure > Server Defaults > Advanced.
In the Add a Name field, enter
org.forgerock.http.TrustTransactionHeader, and entertruein the corresponding Add a Value field.Save your changes.
Your AM instance will now accept incoming
X-ForgeRock-Transactionidheaders, which can then be tracked in the audit logs.Repeat this procedure for all servers requiring this property.
Note
AM 6 supports two Audit Logging Services: the classic Logging Service, which is based on a Java SDK and is available in AM versions prior to AM 6, and a common REST-based Audit Logging Service. The classic Logging Service is deprecated.
To configure AM logging properties, log in to the AM console as AM administrator, and navigate to Configure > Global Services > Logging.
For more information on the available settings, see "Audit Logging" reference.
Important
Any property changes made to the Classic Logging service require an AM restart.
By default, AM audit logs are written to files in the
configuration directory for the instance, such as
$HOME/openam/log/.
AM sends messages to different log files, each named after the
service logging the message, with two different types log files per service:
.access
and.error. Thus, the
current log files for the authentication service are named
amAuthentication.access
and
amAuthentication.error.
For details, see "Log Files and Messages" in the Reference.
AM supports sending audit log messages to a syslog server for collation.
You can enable syslog audit logging by using the AM console,
or the ssoadm command.
Log in to the AM console as AM administrator, for example
amadmin.Navigate to Configure > Global Services > Logging.
On the Syslog tab, configure the following settings as appropriate for your syslog server, and save your changes:
Syslog server hostSyslog server portSyslog server protocolSyslog facilitySyslog connection timeout
For information on these settings, see "Logging" in the Reference.
On the General tab, set the Logging Type drop-down list to
Syslog, and save your changes.
Create a text file, for example,
MySyslogServerSettings.txtcontaining the settings used when audit logging to a syslog server, as shown below:iplanet-am-logging-syslog-port=514 iplanet-am-logging-syslog-protocol=UDP iplanet-am-logging-type=Syslog iplanet-am-logging-syslog-connection-timeout=30 iplanet-am-logging-syslog-host=localhost iplanet-am-logging-syslog-facility=local5
Use the following SSOADM command to configure audit logging to a syslog server:
$ ssoadm \
  set-attr-defs \
  --adminid amadmin \
  --password-file /tmp/pwd.txt \
  --servicename iPlanetAMLoggingService \
  --schematype Global \
  --datafile MySyslogServerSettings.txt
Schema attribute defaults were set.
[4] Note that AM and JMS use the term topic differently. An AM audit topic is a category of audit log event that has an associated one-to-one mapping to a schema type. A JMS topic is a distribution mechanism for publishing messages delivered to multiple subscribers.
This chapter shows how to configure the Dashboard service.
The Dashboard Service provides the end user with an interface to access applications secured by AM, both cloud-based applications like SalesForce and internal applications protected by web or Java agents. The Dashboard Service uses SSO to login to the applications when the user clicks on the application icon. For some apps, like SalesForce, you will want to limit access to only a few users. Other apps, like Google Mail or Drive, you will probably want to make available to all users.
The Dashboard Service is meant to give users a single place to access their applications. Keep in mind that this does not limit user access, only what appears on the user dashboard.
There are three stages to setting up the Dashboard Service:
Setup the Dashboard Service and add applications.
Add the service to the realms.
Assign users applications so that they appear on the users' dashboards. This can be done manually or through a provisioning solution.
Once the Dashboard Service is configured for a user,
the user can access their dashboard after logging in through the XUI
under /XUI/?realm=/#dashboard/.
When making a request to the XUI, specify the realm or realm alias as the value of a
realm parameter in the query string, or the DNS alias in the
domain component of the URL. If you do not use a realm alias, then you must specify the entire
hierarchy of the realm, starting at the top-level realm. For example
https://openam.example.com:8443/openam/XUI/?realm=/customers/europe#login/.
For example, the full URL depending on the deployment might be
at https://openam.example.com:8443/openam/XUI/?realm=/myrealm#dashboard/.
Making some applications universally available ensures that all users have the same basic applications. However, some of your applications should be protected from the majority of your users. You will need to single out which users will include the application on their dashboard.
There are three default applications in the Dashboard Service: Google, SalesForce, and ZenDesk.
To add applications to the Dashboard Service, see "To Add Applications to the Dashboard Service".
To add the Dashboard Service to a realm, see "To Add the Application Dashboard Service to a Realm".
To add an application to a user's dashboard, see "To Add an Application to a User's Dashboard".
To remove an application from a user's dashboard, see "Removing User Access to an Application".
You can add applications to the Dashboard Service with the following steps. All fields except the dashboard class name and ICF Identifier are required for the application to work properly from the dashboard:
Log in to the AM console as AM Administrator,
amadmin.Navigate to Configure > Global Services > Dashboard > Secondary Configurations, and then click Add a Secondary Configuration to add an application to the Dashboard Service.
Provide a unique name for the application.
Add a Dashboard Class Name that identifies how the end user will access the app, such as
SAML2ApplicationClassfor a SAML v2.0 application.Add a Dashboard Name for the application.
Add a Dashboard Display Name. This name is what the end user will see, such as Google.
Add the Dashboard Icon you would like the end user to see for the application. Either use a fully-qualified URL or an appropriate relative URL so that the icon is rendered properly on the user dashboard.
Add the Dashboard Login URL to point to the location the end user will go to once they click on the icon.
Leave the ICF Identifier blank.
Click Add when you are done.
You must add the Dashboard Service to a realm before it will be available. The following instructions show you how to add an application to a single realm. Before you begin, make sure you have the name of the application as it appears on the Secondary Configuration Instance table under Configure > Global Services > Dashboard:
Select Realms > Realm Name > Services, and then click Add a Service.
Select the Dashboard service, and then click Create.
Add or remove the applications you would like to appear on the Dashboard service for the realm.
Click Save Changes when you are done.
Use the following steps to add an application to a user's dashboard:
Select Realms > Realm Name > Identities and click the user identifier to edit the user's profile.
Under Services, click Dashboard.
Add the application beside the user name under the user's Assigned Dashboard list.
Click Save.
You may need to remove an application from user's dashboard, but you do not want to entirely delete the user. The following steps walk you through removing an application from a user's dashboard:
Select Realms > Realm Name > Identities and click the user identifier to edit the user's profile.
Under Services, click Dashboard.
Delete the application beside the user name under the user's Assigned Dashboard list.
Click Save.
AM lets administrators configure online applications to display applications on user Dashboards. You can used exposed REST API to display information about the online applications.
/dashboard/assignedThis endpoint retrieves the list of applications assigned to the authenticated user.
$ curl \ --header "iplanetDirectoryPro: AQIC5w...2NzEz*" \ --header "Accept-API-Version: resource=1.0" \ https://openam.example.com:8443/openam/json/realms/root/dashboard/assigned { "google":{ "dashboardIcon":[ "Google.gif" ], "dashboardName":[ "Google" ], "dashboardLogin":[ "http://www.google.com" ], "ICFIdentifier":[ "" ], "dashboardDisplayName":[ "Google" ], "dashboardClassName":[ "SAML2ApplicationClass" ] } }/dashboard/availableThis endpoint retrieves the list of applications available in the authenticated user's realm. The example is based on two of the default Dashboard applications: Google and Salesforce.
$ curl \ --header "iplanetDirectoryPro: AQIC5w...2NzEz*" \ --header "Accept-API-Version: resource=1.0" \ https://openam.example.com:8443/openam/json/realms/root/dashboard/available { "google":{ "dashboardIcon":[ "Google.gif" ], "dashboardName":[ "Google" ], "dashboardLogin":[ "http://www.google.com" ], "ICFIdentifier":[ "" ], "dashboardDisplayName":[ "Google" ], "dashboardClassName":[ "SAML2ApplicationClass" ] }, "salesforce":{ "dashboardIcon":[ "salesforce.gif" ], "dashboardName":[ "Salesforce" ], "dashboardLogin":[ "http://salesforce.com" ], "ICFIdentifier":[ "" ], "dashboardDisplayName":[ "Salesforce" ], "dashboardClassName":[ "SAML2ApplicationClass" } }/dashboard/definedThis endpoint retrieves the list of all applications available defined for the AM Dashboard service. The example is based on the three default Dashboard applications: Google, Salesforce, and Zendesk.
$ curl \
 --header "iplanetDirectoryPro: AQIC5w...2NzEz*" \
 https://openam.example.com:8443/openam/json/realms/root/dashboard/defined
{
    "google":{
        "dashboardIcon":[
            "Google.gif"
        ],
        "dashboardName":[
            "Google"
        ],
        "dashboardLogin":[
            "http://www.google.com"
        ],
        "ICFIdentifier":[
            "idm magic 34"
        ],
        "dashboardDisplayName":[
            "Google"
        ],
        "dashboardClassName":[
            "SAML2ApplicationClass"
        ]
    },
    "salesforce":{
        "dashboardIcon":[
            "salesforce.gif"
        ],
        "dashboardName":[
            "SalesForce"
        ],
        "dashboardLogin":[
            "http://www.salesforce.com"
        ],
        "ICFIdentifier":[
            "idm magic 12"
        ],
        "dashboardDisplayName":[
            "Salesforce"
        ],
        "dashboardClassName":[
            "SAML2ApplicationClass"
        ]
    },
    "zendesk":{
        "dashboardIcon":[
            "ZenDesk.gif"
        ],
        "dashboardName":[
            "ZenDesk"
        ],
        "dashboardLogin":[
            "http://www.ZenDesk.com"
        ],
        "ICFIdentifier":[
            "idm magic 56"
        ],
        "dashboardDisplayName":[
            "ZenDesk"
        ],
        "dashboardClassName":[
            "SAML2ApplicationClass"
        ]
    }
}
If your application runs in a user-agent such as a browser, you can rely on AM to handle authentication.
This chapter provides a how-to approach to complete common maintenance tasks.
AM stores configuration data in an LDAP directory server and in files. The directory service replicates configuration data between directory servers, allowing AM to share configuration data across servers in a site. During normal production operations, you rely on directory replication to maintain multiple, current copies of AM service configuration. To recover from the loss of a server or from a serious administrative error, back up directory data and configuration files.
This section shows how to backup and restore AM configuration data by backing up and restoring local configuration files and local (embedded) configuration directory server data. If your deployment uses an external configuration directory server, then refer to the documentation for your external directory server or work with your directory server administrator to back up and restore configuration data stored in the external directory service.
For more information about DS, see the chapter Backing Up and Restoring Data in the ForgeRock Directory Services Administration Guide.
This section aims to cover the following uses of backup data.
Recovery from server failure:
Recovery from serious administrative error:
This procedure backs up all the configuration data stored with the server. This backup is to be restored when rebuilding a failed server.
Have the following points in mind when using this procedure:
Use this procedure only when AM stores configuration data in the embedded DS server, which means that the embedded DS server files are co-located with other AM configuration files.
If your deployment uses an external configuration directory server, then refer to the documentation for your external directory server or work with your directory server administrator to back up and restore configuration data stored in the external directory service. For more information about DS, see the chapter Backing Up and Restoring Data in the ForgeRock Directory Services Administration Guide.
Do not restore configuration data from a backup of a different release of AM. The structure of the configuration data can change from release to release.
In AM deployments where configuration directory data is replicated, you must take the following points into consideration:
Directory replication mechanically applies new changes to ensure that replicated data is the same everywhere. When you restore older backup data, directory replication applies newer changes to the older data.
This includes new changes that the administrator sees as mistakes. To recover from administrative error, you must work around this behavior either by performing a change to be replicated that repairs the error or by restoring all replicas to a state prior to the error.
When preparing directory server backup and restore operations, also know that data replication purge operations affect the useful lifetime of any data that you back up.
Replication relies on historical data to resolve any conflicts that arise. If directory servers did not eventually purge this historical data, the data would continue to grow until it filled all available space. Directory servers therefore purge older historical data. DS purges historical data older than 3 days by default.
When the directory server encounters a gap in historical data it cannot correctly complete replication operations. You must make sure, therefore, that any data you restore from backup is not older than the replication purge delay. Otherwise your restoration operation could break replication with the likely result that you must restore all servers from backup, losing any changes that occurred in the meantime.
For more information about purge delay, see the ForgeRock Directory Services Administration Guide section on To Restore a Replica.
Follow these steps for each AM server that you want to back up:
Stop AM or the container in which it runs.
Back up AM configuration files including those of the configuration directory server but skipping log and lock files.
The following example uses the default configuration location. $HOME is the home directory of the user who runs the web container where AM is deployed, and AM is deployed in Apache Tomcat under
openam:$ cd $HOME $ zip \ --recurse-paths \ /path/to/backup-`date -u +i5%F-%m-%S`.zip \ openam .openamcfg/AMConfig_path_to_tomcat_webapps_openam_ \ --exclude openam/openam/debug/* openam/openam/log/* openam/openam/stats* \ openam/opends/logs/* openam/opends/locks/* ... $ ls /path/to/backup-2014-12-01-12-00.zip /path/to/backup-2014-12-01-12-00.zip
The backup is valid until the end of the purge delay.
Start AM or the container in which it runs.
This procedure applies when rebuilding a failed server.
Have the following points in mind when using this procedure:
This procedure restores all the configuration data for a server, where the configuration data has been backed up as described in "To Back Up All Server Configuration Data".
Use this procedure only when AM stores configuration data in the embedded DS server, which means that the embedded DS server files are co-located with other AM configuration files.
If your deployment uses an external configuration directory server, then refer to the documentation for your external directory server or work with your directory server administrator to back up and restore configuration data stored in the external directory service. For DS, you can find more information in the chapter on Backing Up and Restoring Data.
Do not restore configuration data from a backup of a different release of AM. The structure of the configuration data can change from release to release.
If AM also stores CTS data in the embedded DS server, then the restore operation overwrites current CTS data with older data. After you restore from backup, users authenticate again as necessary.
In AM deployments where configuration directory data is replicated, you must take the following points into consideration:
Directory replication mechanically applies new changes to ensure that replicated data is the same everywhere. When you restore older backup data, directory replication applies newer changes to the older data.
This includes new changes that the administrator sees as mistakes. To recover from administrative error, you must work around this behavior either by performing a change to be replicated that repairs the error or by restoring all replicas to a state prior to the error.
When preparing directory server backup and restore operations, also know that data replication purge operations affect the useful lifetime of any data that you back up.
Replication relies on historical data to resolve any conflicts that arise. If directory servers did not eventually purge this historical data, the data would continue to grow until it filled all available space. Directory servers therefore purge older historical data. DS purges historical data older than 3 days by default.
When the directory server encounters a gap in historical data it cannot correctly complete replication operations. You must make sure, therefore, that any data you restore from backup is not older than the replication purge delay. Otherwise your restoration operation could break replication with the likely result that you must restore all servers from backup, losing any changes that occurred in the meantime.
For more information about purge delay, see the ForgeRock Directory Services Administration Guide section on To Restore a Replica.
Follow these steps for each AM server to restore. If you are restoring AM after a failure, make sure you make a copy of any configuration and log files that you need to investigate the problem before restoring AM from backup:
Stop AM or the container in which it runs.
Restore files in the configuration directory as necessary, making sure that you restore from a valid backup, one that is newer than the replication purge delay:
$ cd $HOME
$ unzip /path/to/backup-2014-12-01-12-00.zip
Archive:  /path/to/backup-2014-12-01-12-00.zip
replace openam/.configParam? [y]es, [n]o, [A]ll, [N]one, [r]ename: A
...
Start AM or the container in which it runs.
LDAP Data Interchange Format (LDIF) is a standard, text-based format for storing LDAP directory data. You can use LDIF excerpts to make changes to directory data.
This procedure takes an LDIF backup of AM configuration data only. Use this LDIF data when recovering from a serious configuration error:
Make sure that AM's configuration is in correct working order before exporting configuration data.
Use the DS export-ldif command to run a task that exports only configuration data, not CTS data.
You can run this command without stopping AM.
Find DS commands under the file system directory that contains AM configuration files.
The bind password for Directory Manager is the same as the password for the AM global administrator (amadmin):
$ $HOME/openam/opends/bin/export-ldif \
 --port 4444 \
 --hostname openam.example.com \
 --bindDN "cn=Directory Manager" \
 --bindPassword password \
 --backendID userRoot \
 --includeBranch dc=openam,dc=forgerock,dc=org \
 --excludeBranch ou=tokens,dc=openam,dc=forgerock,dc=org \
 --ldifFile /path/to/backup-`date -u +%F-%m-%s`.ldif \
 --start 0 \
 --trustAll
Export task 20141208113331302 scheduled to start Dec 8, 2014 11:33:31 AM CET
When the task completes, the LDIF file is at the expected location:
$ ls /path/to/*.ldif
/path/to/backup-2014-12-08-12-1418034808.ldif
A serious configuration error is an error that you cannot easily repair by using AM configuration tools, such as the AM console or the ssoadm command.
Use this procedure to recover from a serious configuration error by manually restoring configuration data to an earlier state. This procedure depends on LDIF data that you exported as described in "To Export Only Configuration Data".
Read the DS change log to determine the LDAP changes that caused the configuration problem.
The DS change log provides an external change log mechanism that allows you to read changes made to directory data for replicated directory servers.
For instructions on reading the change log, see the ForgeRock Directory Services Administration Guide section on Change Notification For Your Applications.
Based on the data in the change log, determine what changes would reverse the configuration error.
For changes that resulted in one attribute value being replaced by another, you can recover the information from the change log alone.
For deleted content not contained in the change log, use the LDIF resulting from "To Export Only Configuration Data" to determine a prior, working state of the configuration entry before the configuration error.
Prepare LDIF to modify configuration data in a way that repairs the error by restoring the state of directory entries before the administrative error.
Use the DS ldapmodify command to apply the modification.
For instructions on making changes to directory data see the section on Updating the Directory in the ForgeRock Directory Services Directory Server Developer's Guide.
The built-in amadmin account cannot be disabled, deleted, or
renamed, since it is hard-coded in the source code of several
files.
If you want a user to have administration rights in AM other than
amadmin, delegate realm administration privileges
to the new user. For more information about delegating realm administration
privileges, see "Delegating Realm Administration Privileges".
In this section you will find procedures to change the password of the
top-level administrator amadmin, when:
AM is configured using an external configuration store.
See "To Change the amadmin User's Password: External Configuration Store".
AM is configured using the embedded DS server as the configuration store. It may be configured with an external data store, or with the embedded DS server as a data store.
See "To Change the amadmin User's Password: Embedded Configuration Store".
If AM is configured to use an external configuration store,
perform the following steps to change the
amadmin user's password:
Log in to the AM console as the administrator,
amadmin.Navigate to Realms > Top Level Realm > Identities, and then click
amAdmin.Enter the new password in the Password field.
Save your changes.
If your deployment has multiple AM servers, the new password replicates across all servers.
If AM is configured to use the embedded DS server for
the configuration store, you must change the passwords of the following
two users in the embedded DS accounts to match the new
amadmin password:
You must change these two passwords in the embedded DS server regardless of whether you use an external or embedded data store.
The
cn=Directory Manageruser, created during installation.The global administrator, created in DS by AM after a second AM server has been added to the deployment.
Some functionality might not work if the DS directory manager, AM
administrator amadmin, and DS global administrator
passwords are not identical. For example, adding new servers to the
deployment.
To change the AM amadmin, DS directory manager, and
DS global administrator passwords and the required bindings,
perform the following steps:
Back up your deployment as described in "Backing Up and Restoring Configurations".
Log in to the AM console as the administrator,
amadmin.Navigate to Realms > Top Level Realm > Identities, and then click
amAdmin.Enter the new password in the Password field.
Save your changes.
If your deployment has multiple AM servers, the new password replicates across all servers.
AM binds to the embedded DS server using the
cn=Directory Manageraccount. Change thecn=Directory Manageraccount's bind password in the AM configuration as follows:Change the password for the configuration store binding:
Navigate to Deployment > Servers > Server Name > Directory Configuration.
Enter the new bind password, which is the new
amadminpassword, and save your changes.Make this change for each of your AM servers.
Note
Changing the bind password of the configuration store updates the
configstorepwdalias in thekeystore.jcekskeystore file automatically.For more information, see "To Recreate the configstorepwd Password String Alias".
(Optional) If you use the embedded DS server as a data store, change the following bind passwords:
Navigate to Realms > Realm Name > Data Stores > embedded:
Enter the new bind password, which is the new
amadminpassword, and save your changes.Make this change in every AM realm that uses the embedded DS as a data store.
Navigate to Realms > Realm Name > Services > Policy Configuration:
Enter the new bind password, which is the new
amadminpassword, and save your changes.Make this change in every AM realm that uses the embedded DS as a data store.
Navigate to Realms > Realm Name > Authentication > Modules, and select LDAP:
Enter the new bind password, which is the new
amadminpassword, and save your changes.Make this change in every AM realm that uses the embedded DS as a data store.
To change the
cn=Directory Managerand the global administrator passwords in the embedded DS, see Resetting Administrator Passwords in the ForgeRock Directory Services Administration Guide.
This section covers how to monitor services to ensure appropriate performance and service availability.
You can monitor AM through the following interfaces:
To configure monitoring services, login to the AM console as AM administrator, and navigate to Configure > Global Services > Monitoring. For more information on monitoring metrics, see "Monitoring Metrics"
You can configure AM to allow you to access a web based view of
AM MBeans on port 8082 where the core server runs, such as
http://openam-ter.example.com:8082/. Either use the
console, or use the ssoadm command:
$ ssoadm \
  set-attr-defs \
  --servicename iPlanetAMMonitoringService \
  --schematype Global \
  --adminid amadmin \
  --password-file /tmp/pwd.txt \
  --attributevalues iplanet-am-monitoring-http-enabled=true
The default authentication file allows you to authenticate over HTTP
as user demo, password changeit. The
user name and password are kept in the file specified, with the password
encrypted:
$ cat openam/openam/openam_mon_auth
demo AQICMBCKlwx6G3vzK3TYYRbtTpNYAagVIPNP
Or:
$ cat openam/openam/opensso_mon_auth
demo AQICvSe+tXEg8TUUT8ekzHb8IRzVSvm1Lc2u
You can encrypt a new password using the ampassword command. After changing the authentication file, you must restart AM for the changes to take effect.
You can configure AM to allow you to listen for Java Management eXtension (JMX) clients, by default on port 9999. Either use the AM console page under Configure > Global Services > Monitoring and make sure both Monitoring Status and Monitoring RMI interface status are both set to Enabled, or use the ssoadm command:
$ ssoadm \
  set-attr-defs \
  --servicename iPlanetAMMonitoringService \
  --schematype Global \
  --adminid amadmin \
  --password-file /tmp/pwd.txt \
  --attributevalues iplanet-am-monitoring-enabled=true \
  iplanet-am-monitoring-rmi-enabled=true
A number of tools support JMX, including jvisualvm
and jconsole. When you use jconsole
to browse AM MBeans for example, the default URL for the AM running
on the local system is
service:jmx:rmi:///jndi/rmi://localhost:9999/server.
$ jconsole service:jmx:rmi:///jndi/rmi://localhost:9999/server &
You can also browse the MBeans by connecting to your web application container, and browsing to the AM MBeans. By default, JMX monitoring for your container is likely to be accessible only locally, using the process ID.
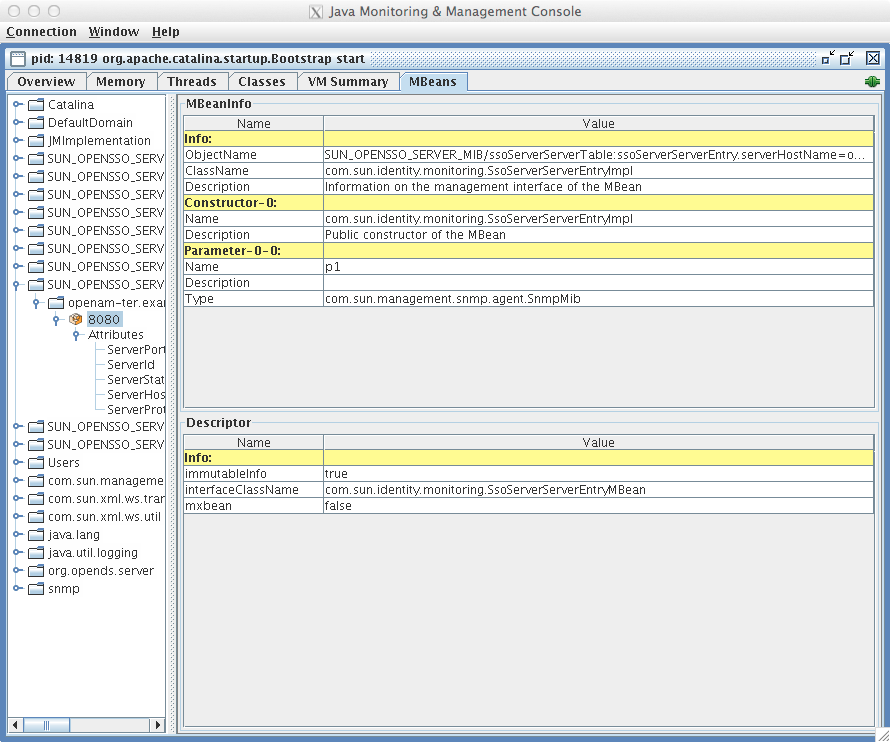
Also see Monitoring and Management Using JMX for instructions on how to connect remotely, how to use SSL, and so forth.
Important
JMX has a limitation in that some Operations and CTS tables cannot be properly serialized from AM to JMX. As a result, only a portion of AM's monitoring information is available through JMX. SNMP is a preferred monitoring option over JMX and exposes all AM tables, especially for CTS, with no serialization limitations.
You can configure AM to allow you to listen on port 8085 for SNMP monitoring.
Stop the AM instance or the container where it runs.
Download the AM 6.0.0.7 ZIP file from the BackStage website.
Extract the contents of the ZIP file.
Navigate to the
/snmpfolder, and run thejdmkrt.jarinstaller file. For example:$ java -jar jdmkrt.jar
Accept the License Agreement.
Select the install directory you want to install to. For example:
/tmp/opendmk.Copy the
jdmkrt.jarfile from the/libfolder of the extracted archive to the AM/WEB-INF/libfolder. For example:$ cp /tmp/opendmk/OpenDMK-bin/lib/jdmkrt.jar /path/to/openam.war/WEB-INF/lib
Restart the AM instance or the container in which it runs.
Navigate to Configure > Global Services > Monitoring.
Set the Monitoring Status to enabled.
Set the Monitoring SNMP interface status property to Enabled. By default, AM will be set to allow you to listen on port 8085 for SNMP monitoring.
Click Save Changes.
Restart the AM instance for the change to take effect.
Prometheus is third-party software used for gathering and processing monitoring data. AM exposes an endpoint which Prometheus uses to gather metrics from the AM instance. For more information about installing and running Prometheus, see the Prometheus documentation.
When enabled, AM makes the Prometheus-formatted metrics available at
the /json/metrics/prometheus endpoint.
Configure Prometheus to monitor the AM endpoint, using the
prometheus.yml configuration file. For more information
on configuring Prometheus, see the
Prometheus
configuration documentation.
Tip
Prometheus provides monitoring and processing for the information provided by AM, but further analysis and visualization may be desired. In this case, you can use tools such as Grafana to create customized charts and graphs based on the information collected by Prometheus. For more information on installing and running Grafana, see the Grafana website.
Before enabling Prometheus access to monitoring metrics, make sure that you have enabled monitoring. To enable monitoring, navigate to Configure > Global Services > Monitoring. Set the Monitoring Status to enabled, and then click Save Changes.
Navigate to Configure > Global Services > Monitoring.
Select the Secondary Configurations tab, and click prometheus.
Set prometheus to Enabled.
Specify the Username and Password that Prometheus will use to authenticate when accessing the endpoint.
Click Save Changes.
CREST is the ForgeRock Common REST API. AM exposes an endpoint which allows REST clients to gather information about your AM installation, in JSON format.
When enabled, AM makes the CREST-formatted metrics available at
the /json/metrics/api endpoint.
Before enabling CREST access to monitoring metrics, make sure that you have enabled monitoring. To enable monitoring, navigate to Configure > Global Services > Monitoring. Set the Monitoring Status to enabled, and then click Save Changes.
Navigate to Configure > Global Services > Monitoring.
Select the Secondary Configurations tab, and click crest.
Set CREST to Enabled.
Click Save Changes.
Graphite is third-party software used for storing monitoring data, and rendering graphs of the data. For more information about installing and running Graphite, see the Graphite documentation.
Before enabling Graphite access to monitoring metrics, make sure that you have enabled monitoring. To enabled monitoring, navigate to Configure > Global Services > Monitoring. Set the Monitoring Status to enabled, and then click Save Changes.
Navigate to Configure > Global Services > Monitoring.
Select the Secondary Configurations tab, and click Add a Secondary Configuration.
Select Graphite Reporter.
Specify the Name and Hostname of the Graphite instance to which to push the metrics data.
Click Create.
The Core Token Service (CTS) provides persistent and highly available token storage for a several components within AM, including user sessions, OAuth 2.0, SAML v2.0 and UMA tokens. For information on configuring the Core Token Service, see "Implementing the Core Token Service" in the Installation Guide.
Depending on system load and usage, the CTS can produce a large quantity of tokens, which can be short lived. This style of usage is significantly different from typical LDAP usage. As such, systems administrators may be interested in monitoring this usage as part of LDAP directory maintenance.
The CTS functions only with one external LDAP service, DS.
To that end, the current state of CTS tokens on a system can be monitored over SNMP. The current state of different types of CTS tokens are associated with different Object Identifiers (OIDs) in a Management Information Base (MIB).
To enable SNMP, see "To Enable the SNMP Monitoring Interface"
Once activated, SNMP monitoring works over UDP by default. You may want to install one of many available network monitoring tools. For the purpose of this section, basic SNMP service and monitoring tools have been installed on a GNU/Linux system. The same commands should work on a Mac OS X system.
SNMP depends on labels known as Object Identifiers (OIDs). These
are uniquely defined labels, organized in tree format. For AM, they
are configured in a .mib file named
FORGEROCK-OPENAM-CTS.mib, found
inside the /path/to/tomcat/webapps/openam/WEB-INF/lib/openam-mib-schema-6.0.0.7.jar
file of the AM deployment.
For detailed information on configured OIDs, see "Core Token Service (CTS) Object Identifiers" in the Installation Guide.
With the OIDs in hand, you can set up an SNMP server to collect the data. You would also need SNMP utility commands with associated OIDs to measure the current state of a component. First, to verify the operation of SNMP on a GNU/Linux system, over port 8085, using SNMP version 2c, run the following command:
# snmpstatus -c public -v 2c localhost
The output should normally specify communications over UDP. If you
get a timeout message, the SNMP service may not be
running.
You can get the value for a specific OID. For example, the following command would retrieve the cumulative count for CTS create operations, over port 8085:
# snmpget -c public -v 2c :8085 enterprises.36733.1.2.3.3.1.1.1
If your version of the tool does not support the enterprises OID string,
use 1.3.6.1.4.1 instead, as in 1.3.6.1.4.1.36733.1.2.3.3.1.1.1.
For one view of the tree of OIDs, you can use the snmpwalk command. For example, the following command lists all OIDs related to CTS:
# snmpwalk -c public -v 2c :8085 enterprises.36733.1.2.3
A number of CTS OIDs are listed with a Counter64 value.
As defined in
RFC 2578, an OID so configured has a maximum
value of 2^64 - 1.
You can monitor policy evaluation performance over SNMP. AM records statistics for up to a number of recent policy evaluation requests. (You can configure the number in the AM console under Configuration > System > Monitoring. For details, see the reference section "Monitoring".
Interface Stability: Evolving in the Release Notes
As described in "CTS SNMP Monitoring",
SNMP uses OIDs defined in the .mib file,
FORGEROCK-OPENAM-POLICY.mib, found inside the
/path/to/tomcat/webapps/openam/WEB-INF/lib/openam-mib-schema-6.0.0.7.jar
file of the AM deployment. This file specifies the statistics AM
keeps for policy evaluation operations.
Adapt the examples in "CTS SNMP Monitoring"
to read monitoring statistics about policy evaluation on the command line.
When monitoring is active, AM records statistics about both the numbers and rates of policy evaluations performed, and also the times taken to process policy evaluations.
The statistics are all read-only.
The base OID for policy evaluation statistics is
enterprises.36733.1.2.2.1.
The following table describes the values that you can read:
| OID | Description | Syntax |
|---|---|---|
|
|
Cumulative number of policy evaluations for specific resources (self) |
|
|
|
Average rate of policy evaluations for specific resources (self) |
|
|
|
Minimum rate of policy evaluations for specific resources (self) |
|
|
|
Maximum rate of policy evaluations for specific resources (self) |
|
|
|
Cumulative number of policy evaluations for a tree of resources (subtree) |
|
|
|
Average rate of policy evaluations for a tree of resources (subtree) |
|
|
|
Minimum rate of policy evaluations for a tree of resources (subtree) |
|
|
|
Maximum rate of policy evaluations for a tree of resources (subtree) |
|
|
|
Average length of time to evaluate a policy for a specific resource (self) |
|
|
|
Slowest evaluation time for a specific resource (self) |
|
|
|
Average length of time to evaluate a policy for a tree of resources (subtree) |
|
|
|
Slowest evaluation time for a tree of resources (subtree) |
|
|
|
Slowest individual policy evaluation time overall |
|
You can monitor CTS-based session statistics over SNMP. AM records statistics for up to a configurable number of recent sessions. (You can configure the number in the AM console under Configuration > System > Monitoring. For details, see the system configuration reference section, "Monitoring" in the Reference.)
SNMP monitoring is not available for client-based sessions.
Interface Stability: Evolving in the Release Notes
As described in "CTS SNMP Monitoring",
SNMP uses OIDs defined in a .mib file
that specifies the statistics AM keeps for policy evaluation operations, the
FORGEROCK-OPENAM-SESSION.mib file. This file is found
inside the /path/to/tomcat/webapps/openam/WEB-INF/lib/openam-mib-schema-6.0.0.7.jar
file of the AM deployment.
Adapt the examples in "CTS SNMP Monitoring"
to read monitoring statistics about sessions on the command line.
When monitoring is active, AM records statistics about both the numbers of internal, remote, and CTS sessions, and also the times taken to process sessions.
The statistics are all read-only.
The base OID for session statistics is
enterprises.36733.1.2.1.
Times are expressed in nanoseconds rather than milliseconds,
as many operations take less than one millisecond.
The following table describes the values that you can read:
| OID | Description | Syntax |
|---|---|---|
|
|
Total number of current internal sessions |
|
|
|
Average time it takes to refresh an internal session |
|
|
|
Average time it takes to logout an internal session |
|
|
|
Average time it takes to destroy an internal session |
|
|
|
Average time it takes to set a property on an internal session |
|
|
|
Total number of current remote sessions |
|
|
|
Average time it takes to refresh a remote session |
|
|
|
Average time it takes to logout a remote session |
|
|
|
Average time it takes to destroy a remote session |
|
|
|
Average time it takes to set a property on a remote session |
|
|
|
Total number of sessions currently in the Core Token Service (CTS) |
|
|
|
Average time it takes to refresh a CTS session |
|
|
|
Average time it takes to logout a CTS session |
|
|
|
Average time it takes to destroy a CTS session |
|
|
|
Average time it takes to set a property on a CTS session |
|
This section covers key AM tunings to ensure smoothly performing access and federation management services, and to maximize throughput while minimizing response times.
Note
The recommendations provided here are guidelines for your testing rather than hard and fast rules for every situation. Said another way, the fact that a given setting is configurable implies that no one setting is right in all circumstances.
The extent to which performance tuning advice applies depends to a large extent on your requirements, on your workload, and on what resources you have available. Test suggestions before rolling them out into production.
The suggestions in this section pertain to AM deployments with the following characteristics:
The deployment has a dedicated DS server for the Core Token Service. The host running this directory server is a high-end server with a large amount of memory and multiple CPUs.
The AM server is configured to use CTS-based sessions.
AM has a number of settings that can be tuned to increase performance.
The following general points apply:
Set debug level to
error.Set container-level logging to a low level, such as
errororsevere.
Tune your LDAP data stores, your LDAP authentication modules, and connection pools for CTS and configuration stores.
To change LDAP data store settings, navigate to Realms > Realm Name > Data Stores > Data Store Name in the AM console. Each data store has its own connection pool and therefore each data store needs its own tuning:
| Property | Default Value | Suggestions |
|---|---|---|
| LDAP Connection Pool Minimum Size | 1 |
The minimum LDAP connection pool size; a good tuning value for this property is 10. ( |
| LDAP Connection Pool Maximum Size | 10 |
The maximum LDAP connection pool size; a high tuning value for this property is 65, though you might well be able to reduce this for your deployment. Ensure your LDAP server can cope with the maximum number of clients across all the AM servers. ( |
To change connection pool settings for the LDAP authentication module, in the AM console, navigate to Configure > Authentication, and then click Core Attributes.
| Property | Default Value | Suggestions |
|---|---|---|
| Default LDAP Connection Pool Size | 1:10 |
The minimum and maximum LDAP connection pool used by the LDAP authentication module. This should be tuned to 10:65 for production. ( |
You can increase the number of connections used for connecting to CTS to increase throughput.
One connection is reserved for cleanup of expired CTS tokens. The remaining connections are allocated for CTS operations such that the number is equal to a power of two. Because of this, you should set the maximum number of connections to 2n+1, as in 9, 17, 33, 65, and so forth.
To increase the number of connections used for the CTS from the default, 10, navigate to Deployment > Servers > Server Name > CTS > CTS Token Store, and alter the Max Connections property.
Tip
You may need to click the Inherit Value property to unlock the value for editings.
Alternatively, you can also edit the Max Connections default globally by navigating to Configure > Server Defaults > CTS, and then click the CTS Token Store tab and alter the Max Connection property.
If you need to change the default CTS connection timeout, set the
org.forgerock.services.datalayer.connection.timeout.cts.async property under Deployment > Servers >
Server Name > Advanced.
Most CTS requests to the directory server are handled quickly, so the default timeout of 10 seconds is suitable in most cases.
You must restart AM or the container in which it runs for these changes to take effect.
AM has two thread pools used to send notifications to clients. The Service Management Service (SMS) thread pool can be tuned in the AM console under Configure > Server Defaults > SDK > Data Store:
| Property | Default Value | Suggestions |
|---|---|---|
| Notification Pool Size | 10 |
This is the size of the thread pool used to send notifications. In production this value should be fine unless lots of clients are registering for SMS notifications. ( |
The session service has its own thread pool to send notifications to listeners about changes to CTS-based sessions. This is configured under Configure > Server Defaults > Session > Notification:
| Property | Default Value | Suggestions |
|---|---|---|
| Notification Pool Size | 10 |
This is the size of the thread pool used to send notifications. In production this should be around 25-30. ( |
| Notification Thread Pool Threshold | 5000 |
This is the maximum number of notifications in the queue waiting to be sent. The default value should be fine in the majority of installations. ( |
The Session Service has additional properties to tune, which are configured under Configure > Server Defaults > Session > Session Limits. The following suggestion applies to deployments using CTS-based sessions:
| Property | Default Value | Suggestion |
|---|---|---|
| Maximum Session Cache Size | 5000 |
Maximum number of AM sessions to cache on the server. In production, this value can safely be set into the 100,000s. The maximum session cache size is really controlled by the maximum size of the JVM heap which must be tuned appropriately to match the desired session cache size. ( |
This section gives some initial guidance on configuring the JVM for running AM. These settings provide a strong foundation to the JVM before a more detailed garbage collection tuning exercise, or as best practice configuration for production:
| JVM Parameters | Suggested Value | Description |
|---|---|---|
| At least 1 GB (2 GB with embedded DS), in production environments at least 2 GB to 3 GB. This setting depends on the available physical memory, and on whether a 32- or 64-bit JVM is used. | - |
| - | Ensures the server JVM is used |
| Set both to 256 MB | Controls the size of the metaspace in the JVM |
| 60000 | Controls the read timeout in the Java HTTP client implementation This applies only to the Sun/Oracle HotSpot JVM. |
| High setting: 30000 (30 seconds) | Controls the connect timeout in the Java HTTP client implementation When you have hundreds of incoming requests per second, reduce this value to avoid a huge connection queue. This applies only to the Sun/Oracle HotSpot JVM. |
| JVM Parameters | Suggested Value | Description | |||
|---|---|---|---|---|---|
|
| Controls the protocols used for outbound HTTPS connections from AM. Specify one or more of the following values, separated by commas:
This setting applies only to Sun/Oracle Java environments. | |||
|
- | Controls the protocol AM uses to connect to various external resources. Specify one or more of the following values, separated by commas:
|
Note
For -Dhttps.protocols, specify the protocol version(s)
Java clients can use to connect to AM.
For -Dorg.forgerock.openam.ldap.secure.protocol.version,
see "Securing Communications" in the Installation Guide for a list of external
resources to which communication is affected.
Specify a single protocol if AM will only use that protocol when
connecting to affected external resources. For example, a value of
TLSv1.2 configures AM to only use the TLSv1.2 protocol
to connect.
Specify a comma-separated list with multiple protocols if AM will use
the most secure protocol supported by the external resources. For example, a
value of TLSv1,TLSv1.1,TLSv1.2 configures AM to attempt
to use the TLSv1.2 protocol to connect to external configuration and user
data stores. If a TLSv1.2 connection is not supported, AM attempts to use
TLSv1.1 to connect. If TLSv1.1 is not supported, AM uses TLSv1.
| JVM Parameters | Suggested Value | Description |
|---|---|---|
| - | Verbose garbage collection reporting |
|
| Location of the verbose garbage collection log file |
| - | Prints a heap histogram when a SIGTERM signal is received by the JVM |
| - | Prints detailed information about garbage collection |
| - | Prints detailed garbage collection timings |
| - | Out of Memory errors generate a heap dump automatically |
|
| Location of the heap dump |
| - | Use the concurrent mark sweep garbage collector |
| - | Allow class unloading during CMS sweeps |
AM caches data to avoid having to query user and configuration data stores each time it needs the information. By default, AM makes use of LDAP persistent search to receive notification of changes to cached data. For this reason, caching works best when data are stored in a directory server that supports LDAP persistent search.
AM has two kinds of cache on the server side that you can configure, one for configuration data and the other for user data. Generally use the default settings for configuration data cache. This section mainly covers the configuration choices you have for caching user data.
AM implements the global user data cache for its user data stores.
The user data store also supports a DN Cache, used to cache DN lookups
that tend to occur in bursts during authentication.
The DN Cache can become out of date when a user is moved or renamed in the
underlying LDAP store, events that are not always reflected in a persistent search result.
You can enable the DN cache when the underlying LDAP store supports persistent
search and mod DN operations (that is, move or rename DN).
The following diagram depicts the two kinds of cache, and also the two types of caching available for user data:
The rest of this section concerns mainly settings for global user data cache and for SDK clients. For a look at data store cache settings, see "LDAP Data Store Settings".
By default AM has caching enabled both for configuration data and
also for user data. This setting is governed by the server property
com.iplanet.am.sdk.caching.enabled, which by default is
true. When you set this advanced property to
false, then you can enable caching independently for
configuration data and for user data.
Disabling caching can have a severe negative impact on performance. This is because when caching is disabled, AM must query a data store each time it needs data.
If, however, you have at least one user data store that does not support LDAP persistent search, then you must disable the global cache for user data. Otherwise user data caches cannot stay in sync with changes to user data entries:
In the AM console, navigate to Deployment > Servers > Server Name > Advanced.
Set the value of the
com.iplanet.am.sdk.caching.enabledproperty tofalseto disable caching overall.Set the value of the
com.sun.identity.sm.cache.enabledproperty totrueto enable configuration data caching.All supported configuration data stores support LDAP persistent search, so it is safe to enable configuration data caching.
You must explicitly set this property to
true, because setting the value of the propertycom.iplanet.am.sdk.caching.enabledtofalsein the previous step disables both user and configuration data caching.Save your work.
AM starts persistent searches on user data stores when possible [5] in order to monitor changes. With user data store caching disabled, AM still starts the persistent searches, even though it no longer uses the results.
Therefore, if you disable user data store caching, you should also disable persistent searches on user data stores in your deployment to improve performance. To disable persistent search on a user data store, remove the value of the Persistent Search Base DN configuration property and leave it blank. Locate this property under Realms > Realm Name > Data Stores > Data Store Name > Persistent Search Controls.
With a large user data store and active user base, the number of user entries in cache can grow large.
In the AM console, navigate to Configure > Server Defaults > SDK.
Change the value of SDK Caching Maximum Size.
There is no corresponding setting for configuration data, as the number of configuration entries in a large deployment is not likely to grow nearly as large as the number of user entries.
The table below provides a quick reference, primarily for user data cache settings. Web and Java agents of version earlier than 5 and other AM SDK clients can also cache user data using most of the properties described in the table.
Notice that many properties for configuration data cache have
sm (for Service Management) in their names, whereas those
for user data have idm (for Identity Management) in their
names:
| Property | Description | Default | Applies To |
|---|---|---|---|
| Maximum number of user entries cached. | 10000 | Server and SDK |
|
Whether to enable caching for both configuration data and also for user data. If If |
| Server & SDK |
|
How often in minutes the SDK client, such as a web or a Java agent should poll AM for modified user data entries. The SDK also uses this value to determine the age of the oldest changes requested. The oldest changes requested are 2 minutes older than this setting. In other words, by default the SDK polls for entries changed in the last 3 minutes. Set this to 0 or a negative integer to disable polling. | 1 (minute) | SDK |
|
How long AM stores a given change to a cached entry, so that clients polling for changes do not miss the change. | 30 (minutes) | Server only |
|
If Otherwise, set this to |
| Server & SDK |
|
How many minutes to store a user data entry in the global user data cache. | 30 (minutes) | Server & SDK |
|
Whether user data entries in the global user data cache should expire over time. |
| Server & SDK |
|
Whether the SDK client, such as a web or a Java agent should register a notification listener for user data changes with the AM server. The SDK client uses the URL specified by
If notifications cannot be enabled for some reason, then the SDK client falls back to polling for changes. |
| SDK |
|
If Otherwise, set this to |
| Server & SDK |
|
Set this to |
| Server & SDK |
|
Sets the cache size. |
| Server & SDK |
The AM console lets the administrator view and manage active CTS-based user sessions by realm by navigating to Realms > Realm Name > Sessions.

To search for active sessions, enter a username in the search box. AM retrieves the sessions for the user and displays them within a table. If no active CTS-based session is found, AM displays a session not found message.
You can end any sessions—except the
current amAdmin user's session—by selecting
it and clicking the Invalidate Selected
button. As a result, the user has to authenticate again.
Note
Deleting a user does not automatically remove any of the user's stateful sessions. After deleting a user, check for any sessions for the user and remove them on the Sessions page.
When you change the AM host name, you must make manual changes to the configuration. This chapter describes what to do. If you must also move an embedded configuration directory from one host to another, see the ForgeRock Directory Services Administration Guide chapter, Moving Servers.
Changing AM host names involves the following high-level steps.
Adding the new host name to the Realm/DNS Aliases list.
Exporting, editing, then importing the configuration.
This step relies on the ssoadm command, which you install separately from AM as described in "Setting Up Administration Tools" in the Installation Guide.
Stopping AM and editing configuration files.
Removing the old host name from the Realm/DNS Aliases list.
Before you start, make sure you have a current backup of your current installation. See "Backing Up and Restoring Configurations" for instructions.
Log in to the AM console as administrator,
amadmin.Under Realms > Realm Name, click Properties, add the new host name to the Realm/DNS Aliases list, and then save your work.
Export the service configuration:
$ ssoadm \
 export-svc-cfg \
 --adminid amadmin \
 --encryptsecret myEncryptSecretString1234 \
 --password-file /tmp/pwd.txt \
 --outfile config.xml
Service Configuration was exported.
AM uses the value entered in
--encryptsecretto encrypt passwords stored in the backup file. It can be any value, and is required when restoring a configuration.Edit the service configuration file:
Change the fully qualified domain name, such as
openam.example.com, throughout the file.If you are changing the context path, such as
/openam, then make the following changes:Change the value of
com.iplanet.am.services.deploymentDescriptor.Change contextPath in the value of the
propertiesViewBeanURL="contextPath/auth/ACServiceInstanceList".Change contextPath in the value of
propertiesViewBeanURL="contextPath/auth/ACModuleList".Change the context path in a <Value> element that is a child of an <AttributeValuePair> element.
Change the context path where it occurs throughout the file in the full URL to AM, such as
http://openam.example.com:8080/contextPath.
If you are changing the port number, then change the value of
com.iplanet.am.server.port.Also change the port number in
host:portcombinations throughout the file.If you are changing the domain name, then change the cookie domain, such as
<Value>.example.com</Value>throughout the file.
Import the updated service configuration:
$ ssoadm \
 import-svc-cfg \
 --adminid amadmin \
 --encryptsecret myEncryptSecretString1234 \
 --password-file /tmp/pwd.txt \
 --xmlfile config.xml
Directory Service contains existing data. Do you want to delete it? [y|N] y
Please wait while we import the service configuration...
Service Configuration was imported.
Stop AM or the web container where it runs.
Edit the boot properties file, such as
/home/user/openam/boot.json, changing the fully-qualified domain name (FQDN), port, and context path for AM as necessary.If you are changing the context path, then move the folder containing AM configuration, such as
/home/user/openam/, to match the new context path, such as/home/user/openam2/.If you are changing the location or context path, change the name of the file in the
/home/user/.openamcfgfolder, such asAMConfig_path_to_tomcat_webapps_openam_, to match the new location and context path.Also edit the path name in the file to match the change you made when moving the folder.
Restart AM or the web container where it runs.
Log in to the AM console as administrator,
amadmin.Under Realms > Realm Name, click Properties, remove the old host name from the Realm/DNS Aliases list, and then save your work.
Configure AM's cookie domain to ensure only users and entities from trusted domains can be authenticated.
Log in to the AM console as an administrator user, for example,
amAdmin.Navigate to Configure > Global Services > Platform > Cookie Domain.
In the Cookie Domain field, set the list of domains into which AM should write cookies. Consider the following points:
By default, AM installer sets the cookie domain based on the fully-qualified hostname of the server on which it installs AM.
After installation, if the cookie domain is
openam.example.com, you may want to change it toexample.comso AM can communicate with any host in the sub-domain.Configure as many cookie domains as your environment requires. For example, for the realms configured with DNS aliases[6]. Browsers ignore any cookies that do not match the current domain to ensure the correct one is used.
If you do not specify any cookie domain, AM uses the fully qualified name of the server, which implies that a host cookie is set rather than a domain cookie.
When configuring AM for Cross-Domain Single Sign-On (CDSSO), you must protect your AM deployment against cookie hijacking by setting a host cookie rather than a domain cookie. For more information, see "Protecting Against Cookie Hijacking" in the Authentication and Single Sign-On Guide.
Do not configure a top-level domain as your cookie domain; browsers will reject them. Top-level domains are browser-specific. For example, Firefox considers special domains like Amazon's web service (for example, ap-southeast-2.compute.amazonaws.com) to be a top-level domain [7].
Save your changes.
Restart AM.
[5]
AM starts persistent searches on user data stores on directory
servers that support the psearch control.
[6] For more information, see "To Configure DNS Aliases for Accessing a Realm".
[7] For a list of effective top-level domains, see https://publicsuffix.org/list/effective_tld_names.dat.
This chapter covers how to get debugging information and troubleshoot issues in deployments.
You can check over HTTP whether AM is up, using
isAlive.jsp. Point your application to the file
under the deployment URL, such as
http://openam.example.com:8080/openam/isAlive.jsp.
If you get a success code (with Server is ALIVE: in
the body of the page returned), then the instance is in operation.
AM services capture a variety of information in debug logs. Unlike audit log records, debug log records are unstructured. Debug logs contain a variety of types of information that is useful when troubleshooting AM, including stack traces. The level of debug log record output is configurable. Debug log records are always written to flat files.
To adjust the debug level while AM is running, login to the AM console as AM administrator and navigate to Deployment > Servers > Server Name > Debugging. The default level for debug logging is Error. This level is appropriate for normal production operations, in which case no debug log messages are expected.
Setting the debug log level to Warning increases the volume of messages. Setting the debug log level to Message dumps detailed trace messages. Unless told to do so by qualified support personnel, do not use Warning and Message levels in production.
By default, certain components that run in AM's JVM—for example,
embedded DS configuration stores—do not generate trace-level
messages when you configure the debug log level to Message. If you need
trace-level messages for these components, navigate to Deployment >
Servers > Server Name > Advanced, create a
org.forgerock.openam.slf4j.enableTraceInMessage
property, and set its value to true.
During development, you might find it useful to log all debug messages
to a single file. In order to do so, set Merge Debug Files to
on.
AM logs to a single file immediately after you change this property. You do not need to restart AM or the container in which it runs for the change to take effect.
When Merge Debug Files is on, AM can write debug messages
to standard output instead of a file.
To enable this feature, set the Java system property,
com.sun.identity.util.debug.provider
to com.sun.identity.shared.debug.impl.StdOutDebugProvider,
in the configuration for the AM web application or the web container where it runs.
For example, when using Apache Tomcat, add the following setting to CATALINA_OPTS:
-Dcom.sun.identity.util.debug.provider=com.sun.identity.shared.debug.impl.StdOutDebugProviderAfter you change the configuration for a web application or web container, you must restart it for the change to take effect. For details on web application and container configuration, see "Preparing a Web Application Container" in the Installation Guide.
AM lets you capture debug log messages selectively for a specific service. This can be useful when you must turn on debugging in a production system where you want to avoid excessive logging, but must gather messages when you reproduce a problem.
Perform these steps to capture debug messages for a specific service:
Log in to the AM console as administrator,
amadmin.Browse to
Debug.jsp, for examplehttp://openam.example.com:8080/openam/Debug.jsp.No links to this page are provided in the AM console.
Select the service to debug and also the level required given the hints provided in the
Debug.jsppage.The changes takes effect immediately.
Promptly reproduce the problem you are investigating.
After reproducing the problem, immediately return to the
Debug.jsppage, and revert to normal log levels to avoid filling up the disk where debug logs are stored.
By default AM does not rotate debug logs. To rotate debug logs,
edit WEB-INF/classes/debugconfig.properties where
AM is deployed.
The debugconfig.properties file includes
the following properties:
org.forgerock.openam.debug.prefixSpecifies the debug log file prefix applied when AM rotates a debug log file. The property has no default. It takes a string as the property value.
org.forgerock.openam.debug.suffixSpecifies the debug log file suffix applied when AM rotates a debug log file. The property takes a
SimpleDateFormatstring. The default is-MM.dd.yyyy-kk.mm.org.forgerock.openam.debug.rotationSpecifies an interval in minutes between debug log rotations. Set this to a value greater than zero to enable debug log rotation based on time passed.
org.forgerock.openam.debug.rotation.maxsizeSpecifies a maximum log file size in megabytes between debug log rotations. Set this to a value greater than zero to enable debug log rotation based on log file size.
Changes to properties in the
debugconfig.properties file
take effect immediately.
You do not need to restart AM or the container in which it runs for
the changes to take effect.
The AM recording facility lets you initiate events to monitor AM while saving output that is useful when performing troubleshooting.
AM recording events save four types of information:
AM debug logs
Thread dumps, which show you the status of every active thread, with output similar to a JStack stack trace
Important run-time properties
The AM configuration
You initiate a recording event by invoking the
ssoadm start-recording command or by using the
start action of the /json/records
REST API endpoint. Both methods use JSON to control the recording event.
This section describes starting and stopping recording using the
ssoadm command, using a JSON file to configure the
recording event, and locating the output recorded information.
For information about using the /json/records REST API
endpoint to activate and deactivate recording, see
"RESTful Troubleshooting Information Recording". For general information about
the REST API, see "About the REST API".
Start AM recording with the ssoadm start-recording command. For example:
$ ssoadm \
  start-recording \
  --servername http://openam.example.com:8080/openam \
  --adminid amadmin \
  --password-file /tmp/pwd.txt \
  --jsonfile recording.json

{
  "recording":true,
  "record": {
    "issueID":103572,
    "referenceID":"policyEvalFails",
    "description":"Record everything",
    "zipEnable":false,
    "threadDump": {
      "enable":true,
      "delay": {
        "timeUnit":"SECONDS",
        "value":5
      }
    },
    "configExport": {
      "enable":true,
      "password":"admin password",
      "sharePassword":true
    },
    "debugLogs": {
      "debugLevel":"message",
      "autoStop": {
        "time": {
           "timeUnit":"MILLISECONDS",
           "value":15000
        },
        "fileSize": {
          "sizeUnit":"KB",
            "value":1048576
        }
      }
    },
    "status":"RUNNING",
    "folder":"/home/openam/debug/record/103572/policyEvalFails/"
  }
}
Note
The ssoadm command output in the preceding example is shown in indented format for ease of reading. The actual output is not indented.
In the preceding ssoadm start-recording command example,
the recording.json file specifies the information
to be recorded and under what conditions recording automatically terminates.
This file is known as the recording control file.
"The Recording Control File" describes the format of recording control
files and provides an annotated example.
An active recording event stops when:
You explicitly tell AM to stop recording by executing the ssoadm stop-recording command. See the ssoadm(1) in the Reference for details about this command.
Another ssoadm start-recording command is sent to AM that specifies an issue ID other that differs from the active recording event's issue ID. In this case, the initial recording session terminates and the new recording event starts. Note that you can determine whether an AM recording event is active by using the ssoadm get-recording-status command.
A timer configured in the recording control file determines that the maximum amount of time for the recording event has been reached.
A file size monitor configured in the recording control file determines that the maximum amount of information in debug logs has been reached.
A JSON file that is input to the ssoadm start-recording command controls the amount of information AM records, the recording duration, and the location of recording output files.
For more information on the properties that comprise the recording control file, see the reference "Record Control File Configuration Properties".
The following is an example of a recording control file:
{
  "issueID": 103572,
  "referenceID": "policyEvalFails",
  "description": "Troubleshooting artifacts in support of case 103572",
  "zipEnable": true,
  "configExport": {
    "enable": true,
    "password": "5x2RR70",
    "sharePassword": false
  },
  "debugLogs": {
    "debugLevel": "MESSAGE",
    "autoStop": {
      "time":  {
      "timeUnit": "SECONDS",
        "value": 15
      },
      "fileSize": {
        "sizeUnit": "GB",
         "value": 1
      }
    }
  },
  "threadDump" : {
    "enable": true,
    "delay" :  {
      "timeUnit": "SECONDS",
      "value": 5
    }
  }
}
The recording control file properties in the preceding example affect the recording output as follows:
| Recording Control File Property | Value | Effect |
|---|---|---|
issueID, referenceID
|
103572, policyEvalFails
|
Recording output is stored at the path
debugFileLocation/record/103572/policyEvalFails_timestamp.zip.
For more information about the location of recording output, see
"Retrieving Recording Information".
|
Description
|
Troubleshooting artifacts in support of case 103572
| No effect. |
zipEnable
|
true
| Recording output is compressed into a zip file. |
configExport / enable
|
true
| The AM configuration is exported at the start of the recording event. |
configExport / password
|
5x2RR70
| Knowledge of this password will be required to access the AM configuration that was saved during recording. |
configExport / sharePassword
|
false
|
The password is not displayed in output messages displayed during
the recording event or in the info.json file.
|
debugLogs / debugLevel
|
MESSAGE
| Recording enables message-level debug logs during the recording event. |
debugLogs / autoStop / time
|
SECONDS, 15
|
Because both the time and
fileSize properties are set, recording stops after
15 seconds, or after the size of the debug logs exceeds 1 GB,
whichever occurs first.
|
debugLogs / autoStop / fileSize
|
GB, 1
|
Because both the time and
fileSize properties are set, recording stops after
15 seconds, or after the size of the debug logs exceeds 1 GB,
whichever occurs first.
|
threadDump / enable
|
true
| Thread dumps are taken throughout the recording event. |
threadDump / delay
|
SECONDS, 5
| The first thread dump is taken when the recording event starts. Additional thread dumps are taken every five seconds hence. |
Information recorded by AM is stored at the path
debugFileLocation/record/issueID/referenceID.
For example, if the debug file location is
/home/openam/debug, the issue ID
103572, and the reference ID
policyEvalFails, the path containing
recorded information is
/home/openam/debug/record/103572/policyEvalFails.
When there are multiple recording events with the same
issueID and referenceID,
AM appends a timestamp to the referenceID
of the earliest paths. For example, multiple recording events for
issue ID 103572 and reference ID
policyEvalFails might be stored at the
following paths:
Most recent recording:
debugFileLocation/record/103572/policyEvalFailsNext most recent recording:
debugFileLocation/record/103572/policyEvalFails_2015-10-24-11-48-51-902-PDTEarliest recording:
debugFileLocation/record/103572/policyEvalFails_2015-08-10-15-15-10-140-PDT
AM compresses the output from recording events when you set the
zipEnable property to true. The output
file can be found at the path
debugFileLocation/record/issueID/referenceID_timestamp.zip.
For example, compressed output for a recording event for
issue ID 103572 and reference ID
policyEvalFails might be stored at the
following path:
debugFileLocation/record/103572/policyEvalFails_2015-08-12-12-19-02-683-PDT.zip.
Use the referenceID property value to segregate
output from multiple problem recreations associated with the same case.
For example, while troubleshooting case 103572, you notice that you only
have a problem when evaluating policy for members of the Finance realm.
You could trigger two recording events as follows:
| AM Behavior | referenceIDValue | Recording Output Path |
|---|---|---|
| Policy evaluation behaves as expected for members of the Engineering realm. |
policyEvalSucceeds
|
debugFileLocation/record/103572/policyEvalSucceeds
|
| Policy evaluation unexpectedly fails for members of the Finance realm. |
policyEvalFails
|
debugFileLocation/record/103572/policyEvalFails
|
This section shows you how to start, stop, and get the status of a troubleshooting recording event using the REST API.
AM provides the /json/records REST endpoint
for the following:
Starting a recording event. See "Starting a Recording Event".
Getting the status of a recording event. See "Getting the Status of a Recording Event".
Stopping a recording event. See "Stopping a Recording Event".
You must authenticate to AM as an administrative user to obtain an SSO
token prior to calling the /json/records REST endpoint.
You then pass the SSO token in the iPlanetDirectoryPro
header as proof of authentication.
You can also record troubleshooting information by using the ssoadm command. For more information, see "Recording Troubleshooting Information".
Note
The curl command output in the examples in this section
is indented for ease of reading. The actual output is
not indented, and the actions available from the
/json/records endpoint do not support the
_prettyPrint parameter.
To start a recording event, perform an HTTP POST using the
/json/records endpoint, specifying the
_action=start parameter in the URL. Specify a JSON
payload identical in format to the input file for the
ssoadm start-recording command, as described in
"The Recording Control File".
$ curl \
--request POST \
--header "Content-Type: application/json" \
--header "iPlanetDirectoryPro: AQIC5..." \
--header "Accept-API-Version: resource=1.0" \
--data ' {
  "issueID": 103572,
  "referenceID": "policyEvalFails",
  "description": "Troubleshooting artifacts in support of case 103572",
  "zipEnable": true,
  "configExport": {
   "enable": true,
   "password": "5x2RR70",
   "sharePassword": false
  },
  "debugLogs": {
   "debugLevel": "MESSAGE",
   "autoStop": {
    "time":  {
     "timeUnit": "SECONDS",
     "value": 15
    },
    "fileSize": {
     "sizeUnit": "GB",
     "value": 1
    }
   }
  },
  "threadDump" : {
   "enable": true,
   "delay" :  {
    "timeUnit": "SECONDS",
    "value": 5
   }
  }
 }' \
https://openam.example.com:8443/openam/json/records?_action=start
{
    "recording":true,
    "record":{
        "issueID":103572,
        "referenceID":"policyEvalFails",
        "description":"Troubleshooting artifacts in support of case 103572",
        "zipEnable":true,
        "threadDump":{
            "enable":true,
            "delay":{
                "timeUnit":"SECONDS",
                "value":5
            }
        },
        "configExport":{
            "enable":true,
            "password":"xxxxxx",
            "sharePassword":false
        },
        "debugLogs":{
            "debugLevel":"message",
            "autoStop":{
                "time":{
                    "timeUnit":"MILLISECONDS",
                    "value":15000
                },
                "fileSize":{
                    "sizeUnit":"KB",
                    "value":1048576
                }
            }
        },
        "status":"RUNNING",
        "folder":"/opt/demo/openam/config/openam/debug/record/103572/policyEvalFails/"
    }
}
To get the status of a recording event, perform an HTTP POST using the
/json/records endpoint, specifying the
_action=status parameter in the URL:
$ curl \
--request POST \
--header "iPlanetDirectoryPro: AQIC5..." \
--header "Accept-API-Version: resource=1.0" \
https://openam.example.com:8443/openam/json/records?_action=status
If there is no active recording event, the following output appears:
{
    "recording":false
}
If there is an active recording event, output similar to the following appears:
{
    "recording":true,
    "record":{
        "issueID":103572,
        "referenceID":"policyEvalFails",
        "description":"Troubleshooting artifacts in support of case 103572",
        "zipEnable":true,
        "threadDump":{
            "enable":true,
            "delay":{
                "timeUnit":"SECONDS",
                "value":5
            }
        },
        "configExport":{
            "enable":true,
            "password":"xxxxxx",
            "sharePassword":false
        },
        "debugLogs":{
            "debugLevel":"message",
            "autoStop":{
                "time":{
                    "timeUnit":"MILLISECONDS",
                    "value":15000
                },
                "fileSize":{
                    "sizeUnit":"KB",
                    "value":1048576
                }
            }
        },
        "status":"RUNNING",
        "folder":"/opt/demo/openam/config/openam/debug/record/103572/policyEvalFails/"
    }
}
To stop a recording event, perform an HTTP POST using the
/json/records endpoint, specifying the
_action=stop parameter in the URL:
$ curl \
--request POST \
--header "iPlanetDirectoryPro: AQIC5..." \
--header "Accept-API-Version: resource=1.0" \
https://openam.example.com:8443/openam/json/records?_action=stop
If there is no active recording event, AM returns a 400 error code.
If there is an active recording event, output similar to the following appears:
{
  "recording": false,
  "record": {
    "issueID": 103572,
    "referenceID": "policyEvalFails",
    "description": "Troubleshooting artifacts in support of case 103572",
    "zipEnable": true,
    "threadDump": {
      "enable": true,
      "delay": {
        "timeUnit": "SECONDS",
        "value": 5
      }
    },
    "configExport": {
      "enable": true,
      "password": "xxxxxx",
      "sharePassword": false
    },
    "debugLogs": {
      "debugLevel": "message",
      "autoStop": {
        "time": {
          "timeUnit": "MILLISECONDS",
          "value": 15000
        },
        "fileSize": {
          "sizeUnit": "KB",
          "value": 1048576
        }
      }
    },
    "status": "STOPPED",
    "folder": "/opt/demo/openam/config/openam/debug/record/103572/policyEvalFails/"
  }
}This chapter covers AM configuration properties accessible through the AM console, most of which can also be set by using the ssoadm command.
For reference information that is not contained on this guide, see the AM Reference Guide or the Reference section included in each of the topic-oriented AM guides.
Use the following reference to configure different data store types navigating to Realms > Realm Name > Data Stores.
Use these attributes when configuring Active Directory data stores:
ssoadm service name:
sunIdentityRepositoryService
- ID
The ID of the data store configuration
- LDAP Server
host:portto contact the directory server, with optional|server_ID|site_IDfor deployments with multiple servers and sites.AM uses the optional settings to determine which directory server to contact first. AM tries to contact directory servers in the following priority order, with highest priority first:
The first directory server in the list whose server_ID matches the current AM server.
The first directory server in the list whose site_ID matches the current AM server.
The first directory server in the remaining list.
If the directory server is not available, AM proceeds to the next directory server in the list.
ssoadm attribute:
sun-idrepo-ldapv3-config-ldap-serverDefault:
host:portof the initial directory server configured for this AM server.- LDAP Bind DN
Bind DN for connecting to the directory server. Some AM capabilities require write access to directory entries.
ssoadm attribute:
sun-idrepo-ldapv3-config-authidDefault:
CN=Administrator,CN=Users,base-dn- LDAP Bind Password
Bind password for connecting to the directory server
ssoadm attribute:
sun-idrepo-ldapv3-config-authpw- LDAP Organization DN
The base DN under which to find user and group profiles.
ssoadm attribute:
sun-idrepo-ldapv3-config-organization_nameDefault:
base-dn- LDAP Connection Mode
Whether to use LDAP, LDAPS or StartTLS to connect to the directory server. When LDAPS or StartTLS are enabled, AM must be able to trust server certificates, either because the server certificates were signed by a CA whose certificate is already included in the trust store used by the container where AM runs, or because you imported the certificates into the trust store.
ssoadm attribute:
sun-idrepo-ldapv3-config-connection-modePossible values:
LDAP,LDAPS, andStartTLS- LDAP Connection Pool Maximum Size
Maximum number of connections to the directory server. Make sure the directory service can cope with the maximum number of client connections across all servers.
ssoadm attribute:
sun-idrepo-ldapv3-config-connection_pool_max_sizeDefault: 10
- LDAP Connection Heartbeat Interval
How often to send a heartbeat request to the directory server to ensure that the connection does not remain idle. Some network administrators configure firewalls and load balancers to drop connections that are idle for too long. You can turn this off by setting the value to 0 or to a negative number. To set the units for the interval use LDAP Connection Heartbeat Time Unit.
ssoadm attribute:
openam-idrepo-ldapv3-heartbeat-intervalDefault: 10
- LDAP Connection Heartbeat Time Unit
Time unit for the LDAP Connection Heartbeat Interval setting.
ssoadm attribute:
openam-idrepo-ldapv3-heartbeat-timeunitDefault:
SECONDS- Maximum Results Returned from Search
A cap for the number of search results to return, for example, when viewing profiles under Identities.
ssoadm attribute:
sun-idrepo-ldapv3-config-max-resultDefault: 1000
- Search Timeout
Maximum time to wait for search results in seconds. Does not apply to persistent searches.
ssoadm attribute:
sun-idrepo-ldapv3-config-time-limitDefault: 10
- LDAPv3 Plugin Search Scope
LDAP searches can apply to a single entry (SCOPE_BASE), entries directly below the search DN (SCOPE_ONE), or all entries below the search DN (SEARCH_SUB)
ssoadm attribute:
sun-idrepo-ldapv3-config-search-scopeDefault:
SCOPE_SUB- LDAPv3 Repository Plugin Class Name
AM identity repository implementation.
ssoadm attribute:
sunIdRepoClassDefault:
org.forgerock.openam.idrepo.ldap.DJLDAPv3Repo- Attribute Name Mapping
Map of AM profile attribute names to directory server attribute names.
ssoadm attribute:
sunIdRepoAttributeMappingDefault:
userPassword=unicodePwd- LDAPv3 Plugin Supported Types and Operations
Specifies the identity types supported by the data store, such as
user,group, orrealm, and which operations can be performed on them.The following table illustrates the identity types supported by this data store, and the operations that can be performed on them:
readcreateeditdeleteservicegroup - realm user Read the identity type Create new identities of the given identity type Edit entities of the given identity type Delete entities of the given identity type Read and write service settings associated with the given identity type. You can remove permissions based on your data store needs. For example, if the data store should not be written to, you can set the operations to
readonly for the identity types.The
serviceoperation is only relevant to therealmand theuseridentity types. For example, the Session Service configuration can be stored by realm, and a user can have specific session timeout settings.ssoadm attribute:
sunIdRepoSupportedOperationsDefault:
group=read,create,edit,deleterealm=read,create,edit,delete,serviceuser=read,create,edit,delete,service- LDAP Users Search Attribute
When searching for a user by name, match values against this attribute.
ssoadm attribute:
sun-idrepo-ldapv3-config-users-search-attributeDefault:
cnWarning
Do not modify the value of the search attribute in user profiles. Modifying this attribute value can result in incorrectly cached identity data. For example, if you configure the search attribute to
mail, it could prevent users from being able to update their email addresses in their user profiles.- LDAP Users Search Filter
When searching for users, apply this LDAP search filter as well.
ssoadm attribute:
sun-idrepo-ldapv3-config-users-search-filterDefault:
(objectclass=person)- LDAP People Container Naming Attribute
RDN attribute of the LDAP base DN which contains user profiles.
ssoadm attribute:
sun-idrepo-ldapv3-config-people-container-nameDefault:
cn- LDAP People Container Value
RDN attribute value of the LDAP base DN which contains user profiles.
If specified, AM will limit searches for user profiles to the provided base DN. Otherwise, AM searches the entire directory.
ssoadm attribute:
sun-idrepo-ldapv3-config-people-container-valueDefault:
users- LDAP User Object Class
User profiles have these LDAP object classes.
AM handles only those attributes listed in this setting. AM discards any such unlisted attributes from requests and the request proceeds without the attribute.
For example, with default settings, if you request that AM execute a search that asks for the
mailAlternateAddressattribute, AM does the search, but does not requestmailAlternateAddress. In the same way, AM does perform an update operation with a request to set the value of an unlisted attribute likemailAlternateAddress, but it drops the unlisted attribute from the update request.ssoadm attribute:
sun-idrepo-ldapv3-config-user-objectclassDefault:
organizationalPerson,person,top,User,- LDAP User Attributes
User profiles have these LDAP attributes.
ssoadm attribute:
sun-idrepo-ldapv3-config-user-attributesDefault:
assignedDashboard,cn,createTimestamp,devicePrintProfiles,displayName,distinguishedName,dn,employeeNumber,givenName,iplanet-am-auth-configuration,iplanet-am-session-destroy-sessions,iplanet-am-session-get-valid-sessions,iplanet-am-session-max-caching-time,iplanet-am-session-max-idle-time,iplanet-am-session-max-session-time,iplanet-am-session-quota-limit,iplanet-am-session-service-status,iplanet-am-user-account-life,iplanet-am-user-admin-start-dn,iplanet-am-user-alias-list,iplanet-am-user-auth-config,iplanet-am-user-auth-modules,iplanet-am-user-failure-url,iplanet-am-user-federation-info,iplanet-am-user-federation-info-key,iplanet-am-user-login-status,iplanet-am-user-password-reset-force-reset,iplanet-am-user-password-reset-options,iplanet-am-user-password-reset-question-answer,iplanet-am-user-success-url,kbaActiveIndex,kbaInfo,mail,modifyTimestamp,name,oath2faEnabled,oathDeviceProfiles,objectGUID,objectclass,postalAddress,preferredLocale,preferredlanguage,preferredtimezone,pushDeviceProfiles,sAMAccountName,sn,sun-fm-saml2-nameid-info,sun-fm-saml2-nameid-infokey,sunAMAuthInvalidAttemptsData,sunIdentityMSISDNNumber,sunIdentityServerDiscoEntries,sunIdentityServerPPAddressCard,sunIdentityServerPPCommonNameAltCN,sunIdentityServerPPCommonNameCN,sunIdentityServerPPCommonNameFN,sunIdentityServerPPCommonNameMN,sunIdentityServerPPCommonNamePT,sunIdentityServerPPCommonNameSN,sunIdentityServerPPDemographicsAge,sunIdentityServerPPDemographicsBirthDay,sunIdentityServerPPDemographicsDisplayLanguage,sunIdentityServerPPDemographicsLanguage,sunIdentityServerPPDemographicsTimeZone,sunIdentityServerPPEmergencyContact,sunIdentityServerPPEmploymentIdentityAltO,sunIdentityServerPPEmploymentIdentityJobTitle,sunIdentityServerPPEmploymentIdentityOrg,sunIdentityServerPPEncryPTKey,sunIdentityServerPPFacadeGreetSound,sunIdentityServerPPFacadeMugShot,sunIdentityServerPPFacadeNamePronounced,sunIdentityServerPPFacadeWebSite,sunIdentityServerPPFacadegreetmesound,sunIdentityServerPPInformalName,sunIdentityServerPPLegalIdentityAltIdType,sunIdentityServerPPLegalIdentityAltIdValue,sunIdentityServerPPLegalIdentityDOB,sunIdentityServerPPLegalIdentityGender,sunIdentityServerPPLegalIdentityLegalName,sunIdentityServerPPLegalIdentityMaritalStatus,sunIdentityServerPPLegalIdentityVATIdType,sunIdentityServerPPLegalIdentityVATIdValue,sunIdentityServerPPMsgContact,sunIdentityServerPPSignKey,telephoneNumber,unicodePwd,userAccountControl,userPrincipalname,userpassword- Create User Attribute Mapping
When creating a user profile, apply this map of AM profile attribute names to directory server attribute names.
The LDAP user profile entries require the Common Name (
cn) and Surname (sn) attributes, so that LDAP constraint violations do not occur when performing an add operation.The
cnattribute gets its value from theuidattribute, which comes from the User Name field on the AM console's login page. Thesnattribute gets the value of thegivenNameattribute. Attributes not mapped to another attribute and attributes mapped to themselves (for example,cn=cn) take the value of the username unless the attribute values are provided when creating the profile.ssoadm attribute:
sun-idrepo-ldapv3-config-createuser-attr-mappingDefault:
cn,sn- Attribute Name of User Status
Attribute to check/set user status.
ssoadm attribute:
sun-idrepo-ldapv3-config-isactiveDefault:
userAccountControl- User Status Active Value
Active users have the user status attribute set to this value.
ssoadm attribute:
sun-idrepo-ldapv3-config-activeDefault: 544
- User Status Inactive Value
Inactive users have the user status attribute set to this value.
ssoadm attribute:
sun-idrepo-ldapv3-config-inactiveDefault: 546
- Authentication Naming Attribute
RDN attribute for building the bind DN when given a username and password to authenticate a user against the directory server.
ssoadm attribute:
sun-idrepo-ldapv3-config-auth-naming-attrDefault:
cn- LDAP Groups Search Attribute
When searching for a group by name, match values against this attribute.
ssoadm attribute:
sun-idrepo-ldapv3-config-groups-search-attributeDefault:
cn- LDAP Groups Search Filter
When searching for groups, apply this LDAP search filter as well.
ssoadm attribute:
sun-idrepo-ldapv3-config-groups-search-filterDefault:
(objectclass=group)- LDAP Groups Container Naming Attribute
RDN attribute of the LDAP base DN which contains group profiles.
ssoadm attribute:
sun-idrepo-ldapv3-config-group-container-nameDefault:
cn- LDAP Groups Container Value
RDN attribute value of the LDAP base DN which contains group profiles.
If specified, AM will limit searches for group profiles to the provided base DN. Otherwise, AM searches the entire directory.
ssoadm attribute:
sun-idrepo-ldapv3-config-group-container-valueDefault:
users- LDAP Groups Object Class
Group profiles have these LDAP object classes.
ssoadm attribute:
sun-idrepo-ldapv3-config-group-objectclassDefault:
Group,top- LDAP Groups Attributes
Group profiles have these LDAP attributes.
ssoadm attribute:
sun-idrepo-ldapv3-config-group-attributesDefault:
cn,distinguishedName,dn,member,name,objectCategory,objectclass,sAMAccountName,sAMAccountType- Attribute Name for Group Membership
LDAP attribute in the member's LDAP entry whose values are the groups to which a member belongs.
ssoadm attribute:
sun-idrepo-ldapv3-config-memberof- Attribute Name of Unique Member
Attribute in the group's LDAP entry whose values are the members of the group.
ssoadm attribute:
sun-idrepo-ldapv3-config-uniquememberDefault:
member- Persistent Search Base DN
Base DN for LDAP-persistent searches used to receive notification of changes in directory server data.
ssoadm attribute:
sun-idrepo-ldapv3-config-psearchbaseDefault:
base-dn- Persistent Search Scope
LDAP searches can apply to a single entry (SCOPE_BASE), entries directly below the search DN (SCOPE_ONE), or all entries below the search DN (SEARCH_SUB).
Specify either
SCOPE_BASEorSCOPE_ONE. Do not specifySCOPE_SUB, as it can have a severe impact on Active Directory performance.ssoadm attribute:
sun-idrepo-ldapv3-config-psearch-scopeDefault:
SCOPE_SUB- The Delay Time Between Retries
How long to wait after receiving an error result that indicates AM should try the LDAP operation again.
ssoadm attribute:
com.iplanet.am.ldap.connection.delay.between.retriesDefault: 1000 milliseconds
- DN Cache Enabled
Whether to enable the DN cache, which is used to cache DN lookups that can happen in bursts during authentication. As the cache can become stale when a user is moved or renamed, enable DN caching when the directory service allows move/rename operations (Mod DN), and when AM uses persistent searches to obtain notification of such updates.
ssoadm attribute:
sun-idrepo-ldapv3-dncache-enabledDefault: false
- DN Cache Size
Maximum number of DNs cached when caching is enabled.
ssoadm attribute:
sun-idrepo-ldapv3-dncache-sizeDefault: 1500 items
- Load Schema
Import appropriate LDAP schema to the directory server before saving the configuration. The LDAP Bind DN user must have access to perform this operation.
This option is not available for use with the ssoadm command.
Default: Disabled.
Use these attributes when configuring Active Directory Application Mode (ADAM) Data Stores:
ssoadm service name:
sunIdentityRepositoryService
- ID
The ID of the data store configuration.
- LDAP Server
host:portto contact the directory server, with optional|server_ID|site_IDfor deployments with multiple servers and sites.AM uses the optional settings to determine which directory server to contact first. AM tries to contact directory servers in the following priority order, with highest priority first:
The first directory server in the list whose server_ID matches the current AM server.
The first directory server in the list whose site_ID matches the current AM server.
The first directory server in the remaining list.
If the directory server is not available, AM proceeds to the next directory server in the list.
ssoadm attribute:
sun-idrepo-ldapv3-config-ldap-serverDefault:
host:portof the initial directory server configured for this AM server.- LDAP Bind DN
Bind DN for connecting to the directory server. Some AM capabilities require write access to directory entries.
ssoadm attribute:
sun-idrepo-ldapv3-config-authidDefault:
CN=Administrator,CN=Users,base-dn- LDAP Bind Password
Bind password for connecting to the directory server.
ssoadm attribute:
sun-idrepo-ldapv3-config-authpw- LDAP Organization DN
The base DN under which to find user and group profiles.
ssoadm attribute:
sun-idrepo-ldapv3-config-organization_nameDefault:
base-dn- LDAP Connection Mode
Whether to use LDAP, LDAPS or StartTLS to connect to the directory server. When LDAPS or StartTLS are enabled, AM must be able to trust server certificates, either because the server certificates were signed by a CA whose certificate is already included in the trust store used by the container where AM runs, or because you imported the certificates into the trust store.
ssoadm attribute:
sun-idrepo-ldapv3-config-connection-modePossible values:
LDAP,LDAPS, andStartTLS- LDAP Connection Pool Maximum Size
Maximum number of connections to the directory server. Make sure the directory service can cope with the maximum number of client connections across all servers.
ssoadm attribute:
sun-idrepo-ldapv3-config-connection_pool_max_sizeDefault: 10
- LDAP Connection Heartbeat Interval
How often to send a heartbeat request to the directory server to ensure that the connection does not remain idle. Some network administrators configure firewalls and load balancers to drop connections that are idle for too long. You can turn this off by setting the value to 0 or to a negative number. To set the units for the interval, use LDAP Connection Heartbeat Time Unit.
ssoadm attribute:
openam-idrepo-ldapv3-heartbeat-intervalDefault: 10
- LDAP Connection Heartbeat Time Unit
Time unit for the LDAP Connection Heartbeat Interval setting
ssoadm attribute:
openam-idrepo-ldapv3-heartbeat-timeunitDefault:
second- Maximum Results Returned from Search
A cap for the number of search results to return, for example, when viewing profiles under Identities.
ssoadm attribute:
sun-idrepo-ldapv3-config-max-resultDefault: 1000
- Search Timeout
Maximum time to wait for search results in seconds. Does not apply to persistent searches.
ssoadm attribute:
sun-idrepo-ldapv3-config-time-limitDefault: 10
- LDAPv3 Plugin Search Scope
LDAP searches can apply to a single entry (SCOPE_BASE), entries directly below the search DN (SCOPE_ONE), or all entries below the search DN (SEARCH_SUB).
ssoadm attribute:
sun-idrepo-ldapv3-config-search-scopeDefault:
SCOPE_SUB- LDAPv3 Repository Plugin Class Name
AM identity repository implementation.
ssoadm attribute:
sunIdRepoClassDefault:
org.forgerock.openam.idrepo.ldap.DJLDAPv3Repo- Attribute Name Mapping
Map of AM profile attribute names to directory server attribute names.
ssoadm attribute:
sunIdRepoAttributeMappingDefault:
userPassword=unicodePwd- LDAPv3 Plugin Supported Types and Operations
Specifies the identity types supported by the data store, such as
user,group, orrealm, and which operations can be performed on them.The following table illustrates the identity types supported by this data store, and the operations that can be performed on them:
readcreateeditdeleteservicegroup - realm user Read the identity type Create new identities of the given identity type Edit entities of the given identity type Delete entities of the given identity type Read and write service settings associated with the given identity type. You can remove permissions based on your data store needs. For example, if the data store should not be written to, you can set the operations to
readonly for the identity types.The
serviceoperation is only relevant to therealmand theuseridentity types. For example, the Session Service configuration can be stored by realm, and a user can have specific session timeout settings.ssoadm attribute:
sunIdRepoSupportedOperationsDefault:
group=read,create,edit,deleterealm=read,create,edit,delete,serviceuser=read,create,edit,delete,service- LDAP Users Search Attribute
When searching for a user by name, match values against this attribute.
ssoadm attribute:
sun-idrepo-ldapv3-config-users-search-attributeDefault:
cnWarning
Do not modify the value of the search attribute in user profiles. Modifying this attribute value can result in incorrectly cached identity data. For example, if you configure the search attribute to
mail, it could prevent users from being able to update their email addresses in their user profiles.- LDAP Users Search Filter
When searching for users, apply this LDAP search filter as well.
ssoadm attribute:
sun-idrepo-ldapv3-config-users-search-filterDefault:
(objectclass=person)- LDAP People Container Naming Attribute
RDN attribute of the LDAP base DN which contains user profiles.
ssoadm attribute:
sun-idrepo-ldapv3-config-people-container-name- LDAP People Container Value
RDN attribute value of the LDAP base DN which contains user profiles.
If specified, AM will limit searches for user profiles to the provided base DN. Otherwise, AM searches the entire directory.
ssoadm attribute:
sun-idrepo-ldapv3-config-people-container-value- LDAP User Object Class
User profiles have these LDAP object classes.
AM handles only those attributes listed in this setting. AM discards any unlisted attributes from requests and the request proceeds without the attribute.
For example, with default settings, if you request that AM execute a search that asks for the
mailAlternateAddressattribute, AM does the search, but does not requestmailAlternateAddress. In the same way, AM does perform an update operation with a request to set the value of an unlisted attribute likemailAlternateAddress, but it drops the unlisted attribute from the update request.ssoadm attribute:
sun-idrepo-ldapv3-config-user-objectclassDefault:
devicePrintProfilesContainer,forgerock-am-dashboard-service,iPlanetPreferences,iplanet-am-auth-configuration-service,iplanet-am-managed-person,iplanet-am-user-service,kbaInfoContainer,oathDeviceProfilesContainer,organizationalPerson,person,pushDeviceProfilesContainer,sunAMAuthAccountLockout,sunFMSAML2NameIdentifier,sunFederationManagerDataStore,sunIdentityServerLibertyPPService,top,User- LDAP User Attributes
User profiles have these LDAP attributes.
AM handles only those attributes listed in this setting. AM discards any unlisted attributes from requests and the request proceeds without the attribute.
ssoadm attribute:
sun-idrepo-ldapv3-config-user-attributesDefault:
assignedDashboard,cn,createTimestamp,devicePrintProfiles,displayName,distinguishedName,dn,employeeNumber,givenName,iplanet-am-auth-configuration,iplanet-am-session-destroy-sessions,iplanet-am-session-get-valid-sessions,iplanet-am-session-max-caching-time,iplanet-am-session-max-idle-time,iplanet-am-session-max-session-time,iplanet-am-session-quota-limit,iplanet-am-session-service-status,iplanet-am-user-account-life,iplanet-am-user-admin-start-dn,iplanet-am-user-alias-list,iplanet-am-user-auth-config,iplanet-am-user-auth-modules,iplanet-am-user-failure-url,iplanet-am-user-federation-info,iplanet-am-user-federation-info-key,iplanet-am-user-login-status,iplanet-am-user-password-reset-force-reset,iplanet-am-user-password-reset-options,iplanet-am-user-password-reset-question-answer,iplanet-am-user-success-url,kbaActiveIndex,kbaInfo,mail,modifyTimestamp,msDS-UserAccountDisabled,name,oath2faEnabled,oathDeviceProfiles,objectGUID,objectclass,postalAddress,preferredLocale,preferredlanguage,preferredtimezone,pushDeviceProfiles,sn,sun-fm-saml2-nameid-info,sun-fm-saml2-nameid-infokey,sunAMAuthInvalidAttemptsData,sunIdentityMSISDNNumber,sunIdentityServerDiscoEntries,sunIdentityServerPPAddressCard,sunIdentityServerPPCommonNameAltCN,sunIdentityServerPPCommonNameCN,sunIdentityServerPPCommonNameFN,sunIdentityServerPPCommonNameMN,sunIdentityServerPPCommonNamePT,sunIdentityServerPPCommonNameSN,sunIdentityServerPPDemographicsAge,sunIdentityServerPPDemographicsBirthDay,sunIdentityServerPPDemographicsDisplayLanguage,sunIdentityServerPPDemographicsLanguage,sunIdentityServerPPDemographicsTimeZone,sunIdentityServerPPEmergencyContact,sunIdentityServerPPEmploymentIdentityAltO,sunIdentityServerPPEmploymentIdentityJobTitle,sunIdentityServerPPEmploymentIdentityOrg,sunIdentityServerPPEncryPTKey,sunIdentityServerPPFacadeGreetSound,sunIdentityServerPPFacadeMugShot,sunIdentityServerPPFacadeNamePronounced,sunIdentityServerPPFacadeWebSite,sunIdentityServerPPFacadegreetmesound,sunIdentityServerPPInformalName,sunIdentityServerPPLegalIdentityAltIdType,sunIdentityServerPPLegalIdentityAltIdValue,sunIdentityServerPPLegalIdentityDOB,sunIdentityServerPPLegalIdentityGender,sunIdentityServerPPLegalIdentityLegalName,sunIdentityServerPPLegalIdentityMaritalStatus,sunIdentityServerPPLegalIdentityVATIdType,sunIdentityServerPPLegalIdentityVATIdValue,sunIdentityServerPPMsgContact,sunIdentityServerPPSignKey,telephoneNumber,unicodePwd,userPrincipalname,userpassword- Create User Attribute Mapping
When creating a user profile, apply this map of AM profile attribute names to directory server attribute names.
Attributes not mapped to another attribute (for example,
cn) and attributes mapped to themselves, (for example,cn=cn) take the value of the username unless the attribute values are provided when creating the profile. The object classes for user profile LDAP entries generally require Common Name (cn) and Surname (sn) attributes, so this prevents an LDAP constraint violation when performing the add operation.ssoadm attribute:
sun-idrepo-ldapv3-config-createuser-attr-mappingDefault:
cn,sn- Attribute Name of User Status
Attribute to check/set user status.
ssoadm attribute:
sun-idrepo-ldapv3-config-isactiveDefault:
msDS-UserAccountDisabled- User Status Active Value
Active users have the user status attribute set to this value.
ssoadm attribute:
sun-idrepo-ldapv3-config-activeDefault:
FALSE- User Status Inactive Value
Inactive users have the user status attribute set to this value.
ssoadm attribute:
sun-idrepo-ldapv3-config-inactiveDefault:
TRUE- Authentication Naming Attribute
RDN attribute for building the bind DN when given a username and password to authenticate a user against the directory server.
ssoadm attribute:
sun-idrepo-ldapv3-config-auth-naming-attrDefault:
cn- LDAP Groups Search Attribute
When searching for a group by name, match values against this attribute.
ssoadm attribute:
sun-idrepo-ldapv3-config-groups-search-attributeDefault:
cn- LDAP Groups Search Filter
When searching for groups, apply this LDAP search filter as well.
ssoadm attribute:
sun-idrepo-ldapv3-config-groups-search-filterDefault:
(objectclass=group)- LDAP Groups Container Naming Attribute
RDN attribute of the LDAP base DN which contains group profiles.
ssoadm attribute:
sun-idrepo-ldapv3-config-group-container-nameDefault:
cn- LDAP Groups Container Value
RDN attribute value of the LDAP base DN which contains group profiles.
If specified, AM will limit searches for group profiles to the provided base DN. Otherwise, AM searches the entire directory.
ssoadm attribute:
sun-idrepo-ldapv3-config-group-container-value- LDAP Groups Object Class
Group profiles have these LDAP object classes.
ssoadm attribute:
sun-idrepo-ldapv3-config-group-objectclassDefault:
Group,top- LDAP Groups Attributes
Group profiles have these LDAP attributes.
ssoadm attribute:
sun-idrepo-ldapv3-config-group-attributesDefault:
cn,distinguishedName,dn,member,name,objectCategory,objectclass,sAMAccountName,sAMAccountType- Attribute Name for Group Membership
LDAP attribute in the member's LDAP entry whose values are the groups to which a member belongs.
ssoadm attribute:
sun-idrepo-ldapv3-config-memberof- Attribute Name of Unique Member
Attribute in the group's LDAP entry whose values are the members of the group.
ssoadm attribute:
sun-idrepo-ldapv3-config-uniquememberDefault:
member- Persistent Search Base DN
Base DN for LDAP-persistent searches used to receive notification of changes in directory server data.
ssoadm attribute:
sun-idrepo-ldapv3-config-psearchbaseDefault:
base-dn- Persistent Search Scope
LDAP searches can apply to a single entry (SCOPE_BASE), entries directly below the search DN (SCOPE_ONE), or all entries below the search DN (SEARCH_SUB).
Specify either
SCOPE_BASEorSCOPE_ONE. Do not specifySCOPE_SUB, as it can have a severe impact on Active Directory performance.ssoadm attribute:
sun-idrepo-ldapv3-config-psearch-scopeDefault:
SCOPE_SUB- The Delay Time Between Retries
How long to wait after receiving an error result that indicates AM should try the LDAP operation again.
ssoadm attribute:
com.iplanet.am.ldap.connection.delay.between.retriesDefault: 1000 milliseconds
- DN Cache Enabled
Whether to enable the DN cache, which is used to cache DN lookups that can happen in bursts during authentication. As the cache can become stale when a user is moved or renamed, enable DN caching when the directory service allows move/rename operations (Mod DN), and when AM uses persistent searches to obtain notification of such updates.
ssoadm attribute:
sun-idrepo-ldapv3-dncache-enabledDefault: false
- DN Cache Size
Maximum number of DNs cached when caching is enabled.
ssoadm attribute:
sun-idrepo-ldapv3-dncache-sizeDefault: 1500 items
- Load Schema
Import appropriate LDAP schema to the directory server before saving the configuration. The LDAP Bind DN user must have access to perform this operation.
This option is not available for use with the ssoadm command.
Default: Disabled.
Use these attributes when configuring Generic LDAPv3 compliant data stores:
ssoadm service name:
sunIdentityRepositoryService
- ID
The ID of the data store configuration.
- LDAP Server
host:portto contact the directory server, with optional|server_ID|site_IDfor deployments with multiple servers and sites.AM uses the optional settings to determine which directory server to contact first. AM tries to contact directory servers in the following priority order, with highest priority first:
The first directory server in the list whose server_ID matches the current AM server.
The first directory server in the list whose site_ID matches the current AM server.
The first directory server in the remaining list.
If the directory server is not available, AM proceeds to the next directory server in the list.
ssoadm attribute:
sun-idrepo-ldapv3-config-ldap-serverDefault:
host:portof the initial directory server configured for this AM server- LDAP Bind DN
Bind DN for connecting to the directory server. Some AM capabilities require write access to directory entries.
ssoadm attribute:
sun-idrepo-ldapv3-config-authid- LDAP Bind Password
Bind password for connecting to the directory server.
ssoadm attribute:
sun-idrepo-ldapv3-config-authpw- LDAP Organization DN
The base DN under which to find user and group profiles.
ssoadm attribute:
sun-idrepo-ldapv3-config-organization_nameDefault:
base-dn- LDAP Connection Mode
Whether to use LDAP, LDAPS or StartTLS to connect to the directory server. When LDAPS or StartTLS are enabled, AM must be able to trust server certificates, either because the server certificates were signed by a CA whose certificate is already included in the trust store used by the container where AM runs, or because you imported the certificates into the trust store.
ssoadm attribute:
sun-idrepo-ldapv3-config-connection-modePossible values:
LDAP,LDAPS, andStartTLS- LDAP Connection Pool Maximum Size
Maximum number of connections to the directory server. Make sure the directory service can cope with the maximum number of client connections across all servers.
ssoadm attribute:
sun-idrepo-ldapv3-config-connection_pool_max_sizeDefault: 10
- LDAP Connection Heartbeat Interval
How often to send a heartbeat request to the directory server to ensure that the connection does not remain idle. Some network administrators configure firewalls and load balancers to drop connections that are idle for too long. You can turn this off by setting the value to 0 or to a negative number. To set the units for the interval, use LDAP Connection Heartbeat Time Unit.
ssoadm attribute:
openam-idrepo-ldapv3-heartbeat-intervalDefault: 10
- LDAP Connection Heartbeat Time Unit
Time unit for the LDAP Connection Heartbeat Interval setting.
ssoadm attribute:
openam-idrepo-ldapv3-heartbeat-timeunitDefault:
second- Maximum Results Returned from Search
A cap for the number of search results to return, for example, when viewing profiles under Identities.
ssoadm attribute:
sun-idrepo-ldapv3-config-max-resultDefault: 1000
- Search Timeout
Maximum time to wait for search results in seconds. Does not apply to persistent searches.
ssoadm attribute:
sun-idrepo-ldapv3-config-time-limitDefault: 10
- LDAPv3 Plugin Search Scope
LDAP searches can apply to a single entry (SCOPE_BASE), entries directly below the search DN (SCOPE_ONE), or all entries below the search DN (SEARCH_SUB).
ssoadm attribute:
sun-idrepo-ldapv3-config-search-scopeDefault:
SCOPE_SUB- LDAPv3 Repository Plugin Class Name
AM identity repository implementation.
ssoadm attribute:
sunIdRepoClassDefault:
org.forgerock.openam.idrepo.ldap.DJLDAPv3Repo- Attribute Name Mapping
Map of AM profile attribute names to directory server attribute names.
ssoadm attribute:
sunIdRepoAttributeMapping- LDAPv3 Plugin Supported Types and Operations
Specifies the identity types supported by the data store, such as
user,group, orrealm, and which operations can be performed on them.The following table illustrates the identity types supported by this data store, and the operations that can be performed on them:
readcreateeditdeleteservicegroup - realm user Read the identity type Create new identities of the given identity type Edit entities of the given identity type Delete entities of the given identity type Read and write service settings associated with the given identity type. You can remove permissions based on your data store needs. For example, if the data store should not be written to, you can set the operations to
readonly for the identity types.The
serviceoperation is only relevant to therealmand theuseridentity types. For example, the Session Service configuration can be stored by realm, and a user can have specific session timeout settings.ssoadm attribute:
sunIdRepoSupportedOperationsDefault:
group=read,create,edit,deleterealm=read,create,edit,delete,serviceuser=read,create,edit,delete,service- LDAP Users Search Attribute
When searching for a user by name, match values against this attribute.
ssoadm attribute:
sun-idrepo-ldapv3-config-users-search-attributeDefault:
uidWarning
Do not modify the value of the search attribute in user profiles. Modifying this attribute value can result in incorrectly cached identity data. For example, if you configure the search attribute to
mail, it could prevent users from being able to update their email addresses in their user profiles.- LDAP Users Search Filter
When searching for users, apply this LDAP search filter as well.
ssoadm attribute:
sun-idrepo-ldapv3-config-users-search-filterDefault:
(objectclass=inetorgperson)- LDAP People Container Naming Attribute
RDN attribute of the LDAP base DN which contains user profiles.
ssoadm attribute:
sun-idrepo-ldapv3-config-people-container-name- LDAP People Container Value
RDN attribute value of the LDAP base DN which contains user profiles.
If specified, AM will limit searches for user profiles to the provided base DN. Otherwise, AM searches the entire directory.
ssoadm attribute:
sun-idrepo-ldapv3-config-people-container-value- LDAP User Object Class
User profiles have these LDAP object classes.
AM handles only those attributes listed in this setting. AM discards any unlisted attributes from requests and the request proceeds without the attribute.
For example, with default settings, if you request that AM execute a search that asks for the
mailAlternateAddressattribute, AM does the search, but does not requestmailAlternateAddress. In the same way, AM does perform an update operation with a request to set the value of an unlisted attribute likemailAlternateAddress, but it drops the unlisted attribute from the update request.ssoadm attribute:
sun-idrepo-ldapv3-config-user-objectclassDefault:
inetorgperson,inetUser,organizationalPerson,person,top,- LDAP User Attributes
User profiles have these LDAP attributes.
AM handles only those attributes listed in this setting. AM discards any unlisted attributes from requests and the request proceeds without the attribute.
ssoadm attribute:
sun-idrepo-ldapv3-config-user-attributesDefault:
uid,caCertificate,authorityRevocationList,inetUserStatus,mail,sn,manager,userPassword,adminRole,objectClass,givenName,memberOf,cn,telephoneNumber,preferredlanguage,userCertificate,postalAddress,dn,employeeNumber,distinguishedName- Create User Attribute Mapping
When creating a user profile, apply this map of AM profile attribute names to directory server attribute names.
Attributes not mapped to another attribute (for example,
cn) and attributes mapped to themselves (for example,cn=cn) take the value of the username unless the attribute values are provided when creating the profile. The object classes for user profile LDAP entries generally require Common Name (cn) and Surname (sn) attributes, so this prevents an LDAP constraint violation when performing the add operation.ssoadm attribute:
sun-idrepo-ldapv3-config-createuser-attr-mappingDefault:
cn,sn- Attribute Name of User Status
Attribute to check/set user status.
ssoadm attribute:
sun-idrepo-ldapv3-config-isactiveDefault:
inetuserstatus- User Status Active Value
Active users have the user status attribute set to this value.
ssoadm attribute:
sun-idrepo-ldapv3-config-activeDefault:
Active- User Status Inactive Value
Inactive users have the user status attribute set to this value.
ssoadm attribute:
sun-idrepo-ldapv3-config-inactiveDefault:
Inactive- Authentication Naming Attribute
RDN attribute for building the bind DN when given a username and password to authenticate a user against the directory server.
ssoadm attribute:
sun-idrepo-ldapv3-config-auth-naming-attrDefault:
uid- LDAP Groups Search Attribute
When searching for a group by name, match values against this attribute.
ssoadm attribute:
sun-idrepo-ldapv3-config-groups-search-attributeDefault:
cn- LDAP Groups Search Filter
When searching for groups, apply this LDAP search filter as well.
ssoadm attribute:
sun-idrepo-ldapv3-config-groups-search-filterDefault:
(objectclass=groupOfUniqueNames)- LDAP Groups Container Naming Attribute
RDN attribute of the LDAP base DN which contains group profiles.
ssoadm attribute:
sun-idrepo-ldapv3-config-group-container-nameDefault:
ou- LDAP Groups Container Value
RDN attribute value of the LDAP base DN which contains group profiles.
If specified, AM will limit searches for group profiles to the provided base DN. Otherwise, AM searches the entire directory.
ssoadm attribute:
sun-idrepo-ldapv3-config-group-container-valueDefault:
groups- LDAP Groups Object Class
Group profiles have these LDAP object classes.
ssoadm attribute:
sun-idrepo-ldapv3-config-group-objectclassDefault:
groupofuniquenames,top- LDAP Groups Attributes
Group profiles have these LDAP attributes.
ssoadm attribute:
sun-idrepo-ldapv3-config-group-attributesDefault:
ou,cn,description,dn,objectclass,uniqueMember- Attribute Name for Group Membership
LDAP attribute in the member's LDAP entry whose values are the groups to which a member belongs.
ssoadm attribute:
sun-idrepo-ldapv3-config-memberof- Attribute Name of Unique Member
Attribute in the group's LDAP entry whose values are the members of the group.
ssoadm attribute:
sun-idrepo-ldapv3-config-uniquememberDefault:
uniqueMember- Attribute Name of Group Member URL
Attribute in the dynamic group's LDAP entry whose value is a URL specifying the members of the group.
ssoadm attribute:
sun-idrepo-ldapv3-config-memberurlDefault:
memberUrl- Default Group Member's User DN
DN of member added to all newly created groups.
ssoadm attribute:
sun-idrepo-ldapv3-config-dftgroupmember- Persistent Search Base DN
Base DN for LDAP-persistent searches used to receive notification of changes in directory server data.
ssoadm attribute:
sun-idrepo-ldapv3-config-psearchbaseDefault:
base-dn- Persistent Search Filter
LDAP filter to apply when performing persistent searches.
ssoadm attribute:
sun-idrepo-ldapv3-config-psearch-filterDefault:
(objectclass=*)- Persistent Search Scope
LDAP searches can apply to a single entry (SCOPE_BASE), entries directly below the search DN (SCOPE_ONE), or all entries below the search DN (SEARCH_SUB).
ssoadm attribute:
sun-idrepo-ldapv3-config-psearch-scopeDefault:
SCOPE_SUB- The Delay Time Between Retries
How long to wait after receiving an error result that indicates AM should try the LDAP operation again.
ssoadm attribute:
com.iplanet.am.ldap.connection.delay.between.retriesDefault: 1000 milliseconds
- DN Cache Enabled
Whether to enable the DN cache, which is used to cache DN lookups that can happen in bursts during authentication. As the cache can become stale when a user is moved or renamed, enable DN caching when the directory service allows move/rename operations (Mod DN), and when AM uses persistent searches to obtain notification of such updates.
ssoadm attribute:
sun-idrepo-ldapv3-dncache-enabledDefault: false
- DN Cache Size
Maximum number of DNs cached when caching is enabled.
ssoadm attribute:
sun-idrepo-ldapv3-dncache-sizeDefault: 1500 items
- Load Schema
Import appropriate LDAP schema to the directory server before saving the configuration. The LDAP Bind DN user must have access to perform this operation.
This option is not available for use with the ssoadm command.
Default: Disabled.
Use these attributes when configuring DS data stores:
ssoadm service name:
sunIdentityRepositoryService
- ID
The ID of the data store configuration.
- LDAP Server
host:portto contact the directory server, with optional|server_ID|site_IDfor deployments with multiple servers and sites.AM uses the optional settings to determine which directory server to contact first. AM tries to contact directory servers in the following priority order, with highest priority first:
The first directory server in the list whose server_ID matches the current AM server.
The first directory server in the list whose site_ID matches the current AM server.
The first directory server in the remaining list.
If the directory server is not available, AM proceeds to the next directory server in the list.
ssoadm attribute:
sun-idrepo-ldapv3-config-ldap-serverDefault:
host:portof the initial directory server configured for this AM server- LDAP Bind DN
Bind DN for connecting to the directory server. Some AM capabilities require write access to directory entries.
ssoadm attribute:
sun-idrepo-ldapv3-config-authid- LDAP Bind Password
Bind password for connecting to the directory server.
ssoadm attribute:
sun-idrepo-ldapv3-config-authpw- LDAP Organization DN
The base DN under which to find user and group profiles.
ssoadm attribute:
sun-idrepo-ldapv3-config-organization_nameDefault:
base-dn- LDAP Connection Mode
Whether to use LDAP, LDAPS or StartTLS to connect to the directory server. When LDAPS or StartTLS are enabled, AM must be able to trust server certificates, either because the server certificates were signed by a CA whose certificate is already included in the trust store used by the container where AM runs, or because you imported the certificates into the trust store.
ssoadm attribute:
sun-idrepo-ldapv3-config-connection-modePossible values:
LDAP,LDAPS, andStartTLS- LDAP Connection Pool Maximum Size
Maximum number of connections to the directory server. Make sure the directory service can cope with the maximum number of client connections across all servers.
ssoadm attribute:
sun-idrepo-ldapv3-config-connection_pool_max_sizeDefault: 10
- LDAP Connection Heartbeat Interval
How often to send a heartbeat request to the directory server to ensure that the connection does not remain idle. Some network administrators configure firewalls and load balancers to drop connections that are idle for too long. You can turn this off by setting the value to 0 or to a negative number. To set the units for the interval, use LDAP Connection Heartbeat Time Unit.
ssoadm attribute:
openam-idrepo-ldapv3-heartbeat-intervalDefault: 10
- LDAP Connection Heartbeat Time Unit
Time unit for the LDAP Connection Heartbeat Interval setting.
ssoadm attribute:
openam-idrepo-ldapv3-heartbeat-timeunitDefault:
second- Maximum Results Returned from Search
A cap for the number of search results to return, for example, when viewing profiles under Identities.
ssoadm attribute:
sun-idrepo-ldapv3-config-max-resultDefault: 1000
- Search Timeout
Maximum time to wait for search results in seconds. Does not apply to persistent searches.
ssoadm attribute:
sun-idrepo-ldapv3-config-time-limitDefault: 10
- LDAPv3 Plugin Search Scope
LDAP searches can apply to a single entry (SCOPE_BASE), entries directly below the search DN (SCOPE_ONE), or all entries below the search DN (SEARCH_SUB).
ssoadm attribute:
sun-idrepo-ldapv3-config-search-scopeDefault:
SCOPE_SUB- LDAPv3 Repository Plugin Class Name
AM identity repository implementation.
ssoadm attribute:
sunIdRepoClassDefault:
org.forgerock.openam.idrepo.ldap.DJLDAPv3Repo- Attribute Name Mapping
Map of AM profile attribute names to directory server attribute names.
ssoadm attribute:
sunIdRepoAttributeMapping- LDAPv3 Plugin Supported Types and Operations
Specifies the identity types supported by the data store, such as
user,group, orrealm, and which operations can be performed on them.The following table illustrates the identity types supported by this data store, and the operations that can be performed on them:
readcreateeditdeleteservicegroup - realm user Read the identity type Create new identities of the given identity type Edit entities of the given identity type Delete entities of the given identity type Read and write service settings associated with the given identity type. You can remove permissions based on your data store needs. For example, if the data store should not be written to, you can set the operations to
readonly for the identity types.The
serviceoperation is only relevant to therealmand theuseridentity types. For example, the Session Service configuration can be stored by realm, and a user can have specific session timeout settings.ssoadm attribute:
sunIdRepoSupportedOperationsDefault:
group=read,create,edit,deleterealm=read,create,edit,delete,serviceuser=read,create,edit,delete,service- LDAP Users Search Attribute
When searching for a user by name, match values against this attribute.
ssoadm attribute:
sun-idrepo-ldapv3-config-users-search-attributeDefault:
uidWarning
Do not modify the value of the search attribute in user profiles. Modifying this attribute value can result in incorrectly cached identity data. For example, if you configure the search attribute to
mail, it could prevent users from being able to update their email addresses in their user profiles.- LDAP Users Search Filter
When searching for users, apply this LDAP search filter as well.
ssoadm attribute:
sun-idrepo-ldapv3-config-users-search-filterDefault:
(objectclass=inetorgperson)- LDAP People Container Naming Attribute
RDN attribute of the LDAP base DN which contains user profiles.
ssoadm attribute:
sun-idrepo-ldapv3-config-people-container-nameDefault:
ou- LDAP People Container Value
RDN attribute value of the LDAP base DN which contains user profiles.
If specified, AM will limit searches for user profiles to the provided base DN. Otherwise, AM searches the entire directory.
ssoadm attribute:
sun-idrepo-ldapv3-config-people-container-valueDefault:
people- LDAP Proxied Authorization
When the
force-change-on-resetpassword policy is configured on the DS user data store, users resetting their passwords using AM's forgotten password feature may be required to reset their passwords twice (prompted by both AM's User Self-Service and DS's password policy).When the LDAP Proxied Authorization property is enabled, AM leverages DS's proxied authorization to reset user passwords as themselves, rather than as the account configured n the LDAP Bind DN property. This way, DS does not require users to reset their passwords again.
Before enabling this setting, ensure that the account configured in the LDAP Bind DN property has the
proxied-authprivilege granted. If the account does not have the required privilege, users would not be able to reset their passwords and AM and DS will log an error message.For examples of setting the privileges required for the password reset feature, see "Preparing Your External Identity Repository" in the Installation Guide.
Enable this property only if:
The
force-change-on-resetpassword policy is configured in the DS user data store.The forgotten password user self-service feature is configured in AM.
Users are being forced to reset their passwords twice.
ssoadm attribute:
openam-idrepo-ldapv3-proxied-auth-enabledDefault:
Disabled- LDAP User Object Class
User profiles have these LDAP object classes.
AM handles only those attributes listed in this setting. AM discards any unlisted attributes from requests and the request proceeds without the attribute.
For example, with default settings, if you request that AM execute a search that asks for the
mailAlternateAddressattribute, AM does the search, but does not requestmailAlternateAddress. In the same way, AM does perform an update operation with a request to set the value of an unlisted attribute likemailAlternateAddress, but it drops the unlisted attribute from the update request.ssoadm attribute:
sun-idrepo-ldapv3-config-user-objectclassDefault:
devicePrintProfilesContainer,forgerock-am-dashboard-service,iPlanetPreferences,inetorgperson,inetuser,iplanet-am-auth-configuration-service,iplanet-am-managed-person,iplanet-am-user-service,kbaInfoContainer,oathDeviceProfilesContainer,organizationalperson,person,pushDeviceProfilesContainer,sunAMAuthAccountLockout,sunFMSAML2NameIdentifier,sunFederationManagerDataStore,sunIdentityServerLibertyPPService,top- LDAP User Attributes
User profiles have these LDAP attributes.
AM handles only those attributes listed in this setting. AM discards any unlisted attributes from requests and the request proceeds without the attribute.
ssoadm attribute:
sun-idrepo-ldapv3-config-user-attributesDefault:
adminRole,assignedDashboard,authorityRevocationList,caCertificate,cn,createTimestamp,devicePrintProfiles,distinguishedName,dn,employeeNumber,givenName,inetUserHttpURL,inetUserStatus,iplanet-am-auth-configuration,iplanet-am-session-destroy-sessions,iplanet-am-session-get-valid-sessions,iplanet-am-session-max-caching-time,iplanet-am-session-max-idle-time,iplanet-am-session-max-session-time,iplanet-am-session-quota-limit,iplanet-am-session-service-status,iplanet-am-user-account-life,iplanet-am-user-admin-start-dn,iplanet-am-user-alias-list,iplanet-am-user-auth-config,iplanet-am-user-auth-modules,iplanet-am-user-failure-url,iplanet-am-user-federation-info,iplanet-am-user-federation-info-key,iplanet-am-user-login-status,iplanet-am-user-password-reset-force-reset,iplanet-am-user-password-reset-options,iplanet-am-user-password-reset-question-answer,iplanet-am-user-success-url,kbaActiveIndex,kbaInfo,mail,manager,memberOf,modifyTimestamp,oath2faEnabled,oathDeviceProfiles,objectClass,postalAddress,preferredLocale,preferredlanguage,preferredtimezone,pushDeviceProfiles,sn,sun-fm-saml2-nameid-info,sun-fm-saml2-nameid-infokey,sunAMAuthInvalidAttemptsData,sunIdentityMSISDNNumber,sunIdentityServerDiscoEntries,sunIdentityServerPPAddressCard,sunIdentityServerPPCommonNameAltCN,sunIdentityServerPPCommonNameCN,sunIdentityServerPPCommonNameFN,sunIdentityServerPPCommonNameMN,sunIdentityServerPPCommonNamePT,sunIdentityServerPPCommonNameSN,sunIdentityServerPPDemographicsAge,sunIdentityServerPPDemographicsBirthDay,sunIdentityServerPPDemographicsDisplayLanguage,sunIdentityServerPPDemographicsLanguage,sunIdentityServerPPDemographicsTimeZone,sunIdentityServerPPEmergencyContact,sunIdentityServerPPEmploymentIdentityAltO,sunIdentityServerPPEmploymentIdentityJobTitle,sunIdentityServerPPEmploymentIdentityOrg,sunIdentityServerPPEncryPTKey,sunIdentityServerPPFacadeGreetSound,sunIdentityServerPPFacadeMugShot,sunIdentityServerPPFacadeNamePronounced,sunIdentityServerPPFacadeWebSite,sunIdentityServerPPFacadegreetmesound,sunIdentityServerPPInformalName,sunIdentityServerPPLegalIdentityAltIdType,sunIdentityServerPPLegalIdentityAltIdValue,sunIdentityServerPPLegalIdentityDOB,sunIdentityServerPPLegalIdentityGender,sunIdentityServerPPLegalIdentityLegalName,sunIdentityServerPPLegalIdentityMaritalStatus,sunIdentityServerPPLegalIdentityVATIdType,sunIdentityServerPPLegalIdentityVATIdValue,sunIdentityServerPPMsgContact,sunIdentityServerPPSignKey,telephoneNumber,uid,userCertificate,userPassword- Create User Attribute Mapping
When creating a user profile, apply this map of AM profile attribute names to directory server attribute names.
Attributes not mapped to another attribute (for example,
cn) and attributes mapped to themselves (for example,cn=cn) take the value of the username unless the attribute values are provided when creating the profile. The object classes for user profile LDAP entries generally require Common Name (cn) and Surname (sn) attributes, so this prevents an LDAP constraint violation when performing the add operation.ssoadm attribute:
sun-idrepo-ldapv3-config-createuser-attr-mappingDefault:
cn,sn- Attribute Name of User Status
Attribute to check/set user status.
ssoadm attribute:
sun-idrepo-ldapv3-config-isactiveDefault:
inetuserstatus- User Status Active Value
Active users have the user status attribute set to this value.
ssoadm attribute:
sun-idrepo-ldapv3-config-activeDefault:
Active- User Status Inactive Value
Inactive users have the user status attribute set to this value.
ssoadm attribute:
sun-idrepo-ldapv3-config-inactiveDefault:
Inactive- Authentication Naming Attribute
RDN attribute for building the bind DN when given a username and password to authenticate a user against the directory server.
ssoadm attribute:
sun-idrepo-ldapv3-config-auth-naming-attrDefault:
uid- LDAP Groups Search Attribute
When searching for a group by name, match values against this attribute.
ssoadm attribute:
sun-idrepo-ldapv3-config-groups-search-attributeDefault:
cn- LDAP Groups Search Filter
When searching for groups, apply this LDAP search filter as well.
ssoadm attribute:
sun-idrepo-ldapv3-config-groups-search-filterDefault:
(objectclass=groupOfUniqueNames)- LDAP Groups Container Naming Attribute
RDN attribute of the LDAP base DN which contains group profiles.
ssoadm attribute:
sun-idrepo-ldapv3-config-group-container-nameDefault:
ou- LDAP Groups Container Value
RDN attribute value of the LDAP base DN which contains group profiles.
If specified, AM will limit searches for group profiles to the provided base DN. Otherwise, AM searches the entire directory.
ssoadm attribute:
sun-idrepo-ldapv3-config-group-container-valueDefault:
groups- LDAP Groups Object Class
Group profiles have these LDAP object classes.
ssoadm attribute:
sun-idrepo-ldapv3-config-group-objectclassDefault:
groupofuniquenames,top- LDAP Groups Attributes
Group profiles have these LDAP attributes.
ssoadm attribute:
sun-idrepo-ldapv3-config-group-attributesDefault:
cn,dn,objectclass,uniqueMember- Attribute Name for Group Membership
LDAP attribute in the member's LDAP entry whose values are the groups to which a member belongs.
ssoadm attribute:
sun-idrepo-ldapv3-config-memberof- Attribute Name of Unique Member
Attribute in the group's LDAP entry whose values are the members of the group.
ssoadm attribute:
sun-idrepo-ldapv3-config-uniquememberDefault:
uniqueMember- Persistent Search Base DN
Base DN for LDAP-persistent searches used to receive notification of changes in directory server data.
ssoadm attribute:
sun-idrepo-ldapv3-config-psearchbaseDefault:
base-dn- Persistent Search Filter
LDAP filter to apply when performing persistent searches.
ssoadm attribute:
sun-idrepo-ldapv3-config-psearch-filterDefault:
(objectclass=*)- Persistent Search Scope
LDAP searches can apply to a single entry (SCOPE_BASE), entries directly below the search DN (SCOPE_ONE), or all entries below the search DN (SEARCH_SUB).
ssoadm attribute:
sun-idrepo-ldapv3-config-psearch-scopeDefault:
SCOPE_SUB- The Delay Time Between Retries
How long to wait after receiving an error result that indicates AM should try the LDAP operation again.
The DS data store uses this setting only for persistent searches.
ssoadm attribute:
com.iplanet.am.ldap.connection.delay.between.retriesDefault: 1000 milliseconds
- DN Cache Enabled
Whether to enable the DN cache, which is used to cache DN lookups that can happen in bursts during authentication. As the cache can become stale when a user is moved or renamed, enable DN caching when the directory service allows move/rename operations (Mod DN), and when AM uses persistent searches to obtain notification of such updates.
ssoadm attribute:
sun-idrepo-ldapv3-dncache-enabledDefault: true
- DN Cache Size
Maximum number of DNs cached when caching is enabled.
ssoadm attribute:
sun-idrepo-ldapv3-dncache-sizeDefault: 1500 items
- Load Schema
Import appropriate LDAP schema to the directory server when saving the configuration. The LDAP Bind DN user must have access to perform this operation.
This option is not available for use with the ssoadm command.
Default: Disabled.
Use these attributes when configuring data stores for Oracle DSEE or Sun DSEE using AM schema:
ssoadm service name:
sunIdentityRepositoryService
- ID
The ID of the data store configuration.
- LDAP Server
host:portto contact the directory server, with optional|server_ID|site_IDfor deployments with multiple servers and sites.AM uses the optional settings to determine which directory server to contact first. AM tries to contact directory servers in the following priority order, with highest priority first:
The first directory server in the list whose server_ID matches the current AM server.
The first directory server in the list whose site_ID matches the current AM server.
The first directory server in the remaining list.
If the directory server is not available, AM proceeds to the next directory server in the list.
ssoadm attribute:
sun-idrepo-ldapv3-config-ldap-serverDefault:
host:portof the initial directory server configured for this AM server.- LDAP Bind DN
Bind DN for connecting to the directory server. Some AM capabilities require write access to directory entries.
ssoadm attribute:
sun-idrepo-ldapv3-config-authidDefault:
cn=dsameuser,ou=DSAME Users,base-dn- LDAP Bind Password
Bind password for connecting to the directory server.
ssoadm attribute:
sun-idrepo-ldapv3-config-authpw- LDAP Organization DN
The base DN under which to find user and group profiles.
ssoadm attribute:
sun-idrepo-ldapv3-config-organization_nameDefault:
base-dn- LDAP Connection Mode
Whether to use LDAP, LDAPS or StartTLS to connect to the directory server. When LDAPS or StartTLS are enabled, AM must be able to trust server certificates, either because the server certificates were signed by a CA whose certificate is already included in the trust store used by the container where AM runs, or because you imported the certificates into the trust store.
ssoadm attribute:
sun-idrepo-ldapv3-config-connection-modePossible values:
LDAP,LDAPS, andStartTLS- LDAP Connection Pool Maximum Size
Maximum number of connections to the directory server. Make sure the directory service can cope with the maximum number of client connections across all servers.
ssoadm attribute:
sun-idrepo-ldapv3-config-connection_pool_max_sizeDefault: 10
- LDAP Connection Heartbeat Interval
How often to send a heartbeat request to the directory server to ensure that the connection does not remain idle. Some network administrators configure firewalls and load balancers to drop connections that are idle for too long. You can turn this off by setting the value to 0 or to a negative number. To set the units for the interval, use LDAP Connection Heartbeat Time Unit.
ssoadm attribute:
openam-idrepo-ldapv3-heartbeat-intervalDefault: 10
- LDAP Connection Heartbeat Time Unit
Time unit for the LDAP Connection Heartbeat Interval setting.
ssoadm attribute:
openam-idrepo-ldapv3-heartbeat-timeunitDefault:
second- Maximum Results Returned from Search
A cap for the number of search results to return, for example, when viewing profiles under Identities.
ssoadm attribute:
sun-idrepo-ldapv3-config-max-resultDefault: 1000
- Search Timeout
Maximum time to wait for search results in seconds. Does not apply to persistent searches.
ssoadm attribute:
sun-idrepo-ldapv3-config-time-limitDefault: 10
- LDAPv3 Plugin Search Scope
LDAP searches can apply to a single entry (SCOPE_BASE), entries directly below the search DN (SCOPE_ONE), or all entries below the search DN (SEARCH_SUB).
ssoadm attribute:
sun-idrepo-ldapv3-config-search-scopeDefault:
SCOPE_SUB- LDAPv3 Repository Plugin Class Name
AM identity repository implementation.
ssoadm attribute:
sunIdRepoClassDefault:
org.forgerock.openam.idrepo.ldap.DJLDAPv3Repo- Attribute Name Mapping
Map of AM profile attribute names to directory server attribute names.
ssoadm attribute:
sunIdRepoAttributeMapping- LDAPv3 Plugin Supported Types and Operations
Specifies the identity types supported by the data store, such as
user,group, orrealm, and which operations can be performed on them.The following table illustrates the identity types supported by this data store, and the operations that can be performed on them:
readcreateeditdeleteservicegroup - realm user role - filteredrole - Read the identity type Create new identities of the given identity type Edit entities of the given identity type Delete entities of the given identity type Read and write service settings associated with the given identity type. You can remove permissions based on your data store needs. For example, if the data store should not be written to, you can set the operations to
readonly for the identity types.The
serviceoperation is only relevant to therealmand theuseridentity types. For example, the Session Service configuration can be stored by realm, and a user can have specific session timeout settings.ssoadm attribute:
sunIdRepoSupportedOperationsDefault:
filteredrole=read,create,edit,deletegroup=read,create,edit,deleterealm=read,create,edit,delete,servicerole=read,create,edit,deleteuser=read,create,edit,delete,service- LDAP Users Search Attribute
When searching for a user by name, match values against this attribute.
ssoadm attribute:
sun-idrepo-ldapv3-config-users-search-attributeDefault:
uidWarning
Do not modify the value of the search attribute in user profiles. Modifying this attribute value can result in incorrectly cached identity data.
- LDAP Users Search Filter
When searching for users, apply this LDAP search filter as well.
ssoadm attribute:
sun-idrepo-ldapv3-config-users-search-filterDefault:
(objectclass=inetorgperson)- LDAP People Container Naming Attribute
RDN attribute of the LDAP base DN which contains user profiles.
ssoadm attribute:
sun-idrepo-ldapv3-config-people-container-nameDefault:
ou- LDAP People Container Value
RDN attribute value of the LDAP base DN which contains user profiles.
If specified, AM will limit searches for user profiles to the provided base DN. Otherwise, AM searches the entire directory.
ssoadm attribute:
sun-idrepo-ldapv3-config-people-container-valueDefault:
people- LDAP User Object Class
User profiles have these LDAP object classes.
AM handles only those attributes listed in this setting. AM discards any unlisted attributes from requests and the request proceeds without the attribute.
For example, with default settings, if you request that AM execute a search that asks for the
mailAlternateAddressattribute, AM does the search, but does not requestmailAlternateAddress. In the same way, AM does perform an update operation with a request to set the value of an unlisted attribute likemailAlternateAddress, but it drops the unlisted attribute from the update request.ssoadm attribute:
sun-idrepo-ldapv3-config-user-objectclassDefault:
devicePrintProfilesContainer,forgerock-am-dashboard-service,iPlanetPreferences,inetadmin,inetorgperson,inetuser,iplanet-am-auth-configuration-service,iplanet-am-managed-person,iplanet-am-user-service,kbaInfoContainer,oathDeviceProfilesContainer,organizationalperson,person,pushDeviceProfilesContainer,sunAMAuthAccountLockout,sunFMSAML2NameIdentifier,sunFederationManagerDataStore,sunIdentityServerLibertyPPService,top- LDAP User Attributes
User profiles have these LDAP attributes.
AM handles only those attributes listed in this setting. AM discards any unlisted attributes from requests and the request proceeds without the attribute.
ssoadm attribute:
sun-idrepo-ldapv3-config-user-attributesDefault:
assignedDashboard,authorityRevocationList,caCertificate,cn,createTimestamp,devicePrintProfiles,distinguishedName,adminRole,dn,employeeNumber,givenName,inetUserHttpURL,inetUserStatus,iplanet-am-auth-configuration,iplanet-am-session-destroy-sessions,iplanet-am-session-get-valid-sessions,iplanet-am-session-max-caching-time,iplanet-am-session-max-idle-time,iplanet-am-session-max-session-time,iplanet-am-session-quota-limit,iplanet-am-session-service-status,iplanet-am-static-group-dn,iplanet-am-user-account-life,iplanet-am-user-admin-start-dn,iplanet-am-user-alias-list,iplanet-am-user-auth-config,iplanet-am-user-auth-modules,iplanet-am-user-failure-url,iplanet-am-user-federation-info,iplanet-am-user-federation-info-key,iplanet-am-user-login-status,iplanet-am-user-password-reset-force-reset,iplanet-am-user-password-reset-options,iplanet-am-user-password-reset-question-answer,iplanet-am-user-success-url,kbaActiveIndex,kbaInfo,mail,manager,memberOf,modifyTimestamp,oath2faEnabled,oathDeviceProfiles,objectClass,postalAddress,preferredLocale,preferredlanguage,preferredtimezone,pushDeviceProfiles,sn,sun-fm-saml2-nameid-info,sun-fm-saml2-nameid-infokey,sunAMAuthInvalidAttemptsData,sunIdentityMSISDNNumber,sunIdentityServerDiscoEntries,sunIdentityServerPPAddressCard,sunIdentityServerPPCommonNameAltCN,sunIdentityServerPPCommonNameCN,sunIdentityServerPPCommonNameFN,sunIdentityServerPPCommonNameMN,sunIdentityServerPPCommonNamePT,sunIdentityServerPPCommonNameSN,sunIdentityServerPPDemographicsAge,sunIdentityServerPPDemographicsBirthDay,sunIdentityServerPPDemographicsDisplayLanguage,sunIdentityServerPPDemographicsLanguage,sunIdentityServerPPDemographicsTimeZone,sunIdentityServerPPEmergencyContact,sunIdentityServerPPEmploymentIdentityAltO,sunIdentityServerPPEmploymentIdentityJobTitle,sunIdentityServerPPEmploymentIdentityOrg,sunIdentityServerPPEncryPTKey,sunIdentityServerPPFacadeGreetSound,sunIdentityServerPPFacadeMugShot,sunIdentityServerPPFacadeNamePronounced,sunIdentityServerPPFacadeWebSite,sunIdentityServerPPFacadegreetmesound,sunIdentityServerPPInformalName,sunIdentityServerPPLegalIdentityAltIdType,sunIdentityServerPPLegalIdentityAltIdValue,sunIdentityServerPPLegalIdentityDOB,sunIdentityServerPPLegalIdentityGender,sunIdentityServerPPLegalIdentityLegalName,sunIdentityServerPPLegalIdentityMaritalStatus,sunIdentityServerPPLegalIdentityVATIdType,sunIdentityServerPPLegalIdentityVATIdValue,sunIdentityServerPPMsgContact,sunIdentityServerPPSignKey,telephoneNumber,uid,userCertificate,userPassword- Create User Attribute Mapping
When creating a user profile, apply this map of AM profile attribute names to directory server attribute names.
Attributes not mapped to another attribute (for example,
cn) and attributes mapped to themselves (for example,cn=cn) take the value of the username unless the attribute values are provided when creating the profile. The object classes for user profile LDAP entries generally require Common Name (cn) and Surname (sn) attributes, so this prevents an LDAP constraint violation when performing the add operation.ssoadm attribute:
sun-idrepo-ldapv3-config-createuser-attr-mappingDefault:
cn,sn- Attribute Name of User Status
Attribute to check/set user status.
ssoadm attribute:
sun-idrepo-ldapv3-config-isactiveDefault:
inetuserstatus- User Status Active Value
Active users have the user status attribute set to this value.
ssoadm attribute:
sun-idrepo-ldapv3-config-activeDefault:
Active- User Status Inactive Value
Inactive users have the user status attribute set to this value.
ssoadm attribute:
sun-idrepo-ldapv3-config-inactiveDefault:
Inactive- Authentication Naming Attribute
RDN attribute for building the bind DN when given a username and password to authenticate a user against the directory server.
ssoadm attribute:
sun-idrepo-ldapv3-config-auth-naming-attrDefault:
uid- LDAP Groups Search Attribute
When searching for a group by name, match values against this attribute.
ssoadm attribute:
sun-idrepo-ldapv3-config-groups-search-attributeDefault:
cn- LDAP Groups Search Filter
When searching for groups, apply this LDAP search filter as well.
ssoadm attribute:
sun-idrepo-ldapv3-config-groups-search-filterDefault:
(objectclass=groupOfUniqueNames)- LDAP Groups Container Naming Attribute
RDN attribute of the LDAP base DN which contains group profiles.
ssoadm attribute:
sun-idrepo-ldapv3-config-group-container-nameDefault:
ou- LDAP Groups Container Value
RDN attribute value of the LDAP base DN which contains group profiles.
If specified, AM will limit searches for group profiles to the provided base DN. Otherwise, AM searches the entire directory.
ssoadm attribute:
sun-idrepo-ldapv3-config-group-container-valueDefault:
groups- LDAP Groups Object Class
Group profiles have these LDAP object classes.
ssoadm attribute:
sun-idrepo-ldapv3-config-group-objectclassDefault:
groupofuniquenames,iplanet-am-managed-group,iplanet-am-managed-static-group,groupofurls,top- LDAP Groups Attributes
Group profiles have these LDAP attributes.
ssoadm attribute:
sun-idrepo-ldapv3-config-group-attributesDefault:
cn,iplanet-am-group-subscribable,dn,objectclass,uniqueMember- Attribute Name for Group Membership
LDAP attribute in the member's LDAP entry whose values are the groups to which a member belongs.
ssoadm attribute:
sun-idrepo-ldapv3-config-memberof- Attribute Name of Unique Member
Attribute in the group's LDAP entry whose values are the members of the group.
ssoadm attribute:
sun-idrepo-ldapv3-config-uniquememberDefault:
uniqueMember- Attribute Name of Group Member URL
Attribute in the dynamic group's LDAP entry whose values are LDAP URLs specifying members of the group.
ssoadm attribute:
sun-idrepo-ldapv3-config-memberurlDefault:
memberUrl- LDAP Roles Search Attribute
When searching for a role by name, match values against this attribute.
ssoadm attribute:
sun-idrepo-ldapv3-config-roles-search-attributeDefault:
cn- LDAP Roles Search Filter
When searching for roles, apply this LDAP search filter as well.
ssoadm attribute:
sun-idrepo-ldapv3-config-roles-search-filterDefault:
(&(objectclass=ldapsubentry)(objectclass=nsmanagedroledefinition))- LDAP Roles Object Class
Role profiles have these LDAP object classes.
ssoadm attribute:
sun-idrepo-ldapv3-config-role-objectclassDefault:
ldapsubentry,nsmanagedroledefinition,nsroledefinition,nssimpleroledefinition,top- LDAP Filter Roles Search Attribute
When searching for a filtered role by name, match values against this attribute.
ssoadm attribute:
sun-idrepo-ldapv3-config-filterroles-search-attributeDefault:
cn- LDAP Filter Roles Search Filter
When searching for filtered roles, apply this LDAP search filter as well.
ssoadm attribute:
sun-idrepo-ldapv3-config-filterroles-search-filterDefault:
(&(objectclass=ldapsubentry)(objectclass=nsfilteredroledefinition))- LDAP Filter Roles Object Class
Filtered role profiles have these LDAP object classes.
ssoadm attribute:
sun-idrepo-ldapv3-config-filterrole-objectclassDefault:
ldapsubentry,nscomplexroledefinition,nsfilteredroledefinition,nsroledefinition- LDAP Filter Roles Attributes
Filtered role profiles have these LDAP attributes.
ssoadm attribute:
sun-idrepo-ldapv3-config-filterrole-attributesDefault:
nsRoleFilter- Attribute Name for Filtered Role Membership
LDAP attribute in the member's LDAP entry whose values are the filtered roles to which a member belongs.
ssoadm attribute:
sun-idrepo-ldapv3-config-nsroleDefault:
nsrole- Attribute Name of Role Membership
LDAP attribute in the member's LDAP entry whose values are the roles to which a member belongs.
ssoadm attribute:
sun-idrepo-ldapv3-config-nsrolednDefault:
nsRoleDN- Attribute Name of Filtered Role Filter
LDAP attribute whose values are the filters for filtered roles.
ssoadm attribute:
sun-idrepo-ldapv3-config-nsrolefilterDefault:
nsRoleFilter- Persistent Search Base DN
Base DN for LDAP-persistent searches used to receive notification of changes in directory server data.
ssoadm attribute:
sun-idrepo-ldapv3-config-psearchbaseDefault:
base-dn- Persistent Search Filter
LDAP filter to apply when performing persistent searches.
ssoadm attribute:
sun-idrepo-ldapv3-config-psearch-filterDefault:
(objectclass=*)- Persistent Search Scope
LDAP searches can apply to a single entry (SCOPE_BASE), entries directly below the search DN (SCOPE_ONE), or all entries below the search DN (SEARCH_SUB).
ssoadm attribute:
sun-idrepo-ldapv3-config-psearch-scopeDefault:
SCOPE_SUB- The Delay Time Between Retries
How long to wait after receiving an error result that indicates AM should try the LDAP operation again.
ssoadm attribute:
com.iplanet.am.ldap.connection.delay.between.retriesDefault: 1000 milliseconds
- DN Cache Enabled
Whether to enable the DN cache, which is used to cache DN lookups that can happen in bursts during authentication. As the cache can become stale when a user is moved or renamed, enable DN caching when the directory service allows move/rename operations (Mod DN), and when AM uses persistent searches to obtain notification of such updates.
ssoadm attribute:
sun-idrepo-ldapv3-dncache-enabledDefault: true
- DN Cache Size
Maximum number of DNs cached when caching is enabled.
ssoadm attribute:
sun-idrepo-ldapv3-dncache-sizeDefault: 1500 items
- Load Schema
Import appropriate LDAP schema to the directory server before saving the configuration. The LDAP Bind DN user must have access to perform this operation.
This option is not available for use with the ssoadm command.
Default: Disabled.
Use these attributes when configuring Tivoli Directory Server data stores:
ssoadm service name:
sunIdentityRepositoryService
- ID
The ID of the data store configuration.
- LDAP Server
host:portto contact the directory server, with optional|server_ID|site_IDfor deployments with multiple servers and sites.AM uses the optional settings to determine which directory server to contact first. AM tries to contact directory servers in the following priority order, with highest priority first.
The first directory server in the list whose server_ID matches the current AM server.
The first directory server in the list whose site_ID matches the current AM server.
The first directory server in the remaining list.
If the directory server is not available, AM proceeds to the next directory server in the list.
ssoadm attribute:
sun-idrepo-ldapv3-config-ldap-serverDefault:
host:portof the initial directory server configured for this AM server- LDAP Bind DN
Bind DN for connecting to the directory server. Some AM capabilities require write access to directory entries.
ssoadm attribute:
sun-idrepo-ldapv3-config-authid- LDAP Bind Password
Bind password for connecting to the directory server.
ssoadm attribute:
sun-idrepo-ldapv3-config-authpw- LDAP Organization DN
The base DN under which to find user and group profiles.
ssoadm attribute:
sun-idrepo-ldapv3-config-organization_nameDefault:
base-dn- LDAP Connection Mode
Whether to use LDAP, LDAPS or StartTLS to connect to the directory server. When LDAPS or StartTLS are enabled, AM must be able to trust server certificates, either because the server certificates were signed by a CA whose certificate is already included in the trust store used by the container where AM runs, or because you imported the certificates into the trust store.
ssoadm attribute:
sun-idrepo-ldapv3-config-connection-modePossible values:
LDAP,LDAPS, andStartTLS- LDAP Connection Pool Maximum Size
Maximum number of connections to the directory server. Make sure the directory service can cope with the maximum number of client connections across all servers.
ssoadm attribute:
sun-idrepo-ldapv3-config-connection_pool_max_sizeDefault: 10
- LDAP Connection Heartbeat Interval
How often to send a heartbeat request to the directory server to ensure that the connection does not remain idle. Some network administrators configure firewalls and load balancers to drop connections that are idle for too long. You can turn this off by setting the value to 0 or to a negative number. To set the units for the interval, use LDAP Connection Heartbeat Time Unit.
ssoadm attribute:
openam-idrepo-ldapv3-heartbeat-intervalDefault: 10
- LDAP Connection Heartbeat Time Unit
Time unit for the LDAP Connection Heartbeat Interval setting.
ssoadm attribute:
openam-idrepo-ldapv3-heartbeat-timeunitDefault:
second- Maximum Results Returned from Search
A cap for the number of search results to return, for example, when viewing profiles under Identities.
ssoadm attribute:
sun-idrepo-ldapv3-config-max-resultDefault: 1000
- Search Timeout
Maximum time to wait for search results in seconds. Does not apply to persistent searches.
ssoadm attribute:
sun-idrepo-ldapv3-config-time-limitDefault: 10
- LDAPv3 Plugin Search Scope
LDAP searches can apply to a single entry (SCOPE_BASE), entries directly below the search DN (SCOPE_ONE), or all entries below the search DN (SEARCH_SUB).
ssoadm attribute:
sun-idrepo-ldapv3-config-search-scopeDefault:
SCOPE_SUB- LDAPv3 Repository Plugin Class Name
AM identity repository implementation.
ssoadm attribute:
sunIdRepoClassDefault:
org.forgerock.openam.idrepo.ldap.DJLDAPv3Repo- Attribute Name Mapping
Map of AM profile attribute names to directory server attribute names.
ssoadm attribute:
sunIdRepoAttributeMapping- LDAPv3 Plugin Supported Types and Operations
Specifies the identity types supported by the data store, such as
user,group, orrealm, and which operations can be performed on them.The following table illustrates the identity types supported by this data store, and the operations that can be performed on them:
readcreateeditdeleteservicegroup - realm user Read the identity type Create new identities of the given identity type Edit entities of the given identity type Delete entities of the given identity type Read and write service settings associated with the given identity type. You can remove permissions based on your data store needs. For example, if the data store should not be written to, you can set the operations to
readonly for the identity types.The
serviceoperation is only relevant to therealmand theuseridentity types. For example, the Session Service configuration can be stored by realm, and a user can have specific session timeout settings.ssoadm attribute:
sunIdRepoSupportedOperationsDefault:
group=read,create,edit,deleterealm=read,create,edit,delete,serviceuser=read,create,edit,delete,service- LDAP Users Search Attribute
When searching for a user by name, match values against this attribute.
ssoadm attribute:
sun-idrepo-ldapv3-config-users-search-attributeDefault:
cnWarning
Do not modify the value of the search attribute in user profiles. Modifying this attribute value can result in incorrectly cached identity data. For example, if you configure the search attribute to
mail, it could prevent users from being able to update their email addresses in their user profiles.- LDAP Users Search Filter
When searching for users, apply this LDAP search filter as well.
ssoadm attribute:
sun-idrepo-ldapv3-config-users-search-filterDefault:
(objectclass=inetorgperson)- LDAP People Container Naming Attribute
RDN attribute of the LDAP base DN which contains user profiles.
ssoadm attribute:
sun-idrepo-ldapv3-config-people-container-nameDefault:
ou- LDAP People Container Value
RDN attribute value of the LDAP base DN which contains user profiles.
If specified, AM will limit searches for user profiles to the provided base DN. Otherwise, AM searches the entire directory.
ssoadm attribute:
sun-idrepo-ldapv3-config-people-container-value- LDAP User Object Class
User profiles have these LDAP object classes.
AM handles only those attributes listed in this setting. AM discards any unlisted attributes from requests and the request proceeds without the attribute.
For example, with default settings if you request that AM execute a search that asks for the
mailAlternateAddressattribute, AM does the search, but does not requestmailAlternateAddress. In the same way, AM does perform an update operation with a request to set the value of an unlisted attribute likemailAlternateAddress, but it drops the unlisted attribute from the update request.ssoadm attribute:
sun-idrepo-ldapv3-config-user-objectclassDefault:
devicePrintProfilesContainer,forgerock-am-dashboard-service,inetorgperson,inetuser,iplanet-am-auth-configuration-service,iplanet-am-managed-person,iplanet-am-user-service,iPlanetPreferences,organizationalperson,person,sunAMAuthAccountLockout,sunFederationManagerDataStore,sunFMSAML2NameIdentifier,sunIdentityServerLibertyPPService,top- LDAP User Attributes
User profiles have these LDAP attributes.
AM handles only those attributes listed in this setting. AM discards any unlisted attributes from requests and the request proceeds without the attribute.
ssoadm attribute:
sun-idrepo-ldapv3-config-user-attributesDefault:
adminRole,assignedDashboard,authorityRevocationList,caCertificate,cn,devicePrintProfiles,distinguishedName,dn,employeeNumber,givenName,inetUserHttpURL,inetUserStatus,iplanet-am-auth-configuration,iplanet-am-session-add-session-listener-on-all-sessions,iplanet-am-session-destroy-sessions,iplanet-am-session-get-valid-sessions,iplanet-am-session-max-caching-time,iplanet-am-session-max-idle-time,iplanet-am-session-max-session-time,iplanet-am-session-quota-limit,iplanet-am-session-service-status,iplanet-am-user-account-life,iplanet-am-user-admin-start-dn,iplanet-am-user-alias-list,iplanet-am-user-auth-config,iplanet-am-user-auth-modules,iplanet-am-user-failure-url,iplanet-am-user-federation-info-key,iplanet-am-user-federation-info,iplanet-am-user-login-status,iplanet-am-user-password-reset-force-reset,iplanet-am-user-password-reset-options,iplanet-am-user-password-reset-question-answer,iplanet-am-user-success-url,mail,manager,memberOf,objectClass,postalAddress,preferredlanguage,preferredLocale,preferredtimezone,sn,sun-fm-saml2-nameid-info,sun-fm-saml2-nameid-infokey,sunAMAuthInvalidAttemptsData,sunIdentityMSISDNNumber,sunIdentityServerDiscoEntries,sunIdentityServerPPAddressCard,sunIdentityServerPPCommonNameAltCN,sunIdentityServerPPCommonNameCN,sunIdentityServerPPCommonNameFN,sunIdentityServerPPCommonNameMN,sunIdentityServerPPCommonNamePT,sunIdentityServerPPCommonNameSN,sunIdentityServerPPDemographicsAge,sunIdentityServerPPDemographicsBirthDay,sunIdentityServerPPDemographicsDisplayLanguage,sunIdentityServerPPDemographicsLanguage,sunIdentityServerPPDemographicsTimeZone,sunIdentityServerPPEmergencyContact,sunIdentityServerPPEmploymentIdentityAltO,sunIdentityServerPPEmploymentIdentityJobTitle,sunIdentityServerPPEmploymentIdentityOrg,sunIdentityServerPPEncryPTKey,sunIdentityServerPPFacadegreetmesound,sunIdentityServerPPFacadeGreetSound,sunIdentityServerPPFacadeMugShot,sunIdentityServerPPFacadeNamePronounced,sunIdentityServerPPFacadeWebSite,sunIdentityServerPPInformalName,sunIdentityServerPPLegalIdentityAltIdType,sunIdentityServerPPLegalIdentityAltIdValue,sunIdentityServerPPLegalIdentityDOB,sunIdentityServerPPLegalIdentityGender,sunIdentityServerPPLegalIdentityLegalName,sunIdentityServerPPLegalIdentityMaritalStatus,sunIdentityServerPPLegalIdentityVATIdType,sunIdentityServerPPLegalIdentityVATIdValue,sunIdentityServerPPMsgContact,sunIdentityServerPPSignKey,telephoneNumber,uid,userCertificate,userPassword- Create User Attribute Mapping
When creating a user profile, apply this map of AM profile attribute names to directory server attribute names.
Attributes not mapped to another attribute (for example,
cn) and attributes mapped to themselves (for example,cn=cn) take the value of the username unless the attribute values are provided when creating the profile. The object classes for user profile LDAP entries generally require Common Name (cn) and Surname (sn) attributes, so this prevents an LDAP constraint violation when performing the add operation.ssoadm attribute:
sun-idrepo-ldapv3-config-createuser-attr-mappingDefault:
cn,sn- Attribute Name of User Status
Attribute to check/set user status.
ssoadm attribute:
sun-idrepo-ldapv3-config-isactiveDefault:
inetuserstatus- User Status Active Value
Active users have the user status attribute set to this value.
ssoadm attribute:
sun-idrepo-ldapv3-config-activeDefault:
Active- User Status Inactive Value
Inactive users have the user status attribute set to this value.
ssoadm attribute:
sun-idrepo-ldapv3-config-inactiveDefault:
Inactive- Authentication Naming Attribute
RDN attribute for building the bind DN when given a username and password to authenticate a user against the directory server.
ssoadm attribute:
sun-idrepo-ldapv3-config-auth-naming-attrDefault:
cn- LDAP Groups Search Attribute
When searching for a group by name, match values against this attribute.
ssoadm attribute:
sun-idrepo-ldapv3-config-groups-search-attributeDefault:
cn- LDAP Groups Search Filter
When searching for groups, apply this LDAP search filter as well.
ssoadm attribute:
sun-idrepo-ldapv3-config-groups-search-filterDefault:
(objectclass=groupOfNames)- LDAP Groups Container Naming Attribute
RDN attribute of the LDAP base DN which contains group profiles.
ssoadm attribute:
sun-idrepo-ldapv3-config-group-container-nameDefault:
ou- LDAP Groups Container Value
RDN attribute value of the LDAP base DN which contains group profiles.
If specified, AM will limit searches for group profiles to the provided base DN. Otherwise, AM searches the entire directory.
ssoadm attribute:
sun-idrepo-ldapv3-config-group-container-value- LDAP Groups Object Class
Group profiles have these LDAP object classes.
ssoadm attribute:
sun-idrepo-ldapv3-config-group-objectclassDefault:
groupofnames,top- LDAP Groups Attributes
Group profiles have these LDAP attributes.
ssoadm attribute:
sun-idrepo-ldapv3-config-group-attributesDefault:
cn,description,dn,member,objectclass,ou- Attribute Name for Group Membership
LDAP attribute in the member's LDAP entry whose values are the groups to which a member belongs.
ssoadm attribute:
sun-idrepo-ldapv3-config-memberof- Attribute Name of Unique Member
Attribute in the group's LDAP entry whose values are the members of the group.
ssoadm attribute:
sun-idrepo-ldapv3-config-uniquememberDefault:
member- Default Group Member's User DN
DN of member added to all newly created groups.
ssoadm attribute:
sun-idrepo-ldapv3-config-dftgroupmember- Persistent Search Base DN
Base DN for LDAP-persistent searches used to receive notification of changes in directory server data.
ssoadm attribute:
sun-idrepo-ldapv3-config-psearchbaseDefault:
base-dn- Persistent Search Filter
LDAP filter to apply when performing persistent searches.
ssoadm attribute:
sun-idrepo-ldapv3-config-psearch-filterDefault:
(objectclass=*)- Persistent Search Scope
LDAP searches can apply to a single entry (SCOPE_BASE), entries directly below the search DN (SCOPE_ONE), or all entries below the search DN (SEARCH_SUB).
ssoadm attribute:
sun-idrepo-ldapv3-config-psearch-scopeDefault:
SCOPE_SUB- The Delay Time Between Retries
How long to wait after receiving an error result that indicates AM should try the LDAP operation again.
ssoadm attribute:
com.iplanet.am.ldap.connection.delay.between.retriesDefault: 1000 milliseconds
- DN Cache Enabled
Whether to enable the DN cache, which is used to cache DN lookups that can happen in bursts during authentication. As the cache can become stale when a user is moved or renamed, enable DN caching when the directory service allows move/rename operations (Mod DN), and when AM uses persistent searches to obtain notification of such updates.
ssoadm attribute:
sun-idrepo-ldapv3-dncache-enabledDefault: true
- DN Cache Size
Maximum number of DNs cached when caching is enabled.
ssoadm attribute:
sun-idrepo-ldapv3-dncache-sizeDefault: 1500 items
- Load Schema
Import appropriate LDAP schema to the directory server before saving the configuration. The LDAP Bind DN user must have access to perform this operation.
This option is not available for use with the ssoadm command.
Default: Disabled.
The following table describes privileges that you can assign in the AM console or by using the ssoadm add-privileges command:
| Privilege as it Appears in the AM console | Privilege Name to Use With the ssoadm add-privileges Command | Notes |
|---|---|---|
| Read and write access to all realm and policy properties | Realm Admin | Assign this privilege to administrators in order to let them modify or read any part of an AM realm. Use this privilege when you do not require granularity in your delegation model. All other AM privileges are included with this privilege. Administrators using the AM administration console must have this privilege. |
| Read and write access to all configured agents | Agent Admin |
Provides access to centralized agent configuration;
subset of the RealmAdmin privilege.
|
| Read and write access to all log files | Log Admin | Subset of the Realm Admin privilege. |
| Read access to all log files | Log Read | Subset of the Realm Admin privilege. |
| Write access to all log files | Log Write | Subset of the RealmAdmin privilege. |
| Read and write access to all federation metadata configurations | Federation Admin | Subset of the Realm Admin privilege. |
| REST calls for reading realms | Realm Read Access | Subset of the Realm Admin privilege. |
| Read and write access only for policy properties, including REST calls | Policy Admin |
Assign this privilege to policy administrators
in order to let them modify or read any part of the AM
policy configuration. This privilege lets an
administrator modify or read all policy components:
policies, applications, subject types,
condition types, subject attributes, and decision combiners.
All other AM privileges that affect policy components
are included with this privilege. Subset of the
Realm Admin privilege.
|
| REST calls for policy evaluation | Entitlement Rest Access |
Subset of the Realm Admin and
Policy Admin privileges.
|
| REST calls for reading policies | Privilege Rest Read Access |
Subset of the Realm Admin and
Policy Admin privileges.
|
| REST calls for managing policies | Privilege Rest Access |
Subset of the Realm Admin and
Policy Admin privileges.
|
| REST calls for reading policy applications | Application Read Access |
Subset of the Realm Admin and
Policy Admin privileges.
|
| REST calls for modifying policy applications | Application Modify Access |
Subset of the Realm Admin and
Policy Admin privileges.
|
| REST calls for reading policy resource types | Resource Type Read Access |
Subset of the Realm Admin and
Policy Admin privileges.
|
| REST calls for modifying policy resource types | Resource Type Modify Access |
Subset of the Realm Admin and
Policy Admin privileges.
|
| REST calls for reading policy application types | Application Types Read Access |
Subset of the Realm Admin and
Policy Admin privileges.
|
| REST calls for reading environment conditions | Condition Types Read Access |
Subset of the Realm Admin and
Policy Admin privileges.
|
| REST calls for reading subject conditions | Subject Types Read Access |
Subset of the Realm Admin and
Policy Admin privileges.
|
| REST calls for reading decision combiners | Decision Combiners Read Access |
Subset of the Realm Admin and
Policy Admin privileges.
|
| REST calls for reading subject attributes | Subject Attributes Read Access |
Subset of the Realm Admin and
Policy Admin privileges.
|
| REST calls for modifying session properties | Session Property Modify Access |
Subset of the Realm Admin and
Policy Admin privileges.
|
The following properties comprise the recording control file:
issueIDType: Number
Required. The issue identifier—a positive integer stored internally as a Java
longdata type. A case number is a good choice for theissueIDvalue.The
issueIDis a component of the path at which recorded information is stored. See "Retrieving Recording Information" for more information.referenceIDType: String
Required. A second identifier for the recording event. Use this property to segregate multiple recording events for the same issue.
The
referenceIDis a component of the path at which recorded information is stored. See "Retrieving Recording Information" for more information.Note that spaces are not allowed in the
referenceIDvalue.DescriptionType: String
Required. A textual description of the recording event.
zipEnableType: Boolean
Required. Whether to compress the output directory into a zip file when recording has stopped.
configExportType: Object
Required. An object containing the following properties:
enableType: Boolean
Required. Whether to export the AM configuration upon completion of the recording event. Exporting the AM configuration is a best practice, because it is extremely useful to have access to the configuration when troubleshooting.
passwordType: String
Required if
enableistrue. A key required to import the exported configuration. The key is used the same way that the ssoadm export-svc-cfg command uses the-eargument.sharePasswordType: Boolean
Required if
enableistrue. Whether to show thepasswordvalue in the ssoadm start-recording, ssoadm get-recording-status, and ssoadm stop-recording output, and in theinfo.jsonfile, which is output during recording events, and which contains run-time properties.
debugLogsType: Object
Required. An object containing the following properties:
debugLevelType: String
Required. The debug level to set for the recording event. Set the value of
debugLeveltoMESSAGEto get the most troubleshooting information from your recording period. Other acceptable but less commonly used values areERRORandWARNING.autoStopType: Object
Optional. Contains another object used to specify an event that automatically ends a recording period. For time-based termination, specify a
timeobject; for termination based on uncompressed file size, specify afileSizeobject. If you specify bothtimeandfileSizeobjects, the event that occurs first causes recording to stop.Specifying
fileSizeandtimeobjects is a best practice, because it ensures that the recorded output does not occupy a larger than expected amount of space on your file system, and that recording events end in a timely fashion.timeType: Object
Optional; must be specified in the
autoStopobject iffileSizeis not specified. Configures a recording period to terminate recording after this amount of time.timeUnitType: String
Required. Acceptable values are
MILLISECONDS,SECONDS,MINUTES,HOURS, andDAYS.valueType: Numeric
Required. Values in
MILLISECONDSare rounded down to the second. The minimum acceptable value forautoStopis one second.
fileSizeType: Object
Optional; must be specified in the
autoStopobject iftimeis not specified. Configures a recording period to terminate after the aggregate size of uncompressed debug logs has reached this size.sizeUnitType: String
Required. Acceptable values are
B,KB,MB, andGB.valueType: Numeric
Required.
threadDumpType: Object
Required. An object containing the following properties:
enableType: Boolean
Required. Whether to dump threads during the recording event. Thread dumps are especially useful when troubleshooting performance issues and issues with unresponsive servers.
delayType: Object
Required if
enableistrue. Contains another object used to specify an interval at which thread dumps are taken. The initial thread dump is taken at the start of the recording event; subsequent thread dumps are taken at multiples of thedelayinterval.timeUnitType: String
Required. Acceptable values are
MILLISECONDS,SECONDS,MINUTES,HOURS, andDAYS.valueType: Numeric
Required. The minimum acceptable value is one second. Time units that are smaller than seconds, such as
MILLISECONDS, are rounded to the closest second.
AM writes log messages generated from audit events triggered by its components, instances, and other ForgeRock-based stack products.
This section presents the audit log format for each topic-based file, event names, and audit constants used in its log messages.
| Schema Property | Description |
|---|---|
_id |
Specifies a universally unique identifier (UUID) for the message
object, such as |
timestamp |
Specifies the timestamp when AM logged the message, in UTC format
to millisecond precision: |
eventName |
Specifies the name of the audit event.
For example,
|
transactionId |
Specifies the UUID of the transaction, which identifies an
external request when it comes into the system boundary.
Any events generated while handling that request will be assigned that
transaction ID, so that you may see the same transaction ID
even for different audit event topics. For example,
AM supports a feature where trusted AM deployment with multiple
instances, components, and ForgeRock stack products can propagate
the transaction ID through each call across the stack. AM
reads the |
user.id |
Specifies the universal identifier for authenticated users.
For example,
|
trackingIds |
Specifies a unique random string generated as an alias for each AM
session ID and OAuth 2.0 token.
In releases prior to OpenAM 13.0.0, the
OpenAM 13.0.0 extended this property to handle OAuth 2.0 tokens.
In this case, whenever AM generates an access or
grant token, it also generates unique random value and logs it as an alias.
In this way, it is possible to trace back an access token back to its
originating grant token, trace the grant token back to the
session in which it was created, and then trace how the session was
authenticated.
An example of a |
server.ip |
Specifies the IP address of the AM server.
For example, |
server.port |
Specifies the port number used by the AM server.
For example, |
client.host |
Specifies the client hostname. This field is only populated if reverse DNS lookup is enabled. |
client.ip |
Specifies the client IP address. |
client.port |
Specifies the client port number. |
authorizationId.roles |
Specifies the list of roles for the authorized user. |
authorizationId.component |
Specifies the component part of the authorized ID, such as |
request.protocol |
Specifies the protocol associated with the request operation.
Possible values: |
request.operation |
Specifies the request operation. For CREST operations, possible values
are:
For PLL operations, possible values are: |
request.detail |
Specifies the detailed information about the request operation. For example:
|
http.method |
Specifies the HTTP method requested by the client.
For example, |
http.path |
Specifies the path of the HTTP request.
For example,
|
http.queryParameters |
Specifies the HTTP query parameter string. For example:
|
http.headers |
Specifies the HTTP header for the request. For example: {
"accept":[
"application/json, text/javascript, */*; q=0.01"
],
"Accept-API-Version":[
"protocol=1.0"
],
"accept-encoding":[
"gzip, deflate"
],
"accept-language":[
"en-US;q=1,en;q=0.9"
],
"cache-control":[
"no-cache"
],
"connection":[
"Keep-Alive"
],
"content-length":[
"0"
],
"host":[
"forgerock-am.openrock.org"
],
"pragma":[
"no-cache"
],
"referer":[
"https://forgerock-am.openrock.org/openam/XUI/"
],
"user-agent":[
"Mozilla/5.0 (X11; Linux x86_64; rv:31.0)
Gecko/20100101 Firefox/31.0"
],
"x-nosession":[
"true"
],
"x-requested-with":[
"XMLHttpRequest"
],
"x-username":[
"anonymous"
]
}
Note: line feeds and truncated values in the example are for readability purposes. |
http.request.cookies |
Specifies a JSON map of key-value pairs and appears as its own property to allow for blacklisting fields or values. |
http.response.cookies |
Not used in AM. |
response.status |
Specifies the response status of the request. For example,
|
response.statusCode |
Specifies the response status code, depending on the protocol. For CREST, HTTP failure codes are displayed but not HTTP success codes. For PLL endpoints, PLL error codes are displayed. |
response.detail |
Specifies the message associated with |
response.elapsedTime |
Specifies the time to execute the access event, usually in millisecond precision. |
response.elapsedTimeUnits |
Specifies the elapsed time units of the response.
For example, |
component |
Specifies the AM service utilized.
For example, |
realm |
Specifies the realm where the operation occurred. For example,
the Top Level Realm ( |
| Property | Description |
|---|---|
_id |
Specifies a universally unique identifier (UUID) for the message
object, such as |
timestamp |
Specifies the timestamp when AM logged the message, in UTC format
to millisecond precision: |
eventName |
Specifies the name of the audit event.
For example,
|
transactionId |
Specifies the UUID of the transaction, which identifies an
external request when it comes into the system boundary.
Any events generated while handling that request will be assigned that
transaction ID, so that you may see the same transaction ID for same
even for different audit event topics. For example,
|
user.id |
Specifies the universal identifier for authenticated users.
For example,
|
trackingIds |
Specifies an array containing a random context ID that identifies the
session and a random string generated from an OAuth 2.0/OpenID Connect 1.0
flow that could track an access token ID or an grant token ID.
For example, |
runAs |
Specifies the user to run the activity as. May be used in delegated
administration. For example,
|
objectId |
Specifies the identifier of an object that has been created, updated, or
deleted. Only session changes are recorded, so that
the session |
operation |
Specifies the state change operation invoked:
|
before |
Not used. |
after |
Not used. |
changedFields |
Not used. |
revision |
Not used. |
component |
Specifies the AM service utilized.
For example, |
realm |
Specifies the realm where the operation occurred. For example,
the Top Level Realm ( |
| Property | Description |
|---|---|
_id |
Specifies a universally unique identifier (UUID) for the message
object, such as |
timestamp |
Specifies the timestamp when AM logged the message, in UTC format
to millisecond precision: |
eventName |
Specifies the name of the audit event.
For example,
|
transactionId |
Specifies the UUID of the transaction, which identifies an
external request when it comes into the system boundary.
Any events generated while handling that request will be assigned that
transaction ID, so that you may see the same transaction ID for same
even for different audit event topics. For example,
|
user.id |
Specifies the universal identifier for authenticated users.
For example,
|
trackingIds |
Specifies an array containing a unique random context ID. For example:
|
result |
Depending on the event being logged, specifies the outcome of:
Possible values are |
principal |
Specifies the array of accounts used to authenticate, such as
|
context |
Not used |
entries |
Specifies the JSON representation of the details of an authentication module, chain, tree or node. AM creates an event as each module or node completes and a final event at the end of the chain or tree. Examples: "entries":[
{
"moduleId":"DataStore",
"info":{
"moduleClass":"DataStore",
"ipAddress":"127.0.0.1",
"moduleName":"DataStore",
"authLevel":"0"
}
}
]
  "entries":[
      {
         "info":{
            "nodeOutcome":"true",
            "treeName":"Example",
            "displayName":"Data Store Decision",
            "nodeType":"DataStoreDecisionNode",
            "nodeId":"e5ec495a-2ae2-4eca-8afb-9781dea04170",
            "authLevel":"0"
         }
      }
   ]
|
component |
Specifies the AM service utilized.
For example, |
realm |
Specifies the realm where the operation occurred. For example,
the Top Level Realm ( |
| Property | Description |
|---|---|
_id |
Specifies a universally unique identifier (UUID) for the message
object. For example,
|
timestamp |
Specifies the timestamp when AM logged the message, in UTC format
to millisecond precision: |
eventName |
Specifies the name of the audit event. For example,
|
transactionId |
Specifies the UUID of the transaction, which identifies an
external request when it comes into the system boundary.
Any events generated while handling that request will be assigned that
transaction ID, so that you may see the same transaction ID
for different audit event topics. For example,
|
user.id |
Not used. You can determine the value for this field by linking
to the access event using the same |
trackingIds |
Not used. |
runAs |
Specifies the user to run the activity as. May be used in delegated
administration. For example,
|
objectId |
Specifies the identifier of a system object that has been created,
modified, or deleted.
For example,
|
operation |
Specifies the state change operation invoked:
|
before |
Specifies the JSON representation of the object prior to the activity. For example: {
"sunsmspriority":[
"0"
],
"objectclass":[
"top",
"sunServiceComponent",
"organizationalUnit"
],
"ou":[
"SamuelTwo"
],
"sunserviceID":[
"serverconfig"
]
}
|
after |
Specifies the JSON representation of the object after the activity. For example: {
"sunKeyValue":[
"forgerock-am-auth-saml2-auth-level=0",
"forgerock-am-auth-saml2-meta-alias=/sp",
"forgerock-am-auth-saml2-entity-name=http://",
"forgerock-am-auth-saml2-authn-context-decl-ref=",
"forgerock-am-auth-saml2-force-authn=none",
"forgerock-am-auth-saml2-is-passive=none",
"forgerock-am-auth-saml2-login-chain=",
"forgerock-am-auth-saml2-auth-comparison=none",
"forgerock-am-auth-saml2-req-binding= urn:oasis:names:tc:SAML:2.0:bindings:HTTP-Redirect",
"forgerock-am-auth-saml2-binding= urn:oasis:names:tc:SAML:2.0:bindings:HTTP-Artifact",
"forgerock-am-auth-saml2-authn-context-class-ref=",
"forgerock-am-auth-saml2-slo-relay=http://",
"forgerock-am-auth-saml2-allow-create=false",
"forgerock-am-auth-saml2-name-id-format= urn:oasis:names:tc:SAML:2.0:nameid-format:persistent"
]
}
|
changedFields |
Specifies the fields that were changed.
For example,
|
revision |
Not used. |
component |
Not used. |
realm |
Specifies the realm where the operation occurred. For example,
the Top Level Realm ( |
The following section presents the predefined names for the audit events:
| Topic | EventName |
|---|---|
access | AM-ACCESS_ATTEMPT |
access | AM-ACCESS-OUTCOME |
activity | AM-SELFSERVICE-REGISTRATION-COMPLETED |
activity | AM-SELFSERVICE-PASSWORDCHANGE-COMPLETED |
activity | AM-SESSION-CREATED |
activity | AM-SESSION-IDLE_TIME_OUT |
activity | AM-SESSION-MAX_TIMED_OUT |
activity | AM-SESSION-LOGGED_OUT |
activity | AM-SESSION-DESTROYED |
activity | AM-SESSION-PROPERTY_CHANGED |
authentication | AM-LOGOUT |
authentication | AM-LOGIN-COMPLETED |
authentication | AM-LOGIN-MODULE-COMPLETED |
authentication | AM-NODE-LOGIN-COMPLETED |
authentication | AM-TREE-LOGIN-COMPLETED |
config | AM-CONFIG-CHANGE |
The following section presents the predefined audit event components that make up the log messages:
| Event Component | AM Component, Service, or Feature |
|---|---|
OAuth |
OAuth 2.0, OpenID Connect 1.0, and UMA |
CTS |
Core Token Service |
AM Agents |
Web and Java agents |
Authentication |
Authentication service |
Dashboard |
Dashboard service |
Server Info |
Server information service |
Users |
Users component |
Groups |
Groups component |
Oath |
Mobile authentication |
Devices |
Trusted devices |
Policy |
Policies |
Realms |
Realms and sub-realms |
Session |
Session service |
Script |
Scripting service |
Batch |
Batch service |
Config |
Configuration |
STS |
Secure Token Service: REST and SOAP |
Record |
Recording service |
Audit |
Auditing service |
Radius |
RADIUS server |
Self-Service |
User Self-Service service |
ssoadm |
ssoadm command |
SAML2 |
SAML v2.0 |
Push |
Push Notification service |
The following section presents the predefined audit event failure reasons:
| Failure | Description |
|---|---|
LOGIN_FAILED |
Incorrect/invalid credentials presented. |
INVALID_PASSWORD |
Invalid credentials entered. |
NO_CONFIG |
Authentication chain does not exist. |
NO_USER_PROFILE |
No user profile found for this user. |
USER_INACTIVE |
User is not active. |
LOCKED_OUT |
Maximum number of failure attempts exceeded. User is locked out. |
ACCOUNT_EXPIRED |
User account has expired. |
LOGIN_TIMEOUT |
Login timed out. |
MODULE_DENIED |
Authentication module is denied. |
MAX_SESSION_REACHED |
Limit for maximum number of allowed sessions has been reached. |
INVALID_REALM |
Realm does not exist. |
REALM_INACTIVE |
Realm is not active. |
USER_NOTE_FOUND |
Role-based authentication: user does not belong to this role. |
AUTH_TYPE_DENIED |
Authentication type is denied. |
SESSION_CREATE_ERROR |
Cannot create a session. |
INVALID_LEVEL |
Level-based authentication: Invalid authentication level. |
AM writes audit events to relational databases using the JDBC audit event handler. This section presents the columns for each audit table.
| Column | Datatype | Description |
|---|---|---|
id | VARCHAR(56) NOT NULL |
Specifies a universally unique identifier (UUID) for the message
object, such as |
timestamp_ | VARCHAR(29) NULL |
Specifies the timestamp when AM logged the message, in UTC format
to millisecond precision: |
transactionid | VARCHAR(255) NULL |
Specifies the UUID of the transaction, which identifies an
external request when it comes into the system boundary.
Any events generated while handling that request will be assigned that
transaction ID, so that you may see the same transaction ID
for different audit event topics. For example,
AM supports a feature where a trusted AM deployment with multiple
instances, components, and ForgeRock products can propagate
a transaction ID through each call across the stack. AM
reads the |
eventname | VARCHAR(255) |
Specifies the name of the audit event.
For example,
|
userid | VARCHAR(255) NULL |
Specifies the universal identifier for the authenticated user.
For example,
|
transactionids | VARCHAR(255) NULL |
Specifies the tracking IDs of the event, used by all topics. |
server_ip | VARCHAR(40) |
Specifies the IP address of the AM server. |
server_port | VARCHAR(5) |
Specifies the port number used by the AM server.
For example, |
client_host | VARCHAR(255) |
Specifies the client hostname. This column is only populated if reverse DNS lookup is enabled. |
client_ip | VARCHAR(40) |
Specifies the client IP address. |
client_port | VARCHAR(5) |
Specifies the client port number. |
request_protocol | VARCHAR(255) NULL |
Specifies the protocol associated with the request operation.
Possible values: |
request_operation | VARCHAR(255) NULL |
Specifies the request operation. For CREST operations, possible values:
For PLL operations, possible values: |
request_detail | TEXT NULL |
Specifies the detailed information about the request operation. For example:
|
http_request_secure | BOOLEAN NULL |
Specifies the HTTP method requested by the client.
For example, |
http_request_method | VARCHAR(7) NULL |
Specifies the HTTP method requested by the client.
For example, |
http_path | VARCHAR(255) NULL |
Specifies the path of the HTTP request.
For example,
|
http_request_queryParameters | MEDIUMTEXT NULL |
Specifies the HTTP query parameter string. For example:
|
http_request_headers | MEDIUMTEXT NULL |
Specifies the HTTP headers for the request. For example: {
"accept":[
"application/json, text/javascript, */*; q=0.01"
],
"Accept-API-Version":[
"protocol=1.0"
],
"accept-encoding":[
"gzip, deflate"
],
"accept-language":[
"en-US;q=1,en;q=0.9"
],
"cache-control":[
"no-cache"
],
"connection":[
"Keep-Alive"
],
"content-length":[
"0"
],
"host":[
"forgerock-am.openrock.org"
],
"pragma":[
"no-cache"
],
"referer":[
"https://forgerock-am.openrock.org/openam/XUI/"
],
"user-agent":[
"Mozilla/5.0 (X11; Linux x86_64; rv:31.0)
Gecko/20100101 Firefox/31.0"
],
"x-nosession":[
"true"
],
"x-requested-with":[
"XMLHttpRequest"
],
"x-username":[
"anonymous"
]
}
Note: line feeds and truncated values in the example are for readability purposes. |
http_request_cookies | MEDIUMTEXT NULL |
Specifies a JSON map of key-value pairs and appears as its own property to allow for blacklisting fields or values. For example:
       "cookies": "amlbcookie=01;
       iPlanetDirectoryPro=\"AQIC5wM2LY....*AAJTSQACMfwT...*\";
       iPlanetDirectoryPro=eyJ0eXAiOiJK....eyJzdWIiOiJkZ..."
Note: line feeds and truncated values in the example are for readability purposes. |
http_response_headers | MEDIUMTEXT NULL |
Captures the headers returned by AM to the client (that is, the
inverse of |
response_status | VARCHAR(10) NULL |
Specifies the response status of the request. For example,
|
response_statuscode | VARCHAR(255) NULL |
Specifies the response status code, depending on the protocol. For CREST, HTTP failure codes are displayed but not HTTP success codes. For PLL endpoints, PLL error codes are displayed. |
response_elapsedtime | VARCHAR(255) NULL |
Specifies the time to execute the access event, usually in millisecond precision. |
response_elapsedtimeunits | VARCHAR(255) NULL |
Specifies the elapsed time units of the response.
For example, |
component | VARCHAR(255) NULL |
Specifies the AM service utilized.
For example, |
realm | VARCHAR(255) NULL |
Specifies the realm where the operation occurred. For example,
the Top Level Realm ( |
| Column | Datatype | Description |
|---|---|---|
id | VARCHAR(56) NOT NULL |
Specifies a universally unique identifier (UUID) for the message
object, such as |
timestamp_ | VARCHAR(29) NULL |
Specifies the timestamp when AM logged the message, in UTC format
to millisecond precision: |
transactionid | VARCHAR(255) NULL |
Specifies the UUID of the transaction, which identifies an
external request when it comes into the system boundary.
Any events generated while handling that request will be assigned that
transaction ID, so that you may see the same transaction ID
for different audit event topics. For example,
AM supports a feature where a trusted AM deployment with multiple
instances, components, and ForgeRock products can propagate
a transaction ID through each call across the stack. AM
reads the |
eventname | VARCHAR(255) NULL |
Specifies the name of the audit event.
For example,
|
userid | VARCHAR(255) NULL |
Specifies the universal identifier for authenticated users.
For example,
|
transactionids | VARCHAR(255) NULL |
Specifies the tracking IDs of the event, used by all topics. |
result | VARCHAR(255) NULL |
Depending on the event being logged, specifies the outcome of:
Possible values are |
principals | MEDIUMTEXT |
Specifies the array of accounts used to authenticate, such as
|
context | N/A |
MEDIUMTEXT. Not used. |
entries | MEDIUMTEXT |
Specifies the JSON representation of the details of an authentication module, chain, tree or node. AM creates an event as each module or node completes and a final event at the end of the chain or tree. For example: "entries":[
{
"moduleId":"DataStore",
"info":{
"moduleClass":"DataStore",
"ipAddress":"127.0.0.1",
"moduleName":"DataStore",
"authLevel":"0"
}
}
]
  "entries":[
      {
         "info":{
            "nodeOutcome":"true",
            "treeName":"Example",
            "displayName":"Data Store Decision",
            "nodeType":"DataStoreDecisionNode",
            "nodeId":"e5ec495a-2ae2-4eca-8afb-9781dea04170",
            "authLevel":"0"
         }
      }
   ]
|
component | VARCHAR(255) NULL |
Specifies the AM service utilized.
For example, |
realm | VARCHAR(255) NULL |
Specifies the realm where the operation occurred. For example,
the Top Level Realm ( |
| Column | Datatype | Description |
|---|---|---|
id | VARCHAR(56) NOT NULL |
Specifies a universally unique identifier (UUID) for the message
object, such as |
timestamp_ | VARCHAR(29) NOT NULL |
Specifies the timestamp when AM logged the message, in UTC format
to millisecond precision: |
transactionid | VARCHAR(255) NULL |
Specifies the UUID of the transaction, which identifies an
external request when it comes into the system boundary.
Any events generated while handling that request will be assigned that
transaction ID, so that you may see the same transaction ID
for different audit event topics. For example,
AM supports a feature where a trusted AM deployment with multiple
instances, components, and ForgeRock products can propagate
a transaction ID through each call across the stack. AM
reads the |
eventname | VARCHAR(255) NULL |
Specifies the name of the audit event. For example,
|
userid | VARCHAR(255) NULL |
Specifies the universal identifier for authenticated users.
For example,
|
transactionids | VARCHAR(255) NULL |
Specifies the tracking IDs of the event, used by all topics. |
runas | VARCHAR(255) NULL |
Specifies the user to run the activity as. May be used in delegated
administration. For example,
|
objectid | VARCHAR(255) NULL |
Specifies the identifier of a system object that has been created,
modified, or deleted.
For example,
|
operation | VARCHAR(255) NULL |
Specifies the state change operation invoked:
|
beforeObject | MEDIUMTEXT NULL |
Specifies the JSON representation of the object prior to the activity. For example: {
"sunsmspriority":[
"0"
],
"objectclass":[
"top",
"sunServiceComponent",
"organizationalUnit"
],
"ou":[
"SamuelTwo"
],
"sunserviceID":[
"serverconfig"
]
}
|
afterObject | MEDIUMTEXT NULL |
Specifies the JSON representation of the object after the activity. For example: {
"sunKeyValue":[
"forgerock-am-auth-saml2-auth-level=0",
"forgerock-am-auth-saml2-meta-alias=/sp",
"forgerock-am-auth-saml2-entity-name=http://",
"forgerock-am-auth-saml2-authn-context-decl-ref=",
"forgerock-am-auth-saml2-force-authn=none",
"forgerock-am-auth-saml2-is-passive=none",
"forgerock-am-auth-saml2-login-chain=",
"forgerock-am-auth-saml2-auth-comparison=none",
"forgerock-am-auth-saml2-req-binding= urn:oasis:names:tc:SAML:2.0:bindings:HTTP-Redirect",
"forgerock-am-auth-saml2-binding= urn:oasis:names:tc:SAML:2.0:bindings:HTTP-Artifact",
"forgerock-am-auth-saml2-authn-context-class-ref=",
"forgerock-am-auth-saml2-slo-relay=http://",
"forgerock-am-auth-saml2-allow-create=false",
"forgerock-am-auth-saml2-name-id-format= urn:oasis:names:tc:SAML:2.0:nameid-format:persistent"
]
}
|
changedfields | VARCHAR(255) NULL |
Specifies the columns that were changed.
For example,
|
rev | VARCHAR(255) NULL |
Not used. |
component | VARCHAR(255) NULL |
Specifies the AM service utilized.
For example, |
realm | VARCHAR(255) NULL |
Specifies the realm where the operation occurred. For example,
the Top Level Realm ( |
| Column | Datatype | Description |
|---|---|---|
id | VARCHAR(56) NOT NULL |
Specifies a universally unique identifier (UUID) for the message
object, such as |
timestamp_ | VARCHAR(29) NULL |
Specifies the timestamp when AM logged the message, in UTC format
to millisecond precision: |
transactionid | VARCHAR(255) NULL |
Specifies the UUID of the transaction, which identifies an
external request when it comes into the system boundary.
Any events generated while handling that request will be assigned that
transaction ID, so that you may see the same transaction ID
for different audit event topics. For example,
AM supports a feature where a trusted AM deployment with multiple
instances, components, and ForgeRock products can propagate
a transaction ID through each call across the stack. AM
reads the |
eventname | VARCHAR(255) NULL |
Specifies the name of the audit event.
For example,
|
userid | VARCHAR(255) NULL |
Specifies the universal identifier for authenticated users.
For example,
|
transactionids | VARCHAR(255) NULL |
Specifies the tracking IDs of the event, used by all topics. |
runas | VARCHAR(255) NULL |
Specifies the user to run the activity as. May be used in delegated
administration. For example,
|
objectid | VARCHAR(255) NULL |
Specifies the identifier of a system object that has been created,
modified, or deleted.
For example,
|
operation | VARCHAR(255) NULL |
Specifies the state change operation invoked:
|
beforeObject | MEDIUMTEXT NULL |
Specifies the JSON representation of the object prior to the activity. For example: {
"sunsmspriority":[
"0"
],
"objectclass":[
"top",
"sunServiceComponent",
"organizationalUnit"
],
"ou":[
"SamuelTwo"
],
"sunserviceID":[
"serverconfig"
]
}
|
afterObject | MEDIUMTEXT NULL |
Specifies the JSON representation of the object after the activity. For example: {
"sunKeyValue":[
"forgerock-am-auth-saml2-auth-level=0",
"forgerock-am-auth-saml2-meta-alias=/sp",
"forgerock-am-auth-saml2-entity-name=http://",
"forgerock-am-auth-saml2-authn-context-decl-ref=",
"forgerock-am-auth-saml2-force-authn=none",
"forgerock-am-auth-saml2-is-passive=none",
"forgerock-am-auth-saml2-login-chain=",
"forgerock-am-auth-saml2-auth-comparison=none",
"forgerock-am-auth-saml2-req-binding= urn:oasis:names:tc:SAML:2.0:bindings:HTTP-Redirect",
"forgerock-am-auth-saml2-binding= urn:oasis:names:tc:SAML:2.0:bindings:HTTP-Artifact",
"forgerock-am-auth-saml2-authn-context-class-ref=",
"forgerock-am-auth-saml2-slo-relay=http://",
"forgerock-am-auth-saml2-allow-create=false",
"forgerock-am-auth-saml2-name-id-format= urn:oasis:names:tc:SAML:2.0:nameid-format:persistent"
]
}
|
changedfields | VARCHAR(255) NULL |
Specifies the columns that were changed.
For example,
|
rev | VARCHAR(255) |
Not used. |
component | VARCHAR(255) NULL |
Specifies the AM service utilized.
For example, |
realm | VARCHAR(255) NULL |
Specifies the realm where the operation occurred. For example,
the Top Level Realm ( |
amster service name: audit
The following settings appear on the Global Attributes tab:
- Audit logging
Enable audit logging in OpenAM.
Default value:
trueamster attribute:
auditEnabled- Field exclusion policies
A list of fields or values (JSON pointers) to exclude from the audit event.
To specify a field or value within a field to be filtered out of the event, start the pointer with the event topic, for example access, activity, authentication, or config, followed by the field name or the path to the value in the field.
For example, to filter out the
userIdfield in an access event the pointer will be/access/userId.To filter out the
content-typevalue in thehttp.request.headersfield the pointer will be/access/http/request/headers/content-type.Only values that are made up of JSON strings can be manipulated in this way.
Default value:
/access/http/request/queryParameters/tokenId
/access/http/request/headers/cache-control
/access/http/request/queryParameters/redirect_uri
/access/http/request/queryParameters/Login.Token1
/access/http/request/headers/accept-language
/config/before
/access/http/request/headers/%AM_AUTH_COOKIE_NAME%
/config/after
/access/http/request/queryParameters/access_token
/access/http/request/headers/X-OpenAM-Password
/access/http/request/queryParameters/id_token_hint
/access/http/request/headers/proxy-authorization
/access/http/request/queryParameters/IDToken1
/access/http/request/queryParameters/requester
/access/http/request/headers/connection
/access/http/request/queryParameters/sessionUpgradeSSOTokenId
/access/http/request/headers/content-type
/access/http/request/cookies/%AM_COOKIE_NAME%
/access/http/request/headers/accept-encoding
/access/http/request/headers/authorization
/access/http/request/headers/content-length
/access/http/request/headers/%AM_COOKIE_NAME%amster attribute:
fieldFilterPolicy
The following settings appear on the Realm Defaults tab:
- Audit logging
Enable audit logging in OpenAM.
Default value:
trueamster attribute:
auditEnabled- Field exclusion policies
A list of fields or values (JSON pointers) to exclude from the audit event.
To specify a field or value within a field to be filtered out of the event, start the pointer with the event topic, for example access, activity, authentication, or config, followed by the field name or the path to the value in the field.
For example, to filter out the
userIdfield in an access event the pointer will be/access/userId.To filter out the
content-typevalue in thehttp.request.headersfield the pointer will be/access/http/request/headers/content-type.Only values that are made up of JSON strings can be manipulated in this way.
Default value:
/access/http/request/queryParameters/tokenId
/access/http/request/headers/cache-control
/access/http/request/queryParameters/redirect_uri
/access/http/request/queryParameters/Login.Token1
/access/http/request/headers/accept-language
/config/before
/access/http/request/headers/%AM_AUTH_COOKIE_NAME%
/config/after
/access/http/request/queryParameters/access_token
/access/http/request/headers/X-OpenAM-Password
/access/http/request/queryParameters/id_token_hint
/access/http/request/headers/proxy-authorization
/access/http/request/queryParameters/IDToken1
/access/http/request/queryParameters/requester
/access/http/request/headers/connection
/access/http/request/queryParameters/sessionUpgradeSSOTokenId
/access/http/request/headers/content-type
/access/http/request/cookies/%AM_COOKIE_NAME%
/access/http/request/headers/accept-encoding
/access/http/request/headers/authorization
/access/http/request/headers/content-length
/access/http/request/headers/%AM_COOKIE_NAME%amster attribute:
fieldFilterPolicy
This service has the following Secondary Configurations.
A configured secondary instance of the JMS type has the following tabs:
The General Handler Configuration tab contains the following secondary configuration properties:
- Enabled
Enables or disables an audit event handler.
Default value:
trueamster attribute:
enabled- Topics
List of topics handled by an audit event handler.
Default value:
access
activity
config
authenticationamster attribute:
topics
The Audit Event Handler Factory tab contains the following secondary configuration properties:
- Factory Class Name
The fully qualified class name of the factory responsible for creating the Audit Event Handler. The class must implement
org.forgerock.openam.audit.AuditEventHandlerFactory.Default value:
org.forgerock.openam.audit.events.handlers.JmsAuditEventHandlerFactoryamster attribute:
handlerFactory
The JMS Configuration tab contains the following secondary configuration properties:
- Delivery Mode
Specifies whether JMS messages used to transmit audit events use persistent or non-persistent delivery.
With persistent delivery, the JMS provider ensures that messages are not lost in transit in case of a provider failure by logging messages to storage when they are sent.
Specify the delivery mode as persistent if it is unacceptable for delivery of audit events to be lost in JMS transit. If the possible loss of audit events is acceptable, choose non-persistent delivery, which provides better performance.
Default value:
NON_PERSISTENTamster attribute:
deliveryMode- Session Mode
Specifies the JMS session acknowledgement mode:
AUTO,CLIENT, orDUPS_OK.Auto mode guarantees once-only delivery of JMS messages used to transmit audit events.
Duplicates OK mode ensures that messages are delivered at least once.
Client mode does not ensure delivery.
Use the default setting unless your JMS broker implementation requires otherwise. See your broker documentation for more information.
Default value:
AUTOamster attribute:
sessionMode- JNDI Context Properties
Specifies JNDI properties that OpenAM uses to connect to the JMS message broker to which OpenAM will publish audit events.
OpenAM acts as a JMS client, using a JMS connection factory to connect to your JMS message broker. In order for OpenAM to connect to the broker, the JNDI context properties must conform to those needed by the broker. See the documentation for your JMS message broker for required values.
The default properties are example properties for connecting to Apache ActiveMQ.
Default value:
topic.audit=audit
java.naming.factory.initial=org.apache.activemq.jndi.ActiveMQInitialContextFactory
java.naming.provider.url=tcp://localhost:61616
amster attribute:
jndiContextProperties- JMS Topic Name
JNDI lookup name for the JMS topic
Default value:
auditamster attribute:
jndiTopicName- JMS Connection Factory Name
Specifies the JNDI lookup name for the connection factory exposed by your JMS message broker. OpenAM performs a JNDI lookup on this name to locate your broker's connection factory.
See the documentation for your JMS message broker for the required value.
The default is the connection factory name for Apache ActiveMQ.
Default value:
ConnectionFactoryamster attribute:
jndiConnectionFactoryName
The Batch Events tab contains the following secondary configuration properties:
- Batch enabled
Boolean for batch delivery of audit events.
Default value:
trueamster attribute:
batchEnabled- Capacity
Maximum event count in the batch queue; additional events are dropped.
Default value:
1000amster attribute:
batchCapacity- Max Batched
Maximum number of events per batch.
Default value:
100amster attribute:
maxBatchedEvents- Thread Count
Number of concurrent threads that pull events from the batch queue.
Default value:
3amster attribute:
batchThreadCount- Insert Timeout
Waiting period (seconds) for available capacity, when a new event enters the queue.
Default value:
60amster attribute:
insertTimeoutSec- Polling Timeout
Worker thread waiting period (seconds) for the next event, before going idle.
Default value:
10amster attribute:
pollTimeoutSec- Shutdown Timeout
Application waiting period (seconds) for worker thread termination.
Default value:
60amster attribute:
shutdownTimeoutSec
A configured secondary instance of the Elasticsearch type has the following tabs:
The General Handler Configuration tab contains the following secondary configuration properties:
- Enabled
Enables or disables an audit event handler.
Default value:
trueamster attribute:
enabled- Topics
List of topics handled by an audit event handler.
Default value:
access
activity
config
authenticationamster attribute:
topics
The Audit Event Handler Factory tab contains the following secondary configuration properties:
- Factory Class Name
The fully qualified class name of the factory responsible for creating the Audit Event Handler. The class must implement
org.forgerock.openam.audit.AuditEventHandlerFactory.Default value:
org.forgerock.openam.audit.events.handlers.JmsAuditEventHandlerFactoryamster attribute:
handlerFactory
The Elasticsearch Configuration tab contains the following secondary configuration properties:
- Server Hostname
Host name or IP address of the Elasticsearch server.
amster attribute:
host- Server Port
Specifies the port number used to access Elasticsearch's REST API.
amster attribute:
port- SSL Enabled
Specifies whether SSL is configured on the Elasticsearch server.
If SSL is enabled, be sure to import the CA certificate used to sign Elasticsearch node certificates into the Java keystore on the host that runs OpenAM before attempting to log audit events to Elasticsearch.
Default value:
falseamster attribute:
sslEnabled- Elasticsearch Index
Specifies the name of the Elasticsearch index to be used for OpenAM audit logging.
amster attribute:
index
The Authentication tab contains the following secondary configuration properties:
- Username
Specifies the username to access the Elasticsearch server.
Required if Elasticsearch Shield authentication is configured.
amster attribute:
username- Password
Specifies the password to access the Elasticsearch server.
Required if Elasticsearch Shield authentication is configured.
amster attribute:
password
The Buffering tab contains the following secondary configuration properties:
- Buffering Enabled
Default value:
trueamster attribute:
bufferingEnabled- Batch Size
Maximum number of events that can be buffered (default: 10000)
Default value:
500amster attribute:
batchSize- Queue Capacity
Maximum number of audit logs in the batch queue. Additional audit events are dropped.
Default value:
10000amster attribute:
maxEvents- Write interval (in milliseconds)
Specifies the interval in milliseconds at which buffered events are written to Elasticsearch.
Default value:
250amster attribute:
writeInterval
A configured secondary instance of the Syslog type has the following tabs:
The General Handler Configuration tab contains the following secondary configuration properties:
- Enabled
Enables or disables an audit event handler.
Default value:
trueamster attribute:
enabled- Topics
List of topics handled by an audit event handler.
Default value:
access
activity
config
authenticationamster attribute:
topics
The Audit Event Handler Factory tab contains the following secondary configuration properties:
- Factory Class Name
The fully qualified class name of the factory responsible for creating the Audit Event Handler. The class must implement
org.forgerock.openam.audit.AuditEventHandlerFactory.Default value:
org.forgerock.openam.audit.events.handlers.JmsAuditEventHandlerFactoryamster attribute:
handlerFactory
The Syslog Configuration tab contains the following secondary configuration properties:
- Server hostname
Host name or IP address of receiving syslog server.
amster attribute:
host- Server port
Port number of receiving syslog server.
amster attribute:
port- Transport Protocol
Default value:
TCPamster attribute:
transportProtocol- Connection timeout
Timeout for connecting to syslog server, in seconds.
amster attribute:
connectTimeout- Facility
Syslog facility value to apply to all events.
Default value:
USERamster attribute:
facility
The Buffering tab contains the following secondary configuration properties:
- Buffering Enabled
Enables or disables audit event buffering.
Default value:
trueamster attribute:
bufferingEnabled- Buffer Size
Maximum number of events that can be buffered (default/minimum: 5000)
Default value:
5000amster attribute:
bufferingMaxSize
A configured secondary instance of the CSV type has the following tabs:
The General Handler Configuration tab contains the following secondary configuration properties:
- Enabled
Enables or disables an audit event handler.
Default value:
trueamster attribute:
enabled- Topics
List of topics handled by an audit event handler.
Default value:
access
activity
config
authenticationamster attribute:
topics
The Audit Event Handler Factory tab contains the following secondary configuration properties:
- Factory Class Name
The fully qualified class name of the factory responsible for creating the Audit Event Handler. The class must implement
org.forgerock.openam.audit.AuditEventHandlerFactory.Default value:
org.forgerock.openam.audit.events.handlers.JmsAuditEventHandlerFactoryamster attribute:
handlerFactory
The CSV Configuration tab contains the following secondary configuration properties:
- Log Directory
Directory in which to store audit log CSV files.
Default value:
%BASE_DIR%/%SERVER_URI%/log/amster attribute:
location
The File Rotation tab contains the following secondary configuration properties:
- Rotation Enabled
Enables and disables audit file rotation.
Default value:
trueamster attribute:
rotationEnabled- Maximum File Size
Maximum size, in bytes, which an audit file can grow to before rotation is triggered. A negative or zero value indicates this policy is disabled.
Default value:
100000000amster attribute:
rotationMaxFileSize- File Rotation Prefix
Prefix to prepend to audit files when rotating audit files.
amster attribute:
rotationFilePrefix- File Rotation Suffix
Suffix to append to audit files when they are rotated. Suffix should be a timestamp.
Default value:
-yyyy.MM.dd-HH.mm.ssamster attribute:
rotationFileSuffix- Rotation Interval
Interval to trigger audit file rotations, in seconds. A negative or zero value disables this feature.
Default value:
-1amster attribute:
rotationInterval- Rotation Times
Durations after midnight to trigger file rotation, in seconds.
amster attribute:
rotationTimes
The File Retention tab contains the following secondary configuration properties:
- Maximum Number of Historical Files
Maximum number of backup audit files allowed. A value of
-1disables pruning of old history files.Default value:
1amster attribute:
retentionMaxNumberOfHistoryFiles- Maximum Disk Space
The maximum amount of disk space the audit files can occupy, in bytes. A negative or zero value indicates this policy is disabled.
Default value:
-1amster attribute:
retentionMaxDiskSpaceToUse- Minimum Free Space Required
Minimum amount of disk space required, in bytes, on the system where audit files are stored. A negative or zero value indicates this policy is disabled.
Default value:
-1amster attribute:
retentionMinFreeSpaceRequired
The Buffering tab contains the following secondary configuration properties:
- Buffering Enabled
Enables or disables buffering.
Default value:
trueamster attribute:
bufferingEnabled- Flush Each Event Immediately
Performance may be improved by writing all buffered events before flushing.
Default value:
falseamster attribute:
bufferingAutoFlush
The Tamper Evident Configuration tab contains the following secondary configuration properties:
- Is Enabled
Enables the CSV tamper evident feature.
Default value:
falseamster attribute:
securityEnabled- Certificate Store Location
Path to Java keystore.
Default value:
%BASE_DIR%/%SERVER_URI%/Logger.jksamster attribute:
securityFilename- Certificate Store Password
Password for Java keystore.
amster attribute:
securityPassword- Signature Interval
Signature generation interval, in seconds.
Default value:
900amster attribute:
securitySignatureInterval
A configured secondary instance of the JDBC type has the following tabs:
The General Handler Configuration tab contains the following secondary configuration properties:
- Enabled
Enables or disables an audit event handler.
Default value:
trueamster attribute:
enabled- Topics
List of topics handled by an audit event handler.
Default value:
access
activity
config
authenticationamster attribute:
topics
The Audit Event Handler Factory tab contains the following secondary configuration properties:
- Factory Class Name
The fully qualified class name of the factory responsible for creating the Audit Event Handler. The class must implement
org.forgerock.openam.audit.AuditEventHandlerFactory.Default value:
org.forgerock.openam.audit.events.handlers.JmsAuditEventHandlerFactoryamster attribute:
handlerFactory
The Database Configuration tab contains the following secondary configuration properties:
- Database Type
Select the database to use for logging audit events.
Identifies the database in use, for example MySQL, Oracle, or SQL.
Default value:
oracleamster attribute:
databaseType- JDBC Database URL
URL of the JDBC database.
amster attribute:
jdbcUrl- JDBC Driver
Fully qualified JDBC driver class name.
amster attribute:
driverClassName- Database Username
Specifies the username to access the database server.
amster attribute:
username- Database Password
Specifies the password to access the database server.
amster attribute:
password- Connection Timeout (seconds)
Specifies the maximum wait time before failing the connection, in seconds.
Default value:
30amster attribute:
connectionTimeout- Maximum Connection Idle Timeout (seconds)
Specifies the maximum idle time before the connection is closed, in seconds.
Default value:
600amster attribute:
idleTimeout- Maximum Connection Time (seconds)
Specifies the maximum time a JDBC connection can be open, in seconds.
Default value:
1800amster attribute:
maxLifetime- Minimum Idle Connections
Specifies the minimum number of idle connections in the connection pool.
Default value:
10amster attribute:
minIdle- Maximum Connections
Specifies the maximum number of connections in the connection pool.
Default value:
10amster attribute:
maxPoolSize
The Buffering tab contains the following secondary configuration properties:
- Buffering Enabled
Enables or disables audit event buffering.
Default value:
trueamster attribute:
bufferingEnabled- Buffer Size (number of events)
Size of the queue where events are buffered before they are written to the database.
This queue has to be big enough to store all incoming events that have not yet been written to the database.
If the queue reaches capacity, the process will block until a write occurs.
Default value:
5000amster attribute:
bufferingMaxSize- Write Interval
Specifies the interval (seconds) at which buffered events are written to the database.
Default value:
5amster attribute:
bufferingWriteInterval- Writer Threads
Specifies the number of threads used to write the buffered events.
Default value:
1amster attribute:
bufferingWriterThreads- Max Batched Events
Specifies the maximum number of batched statements the database can support per connection.
Default value:
100amster attribute:
bufferingMaxBatchedEvents
A configured secondary instance of the JSON type has the following tabs:
The General Handler Configuration tab contains the following secondary configuration properties:
- Enabled
Enables or disables an audit event handler.
Default value:
trueamster attribute:
enabled- Topics
List of topics handled by an audit event handler.
Default value:
access
activity
config
authenticationamster attribute:
topics
The Audit Event Handler Factory tab contains the following secondary configuration properties:
- Factory Class Name
The fully qualified class name of the factory responsible for creating the Audit Event Handler. The class must implement
org.forgerock.openam.audit.AuditEventHandlerFactory.Default value:
org.forgerock.openam.audit.events.handlers.JmsAuditEventHandlerFactoryamster attribute:
handlerFactory
The JSON Configuration tab contains the following secondary configuration properties:
- Log Directory
Directory in which to store audit log JSON files.
Default value:
%BASE_DIR%/%SERVER_URI%/log/amster attribute:
location- ElasticSearch JSON Format Compatible
JSON format should be transformed to be compatible with ElasticSearch format restrictions.
Default value:
falseamster attribute:
elasticsearchCompatible- File Rotation Retention Check Interval
Interval to check time-based file rotation policies, in seconds.
Default value:
5amster attribute:
rotationRetentionCheckInterval
The File Rotation tab contains the following secondary configuration properties:
- Rotation Enabled
Enables and disables audit file rotation.
Default value:
trueamster attribute:
rotationEnabled- Maximum File Size
Maximum size, in bytes, which an audit file can grow to before rotation is triggered. A negative or zero value indicates this policy is disabled.
Default value:
100000000amster attribute:
rotationMaxFileSize- File Rotation Prefix
Prefix to prepend to audit files when rotating audit files.
amster attribute:
rotationFilePrefix- File Rotation Suffix
Suffix to append to audit files when they are rotated. Suffix should be a timestamp.
Default value:
-yyyy.MM.dd-HH.mm.ssamster attribute:
rotationFileSuffix- Rotation Interval
Interval to trigger audit file rotations, in seconds. A negative or zero value disables this feature.
Default value:
-1amster attribute:
rotationInterval- Rotation Times
Durations after midnight to trigger file rotation, in seconds.
amster attribute:
rotationTimes
The File Retention tab contains the following secondary configuration properties:
- Maximum Number of Historical Files
Maximum number of backup audit files allowed. A value of
-1disables pruning of old history files.Default value:
1amster attribute:
retentionMaxNumberOfHistoryFiles- Maximum Disk Space
The maximum amount of disk space the audit files can occupy, in bytes. A negative or zero value indicates this policy is disabled.
Default value:
-1amster attribute:
retentionMaxDiskSpaceToUse- Minimum Free Space Required
Minimum amount of disk space required, in bytes, on the system where audit files are stored. A negative or zero value indicates this policy is disabled.
Default value:
-1amster attribute:
retentionMinFreeSpaceRequired
The Buffering tab contains the following secondary configuration properties:
- Batch Size
Maximum number of events that can be buffered (default/minimum: 100000)
Default value:
5000amster attribute:
bufferingMaxSize- Write interval
Interval at which buffered events are written to a file, in milliseconds.
Default value:
5amster attribute:
bufferingWriteInterval
A configured secondary instance of the Splunk type has the following tabs:
The General Handler Configuration tab contains the following secondary configuration properties:
- Enabled
Enables or disables an audit event handler.
Default value:
trueamster attribute:
enabled- Topics
List of topics handled by an audit event handler.
Default value:
access
activity
config
authenticationamster attribute:
topics
The Audit Event Handler Factory tab contains the following secondary configuration properties:
- Factory Class Name
The fully qualified class name of the factory responsible for creating the Audit Event Handler. The class must implement
org.forgerock.openam.audit.AuditEventHandlerFactory.Default value:
org.forgerock.openam.audit.events.handlers.JmsAuditEventHandlerFactoryamster attribute:
handlerFactory
The Splunk Configuration tab contains the following secondary configuration properties:
- Authorization Token
Authorization token used to connect to Splunk HTTP Event Collector endpoint.
amster attribute:
authzToken- Server Hostname
Host name or IP address of Splunk server.
amster attribute:
host- Server Port
Port number of Splunk server.
amster attribute:
port- SSL Enabled
Use HTTPS protocol for communication with Splunk.
Default value:
falseamster attribute:
sslEnabled
The Buffering tab contains the following secondary configuration properties:
- Batch Size
Maximum number of events that can be buffered (default: 10000).
Default value:
500amster attribute:
batchSize- Queue Capacity
Maximum number of audit evens in the batch queue; additional events are dropped.
Default value:
10000amster attribute:
maxEvents- Write interval (in milliseconds)
Interval at which buffered events are written to Splunk.
Default value:
250amster attribute:
writeInterval
amster service name: logging
The following settings appear on the General tab:
- Log Status
Enable the OpenAM logging system.
OpenAM supports two Audit Logging Services: the legacy Logging Service, which is based on a Java SDK and is available in OpenAM versions prior to OpenAM 13.5, and a new common REST-based Audit Logging Service available from OpenAM 13.5.
The legacy Logging Service will be deprecated in a future release.
The possible values for this property are:
ACTIVEINACTIVE
Default value:
INACTIVEamster attribute:
status- Log Record Resolve Host Name
Enable this to have OpenAM perform a DNS host lookup to populate the host name field for log records.
Note: Enabling this functionality will increase the load of the logging system and the OpenAM host must have DNS configured.
Default value:
falseamster attribute:
resolveHostName- Logging Type
Specifies whether to log to a database, Syslog, or to the filing system.
If you choose database then be sure to set the connection attributes correctly, including the JDBC driver to use.
The possible values for this property are:
FileDBSyslog
Default value:
Fileamster attribute:
type- Configurable Log Fields
Controls the fields that are logged by OpenAM.
This property is the list of fields that are logged by default. Administrators can choose to limit the information logged by OpenAM.
Default value:
IPAddr
LoggedBy
LoginID
NameID
ModuleName
ContextID
Domain
LogLevel
HostName
MessageIDamster attribute:
fields- Log Verification Frequency
The frequency (in seconds) that OpenAM verifies security of the log files.
When secure logging is enabled, this is the period that OpenAM will check the integrity of the log files.
Default value:
3600amster attribute:
verifyPeriod- Log Signature Time
The frequency (in seconds) that OpenAM will digitally sign the log records.
When secure logging is enabled, this is the period that OpenAM will digitally signed the contents of the log files. The log signatures form the basis of the log file integrity checking.
Default value:
900amster attribute:
signaturePeriod- Secure Logging
Enable or Disable secure logging.
Enabling this setting will cause OpenAM to digitally sign and verify the contents of the log files to help prevent and detect log file tampering. A certificate must be configured for this functionality to be enabled.
The possible values for this property are:
ONOFF
Default value:
OFFamster attribute:
security- Secure Logging Signing Algorithm
Determines the algorithm used to digitally sign the log records.
The possible values for this property are:
MD2withRSA. MD2 with RSAMD5withRSA. MD5 with RSASHA1withDSA. SHA1 with DSASHA1withRSA. SHA1 with RSA
Default value:
SHA1withRSAamster attribute:
signingAlgorithm- Logging Certificate Store Location
The path to the Java keystore containing the logging system certificate.
The secure logging system will use the certificate alias of
Loggerto locate the certificate in the specified keystore.Default value:
%BASE_DIR%/%SERVER_URI%/Logger.jksamster attribute:
certificateStore- Number of Files per Archive
Controls the number of logs files that will be archived by the secure logging system.
Default value:
5amster attribute:
filesPerKeystore- Buffer Size
The number of log records held in memory before the log records will be flushed to the logfile or the database.
Default value:
25amster attribute:
bufferSize- Buffer Time
The maximum time (in seconds) OpenAM will hold log records in memory before flushing to the underlying repository.
Default value:
60amster attribute:
bufferTime- Time Buffering
Enable or Disable log buffering
When enabled OpenAM holds all log records in a memory buffer that it periodically flush to the repository. The period is set in the Buffer Time property.
The possible values for this property are:
ONOFF
Default value:
ONamster attribute:
buffering- Logging Level
Control the level of JDK logging within OpenAM.
The possible values for this property are:
OFFSEVEREWARNINGINFOCONFIGFINEFINERFINEST
Default value:
INFOamster attribute:
jdkLoggingLevel
The following settings appear on the File tab:
- Log Rotation
Enable log rotation to cause new log files to be created when configured thresholds are reached, such as Maximum Log Size or Logfile Rotation Interval.
Default value:
trueamster attribute:
rotationEnabled- Maximum Log Size
Maximum size of a log file, in bytes.
Default value:
100000000amster attribute:
maxFileSize- Number of History Files
Sets the number of history files for each log that OpenAM keeps, including time-based histories.
The previously live file is moved and is included in the history count, and a new log is created to serve as the live log file. Any log file in the history count that goes over the number specified here will be deleted.
For time-based logs, a new set of logs will be created when OpenAM is started because of the time-based file names that are used.
Default value:
1amster attribute:
numberHistoryFiles- Logfile Rotation Prefix
The name of the log files will be prefixed with the supplied value.
This field defines the log file prefix. The prefix will be added to the name of all logfiles.
Note: Only used when time-based log rotation is enabled.
amster attribute:
prefix- Logfile Rotation Suffix
The name of the log files will be suffixed with the supplied value.
This field defines the log file suffix. If no suffix is provided, then the following default suffix format will be used:
-MM.dd.yy-kk.mm. The suffix allows use of Date and Time patterns defined inSimpleDateFormatNote: This field is only used if the time based rotation is enabled.
Default value:
-MM.dd.yy-kk.mmamster attribute:
suffix- Logfile Rotation Interval
The rotation interval (in minutes).
The rotation interval determines the frequency of when the log files will be rotated. If the value is
-1, then time based rotation is disabled and log file size based rotation is enabled.Default value:
-1amster attribute:
rotationInterval- Log File Location
The path to the location of the log files
This property controls the location of the log files; the value of this property varies on whether File or DB logging is in use:
File: The full pathname to the directory containing the log files.
DB: The JDBC URL to the database used to store the log file database.
Default value:
%BASE_DIR%/%SERVER_URI%/log/amster attribute:
location
The following settings appear on the Database tab:
- Database User Name
When logging to a database, set this to the user name used to connect to the database. If this attribute is incorrectly set, OpenAM performance suffers.
Default value:
dbuseramster attribute:
user- Database User Password
When logging to a database, set this to the password used to connect to the database. If this attribute is incorrectly set, OpenAM performance suffers.
amster attribute:
password- Database Driver Name
When logging to a database, set this to the class name of the JDBC driver used to connect to the database.
The default is for Oracle. OpenAM also works with the MySQL database driver.
Default value:
oracle.jdbc.driver.OracleDriveramster attribute:
driver- Maximum Number of Records
The maximum number of records read from the logs via the Logging API
Default value:
500amster attribute:
maxRecords- DB Failure Memory Buffer Size
Max number of log records held in memory if DB logging fails.
This is the maximum number of log records that will be held in memory if the database is unavailable. When the buffer is full, new log records cause the oldest record in the buffer to be cleared. OpenAM monitoring records the number of log entries cleared when the database was unavailable.
If the value of this property is less than that of the Buffer Size then the buffer size value will take precedence.
Default value:
2amster attribute:
databaseFailureMemoryBufferSize
The following settings appear on the Syslog tab:
- Syslog server host
The URL or IP address of the syslog server, for example
http://mysyslog.example.com, orlocalhost.Default value:
localhostamster attribute:
host- Syslog server port
The port number the syslog server is configured to listen to.
Default value:
514amster attribute:
port- Syslog transport protocol
The protocol to use to connect to the syslog server.
The possible values for this property are:
UDPTCP
Default value:
UDPamster attribute:
protocol- Syslog facility
Syslog uses the facility level to determine the type of program that is logging the message.
The possible values for this property are:
kernusermaildaemonauthsysloglprnewsuucpcronauthprivftplocal0local1local2local3local4local5local6local7
Default value:
local5amster attribute:
facility- Syslog connection timeout
The amount of time to wait when attempting to connect to the syslog server before reporting a failure, in seconds.
Default value:
30amster attribute:
timeout
This section contains reference information for the monitoring service, metric types, and monitoring metrics.
amster service name: monitoring
The following settings appear on the Configuration tab:
- Monitoring Status
Enable / Disable the monitoring system
Default value:
falseamster attribute:
enabled- Monitoring HTTP Port
Port number for the HTTP monitoring interface
Default value:
8082amster attribute:
httpPort- Monitoring HTTP interface status
Enable / Disable the HTTP access to the monitoring system
Default value:
falseamster attribute:
httpEnabled- Monitoring HTTP interface authentication file path
Path to the monitoring system authentication file
The
openam_mon_authfile contains the username and password of the account used to protect the monitoring interfaces. The default username isdemowith a password ofchangeit. Use theampasswordcommand to encrypt a new password.Default value:
%BASE_DIR%/%SERVER_URI%/openam_mon_authamster attribute:
authfilePath- Monitoring RMI Port
Port number for the JMX monitoring interface
Default value:
9999amster attribute:
rmiPort- Monitoring RMI interface status
Enable / Disable the JMX access to the monitoring system
Default value:
falseamster attribute:
rmiEnabled- Monitoring SNMP Port
Port number for the SNMP monitoring interface
Default value:
8085amster attribute:
snmpPort- Monitoring SNMP interface status
Enable / Disable the SNMP access to the monitoring system
Default value:
falseamster attribute:
snmpEnabled- Policy evaluation monitoring history size
Size of the window of most recent policy evaluations to record to expose via monitoring system. Valid range is 100 - 1000000.
Default value:
10000amster attribute:
policyHistoryWindowSize- Session monitoring history size
Size of the window of most recent session operations to record to expose via monitoring system. Valid range is 100 - 1000000.
Default value:
10000amster attribute:
sessionHistoryWindowSize
This service has the following Secondary Configurations.
- Enabled
Default value:
falseamster attribute:
enabled
- Hostname
The hostname of the Graphite server to which metrics should be published.
amster attribute:
host- Port
The port of the Graphite server to which metrics should be published.
Default value:
2004amster attribute:
port- Frequency
The frequency (in seconds) at which metrics should be published.
Default value:
30amster attribute:
frequency
- Enabled
Default value:
falseamster attribute:
enabled- Username
Default value:
prometheusamster attribute:
username- Password
amster attribute:
password
This section describes the monitoring metric types that are available in AM. The available types are:
- Summary
Metric that samples observations, providing a count of observations, sum total of observed amounts, average rate of events, and moving average rates across sliding time windows.
Fields
When using the CREST, JMX, or Graphite interfaces, the
Summarymetric type has the following fields:Field Description _idThe metric ID. _typeThe metric type. countThe number of events recorded for this metric. totalThe sum of the values of events recorded for this metric.
Note
As the increment is always 1, the total and the count will always be equal.
m1_rateThe one-minute average rate. m5_rateThe five-minute average rate. m15_rateThe fifteen-minute average rate. mean_rateThe average rate. unitsA description of the units the metric is presented in. The following is an example of the
authentication.successmetric from the CREST endpoint:{ "_id" : "authentication.success", "_type" : "summary", "count" : 2, "total" : 2.0, "m1_rate" : 3.2668341885586836E-14, "m5_rate" : 7.794695663154025E-5, "m15_rate" : 0.01377545747021923, "mean_rate" : 8.238608027596704E-4, "units" : "events/second" }Prometheus Fields
The Prometheus endpoint does not provide rate-based statistics, as rates can be calculated from the time-series data.
When using the Prometheus interface, the
Summarymetric type has the following fields:Field Description # TYPEThe metric ID, and type. Formatted as a comment. _countThe number of events recorded. _totalThe sum of the amounts of events recorded The following is an example of the
am_authentication{outcome="success"}metric from the Prometheus endpoint:# TYPE am_authentication summary am_authentication_count{outcome="success"} 2.0 am_authentication_total{outcome="success"} 2.0
- Timer
Metric that combines both rate and duration information.
Fields
When using the CREST, JMX, or Graphite interfaces, the
Timermetric type has the following fields:Field Description _idThe metric ID. _typeThe metric type. countThe number of events recorded for this metric. totalThe sum of the durations recorded for this metric. minThe minimum duration recorded for this metric. maxThe maximum duration recorded for this metric. meanThe mean average duration recorded for this metric. stddevThe standard deviation of durations recorded for this metric. duration_unitsThe units used for measuring the durations in the metric. p5050% of the durations recorded are at or below this value. p7575% of the durations recorded are at or below this value. p9595% of the durations recorded are at or below this value. p9898% of the durations recorded are at or below this value. p9999% of the durations recorded are at or below this value. p99999.9% of the durations recorded are at or below this value. m1_rateThe one-minute average rate. m5_rateThe five-minute average rate. m15_rateThe fifteen-minute average rate. mean_rateThe average rate. rate_unitsThe units used for measuring the rate of the metric. Note
Duration-based values, such as
min,max, andp50, are weighted towards newer data. By representing approximately the last five minutes of data, the timers make it easier to see recent changes in behavior, rather than a uniform average of recordings since the server was started.The following is an example of the
cts.connection.successmetric from the CREST endpoint:{ "_id" : "cts.connection.success", "_type" : "timer", "count" : 486, "total" : 80.0, "min" : 0.0, "max" : 1.0, "mean" : 0.1905615495053855, "stddev" : 0.39274399467782056, "duration_units" : "milliseconds", "p50" : 0.0, "p75" : 0.0, "p95" : 1.0, "p98" : 1.0, "p99" : 1.0, "p999" : 1.0, "m1_rate" : 0.1819109974890356, "m5_rate" : 0.05433445522996721, "m15_rate" : 0.03155662103953588, "mean_rate" : 0.020858521722211427, "rate_units" : "calls/second" }Prometheus Fields
The Prometheus endpoint does not provide rate-based statistics, as rates can be calculated from the time-series data.
When using the Prometheus interface, the
Timermetric type has the following fields:Field Description # TYPEThe metric ID, and type. Note that the Timermetric type is reported as aSummarytype. Formatted as a comment._countThe number of events recorded. _totalThe sum of the durations recorded. {quantile="0.5"}50% of the durations are at or below this value. {quantile="0.75"}75% of the durations are at or below this value. {quantile="0.95"}95% of the durations are at or below this value. {quantile="0.98"}98% of the durations are at or below this value. {quantile="0.99"}99% of the durations are at or below this value. {quantile="0.999"}99.9% of the durations are at or below this value. Note
Duration-based quantile values are weighted towards newer data. By representing approximately the last five minutes of data, the timers make it easier to see recent changes in behavior, rather than a uniform average of recordings since the server was started.
The following is an example of the
am_authentication{outcome="success"}metric from the Prometheus endpoint:# TYPE am_cts_connection_seconds summary am_cts_connection_seconds{outcome="success",quantile="0.5",} 0.0 am_cts_connection_seconds{outcome="success",quantile="0.75",} 0.0 am_cts_connection_seconds{outcome="success",quantile="0.95",} 0.001 am_cts_connection_seconds{outcome="success",quantile="0.98",} 0.001 am_cts_connection_seconds{outcome="success",quantile="0.99",} 0.001 am_cts_connection_seconds{outcome="success",quantile="0.999",} 0.001 am_cts_connection_count{outcome="success",} 492.0 am_cts_connection_seconds_total{outcome="success",} 0.081
- Gauge
Metric for a numerical value that can increase or decrease. The value for a gauge is calculated when requested, and represents the state of the metric at that specific time.
Fields
When using the CREST, JMX, or Graphite interfaces, the
Timermetric type has the following fields:Field Description _idThe metric ID. _typeThe metric type. valueThe current value of the metric. The following is an example of the
jvm.used-memorymetric from the CREST endpoint:{ "_id" : "jvm.used-memory", "_type" : "gauge", "value" : 2.13385216E9 }Prometheus Fields
When using the Prometheus interface, the
Timermetric type has the following fields:Field Description # TYPEThe metric ID, and type. Formatted as a comment. {Metric ID}The current value. Large values may be represented in scientific E-notation. The following is an example of the
am_jvm_used_memory_bytesmetric from the Prometheus endpoint:# TYPE am_jvm_used_memory_bytes gauge am_jvm_used_memory_bytes 2.13385216E9
- DistinctCounter
Metric providing an estimate of the number of unique values recorded.
For example, this could be used to estimate the number of unique users who have authenticated, or unique client IP addresses.
Note
The
DistinctCountermetric is calculated per instance of AM, and cannot be aggregated across multiple instances to get a site-wide view.Fields
When using the CREST, JMX, or Graphite interfaces, the
DistinctCountermetric type has the following fields:Field Description _idThe metric ID. _typeThe metric type. Note that the distinctCountertype is reported as agaugetype. The output formats are identical.valueThe calculated estimate of the number of unique values recorded in the metric. The following is an example of the
authentication.unique-uuid.successmetric from the CREST endpoint:{ "_id" : "authentication.unique-uuid.success", "_type" : "gauge", "value" : 3.0 }Prometheus Fields
When using the Prometheus interface, the
distinctCountermetric type has the following fields:Field Description # TYPEThe metric ID, and type. Note that the distinctCountertype is reported as agaugetype. The output formats are identical. Formatted as a comment.{Metric ID}The calculated estimate of the number of unique values recorded in the metric. The following is an example of the
am_authentication_unique_uuid{outcome="success"}metric from the Prometheus endpoint:# TYPE am_authentication_unique_uuid gauge am_authentication_unique_uuid{outcome="success"} 3.0
AM exposes the monitoring metrics described in this section.
AM exposes the following authentication-related monitoring metrics:
-
authentication.module.<auth-module-name>.<outcome> Rate of successful/unsuccessful authentication module outcomes. (Summary)
Prometheus syntax:
am_authentication_module{module=<auth-module-name>,outcome=<outcome>}
Labels:
-
<auth-module-name> Classname of the authentication module, for example:
ApplicationDataStore-
<outcome> successfailuretimeout
-
-
authentication.unique-uuid.success Count of unique identities which have successfully logged in. (DistinctCounter)
Prometheus syntax:
am_authentication_unique_uuid{outcome=success}
-
authentication.<outcome> Rate of successful/unsuccessful/timed-out authentication flows. (Summary)
Prometheus syntax:
am_authentication{outcome=<outcome>}
Labels:
-
<outcome> successfailuretimeout
-
AM exposes the following authorization-related monitoring metrics:
-
authorization.policy-set.<policy-set-name>.evaluate.action.<policy-action-name>.<outcome> Rate of policy evaluation allowed/denied actions being returned under a given policy set. (Summary)
Prometheus syntax:
am_authorization_policy_set_evaluate_action{policy_set=<policy-set-name>, action-type=<policy-action-name>,outcome=<outcome>}
Labels:
-
<policy-set-name> Name of the policy set, for example:
iPlanetAMWebAgentServiceoauth2Scopes-
<policy-action-name> Name of the action as specified in the policy, for example:
GETPOSTGRANT-
<outcome> allowdeny
-
-
authorization.policy-set.<policy-set-name>.evaluate.advice.<policy-advice-type-name> Rate of policy evaluation advice types being returned under a given policy set. (Summary)
Prometheus syntax:
am_authorization_policy_set_evaluate_advice{policy_set=<policy-set-name>,advice-type=<policy-advice-type-name>}
Labels:
-
<policy-set-name> Name of the policy set, for example:
iPlanetAMWebAgentServiceoauth2Scopes-
<policy-advice-type-name> Name of the policy condition advice, for example:
AuthSchemeConditionAdviceAuthenticateToServiceConditionAdviceAuthLevelConditionAdviceAuthenticateToTreeConditionAdviceAuthenticateToRealmConditionAdviceTransactionConditionAdvice
-
-
authorization.policy-set.evaluate.subject-cache.size Number of cached subject membership relationships. (Gauge)
Prometheus syntax:
am_authorization_policy_set_evaluate_subject_cache_size
-
authorization.policy-set.<policy-set-name>.evaluate.<outcome> Rate of successful/unsuccessful policy evaluation calls under a given policy set and time taken to perform this operation. (Timer)
Prometheus syntax:
am_authorization_policy_set_evaluate{policy_set=<policy-set-name>,outcome=<outcome>}
Labels:
-
<policy-set-name> Name of the policy set, for example:
iPlanetAMWebAgentServiceoauth2Scopes-
<outcome> successfailuretimeout
-
-
authorization.policy-set.<policy-set-name>.policy.<operation> Number of policies created/updated/deleted under a given policy set since this AM instance was started. (Summary)
Prometheus syntax:
am_authorization_policy_set_policy{policy_set=<policy-set-name>,operation=<operation>}
Labels:
-
<policy-set-name> Name of the policy set, for example:
iPlanetAMWebAgentServiceoauth2Scopes-
<operation> createupdatedelete
-
AM exposes the following blacklisting-related monitoring metrics:
-
<blacklist-type>.blacklist.bloomfilter.check.<outcome> Rate of bloom filter blacklist checks. (Summary)
Prometheus syntax:
am_blacklist_bloomfilter_check{blacklist_type=<blacklist-type>,outcome=<outcome>}
Labels:
-
<blacklist-type> session.client-based(Prometheus:session_client_based)oauth2-
<outcome> negative. The bloom filter reports that the checked token is not blacklisted.false-positive. The bloom filter reports that the checked token may be blacklisted, but the token was not blacklisted.positive. The bloom filter reports that the checked token may be blacklisted, and this was found to be true.
-
-
<blacklist-type>.blacklist.cache.hit Rate of cache hits of the blacklist cache layer. (Summary)
Prometheus syntax:
am_blacklist_cache{blacklist_type=<blacklist-type>,outcome=hit}
Labels:
-
<blacklist-type> session.client-based(Prometheus:session_client_based)oauth2
-
-
<blacklist-type>.blacklist.cache.miss Rate of cache misses of the blacklist cache layer. (Summary)
Prometheus syntax:
am_blacklist_cache{blacklist_type=<blacklist-type>,outcome=miss}
Labels:
-
<blacklist-type> session.client-based(Prometheus:session_client_based)oauth2
-
-
<blacklist-type>.blacklist.check.<outcome> Rate of blacklist checks. (Summary)
Prometheus syntax:
am_blacklist_check{blacklist_type=<blacklist-type>,outcome=<outcome>}
Labels:
-
<blacklist-type> session.client-based(Prometheus:session_client_based)oauth2-
<outcome> true. The token is blacklisted.false. The token is not blacklisted.
-
-
<blacklist-type>.blacklist.cts.search.result Rate of blacklist entries returned by searches. (Summary)
Prometheus syntax:
am_blacklist_cts_search_result{blacklist_type=<blacklist-type>}
Labels:
-
<blacklist-type> session.client-based(Prometheus:session_client_based)oauth2
-
-
<blacklist-type>.blacklist.cts.search.<outcome> Tracks time to search CTS for blacklist entries. (Timer)
Prometheus syntax:
am_blacklist_cts_search{blacklist_type=<blacklist-type>,outcome=<outcome>}
Labels:
-
<blacklist-type> session.client-based(Prometheus:session_client_based)oauth2-
<outcome> successfailure
-
AM exposes the following CTS-related monitoring metrics:
-
cts.connection.<outcome> Rate of successful/unsuccessful CTS connections to DS and time taken to obtain the connection. (Timer)
Prometheus syntax:
am_cts_connection{outcome=<outcome>}
Labels:
-
<outcome> successfailure
-
-
cts.reaper.cache.size Number of entries in the token reaper cache. (Gauge)
Prometheus syntax:
am_cts_reaper_cache_size
-
cts.reaper.cache.<token-type>.deletion.<outcome> Rate of successful/unsuccessful token deletions from cache by token type. (Summary)
Prometheus syntax:
am_cts_reaper_deletion{reaper_type=cache,token_type=<token-type>,outcome=<outcome>}
Labels:
-
<token-type> sessionsaml2oauth2restoauth2-csrf-protection(Prometheus:oauth2_csrf_protection)resource-set(Prometheus:resource_set)uma-permission-ticket(Prometheus:uma_permission_ticket)uma-requesting-party(Prometheus:uma_requesting_party)uma-audit-entry(Prometheus:uma_audit_entry)session-blacklist(Prometheus:session_blacklist)uma-pending-request(Prometheus:uma_pending_request)stsoauth2-blacklist(Prometheus:oauth2_blacklist)oauth2-stateless(Prometheus:oauth2_stateless)push-notification(Prometheus:push_notification)cluster-notification(Prometheus:cluster_notification)oauth2-stateless-grant(Prometheus:oauth2_stateless_grant)transactionauthentication-whitelist(Prometheus:authentication_whitelist)oauth2-grant-set(Prometheus:oauth2_grant_set)-
<outcome> successfailure
-
-
cts.reaper.search.<token-type>.deletion.<outcome> Rate of successful/unsuccessful token deletions from search by token type. (Summary)
Prometheus syntax:
am_cts_reaper_deletion{reaper_type=search,token_type=<token-type>,outcome=<outcome>}
Labels:
-
<token-type> sessionsaml2oauth2restoauth2-csrf-protection(Prometheus:oauth2_csrf_protection)resource-set(Prometheus:resource_set)uma-permission-ticket(Prometheus:uma_permission_ticket)uma-requesting-party(Prometheus:uma_requesting_party)uma-audit-entry(Prometheus:uma_audit_entry)session-blacklist(Prometheus:session_blacklist)uma-pending-request(Prometheus:uma_pending_request)stsoauth2-blacklist(Prometheus:oauth2_blacklist)oauth2-stateless(Prometheus:oauth2_stateless)push-notification(Prometheus:push_notification)cluster-notification(Prometheus:cluster_notification)oauth2-stateless-grant(Prometheus:oauth2_stateless_grant)transactionauthentication-whitelist(Prometheus:authentication_whitelist)oauth2-grant-set(Prometheus:oauth2_grant_set)-
<outcome> successfailure
-
-
cts.reaper.search.<outcome> Rate of successful/unsuccessful search and time taken to perform this operation. (Timer)
Prometheus syntax:
am_cts_reaper_search{outcome=<outcome>}
Labels:
-
<outcome> successfailure
-
-
cts.task.queue Queueing times for CTS operations. (Timer)
Prometheus syntax:
am_cts_task_queue
-
cts.task.queue.size Number of operations waiting in a CTS queue. (Gauge)
Prometheus syntax:
am_cts_task_queue_size
-
cts_task.<token-type>.<operation-type>.<outcome> Rate of successful/unsuccessful CTS operation types, by token type and time taken to perform them. (Timer)
Prometheus syntax:
am_cts_task{operation=<operation-type>,token-type=<token-type>,outcome=<outcome>}
Labels:
-
<token-type> sessionsaml2oauth2restoauth2-csrf-protection(Prometheus:oauth2_csrf_protection)resource-set(Prometheus:resource_set)uma-permission-ticket(Prometheus:uma_permission_ticket)uma-requesting-party(Prometheus:uma_requesting_party)uma-audit-entry(Prometheus:uma_audit_entry)session-blacklist(Prometheus:session_blacklist)uma-pending-request(Prometheus:uma_pending_request)stsoauth2-blacklist(Prometheus:oauth2_blacklist)oauth2-stateless(Prometheus:oauth2_stateless)push-notification(Prometheus:push_notification)cluster-notification(Prometheus:cluster_notification)oauth2-stateless-grant(Prometheus:oauth2_stateless_grant)transactionauthentication-whitelist(Prometheus:authentication_whitelist)oauth2-grant-set(Prometheus:oauth2_grant_set)-
<operation-type> createreadupdatedeletepatchquerypartial-query(Prometheus:partial_query)-
<outcome> successfailure
-
AM exposes the JVM-related monitoring metrics covered in this section.
Tip
To get the metric name used by Prometheus, prepend am_ to the names below, and replace period (.)
and hyphen (-) characters with underscore (_) characters.
For example, the jvm.available-cpus metric is named am_jvm_available_cpus in Prometheus.
| Name | Description |
|---|---|
jvm.available-cpus
|
Number of processors available to the Java virtual machine. (Gauge) |
jvm.class-loading.loaded
|
Number of classes loaded since the Java virtual machine started. (Gauge) |
jvm.class-loading.unloaded
|
Number of classes unloaded since the Java virtual machine started. (Gauge) |
jvm.garbage-collector.PS-MarkSweep.count
|
Number of collections performed by the "parallel scavenge mark sweep" garbage collection algorithm. (Gauge) |
jvm.garbage-collector.PS-MarkSweep.time
|
Approximate accumulated time taken by the "parallel scavenge mark sweep" garbage collection algorithm. (Gauge) |
jvm.garbage-collector.PS-Scavenge.count
|
Number of collections performed by the "parallel scavenge" garbage collection algorithm. (Gauge) |
jvm.garbage-collector.PS-Scavenge.time
|
Approximate accumulated time taken by the "parallel scavenge" garbage collection algorithm. (Gauge) |
jvm.memory-usage.heap.init
|
Amount of heap memory that the Java virtual machine initially requested from the operating system. (Gauge) |
jvm.memory-usage.heap.max
|
Maximum amount of heap memory that the Java virtual machine will attempt to use. (Gauge) |
jvm.memory-usage.heap.committed
|
Amount of heap memory that is committed for the Java virtual machine to use. (Gauge) |
jvm.memory-usage.heap.used
|
Amount of heap memory used by the Java virtual machine. (Gauge) |
jvm.memory-usage.total.init
|
Amount of memory that the Java virtual machine initially requested from the operating system. (Gauge) |
jvm.memory-usage.total.max
|
Maximum amount of memory that the Java virtual machine will attempt to use. (Gauge) |
jvm.memory-usage.non-heap.init
|
Amount of non-heap memory that the Java virtual machine initially requested from the operating system. (Gauge) |
jvm.memory-usage.non-heap.max
|
Maximum amount of non-heap memory that the Java virtual machine will attempt to use. (Gauge) |
jvm.memory-usage.non-heap.committed
|
Amount of non-heap memory that is committed for the Java virtual machine to use. (Gauge) |
jvm.memory-usage.non-heap.used
|
Amount of non-heap memory used by the Java virtual machine. (Gauge) |
jvm.memory-usage.pools.Code-Cache.init
|
Amount of "code cache" memory that the Java virtual machine initially requested from the operating system. (Gauge) |
jvm.memory-usage.pools.Code-Cache.max
|
Maximum amount of "code cache" memory that the Java virtual machine will attempt to use. (Gauge) |
jvm.memory-usage.pools.Code-Cache.committed
|
Amount of "code cache" memory that is committed for the Java virtual machine to use. (Gauge) |
jvm.memory-usage.pools.Code-Cache.used
|
Amount of "code cache" memory used by the Java virtual machine. (Gauge) |
jvm.memory-usage.pools.Compressed-Class-Space.init
|
Amount of "compressed class space" memory that the Java virtual machine initially requested from the operating system. (Gauge) |
jvm.memory-usage.pools.Compressed-Class-Space.init
|
Maximum amount of "compressed class space" memory that the Java virtual machine will attempt to use. (Gauge) |
jvm.memory-usage.pools.Compressed-Class-Space.committed
|
Amount of "compressed class space" memory that is committed for the Java virtual machine to use. (Gauge) |
jvm.memory-usage.pools.Compressed-Class-Space.used
|
Amount of "compressed class space" memory used by the Java virtual machine. (Gauge) |
jvm.memory-usage.pools.Metaspace.init
|
Amount of "metaspace" memory that the Java virtual machine initially requested from the operating system. (Gauge) |
jvm.memory-usage.pools.Metaspace.max
|
Maximum amount of "metaspace" memory that the Java virtual machine will attempt to use. (Gauge) |
jvm.memory-usage.pools.Metaspace.committed
|
Amount of "metaspace" memory that is committed for the Java virtual machine to use. (Gauge) |
jvm.memory-usage.pools.Metaspace.used
|
Amount of "metaspace" memory used by the Java virtual machine. (Gauge) |
jvm.memory-usage.pools.PS-Eden-Space.init
|
Amount of "parallel scavenge eden space" memory that the Java virtual machine initially requested from the operating system. (Gauge) |
jvm.memory-usage.pools.PS-Eden-Space.max
|
Maximum amount of "parallel scavenge eden space" memory that the Java virtual machine will attempt to use. (Gauge) |
jvm.memory-usage.pools.PS-Eden-Space.committed
|
Amount of "parallel scavenge eden space" memory that is committed for the Java virtual machine to use. (Gauge) |
jvm.memory-usage.pools.PS-Eden-Space.used-after-gc
|
Amount of "parallel scavenge eden space" memory after the last time garbage collection recycled unused objects in this memory pool. (Gauge) |
jvm.memory-usage.pools.PS-Eden-Space.used
|
Amount of "parallel scavenge eden space" memory used by the Java virtual machine. (Gauge) |
jvm.memory-usage.pools.PS-Old-Gen.init
|
Amount of "parallel scavenge old generation" memory that the Java virtual machine initially requested from the operating system. (Gauge) |
jvm.memory-usage.pools.PS-Old-Gen.max
|
Maximum amount of "parallel scavenge old generation" memory that the Java virtual machine will attempt to use. (Gauge) |
jvm.memory-usage.pools.PS-Old-Gen.committed
|
Amount of "parallel scavenge old generation" memory that is committed for the Java virtual machine to use. (Gauge) |
jvm.memory-usage.pools.PS-Old-Gen.used-after-gc
|
Amount of "parallel scavenge old generation" memory after the last time garbage collection recycled unused objects in this memory pool. (Gauge) |
jvm.memory-usage.pools.PS-Old-Gen.used
|
Amount of "parallel scavenge old generation" memory used by the Java virtual machine. (Gauge) |
jvm.memory-usage.pools.PS-Survivor-Space.init
|
Amount of "parallel scavenge survivor space" memory that the Java virtual machine initially requested from the operating system. (Gauge) |
jvm.memory-usage.pools.PS-Survivor-Space.max
|
Maximum amount of "parallel scavenge survivor space" memory that the Java virtual machine will attempt to use. (Gauge) |
jvm.memory-usage.pools.PS-Survivor-Space.committed
|
Amount of "parallel scavenge survivor space" memory that is committed for the Java virtual machine to use. (Gauge) |
jvm.memory-usage.pools.PS-Survivor-Space.used-after-gc
|
Amount of "parallel scavenge survivor space" memory after the last time garbage collection recycled unused objects in this memory pool. (Gauge) |
jvm.memory-usage.pools.PS-Survivor-Space.used
|
Amount of "parallel scavenge survivor space" memory used by the Java virtual machine. (Gauge) |
jvm.memory-usage.total.committed
|
Amount of memory that is committed for the Java virtual machine to use. (Gauge) |
jvm.memory-usage.total.used
|
Amount of memory used by the Java virtual machine. (Gauge) |
jvm.thread-state.blocked.count
|
Number of threads in the BLOCKED state. (Gauge) |
jvm.thread-state.count
|
Number of live threads including both daemon and non-daemon threads. (Gauge) |
jvm.thread-state.daemon.count
|
Number of live daemon threads. (Gauge) |
jvm.thread-state.new.count
|
Number of threads in the NEW state. (Gauge) |
jvm.thread-state.runnable.count
|
Number of threads in the RUNNABLE state. (Gauge) |
jvm.thread-state.terminated.count
|
Number of threads in the TERMINATED state. (Gauge) |
jvm.thread-state.timed_waiting.count
|
Number of threads in the TIMED_WAITING state. (Gauge) |
jvm.thread-state.waiting.count
|
Number of threads in the WAITING state. (Gauge) |
AM exposes the following CTS-related monitoring metrics:
-
oauth2.grant.<grant-type> Rate of OAuth 2.0 grant completion by grant type. (Summary)
Prometheus syntax:
am_oauth2_grant{grant_type=<grant-type>}
Labels:
-
<grant-type> authorization-code(Prometheus:authorization_code)client-credentials(Prometheus:client_credentials)device-code(Prometheus:device_code)implicitrefreshresource-owner-password(Prometheus:resource_owner_password)
-
-
oauth2.grant.revoke Rate of OAuth 2.0 grant revocation. (Summary)
Prometheus syntax:
am_oauth2_grant_revoke
-
oauth2.token.<token-type>.issue Rate of OAuth 2.0 token issuance by token type. (Summary)
Prometheus syntax:
am_oauth2_token_issue{token_type=<token-type>}
Labels:
-
<token-type> access-token(Prometheus:access_token)authorization-code(Prometheus:authorization_code)device-code(Prometheus:device_code)id-token. OpenID Connect ID token. (Prometheus:id_token)ops. OpenID Connect Ops token for session management.permission-ticket. User-Managed Access permission ticket. (Prometheus:permission_ticket)refresh-token(Prometheus:refresh_token)
-
-
oauth2.token.access-token.revoke Rate of OAuth 2.0 access token revocation. (Summary)
Prometheus syntax:
am_oauth2_token_revoke{token_type=access_token}
-
oauth2.token.read-as-jwt.<outcome> Rate of successfully/unsuccessfully reading OAuth 2.0 JSON Web Tokens (JWT). (Timer)
Prometheus syntax:
am_oauth2_token_read_as_jwt{outcome=<outcome>}
Labels:
-
<outcome> successfailure
-
AM exposes the following session-related monitoring metrics:
-
session.authentication-in-memory.store.size Number of authentication sessions stored in the in-memory authentication session store. (Gauge)
Prometheus syntax:
am_session_authentication_in_memory_store_size
-
session.cts-based.cache.eviction Rate of evictions from the session cache. (Summary)
Prometheus syntax:
am_session_cts_based_cache_eviction
-
session.cts-based.cache.size Number of sessions in the session cache. (Gauge)
Prometheus syntax:
am_session_cts_based_cache_size
-
session.cts-based.cache.hit Rate of cache hits for the session cache. (Summary)
Prometheus syntax:
am_session_cts_based_cache{outcome=hit}
-
session.cts-based.cache.miss Rate of cache misses for the session cache. (Summary)
Prometheus syntax:
am_session_cts_based_cache{outcome=miss}
-
session.<session-type>.lifetime Rate of session lifetimes. (Timer)
Prometheus syntax:
am_session_lifetime{session_type=<session-type>}
Labels:
-
<session-type> authentication-in-memory. In-memory authentication sessions used to track authentication progress. (Prometheus:authentication_in_memoryauthentication-cts-based. CTS-based authentication sessions used to track authentication progress. (Prometheus:authentication_cts_basedauthentication-client-based. Client-based authentication sessions used to track authentication progress. (Prometheus:authentication_client_basedcts-based. CTS-based sessions issued after successful authentication. (Prometheus:cts_basedclient-based. Client-based sessions, for example in a browser cookie, issued after successful authentication. (Prometheus:client_based
-
-
session.<session-type>.add-listener.<outcome> Rate of successful/unsuccessful p-search listener adds and time taken to perform this operation. (Timer)
Prometheus syntax:
am_session{session_type=<session-type>,operation=add-listener, outcome=<outcome>}
Labels:
-
<session-type> authentication-in-memory. In-memory authentication sessions used to track authentication progress. (Prometheus:authentication_in_memoryauthentication-cts-based. CTS-based authentication sessions used to track authentication progress. (Prometheus:authentication_cts_basedauthentication-client-based. Client-based authentication sessions used to track authentication progress. (Prometheus:authentication_client_basedcts-based. CTS-based sessions issued after successful authentication. (Prometheus:cts_basedclient-based. Client-based sessions, for example in a browser cookie, issued after successful authentication. (Prometheus:client_based-
<outcome> successfailure
-
-
session.<session-type>.add-pll-listener.<outcome> Rate of successful/unsuccessful PLL listener adds and time taken to perform this operation. (Timer)
Prometheus syntax:
am_session{session_type=<session-type>,operation=add-pll-listener, outcome=<outcome>}
Labels:
-
<session-type> authentication-in-memory. In-memory authentication sessions used to track authentication progress. (Prometheus:authentication_in_memoryauthentication-cts-based. CTS-based authentication sessions used to track authentication progress. (Prometheus:authentication_cts_basedauthentication-client-based. Client-based authentication sessions used to track authentication progress. (Prometheus:authentication_client_basedcts-based. CTS-based sessions issued after successful authentication. (Prometheus:cts_basedclient-based. Client-based sessions, for example in a browser cookie, issued after successful authentication. (Prometheus:client_based-
<outcome> successfailure
-
-
session.<session-type>.check-exists.<outcome> Rate of successful/unsuccessful calls to check if a session exists and time taken to perform this operation. (Timer)
Prometheus syntax:
am_session{session_type=<session-type>,operation=check-exists, outcome=<outcome>}
Labels:
-
<session-type> authentication-in-memory. In-memory authentication sessions used to track authentication progress. (Prometheus:authentication_in_memoryauthentication-cts-based. CTS-based authentication sessions used to track authentication progress. (Prometheus:authentication_cts_basedauthentication-client-based. Client-based authentication sessions used to track authentication progress. (Prometheus:authentication_client_basedcts-based. CTS-based sessions issued after successful authentication. (Prometheus:cts_basedclient-based. Client-based sessions, for example in a browser cookie, issued after successful authentication. (Prometheus:client_based-
<outcome> successfailure
-
-
session.<session-type>.create.<outcome> Rate of successful/unsuccessful session creation and time taken to perform this operation. (Timer)
Prometheus syntax:
am_session{session_type=<session-type>,operation=create, outcome=<outcome>}
Labels:
-
<session-type> authentication-in-memory. In-memory authentication sessions used to track authentication progress. (Prometheus:authentication_in_memoryauthentication-cts-based. CTS-based authentication sessions used to track authentication progress. (Prometheus:authentication_cts_basedauthentication-client-based. Client-based authentication sessions used to track authentication progress. (Prometheus:authentication_client_basedcts-based. CTS-based sessions issued after successful authentication. (Prometheus:cts_basedclient-based. Client-based sessions, for example in a browser cookie, issued after successful authentication. (Prometheus:client_based-
<outcome> successfailure
-
-
session.<session-type>.destroy.<outcome> Rate of successful/unsuccessful session destroy and time taken to perform this operation. (Timer)
Prometheus syntax:
am_session{session_type=<session-type>,operation=destroy, outcome=<outcome>}
Labels:
-
<session-type> authentication-in-memory. In-memory authentication sessions used to track authentication progress. (Prometheus:authentication_in_memoryauthentication-cts-based. CTS-based authentication sessions used to track authentication progress. (Prometheus:authentication_cts_basedauthentication-client-based. Client-based authentication sessions used to track authentication progress. (Prometheus:authentication_client_basedcts-based. CTS-based sessions issued after successful authentication. (Prometheus:cts_basedclient-based. Client-based sessions, for example in a browser cookie, issued after successful authentication. (Prometheus:client_based-
<outcome> successfailure
-
-
session.<session-type>.get-restricted-token-id.<outcome> Rate of successful/unsuccessful restricted token ID dereferencing and time taken to perform this operation. (Timer)
Prometheus syntax:
am_session{session_type=<session-type>,operation=get-restricted-token-id, outcome=<outcome>}
Labels:
-
<session-type> authentication-in-memory. In-memory authentication sessions used to track authentication progress. (Prometheus:authentication_in_memoryauthentication-cts-based. CTS-based authentication sessions used to track authentication progress. (Prometheus:authentication_cts_basedauthentication-client-based. Client-based authentication sessions used to track authentication progress. (Prometheus:authentication_client_basedcts-based. CTS-based sessions issued after successful authentication. (Prometheus:cts_basedclient-based. Client-based sessions, for example in a browser cookie, issued after successful authentication. (Prometheus:client_based-
<outcome> successfailure
-
-
session.<session-type>.idle-timeout.<outcome> Rate of successful/unsuccessful session idle time out and time taken to perform this operation. (Timer)
Prometheus syntax:
am_session{session_type=<session-type>,operation=idle-timeout, outcome=<outcome>}
Labels:
-
<session-type> authentication-in-memory. In-memory authentication sessions used to track authentication progress. (Prometheus:authentication_in_memoryauthentication-cts-based. CTS-based authentication sessions used to track authentication progress. (Prometheus:authentication_cts_basedauthentication-client-based. Client-based authentication sessions used to track authentication progress. (Prometheus:authentication_client_basedcts-based. CTS-based sessions issued after successful authentication. (Prometheus:cts_basedclient-based. Client-based sessions, for example in a browser cookie, issued after successful authentication. (Prometheus:client_based-
<outcome> successfailure
-
-
session.<session-type>.logout.<outcome> Rate of successful/unsuccessful session logout and time taken to perform this operation. (Timer)
Prometheus syntax:
am_session{session_type=<session-type>,operation=logout, outcome=<outcome>}
Labels:
-
<session-type> authentication-in-memory. In-memory authentication sessions used to track authentication progress. (Prometheus:authentication_in_memoryauthentication-cts-based. CTS-based authentication sessions used to track authentication progress. (Prometheus:authentication_cts_basedauthentication-client-based. Client-based authentication sessions used to track authentication progress. (Prometheus:authentication_client_basedcts-based. CTS-based sessions issued after successful authentication. (Prometheus:cts_basedclient-based. Client-based sessions, for example in a browser cookie, issued after successful authentication. (Prometheus:client_based-
<outcome> successfailure
-
-
session.<session-type>.max-timeout.<outcome> Rate of successful/unsuccessful session end of life and time taken to perform this operation. (Timer)
Prometheus syntax:
am_session{session_type=<session-type>,operation=max-timeout, outcome=<outcome>}
Labels:
-
<session-type> authentication-in-memory. In-memory authentication sessions used to track authentication progress. (Prometheus:authentication_in_memoryauthentication-cts-based. CTS-based authentication sessions used to track authentication progress. (Prometheus:authentication_cts_basedauthentication-client-based. Client-based authentication sessions used to track authentication progress. (Prometheus:authentication_client_basedcts-based. CTS-based sessions issued after successful authentication. (Prometheus:cts_basedclient-based. Client-based sessions, for example in a browser cookie, issued after successful authentication. (Prometheus:client_based-
<outcome> successfailure
-
-
session.<session-type>.read-all.<outcome> Rate of successful/unsuccessful requests to read all sessions and time taken to perform this operation. (Timer)
Prometheus syntax:
am_session{session_type=<session-type>,operation=read-all, outcome=<outcome>}
Labels:
-
<session-type> authentication-in-memory. In-memory authentication sessions used to track authentication progress. (Prometheus:authentication_in_memoryauthentication-cts-based. CTS-based authentication sessions used to track authentication progress. (Prometheus:authentication_cts_basedauthentication-client-based. Client-based authentication sessions used to track authentication progress. (Prometheus:authentication_client_basedcts-based. CTS-based sessions issued after successful authentication. (Prometheus:cts_basedclient-based. Client-based sessions, for example in a browser cookie, issued after successful authentication. (Prometheus:client_based-
<outcome> successfailure
-
-
session.<session-type>.read.<outcome> Rate of successful/unsuccessful session reads and time taken to perform this operation. (Timer)
Prometheus syntax:
am_session{session_type=<session-type>,operation=read, outcome=<outcome>}
Labels:
-
<session-type> authentication-in-memory. In-memory authentication sessions used to track authentication progress. (Prometheus:authentication_in_memoryauthentication-cts-based. CTS-based authentication sessions used to track authentication progress. (Prometheus:authentication_cts_basedauthentication-client-based. Client-based authentication sessions used to track authentication progress. (Prometheus:authentication_client_basedcts-based. CTS-based sessions issued after successful authentication. (Prometheus:cts_basedclient-based. Client-based sessions, for example in a browser cookie, issued after successful authentication. (Prometheus:client_based-
<outcome> successfailure
-
-
session.<session-type>.refresh.<outcome> Rate of successful/unsuccessful session refresh and time taken to perform this operation. (Timer)
Prometheus syntax:
am_session{session_type=<session-type>,operation=refresh, outcome=<outcome>}
Labels:
-
<session-type> authentication-in-memory. In-memory authentication sessions used to track authentication progress. (Prometheus:authentication_in_memoryauthentication-cts-based. CTS-based authentication sessions used to track authentication progress. (Prometheus:authentication_cts_basedauthentication-client-based. Client-based authentication sessions used to track authentication progress. (Prometheus:authentication_client_basedcts-based. CTS-based sessions issued after successful authentication. (Prometheus:cts_basedclient-based. Client-based sessions, for example in a browser cookie, issued after successful authentication. (Prometheus:client_based-
<outcome> successfailure
-
-
session.<session-type>.search.<outcome> Rate of successful/unsuccessful session searches and time taken to perform this operation. (Timer)
Prometheus syntax:
am_session{session_type=<session-type>,operation=search, outcome=<outcome>}
Labels:
-
<session-type> authentication-in-memory. In-memory authentication sessions used to track authentication progress. (Prometheus:authentication_in_memoryauthentication-cts-based. CTS-based authentication sessions used to track authentication progress. (Prometheus:authentication_cts_basedauthentication-client-based. Client-based authentication sessions used to track authentication progress. (Prometheus:authentication_client_basedcts-based. CTS-based sessions issued after successful authentication. (Prometheus:cts_basedclient-based. Client-based sessions, for example in a browser cookie, issued after successful authentication. (Prometheus:client_based-
<outcome> successfailure
-
-
session.<session-type>.set-external-property.<outcome> Rate of successful/unsuccessful setting a property on a session and time taken to perform this operation. (Timer)
Prometheus syntax:
am_session{session_type=<session-type>,operation=set-external-property, outcome=<outcome>}
Labels:
-
<session-type> authentication-in-memory. In-memory authentication sessions used to track authentication progress. (Prometheus:authentication_in_memoryauthentication-cts-based. CTS-based authentication sessions used to track authentication progress. (Prometheus:authentication_cts_basedauthentication-client-based. Client-based authentication sessions used to track authentication progress. (Prometheus:authentication_client_basedcts-based. CTS-based sessions issued after successful authentication. (Prometheus:cts_basedclient-based. Client-based sessions, for example in a browser cookie, issued after successful authentication. (Prometheus:client_based-
<outcome> successfailure
-
-
session.<session-type>.set-property.<outcome> Rate of successful/unsuccessful session property setting and time taken to perform this operation. (Timer)
Prometheus syntax:
am_session{session_type=<session-type>,operation=set-property, outcome=<outcome>}
Labels:
-
<session-type> authentication-in-memory. In-memory authentication sessions used to track authentication progress. (Prometheus:authentication_in_memoryauthentication-cts-based. CTS-based authentication sessions used to track authentication progress. (Prometheus:authentication_cts_basedauthentication-client-based. Client-based authentication sessions used to track authentication progress. (Prometheus:authentication_client_basedcts-based. CTS-based sessions issued after successful authentication. (Prometheus:cts_basedclient-based. Client-based sessions, for example in a browser cookie, issued after successful authentication. (Prometheus:client_based-
<outcome> successfailure
-
-
session.<session-type>.validate.<outcome> Rate of successful/unsuccessful session validation and time taken to perform this operation. (Timer)
Prometheus syntax:
am_session{session_type=<session-type>,operation=validate, outcome=<outcome>}
Labels:
-
<session-type> authentication-in-memory. In-memory authentication sessions used to track authentication progress. (Prometheus:authentication_in_memoryauthentication-cts-based. CTS-based authentication sessions used to track authentication progress. (Prometheus:authentication_cts_basedauthentication-client-based. Client-based authentication sessions used to track authentication progress. (Prometheus:authentication_client_basedcts-based. CTS-based sessions issued after successful authentication. (Prometheus:cts_basedclient-based. Client-based sessions, for example in a browser cookie, issued after successful authentication. (Prometheus:client_based-
<outcome> successfailure
-
amster service name: oauth-oidc
The following settings appear on the Global Attributes tab:
- Token Blacklist Cache Size
Number of blacklisted tokens to cache in memory to speed up blacklist checks and reduce load on the CTS.
Default value:
10000amster attribute:
blacklistCacheSize- Blacklist Poll Interval (seconds)
How frequently to poll for token blacklist changes from other servers, in seconds.
How often each server will poll the CTS for token blacklist changes from other servers. This is used to maintain a highly compressed view of the overall current token blacklist improving performance. A lower number will reduce the delay for blacklisted tokens to propagate to all servers at the cost of increased CTS load. Set to 0 to disable this feature completely.
Default value:
60amster attribute:
blacklistPollInterval- Blacklist Purge Delay (minutes)
Length of time to blacklist tokens beyond their expiry time.
Allows additional time to account for clock skew to ensure that a token has expired before it is removed from the blacklist.
Default value:
1amster attribute:
blacklistPurgeDelay- Authenticity Secret
A secret to use when signing data that will be sent back to AM so that authenticity can be assured when they are presented back to OpenAM.
amster attribute:
idTokenAuthenticitySecret- ID Token Signing Key Alias for Agent Clients
The alias for the RSA key that should be used signing ID tokens for Agent OAuth2 Clients
Default value:
testamster attribute:
agentIdTokenSigningKeyAlias- Stateless Grant Token Upgrade Compatibility Mode
Enable OpenAM to consume and create stateless OAuth 2.0 tokens in two different formats simultaneously.
Enable this option when upgrading OpenAM to allow the new instance to create and consume stateless OAuth 2.0 tokens in both the previous format, and the new format. Disable this option once all OpenAM instances in the cluster have been upgraded.
Default value:
falseamster attribute:
statelessGrantTokenUpgradeCompatibilityMode
The following settings appear on the Core tab:
- Use Stateless Access & Refresh Tokens
When enabled, OpenAM issues access and refresh tokens that can be inspected by resource servers.
Default value:
falseamster attribute:
statelessTokensEnabled- Authorization Code Lifetime (seconds)
The time an authorization code is valid for, in seconds.
Default value:
120amster attribute:
codeLifetime- Refresh Token Lifetime (seconds)
The time in seconds a refresh token is valid for. If this field is set to
-1, the token will never expire.Default value:
604800amster attribute:
refreshTokenLifetime- Access Token Lifetime (seconds)
The time an access token is valid for, in seconds.
Default value:
3600amster attribute:
accessTokenLifetime- Issue Refresh Tokens
Whether to issue a refresh token when returning an access token.
Default value:
trueamster attribute:
issueRefreshToken- Issue Refresh Tokens on Refreshing Access Tokens
Whether to issue a refresh token when refreshing an access token.
Default value:
trueamster attribute:
issueRefreshTokenOnRefreshedToken- Use Policy Engine for Scope decisions
With this setting enabled, the policy engine is consulted for each scope value that is requested.
If a policy returns an action of GRANT=true, the scope is consented automatically, and the user is not consulted in a user-interaction flow. If a policy returns an action of GRANT=false, the scope is not added to any resulting token, and the user will not see it in a user-interaction flow. If no policy returns a value for the GRANT action, then if the grant type is user-facing (i.e. authorization or device code flows), the user is asked for consent (or saved consent is used), and if the grant type is not user-facing (password or client credentials), the scope is not added to any resulting token.
Default value:
falseamster attribute:
usePolicyEngineForScope
The following settings appear on the Advanced tab:
- Custom Login URL Template
Custom URL for handling login, to override the default OpenAM login page.
Supports Freemarker syntax, with the following variables:
Variable Description gotoUrlThe URL to redirect to after login. acrValuesThe Authentication Context Class Reference (acr) values for the authorization request. realmThe OpenAM realm the authorization request was made on. moduleThe name of the OpenAM authentication module requested to perform resource owner authentication. serviceThe name of the OpenAM authentication chain requested to perform resource owner authentication. localeA space-separated list of locales, ordered by preference. The following example template redirects users to a non-OpenAM front end to handle login, which will then redirect back to the
/oauth2/authorizeendpoint with any required parameters:http://mylogin.com/login?goto=${goto}<#if acrValues??>&acr_values=${acrValues}</#if><#if realm??>&realm=${realm}</#if><#if module??>&module=${module}</#if><#if service??>&service=${service}</#if><#if locale??>&locale=${locale}</#if>NOTE: Default OpenAM login page is constructed using "Base URL Source" service.
amster attribute:
customLoginUrlTemplate- Scope Implementation Class
The class that contains the required scope implementation, must implement the
org.forgerock.oauth2.core.ScopeValidatorinterface.Default value:
org.forgerock.openam.oauth2.OpenAMScopeValidatoramster attribute:
scopeImplementationClass- Response Type Plugins
List of plugins that handle the valid
response_typevalues.OAuth 2.0 clients pass response types as parameters to the OAuth 2.0 Authorization endpoint (
/oauth2/authorize) to indicate which grant type is requested from the provider. For example, the client passescodewhen requesting an authorization code, andtokenwhen requesting an access token.Values in this list take the form
response-type|plugin-class-name.Default value:
code|org.forgerock.oauth2.core.AuthorizationCodeResponseTypeHandler
device_code|org.forgerock.oauth2.core.TokenResponseTypeHandler
token|org.forgerock.oauth2.core.TokenResponseTypeHandleramster attribute:
responseTypeClasses- User Profile Attribute(s) the Resource Owner is Authenticated On
Names of profile attributes that resource owners use to log in. You can add others to the default, for example
mail.Default value:
uidamster attribute:
authenticationAttributes- User Display Name attribute
The profile attribute that contains the name to be displayed for the user on the consent page.
Default value:
cnamster attribute:
displayNameAttribute- Supported Scopes
The set of supported scopes, with translations.
Scopes may be entered as simple strings or pipe-separated strings representing the internal scope name, locale, and localized description.
For example:
read|en|Permission to view email messages in your accountLocale strings are in the format:
language_country_variant, for exampleen,en_GB, oren_US_WIN.If the locale and pipe is omitted, the description is displayed to all users that have undefined locales.
If the description is also omitted, nothing is displayed on the consent page for the scope. For example specifying
read|would allow the scope read to be used by the client, but would not display it to the user on the consent page when requested.amster attribute:
supportedScopes- Subject Types supported
List of subject types supported. Valid values are:
public- Each client receives the same subject (sub) value.pairwise- Each client receives a different subject (sub) value, to prevent correlation between clients.
Default value:
publicamster attribute:
supportedSubjectTypes- Default Client Scopes
List of scopes a client will be granted if they request registration without specifying which scopes they want. Default scopes are NOT auto-granted to clients created through the OpenAM console.
amster attribute:
defaultScopes- OAuth2 Token Signing Algorithm
Algorithm used to sign stateless OAuth 2.0 tokens in order to detect tampering.
OpenAM supports signing algorithms listed in JSON Web Algorithms (JWA): "alg" (Algorithm) Header Parameter Values for JWS:
HS256- HMAC with SHA-256.HS384- HMAC with SHA-384.HS512- HMAC with SHA-512.ES256- ECDSA with SHA-256 and NIST standard P-256 elliptic curve.ES384- ECDSA with SHA-384 and NIST standard P-384 elliptic curve.ES512- ECDSA with SHA-512 and NIST standard P-521 elliptic curve.RS256- RSASSA-PKCS-v1_5 using SHA-256.
The possible values for this property are:
HS256HS384HS512RS256RS384RS512ES256ES384ES512PS256PS384PS512
Default value:
HS256amster attribute:
tokenSigningAlgorithm- Stateless Token Compression
Whether stateless access and refresh tokens should be compressed.
amster attribute:
tokenCompressionEnabled- Token Signing HMAC Shared Secret
Base64-encoded key used by HS256, HS384 and HS512.
amster attribute:
tokenSigningHmacSharedSecret- Token Signing RSA Public/Private Key Pair
The public/private key pair used by RS256.
The public/private key pair will be retrieved from the keystore referenced by the property
com.sun.identity.saml.xmlsig.keystore.Default value:
testamster attribute:
keypairName- Token Signing ECDSA Public/Private Key Pair Alias
The list of public/private key pairs used for the elliptic curve algorithms (ES256/ES384/ES512). Add an entry to specify an alias for a specific elliptic curve algorithm, for example
ES256|es256Alias.Each of the public/private key pairs will be retrieved from the keystore referenced by the property
com.sun.identity.saml.xmlsig.keystore.Default value:
ES512|es512test
ES384|es384test
ES256|es256testamster attribute:
tokenSigningECDSAKeyAlias- Enable Stateless Token Encryption
Whether stateless access and refresh tokens should be encrypted.
Enabling token encryption will disable token signing as encryption is performed using direct symmetric encryption.
Default value:
falseamster attribute:
tokenEncryptionEnabled- Token Encryption Secret Key Alias
The secret key used for encryption.
The secret key will be retrieved from the keystore referenced by the property
com.sun.identity.saml.xmlsig.keystore.Default value:
directenctestamster attribute:
tokenEncryptionKeyAlias- Subject Identifier Hash Salt
If pairwise subject types are supported, it is STRONGLY RECOMMENDED to change this value. It is used in the salting of hashes for returning specific
subclaims to individuals using the samerequest_uriorsector_identifier_uri.For example, you might set this property to: changeme
amster attribute:
hashSalt- Code Verifier Parameter Required
If enabled, requests using the authorization code grant require a
code_challengeattribute.For more information, read the draft specification for this feature.
Default value:
falseamster attribute:
codeVerifierEnforced- Modified Timestamp Attribute Name
The identity Data Store attribute used to return modified timestamp values.
This attribute is paired together with the
Created Timestamp Attribute Nameattribute (createdTimestampAttribute). You can leave both attributes unset (default) or set them both. If you set only one attribute and leave the other blank, the access token fails with a 500 error.For example, when you configure AM as an OpenID Connect Provider in a Mobile Connect application and use DS as an Identity data store, the client accesses the
userinfoendpoint to obtain theupdated_atclaim value in the ID token. Theupdated_atclaim obtains its value from themodifiedTimestampAttributeattribute in the user profile. If the profile has never been modified,updated_atclaim uses thecreatedTimestampAttributeattribute. For more information, see "Configuring as an OP for Mobile Connect" in the OpenID Connect 1.0 Guide.amster attribute:
modifiedTimestampAttribute- Created Timestamp Attribute Name
The identity Data Store attribute used to return created timestamp values.
This attribute is paired together with the
Modified Timestamp Attribute Name(modifyTimestampAttribute). You can leave both attributes unset (default) or set them both. If you set only one attribute and leave the other blank, the access token fails with a 500 error.For example, when you configure AM as an OpenID Connect Provider in a Mobile Connect application and use DS as an Identity data store, the client accesses the
userinfoendpoint to obtain theupdated_atclaim value in the ID token. Theupdated_atclaim obtains its value from themodifiedTimestampAttributeattribute in the user profile. If the profile has never been modified,updated_atclaim uses thecreatedTimestampAttributeattribute. For more information, see "Configuring as an OP for Mobile Connect" in the OpenID Connect 1.0 Guide.amster attribute:
createdTimestampAttribute- Enable Auth Module Messages for Password Credentials Grant
If enabled, authentication module failure messages are used to create Resource Owner Password Credentials Grant failure messages. If disabled, a standard authentication failed message is used.
The Resource Owner Password Credentials grant type requires the
grant_type=passwordparameter.Default value:
falseamster attribute:
moduleMessageEnabledInPasswordGrant
The following settings appear on the Client Dynamic Registration tab:
- Require Software Statement for Dynamic Client Registration
When enabled, a software statement JWT containing at least the
iss(issuer) claim must be provided when registering an OAuth 2.0 client dynamically.Default value:
falseamster attribute:
dynamicClientRegistrationSoftwareStatementRequired- Required Software Statement Attested Attributes
The client attributes that are required to be present in the software statement JWT when registering an OAuth 2.0 client dynamically. Only applies if Require Software Statements for Dynamic Client Registration is enabled.
Leave blank to allow any attributes to be present.
Default value:
redirect_urisamster attribute:
requiredSoftwareStatementAttestedAttributes- Allow Open Dynamic Client Registration
Allow clients to register without an access token. If enabled, you should consider adding some form of rate limiting. For more information, see Client Registration in the OpenID Connect specification.
Default value:
falseamster attribute:
allowDynamicRegistration- Generate Registration Access Tokens
Whether to generate Registration Access Tokens for clients that register by using open dynamic client registration. Such tokens allow the client to access the Client Configuration Endpoint as per the OpenID Connect specification. This setting has no effect if Allow Open Dynamic Client Registration is disabled.
Default value:
trueamster attribute:
generateRegistrationAccessTokens- Scope to give access to dynamic client registration
Mandatory scope required when registering a new OAuth2 client.
Default value:
dynamic_client_registrationamster attribute:
dynamicClientRegistrationScope
The following settings appear on the OpenID Connect tab:
- OIDC Claims Script
The script that is run when issuing an ID token or making a request to the userinfo endpoint during OpenID requests.
The script gathers the scopes and populates claims, and has access to the access token, the user's identity and, if available, the user's session.
The possible values for this property are:
OIDC Claims Script
Default value:
OIDC Claims Scriptamster attribute:
oidcClaimsScript- ID Token Signing Algorithms supported
Algorithms supported to sign OpenID Connect
id_tokens.OpenAM supports signing algorithms listed in JSON Web Algorithms (JWA): "alg" (Algorithm) Header Parameter Values for JWS:
HS256- HMAC with SHA-256.HS384- HMAC with SHA-384.HS512- HMAC with SHA-512.ES256- ECDSA with SHA-256 and NIST standard P-256 elliptic curve.ES384- ECDSA with SHA-384 and NIST standard P-384 elliptic curve.ES512- ECDSA with SHA-512 and NIST standard P-521 elliptic curve.RS256- RSASSA-PKCS-v1_5 using SHA-256.
Default value:
RS384
PS284
ES384
HS256
HS512
ES256
RS256
HS384
ES512
PS256
PS512
RS512amster attribute:
supportedIDTokenSigningAlgorithms- ID Token Encryption Algorithms supported
Encryption algorithms supported to encrypt OpenID Connect ID tokens in order to hide its contents.
OpenAM supports the following ID token encryption algorithms:
RSA-OAEP- RSA with Optimal Asymmetric Encryption Padding (OAEP) with SHA-1 and MGF-1.RSA-OAEP-256- RSA with OAEP with SHA-256 and MGF-1.A128KW- AES Key Wrapping with 128-bit key derived from the client secret.RSA1_5- RSA with PKCS#1 v1.5 padding.A256KW- AES Key Wrapping with 256-bit key derived from the client secret.dir- Direct encryption with AES using the hashed client secret.A192KW- AES Key Wrapping with 192-bit key derived from the client secret.
Default value:
RSA-OAEP
RSA-OAEP-256
A128KW
RSA1_5
A256KW
dir
A192KWamster attribute:
supportedIDTokenEncryptionAlgorithms- ID Token Encryption Methods supported
Encryption methods supported to encrypt OpenID Connect ID tokens in order to hide its contents.
OpenAM supports the following ID token encryption algorithms:
A128GCM,A192GCM, andA256GCM- AES in Galois Counter Mode (GCM) authenticated encryption mode.A128CBC-HS256,A192CBC-HS384, andA256CBC-HS512- AES encryption in CBC mode, with HMAC-SHA-2 for integrity.
Default value:
A256GCM
A192GCM
A128GCM
A128CBC-HS256
A192CBC-HS384
A256CBC-HS512amster attribute:
supportedIDTokenEncryptionMethods- Supported Claims
Set of claims supported by the OpenID Connect
/oauth2/userinfoendpoint, with translations.Claims may be entered as simple strings or pipe separated strings representing the internal claim name, locale, and localized description.
For example:
name|en|Your full name..Locale strings are in the format:
language + "_" + country + "_" + variant, for exampleen,en_GB, oren_US_WIN. If the locale and pipe is omitted, the description is displayed to all users that have undefined locales.If the description is also omitted, nothing is displayed on the consent page for the claim. For example specifying
family_name|would allow the claimfamily_nameto be used by the client, but would not display it to the user on the consent page when requested.amster attribute:
supportedClaims- OpenID Connect JWT Token Lifetime (seconds)
The amount of time the JWT will be valid for, in seconds.
Default value:
3600amster attribute:
jwtTokenLifetime- Token Encryption RSA Public/Private Key Pair Alias
The list of public/private key pairs used for the RSA algorithms (RSA1_5/RSA-OAEP/RSA-OAEP-256). Add an entry to specify an alias for a specific RSA algorithm, for example
RSA1_5|rsa1_5Alias.Each of the public/private key pairs will be retrieved from the keystore referenced by the property
com.sun.identity.saml.xmlsig.keystore.Default value:
RSA1_5|test
RSA-OAEP|test
RSA-OAEP-256|testamster attribute:
tokenEncryptionSigningKeyAlias
The following settings appear on the Advanced OpenID Connect tab:
- Remote JSON Web Key URL
The Remote URL where the providers JSON Web Key can be retrieved.
If this setting is not configured, then OpenAM provides a local URL to access the public key of the private key used to sign ID tokens.
amster attribute:
jkwsURI- Idtokeninfo Endpoint Requires Client Authentication
When enabled, the
/oauth2/idtokeninfoendpoint requires client authentication if the signing algorithm is set toHS256,HS384, orHS512.Default value:
trueamster attribute:
idTokenInfoClientAuthenticationEnabled- Enable "claims_parameter_supported"
If enabled, clients will be able to request individual claims using the
claimsrequest parameter, as per section 5.5 of the OpenID Connect specification.Default value:
falseamster attribute:
claimsParameterSupported- OpenID Connect acr_values to Auth Chain Mapping
Maps OpenID Connect ACR values to authentication chains. For more details, see the acr_values parameter in the OpenID Connect authentication request specification.
amster attribute:
loaMapping- Default ACR values
Default requested Authentication Context Class Reference values.
List of strings that specifies the default acr values that the OP is being requested to use for processing requests from this Client, with the values appearing in order of preference. The Authentication Context Class satisfied by the authentication performed is returned as the acr Claim Value in the issued ID Token. The acr Claim is requested as a Voluntary Claim by this parameter. The acr_values_supported discovery element contains a list of the acr values supported by this server. Values specified in the acr_values request parameter or an individual acr Claim request override these default values.
amster attribute:
defaultACR- OpenID Connect id_token amr Values to Auth Module Mappings
Specify
amrvalues to be returned in the OpenID Connectid_token. Once authentication has completed, the authentication modules that were used from the authentication service will be mapped to theamrvalues. If you do not requireamrvalues, or are not providing OpenID Connect tokens, leave this field blank.amster attribute:
amrMappings- Always Return Claims in ID Tokens
If enabled, include scope-derived claims in the
id_token, even if an access token is also returned that could provide access to get the claims from theuserinfoendpoint.If not enabled, if an access token is requested the client must use it to access the
userinfoendpoint for scope-derived claims, as they will not be included in the ID token.Default value:
falseamster attribute:
alwaysAddClaimsToToken- Store Ops Tokens
Whether OpenAM will store the ops tokens corresponding to OpenID Connect sessions in the CTS store. Note that session management related endpoints will not work when this setting is disabled.
Default value:
trueamster attribute:
storeOpsTokens- Request Parameter Signing Algorithms Supported
Algorithms supported to verify signature of Request parameterOpenAM supports signing algorithms listed in JSON Web Algorithms (JWA): "alg" (Algorithm) Header Parameter Values for JWS:
HS256- HMAC with SHA-256.HS384- HMAC with SHA-384.HS512- HMAC with SHA-512.ES256- ECDSA with SHA-256 and NIST standard P-256 elliptic curve.ES384- ECDSA with SHA-384 and NIST standard P-384 elliptic curve.ES512- ECDSA with SHA-512 and NIST standard P-521 elliptic curve.RS256- RSASSA-PKCS-v1_5 using SHA-256.
Default value:
PS384
RS384
ES384
HS256
HS512
ES256
RS256
HS384
ES512
PS256
PS512
RS512amster attribute:
supportedRequestParameterSigningAlgorithms- Request Parameter Encryption Algorithms Supported
Encryption algorithms supported to decrypt Request parameter.
OpenAM supports the following ID token encryption algorithms:
RSA-OAEP- RSA with Optimal Asymmetric Encryption Padding (OAEP) with SHA-1 and MGF-1.RSA-OAEP-256- RSA with OAEP with SHA-256 and MGF-1.A128KW- AES Key Wrapping with 128-bit key derived from the client secret.RSA1_5- RSA with PKCS#1 v1.5 padding.A256KW- AES Key Wrapping with 256-bit key derived from the client secret.dir- Direct encryption with AES using the hashed client secret.A192KW- AES Key Wrapping with 192-bit key derived from the client secret.
Default value:
RSA-OAEP
RSA-OAEP-256
A128KW
RSA1_5
A256KW
dir
A192KWamster attribute:
supportedRequestParameterEncryptionAlgorithms- Request Parameter Encryption Methods Supported
Encryption methods supported to decrypt Request parameter.
OpenAM supports the following Request parameter encryption algorithms:
A128GCM,A192GCM, andA256GCM- AES in Galois Counter Mode (GCM) authenticated encryption mode.A128CBC-HS256,A192CBC-HS384, andA256CBC-HS512- AES encryption in CBC mode, with HMAC-SHA-2 for integrity.
Default value:
A256GCM
A192GCM
A128GCM
A128CBC-HS256
A192CBC-HS384
A256CBC-HS512amster attribute:
supportedRequestParameterEncryptionEnc- Require Pre-registered request_uri Values
When enabled, any
request_urivalues used must be pre-registered using therequest_urisregistration parameter.Default value:
falseamster attribute:
requireRequestUriRegistration- Authorized OIDC SSO Clients
Clients authorized to use OpenID Connect ID tokens as SSO Tokens.
Allows clients to act with the full authority of the user. Grant this permission only to trusted clients.
amster attribute:
authorisedOpenIdConnectSSOClients
The following settings appear on the Device Flow tab:
- Verification URL
The URL that the user will be instructed to visit to complete their OAuth 2.0 login and consent when using the device code flow.
amster attribute:
verificationUrl- Device Completion URL
The URL that the user will be sent to on completion of their OAuth 2.0 login and consent when using the device code flow.
amster attribute:
completionUrl- Device Code Lifetime (seconds)
The lifetime of the device code, in seconds.
Default value:
300amster attribute:
deviceCodeLifetime- Device Polling Interval
The polling frequency for devices waiting for tokens when using the device code flow.
Default value:
5amster attribute:
devicePollInterval
The following settings appear on the Consent tab:
- Saved Consent Attribute Name
Name of a multi-valued attribute on resource owner profiles where OpenAM can save authorization consent decisions.
When the resource owner chooses to save the decision to authorize access for a client application, then OpenAM updates the resource owner's profile to avoid having to prompt the resource owner to grant authorization when the client issues subsequent authorization requests.
amster attribute:
savedConsentAttribute- Allow Clients to Skip Consent
If enabled, clients may be configured so that the resource owner will not be asked for consent during authorization flows.
Default value:
falseamster attribute:
clientsCanSkipConsent- Enable Remote Consent
Default value:
falseamster attribute:
enableRemoteConsent- Remote Consent Service ID
The ID of an existing remote consent service agent.
The possible values for this property are:
[Empty]
amster attribute:
remoteConsentServiceId- Remote Consent Service Request Signing Algorithms Supported
Algorithms supported to sign consent_request JWTs for Remote Consent Services.
OpenAM supports signing algorithms listed in JSON Web Algorithms (JWA): "alg" (Algorithm) Header Parameter Values for JWS:
HS256- HMAC with SHA-256.HS384- HMAC with SHA-384.HS512- HMAC with SHA-512.ES256- ECDSA with SHA-256 and NIST standard P-256 elliptic curve.ES384- ECDSA with SHA-384 and NIST standard P-384 elliptic curve.ES512- ECDSA with SHA-512 and NIST standard P-521 elliptic curve.RS256- RSASSA-PKCS-v1_5 using SHA-256.
Default value:
PS384
RS384
ES384
HS256
HS512
ES256
RS256
HS384
ES512
PS256
PS512
RS512amster attribute:
supportedRcsRequestSigningAlgorithms- Remote Consent Service Request Encryption Algorithms Supported
Encryption algorithms supported to encrypt Remote Consent Service requests.
OpenAM supports the following encryption algorithms:
RSA1_5- RSA with PKCS#1 v1.5 padding.RSA-OAEP- RSA with Optimal Asymmetric Encryption Padding (OAEP) with SHA-1 and MGF-1.RSA-OAEP-256- RSA with OAEP with SHA-256 and MGF-1.A128KW- AES Key Wrapping with 128-bit key derived from the client secret.A192KW- AES Key Wrapping with 192-bit key derived from the client secret.A256KW- AES Key Wrapping with 256-bit key derived from the client secret.dir- Direct encryption with AES using the hashed client secret.
Default value:
RSA-OAEP
RSA-OAEP-256
A128KW
RSA1_5
A256KW
dir
A192KWamster attribute:
supportedRcsRequestEncryptionAlgorithms- Remote Consent Service Request Encryption Methods Supported
Encryption methods supported to encrypt Remote Consent Service requests.
OpenAM supports the following encryption methods:
A128GCM,A192GCM, andA256GCM- AES in Galois Counter Mode (GCM) authenticated encryption mode.A128CBC-HS256,A192CBC-HS384, andA256CBC-HS512- AES encryption in CBC mode, with HMAC-SHA-2 for integrity.
Default value:
A256GCM
A192GCM
A128GCM
A128CBC-HS256
A192CBC-HS384
A256CBC-HS512amster attribute:
supportedRcsRequestEncryptionMethods- Remote Consent Service Response Signing Algorithms Supported
Algorithms supported to verify signed consent_response JWT from Remote Consent Services.
OpenAM supports signing algorithms listed in JSON Web Algorithms (JWA): "alg" (Algorithm) Header Parameter Values for JWS:
HS256- HMAC with SHA-256.HS384- HMAC with SHA-384.HS512- HMAC with SHA-512.ES256- ECDSA with SHA-256 and NIST standard P-256 elliptic curve.ES384- ECDSA with SHA-384 and NIST standard P-384 elliptic curve.ES512- ECDSA with SHA-512 and NIST standard P-521 elliptic curve.RS256- RSASSA-PKCS-v1_5 using SHA-256.
Default value:
PS384
RS384
ES384
HS256
HS512
ES256
RS256
HS384
ES512
PS256
PS512
RS512amster attribute:
supportedRcsResponseSigningAlgorithms- Remote Consent Service Response Encryption Algorithms Supported
Encryption algorithms supported to decrypt Remote Consent Service responses.
OpenAM supports the following encryption algorithms:
RSA1_5- RSA with PKCS#1 v1.5 padding.RSA-OAEP- RSA with Optimal Asymmetric Encryption Padding (OAEP) with SHA-1 and MGF-1.RSA-OAEP-256- RSA with OAEP with SHA-256 and MGF-1.A128KW- AES Key Wrapping with 128-bit key derived from the client secret.A192KW- AES Key Wrapping with 192-bit key derived from the client secret.A256KW- AES Key Wrapping with 256-bit key derived from the client secret.dir- Direct encryption with AES using the hashed client secret.
Default value:
RSA-OAEP
RSA-OAEP-256
A128KW
RSA1_5
A256KW
dir
A192KWamster attribute:
supportedRcsResponseEncryptionAlgorithms- Remote Consent Service Response Encryption Methods Supported
Encryption methods supported to decrypt Remote Consent Service responses.
OpenAM supports the following encryption methods:
A128GCM,A192GCM, andA256GCM- AES in Galois Counter Mode (GCM) authenticated encryption mode.A128CBC-HS256,A192CBC-HS384, andA256CBC-HS512- AES encryption in CBC mode, with HMAC-SHA-2 for integrity.
Default value:
A256GCM
A192GCM
A128GCM
A128CBC-HS256
A192CBC-HS384
A256CBC-HS512amster attribute:
supportedRcsResponseEncryptionMethods
amster service name: dashboard
The following settings appear on the Realm Defaults tab:
- Available Dashboard Apps
List of application dashboard names available by default for realms with the Dashboard service configured.
amster attribute:
assignedDashboard
This service has the following Secondary Configurations.
- Dashboard Class Name
Identifies how to access the application, for example
SAML2ApplicationClassfor a SAML v2.0 application.amster attribute:
className- Dashboard Name
The application name as it will appear to the administrator for configuring the dashboard.
Default value:
Dashboardamster attribute:
name- Dashboard Display Name
The application name that displays on the dashboard client.
amster attribute:
displayName- Dashboard Icon
The icon name that will be displayed on the dashboard client identifying the application.
amster attribute:
icon- Dashboard Login
The URL that takes the user to the application.
amster attribute:
login- ICF Identifier
amster attribute:
icfIdentifier
Name
ampassword — change passwords for the AM Administrator
Synopsis
ampassword {options}
Description
This command allows you to change passwords held in the configuration store, and to encrypt passwords.
Options
The following options are supported.
-a | --admin
    [ -o | --old old-password-file
    -n | --new new-password-file ]
Change the password for
amAdminfrom the value stored in old-password-file to the value stored in new-password-file.-p | --proxy [ -o | --old old-password-file -n | --new new-password-file ]Change the password for the proxy administrator from the value stored in old-password-file to the value stored in new-password-file.
The proxy administrator password is shown encrypted in the output from ssoadm get-svrcfg-xml.
-e | --encrypt
    [ password-file ]
Display the password value provided encrypted with the key generated during AM installation.
-h | --helpDisplay the usage message.
Examples
The following example encrypts the password contained within a text file.
Create a text file, for example
$HOME/.pwd.txt, containing the password string on a single line.Encrypt the password by using the ampassword command:
$ ampassword -e $HOME/.pwd.txt
AQICkZs3qy5QUCXir9tebIEEZYGFXI2lCC4B
This appendix shows how to use the RESTful interfaces for direct integration between web client applications and ForgeRock Access Management.
Representational State Transfer (REST) is an architectural style that sets certain constraints for designing and building large-scale distributed hypermedia systems.
As an architectural style, REST has very broad applications. The designs of both HTTP 1.1 and URIs follow RESTful principles. The World Wide Web is no doubt the largest and best known REST application. Many other web services also follow the REST architectural style. Examples include OAuth 2.0, OpenID Connect 1.0, and User-Managed Access (UMA).
The ForgeRock Common REST (CREST) API applies RESTful principles to define common verbs for HTTP-based APIs that access web resources and collections of web resources.
Interface Stability: Evolving
Most native AM REST APIs use the CREST verbs. (In contrast, OAuth 2.0, OpenID Connect 1.0 and UMA APIs follow their respective standards.)
ForgeRock® Common REST is a common REST API framework. It works across the ForgeRock platform to provide common ways to access web resources and collections of resources. Adapt the examples in this section to your resources and deployment.
Servers generally return JSON-format resources, though resource formats can depend on the implementation.
Resources in collections can be found by their unique identifiers (IDs).
IDs are exposed in the resource URIs.
For example, if a server has a user collection under /users,
then you can access a user at
/users/user-id.
The ID is also the value of the _id field of the resource.
Resources are versioned using revision numbers.
A revision is specified in the resource's _rev field.
Revisions make it possible to figure out whether to apply changes
without resource locking and without distributed transactions.
The Common REST APIs use the following verbs, sometimes referred to collectively as CRUDPAQ. For details and HTTP-based examples of each, follow the links to the sections for each verb.
- Create
Add a new resource.
This verb maps to HTTP PUT or HTTP POST.
For details, see "Create".
- Read
Retrieve a single resource.
This verb maps to HTTP GET.
For details, see "Read".
- Update
Replace an existing resource.
This verb maps to HTTP PUT.
For details, see "Update".
- Delete
Remove an existing resource.
This verb maps to HTTP DELETE.
For details, see "Delete".
- Patch
Modify part of an existing resource.
This verb maps to HTTP PATCH.
For details, see "Patch".
- Action
Perform a predefined action.
This verb maps to HTTP POST.
For details, see "Action".
- Query
Search a collection of resources.
This verb maps to HTTP GET.
For details, see "Query".
Common REST reserved query string parameter names start with an underscore,
_.
Reserved query string parameters include, but are not limited to, the following names:
_action |
_api |
_crestapi |
_fields |
_mimeType |
_pageSize |
_pagedResultsCookie |
_pagedResultsOffset |
_prettyPrint |
_queryExpression |
_queryFilter |
_queryId |
_sortKeys |
_totalPagedResultsPolicy |
Note
Some parameter values are not safe for URLs, so URL-encode parameter values as necessary.
Continue reading for details about how to use each parameter.
The action verb is the main vehicle for extensions.
For example, to create a new user with HTTP POST rather than HTTP PUT,
you might use /users?_action=create.
A server can define additional actions.
For example, /tasks/1?_action=cancel.
A server can define stored queries to call by ID.
For example, /groups?_queryId=hasDeletedMembers.
Stored queries can call for additional parameters.
The parameters are also passed in the query string.
Which parameters are valid depends on the stored query.
Common REST APIs often depend at least in part on runtime configuration. Many Common REST endpoints therefore serve API descriptors at runtime. An API descriptor documents the actual API as it is configured.
Use the following query string parameters to retrieve API descriptors:
_apiServes an API descriptor that complies with the OpenAPI specification.
This API descriptor represents the API accessible over HTTP. It is suitable for use with popular tools such as Swagger UI.
_crestapiServes a native Common REST API descriptor.
This API descriptor provides a compact representation that is not dependent on the transport protocol. It requires a client that understands Common REST, as it omits many Common REST defaults.
Note
Consider limiting access to API descriptors in production environments in order to avoid unnecessary traffic.
To provide documentation in production environments, see "To Publish OpenAPI Documentation" instead.
In production systems, developers expect stable, well-documented APIs. Rather than retrieving API descriptors at runtime through Common REST, prepare final versions, and publish them alongside the software in production.
Use the OpenAPI-compliant descriptors to provide API reference documentation for your developers as described in the following steps:
Configure the software to produce production-ready APIs.
In other words, the software should be configured as in production so that the APIs are identical to what developers see in production.
Retrieve the OpenAPI-compliant descriptor.
The following command saves the descriptor to a file,
myapi.json:$ curl -o myapi.json endpoint?_api(Optional) If necessary, edit the descriptor.
For example, you might want to add security definitions to describe how the API is protected.
If you make any changes, then also consider using a source control system to manage your versions of the API descriptor.
Publish the descriptor using a tool such as Swagger UI.
You can customize Swagger UI for your organization as described in the documentation for the tool.
There are two ways to create a resource, either with an HTTP POST or with an HTTP PUT.
To create a resource using POST, perform an HTTP POST
with the query string parameter _action=create
and the JSON resource as a payload.
Accept a JSON response.
The server creates the identifier if not specified:
POST /users?_action=create HTTP/1.1
Host: example.com
Accept: application/json
Content-Length: ...
Content-Type: application/json
{ JSON resource }
To create a resource using PUT, perform an HTTP PUT
including the case-sensitive identifier for the resource in the URL path,
and the JSON resource as a payload.
Use the If-None-Match: * header.
Accept a JSON response:
PUT /users/some-id HTTP/1.1
Host: example.com
Accept: application/json
Content-Length: ...
Content-Type: application/json
If-None-Match: *
{ JSON resource }
The _id and content of the resource depend on the server implementation.
The server is not required to use the _id that the client provides.
The server response to the create request indicates the resource location
as the value of the Location header.
If you include the If-None-Match header, its value must be
*. In this case, the request creates the object if it
does not exist, and fails if the object does exist. If you include the
If-None-Match header with any value other than
*, the server returns an HTTP 400 Bad Request error. For
example, creating an object with
If-None-Match: revision returns
a bad request error. If you do not include If-None-Match: *,
the request creates the object if it does not exist, and
updates the object if it does exist.
You can use the following parameters:
_prettyPrint=trueFormat the body of the response.
_fields=field[,field...]Return only the specified fields in the body of the response.
The
fieldvalues are JSON pointers. For example if the resource is{"parent":{"child":"value"}},parent/childrefers to the"child":"value".If the
fieldis left blank, the server returns all default values.
To retrieve a single resource, perform an HTTP GET on the resource
by its case-sensitive identifier (_id)
and accept a JSON response:
GET /users/some-id HTTP/1.1
Host: example.com
Accept: application/json
You can use the following parameters:
_prettyPrint=trueFormat the body of the response.
_fields=field[,field...]Return only the specified fields in the body of the response.
The
fieldvalues are JSON pointers. For example if the resource is{"parent":{"child":"value"}},parent/childrefers to the"child":"value".If the
fieldis left blank, the server returns all default values._mimeType=mime-typeSome resources have fields whose values are multi-media resources such as a profile photo for example.
By specifying both a single field and also the mime-type for the response content, you can read a single field value that is a multi-media resource.
In this case, the content type of the field value returned matches the mime-type that you specify, and the body of the response is the multi-media resource.
The
Acceptheader is not used in this case. For example,Accept: image/pngdoes not work. Use the_mimeTypequery string parameter instead.
To update a resource, perform an HTTP PUT
including the case-sensitive identifier (_id)
as the final element of the path to the resource,
and the JSON resource as the payload.
Use the If-Match: _rev header
to check that you are actually updating the version you modified.
Use If-Match: * if the version does not matter.
Accept a JSON response:
PUT /users/some-id HTTP/1.1
Host: example.com
Accept: application/json
Content-Length: ...
Content-Type: application/json
If-Match: _rev
{ JSON resource }
When updating a resource, include all the attributes to be retained. Omitting an attribute in the resource amounts to deleting the attribute unless it is not under the control of your application. Attributes not under the control of your application include private and read-only attributes. In addition, virtual attributes and relationship references might not be under the control of your application.
You can use the following parameters:
_prettyPrint=trueFormat the body of the response.
_fields=field[,field...]Return only the specified fields in the body of the response.
The
fieldvalues are JSON pointers. For example if the resource is{"parent":{"child":"value"}},parent/childrefers to the"child":"value".If the
fieldis left blank, the server returns all default values.
To delete a single resource, perform an HTTP DELETE
by its case-sensitive identifier (_id)
and accept a JSON response:
DELETE /users/some-id HTTP/1.1
Host: example.com
Accept: application/json
You can use the following parameters:
_prettyPrint=trueFormat the body of the response.
_fields=field[,field...]Return only the specified fields in the body of the response.
The
fieldvalues are JSON pointers. For example if the resource is{"parent":{"child":"value"}},parent/childrefers to the"child":"value".If the
fieldis left blank, the server returns all default values.
To patch a resource, send an HTTP PATCH request with the following parameters:
operationfieldvaluefrom(optional with copy and move operations)
You can include these parameters in the payload for a PATCH request, or in a JSON PATCH file. If successful, you'll see a JSON response similar to:
PATCH /users/some-id HTTP/1.1
Host: example.com
Accept: application/json
Content-Length: ...
Content-Type: application/json
If-Match: _rev
{ JSON array of patch operations }
PATCH operations apply to three types of targets:
single-valued, such as an object, string, boolean, or number.
list semantics array, where the elements are ordered, and duplicates are allowed.
set semantics array, where the elements are not ordered, and duplicates are not allowed.
ForgeRock PATCH supports several different operations.
The following sections show each of these operations, along with options
for the field and value:
The add operation ensures that the target field contains
the value provided, creating parent fields as necessary.
If the target field is single-valued, then the value you include in the PATCH replaces the value of the target. Examples of a single-valued field include: object, string, boolean, or number.
An add operation has different results on two standard
types of arrays:
List semantic arrays: you can run any of these
addoperations on that type of array:If you
addan array of values, the PATCH operation appends it to the existing list of values.If you
adda single value, specify an ordinal element in the target array, or use the{-}special index to add that value to the end of the list.
Set semantic arrays: The list of values included in a patch are merged with the existing set of values. Any duplicates within the array are removed.
As an example, start with the following list semantic array resource:
{
    "fruits" : [ "orange", "apple" ]
}
The following add operation includes the pineapple to the end of the list of
fruits, as indicated by the - at the end of the
fruits array.
{
    "operation" : "add",
    "field" : "/fruits/-",
    "value" : "pineapple"
}
The following is the resulting resource:
{
    "fruits" : [ "orange", "apple", "pineapple" ]
}
The copy operation takes one or more existing values from the source field.
It then adds those same values on the target field. Once the values are
known, it is equivalent to performing an add operation
on the target field.
The following copy operation takes the value from a field
named mail, and then runs a replace
operation on the target field, another_mail.
[
  {
     "operation":"copy",
     "from":"mail",
     "field":"another_mail"
  }
]
If the source field value and the target field value are configured as arrays, the result depends on whether the array has list semantics or set semantics, as described in "Patch Operation: Add".
The increment operation changes the value or values of
the target field by the amount you specify. The value that you include
must be one number, and may be positive or negative. The value of the
target field must accept numbers. The following increment
operation adds 1000 to the target value of
/user/payment.
[
  {
    "operation" : "increment",
    "field" : "/user/payment",
    "value" : "1000"
  }
]
Since the value of the increment is
a single number, arrays do not apply.
The move operation removes existing values on the source field. It
then adds those same values on the target field. It is equivalent to
performing a remove operation on the source, followed
by an add operation with the same values, on the target.
The following move operation is equivalent to a
remove operation on the source field,
surname, followed by a replace
operation on the target field value, lastName. If the
target field does not exist, it is created.
[
  {
     "operation":"move",
     "from":"surname",
     "field":"lastName"
  }
]
To apply a move operation on an array, you need a
compatible single-value, list semantic array, or set semantic array on
both the source and the target. For details, see the criteria described
in "Patch Operation: Add".
The remove operation ensures that the target field no
longer contains the value provided. If the remove operation does not include
a value, the operation removes the field. The following
remove deletes the value of the
phoneNumber, along with the field.
[
  {
    "operation" : "remove",
    "field" : "phoneNumber"
  }
]
If the object has more than one phoneNumber, those
values are stored as an array.
A remove operation has different results on two standard
types of arrays:
List semantic arrays: A
removeoperation deletes the specified element in the array. For example, the following operation removes the first phone number, based on its array index (zero-based):[ { "operation" : "remove", "field" : "/phoneNumber/0" } ]Set semantic arrays: The list of values included in a patch are removed from the existing array.
The replace operation removes any existing value(s) of
the targeted field, and replaces them with the provided value(s). It is
essentially equivalent to a remove followed by a
add operation. If the arrays are used, the criteria is
based on "Patch Operation: Add". However, indexed updates are
not allowed, even when the target is an array.
The following replace operation removes the existing
telephoneNumber value for the user, and then adds the
new value of +1 408 555 9999.
[
  {
    "operation" : "replace",
    "field" : "/telephoneNumber",
    "value" : "+1 408 555 9999"
  }
]
A PATCH replace operation on a list semantic array works in the same fashion as a PATCH remove operation. The following example demonstrates how the effect of both operations. Start with the following resource:
{
    "fruits" : [ "apple", "orange", "kiwi", "lime" ],
}
Apply the following operations on that resource:
[
  {
    "operation" : "remove",
    "field" : "/fruits/0",
    "value" : ""
  },
  {
    "operation" : "replace",
    "field" : "/fruits/1",
    "value" : "pineapple"
  }
]
The PATCH operations are applied sequentially. The remove
operation removes the first member of that resource, based on its array
index, (fruits/0), with the following result:
[
  {
    "fruits" : [ "orange", "kiwi", "lime" ],
  }
]
The second PATCH operation, a replace, is applied on the
second member (fruits/1) of the intermediate resource,
with the following result:
[
  {
    "fruits" : [ "orange", "pineapple", "lime" ],
  }
]
The transform operation changes the value of a field
based on a script or some other data transformation command. The following
transform operation takes the value from the field
named /objects, and applies the
something.js script as shown:
[
  {
    "operation" : "transform",
    "field" : "/objects",
    "value" : {
      "script" : {
        "type" : "text/javascript",
        "file" : "something.js"
      }
    }
  }
]Some HTTP client libraries do not support the HTTP PATCH operation. Make sure that the library you use supports HTTP PATCH before using this REST operation.
For example, the Java Development Kit HTTP client does not support
PATCH as a valid HTTP method. Instead, the method
HttpURLConnection.setRequestMethod("PATCH")
throws ProtocolException.
You can use the following parameters. Other parameters might depend on the specific action implementation:
_prettyPrint=trueFormat the body of the response.
_fields=field[,field...]Return only the specified fields in the body of the response.
The
fieldvalues are JSON pointers. For example if the resource is{"parent":{"child":"value"}},parent/childrefers to the"child":"value".If the
fieldis left blank, the server returns all default values.
Actions are a means of extending Common REST APIs and are defined by the resource provider, so the actions you can use depend on the implementation.
The standard action indicated by _action=create
is described in "Create".
You can use the following parameters. Other parameters might depend on the specific action implementation:
_prettyPrint=trueFormat the body of the response.
_fields=field[,field...]Return only the specified fields in the body of the response.
The
fieldvalues are JSON pointers. For example if the resource is{"parent":{"child":"value"}},parent/childrefers to the"child":"value".If the
fieldis left blank, the server returns all default values.
To query a resource collection
(or resource container if you prefer to think of it that way),
perform an HTTP GET and accept a JSON response, including at least
a _queryExpression,
_queryFilter, or _queryId parameter.
These parameters cannot be used together:
GET /users?_queryFilter=true HTTP/1.1
Host: example.com
Accept: application/json
The server returns the result as a JSON object including a "results" array and other fields related to the query string parameters that you specify.
You can use the following parameters:
_queryFilter=filter-expressionQuery filters request that the server return entries that match the filter expression. You must URL-escape the filter expression.
The string representation is summarized as follows. Continue reading for additional explanation:
Expr           = OrExpr
OrExpr         = AndExpr ( 'or' AndExpr ) *
AndExpr        = NotExpr ( 'and' NotExpr ) *
NotExpr        = '!' PrimaryExpr | PrimaryExpr
PrimaryExpr    = '(' Expr ')' | ComparisonExpr | PresenceExpr | LiteralExpr
ComparisonExpr = Pointer OpName JsonValue
PresenceExpr   = Pointer 'pr'
LiteralExpr    = 'true' | 'false'
Pointer        = JSON pointer
OpName         = 'eq' |  # equal to
                 'co' |  # contains
                 'sw' |  # starts with
                 'lt' |  # less than
                 'le' |  # less than or equal to
                 'gt' |  # greater than
                 'ge' |  # greater than or equal to
                 STRING  # extended operator
JsonValue      = NUMBER | BOOLEAN | '"' UTF8STRING '"'
STRING         = ASCII string not containing white-space
UTF8STRING     = UTF-8 string possibly containing white-space
JsonValue components of filter expressions follow RFC 7159: The JavaScript Object Notation (JSON) Data Interchange Format. In particular, as described in section 7 of the RFC, the escape character in strings is the backslash character. For example, to match the identifier
test\, use_id eq 'test\\'. In the JSON resource, the\is escaped the same way:"_id":"test\\".When using a query filter in a URL, be aware that the filter expression is part of a query string parameter. A query string parameter must be URL encoded as described in RFC 3986: Uniform Resource Identifier (URI): Generic Syntax For example, white space, double quotes (
"), parentheses, and exclamation characters need URL encoding in HTTP query strings. The following rules apply to URL query components:query = *( pchar / "/" / "?" ) pchar = unreserved / pct-encoded / sub-delims / ":" / "@" unreserved = ALPHA / DIGIT / "-" / "." / "_" / "~" pct-encoded = "%" HEXDIG HEXDIG sub-delims = "!" / "$" / "&" / "'" / "(" / ")" / "*" / "+" / "," / ";" / "="ALPHA,DIGIT, andHEXDIGare core rules of RFC 5234: Augmented BNF for Syntax Specifications:ALPHA = %x41-5A / %x61-7A ; A-Z / a-z DIGIT = %x30-39 ; 0-9 HEXDIG = DIGIT / "A" / "B" / "C" / "D" / "E" / "F"As a result, a backslash escape character in a JsonValue component is percent-encoded in the URL query string parameter as
%5C. To encode the query filter expression_id eq 'test\\', use_id+eq+'test%5C%5C', for example.A simple filter expression can represent a comparison, presence, or a literal value.
For comparison expressions use json-pointer comparator json-value, where the comparator is one of the following:
eq(equals)co(contains)sw(starts with)lt(less than)le(less than or equal to)gt(greater than)ge(greater than or equal to)For presence, use json-pointer pr to match resources where:
The JSON pointer is present.
The value it points to is not
null.
Literal values include true (match anything) and false (match nothing).
Complex expressions employ
and,or, and!(not), with parentheses,(expression), to group expressions._queryId=identifierSpecify a query by its identifier.
Specific queries can take their own query string parameter arguments, which depend on the implementation.
_pagedResultsCookie=stringThe string is an opaque cookie used by the server to keep track of the position in the search results. The server returns the cookie in the JSON response as the value of
pagedResultsCookie.In the request
_pageSizemust also be set and non-zero. You receive the cookie value from the provider on the first request, and then supply the cookie value in subsequent requests until the server returns anullcookie, meaning that the final page of results has been returned.The
_pagedResultsCookieparameter is supported when used with the_queryFilterparameter. The_pagedResultsCookieparameter is not guaranteed to work when used with the_queryExpressionand_queryIdparameters.The
_pagedResultsCookieand_pagedResultsOffsetparameters are mutually exclusive, and not to be used together._pagedResultsOffset=integerWhen
_pageSizeis non-zero, use this as an index in the result set indicating the first page to return.The
_pagedResultsCookieand_pagedResultsOffsetparameters are mutually exclusive, and not to be used together._pageSize=integerReturn query results in pages of this size. After the initial request, use
_pagedResultsCookieor_pageResultsOffsetto page through the results._totalPagedResultsPolicy=stringWhen a
_pageSizeis specified, and non-zero, the server calculates the "totalPagedResults", in accordance with thetotalPagedResultsPolicy, and provides the value as part of the response. The "totalPagedResults" is either an estimate of the total number of paged results (_totalPagedResultsPolicy=ESTIMATE), or the exact total result count (_totalPagedResultsPolicy=EXACT). If no count policy is specified in the query, or if_totalPagedResultsPolicy=NONE, result counting is disabled, and the server returns value of -1 for "totalPagedResults"._sortKeys=[+-]field[,[+-]field...]Sort the resources returned based on the specified field(s), either in
+(ascending, default) order, or in-(descending) order.Because ascending order is the default, including the
+character in the query is unnecessary. If you do include the+, it must be URL-encoded as%2B, for example:http://localhost:8080/api/users?_prettyPrint=true&_queryFilter=true&_sortKeys=%2Bname/givenName
The
_sortKeysparameter is not supported for predefined queries (_queryId)._prettyPrint=trueFormat the body of the response.
_fields=field[,field...]Return only the specified fields in each element of the "results" array in the response.
The
fieldvalues are JSON pointers. For example if the resource is{"parent":{"child":"value"}},parent/childrefers to the"child":"value".If the
fieldis left blank, the server returns all default values.
When working with a Common REST API over HTTP, client applications should expect at least the following HTTP status codes. Not all servers necessarily return all status codes identified here:
- 200 OK
The request was successful and a resource returned, depending on the request.
- 201 Created
The request succeeded and the resource was created.
- 204 No Content
The action request succeeded, and there was no content to return.
- 304 Not Modified
The read request included an
If-None-Matchheader, and the value of the header matched the revision value of the resource.- 400 Bad Request
The request was malformed.
- 401 Unauthorized
The request requires user authentication.
- 403 Forbidden
Access was forbidden during an operation on a resource.
- 404 Not Found
The specified resource could not be found, perhaps because it does not exist.
- 405 Method Not Allowed
The HTTP method is not allowed for the requested resource.
- 406 Not Acceptable
The request contains parameters that are not acceptable, such as a resource or protocol version that is not available.
- 409 Conflict
The request would have resulted in a conflict with the current state of the resource.
- 410 Gone
The requested resource is no longer available, and will not become available again. This can happen when resources expire for example.
- 412 Precondition Failed
The resource's current version does not match the version provided.
- 415 Unsupported Media Type
The request is in a format not supported by the requested resource for the requested method.
- 428 Precondition Required
The resource requires a version, but no version was supplied in the request.
- 500 Internal Server Error
The server encountered an unexpected condition that prevented it from fulfilling the request.
- 501 Not Implemented
The resource does not support the functionality required to fulfill the request.
- 503 Service Unavailable
The requested resource was temporarily unavailable. The service may have been disabled, for example.
AM includes a global filter to harden AM's protection
against CSRF attacks. The filter applies to all REST endpoints under
json/ and requires that all requests other than GET, HEAD,
or OPTIONS include, at least, one of the following headers:
X-Requested-WithThis header is often sent by Javascript frameworks, and the XUI already sends it on all requests.
Accept-API-VersionThis header specifies which version of the REST API to use. Use this header in your requests to ensure future changes to the API do not affect your clients.
For more information about API versioning, see "REST API Versioning".
Failure to include at least one of the headers would cause the REST call
to fail with a 403 Forbidden error, even if the
SSO token is valid.
To disable the filter, navigate to Configure > Global Services > REST APIs > and turn off Enable CSRF Protection.
The json/ endpoint is not vulnerable to CSRF attacks
when the filter is disabled, since it requires the
"Content-Type: application/json" header, which currently
triggers the same protection in browsers. This may change in the future, so it is
recommended to enable the CSRF filter.
In OpenAM 12.0.0 and later, REST API features are assigned version numbers.
Providing version numbers in the REST API helps ensure compatibility between releases. The version number of a feature increases when AM introduces a non-backwards-compatible change that affects clients making use of the feature.
AM provides versions for the following aspects of the REST API.
- resource
Any changes to the structure or syntax of a returned response will incur a resource version change. For example changing
errorMessagetomessagein a JSON response.- protocol
Any changes to the methods used to make REST API calls will incur a protocol version change. For example changing
_actionto$actionin the required parameters of an API feature.
To ensure your clients are always compatible with a newer version of AM, you should always include resource versions in your REST calls.
The REST API version numbers supported in AM 6 are as follows:
- Supported protocol versions
The protocol versions supported in AM 6 are:
1.0- Supported resource versions
The resource versions supported in AM 6 are shown in the following table.
Base End Point Supported Versions /json /authenticate 1.1, 2.0 /users 1.1, 1.2, 2.0, 2.1, 3.0 /groups 1.1, 2.0, 2.1, 3.0 /agents 1.1, 2.0, 2.1, 3.0 /realms 1.0 /dashboard 1.0 /sessions 1.2, 2.1, 3.1 /serverinfo/* 1.1 /users/{user}/devices/trusted 1.0 /users/{user}/uma/policies 1.0 /applications 1.0, 2.0 /resourcetypes 1.0 /policies 1.0, 2.0 /applicationtypes 1.0 /conditiontypes 1.0 /subjecttypes 1.0 /subjectattributes 1.0 /decisioncombiners 1.0 /subjectattributes 1.0 /xacml /policies 1.0 /frrest /token 1.0 /client 1.0
For information about the supported protocol and resource versions available in AM 6, see the API Explorer in the Development Guide available in the AM console.
The AM Release Notes section, "Changes and Deprecated Functionality" in the Release Notes describes the differences between API versions.
You can specify which version of the REST API to use by adding an
Accept-API-Version header to the request. The
following example requests resource version
2.0 and protocol version 1.0:
$ curl \
--request POST \
--header "Content-Type: application/json" \
--header "X-OpenAM-Username: demo" \
--header "X-OpenAM-Password: changeit" \
--header "Accept-API-Version: resource=2.0, protocol=1.0" \
--data "{}" \
https://openam.example.com:8443/openam/json/realms/root/authenticate
You can configure the default behavior AM will take when a REST call does not specify explicit version information. For more information, see "Configuring the Default REST API Version for a Deployment".
You can configure the default behavior AM will take when a REST call does not specify explicit version information using either of the following procedures:
The available options for default behavior are as follows:
- Latest
The latest available supported version of the API is used.
This is the preset default for new installations of AM.
- Oldest
The oldest available supported version of the API is used.
This is the preset default for upgraded AM instances.
Note
The oldest supported version may not be the first that was released, as APIs versions become deprecated or unsupported. See "Deprecated Functionality" in the Release Notes.
- None
No version will be used. When a REST client application calls a REST API without specifying the version, AM returns an error and the request fails.
Log in as AM administrator,
amadmin.Click Configure > Global Services, and then click REST APIs.
In Default Version, select the required response to a REST API request that does not specify an explicit version:
Latest,Oldest, orNone.(Optional) Optionally, enable
Warning Headerto include warning messages in the headers of responses to requests.Save your work.
Use the ssoadm set-attr-defs command with the
openam-rest-apis-default-versionattribute set to eitherLatest,OldestorNone, as in the following example:$ ssh openam.example.com $ cd /path/to/openam-tools/admin/openam/bin $ ./ssoadm \ set-attr-defs \ --adminid amadmin \ --password-file /tmp/pwd.txt \ --servicename RestApisService \ --schematype Global \ --attributevalues openam-rest-apis-default-version=None Schema attribute defaults were set.
AM provides REST API version messages in the JSON response to a REST API call. You can also configure AM to return version messages in the response headers.
Messages include:
Details of the REST API versions used to service a REST API call.
Warning messages if REST API version information is not specified or is incorrect in a REST API call.
The resource and protocol version
used to service a REST API call are returned in the
Content-API-Version header, as shown below:
$ curl \
-i \
--request POST \
--header "Content-Type: application/json" \
--header "X-OpenAM-Username: demo" \
--header "X-OpenAM-Password: changeit" \
--header "Accept-API-Version: resource=2.0, protocol=1.0" \
--data "{}" \
https://openam.example.com:8443/openam/json/realms/root/authenticate
HTTP/1.1 200 OK
Content-API-Version: protocol=1.0,resource=2.0
Server: Restlet-Framework/2.1.7
Content-Type: application/json;charset=UTF-8

{
    "tokenId":"AQIC5wM...TU3OQ*",
    "successUrl":"/openam/console"
}
If the default REST API version behavior is set to None,
and a REST API call does not include the Accept-API-Version
header, or does not specify a resource version, then a
400 Bad Request status code is returned,
as shown below:
$ curl \
--header "Content-Type: application/json" \
--header "Accept-API-Version: protocol=1.0" \
https://openam.example.com:8443/openam/json/realms/root/serverinfo/*
{
    "code":400,
    "reason":"Bad Request",
    "message":"No requested version specified and behavior set to NONE."
}
If a REST API call does include the Accept-API-Version
header, but the specified resource or
protocol version does not exist in AM, then a
404 Not Found status code is returned,
as shown below:
$ curl \
--header "Content-Type: application/json" \
--header "Accept-API-Version: protocol=1.0, resource=999.0" \
https://openam.example.com:8443/openam/json/realms/root/serverinfo/*
{
    "code":404,
    "reason":"Not Found",
    "message":"Accept-API-Version: Requested version \"999.0\" does not match any routes."
}
Tip
For more information on setting the default REST API version behavior, see "Specifying an Explicit REST API Version".
This section describes how to work with realms when making REST API calls to AM.
Realms can be specified in the following ways when making a REST API call to AM:
- DNS Alias
When making a REST API call, the DNS alias of a realm can be specified in the subdomain and domain name components of the REST endpoint.
To list all users in the top-level realm use the DNS alias of the AM instance, for example the REST endpoint would be:
https://openam.example.com:8443/openam/json/users?_queryId=*
To list all users in a realm with DNS alias
suppliers.example.comthe REST endpoint would be:https://suppliers.example.com:8443/openam/json/users?_queryId=*
- Path
When making a REST API call, specify the realm in the path component of the endpoint. You must specify the entire hierarchy of the realm, starting at the top-level realm. Prefix each realm in the hierarchy with the
realms/keyword. For example/realms/root/realms/customers/realms/europe.To authenticate a user in the top-level realm, use the
rootkeyword. For example:https://openam.example.com:8443/openam/json/realms/root/authenticate
To authenticate a user in a subrealm named
customerswithin the top-level realm, the REST endpoint would be:https://openam.example.com:8443/openam/json/realms/root/realms/customers/authenticate
If realms are specified using both the DNS alias and path methods, the path is used to determine the realm.
For example, the following REST endpoint returns users in a
subrealm of the top-level realm named europe, not
the realm with DNS alias suppliers.example.com:
https://suppliers.example.com:8443/openam/json/realms/root/realms/europe/users?_queryId=*
You can use REST-like APIs under /json/authenticate and
/json/sessions for authentication and for logout.
The /json/authenticate endpoint does not support the
CRUDPAQ verbs and therefore does not technically satisfy REST architectural
requirements. The term REST-like describes this
endpoint better than REST.
The simplest user name/password authentication returns a
tokenId that applications can present as a cookie
value for other operations that require authentication. The type of
tokenId returned varies depending on whether client-based
sessions are enabled in the realm to which the user authenticates:
If client-based sessions are not enabled, the
tokenIdis an AM SSO token.If client-based sessions are enabled, the
tokenIdis an AM SSO token that includes an encoded AM session.
Developers should be aware that the size of the tokenId
for client-based sessions—2000 bytes or greater—is
considerably longer than for CTS-based sessions—approximately 100 bytes.
For more information about session tokens,
see "Session Cookies" in the Authentication and Single Sign-On Guide.
When authenticating with a user name and password, use
HTTP POST to prevent the web container from logging the credentials.
Pass the user name in an X-OpenAM-Username header, and
the password in an X-OpenAM-Password header:
$ curl \
--request POST \
--header "Content-Type: application/json" \
--header "X-OpenAM-Username: demo" \
--header "X-OpenAM-Password: changeit" \
--header "Accept-API-Version: resource=2.0, protocol=1.0" \
--data "{}" \
https://openam.example.com:8443/openam/json/realms/root/authenticate
{
    "tokenId": "AQIC5w...NTcy*",
    "successUrl": "/openam/console",
    "realm":"/"
}
To use UTF-8 user names and passwords in calls to the /json/authenticate
endpoint, base64-encode the string, and then wrap the string as described in
RFC 2047:
encoded-word = "=?" charset "?" encoding "?" encoded-text "?="
For example, to authenticate using a UTF-8 username, such as ɗëɱø, perform
the following steps:
Encode the string in base64 format:
yZfDq8mxw7g=.Wrap the base64-encoded string as per RFC 2047:
=?UTF-8?B?yZfDq8mxw7g=?=.Use the result in the
X-OpenAM-Usernameheader passed to the authentication endpoint as follows:$ curl \ --request POST \ --header "Content-Type: application/json" \ --header "X-OpenAM-Username: =?UTF-8?B?yZfDq8mxw7g=?=" \ --header "X-OpenAM-Password: changeit" \ --header "Accept-API-Version: resource=2.0, protocol=1.0" \ --data "{}" \ https://openam.example.com:8443/openam/json/realms/root/authenticate { "tokenId": "AQIC5w...NTcy*", "successUrl": "/openam/console", "realm":"/" }
This zero page login mechanism works only for name/password authentication. If you include a POST body with the request, it must be an empty JSON string as shown in the example. Alternatively, you can leave the POST body empty. Otherwise, AM interprets the body as a continuation of an existing authentication attempt, one that uses a supported callback mechanism.
The authentication service at /json/authenticate
supports callback mechanisms that make it possible to perform other types of
authentication in addition to simple user name/password login.
Callbacks that are not completed based on the content of the client HTTP request are returned in JSON as a response to the request. Each callback has an array of output suitable for displaying to the end user, and input which is what the client must complete and send back to AM. The default is still user name/password authentication:
$ curl \
--request POST \
--header "Content-Type: application/json" \
--header "Accept-API-Version: resource=2.0, protocol=1.0" \
https://openam.example.com:8443/openam/json/realms/root/authenticate
{
    "authId": "...jwt-value...",
    "template": "",
    "stage": "DataStore1",
    "callbacks": [
        {
            "type": "NameCallback",
            "output": [
                {
                    "name": "prompt",
                    "value": " User Name: "
                }
            ],
            "input": [
                {
                    "name": "IDToken1",
                    "value": ""
                }
            ]
        },
        {
            "type": "PasswordCallback",
            "output": [
                {
                    "name": "prompt",
                    "value": " Password: "
                }
            ],
            "input": [
                {
                    "name": "IDToken2",
                    "value": ""
                }
            ]
        }
    ]
}
The authID value is a JSON Web Token (JWT) that
uniquely identifies
the authentication context to AM, and so must also be sent back with the
requests.
To respond to the callback, send back the JSON object with the missing
values filled, as in this case where the user name is demo
and the password is changeit:
$ curl \
--request POST \
--header "Content-Type: application/json" \
--header "Accept-API-Version: resource=2.0, protocol=1.0" \
--data '{ "authId": "...jwt-value...", "template": "", "stage": "DataStore1",
        "callbacks": [ { "type": "NameCallback", "output": [ { "name": "prompt",
        "value": " User Name: " } ], "input": [ { "name": "IDToken1", "value": "demo" } ] },
        { "type": "PasswordCallback", "output": [ { "name": "prompt", "value": " Password: " } ],
        "input": [ { "name": "IDToken2", "value": "changeit" } ] } ] }' \
https://openam.example.com:8443/openam/json/realms/root/authenticate
{
    "tokenId":"AQIC5wM2...U3MTE4NA..*",
    "successUrl": "/openam/console",
    "realm":"/"
}
The response is a token ID holding the SSO token value.
Alternatively, you can authenticate without requesting a session
using the noSession query string parameter:
$ curl \
--request POST \
--header "Content-Type: application/json" \
--header "Accept-API-Version: resource=2.0, protocol=1.0" \
--data '{ "authId": "...jwt-value...", "template": "", "stage": "DataStore1",
        "callbacks": [ { "type": "NameCallback", "output": [ { "name": "prompt",
        "value": " User Name: " } ], "input": [ { "name": "IDToken1", "value": "demo" } ] },
        { "type": "PasswordCallback", "output": [ { "name": "prompt", "value": " Password: " } ],
        "input": [ { "name": "IDToken2", "value": "changeit" } ] } ] }' \
https://openam.example.com:8443/openam/json/realms/root/authenticate?noSession=true
{
    "message":"Authentication Successful",
    "successUrl":"/openam/console",
    "realm":"/"
}
AM can be configured to return a failure URL value when
authentication fails. No failure URL is configured by default. The Default
Failure Login URL can be set per realm; see
"Post Authentication Processing" in the Authentication and Single Sign-On Guide
for details. Alternatively, failure URLs can be configured per authentication
chain, which your client can specify using the service
parameter described below. On failure AM then returns HTTP status
code 401 Unauthorized, and the JSON in the reply indicates the failure
URL:
$ curl \
--request POST \
--header "Content-Type: application/json" \
--header "Accept-API-Version: resource=2.0, protocol=1.0" \
--header "X-OpenAM-Username: demo" \
--header "X-OpenAM-Password: badpassword" \
https://openam.example.com:8443/openam/json/realms/root/authenticate
{
    "code":401,
    "reason":"Unauthorized",
    "message":"Invalid Password!!",
    "failureUrl": "http://www.example.com/401.html"
}
When making a REST API call, specify the realm in the path component of the
endpoint. You must specify the entire hierarchy of the realm, starting at the top-level realm.
Prefix each realm in the hierarchy with the realms/ keyword. For example
/realms/root/realms/customers/realms/europe.
For example, to authenticate to a subrealm customers within the
top-level realm, then the authentication endpoint URL is as follows:
https://openam.example.com:8443/openam/json/realms/root/realms/customers/authenticate
The following additional parameters are supported:
You can use the authIndexType and
authIndexValue query string parameters as a pair
to provide additional information about how you are authenticating.
The authIndexType can be one of the following
types:
- composite
Set the value to a composite advice string.
- level
Set the value to the authentication level.
- module
Set the value to the name of an authentication module.
- resource
Set the value to a URL protected by an AM policy.
- role
Set the value to an AM role.
- service
Set the value to the name of an authentication tree or authentication chain.
- user
Set the value to an AM user ID.
For example, to log into AM using the built-in ldapService authentication
chain, you could use the following:
$ curl \
--request POST \
--header 'Accept-API-Version: resource=2.0, protocol=1.0' \
--header 'X-OpenAM-Username: demo' \
--header 'X-OpenAM-Password: changeit' \
'http://openam.example.com:8080/openam/json/realms/root/authenticate?authIndexType=service&authIndexValue=ldapService'
You can use the query string parameter,
sessionUpgradeSSOTokenId=tokenId,
to request session upgrade.
Before the tokenId is searched for in the
query string for session upgrade, the token is grabbed from the cookie.
For an explanation of session upgrade,
see "Session Upgrade" in the Authentication and Single Sign-On Guide.
AM uses the following callback types depending on the authentication module in use:
ChoiceCallback: Used to display a list of choices and retrieve the selected choice.ConfirmationCallback: Used to ask for a confirmation such as Yes, No, or Cancel and retrieve the selection.HiddenValueCallback: Used to return form values that are not visually rendered to the end user.HttpCallback: Used for HTTP handshake negotiations.LanguageCallback: Used to retrieve the locale for localizing text presented to the end user.NameCallback: Used to retrieve a name string.PasswordCallback: Used to retrieve a password value.PollingWaitCallback: Used to restrict polling requests by specifying an amount of time to wait before responding.RedirectCallback: Used to redirect the client user-agent.ScriptTextOutputCallback: Used to insert a script into the page presented to the end user. The script can, for example, collect data about the user's environment.TextInputCallback: Used to retrieve text input from the end user.TextOutputCallback: Used to display a message to the end user.X509CertificateCallback: Used to retrieve the content of an x.509 certificate.
Authenticated users can log out with the token cookie value and an HTTP
POST to /json/sessions/?_action=logout:
$ curl \
--request POST \
--header "Content-Type: application/json" \
--header "Cache-Control: no-cache" \
--header "iplanetDirectoryPro: AQIC5wM2...U3MTE4NA..*" \
--header "Accept-API-Version: resource=3.1, protocol=1.0" \
https://openam.example.com:8443/openam/json/realms/root/sessions/?_action=logout
{
    "result":"Successfully logged out"
}
To log out a session using a session handle, first perform an HTTP GET to the
resource URL, /json/sessions/, using the
queryFilter action to get the session handle:
$ curl \
--request GET \
--header "Content-Type: application/json" \
--header "Cache-Control: no-cache" \
--header "iPlanetDirectoryPro: AQICS...NzEz*" \
--header "Accept-API-Version: resource=3.1, protocol=1.0" \
https://openam.example.com:8443/openam/json/realms/root/sessions?_queryFilter=username%20eq%20%22demo%22%20and%20realm%20eq%20%22%2F%22
{
    "result": [
        {
            "username": "demo",
            "universalId": "id=demo,ou=user,dc=openam,dc=forgerock,dc=org",
            "realm":"/",
            "sessionHandle":"shandle:SJ80.*AA....JT.*",
            "latestAccessTime":"2018-10-23T09:37:54.387Z",
            "maxIdleExpirationTime":"2018-10-23T10:07:54Z",
            "maxSessionExpirationTime":"2018-10-23T11:37:54Z"
        },
         {
            "username": "demo",
            "universalId": "id=demo,ou=user,dc=openam,dc=forgerock,dc=org",
            "realm":"/",
            "sessionHandle":"shandle:H4CV.*DV....FM.*",
            "latestAccessTime":"2018-10-23T09:37:43.780Z",
            "maxIdleExpirationTime":"2018-10-23T10:07:43Z",
            "maxSessionExpirationTime":"2018-10-23T11:37:43Z"
        }
    ],
    "resultCount": 2,
    "pagedResultsCookie": null,
    "totalPagedResultsPolicy": "NONE",
    "totalPagedResults": -1,
    "remainingPagedResults": -1
}
To log out a session using a session handle, perform an HTTP POST to the
resource URL, /json/sessions/, using the
logoutByHandle action.
$ curl \
--request POST \
--header "Content-Type: application/json" \
--header "Cache-Control: no-cache" \
--header "iplanetDirectoryPro: AQIC5w...NTcy*" \
--header "Accept-API-Version: resource=3.1, protocol=1.0" \
--data '{
    "sessionHandles": [
        "shandle:SJ80.*AA....JT.*",
        "shandle:H4CV.*DV....FM.*"
    ]
}' \
https://openam.example.com:8443/openam/json/realms/root/sessions/?_action=logoutByHandle
{
    "result": {
        "shandle:SJ80.*AA....JT.*": true,
        "shandle:H4CV.*DV....FM.*": true
    }
}
When authentication depends on the client IP address and AM lies behind
a load balancer or proxy layer, configure the load balancer or proxy to send
the address by using the X-Forwarded-For header, and
configure AM to consume and forward the header as necessary. For
details, see
"Handling HTTP Request Headers" in the Installation Guide.
When authenticating with Windows Desktop SSO, add an
Authorization header containing the string
Basic , followed by a base64-encoded string of the
username, a colon character, and the password. In the following example, the
credentials demo:changeit are base64-encoded into the
string ZGVtbzpjaGFuZ2VpdA==:
$ curl \
--request POST \
--header "Content-Type: application/json" \
--header "Accept-API-Version: resource=2.0, protocol=1.0" \
--header "X-OpenAM-Username: demo" \
--header "X-OpenAM-Password: changeit" \
--header "Authorization: Basic ZGVtbzpjaGFuZ2VpdA==" \
--data "{}" \
https://openam.example.com:8443/openam/json/realms/root/authenticate
{
    "tokenId":"AQIC5w...NTcy*",
    "successUrl":"/openam/console",
    "realm":"/"
}The following is a common scenario when accessing AM by using REST API calls:
First, call the
/json/authenticateendpoint to log a user in to AM. This REST API call returns atokenIDvalue, which is used in subsequent REST API calls to identify the user:$ curl \ --request POST \ --header "Content-Type: application/json" \ --header "X-OpenAM-Username: demo" \ --header "X-OpenAM-Password: changeit" \ --header "Accept-API-Version: resource=2.0, protocol=1.0" \ --data "{}" \ https://openam.example.com:8443/openam/json/realms/root/authenticate { "tokenId":"AQIC5wM...TU3OQ*", "successUrl":"/openam/console", "realm":"/" }The returned
tokenIDis known as a session token (also referred to as an SSO token). REST API calls made after successful authentication to AM must present the session token in the HTTP header as proof of authentication.Next, call one or more additional REST APIs on behalf of the logged-in user. Each REST API call passes the user's
tokenIDback to AM in the HTTP header as proof of previous authentication.The following is a partial example of a curl command that inserts the token ID returned from a prior successful AM authentication attempt into the HTTP header:
$ curl \
--request POST \
--header "Content-Type: application/json" \
--header "iPlanetDirectoryPro: AQIC5w...NTcy*" \
--header "Accept-API-Version: resource=2.0, protocol=1.0" \
--data '{
  ...
Observe that the session token is inserted into a header field named
iPlanetDirectoryPro. This header field name must correspond to the name of the AM session cookie—by default,iPlanetDirectoryPro. You can find the cookie name in the AM console by navigating to Deployment > Servers > Server Name > Security > Cookie, in the Cookie Name field of the AM console.Once a user has authenticated, it is not necessary to insert login credentials in the HTTP header in subsequent REST API calls. Note the absence of
X-OpenAM-UsernameandX-OpenAM-Passwordheaders in the preceding example.Users are required to have appropriate privileges in order to access AM functionality using the REST API. For example, users who lack administrative privileges cannot create AM realms. For more information on the AM privilege model, see "Delegating Realm Administration Privileges".
Finally, call the REST API to log the user out of AM as described in "Authentication and Logout". As with other REST API calls made after a user has authenticated, the REST API call to log out of AM requires the user's
tokenIDin the HTTP header.
You can retrieve AM server information by using HTTP GET on
/json/serverinfo/* as follows:
$ curl \
--request GET \
--header "Content-Type: application/json" \
--header "Accept-API-Version: resource=1.1, protocol=1.0" \
https://openam.example.com:8443/openam/json/serverinfo/*
{
    "domains": [
        ".example.com"
    ],
    "protectedUserAttributes": [],
    "cookieName": "iPlanetDirectoryPro",
    "secureCookie": false,
    "forgotPassword": "false",
    "forgotUsername": "false",
    "kbaEnabled": "false",
    "selfRegistration": "false",
    "lang": "en-US",
    "successfulUserRegistrationDestination": "default",
    "socialImplementations": [
        {
            "iconPath": "XUI/images/logos/facebook.png",
            "authnChain": "FacebookSocialAuthenticationService",
            "displayName": "Facebook",
            "valid": true
        }
    ],
    "referralsEnabled": "false",
    "zeroPageLogin": {
        "enabled": false,
        "refererWhitelist": [
            ""
        ],
        "allowedWithoutReferer": true
    },
    "realm": "/",
    "xuiUserSessionValidationEnabled": true,
    "FQDN": "openam.example.com"
}Valid tokens in AM requires configuration either in percent encoding or in C66Encode format. C66Encode format is encouraged. It is the default token format for AM, and is used in this section. The following is an example token that has not been encoded:
AQIC5wM2LY4SfczntBbXvEAOuECbqMY3J4NW3byH6xwgkGE=@AAJTSQACMDE=#
This token includes reserved characters such as +, /,
and = (The @, #, and * are not
reserved characters per se, but substitutions are still required). To c66encode this token,
you would substitute certain characters for others, as follows:
| + is replaced with - |
| / is replaced with _ |
| = is replaced with . |
| @ is replaced with * |
| # is replaced with * |
| * (first instance) is replaced with @ |
| * (subsequent instances) is replaced with # |
In this case, the translated token would appear as shown here:
AQIC5wM2LY4SfczntBbXvEAOuECbqMY3J4NW3byH6xwgkGE.*AAJTSQACMDE.*
AM 6 supports two Audit Logging Services: a new common REST-based Audit Logging Service, and the legacy Logging Service, which is based on a Java SDK and is available in AM versions prior to OpenAM 13. The legacy Logging Service is deprecated.
Both audit facilities log AM REST API calls.
AM logs information about all REST API calls to the
access topic. For more information about AM audit
topics, see "Audit Log Topics".
Locate specific REST endpoints in the http.path log file
property.
AM logs information about REST API calls to two files:
amRest.access. Records accesses to a CREST endpoint, regardless of whether the request successfully reached the endpoint through policy authorization.
An
amRest.accessexample is as follows:$ cat openam/openam/log/amRest.access #Version: 1.0 #Fields: time Data LoginID ContextID IPAddr LogLevel Domain LoggedBy MessageID ModuleName NameID HostName "2011-09-14 16:38:17" /home/user/openam/openam/log/ "cn=dsameuser,ou=DSAME Users,o=openam" aa307b2dcb721d4201 "Not Available" INFO o=openam "cn=dsameuser,ou=DSAME Users,o=openam" LOG-1 amRest.access "Not Available" 192.168.56.2 "2011-09-14 16:38:17" "Hello World" id=bjensen,ou=user,o=openam 8a4025a2b3af291d01 "Not Available" INFO o=openam id=amadmin,ou=user,o=openam "Not Available" amRest.access "Not Available" 192.168.56.2
amRest.authz. Records all CREST authorization results regardless of success. If a request has an entry in the
amRest.accesslog, but no corresponding entry inamRest.authz, then that endpoint was not protected by an authorization filter and therefore the request was granted access to the resource.The
amRest.authzfile contains theDatafield, which specifies the authorization decision, resource, and type of action performed on that resource. TheDatafield has the following syntax:("GRANT"||"DENY") > "RESOURCE | ACTION" where "GRANT > " is prepended to the entry if the request was allowed "DENY > " is prepended to the entry if the request was not allowed "RESOURCE" is "ResourceLocation | ResourceParameter" where "ResourceLocation" is the endpoint location (e.g., subrealm/applicationtypes) "ResourceParameter" is the ID of the resource being touched (e.g., myApplicationType) if applicable. Otherwise, this field is empty if touching the resource itself, such as in a query. "ACTION" is "ActionType | ActionParameter" where "ActionType" is "CREATE||READ||UPDATE||DELETE||PATCH||ACTION||QUERY" "ActionParameter" is one of the following depending on the ActionType: For CREATE: the new resource ID For READ: empty For UPDATE: the revision of the resource to update For DELETE: the revision of the resource to delete For PATCH: the revision of the resource to patch For ACTION: the actual action performed (e.g., "forgotPassword") For QUERY: the query ID if any$ cat openam/openam/log/amRest.authz #Version: 1.0 #Fields: time Data ContextID LoginID IPAddr LogLevel Domain MessageID LoggedBy NameID ModuleName HostName "2014-09-16 14:17:28" /var/root/openam/openam/log/ 7d3af9e799b6393301 "cn=dsameuser,ou=DSAME Users,dc=openam,dc=forgerock,dc=org" "Not Available" INFO dc=openam,dc=forgerock,dc=org LOG-1 "cn=dsameuser,ou=DSAME Users,dc=openam,dc=forgerock,dc=org" "Not Available" amRest.authz 10.0.1.5 "2014-09-16 15:56:12" "GRANT > sessions|ACTION|logout|AdminOnlyFilter" d3977a55a2ee18c201 id=amadmin,ou=user,dc=openam,dc=forgerock,dc=org "Not Available" INFO dc=openam,dc=forgerock,dc=org OAuth2Provider-2 "cn=dsameuser,ou=DSAME Users,dc=openam,dc=forgerock,dc=org" "Not Available" amRest.authz 127.0.0.1 "2014-09-16 15:56:40" "GRANT > sessions|ACTION|logout|AdminOnlyFilter" eedbc205bf51780001 id=amadmin,ou=user,dc=openam,dc=forgerock,dc=org "Not Available" INFO dc=openam,dc=forgerock,dc=org OAuth2Provider-2 "cn=dsameuser,ou=DSAME Users,dc=openam,dc=forgerock,dc=org" "Not Available" amRest.authz 127.0.0.1
AM also provides additional information in its debug notifications for accesses to any endpoint, depending on the message type (error, warning or message) including realm, user, and result of the operation.
This reference section covers return codes and system settings relating to REST API support in AM.
amster service name: rest
The following settings are available in this service:
- Default Resource Version
The API resource version to use when the REST request does not specify an explicit version. Choose from:
Latest. If an explicit version is not specified, the latest resource version of an API is used.Oldest. If an explicit version is not specified, the oldest supported resource version of an API is used. Note that since APIs may be deprecated and fall out of support, the oldest supported version may not be the first version.None. If an explicit version is not specified, the request will not be handled and an error status is returned.
The possible values for this property are:
LatestOldestNone
Default value:
Latestamster attribute:
defaultVersion- Warning Header
Whether to include a warning header in the response to a request which fails to include the
Accept-API-Versionheader.Default value:
falseamster attribute:
warningHeader- API Descriptions
Whether API Explorer and API Docs are enabled in OpenAM and how the documentation for them is generated. Dynamic generation includes descriptions from any custom services and authentication modules you may have added. Static generation only includes services and authentication modules that were present when OpenAM was built. Note that dynamic documentation generation may not work in some application containers.
The possible values for this property are:
DYNAMIC. Enabled with Dynamic DocumentationSTATIC. Enabled with Static DocumentationDISABLED
Default value:
STATICamster attribute:
descriptionsState- Default Protocol Version
The API protocol version to use when a REST request does not specify an explicit version. Choose from:
Oldest. If an explicit version is not specified, the oldest protocol version is used.Latest. If an explicit version is not specified, the latest protocol version is used.None. If an explicit version is not specified, the request will not be handled and an error status is returned.
The possible values for this property are:
OldestLatestNone
Default value:
Latestamster attribute:
defaultProtocolVersion- Enable CSRF Protection
If enabled, all non-read/query requests will require the X-Requested-With header to be present.
Requiring a non-standard header ensures requests can only be made via methods (XHR) that have stricter same-origin policy protections in Web browsers, preventing Cross-Site Request Forgery (CSRF) attacks. Without this filter, cross-origin requests are prevented by the use of the application/json Content-Type header, which is less robust.
Default value:
trueamster attribute:
csrfFilterEnabled
For more information or resources about AM and ForgeRock Support, see the following sections:
ForgeRock publishes comprehensive documentation online:
The ForgeRock Knowledge Base offers a large and increasing number of up-to-date, practical articles that help you deploy and manage ForgeRock software.
While many articles are visible to community members, ForgeRock customers have access to much more, including advanced information for customers using ForgeRock software in a mission-critical capacity.
ForgeRock product documentation, such as this document, aims to be technically accurate and complete with respect to the software documented. It is visible to everyone and covers all product features and examples of how to use them.
The ForgeRock.org site has links to source code for ForgeRock open source software, as well as links to the ForgeRock forums and technical blogs.
If you are a ForgeRock customer, raise a support ticket instead of using the forums. ForgeRock support professionals will get in touch to help you.
ForgeRock provides support services, professional services, training through ForgeRock University, and partner services to assist you in setting up and maintaining your deployments. For a general overview of these services, see https://www.forgerock.com.
ForgeRock has staff members around the globe who support our international customers and partners. For details, visit https://www.forgerock.com, or send an email to ForgeRock at info@forgerock.com.
- Access control
Control to grant or to deny access to a resource.
- Account lockout
The act of making an account temporarily or permanently inactive after successive authentication failures.
- Actions
Defined as part of policies, these verbs indicate what authorized identities can do to resources.
- Advice
In the context of a policy decision denying access, a hint to the policy enforcement point about remedial action to take that could result in a decision allowing access.
- Agent administrator
User having privileges only to read and write agent profile configuration information, typically created to delegate agent profile creation to the user installing a web or Java agent.
- Agent authenticator
Entity with read-only access to multiple agent profiles defined in the same realm; allows an agent to read web service profiles.
- Application
In general terms, a service exposing protected resources.
In the context of AM policies, the application is a template that constrains the policies that govern access to protected resources. An application can have zero or more policies.
- Application type
Application types act as templates for creating policy applications.
Application types define a preset list of actions and functional logic, such as policy lookup and resource comparator logic.
Application types also define the internal normalization, indexing logic, and comparator logic for applications.
- Attribute-based access control (ABAC)
Access control that is based on attributes of a user, such as how old a user is or whether the user is a paying customer.
- Authentication
The act of confirming the identity of a principal.
- Authentication chaining
A series of authentication modules configured together which a principal must negotiate as configured in order to authenticate successfully.
- Authentication level
Positive integer associated with an authentication module, usually used to require success with more stringent authentication measures when requesting resources requiring special protection.
- Authentication module
AM authentication unit that handles one way of obtaining and verifying credentials.
- Authorization
The act of determining whether to grant or to deny a principal access to a resource.
- Authorization Server
In OAuth 2.0, issues access tokens to the client after authenticating a resource owner and confirming that the owner authorizes the client to access the protected resource. AM can play this role in the OAuth 2.0 authorization framework.
- Auto-federation
Arrangement to federate a principal's identity automatically based on a common attribute value shared across the principal's profiles at different providers.
- Bulk federation
Batch job permanently federating user profiles between a service provider and an identity provider based on a list of matched user identifiers that exist on both providers.
- Circle of trust
Group of providers, including at least one identity provider, who have agreed to trust each other to participate in a SAML v2.0 provider federation.
- Client
In OAuth 2.0, requests protected web resources on behalf of the resource owner given the owner's authorization. AM can play this role in the OAuth 2.0 authorization framework.
- Client-based sessions
AM sessions for which AM returns session state to the client after each request, and require it to be passed in with the subsequent request. For browser-based clients, AM sets a cookie in the browser that contains the session information.
For browser-based clients, AM sets a cookie in the browser that contains the session state. When the browser transmits the cookie back to AM, AM decodes the session state from the cookie.
- Conditions
Defined as part of policies, these determine the circumstances under which which a policy applies.
Environmental conditions reflect circumstances like the client IP address, time of day, how the subject authenticated, or the authentication level achieved.
Subject conditions reflect characteristics of the subject like whether the subject authenticated, the identity of the subject, or claims in the subject's JWT.
- Configuration datastore
LDAP directory service holding AM configuration data.
- Cross-domain single sign-on (CDSSO)
AM capability allowing single sign-on across different DNS domains.
- CTS-based sessions
AM sessions that reside in the Core Token Service's token store. CTS-based sessions might also be cached in memory on one or more AM servers. AM tracks these sessions in order to handle events like logout and timeout, to permit session constraints, and to notify applications involved in SSO when a session ends.
- Delegation
Granting users administrative privileges with AM.
- Entitlement
Decision that defines which resource names can and cannot be accessed for a given identity in the context of a particular application, which actions are allowed and which are denied, and any related advice and attributes.
- Extended metadata
Federation configuration information specific to AM.
- Extensible Access Control Markup Language (XACML)
Standard, XML-based access control policy language, including a processing model for making authorization decisions based on policies.
- Federation
Standardized means for aggregating identities, sharing authentication and authorization data information between trusted providers, and allowing principals to access services across different providers without authenticating repeatedly.
- Fedlet
Service provider application capable of participating in a circle of trust and allowing federation without installing all of AM on the service provider side; AM lets you create Java Fedlets.
- Hot swappable
Refers to configuration properties for which changes can take effect without restarting the container where AM runs.
- Identity
Set of data that uniquely describes a person or a thing such as a device or an application.
- Identity federation
Linking of a principal's identity across multiple providers.
- Identity provider (IdP)
Entity that produces assertions about a principal (such as how and when a principal authenticated, or that the principal's profile has a specified attribute value).
- Identity repository
Data store holding user profiles and group information; different identity repositories can be defined for different realms.
- Java agent
Java web application installed in a web container that acts as a policy enforcement point, filtering requests to other applications in the container with policies based on application resource URLs.
- Metadata
Federation configuration information for a provider.
- Policy
Set of rules that define who is granted access to a protected resource when, how, and under what conditions.
- Policy agent
Java, web, or custom agent that intercepts requests for resources, directs principals to AM for authentication, and enforces policy decisions from AM.
- Policy Administration Point (PAP)
Entity that manages and stores policy definitions.
- Policy Decision Point (PDP)
Entity that evaluates access rights and then issues authorization decisions.
- Policy Enforcement Point (PEP)
Entity that intercepts a request for a resource and then enforces policy decisions from a PDP.
- Policy Information Point (PIP)
Entity that provides extra information, such as user profile attributes that a PDP needs in order to make a decision.
- Principal
Represents an entity that has been authenticated (such as a user, a device, or an application), and thus is distinguished from other entities.
When a Subject successfully authenticates, AM associates the Subject with the Principal.
- Privilege
In the context of delegated administration, a set of administrative tasks that can be performed by specified identities in a given realm.
- Provider federation
Agreement among providers to participate in a circle of trust.
- Realm
AM unit for organizing configuration and identity information.
Realms can be used for example when different parts of an organization have different applications and user data stores, and when different organizations use the same AM deployment.
Administrators can delegate realm administration. The administrator assigns administrative privileges to users, allowing them to perform administrative tasks within the realm.
- Resource
Something a user can access over the network such as a web page.
Defined as part of policies, these can include wildcards in order to match multiple actual resources.
- Resource owner
In OAuth 2.0, entity who can authorize access to protected web resources, such as an end user.
- Resource server
In OAuth 2.0, server hosting protected web resources, capable of handling access tokens to respond to requests for such resources.
- Response attributes
Defined as part of policies, these allow AM to return additional information in the form of "attributes" with the response to a policy decision.
- Role based access control (RBAC)
Access control that is based on whether a user has been granted a set of permissions (a role).
- Security Assertion Markup Language (SAML)
Standard, XML-based language for exchanging authentication and authorization data between identity providers and service providers.
- Service provider (SP)
Entity that consumes assertions about a principal (and provides a service that the principal is trying to access).
- Authentication Session
The interval while the user or entity is authenticating to AM.
- Session
The interval that starts after the user has authenticated and ends when the user logs out, or when their session is terminated. For browser-based clients, AM manages user sessions across one or more applications by setting a session cookie. See also CTS-based sessions and Client-based sessions.
- Session high availability
Capability that lets any AM server in a clustered deployment access shared, persistent information about users' sessions from the CTS token store. The user does not need to log in again unless the entire deployment goes down.
- Session token
Unique identifier issued by AM after successful authentication. For a CTS-based sessions, the session token is used to track a principal's session.
- Single log out (SLO)
Capability allowing a principal to end a session once, thereby ending her session across multiple applications.
- Single sign-on (SSO)
Capability allowing a principal to authenticate once and gain access to multiple applications without authenticating again.
- Site
Group of AM servers configured the same way, accessed through a load balancer layer. The load balancer handles failover to provide service-level availability.
The load balancer can also be used to protect AM services.
- Standard metadata
Standard federation configuration information that you can share with other access management software.
- Stateless Service
Stateless services do not store any data locally to the service. When the service requires data to perform any action, it requests it from a data store. For example, a stateless authentication service stores session state for logged-in users in a database. This way, any server in the deployment can recover the session from the database and service requests for any user.
All AM services are stateless unless otherwise specified. See also Client-based sessions and CTS-based sessions.
- Subject
Entity that requests access to a resource
When an identity successfully authenticates, AM associates the identity with the Principal that distinguishes it from other identities. An identity can be associated with multiple principals.
- User data store
Data storage service holding principals' profiles; underlying storage can be an LDAP directory service or a custom
IdRepoimplementation.- Web Agent
Native library installed in a web server that acts as a policy enforcement point with policies based on web page URLs.