Application Owner Tasks
The Applications lets an application owner view their applications and all associated entitlements.
View Applications
Follow these steps to view applications:
-
As an Application Owner, log in to the Autonomous Identity console.
-
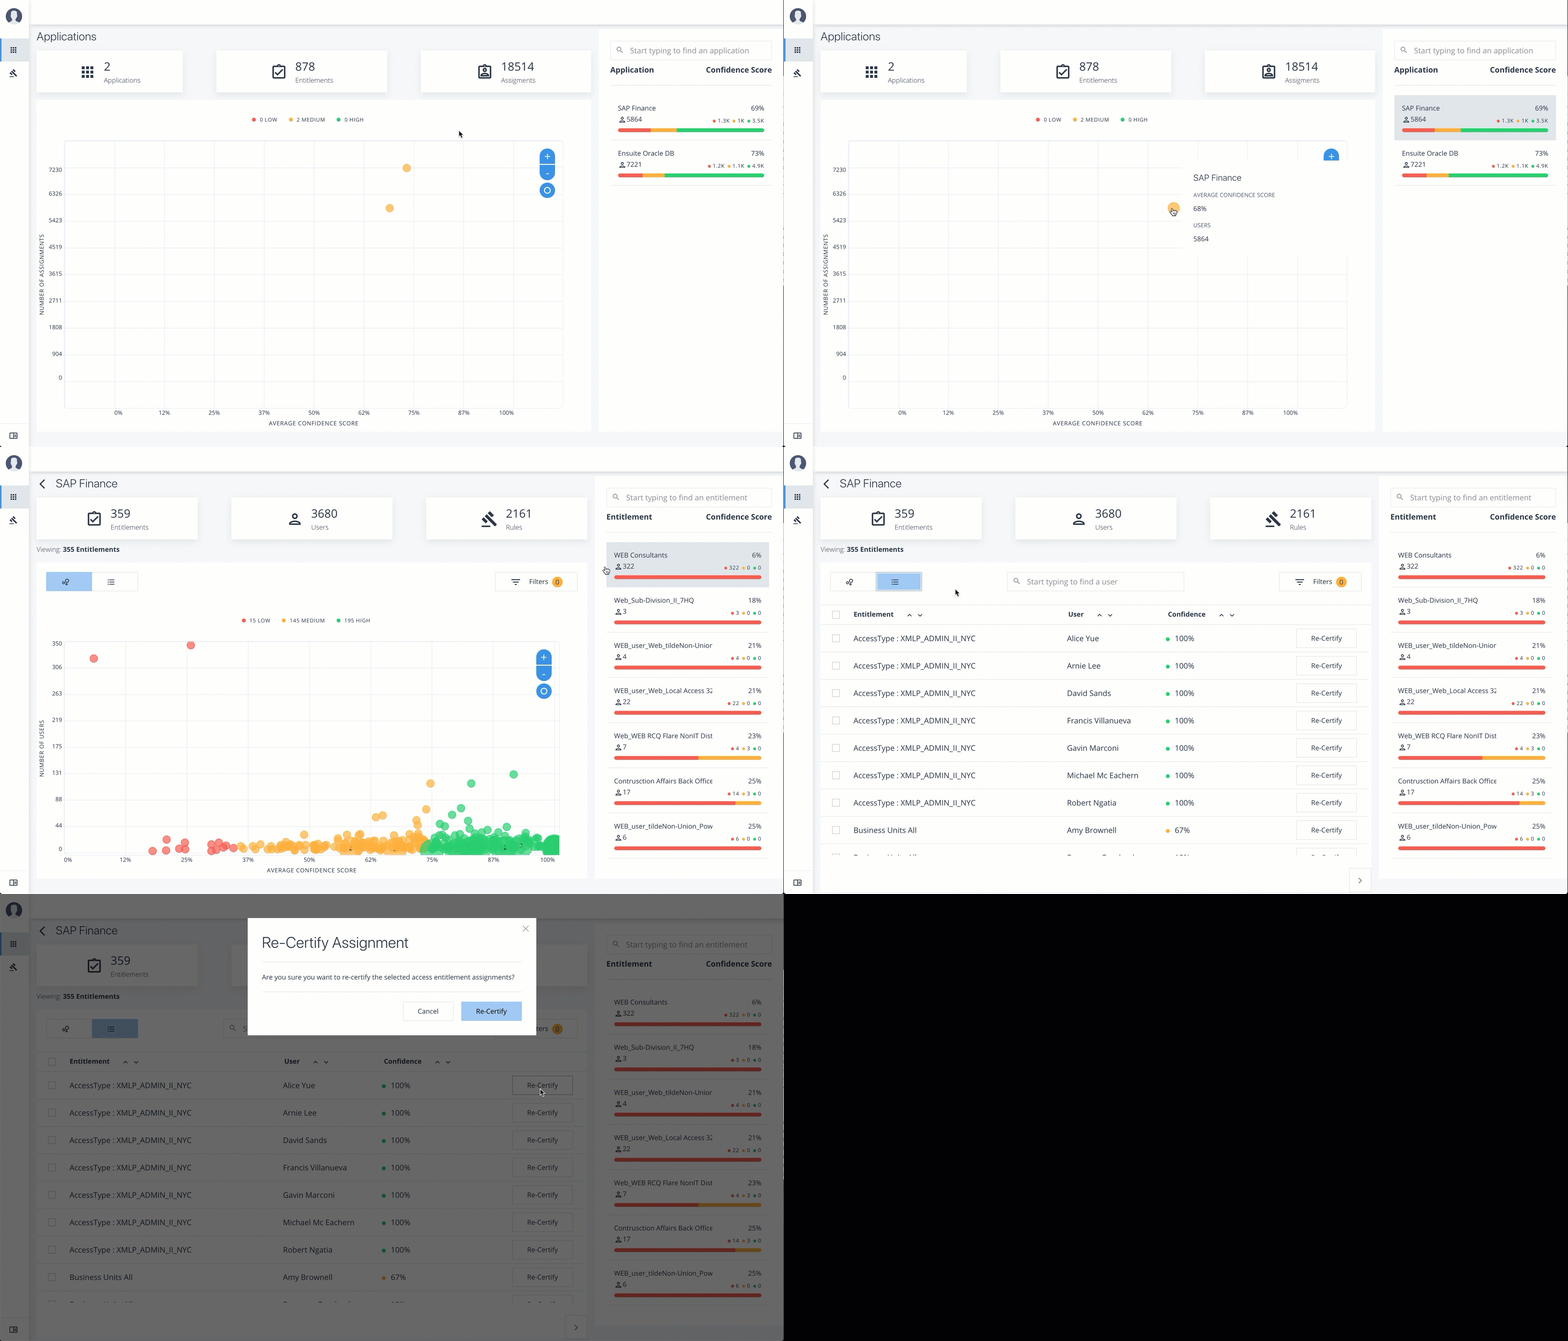
On the Applications page, click a circle in the graph or an application in the Applications list on the right.
-
On the Applications Detail page, review the information on the page: the number of entitlements associated with the application, the number of users, the number of rules, and a graph of the average confidence score versus number of users.
-
To view the list of entitlements for the application ordered by confidence score, click the list icon on the top left. From there, click Re-certify to approve the entitlement assignment for the application.
See it in action

Apply Filters
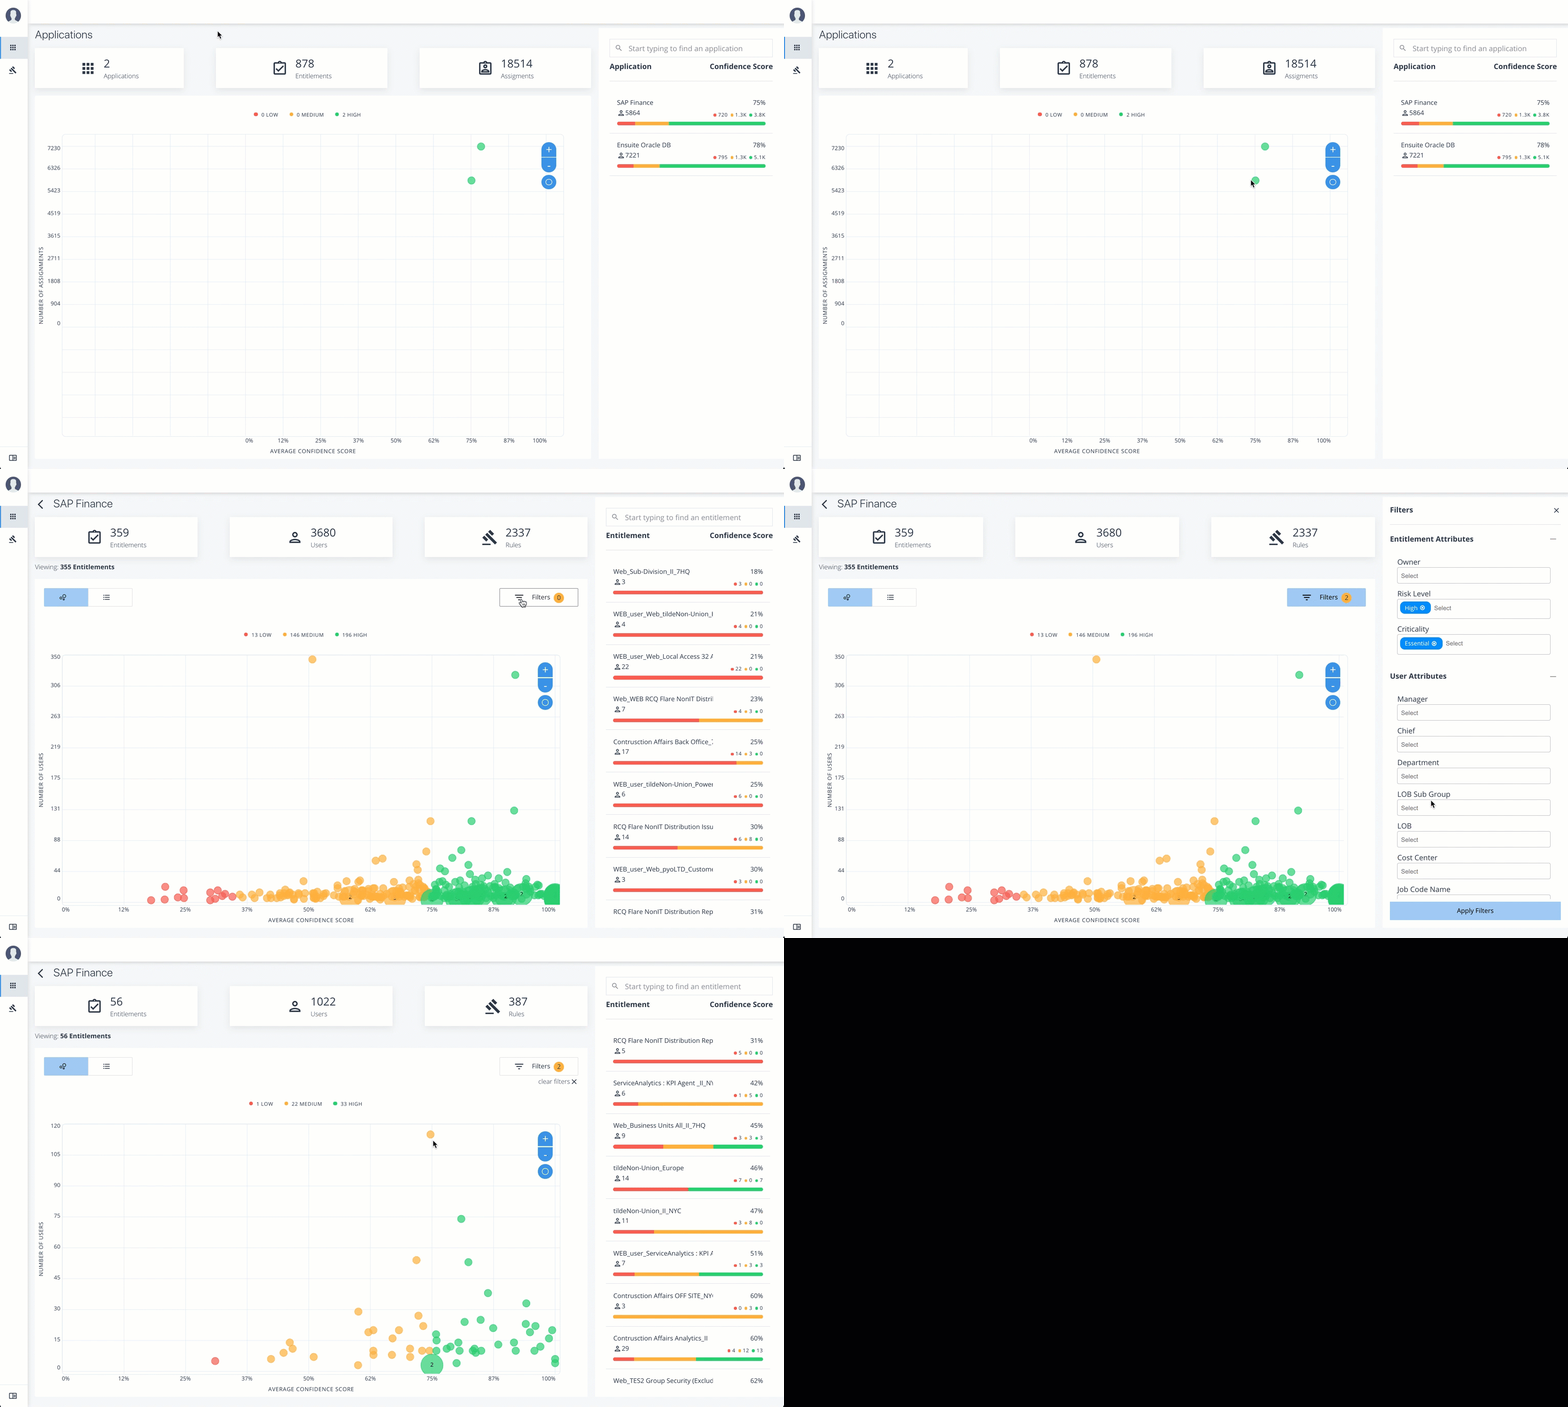
Follow these steps to apply filters to your confidence score graphs:
-
Log in to the Autonomous Identity console.
-
On the Applications page, click
Filters. -
Under Entitlement Attributes, do one or all of the following:
-
Click Owner to filter on the entitlement owner. You can make more than one selection.
-
Click Risk Level to filter on low, high, and middle risk entitlements. You can make more than one selection.
-
Click Criticality to filter on Essential or Non-Essential entitlements.
-
-
Under User Attributes, do one or all of the following:
-
Click Manager to filter on a manager. You can make more than one selection.
-
Click Chief to filter if the entitlement is manager or not.
-
Click Department to filter on a specific department. You can make more than one selection.
-
Click LOB Sub Group to filter on a line of business subgroup. You can make more than one selection.
-
Click LOB to filter on the line of business for the division. You can make more than one selection.
-
Click Cost Center to filter on a cost center. You can make more than one selection.
-
Click Job Code Name to filter on a job code. You can make more than one selection.
-
Click City to filter on the city of the operations. You can make more than one selection.
-
Click Employee Type to filter Employee or Non-Employee.
-
-
Click Apply Filters to see the results on the graph. You can cancel your filters by click the
clear filterslink.
See it in action

Re-certify Entitlement Assignments
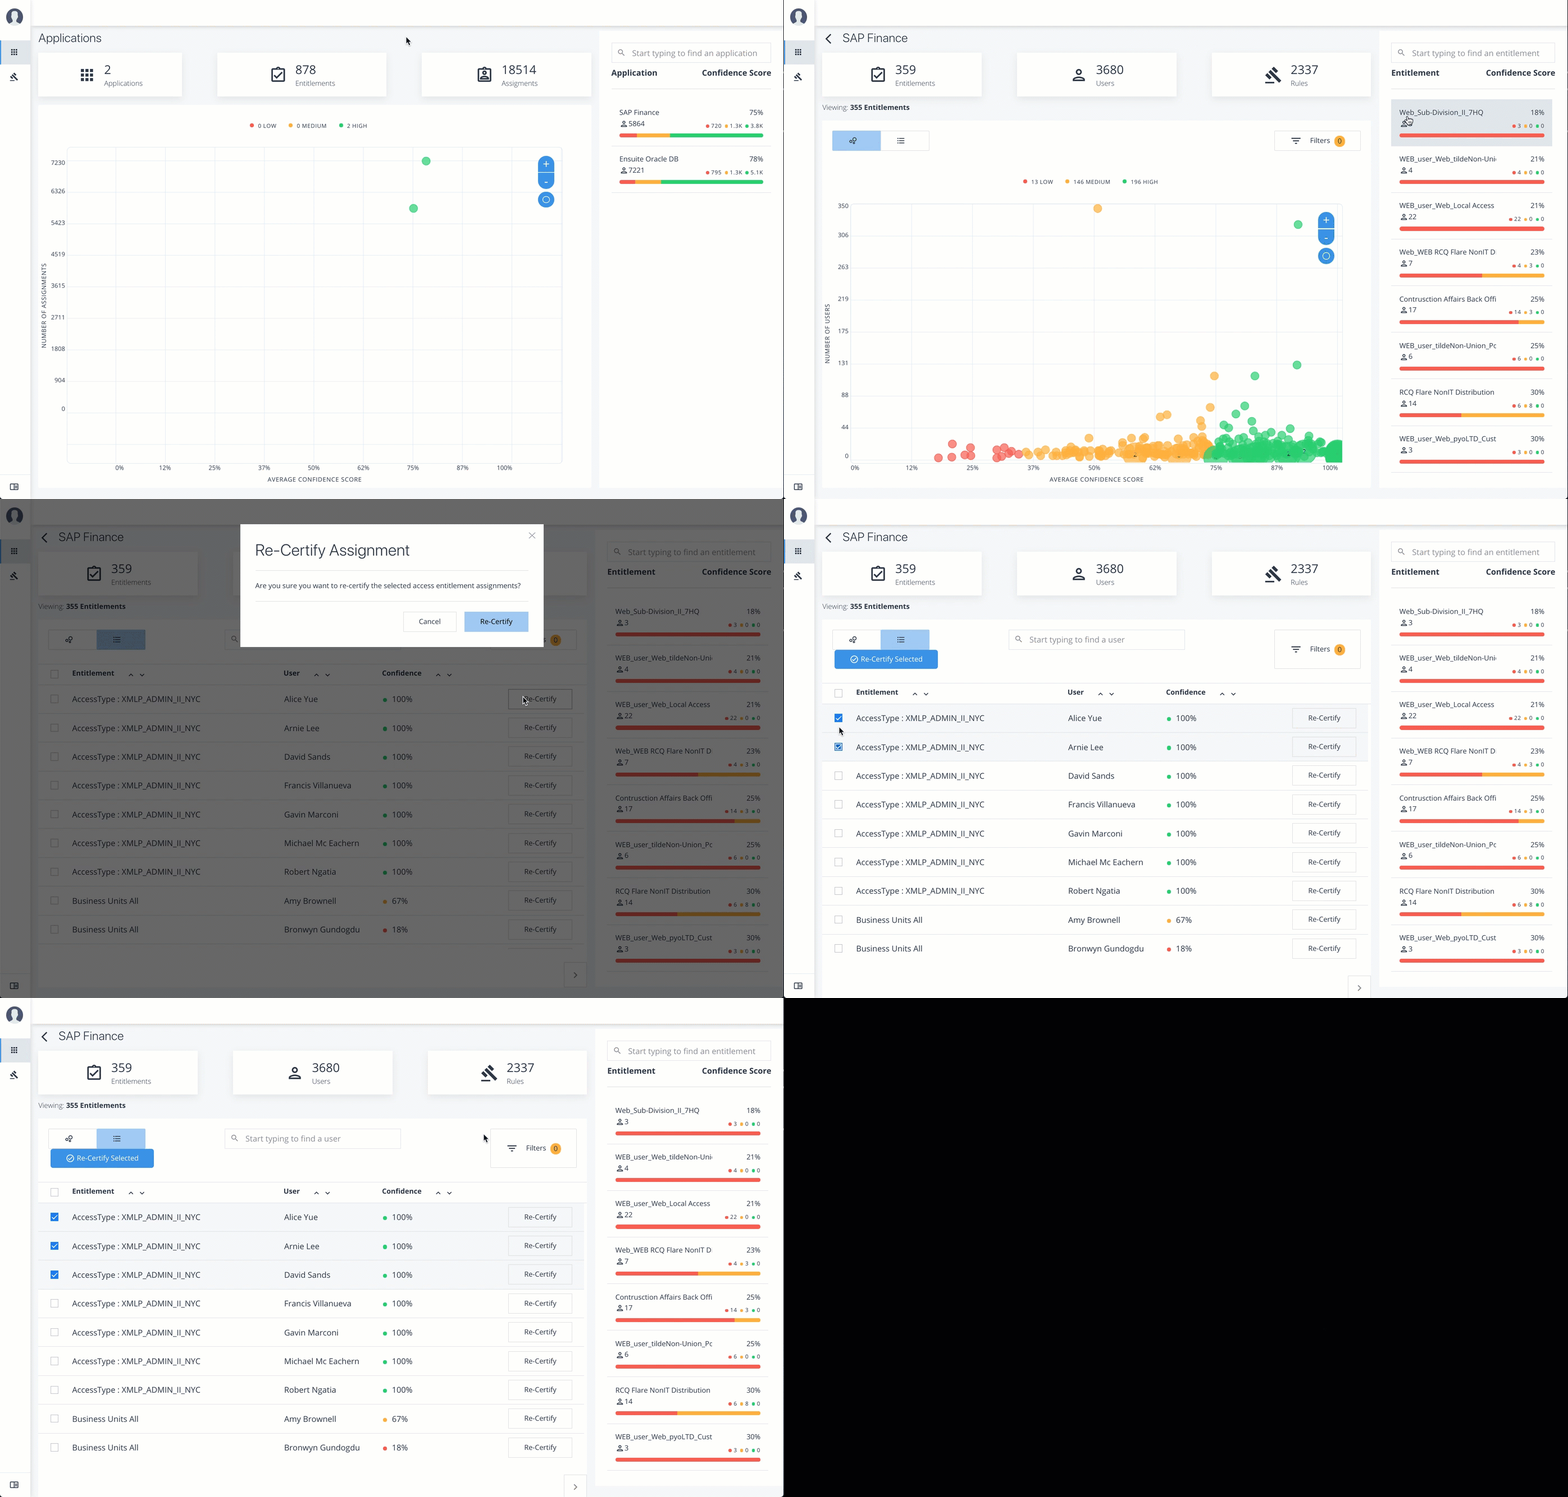
Follow these steps to re-certify an entitlement assignment:
-
Log in to the Autonomous Identity console as an Application Owner.
-
On the Applications page, select an application to view by clicking a circle in the graph or the application on the right-hand menu.
-
Click list view.
-
Click Re-Certify, and then click Re-Certify again to confirm the assignment.
You can also select all or multiple entitlements for bulk re-certify.
See it in action

Approve Rule Justifications
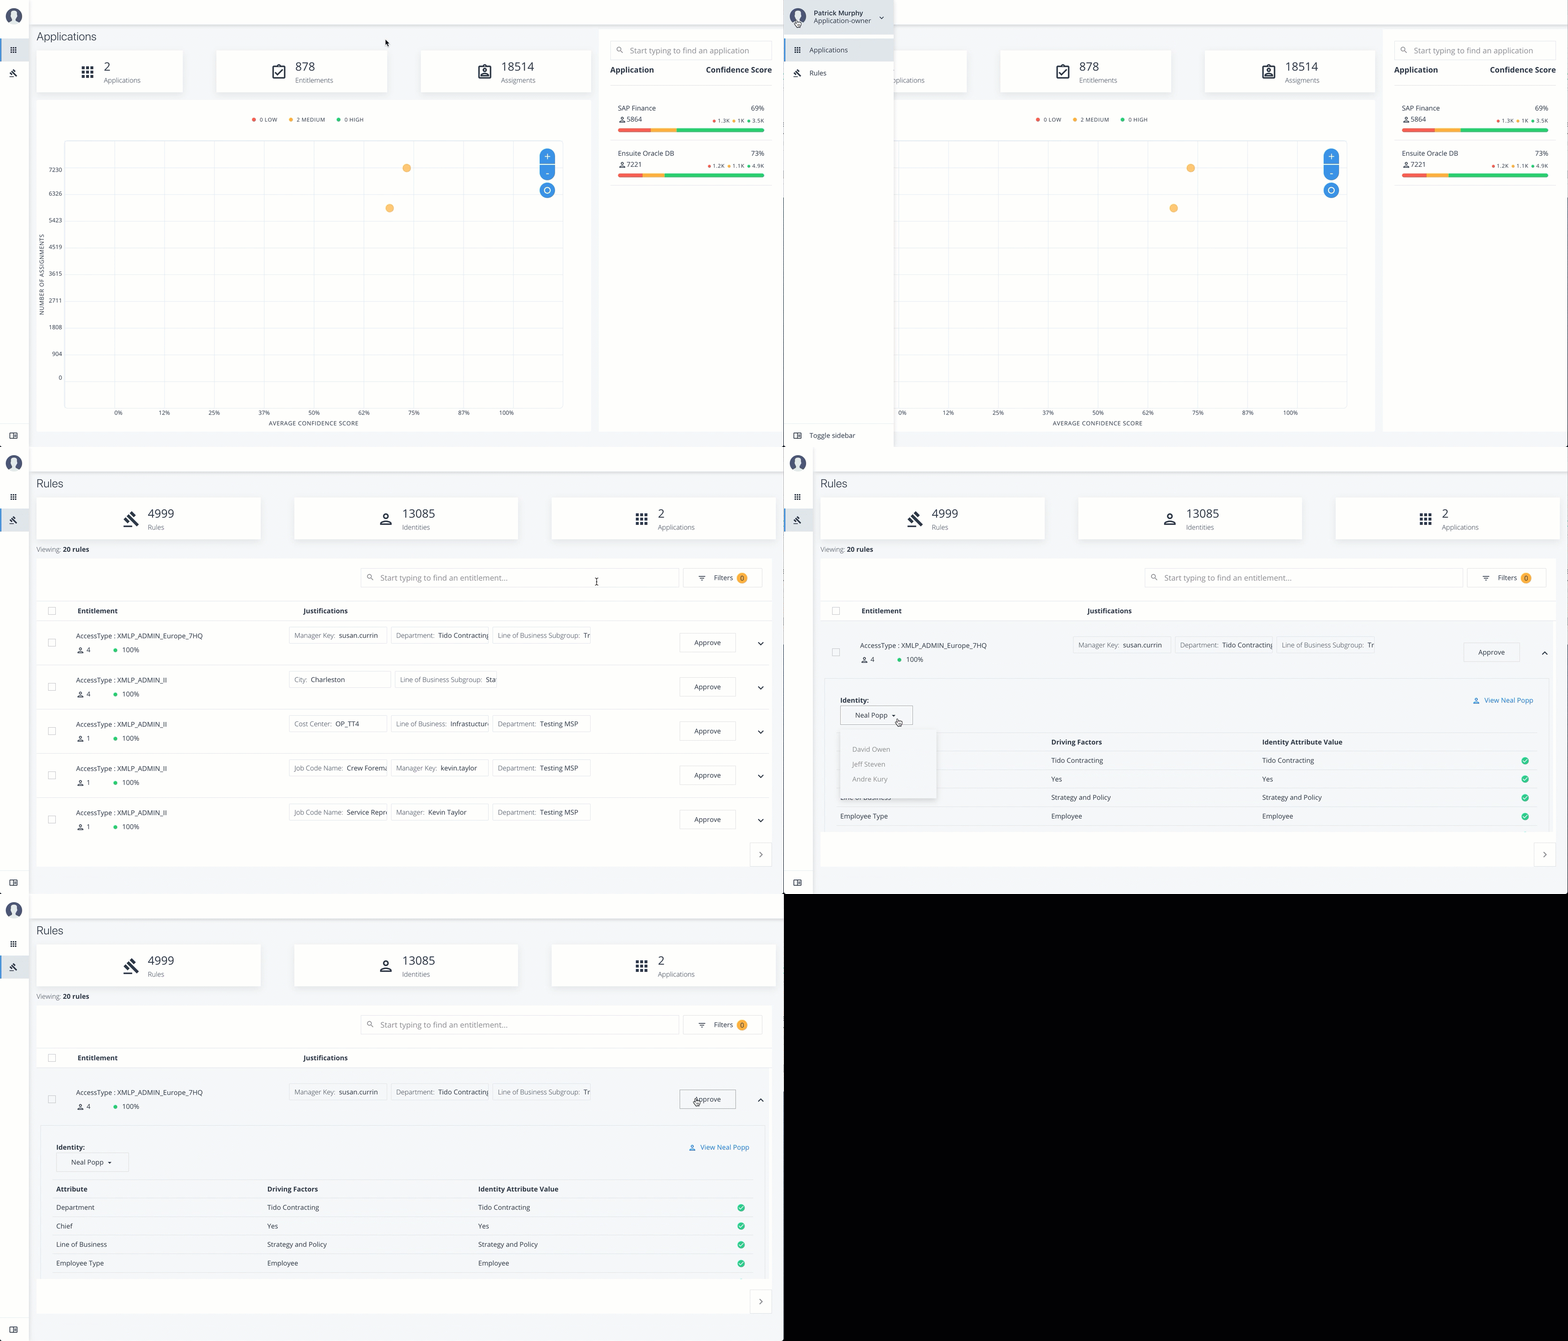
Follow these steps to apply rule justifications for an entitlement:
-
Log in to the Autonomous Identity console.
-
Click Rules.
-
On the Rules page, select an entitlement to view, and then click the down arrow to see the driving factors for the entitlement.
-
Under Identity, change to see another user’s attributes and driving factors. If you want to see the user’s entitlements page, click View <User>.
-
After researching the entitlement, click Approve. Click Auto Certify or Auto Request or both, and enter a reason for the approval. Click Submit Approval when ready.
You can also select all or multiple entitlements to do a bulk approve. Autonomous Identity only allows a single revoke action at a time.
Auto Certify indicates that any user who has this justification is automatically approved for this entitlement. Auto Request indicates that anyone who matches these set of criteria and may not already have access, automatically gets provisioned for this entitlement.
See it in action
