Creating requests
To create a new request, click on the New Request button on the top left of the My Requests page to reveal the create request form.
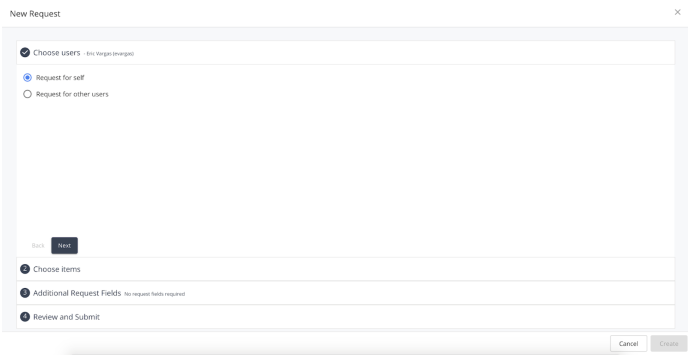
Create Request Form
The create request form consists of four sections that the user must complete in order to submit a request for access: Choose users, choose items, additional request fields, and review and submit. They are each described in detail below:
Choose Users
This section allows the requester to choose what users they would like to request access for. Two options are presented initially: Request for self or request for other users. The request for self option is a shortcut to allow the user to create a single requestee request targeting themselves. The request for others option will allow the user to search for and add one or more users to the request form individually. Note that this option can also be used to add the current user to the request, if requesting for access for yourself as well as others together.
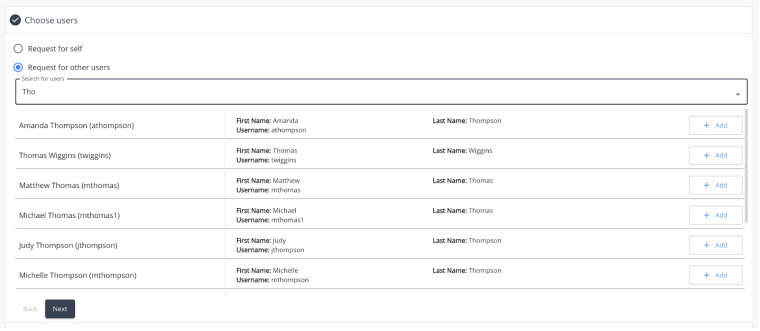
Choose Users Search
When searching for other users, simply enter in the target search term for the desired user into the search box at the top of the section. As the user types, the results table will begin to display based on the text entered and the users found. Each entry within the table will display some additional information about the user to help the requester identify the correct person. The fields that are used to search the user base are configurable by administrators, and may vary depending on the individual environment, however the default searchable fields are first name, last name, and username.
Once the desired user(s) has been found, clicking the ‘Add’ button on the right side of the user result will add them to the request. Once added, a chip for the selected user will be added to the search box at the top of the form to indicate which users are currently part of the request. The header of the Choose Users section will also be updated to reflect the names of the selected users as well.

Choose Items
The choose items section is where the user can add one or more requestable items to the request.
Choose Items Search
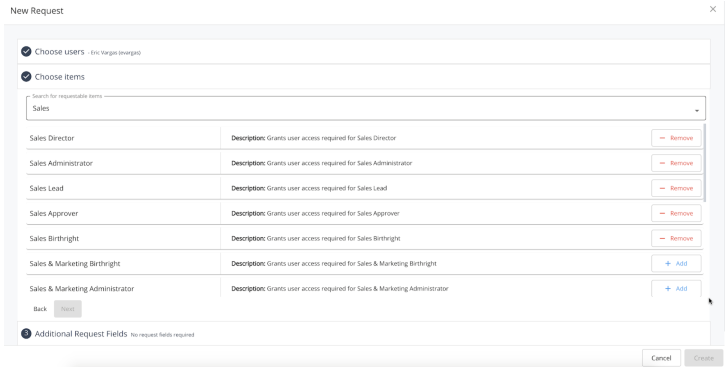
When searching for requestable items, simply enter in the target search term for the desired item into the search box at the top of the section. As the user types, the results table will begin to display based on the text entered and the items found. Each entry within the table will display some additional information about the requestable item to help the requester identify the correct access to request. The fields that are used to search the requestable item catalog are configurable by administrators, and may vary depending on the individual environment, however the default searchable field will include the display name.
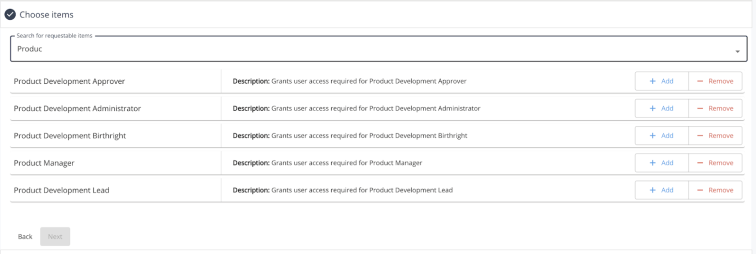
Once the desired item(s) has been found, there can be multiple options for adding an item to a request, depending on a few key factors (see below). By default, the user can choose to either ‘Add’ or ‘Remove’ the item within the request. Choosing ‘Add’ will add the item to the list of selected items to be requested and provisioned to the user. Choosing ‘Remove’ will add the item to the list of selected items to be requested to remove the access from the user. The two different request types (add/remove) can be differentiated by the color of the chip that appears within the item search field. Those items that are requests to add will appear in blue, while those that are requests for removal will appear highlighted in red.

Viewing User’s Current Access
If certain criteria within the request form are met, the requester will be able to see some of the user’s current access to assist in making their request. The criteria is as follows:
-
The request is for a single user only
-
The requestee is either the user themselves, or a direct report of the requester
If those conditions are satisfied, any requestable item searched for that is directly managed by IDM (a managed user attribute or relationship, not disconnected) displays only an Add button or Remove button depending on whether the user already has access to that item.
For example, if a user is creating a request for themselves, and searches for Role “A” which they already have access to, they will only see the ‘Remove’ option available for that item within the request If they search for Role “B” that they do not have access to, they will only see the ‘Add’ option available.
Any access that the requestee user does currently have access to will bubble up to the top of the item search results, ahead of any items that they do not currently have.
Additional Request Fields
Certain requestable items may require or allow the requester to complete additional form fields in order to submit their request for approval. If no items within the request have any request fields defined, then this section will be marked as ‘No request fields required.’ and will not be expandable within the form. The request form will simply advance the user past this section and directly into ‘Review and Submit.’
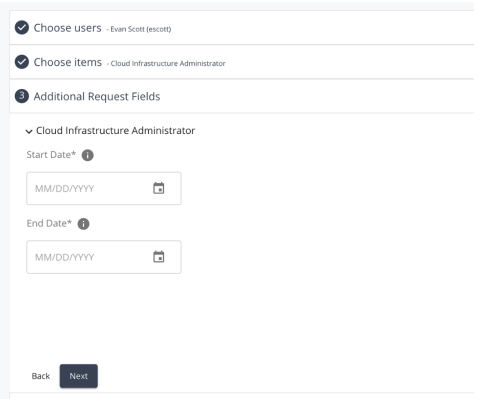
When a requestable item does have request fields defined, then the Additional Request Fields section will populate with the form as defined for each item. Each item will have its own individual fields grouped together in an expandable section denoted by the item name. Clicking on the carat icon to the left of the item name will expand or collapse that section accordingly.

A single request field consists of the following components:
-
Name - The name of the request field.
-
Required - Any field that is required in order to submit the form will be denoted with an asterix.
-
Information Icon - Hovering over the “i” icon will display additional information about that request field.
-
Input - The text field/date picker/select box/etc. where the value is to be entered.
Requests with Multiple Request Fields
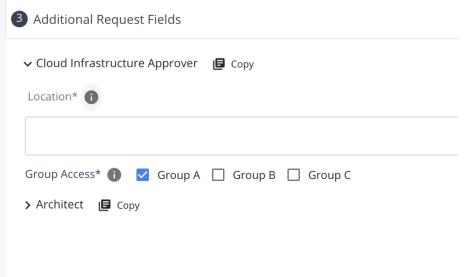
When requesting several items, it is likely that more than one of the items requires additional input within the request form. When that is the case, each item will have its own subsection with the Additional Request Fields section, denoted by the item name as mentioned above.
In addition, some of the chosen items may require the same fields to be submitted as the others. A common example of this would be multiple items that require a start and end date for the access to be provisioned. To save the user from having to potentially fill out the same form fields repeatedly, each item’s subsection will have a “copy” icon available to click when any of its request fields appear elsewhere in the form. When clicked, any matching field found within the request body will have its value copied from the current item. Using the example above, when filling out a request form for three items that all include a start and end date, the end user could fill out the dates for the first item, click the copy button, and then move on to submit the request.
Request Field Types
The following field types may appear within a create request form:
-
Text - Basic text entry field

-
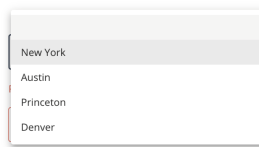
Select - Dropdown select menu from a preset list of options.
-
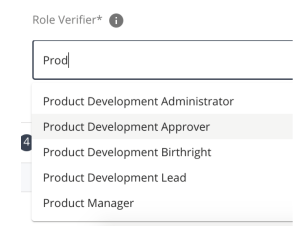
Typeahead - Search for a value among a list of existing objects.
-
Radio - Select one from a list of predefined options.

-
Checkbox - Select one or more from a list of predefined options.

-
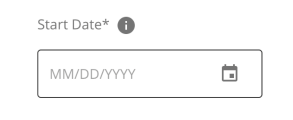
Datepicker - Choose a date from a calendar date picker.
-
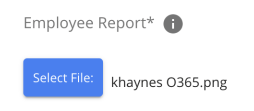
File - Choose a file to upload from your local machine.
Review
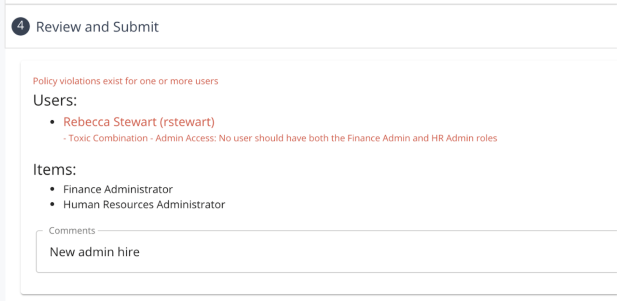
When all of the above three fields have been completed, the review section will be available to see all of the request contents before submitting for approval.
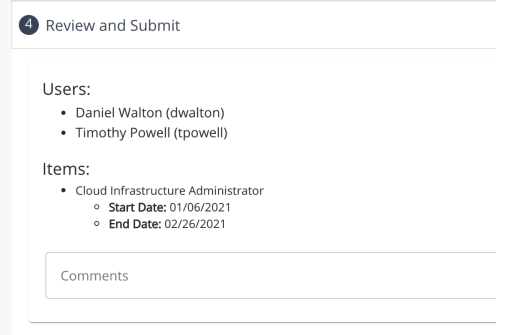
The review section is broken down into the users being targeted, the items being requested, and under each item, any request fields that were filled out during the process.
Additionally, there is a field available for the requester to make any general comments regarding the request to help with the process. Any comment made here will apply to all requestees and all items being targeted, and so will be visible to all approvers/admins/etc. This field is optional and is not required to submit a request.
Policy Violations
It is possible for administrators to enforce policy restrictions on the requests that users are able to submit. In the event that this functionality is enabled, any request that violates a policy defined in the system will not be eligible to submit within the request form. When a request violates one or more policies, and the user clicks create to attempt to submit the request, the user will be informed within the review section what policies are being violated, and by which user within the request. The error message displayed will contain the name of the policy, as well as a description of the policy, so that the requester can gain some insight as to what they are unable to request.
