Installation
This guide shows you how to install ForgeRock Access Management for access and federation management.
Unless you are planning a demo or test installation, read the Release Notes before you get started.
Prepare the environment for deployment
Prerequisites for deploying Access Management software.
Prepare the Java container
Prepare the application server of your choice.
Install AM
Install AM servers for high availability.
Prepare external stores
Covers identity, configuration, and policy/application stores.
Remove installations
Uninstall AM and start over.
Troubleshoot installations
Troubleshoot or repair an AM installation.
ForgeRock® Identity Platform serves as the basis for our simple and comprehensive Identity and Access Management solution. We help our customers deepen their relationships with their customers, and improve the productivity and connectivity of their employees and partners. For more information about ForgeRock and about the platform, see https://www.forgerock.com.
Download AM
The ForgeRock BackStage download site hosts downloads,
including a .zip file with all of the AM components,
the .war file, AM tools, the configurator, web and Java agents, Identity Gateway, and documentation.
Review the Software License and Subscription Agreement presented before you download AM files.
For each release of AM, you can download the entire package as a .zip file,
only the AM .war file, or only the administrative tools as a .zip archive.
The Archives only have the AM source code used to build the release.
After you download the .zip file, create a new directory for AM,
and unzip the .zip file to access the content.
$ cd ~/Downloads
$ mkdir openam && cd openam
$ unzip ~/Downloads/AM-7.2.2.zip
When you unzip the archive of the entire package, you get ldif, license, and legal directories in addition to the following files:
| File | Description |
|---|---|
|
The distribution During installation, the |
|
AM provides a utility with some cryptographic functionality used for creating Docker images. This utility is strictly for future use, and is not currently supported. |
|
AM provides a SOAP-based security token service (STS) server that issues tokens based on the WS-Security protocol.(1) |
|
AM provides an The |
|
AM provides configuration and upgrade tools for installing and maintaining your server. The |
|
AM provides a configuration file upgrade tool. For more information on converting configuration files for import into AM,
see the |
|
AM provides an AM Fedlet, a light-weight SAML v2.0 service provider. The Fedlet lets you set up a federated deployment without the need of a fully-featured service provider. |
|
AM provides an IDP Discovery Profile (SAMLv2 binding profile) for its IDP Discovery service. The profile keeps track of the identity providers for each user. |
|
Clean installs of AM with an embedded data store provide ready-made sample authentication trees to demonstrate how they can be put together. These sample trees are not installed by default on installs of AM with an external configuration store,
or if you are upgrading an existing instance of AM.
The |
|
AM provides a utility to help with creating a trust store for use with web authentication. See the |
(1) AM also provides REST-based STS service endpoints, which you can directly utilize on the AM server.
Customize the AM WAR file
The most basic installations of AM do not require you to customize the AM WAR file before deploying it. If you need to customize any AM extension points, you should add the new classes to the WAR file before deploying it.
|
To customize the secure cookie filter, refer to Secure cookie filter. |
You can also customize the AM user pages and package them into the WAR file.
For more information about the customizations to include in the WAR file, refer to Customize before upgrading.
Enable RSA SecurID support
To use the SecurID authentication module, you must first build an AM WAR file
that includes the supporting libraries, authapi.jar and crypto.jar, which you must obtain from RSA.
-
Unpack the AM
.warfile. For example:$ mkdir /tmp/openam $ cd /tmp/openam/ $ jar -xf ~/Downloads/openam/AM-7.2.2.war
-
Obtain the
authapi.jarand its dependency file,crypto.jarfrom RSA.Copy
authapi.jarinto theWEB-INF/libdirectory.For example:
$ cp /path/to/authapi-<VERSION>.jar WEB-INF/lib/
-
Pack up the AM
.warfile. For example:$ jar -cf ../openam.war *
-
Deploy the new
.warfile. For more information, see Deploy AM.In this example, the
.warfile to deploy is/tmp/openam.war.
Prepare the environment
Perform the following tasks to prepare your environment for AM:
|
For more information about supported operating systems and Java requirements, refer to Operating systems and Java. |
Prepare an FQDN
AM requires that you provide an FQDN when you configure it.
Before you set up AM, be sure that your system has an FQDN, such as openam.example.com.
For evaluation purposes, you can give your system an alias using the /etc/hosts file on UNIX systems
or %SystemRoot%\system32\drivers\etc\hosts on Windows.
For production deployments, make sure the FQDN is properly assigned using DNS.
Do not use the hostname localhost for AM, not even for testing purposes.
AM relies on browser cookies, which are returned based on the domain name.
You can set the cookie domain name value to an empty string for host-only cookies or to any non-top level domain.
For example, if you install AM and use openam.example.com as the host,
you can set the cookie domain name as example.com.
|
Do not configure a top-level domain as your cookie domain as browsers will reject them. Top-level domains are browser-specific. Some browsers, like Firefox, also consider special domains like Amazon’s web service (for example, ap-southeast-2.compute.amazonaws.com) to be a top-level domain. Check the effective top-level domain list at https://publicsuffix.org/list/effective_tld_names.dat to ensure that you do not set your cookie to a domain in the list. |
Prepare the Java environment
AM software depends on a Java runtime environment.
Check the output of the java -version command to make sure your version is supported
according to Java requirements.
|
It is important to keep your Java software up-to-date with the latest supported version.
Make sure that your |
The following table summarizes the high-level tasks required to configure your Java environment:
| Task | Resources |
|---|---|
Prepare your JDK. The suggestions in these sections pertain to AM deployments with the following characteristics:
|
|
Tune the JVM for AM ForgeRock provides guidance on how to tune the JVM for production, but you still need to tune it for garbage collection based on your environment. |
|
To configure JVM properties for proxy support, see Configuring AM for Outbound Communication. |
Settings for Oracle Java environments
When using an Oracle Java environment, set at least the following options:
-Xmx1g(minimum)-
AM requires at least a 1 GB heap. If you are including the embedded DS, AM requires at least a 2 GB heap, as 50% of that space is allocated to DS. Higher volume and higher performance deployments require additional heap space.
-XX:MetaspaceSize=256m-
Set the metaspace memory size to 256 MB.
-XX:MaxMetaspaceSize=256m-
Set the maximum metaspace memory size to 256 MB.
For additional JVM tuning and security recommendations, see Tune JVM settings.
Settings for OpenJDK Java environment
When using an OpenJDK Java environment, set at least the following options.
-Xmx1024m(minimum)-
AM requires at least a 1 GB heap. If you are including the embedded DS, AM requires at least a 2 GB heap, as 50% of that space is allocated to DS. Higher volume and higher performance deployments require additional heap space.
Recommended:
-Xmx2048m. -XX:MetaspaceSize=256m-
Set the initial metadata space size to 256 MB.
Tune JVM settings
This section gives some initial guidance on configuring the JVM for running AM when the deployment has a dedicated CTS token store, and AM is configured to use server-side sessions.
These settings provide a strong foundation to the JVM before a more detailed garbage collection tuning exercise, or as best practice configuration for production:
| JVM parameters | Suggested value | Description |
|---|---|---|
|
At least 1 GB (2 GB with embedded DS), in production environments at least 2 GB to 3 GB. This setting depends on the available physical memory, and on whether a 32- or 64-bit JVM is used. |
|
|
Set both to 256 MB |
Controls the size of the metaspace in the JVM |
|
60000 |
Controls the read timeout in the Java HTTP client implementation. This applies only to the Sun/Oracle HotSpot JVM. |
|
High setting: 30000 (30 seconds) |
Controls the connect timeout in the Java HTTP client implementation When you have hundreds of incoming requests per second, reduce this value to avoid a huge connection queue. This applies only to the Sun/Oracle HotSpot JVM. |
| JVM parameters | Suggested value | Description |
|---|---|---|
|
|
Controls the protocols used for outbound HTTPS connections from AM. Specify one or more of the following values, separated by commas:
This setting applies only to Sun/Oracle Java environments. |
|
|
Controls the protocol AM uses to connect to affected external resources. Specify one or more of the following values, separated by commas:
This setting overrides the default server value. For details, refer to advanced properties. |
| JVM parameters | Suggested value | Description |
|---|---|---|
|
Verbose garbage collection reporting. |
|
|
|
Logs detailed information about garbage collection.
When using the |
|
Out of Memory errors generate a heap dump automatically. |
|
|
|
Location of the heap dump. |
|
Prints a heap histogram when the JVM receives a SIGTERM signal. |
Set maximum file descriptors and processes
AM is not file-descriptor intensive. However, each DS instance in your environment should have access to at least 65,536 file descriptors to handle multiple client connections.
Ensure that every DS instance is allocated enough file descriptors.
For example, use the ulimit -n command to check the limits for a particular user:
$ su - opendj
$ ulimit -n
65536It may also be necessary to increase the number of processes available to the user running the AM processes.
For example, use the ulimit -u command to check the process limits for a user:
$ su - openam
$ ulimit -u
2048|
Before increasing the file descriptors for the DS instance, ensure that the total amount of file descriptors configured for the operating system is higher than 65,536. Otherwise, if the DS instance uses all the file descriptors, the operating system will run out of file descriptors. This may prevent other services from working, including those required for logging in the system. |
Refer to your operating system’s documentation for instructions on how to display and increase the file descriptors or process limits for the operating system and for a given user.
For more information about setting up your environment for DS, see Operating systems in the DS Release Notes.
Prepare a web application container
As a Java application, AM must be deployed in a Java container. For a list of supported containers, refer to Application containers.
The following table summarizes the high-level tasks required to prepare your container:
| Task | Resources |
|---|---|
Prepare the container for AM Follow the instructions for your container. |
|
Secure the container There are many ways to deploy and configure your environment for AM. ForgeRock recommends that you enforce HTTPS connections to AM. If a Java Security Manager is enabled for your web application container, add permissions before installing AM. |
Apache Tomcat
AM examples often use Apache Tomcat (Tomcat) as the deployment container.
In these examples, Tomcat is installed on openam.example.com and listens on the default ports without a Java
Security Manager enabled.
JVM startup
AM core services require a minimum JVM heap size of 1 GB, and a metadata space size of up to 256 MB. If you are evaluating AM and using the embedded DS, you require at least a 2 GB heap, as 50% of that space is allocated to DS. See Prepare the Java environment for details.
Set a CATALINA_OPTS environment variable with the appropriate tuning for your environment.
For example, add the following in the $CATALINA_BASE/bin/setenv.sh file:
export CATALINA_OPTS="$CATALINA_OPTS -server -Xmx2g -XX:MetaspaceSize=256m -XX:MaxMetaspaceSize=256m"Some versions of Microsoft Edge support the Expires header attribute
instead of the Max-Age header attribute, which may cause SAML v2.0 and agent logout sequences to fail.
If you have set the org.apache.catalina.STRICT_SERVLET_COMPLIANCE Tomcat property to true,
add the org.apache.tomcat.util.http.ServerCookie.ALWAYS_ADD_EXPIRE property
in the $CATALINA_BASE/bin/setenv.sh file, to add the Expires attribute to the headers:
export CATALINA_OPTS="$CATALINA_OPTS -server -Xmx2g -XX:MetaspaceSize=256m -XX:MaxMetaspaceSize=256m \
-Dorg.apache.tomcat.util.http.ServerCookie.ALWAYS_ADD_EXPIRES=true"Slashes in resource names
Some AM resources have names that can contain slash characters (/), for example, in policy names, application names, and SAML v2.0 entities. These slash characters can cause unexpected behavior when running AM on Tomcat.
In development environments, a possible workaround is to configure Tomcat to allow encoded slash characters by adding
the org.apache.tomcat.util.buf.UDecoder.ALLOW_ENCODED_SLASH=true property to the CATALINA_OPTS variable; for example:
export CATALINA_OPTS="$CATALINA_OPTS -server -Xmx2g -XX:MetaspaceSize=256m -XX:MaxMetaspaceSize=256m \
-Dorg.apache.tomcat.util.buf.UDecoder.ALLOW_ENCODED_SLASH=true"|
Do not enable |
Cookie domains
Set the cookie domain name value to an empty string (for host-only cookies) or to any non-top level domain (for domain cookies).
For example, if you install AM on openam.example.com, you can set the cookie domain name to example.com.
| Because host-only cookies are more secure than domain cookies, you should use host-only cookies unless you have a good business case for using domain cookies. |
Refer to Install an instance to configure the cookie domain during installation.
Log request times
Tomcat provides components called valves that can be configured to track access to resources. The Access Log Valve outputs information about request activity to log files, for you to analyze or use when troubleshooting.
To record request times in the Access Log Valve log, configure the pattern attribute to include the following values:
-
%D- Time taken to send an entire request, in millis. This is the total processing time and may be affected by network conditions. -
%F- Time taken to commit the response, in millis (not available in Tomcat 7 or earlier).
Example Valve element in server.xml:
<Valve className="org.apache.catalina.valves.AccessLogValve" directory="logs"
       prefix="localhost_access_log" suffix=".txt"
pattern="%h %l %u %t "%r" %s %b %D %F" />For information about the Access Log Valve configuration, refer to the documentation for Tomcat 7.0, or
Tomcat 8.0, which includes the %F value.
Encoding and security
ForgeRock recommends that you edit the Tomcat <Connector> configuration to set URIEncoding="UTF-8".
UTF-8 URI encoding ensures that URL-encoded characters in the paths of URIs are correctly decoded by the container.
This is particularly useful if your applications use the AM REST APIs and some identifiers,
such as user names, contain special characters.
You should also ensure the sslProtocol property is set to TLS,
which disables the potentially vulnerable SSL v3.0 protocol.
<Connector> configuration elements are found in the configuration file, /path/to/tomcat/conf/server.xml.
The following excerpt shows an example <Connector> with the URIEncoding and sslProtocol attributes
set appropriately:
<Connector port="8443" protocol="HTTP/1.1" SSLEnabled="true"
 maxThreads="150" scheme="https" secure="true"
clientAuth="false" sslProtocol="TLS" URIEncoding="UTF-8" />When you have finished setting up Apache Tomcat, you should enforce HTTPS connections to AM. For details, refer to Secure connections to the AM container.
JBoss and WildFly
You can deploy AM on JBoss AS, JBoss EAP, and WildFly. The procedures listed here provide steps for configuring JBoss AS, JBoss EAP, and WildFly for AM.
After configuring JBoss or WildFly, you then prepare AM for deployment
by making a few changes to the contents of the AM .war archive.
Prepare JBoss or WildFly
-
Stop JBoss or WildFly.
-
The default JVM settings do not allocate sufficient memory to AM. This step shows one method you can use to modify the JVM settings. For other methods, refer to the JBoss Configuring JVM Settings page, or the WildFly JVM Settings page.
-
Open the
standalone.conffile in the/path/to/jboss/bindirectory for JBoss or WildFly in standalone mode. -
Check the JVM settings associated with
JAVA_OPTS.Change the JVM heap size to
-Xmx1g. The default JVM heap size for some versions of JBoss might already exceed the recommended value. If you are evaluating AM and using the embedded version of DS, the minimum heap size may be higher. For details on the JVM options to use, refer to Prepare the Java environment.Change the metaspace size to
-XX:MaxMetaspaceSize=256mif the default size does not exceed this amount. -
Set the following JVM
JAVA_OPTSsetting in the same file:-Dorg.apache.tomcat.util.http.ServerCookie.ALWAYS_ADD_EXPIRES=trueVerify that the headers include the
Expiresattribute rather than onlyMax-Ageas some versions of Microsoft Edge do not supportMax-Age.
-
-
Edit the WildFly configuration to allow HTTP connections from any IP address.
In the
/path/to/wildfly/standalone/configuration/standalone.xmlfile, locate the<interface name="public">interface (around line 512 of the file) and change the value to<any-address/>:<interface name="public"> <any-address/> </interface>xml -
Set up WildFly for Social Authentication, by performing the following steps:
-
Ensure the WildFly server is running.
-
Go to the WildFly Path.
-
In the
$JBOSS_HOME/bindirectory, run thejboss-cli.shscript file:$ ./bin/jboss-cli.shbash -
Type "connect" to connect to the server.
-
Enable use of the equals (=) symbol in cookies by running the following command:
For example:
[standalone@localhost:9990 /] /subsystem=undertow/server=default-server/ http-listener=default:write-attribute(name=allow-equals-in-cookie-value, value=true) { "outcome" => "success", "response-headers" => { "operation-requires-reload" => true, "process-state" => "reload-required" } } -
Restart WildFly.
-
-
Now deploy the
openam.warfile into the appropriate deployment directory. The directory varies depending on whether you are running in standalone or domain mode.
Prepare AM for JBoss and WildFly
To prepare AM to run with JBoss or WildFly, you must change the default AM war file.
JBoss and WildFly deploy applications from different temporary directories every time you restart the container,
which would require reconfiguring AM. To avoid problems, change the AM war file as follows:
-
If you have not already done so, create a temporary directory and expand the
AM-7.2.2.warfile. For example:$ cd /tmp $ mkdir /tmp/openam && cd /tmp/openam $ jar xvf ~/Downloads/AM-7.2.2.warbash -
Locate the
bootstrap.propertiesfile in theWEB-INF/classesdirectory of the expandedwararchive. Update the# configuration.dir=line in this file to specify a path with read and write permissions, then save the change.# This property should also be used when the system user that # is running the web/application server process does not have # a home directory. i.e. System.getProperty("user.home") returns # null. configuration.dir=/my/readwrite/config/dirproperties -
If you are deploying AM on JBoss AS or JBoss EAP, remove the
jboss-all.xmlfile from theWEB-INFdirectory of the expandedwararchive.Do not remove this file if you are deploying AM on WildFly.
-
If you are deploying AM on WildFly 12, remove the
jul-to-slf4j-1.7.21.jarfile from theWEB-INF/libdirectory of the expandedwararchive. -
Rebuild the
openam.warfile.$ jar cvf ../openam.war *bash
IBM WebSphere Liberty
To deploy AM in IBM WebSphere Liberty, perform the following steps:
-
Update the JVM options as described in Prepare the Java environment.
-
Customize the
AM-7.2.2.warfile as described in Prepare AM for WebSphere. -
After deploying AM, configure WebSphere as described in Prepare WebSphere.
Prepare AM for WebSphere
To prepare AM to run in WebSphere, change the AM .war file to ensure that the AM upgrade process
is able to find the AM configuration files.
You must make this change whenever you deploy a new .war file as part of an AM upgrade.
If you are installing on Windows, use slashes (/) in the paths listed here, and not backslashes (\).
|
-
Create a temporary directory and expand the
AM-7.2.2.warfile. For example:$ cd /tmp $ mkdir /tmp/openam && cd /tmp/openam $ jar xvf ~/Downloads/AM-7.2.2.warbash -
Locate the
bootstrap.propertiesfile in theWEB-INF/classesdirectory of the expandedwarfile.Update the
# configuration.dir=line in thebootstrap.propertiesfile to specify a path with read and write permissions. For example:# This property should also be used when the system user that # is running the web/application server process does not have # a home directory. i.e. System.getProperty("user.home") returns # null. configuration.dir=/my/readwrite/config/dirproperties -
Rebuild the
AM-7.2.2.warfile:$ jar cvf ../AM-7.2.2.war *bash
Prepare WebSphere
In addition to preparing the AM WAR file, follow these steps to configure WebSphere for AM after you deploy AM into WebSphere:
-
Load classes from AM bundled libraries before loading classes from libraries delivered with Liberty:
-
In the WebSphere Liberty administration console, go to Explore > Configure > server.xml.
-
Select the
openamweb application, click Add Child, and select Classloader from the list. -
In the Delegation field, select parentLast.
-
Save your work.
-
-
If your environment uses SOAP, add the SOAP-related properties to the JVM.
In the
AM-config-dir, create a file namedjvm.options, and add the following properties:-Djavax.xml.soap.MessageFactory=com.sun.xml.internal.messaging.saaj.soap.ver1_1.SOAPMessageFactory1_1Impl -Djavax.xml.soap.SOAPFactory=com.sun.xml.internal.messaging.saaj.soap.ver1_1.SOAPFactory1_1Impl -Djavax.xml.soap.SOAPConnectionFactory=com.sun.xml.internal.messaging.saaj.client.p2p.HttpSOAPConnectionFactory -Djavax.xml.soap.MetaFactory=com.sun.xml.internal.messaging.saaj.soap.SAAJMetaFactoryImpl -Dcom.ibm.websphere.webservices.DisableIBMJAXWSEngine=true
Secure connections to the AM container
There are many ways to deploy and configure your environment for AM, but we recommend that you enforce HTTPS connections to AM. For more information about securing AM, see Security.
The container where AM runs requires a certificate to set up secure connections. You can install either CA-signed or self-signed certificates in the container where AM runs, although you should have in mind that you will need to configure your applications to trust your self-signed certificates.
The following is an example about how to configure Apache Tomcat for HTTPS:
Configure Apache Tomcat for HTTPS
There are several ways of completing the tasks ahead, and it is beyond the scope of this document to explore them all.
If this procedure does not suit your environment, refer to your CA vendor documentation,
the keytool command documentation, or Java container documentation for more information.
-
Stop Apache Tomcat.
-
Ensure you have a keystore containing the appropriate certificates:
-
If you have CA certificates, import them in a new keystore using the
keytoolcommand. For example, if you have root, intermediate, and primary certificates, import them in the same keystore you used when generating your certificate signing request (CSR):$ keytool -importcert -alias root -file myrootCA.cert \ -keystore /path/to/tomcat_keystore.pfx -storetype PKCS12 $ keytool -importcert -alias intermediate -file myintCA.cert \ -keystore /path/to/tomcat_keystore.pfx -storetype PKCS12 $ keytool -importcert -alias mysite.example.com -file mypriCA.cert \ -keystore /path/to/tomcat_keystore.pfx -storetype PKCS12
-
If you need a self-signed certificate, create a new self-signed key pair with the
keytoolcommand.For example:
$ cd /path/to/tomcat/conf/
$ keytool -genkey -alias openam.example.com -storetype PKCS12 -keyalg RSA -validity 730 \
  -keysize 2048 -keystore tomcat_keystore.pfx -dname 'CN=openam.example.com' -ext 'san=dns:openam.example.com'
-
-
Create an SSL connector configuration in Apache Tomcat’s
conf/server.xmlconfiguration file, and specify your keystore file, type, and password.Note that there are different types of SSL connectors, and that implementation details may change across Tomcat versions. This example creates a JSSE connector in Tomcat as provided as part of the Java runtime:
<Connector port="8443" protocol="org.apache.coyote.http11.Http11NioProtocol" maxThreads="200" SSLEnabled="true" scheme="https" secure="true" keystoreFile="/path/to/tomcat_keystore.pfx" keystoreType="PKCS12" keystorePass="keystore_password" clientAuth="false" sslProtocol="TLS" />xmlYou may need different settings depending on your configuration and version of Apache Tomcat. See the documentation for your version for more information.
-
Start Tomcat.
-
Verify that you can connect to Apache Tomcat on port 8443 over HTTPS.
If you used self-signed certificates, your browser would not trust the certificate, because the certificate is self-signed and not signed by any of the CAs stored in your browser.
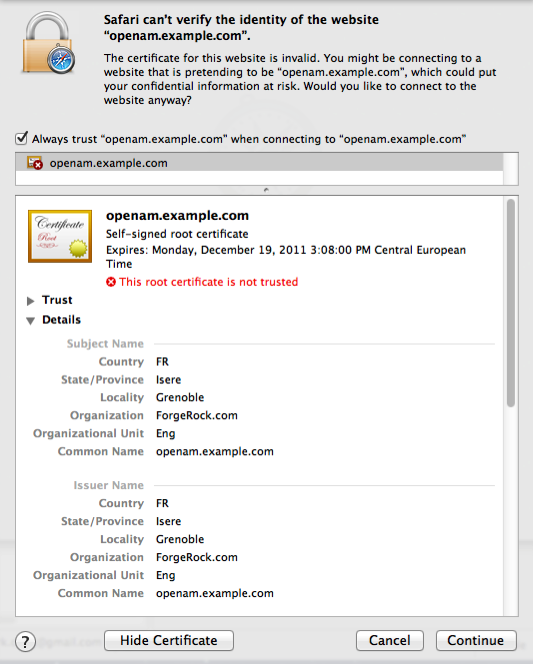 Figure 1. Unknown Certificate
If you recognize the subject and issuer of your certificate, and so can choose to trust the certificate, save it into your browser’s trust store.
-
Deploy and configure AM.
-
To share the self-signed certificate in your container with other applications or servers, see Share self-signed certificates.
Share self-signed certificates
How you configure the containers where AM and your applications run to use self-signed certificates depends on your web application server or web server software. The following basic principles apply:
-
First, your container requires its own certificate for setting up secure connections.
-
Second, the clients connecting must be able to trust the container’s certificate. Generally, this means that clients recognize the container’s certificate because they have a copy of the public certificate stored somewhere the client trusts.
-
Third, if you use certificate authentication in AM, AM must also be able to find a copy of the client’s public certificate to trust the client, most likely by finding a match with the certificate stored in the client profile from the identity repository. How you include client certificates in their identity repository entries depends on your identity repository more than it depends on AM.
Some client applications let you trust certificates blindly. This can be helpful when working in your lab or test environment with self-signed certificates. For example, you might want to use HTTPS with the AM RESTful API without having the client recognize the self-signed server certificate:
$ curl \
--request POST \
--header "Content-Type: application/json" \
--header "X-OpenAM-Username: demo" \
--header "X-OpenAM-Password: Ch4ng31t" \
--header "Accept-API-Version: resource=2.0, protocol=1.0" \
'https://openam.example.com:8443/openam/json/realms/root/realms/alpha/authenticate'
{
    curl: (60) Peer certificate cannot be authenticated with known CA certificates
}The curl command performs SSL certificate verification by default,
using a "bundle" of CA-signed public keys.
If the default bundle file is not adequate, you can specify an alternate file using the --cacert option.
If this HTTPS server uses a certificate signed by a CA represented in the bundle,
the certificate verification probably failed due to a problem with the certificate
(it might be expired, or the name might not match the domain name in the URL).
If you would like to turn off curl’s verification of the certificate for test purposes only,
use the --insecure option.
$ curl \
--request POST \
--insecure \
--header "Content-Type: application/json" \
--header "X-OpenAM-Username: demo" \
--header "X-OpenAM-Password: Ch4ng31t" \
--header "Accept-API-Version: resource=2.0, protocol=1.0" \
'https://openam.example.com:8443/openam/json/realms/root/realms/alpha/authenticate'
{
"tokenId":"rMLhJjWVo…MAAlMxAAA.*",
"successUrl":"/openam/console",
"realm":"/alpha"
}When you use a self-signed certificate for your container, clients connecting must be able to trust the container certificate. Your browser makes this an easy, but manual process. For other client applications, you must import the certificate into the truststore used by the client. By default, Java applications can use the $JAVA_HOME/lib/security/cacerts
store. The default password is changeit.(1)
The following steps demonstrate how to import a self-signed certificate into the Java cacerts store:
-
Export the certificate from the keystore:
$ cd /path/to/tomcat/conf/
$ keytool \
-exportcert \
-alias openam.example.com \
-file openam.crt \
-storetype JCEKS
-keystore keystore.jceks
Enter keystore password:
Certificate stored in file <openam.crt>;
bash -
Import the certificate into the trust store:
$ keytool \
-importcert \
-alias openam.example.com \
-file openam.crt
-trustcacerts \
-keystore $JAVA_HOME/lib/security/cacerts
Enter keystore password:
Owner: CN=openam.example.com, OU=Eng, O=ForgeRock.com, L=Grenoble, ST=Isere,
C=FR
Issuer: CN=openam.example.com, OU=Eng, O=ForgeRock.com, L=Grenoble, ST=Isere,
C=FR
Serial number: 4e789e40
Valid from: Tue Sep 20 16:08:00 CEST 2011 until: Mon Dec 19 15:08:00 CET 2011
Certificate fingerprints:
MD5:  31:08:11:3B:15:75:87:C2:12:08:E9:66:00:81:61:8D
SHA1: AA:90:2F:42:0A:F4:A9:A5:0C:90:A9:FC:69:FD:64:65:D9:78:BA:1D
Signature algorithm name: SHA1withRSA
Version: 3
Trust this certificate? [no]: yes
Certificate was added to keystore
bash
(1) Alternatively, you can specify the trust store for a Java application,
such as -Djavax.net.ssl.trustStore=/path/to/truststore.jks -Djavax.net.ssl.trustStorePassword=changeit.
Use stronger encryption algorithms
AM encrypts and decrypts system passwords and the keys used in the configuration, and by components such as agents. The default encryption algorithm is Java Cryptography Extension (JCE) PBEWithMD5AndDES.
If you need a more secure encryption algorithm, use the Advanced Encryption Standard (AES) Key Wrap algorithm (RFC3394). AM’s implementation of AES Key Wrap uses the Password-Based Key Derivation Function 2 (PBKDF2) (RFC2898) with HMAC-SHA1. This lets you choose key size hash algorithms, such as SHA256, SHA384, or SHA512.
|
The AES Key Wrap encryption algorithm is only enabled when installing AM. There is no current upgrade path for existing installations. The Security Token Service (STS) does not support the AES Key Wrap encryption algorithm. Do not deploy the STS in an AM instance configured to use the AES Key Wrap encryption algorithm. You must also Configure |
Configure AES Key Wrap encryption for Tomcat
-
Edit your container startup scripts, for example
setenv.sh, to set the following JVM system properties in Tomcat:JAVA_OPTS="$JAVA_OPTS -Dcom.iplanet.security.encryptor=org.forgerock.openam.shared.security.crypto.AESWrapEncryption"(1) JAVA_OPTS="$JAVA_OPTS -Dorg.forgerock.openam.encryption.key.iterations=10000"(2) JAVA_OPTS="$JAVA_OPTS -Dorg.forgerock.openam.encryption.useextractandexpand=true"(3) JAVA_OPTS="$JAVA_OPTS -Dorg.forgerock.openam.encryption.key.size=256"(4) JAVA_OPTS="$JAVA_OPTS -Dorg.forgerock.openam.encryption.key.digest=SHA512"(5) JAVA_OPTS="$JAVA_OPTS -Dorg.forgerock.openam.encryption.padshortinputs"(6)1 Enables use of AES Key Wrap encryption. 2 Specifies the iteration count of the encryption key. Large iteration counts, for example, of 20,000, slow down brute-force attacks when passwords are of low quality (less than 20 characters and easy to predict). AM does not have an iteration count requirement. However, it will log a warning if both of the following conditions are true: -
The number of iterations is less than 10,000.
-
The AM encryption key is less than 20 characters long.
3 Enables the algorithm introduced in AM 7.1 that reduces the performance cost of AES Key Wrap encryption even when high iteration counts are used. If this property is unset, and you configured a large iteration count, AM startup times may see a performance impact if there are many agents in your deployment. Determine the optimal iteration count based on the security and performance requirements of your deployment. 4 Specifies the size of the encryption key. Configure the key size to meet the needs of your deployment. 5 Specifies the digest algorithm. Possible values are SHA1,SHA256,SHA384, orSHA512. Configure the digest algorithm to meet the needs of your deployment.6 For systems running Java 17, this property pads short inputs (less than 8 bytes). If you are using Java 17 with AES Key Wrap Encryption, enable this system property and re-encrypt any short system passwords that have already been encrypted. If you do not do this, AM will be unable to decrypt the short values. You cannot change these configuration parameters once AM has been installed. -
Configure ssoadm for AES Key Wrap encryption
After you enable AES key wrap encryption, update the ssoadm command for it to work with the new encryption settings.
Add the following properties to the /path/to/ssoadm/setup and /path/to/ssoadm/bin/ssoadm commands:
-Dcom.iplanet.security.encryptor=org.forgerock.openam.shared.security.crypto.AESWrapEncryption
-Dorg.forgerock.openam.encryption.key.iterations=10000
-Dorg.forgerock.openam.encryption.key.size=256
-Dorg.forgerock.openam.encryption.key.digest=SHA512Deploy AM
After you have downloaded AM software, deploy it to your installed application container.
Deploying AM only extracts the files into the application container, prior to installation and configuration. Deploying AM also makes LDIF files available, which can be used to prepare external data stores for use with AM.
|
After deploying AM, but before installation, your application container serves AM’s installer (or upgrader, if performing an upgrade) user interfaces. We recommend that any external network access to the application container is suspended until the install, or upgrade, is complete. When complete, AM prevents access to the installer, or upgrader UI itself. |
The AM-7.2.2.war file contains the AM server.
How you deploy the .war file depends on your web application container.
-
Deploy the
.warfile on your container.For example, copy the file to deploy on Apache Tomcat.
$ cp AM-7.2.2.war /path/to/tomcat/webapps/openam.war
In development or demonstration deployments, change the WAR file name to
openam.warwhen deploying in Tomcat, so that the deployment URI is/openam.-
Change the file name to something other than
openam.warwhen deploying so that the deployment URI is not/openam. In a production environment, your deployment URI should not disclose the kind of software it is hosting. -
AM requires a deployment URI with a non-empty string after
/. Do not deploy AM in the root context. Do not rename the.warfile toROOT.warbefore deploying on Tomcat, for example.
It can take several seconds for AM to be deployed in your container.
-
-
Go to the initial configuration screen. For example,
https://openam.example.com:8443/openam.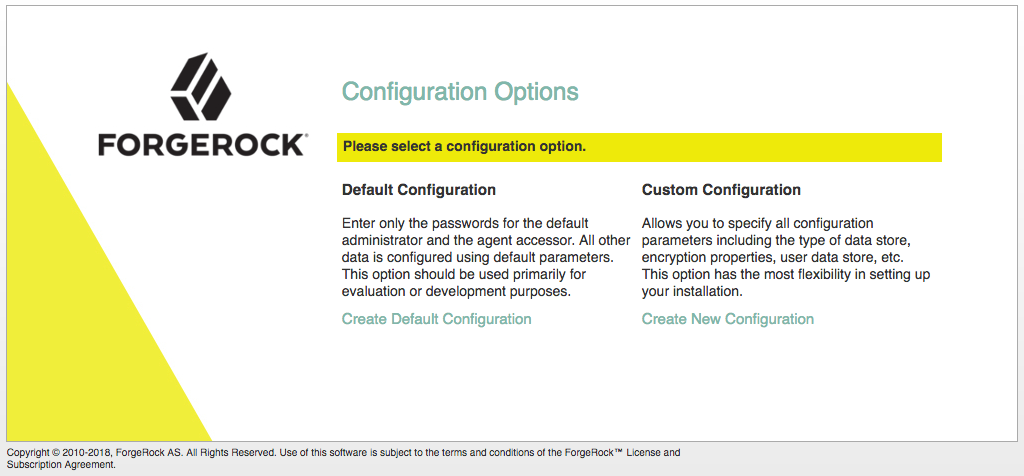
AM is now ready for installation.
-
Proceed to configuring external data stores using the files created during deployment. See Prepare external stores.
Prepare external stores
You need at least one DS server to store AM data. AM has several distinct data types; for example, configuration data, information about identities, client applications, policies, sessions, and so on.
Apart from identity data, AM stores all data after the installation process in its configuration store. This keeps basic deployments simple.
For advanced and high-load deployments, you can configure different sets of replicated DS servers to keep distinct data types separate and to tune DS for different requirements.
AM supports following DS data stores:
| Store name | Type of data | Required during installation? |
|---|---|---|
Configuration store |
Stores the properties and settings used by the AM instance. |
Yes |
Identity or user store |
Stores identity profiles; that is, information about the users, devices, or things that authenticate to your systems. You can also configure AM to access existing directory servers to obtain identity profiles. |
No, but you can configure one during the installation process In production deployments, you must configure an external identity store, or configure AM to access an existing identity store. |
Policy store |
Stores policy-related data, such as policies, policy sets, and resource types. |
No |
Application store |
Stores application-related data, such as web and Java agent configurations, federation entities and configuration, and OAuth 2.0 client definitions. |
No |
CTS token store |
Stores information about sessions, SAML v2.0 assertions, OAuth 2.0 tokens, and session denylists and allowlists. |
No |
UMA store |
Stores information about UMA resources, labels, audit messages, and pending requests. |
No |
The following table lists the supported directory servers for storing different data types:
| Directory server | Versions | Configuration | Apps / policies | CTS | Identities | UMA |
|---|---|---|---|---|---|---|
Embedded ForgeRock Directory Services(1) |
7.2.1 |
✔ |
✔ |
✔ |
✔ |
✔ |
External ForgeRock Directory Services |
6 and later |
✔ |
✔ |
✔ |
✔ |
✔ |
File system-based |
N/A |
✔ |
||||
Oracle Unified Directory |
11g R2 |
✔ |
||||
Oracle Directory Server Enterprise Edition |
11g |
✔ |
||||
Microsoft Active Directory |
2016, 2019 |
✔ |
||||
IBM Tivoli Directory Server |
6.4 |
✔ |
(1) Demo and test environments only.
The procedure for preparing external directory servers for AM to use is similar for each data type and includes the following steps:
-
If you don’t have an existing directory server, install the external directory server software; for example, Directory Services.
-
As the directory administrator, you may need to perform the following steps:
-
Apply the relevant schema to the directory.
-
Create indexes to optimize data retrieval from the directory server.
-
Create a user account with the minimum required privileges for AM to bind to the directory server and access necessary data.
-
To prepare the external stores AM needs during installation, refer to the following pages:
Where do I find more information about the other external stores?
You can configure all data stores except the configuration store after you install AM:
Prepare the truststore
Directory Services requires secure connections, using LDAPS. To connect to a DS server securely, AM needs access to DS’s CA certificate. AM also needs access to CA certificates for making secure connections to other sites; for example, connections to social providers using HTTPS.
To give AM access to these certificates, you create a truststore that contains the certificates, and configure AM’s web application container to use that truststore when starting up.
AM uses a single truststore for LDAPS and outbound HTTPS connections. This truststore must contain the CA certificates of the sites with which AM communicates securely.
By default, Apache Tomcat loads the truststore configured for its JVM (for example, $JAVA_HOME/JRE/lib/security/cacerts).
The default JVM truststore contains multiple CA certificates. Its password, by default, is changeit.
As a best practice, create a new truststore with the certificates required for your AM deployment, then configure
your container to use it. Don’t add the DS CA certificate to the JVM’s truststore because JVM updates are likely
to overwrite the cacerts file.
To keep all existing CA certificates, you can copy the cacerts keystore file, change its password to a secure one,
and import the DS CA certificate into it. Then, configure your web application container (for example, Apache Tomcat)
to load that file as its truststore.
|
Using a separate truststore for AM means that updates to the JVM truststore in patch releases aren’t taken into account. This can cause operational issues, for example, when distrusted root CA certificates are removed, or when new root CA certificates are added. To mitigate this risk, update the AM truststore periodically to reflect the latest JVM truststore settings. |
What if I am evaluating AM using an embedded DS?
If you are installing AM for evaluation purposes,
AM creates a copy of your JDK’s default lib/security/cacerts truststore, names it truststore,
and places it in /path/to/openam/security/keystores/.
AM then attempts to add the DS self-signed certificate to that store, with an alias of ds-ca-cert.
If the lib/security/cacerts truststore does not have the default password of changeit,
and/or if it does not have at least 644 permissions, then AM installation will fail,
as it will not be able to open the truststore to add the DS certificate.
|
Create a truststore for AM
These steps create a copy of the default JVM truststore, and configure the AM web application container to use the new truststore:
-
Copy the default truststore; for example,
$JAVA_HOME/lib/security/cacerts, name ittruststore, and place it in a directory of your choice:$ cp $JAVA_HOME/lib/security/cacerts /path/to/truststorebashIf you place the truststore in the
/path/to/openamdirectory before you install AM, the installation process detects that the directory is not empty and the installation fails.After AM is installed, you can move the truststore to a different directory. For example, the
/path/to/openam/security/keystoresdirectory. -
For improved security, change the default password for the truststore.
The default password of the $JAVA_HOME/lib/security/cacertstruststore ischangeit.Use the
keytool -storepasswdoption to change the default password:$ keytool -storepasswd -keystore /path/to/truststore Enter keystore password: changeit New keystore password: new-password Re-enter new keystore password: new-passwordbash -
Export the DS certificate.
-
On the DS host, export the DS CA certificate.
DS uses a deployment ID and password to generate a CA key pair. Learn more in Deployment IDs.
Use the
dskeymgrcommand to export the CA certificate:$ /path/to/opendj/bin/dskeymgr \ export-ca-cert \ --deploymentId $DEPLOYMENT_ID \ --deploymentIdPassword password \ --outputFile /path/to/ca-cert.pembash -
Copy the
ca-cert.pemfile to an accessible location on the AM host.
-
-
Import the DS CA certificate into the new truststore:
$ keytool \
-importcert \
-file /path/to/ca-cert.pem \
-keystore /path/to/truststore
bash -
To configure the truststore in Apache Tomcat so that AM can access it, append the truststore settings to the
CATALINA_OPTSvariable in thesetenvfile.For example:
-
Linux
-
Windows
In
$CATALINA_BASE/bin/setenv.sh:export CATALINA_OPTS="$CATALINA_OPTS -server -Xmx2g -XX:MetaspaceSize=256m -XX:MaxMetaspaceSize=256m \ -Djavax.net.ssl.trustStore=/path/to/truststore \ -Djavax.net.ssl.trustStorePassword=new-password \ -Djavax.net.ssl.trustStoreType=jks"bashIn
$CATALINA_BASE/bin/setenv.bat:set "CATALINA_OPTS=%CATALINA_OPTS% -server -Xmx2g -XX:MetaspaceSize=256m -XX:MaxMetaspaceSize=256m - -Djavax.net.ssl.trustStore=/path/to/truststore - -Djavax.net.ssl.trustStorePassword=new-password - -Djavax.net.ssl.trustStoreType=jks"powershellRefer to your specific container’s documentation for information on configuring truststores.
After AM is installed, you can move the truststore to a different location. For example, the
/path/to/openam/security/keystores/. If you do, remember to update the truststore path in the container configuration. -
Prepare a configuration store
This page explains how to prepare a single DS server as an external configuration data store. Make sure DS replicas use the same configuration.
Installing DS with a setup profile creates the required backend, schema, bind user, and indexes:
-
Follow the steps in Install DS for AM configuration in the Directory Services documentation.
-
Install AM to use the prepared DS directory server as an external configuration store.
The default bind DN of the service account to connect to the external configuration store is:
uid=am-config,ou=admins,ou=am-config
-
Share the configuration store certificate with the AM container to prepare for TLS/LDAPS.
Communication with the configuration store must use a secure connection.
-
On the DS host, export the DS CA certificate.
DS uses a deployment ID and password to generate a CA key pair. Learn more in Deployment IDs.
Use the
dskeymgrcommand to export the CA certificate:$ /path/to/opendj/bin/dskeymgr \ export-ca-cert \ --deploymentId $DEPLOYMENT_ID \ --deploymentIdPassword password \ --outputFile /path/to/ca-cert.pembash -
Copy the
ca-cert.pemfile to an accessible location on the AM host.
-
Import the DS certificate into the AM truststore:
$ keytool \
-importcert \
-file /path/to/ca-cert.pem \
-keystore /path/to/openam/security/keystores/truststore
bash
Learn more about configuring AM’s truststore in Prepare the truststore.
-
-
When the certificate is in place, continue installing AM.
| After setting up the external configuration store, you can enhance security by configuring mTLS authentication to that store and rotating the mTLS certificates periodically. Learn more in mTLS for configuration stores. |
Prepare identity repositories
AM accesses user identity data from one or more identity repositories.
In most deployments, AM connects to existing LDAP directory servers for user identity data, because it shares data in an identity repository with other applications.
|
You should not configure more than one writable identity repository in a single realm. AM tries to perform write operations on each identity repository configured in a realm, and there is no way to configure which repository is written to. To manage identities and reconcile differences between multiple identity repositories, use ForgeRock Identity Management. |
To prepare external identity repositories, refer to the following sections:
-
If you’re installing a new Directory Services instance for identity data, read Install and configure Directory Services for identity data.
-
If you’re connecting AM to an existing identity repository, read Configure existing directory servers for identity data.
Install and configure Directory Services for identity data
This section shows how to install and set up a new DS server for identity data. Make sure DS replicas use the same configuration.
Installing DS with a setup profile creates the required backend, schema, bind user, and indexes.
| The bind account for the identity store is fetched when AM starts up. If you change the account (DN or password) while AM is running, you must restart AM for the change to be taken into account. Otherwise, you’ll encounter bind failures with persistent searches. |
-
Follow the steps in Install DS for AM identities in the Directory Services documentation.
-
Share the identity store certificate with the AM container to prepare for TLS/LDAPS. Communication with the identity store must use a secure connection.
-
On the DS host, export the DS CA certificate.
DS uses a deployment ID and password to generate a CA key pair. Learn more in Deployment IDs.
Use the
dskeymgrcommand to export the CA certificate:$ /path/to/opendj/bin/dskeymgr \ export-ca-cert \ --deploymentId $DEPLOYMENT_ID \ --deploymentIdPassword password \ --outputFile /path/to/ca-cert.pembash -
Copy the
ca-cert.pemfile to an accessible location on the AM host.
-
Import the DS certificate into the AM truststore:
$ keytool \
-importcert \
-file /path/to/ca-cert.pem \
-keystore /path/to/openam/security/keystores/truststore
bash
Learn more about configuring AM’s truststore, in Prepare the truststore.
-
-
If you did not install DS using a setup profile, perform the following steps to update the permissions in an external Directory Services identity repository.
If you are using a directory server other than Directory Services, apply the relevant LDIF files using the appropriate tools.
-
Edit the
opendj_userinit.ldifLDIF file in the/path/to/openam/WEB-INF/template/ldif/opendjdirectory, replacing all variables that are surrounded by at (@ ) symbols with a value specific to your directory server.For example, in the
opendj_userinit.ldifLDIF file you must replace all instances of @userStoreRootSuffix@ with the root suffix you specified when configuring the external DS identity store, the default beingou=identities. -
Use the
ldapmodifycommand to add the updated LDIF data to the external instance.For example:
$ /path/to/opendj/bin/ldapmodify \ --hostname 'id.example.com' \ --port 1636 \ --useSsl \ --usePkcs12TrustStore /path/to/opendj/config/keystore \ --trustStorePasswordFile /path/to/opendj/config/keystore.pin \ --continueOnError \ --bindDN uid=admin \ --bindPassword str0ngAdm1nPa55word \ /path/to/tomcat/webapps/openam/WEB-INF/template/ldif/opendj/opendj_userinit.ldifbashFor more information on this LDIF file, and equivalent files for supported directory servers, refer to Set up directory schemas with LDIF.
-
If you intend to use web authentication, or perform device profiling with the ForgeRock SDK, you might need to update the directory server schema. For a ForgeRock Directory Services repository, you can update the schema by applying the following LDIF files:
-
/path/to/openam/WEB-INF/template/ldif/opendj/opendj_webauthndevices.ldif -
/path/to/openam/WEB-INF/template/ldif/opendj/opendj_deviceprofiles.ldifFor example:
$ /path/to/opendj/bin/ldapmodify \ --hostname 'id.example.com' \ --port 1636 \ --useSsl \ --usePkcs12TrustStore /path/to/opendj/config/keystore \ --trustStorePasswordFile /path/to/opendj/config/keystore.pin \ --continueOnError \ --bindDN uid=admin \ --bindPassword str0ngAdm1nPa55word \ /path/to/tomcat/webapps/openam/WEB-INF/template/ldif/opendj/opendj_webauthndevices.ldif\ /path/to/tomcat/webapps/openam/WEB-INF/template/ldif/opendj/opendj_deviceprofiles.ldifbashFor more information on these LDIF files, refer to Set up directory schemas with LDIF. For directory servers other than ForgeRock Directory Services, adapt the
opendj_*.ldiffiles accordingly.
-
-
-
Proceed to configure the identity store in AM.
The bind DN of the service account to use when configuring the identity store in AM is
uid=am-identity-bind-account,ou=admins,ou=identities.
Configure existing directory servers for identity data
It is common for AM to access identity data from an existing directory server. AM requires a user account to connect to the directory server, and AM LDAP schema to update entries with AM-related identity data.
For the list of supported external directory servers, refer to Directory servers.
The following sections show you how to prepare an existing identity repository for use in AM:
Create a directory server user for AM connections
AM connects to an external directory server with a service account that you specify in the AM identity repository configuration. This service account is known as the AM bind account.
Specifying the directory administrator as the AM bind account is not recommended for production deployments as it would give AM directory administrator privileges to the identity repository.
Instead, create a separate AM bind account with fewer access privileges than the directory administrator so that you can assign the appropriate level of privileges for the AM bind account.
You need to consider two areas of permission for the AM bind account:
- Schema Update Privileges
-
AM needs to update the directory schema when you configure a new identity repository and when you upgrade AM software. If the AM bind account has schema update privileges, AM can update the schema dynamically during identity repository configuration and during AM upgrades. If the AM bind account does not have schema update privileges, you must update the schema manually before configuring a new identity repository and before upgrading AM.
- Directory Read and Write Access Privileges
-
If you want AM to create, update, and delete user entries, then the AM bind account must have full read and write access to the identity data in the directory. If you are using an external identity repository as a read-only user directory, then the AM bind account needs read privileges only.
The level of access privileges you give the AM bind account is specific to each AM deployment. Work with your directory server administrator to determine the appropriate level of privileges as part of the process of preparing your external identity repositories.
Create a bind account in Active Directory for AM connections
The following procedure gives an example of creating a bind account in Active Directory:
Perform these steps to create a user that AM can use to connect to Active Directory. These steps are one example, consult with your Active Directory administrator on how best to create an account.
-
Create a new user account in the Active Directory domain. For example, in Windows 2019:
-
In the Active Directory Users and Computers tool, right-click Users in the domain, and select New > User.
-
Provide descriptive values for the new user, and a logon name such as
AM-Bind-Account. -
Click Next.
-
Enter a strong password for the bind account, disable the User must change password at next logon option, and click Next.
-
Review the details of the new account, and click Finish.
-
-
Give the new bind account access to the directory data:
-
In the Active Directory Users and Computers tool, right-click the domain that contains your users, and select Delegate Control.
-
Add the bind account you created in the previous step, and click Next.
-
Select the tasks you want to allow the AM bind account to perform from the list.
For example, to allow read and write access to users, enable the
Create, delete, and manage inetOrgPerson accountstask. -
After assigning the tasks you want to allow the AM bind account to perform, click Finish.
You can now set up the necessary schema in the directory server.
The bind account to use when configuring the identity store in AM is the full DN of the user, for example
uid=AM-Bind-Account,ou=Users,dc=example,dc=org. -
Update the schema in an external identity repository
AM can add the necessary LDAP schema definitions itself, if it has sufficient privileges to do so, or you can apply the LDAP schema definition LDIF files manually if required. Refer to the following procedures:
Prepare an external identity repository with manual schema updates
If the AM bind account does not have permission to update schema then you must configure existing external data stores by using manual schema updates. To do this, you must update the directory server schema of the external identity repository manually at the following times:
-
Before you configure the identity repository as part of initial AM configuration.
-
Before you configure an identity repository after initial AM configuration.
-
Whenever you upgrade AM.
A number of LDIF files are provided in the AM .war file for supported identity directory servers.
The path is /path/to/openam/WEB-INF/template/ldif/directory-type, where directory-type is one of the following:
-
adfor Microsoft Active Directory -
adamfor Microsoft Active Directory Lightweight Directory Services -
odseefor Oracle Directory Server Enterprise Edition -
opendjfor ForgeRock Directory Services and Oracle Unified Directory -
tivolifor IBM Tivoli Directory Server
For more information on the LDIF files, refer to Set up directory schemas with LDIF.
The following steps update the schema in an Active Directory identity repository. For other directory servers, apply the relevant LDIF files using the appropriate tools.
-
Edit the LDIF files in the
/path/to/openam/WEB-INF/template/ldif/addirectory, replacing any variables that are surrounded by at (@ ) symbols with a value specific to your directory server.For the Active Directory LDIF files you must replace all instances of @userStoreRootSuffix@ with the root suffix used by your Active Directory identity store, for example
DC=example,DC=org. -
Using an Active Directory administrator account, add the required AM schema extensions to your external identity repository.
For example, in PowerShell, run the
ldifdecommand to import the user, device print, and dashboard schema extensions:PS C:\Users\Administrator> cd \path\to\openam\WEB-INF\template\ldif\ad PS C:\path\to\openam\WEB-INF\template\ldif\ad> ldifde -i -f .\ad_user_schema.ldif Connecting to "domain.example.org" Logging in as current user using SSPI Importing directory from file ".\ad_user_schema.ldif" Loading entries................................................................. 64 entries modified successfully. The command has completed successfully PS C:\path\to\openam\WEB-INF\template\ldif\ad> ldifde -i -f .\ad_deviceprint.ldif Connecting to "domain.example.org" Logging in as current user using SSPI Importing directory from file ".\ad_deviceprint.ldif" Loading entries................................................................. 6 entries modified successfully. The command has completed successfully PS C:\path\to\openam\WEB-INF\template\ldif\ad> ldifde -i -f .\ad_dashboard.ldif Connecting to "domain.example.org" Logging in as current user using SSPI Importing directory from file ".\ad_dashboard.ldif" Loading entries................................................................. 6 entries modified successfully. The command has completed successfullypowershell -
If you intend to use push or web authentication, apply the following LDIF files:
-
/path/to/openam/WEB-INF/template/ldif/ad/ad_pushdevices.ldif -
/path/to/openam/WEB-INF/template/ldif/ad/ad_webauthndevices.ldif
For more information on these LDIF files, and the equivalent files for supported directory servers, refer to Set up directory schemas with LDIF.
-
-
Proceed to configure the identity store in AM.
If you updated the schema to make use of web authentication, when configuring the external identity store in a realm, on the User Configuration tab, ensure webauthnDeviceProfilesContaineris in the LDAP User Object Class property. If not, add the value, and then save your changes.
Prepare an external identity repository with automatic schema updates
If the bind account has permission to update schema then you can allow AM to update the schema automatically.
To allow AM to update the schema, you must first configure AM to be able to access the directory server, and enable the Load Schema option, by performing the following steps:
-
Configure the directory server in AM by following the instructions in Configure an identity store.
Enable the Load Schema option before saving your changes, and AM will apply the necessary schema to the directory server. The schema is loaded as part of configuring the identity store in AM. No further configuration is required.
-
Verify that the new identity repository is correctly configured in AM. Refer to Test external identity repository access.
Set up directory schemas with LDIF
AM installation deploys several LDIF files that can be used to create the schemas required by AM. LDIF files are available for Microsoft Active Directory, Microsoft Active Directory Lightweight Directory Services, Oracle Directory Server Enterprise Edition, ForgeRock Directory Services, Oracle Unified Directory, and IBM Tivoli Directory Server.
The following tables provide descriptions for each LDIF file:
| LDIF File | Description |
|---|---|
ad_config_schema.ldif |
Obsolete. Active Directory is not supported as a configuration store. |
ad_dashboard.ldif |
LDIF to support the dashboard service. |
ad_deviceprint.ldif |
LDIF to support the device print service. |
ad_kba.ldif |
LDIF to support the User Self-Service’s knowledge-based questions and answers service. |
ad_oathdevices.ldif |
LDIF to support registered devices for the OATH authentication service. |
ad_pushdevices.ldif |
LDIF to support registered devices for the PUSH notification service. |
ad_user_schema.ldif |
LDIF for the user schema. |
ad_webauthndevices.ldif |
LDIF to support registered devices for the Web Authentication (WebAuthn) authentication service. |
| LDIF file | Description |
|---|---|
adam_dashboard.ldif |
LDIF to support the dashboard service. |
adam_deviceprint.ldif |
LDIF to support the device print service. |
adam_kba.ldif |
LDIF to support the User Self-Service’s knowledge-based questions and answers. |
adam_oathdevices.ldif |
LDIF to support registered devices for the OATH authentication service. |
adam_pushdevices.ldif |
LDIF to support registered devices for the PUSH notification service. |
adam_user_schema.ldif |
LDIF for the user schema. |
adam_webauthndevices.ldif |
LDIF to support registered devices for the Web Authentication (WebAuthn) authentication service. |
| LDIF file | Description |
|---|---|
amsdk_plugin |
Folder containg the AM SDK LDIF files: amsdk_init_template.ldif and amsdk_sunone_schema2.ldif. |
odsee_config_index.ldif |
LDIF for the ODSEE configuration indexes. |
odsee_config_schema.ldif |
LDIF for the ODSEE configuration schema. |
odsee_dashboard.ldif |
LDIF to support the dashboard service. |
odsee_deviceprint.ldif |
LDIF to support the device print service. |
odsee_kba.ldif |
LDIF to support the User Self-Service’s knowledge-based questions and answers. |
odsee_oathdevices.ldif |
LDIF to support registered devices for the OATH authentication service. |
odsee_pushdevices.ldif |
LDIF to support registered devices for the PUSH notification service. |
odsee_user_index.ldif |
LDIF for the user respository indexes. |
odsee_user_schema.ldif |
LDIF for the user repository schema. |
odsee_userinit.ldif |
LDIF for the setting up user session initialization. |
odsee_webauthndevices.ldif |
LDIF to support registered devices for the Web Authentication (WebAuthn) authentication service. |
| LDIF file | Description |
|---|---|
oath_2fa.ldif |
LDIF for the OATH two-factor authentication service. |
opendj_aci_lift_user_password_restriction.ldif |
LDIF to add an ACI entry to the root suffix to allow users to modify the user password attribute. |
opendj_aci_remove_blanket_deny_all.ldif |
LDIF to lift any user password restrictions for upgrade. |
opendj_add_kba_attempts.ldif |
LDIF to upgrade a user data store from a version earlier than AM 6 to support account lockout when the user fails to answer their security questions a number of times. |
opendj_config_schema.ldif |
LDIF for the DS configuration schema. |
opendj_dashboard.ldif |
LDIF to support the dashboard service. |
opendj_deviceprint.ldif |
LDIF to support the device print service. |
opendj_deviceprofiles.ldif |
LDIF to support storage of device information, collected by the SDK device authentication nodes. Apply this LDIF if you intend to use the ForgeRock SDK for device profiling. |
opendj_embinit.ldif |
LDIF for the DS user management and SMS/configuration datastore schema for evaluation (embedded DS) deployments. |
opendj_kba.ldif |
LDIF to support the User Self-Service’s knowledge-based questions and answers. |
opendj_oathdevices.ldif |
LDIF to support registered devices for the OATH authentication service. |
opendj_pushdevices.ldif |
LDIF to support registered devices for the PUSH notification service. |
opendj_remove_config_schema.ldif |
LDIF to remove the configuration schema. |
opendj_remove_user_schema.ldif |
LDIF to remove the user schema. |
opendj_retry_limit_node_count.ldif |
LDIF to upgrade the identity store to support persisting failed login attempts to the user’s profile when using the Retry Limit Decision node. There are no equivalent files for other supported directory servers.
Adapt the contents of the |
opendj_uma_audit.ldif |
LDIF to add auditing capabilities for the UMA service. |
opendj_uma_labels_schema.ldif |
LDIF to add a schema for the UMA service labels. |
opendj_uma_pending_requests.ldif |
LDIF to add pending requests for the UMA service. |
opendj_uma_resource_set_labels.ldif |
LDIF to support labels for UMA resources. |
opendj_uma_resource_sets.ldif |
LDIF to support UMA resources. |
opendj_update_aci_kba_attempts.ldif |
LDIF to upgrade a user data store from a version earlier than AM 6 to support account lockout when the user fails to answer their security questions a number of times. |
opendj_user_index.ldif |
LDIF for the user respository indexes. |
opendj_user_schema.ldif |
LDIF for the user repository schema. |
opendj_userinit.ldif |
LDIF for the setting up user session initialization. |
opendj_webauthndevices.ldif |
LDIF to support registered devices for the Web Authentication (WebAuthn) authentication service. |
push_2fa.ldif |
LDIF for the push two-factor authentication service. Not required if you installed DS 7.1 or later
by using the |
| LDIF file | Description |
|---|---|
tivoli_dashboard.ldif |
LDIF to support the dashboard service. |
tivoli_deviceprint.ldif |
LDIF to support the device print service. |
tivoli_kba.ldif |
LDIF to support the User Self-Service’s knowledge-based questions and answers. |
tivoli_oathdevices.ldif |
LDIF to support registered devices for the OATH authentication service. |
tivoli_pushdevices.ldif |
LDIF to support registered devices for the PUSH notification service. |
tivoli_user_schema.ldif |
LDIF for the user repository schema. |
tivoli_webauthndevices.ldif |
LDIF to support registered devices for the Web Authentication (WebAuthn) authentication service. |
Install AM
Production or production-like environments require an external configuration store and an external CTS token store, both of which are DS servers. The configuration store will act as the CTS token store until you configure an external one.
For more information, see Prepare external stores.
Install multiple instances for high availability
Install multiple instances to maintain service availability. If one instance is down for any reason, another instance can respond instead. This means that you need some type of component, such as a load balancer or a proxy server, between incoming traffic and AM to route around instances that are down.
AM uses a site for this purpose. In an AM site, multiple AM instances are configured in the same way, and accessed through a load balancer layer.
The load balancer can be implemented in hardware or software, but it is separate and independent from AM. When installed properly, a site configuration improves service availability, as the load balancer routes around AM instances that are down, sending traffic to other servers in the site.
For high-level deployment information, see Deployment planning.
The following table provides information to help you install AM instances:
| Task or requirement | Resources |
|---|---|
Configure a single instance on a production or pre-production environment. This can be the first instance of a site deployment. |
|
Configure a site and add a instance to an AM site |
|
Configure an instance silently |
|
If at any point you need to scrap the AM configuration to start again, see Delete and redeploy AM. |
Install an instance
You can customize several AM parameters during installation, such as the cookie domain and the settings of the configuration store.
-
Installing the first instance creates the required configuration that the site will share.
You can specify the site configuration when you install the first instance or configure the site when the first instance is running.
-
By default, the cookie domain is set to the full URL of the first instance; for example,
server.west.example.com.You can change the cookie domain when you’re installing the first instance or later.
-
You can use a load balancer layer to protect AM services. The load balancer can restrict access to AM services, throttle traffic, offload HTTPS encryption, and so forth.
As an alternative, or in addition, you can use a separate reverse proxy.
-
When you are protecting AM with a load balancer or proxy service, configure your container so that AM can trust the load balancer or proxy service.
-
The container for each instance in the site must trust any certificate authorities (CA) used to sign certificates used by other instances in the site in order to communicate using SSL.
-
Successful authentication can depend on information about the authenticating user, such as the IP address where the request originated. When AM is accessed through a load balancer or proxy layer, pass this information along using request headers. Also, configure AM to consume and to forward the headers as necessary. Learn more in Handle HTTP request headers.
Follow these steps to install a single AM instance, or to install the first instance on a site.
-
Go to your deployment URL. For example,
https://openam.example.com:8443/openam. -
On the initial configuration screen, click Create New Configuration under Custom Configuration.
-
Read the license agreement. Agree to the license agreement and click Continue.
-
On the Default User Password page, provide a password with at least eight characters for the AM Administrator,
amAdmin. -
Verify that the server settings are valid for your configuration.
- Server URL
-
Provide a valid URL to the base of your AM web container, including an FQDN.
In a test or QA environment, you can simulate the FQDN by adding it to your
/etc/hostsas an alias. The following example shows lines from the/etc/hostsfile on a Linux system where AM is installed:127.0.0.1 localhost.localdomain localhost ::1 localhost6.localdomain6 localhost6 127.0.1.1 openam openam.example.com - Cookie Domain
-
The domain for which created cookies will be valid; for example
example.com. - Platform Locale
-
Supported locales include en_US (English), de (German), es (Spanish), fr (French), ja (Japanese), ko (Korean), zh_CN (Simplified Chinese), and zh_TW (Traditional Chinese).
- Configuration Directory
-
Location on server for AM configuration files. AM must be able to write to this directory.
-
In the Configuration Data Store screen, you make choices related to AM configuration data.
- Configuration Data Store
-
-
Embedded DS
The configurator process spins an embedded DS instance to store AM configuration data, the default users, and the CTS store. Use on demo or test environments only.
Instances using the embedded DS server cannot be added to a site.
If you choose the embedded DS, you can leave the rest of the values by default.
-
External DS
The configurator process stores AM configuration data in an existing DS server. You must have prepared the server as explained in Prepare a configuration store.
Choose this option if you intend to add this instance to an existing deployment.
An external DS instance is required in non-evaluation deployments.
If you choose the external DS, you must configure the rest of the fields.
-
- SSL/TLS Enabled
-
Whether AM must use LDAPS to communicate with the configuration store.
For security reasons, the configuration store should communicate with AM using LDAPS.
DS 7 is configured for LDAPS by default. If you are using this version, enable this option and share the DS certificate with the container where AM is running before continuing. Learn more in Secure Directory Server communication.
If you are using a different version, you can configure DS and AM to use LDAPS after the installation.
- Host Name
-
The FQDN of the external DS.
- Port
-
The LDAP or LDAPS port of the external DS. The default values are:
-
LDAP:
1389 -
LDAPS:
1636
-
- Encryption Key
-
A randomly-generated key that AM uses for different purposes. All the servers in the site must have the same encryption key.
The installer creates a random key automatically; you can leave the value by default.
- Root Suffix
-
The root suffix of the external DS store.
The default base DN of an external DS store when you configure it with the
am_configprofile isou=am-config. - Login ID
-
The bind DN that AM should use to connect to the external DS store.
The default bind DN of an external DS store when you configure it with the
am_configprofile isuid=am-config,ou=admins,ou=am-config.You should not use
cn=adminas the bind account. - Password
-
The password of the bind DN.
- Server configuration
-
Note that this option only appears when you specify an external configuration store.
-
New deployment
Specifies that the installation is a new deployment, with its own configuration and identity stores.
If you choose this option, the next step is to configure the identity store.
-
Additional server for existing deployment
Specifies that the installation is an additional server for an existing deployment and will use the existing configuration and identity stores.
If you choose this option, you don’t need to configure the identity store. The installation uses the same stores as those of the existing deployment.
Learn more in Add a server to a site.
-
-
If you specified New deployment in the previous step, the User Store screen appears as the next step. Use the page to configure where AM looks for user identities.
AM must have write access to the directory service you choose, as it adds to the directory schema needed to allow AM to manage access for users in the user store.
- User Data Store Type
-
If you have already provisioned a directory service with users in a supported user data store, then select that type of directory from the options available.
- SSL/TLS Enabled
-
To use a secure connection, check this box, then make sure the port you define corresponds to the port the directory server listens to for StartTLS or SSL connections. When using this option, you also need to make sure the trust store used by the JVM running AM has the necessary certificates installed.
- Directory Name
-
FQDN for the host housing the directory service.
- Port
-
LDAP directory port. The default for LDAP and LDAP with StartTLS to protect the connection is port 389. The default for LDAP over SSL is port 636. Your directory service might use a different port.
- Root Suffix
-
Base distinguished name (DN) where user data is stored.
- Login ID
-
Directory administrator user DN. The administrator must be able to update the schema and user data.
- Password
-
Password for the directory administrator user.
-
In the Site Configuration screen, you can set up AM as part of a site where the load is balanced across multiple AM servers.
When you deploy multiple servers, AM automatically enables session high availability.(1) AM stores session data in a directory service that is shared by multiple AM servers. The shared storage means that if an AM server fails, other AM servers in the deployment have access to the user’s session data and can serve requests about that user. As a result, the user does not have to log in again.
It is possible to set up a site after initial installation and configuration. Learn more in Deployment configuration.
-
Check the summary screen, and if necessary, click Previous to return to earlier screens to fix any configuration errors as needed.
After you click Create Configuration in the summary screen, configuration proceeds, logging progress that you can read in your browser, and later, in the installation log. The process ends, and AM shows the Proceed to Login prompt.
-
When the configuration completes, click Proceed to Login, and log in as the AM administrator,
amAdmin.After logging in, AM redirects you to the Realms page.
You can also access the AM admin UI by going to the console URL; for example
https://openam.example.com:8443/openam/console. -
Restrict permissions to the configuration directory (by default,
$HOME/openam, where $HOME corresponds to the user who runs the web container). Prevent other users from accessing files in the configuration directory. -
The AM install wizard uses three libraries that should be removed after installation for security reasons.
When your installation is complete, remove the following .jar files from the
WEB-INF/libdirectory:-
click-extras-2.3.0.jar -
click-nodeps-2.3.0.jar -
velocity-1.7.jarThese files are used only by the install and upgrade wizards. Removing them will have no effect on your installed instance.
You must also remove the references to
click-servletfrom the deployment descriptor file. Edit/path/to/openam/WEB-INF/web.xmlto remove the following mappings:<servlet> <servlet-name>click-servlet</servlet-name> <servlet-class>org.apache.click.ClickServlet</servlet-class> </servlet> ... <servlet-mapping> <servlet-name>click-servlet</servlet-name> <url-pattern>*.htm</url-pattern> </servlet-mapping>xml -
-
Review the suggested next steps after installing AM.
(1) You can configure AM to store sessions in the Core Token Service (CTS) token store or on the client. Because client-side sessions reside in HTTP cookies, they do not need to be retrieved from a persistent data store. In the event of a server failure, they can be retrieved from the cookies. AM does not store client-side sessions in the CTS token store. You can find details about sessions in Introduction to sessions.
Configure sites and add servers
Configuring a site is a three-step process:
-
Install the first server in the site. This will create the configuration that the site will share.
Learn more in Install an instance.
-
Add the first server to a site, if you did not already while installing it.
Learn more in Configure a site with the first server.
-
Add more servers to the site.
Learn more in Add a server to a site.
Configure a site with the first server
The following steps show how to set up a site when AM is running:
-
Review AM’s load balancing requirements in Load balancing.
-
In the AM admin UI, go to Deployment > Sites.
-
Click Add a Site to start configuring the new site.
-
On the New Site page, enter the site name without any spaces. For example, the site name must be in the format
ExampleSite, rather thanExample Site.Set the Primary URL to the load balancer URL that is the entry point for the site, such as
https://lb.example.com/openam.The site URL is the URL to the load balancer in front of the AM servers in the site. For example, if your load balancer listens for HTTPS on host
lb.example.comand port443with AM under/openam, then your site URL ishttps://lb.example.com/openam.Client applications and web or Java agents access the servers in the site through the site URL.
-
Click Save to keep the site configuration.
-
Configure the cookie domain of your site as required. Learn more in Change the cookie domain.
-
Go to Deployment > Servers > Server Name > General.
-
Set the Parent Site drop-down menu to the name of the site you just created, and save your changes.
At this point, the first server is part of the new site you have configured.
For all additional servers in the AM site, add them to the site at configuration time as described in Add a server to a site.
Add a server to a site
High availability requires redundant servers in case of failure. With AM, you configure an AM site with multiple servers in a pool behind a load balancing service that exposes a single URL as an entry point to the site.
Follow these steps to configure a server to an existing site:
-
Go to the deployment URL of the new instance. You should see the AM configurator page.
-
In the initial configuration screen, under Custom Configuration, click Create New Configuration.
-
In the first screen, enter the same password you entered for the AM administrator,
amAdmin, when you configured the first server in the site. -
Configure server settings as required.
The cookie domain should be identical to that of the first server in the site.
The installer may show that the Configuration Directory is not empty; it is a warning in case you are trying to use a directory that contains data not pertaining to AM. -
In the configuration store screen, ensure that you select the External DS option, and configure the same DS instance that is already working as the configuration store for the rest of the instances in the site, including the same encryption key.
Ensure that you also select the Additional server for existing deployment option.
Instances using the embedded DS cannot be part of a site.
-
In the site configuration screen, select Yes, and enter the same Site Name and Load Balancer URL values as the existing servers in the site.
Spaces are not allowed in the site name. Settings for agent information are also shared with the existing server, so the corresponding wizard screen is skipped.
-
In the summary screen, verify the settings you chose, and click Create Configuration.
-
When the configuration process finishes, stop the newly-installed AM instance or the container where it runs, and do not try to access it.
-
Compare the
/path/to/openam/config/boot.jsonbootstrap file with that of a running instance. You must ensure that the newly installed instance’s bootstrap file is appropriate for your environment.The
boot.jsonfile does not exist in the new instanceDepending on the configuration of the AM keystore in the site, the installation process may not create the bootstrap file.
If so, copy the bootstrap file from another instance and continue with the procedure.
Unless your environment has a requirement to configure the AM keystore in a different location on each instance, it is likely that the bootstrap file should be the same across the site.
If you are overriding the start up settings:
-
Ensure you have copied the customized bootstrap file from another instance in the site.
-
Ensure you are overwriting the existing bootstrap file with your modified file prior to every AM restart.
-
-
Make the existing AM keystore infrastructure available to the new instance:
-
Back up the new instance’s default keystore and password files in the following locations:
-
/path/to/openam/security/keystores/ -
/path/to/openam/security/secrets/default/
-
-
Ensure that the existing keystores in the site are available in the same location to the new instance. This may mean copying the keystores and their password files, mounting a volume, or others.
-
Ensure that the keystore files configured in the
/path/to/openam/config/boot.jsonfile are available to the instance.
-
-
Make the existing secret store infrastructure in the site available to the new instance:
-
In the AM admin UI of an existing instance in the site, go to Configure > Secret Stores.
-
Review the list of secret stores configured globally and provide the relevant stores to the new instance. For example:
-
For keystore-type secret stores, copy the keystores to the same path on the new instance.
-
For filesystem-type secret stores, copy the contents of the directories to the same path or make the filesystem available on the same mount point on the new instance.
-
For HSM-type stores, ensure the new instance can access it.
-
For secrets configured as environment variables accessible by the container where AM runs, ensure they are also accessible by the container of the new instance.
-
-
Go to Realms > Realm Name > Secret Stores.
-
Review the list of secret stores configured per realm and make sure to provide the relevant stores to the new instance.
-
-
Restart the new instance.
The instance is now configured for the site.
-
Review AM’s load balancing requirements in Load balancing.
-
Ensure that the cookie domain configuration is appropriate for your site. Learn more in Change the cookie domain.
Install silently
AM provides configuration and upgrade tools for installing and maintaining your server.
The AM-SSOConfiguratorTools-5.1.3.27.zip file contains libraries, legal notices, and supported binaries for these configuration tools.
It also contains example configuration and upgrade properties files you can use as templates in your deployment.
When the AM server is deployed and running but not yet configured, you can use the configurator tool,
openam-configurator-tool-14.1.3.27.jar, to install AM silently.
Perform the following tasks to install AM silently:
-
Install the configuration tool. See Set up the configuration tools.
-
Use the configuration tool to install AM using a property file. See Install AM silently.
Set up the configuration tools
-
Verify that the
JAVA_HOMEenvironment variable is properly set:$ echo $JAVA_HOME /path/to/jdkbash -
Create a file system directory to unpack the tools:
$ mkdir -p /path/to/openam-tools/configbash -
Unpack the tools from where you unzipped AM:
$ cd /path/to/openam-tools/config $ unzip ~/Downloads/openam/AM-SSOConfiguratorTools-5.1.3.27.zip Archive: ~/Downloads/openam/AM-SSOConfiguratorTools-5.1.3.27.zip creating: legal-notices/ inflating: legal-notices/LICENSE.DOM-software.html inflating: legal-notices/NOTICE.resolver.txt inflating: legal-notices/LICENSE.DOM-documentation.html … (more output) … extracting: lib/xml-apis-2.11.0.jar extracting: openam-configurator-tool-14.1.3.27.jar extracting: lib/servlet-api-2.5.jarbash
Install AM silently
-
Verify that the
JAVA_HOMEenvironment variable is properly set:$ echo $JAVA_HOME /path/to/jdkbash -
The configurator tool needs a property file to specify the AM configuration. For property file options, see configurator.jar.
Copy the sample configuration property file provided with AM, and modify properties as needed:
$ cd /path/to/openam-tools/config $ cp sampleconfiguration config.properties $ grep -v "^#" config.properties \| grep -v "^$" SERVER_URL=https://openam.example.com:8443 DEPLOYMENT_URI=/openam BASE_DIR=/home/openam/ locale=en_US PLATFORM_LOCALE=en_US AM_ENC_KEY= ADMIN_PWD=password COOKIE_DOMAIN=example.com ACCEPT_LICENSES=true DATA_STORE=dirServer DIRECTORY_SSL=SIMPLE DIRECTORY_SERVER=config.example.com DIRECTORY_PORT=50389 DIRECTORY_ADMIN_PORT=4444 DIRECTORY_JMX_PORT=1689 ROOT_SUFFIX=dc=openam,dc=forgerock,dc=org DS_DIRMGRDN=uid=admin DS_DIRMGRPASSWD=passwordbashWhen setting options in the property file, note the following:
-
If you include the
ACCEPT_LICENSES=trueproperty, AM automatically accepts the software license agreement and suppresses the display of the license acceptance screen during silent installation. -
When installing AM to support HTTPS, make sure the
SERVER_URLproperty specifies a URL with HTTPS.
-
-
Run the AM configurator tool,
openam-configurator-tool-14.1.3.27.jar:$ java -jar openam-configurator-tool-14.1.3.27.jar --file config.propertiesbashYou can specify additional runtime options on the command line:
-
With the
--acceptLicenseoption, the installer auto-accepts the software licensing agreement and suppresses the display of the license acceptance screen, resulting in the same behavior as specifyingACCEPT_LICENSES=truein the configuration property file. -
The
-Djavax.net.ssl.trustStore=PATH_TO_JKS_TRUSTSTOREoption is required when installing AM to support HTTPS. Specify the AM web container’s trust store forPATH_TO_JKS_TRUSTSTORE.The installer displays output similar to the following:
$ java -jar openam-configurator-tool-14.1.3.27.jar --file config.properties Checking license acceptance…License terms accepted. Checking configuration directory /home/openam….Success. Installing OpenAM configuration store…Success RSA/ECB/OAEPWithSHA1AndMGF1… Extracting OpenDJ, please wait…Complete Running OpenDJ setupSetup command: --cli --adminConnectorPort 4444 --baseDN dc=openam,dc=forgerock,dc=org --rootUserDN uid=admin --ldapPort 50389 --skipPortCheck --rootUserPassword xxxxxxx --jmxPort 1689 --no-prompt --doNotStart --hostname openam.example.com … …Success Installing OpenAM configuration store in /home/openam/… …Success. Creating OpenAM suffixImport+task+ … …Success Tag swapping schema files….Success. Loading Schema opendj_config_schema.ldif…Success. … …Success. Reinitializing system properties….Done Registering service dashboardService.xml…Success. … Configuring system….Done Configuring server instance….Done Creating demo user….Done Creating Web Service Security Agents….Done Setting up monitoring authentication file. Configuration complete!bash -
Delete and redeploy AM
If you need to delete your configuration and start the process from the beginning, follow these steps:
-
Stop the AM web application to clear the configuration held in memory.
The following example shuts down Apache Tomcat:
$ /path/to/tomcat/bin/shutdown.sh
Password:
Using CATALINA_BASE:   /path/to/tomcat
Using CATALINA_HOME:   /path/to/tomcat
Using CATALINA_TMPDIR: /path/to/tomcat/temp
Using JRE_HOME:        /path/to/jdk/jre
Using CLASSPATH:
/path/to/tomcat/bin/bootstrap.jar:/path/to/tomcat/bin/tomcat-juli.jar
bash -
Delete the AM configuration files, by default under the
$HOMEof the user running the web application container:$ rm -rf $HOME/openam $HOME/.openamcfgbash -
When installing or reinstalling a standalone AM instance, you must ensure the configuration store used does not contain previous configuration data.
You should either install a new, clean instance of DS, or delete the entries under the configured AM suffix (by default
ou=am-config) of an existing instance.Note that when adding a server to an existing deployment, you must not delete the configuration from DS, as it is shared by all servers in the deployment. See Add a server to a site.
-
Delete any cached files from the container.
For example, on Tomcat, files are cached in a folder named after the deployment path, such as
/path/to/tomcat/work/Catalina/localhost/deployment path. Use a command such as the following to delete these cached files:$ rm -rf /path/to/tomcat/work/Catalina/localhost/openambash -
Restart the AM web application.
The following example starts the Tomcat container:
$ /path/to/tomcat/bin/startup.sh
Password:
Using CATALINA_BASE:   /path/to/tomcat
Using CATALINA_HOME:   /path/to/tomcat
Using CATALINA_TMPDIR: /path/to/tomcat/temp
Using JRE_HOME:        /path/to/jdk/jre
Using CLASSPATH:
/path/to/tomcat/bin/bootstrap.jar:/path/to/tomcat/bin/tomcat-juli.jar
bash
Start AM
AM is a web application installed in a web container, such as Apache Tomcat. Starting the web container starts the AM application.
At the beginning of its startup process, AM performs an operation called bootstrapping,
during which AM obtains startup settings from a bootstrap file in its configuration directory,
then uses those settings to initiate its operation.
AM creates the bootstrap file, boot.json, during installation.
How is the bootstrap file created?
The installation or upgrade process creates the file after configuring the instance, provided it can find the AM keystore and its password files in either of the following locations:
-
Configure > Server Defaults > Security > Key Store
-
Deployment > Servers > Server Name > Security > Key Store
ForgeRock recommends changing the AM default keystore configuration at Server Default level, so that the environment is homogeneous.
When is the bootstrap file updated?
After every successful startup, AM rewrites the bootstrap file using the current information for the AM keystore.
If you change the configuration of the AM keystore, for example, the path to its files, AM will save the changes to the bootstrap file the next time it starts successfully.
This is why, if you want to override AM’s startup settings, you need to replace the bootstrap file manually before AM starts.
Override startup settings
Users who deploy AM with DevOps tooling, such as Docker and Kubernetes, might want to launch multiple AM instances from a single image, providing startup settings dynamically when AM starts up instead of reading the settings from the bootstrap file created during AM installation.
You can replace the bootstrap file and provide your own static and dynamic startup settings. The following sections describe how to override the bootstrap file created during AM installation:
-
Replace the bootstrap File covers how to specify a custom bootstrap file, and describes all the startup settings in the bootstrap file.
-
Override startup settings using environment variables covers how to dynamically override startup settings in the bootstrap file with environment variables.
-
Override startup settings using Java properties covers how to dynamically override startup settings in the bootstrap file with Java properties.
Replace the bootstrap File
AM’s bootstrap file is located at the path /path/to/openam/config/boot.json,
where /path/to/openam is the AM configuration directory.
How is the AM configuration directory specified?
You specify it during AM installation, as follows:
-
In the Configuration Directory field on the Server Settings page when using GUI installation. See Install an instance for details.
-
In the
BASE_DIRproperty in the installation configuration file when using command-line installation. See configurator.jar for more information.
To override AM’s startup configuration, modify the bootstrap file, boot.json,
and then overwrite the existing bootstrap file with your modified file prior to every AM restart.
You must overwrite the file each time you start AM because after startup, AM overwrites the bootstrap file with the initial startup settings created during AM installation, removing any modifications you might have made to startup settings in the bootstrap file.
Make changes to supporting files and passwords before changing bootstrap file properties—AM will
fail to start up when bootstrap file properties do not correspond to actual configuration.
For example, if you change the value of the keyStorePasswordFile property to a file that does not exist,
AM will not be able to start up.
Bootstrap file example, with properties
{
  "instance": "https://openam.example.com:8443/openam",
  "dsameUser": "cn=dsameuser,ou=DSAME Users,dc=openam,dc=forgerock,dc=org",
  "keystores": {
    "default": {
      "keyStorePasswordFile": "{amSecretsBase}/default/.storepass",
      "keyPasswordFile": "{amSecretsBase}/default/.keypass",
      "keyStoreType": "JCEKS",
      "keyStoreFile": "{amKeystoreBase}/keystore.jceks"
    }
  },
  "configStoreList": [
    {
      "baseDN": "ou=am-config",
      "dirManagerDN": "uid=am-config,ou=admins,ou=am-config",
      "ldapHost": "opendj.example.com",
      "ldapPort": 1636,
      "ldapProtocol": "ldap"
    }
  ]
}| Property | Description and Derivation |
|---|---|
|
AM server URL. Defaults to the Server URL field on the Server Settings page (GUI configurator)
or the This property’s value is the URL for directly accessing an AM instance, not an AM site using a load balancer URL. Do not modify this bootstrap file property. If you need to change the AM instance URL, reinstall AM. |
|
Special AM user. The first part of the user’s DN is always created initially as |
|
The AM keystore. Currently, no other keystores are referenced in the bootstrap file. |
|
Path to the file that contains the password required to open the AM keystore.
Always created initially as When creating a new |
|
Path to the file that contains the password used to encrypt individual keystore entries.
Always created initially as When creating a new |
|
AM key store type. Currently, the only valid value is |
|
Path to the AM keystore. Always created initially as The AM keystore is required for startup because it contains the password of the directory manager user of the AM configuration store. |
|
Array of one or more objects that describe AM configuration stores. The initial object in the array is mandatory and defines the primary configuration store. Additional objects are optional and define failover configuration stores. |
|
Root suffix of the AM configuration store. Defaults to the Root Suffix field on the Configuration Data Store Settings page (GUI configurator) or the |
|
DN of the configuration store directory manager user. Defaults to |
|
fully qualified domain name (FQDN) of the configuration store’s host. Defaults to the Host Name field on the Configuration Data Store Settings page (GUI configurator) or the |
|
LDAP or LDAPS port number on which to access the configuration store. Defaults to the Port field on the Configuration Data Store Settings page (GUI configurator) or the |
|
Protocol with which to access the directory service running the configuration store.
The value can be Defaults to the SSL/TLS Enabled field on the Configuration Data Store Settings page (GUI configurator)
or the |
Override startup settings using environment variables
You can dynamically override startup settings in the bootstrap file by defining environment variables in the shell that starts AM and referencing the variables in a modified version of the bootstrap file.
Specify JSON properties that reference environment variables in a modified bootstrap file
that uses the notation ${env.MY_ENVIRONMENT_VARIABLE}.
For example, you could dynamically change the AM instance URL as follows:
-
Set an environment variable named
MY_INSTANCEin the shell that starts AM. -
Create a modified version of the bootstrap file with the following line:
"instance" : "${env.MY_INSTANCE}", -
Overwrite the initial bootstrap file with the modified bootstrap file.
-
Start AM.
Override startup settings using Java properties
You can dynamically override startup settings in the bootstrap file by referencing Java system properties
in a modified version of the bootstrap file.
You can reference both built-in Java system properties and properties specified with the -D option
in the web container that runs AM.
Specify JSON properties that reference Java properties in a modified bootstrap file that uses the notation
${MY_JAVA_PROPERTY}.
For example, you could dynamically change the AM keystore’s path to the user’s home directory as follows:
-
Create a modified version of the bootstrap file, specifying the default AM keystore as follows:
"keystores" : { "default" : { "keyStorePasswordFile" : "/home/jenkins/.storepass", "keyPasswordFile" : "/home/jenkins/.keypass", "keyStoreType" : "JCEKS", "keyStoreFile" : "/home/jenkins/keystore.jceks" } }, -
Overwrite the initial bootstrap file with the modified bootstrap file.
-
Start AM.
Set up administration tools
AM provides a set of administration tools that are now deprecated in favor of Amster. They are part of the AM distributable file.
The ssoadm tool requires access to the AM configuration files
and therefore must be installed on the same host as AM.
-
Verify that AM is installed and running before proceeding.
-
Verify that the
JAVA_HOMEenvironment variable is set properly:$ echo $JAVA_HOME /path/to/jdk
-
Create a file system directory to unpack the tools:
$ mkdir -p /path/to/openam-tools/admin
-
Unpack the tools:
$ cd /path/to/openam-tools/admin
$ unzip ~/Downloads/openam/AM-SSOAdminTools-5.1.3.27.zip
-
If you use IBM Java, add
-D"amCryptoDescriptor.provider=IBMJCE"and-D"amKeyGenDescriptor.provider=IBMJCE"options to thesetuporsetup.batscript before you install the tools.The options should be set for the
javacommand at the end of the script:$ tail setup CLASSPATH="$CLASSPATH:resources" $JAVA_HOME/bin/java -D"load.config=yes" \ -D"help.print=$help_print" \ -D"path.AMConfig=$path_AMConfig" \ -D"path.debug=$path_debug" \ -D"path.log=$path_log" \ -D"amCryptoDescriptor.provider=IBMJCE" \ -D"amKeyGenDescriptor.provider=IBMJCE" \ -cp "$CLASSPATH" \ com.sun.identity.tools.bundles.Main
-
Run the
setuputility (setup.baton Windows) providing the location, password, and type of the truststore containing the public certificate of the DS configuration store.Optionally, include the
--acceptLicenseoption if you want to auto-accept the license agreement and suppress the license acceptance screen to the user.How do I create the truststore?
Even though you may have other truststores containing the public certificate of the configuration store, ForgeRock recommends that you use a truststore specifically for the
ssoadmcommand.To create it, follow the steps in Prepare the truststore, but do not configure the new truststore in the container. You will configure it in the
ssoadmcommand script later.If the container where AM runs is configured for secure connections and is using self-signed certificates, import that public certificate into the new truststore, too. For details, refer to To Share Self-Signed Certificates.
When using self-signed certificates (in non-production environments, for example), you can configure the ssoadmcommand to trust all server certificates. Learn more in How do I configure ssoadm to trust all certificates? in the Knowledge Base.You will also need to provide the paths to the directories where AM configuration files are located, and where the
ssoadmdebug and log information will be located.For example:
$ ./setup --truststore-path /my/ssoadm/truststore --truststore-password changeit \
--truststore-type JKS --acceptLicense
Path to config files of OpenAM server [/home/user/openam]:
Debug Directory [/path/to/openam-tools/admin/debug]:
Log Directory [/path/to/openam-tools/admin/log]:
The scripts are properly setup under directory:
/path/to/openam-tools/admin/openam
Debug directory is /path/to/openam-tools/admin/debug.
Log directory is /path/to/openam-tools/admin/log.
The version of this tools.zip is: version and date
The version of your server instance is: ForgeRock Access Management version, Build, and date
If the
setuputility cannot connect to the configuration store, it outputs a message similar to the following:Connect Error: No operational connection factories available
If you receive this message, check that the truststore exists in the specified location, that it contains the configuration store certificate, and that the user running the
setuputility can change directories to the specified location and open/read the file.After setup, the tools are located under a directory named after the instance of AM:
$ ls openam/bin/
ampassword  amverifyarchive  ssoadm
On Windows, these files are
.batscripts. -
Edit the
ssoadmscript and configure the truststore containing the certificate of the configuration store. This truststore may also contain the certificate to connect to AM using SSL, if needed.-
In the script, look for the following lines:
.... TRUSTSTORE="-Djavax.net.ssl.trustStore=$truststore_path" TRUSTSTORE="$TRUSTSTORE -Djavax.net.ssl.trustStorePassword=$truststore_password" TRUSTSTORE="$TRUSTSTORE -Djavax.net.ssl.trustStoreType=$truststore_type" .... -
Add the
truststore_path,truststore_password, andtruststore_typevariables above the lines you found:truststore_path=/my/ssoadm/truststore truststore_password=changeit truststore_type=JKS TRUSTSTORE="-Djavax.net.ssl.trustStore=$truststore_path" TRUSTSTORE="$TRUSTSTORE -Djavax.net.ssl.trustStorePassword=$truststore_password" TRUSTSTORE="$TRUSTSTORE -Djavax.net.ssl.trustStoreType=$truststore_type" ....
-
-
If you use IBM Java, add
-D"amCryptoDescriptor.provider=IBMJCE"and-D"amKeyGenDescriptor.provider=IBMJCE"options to thessoadmorssoadm.batscript before using the script.The options should be set before the call to
com.sun.identity.cli.CommandManagerat the end of the script:$ tail -3 /path/to/openam-tools/admin/openam/bin/ssoadm -D"amCryptoDescriptor.provider=IBMJCE" \ -D"amKeyGenDescriptor.provider=IBMJCE" \ com.sun.identity.cli.CommandManager "$@"
-
Check that the
ssoadmcommand works properly:-
Create a text file, for example
$HOME/.pwd.txt, containing the AM administrative user’s password string in cleartext on a single line. -
Make the text file read-only:
$ chmod 400 $HOME/.pwd.txt
-
Run the
ssoadmcommand to list the configured servers:$ cd /path/to/openam-tools/admin/openam/bin/ $ ./ssoadm list-servers --adminid uid=amAdmin,ou=People,dc=openam,dc=forgerock,dc=org --password-file $HOME/.pwd.txt https://openam.example.com:8443/openam
The value for the
--adminidparameter is the universal ID of an administrative user.Administrative users are listed in the
com.sun.identity.authentication.super.userorcom.sun.identity.authentication.special.usersadvanced properties, under Configure > Server Defaults > Advanced.The default super-user account is
uid=amAdmin,ou=People,%ROOT_SUFFIX%. To check your %ROOT_SUFFIX% value, go to the/path/to/openam/config/boot.jsonfile, and find the value for theconfigStoreList/baseDNproperty.
-
-
If you have deployed AM in a site configuration, edit the
ssoadm(ssoadm.baton Windows) script to map the site URL to the AM server URL.To do this, set the
com.iplanet.am.naming.map.site.to.serversystem property as ajavacommand option in the script. The option takes the following form:-D"com.iplanet.am.naming.map.site.to.server=lb-url=openam-url[,other-lb-url=openam-url…]"
The property maps each lb-url key to an openam-url value, where lb-url is the URL to a site load balancer, and openam-url is the URL to the AM server against which you set up the
ssoadmcommand.The
ssoadmcommand is dependent on the AM server against which you set it up, so always map site load balancer URLs to that server’s openam-url.For example, if your site is behind
https://lb.example.com:443/openam, and the AM server against which you set up thessoadmcommand is athttps://openam.example.com:8443/openam, then add the following property to thejavacommand (all on one line without spaces):-D"com.iplanet.am.naming.map.site.to.server=https://lb.example.com:443/openam=https://openam.example.com:8443/openam"
Repeat this step for each AM server in your site configuration. You can install all your instances of
ssoadmon the same host, but in each case the command should manage only one AM server.
Next steps
Congratulations on installing AM!
The following list shows you different tasks you should consider after installing AM:
- Core administrative tasks
-
-
Learn about realms, configure them, and connect them to identity stores.
-
Configure AM’s cookie domain.
-
Learn about other types of configuration stores and decide if your environment would benefit from having dedicated application stores.
For more information, see the Setup.
-
- Core Token Service tasks
-
-
Learn about the Core Token Service and decide if your environment would benefit from having dedicated CTS token stores.
For more information, see the Core Token Service (CTS).
-
- Access Management-related tasks
-
-
Learn about authentication trees and nodes and configure them to let your users log in to AM.
-
Learn about sessions in AM and configure them for your environment.
For more information, see the Authentication and SSO
-
- Security-related tasks
-
-
Secure your core AM environment against different threats.
-
Configure keys and keystores used for different AM features.
-
Change the
amAdminuser password. -
Learn about delegated privileges and configure delegated realm administrators.
-
Configure audit logging services.
For more information, see the Security.
-
- Maintenance-related tasks
-
-
Learn how to back up and restore your environment.
-
Learn how to monitor your AM instances.
-
Learn how to enable debug logging and how to record troubleshooting information.
-
Tune AM.
For more information, see the Maintenance.
-
AM offers authentication and authorization functionality, which you can expand with Internet specifications and drafts, such as OAuth 2.0, and SAML v2.0.
Once you are confident about your base AM configuration, move on to more advanced features, such as protecting web applications, configuring single sign-on (SSO), federating access across applications, and others.
Uninstall AM
This topic describes how to remove AM software.
To remove a single server from a multi-server deployment, select Deployment > Servers > Server Name then click and Delete.
You can find instructions on removing agents in the Web Agents Installation Guide and the Java Agents Installation Guide.
After you have deployed and configured AM, you might have as many as four locations where AM files are stored on your system.
In a test deployment, the following steps remove the AM software and the internal configuration store. If you used an external configuration store, remove AM configuration data after removing all the software.
-
Shut down the web application container in which you deployed AM.
$ /etc/init.d/tomcat stop
Password:
Using CATALINA_BASE:   /path/to/tomcat
Using CATALINA_HOME:   /path/to/tomcat
Using CATALINA_TMPDIR: /path/to/tomcat/temp
Using JRE_HOME:        /path/to/jdk/jre
Using CLASSPATH:       /path/to/tomcat/bin/bootstrap.jar:
 /path/to/tomcat/bin/tomcat-juli.jar
bash -
Unconfigure AM by removing the configuration files in the $HOME directory of the user running the web application container.
For example:
$ rm -rf $HOME/openam $HOME/.openamcfgbashTo uninstall AM and its associated configuration files, delete the following directories:
-
The configuration directory.
If you didn’t use the default configuration location (
$HOME/openam), check the value of theBase installation directoryproperty under Deployment > Servers > Server Name > General > System. -
The hidden directory that holds a file pointing to the configuration directory.
For example, if you are using Apache Tomcat as the web container, this file could be
$HOME/.openamcfg/AMConfig_path_to_tomcat_webapps_openam_.
-
-
Remove the configuration manually from your external directory server. The default base DN for AM configuration data is
ou=am-config.At this point, you can restart the web container and reconfigure AM if you only want to start over with a clean configuration rather than removing AM completely. -
Undeploy the AM web application.
For example, if you are using Apache Tomcat as the web container, remove the
.warfile and expanded web application from the container:$ cd /path/to/tomcat/webapps/ $ rm -rf openam.war openam/bash
Troubleshoot installations
AM can capture information in debug log files that are useful when troubleshooting AM problems. Debug logging describes how to enable debug logging after AM has been started.
It is also possible to capture debug logs while installing AM. This can be useful if you need to troubleshoot an installation problem.
Follow these steps to capture debug logs while installing AM on Tomcat:
-
If Tomcat is already started, stop it.
-
Specify the
-Dcom.iplanet.services.debug.level=messageoption in theCATALINA_OPTSenvironment variable:$ export CATALINA_OPTS=-Dcom.iplanet.services.debug.level=message
There are several ways that you can specify the
CATALINA_OPTSenvironment variable. You can set the variable:-
In the
/path/to/tomcat/bin/setenv.shfile -
In the login shell of the user who runs Tomcat
-
-
Run the AM installation. Debug log files containing troubleshooting information appear in the
/path/to/openam/var/debugdirectory. -
When you have completed AM installation and no longer need to capture debug logs, stop Tomcat, revert the debug logging options, and restart Tomcat.