Social registration
| Social authentication is deprecated and will be removed in a future release of IDM. For more information, refer to Deprecation. |
IDM provides a standards-based solution for social authentication requirements, based on the OAuth 2.0 and OpenID Connect 1.0 standards. They are similar, as OpenID Connect 1.0 is an authentication layer built on OAuth 2.0.
This chapter describes how to configure IDM to register and authenticate users with multiple social identity providers.
To configure different social identity providers, you’ll take the same general steps:
-
Enable the social providers authentication module.
-
Set up the provider. You’ll need information such as a
Client IDandClient Secretto set up an interface with IDM. -
Configure the provider on IDM.
-
Set up User Registration. Activate
Social Registrationin the applicable admin UI screen or configuration file. -
After configuration is complete, test the result. For a common basic procedure, refer to Test social identity providers.
Enable the social providers authentication module
You must enable the social providers authentication module before using social registration:
-
From the navigation bar, click Configure > Authentication.
-
On the Authentication page, click the Modules tab.
-
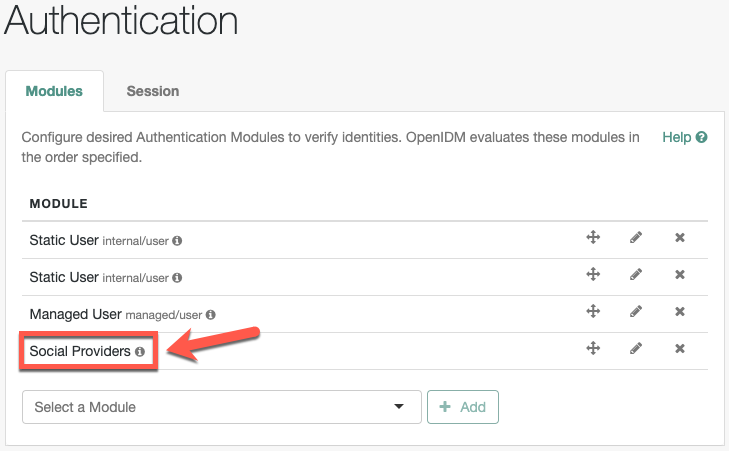
From the Select a module drop-down list, select Social Providers, and click Add.
-
In the New Social Providers Authentication Module window, make sure Module Enabled is enabled.
-
Make changes as necessary, and click Save.
Social Providers now displays in the Module list.

-
Copy
/path/to/openidm/samples/example-configurations/self-service/identityProviders.jsonto your project’sconf/directory.
To understand how data is transmitted between IDM and a social identity provider, read OpenID connect authorization code flow.
|
For all social identity providers, set up a FQDN for IDM, along with information in a DNS server, or system |
When you’ve configured one or more social identity providers, you can activate the Social Registration option in User Registration. This action adds:
-
The following setting to the
selfservice-registration.jsonconfiguration file:"socialRegistrationEnabled" : true, -
The
selfservice-socialUserClaim.jsonconfiguration file, discussed in Account Claiming.
Under the Social tab, you’ll refer to a list of property mappings as defined in the selfservice.propertymap.json file.
One or more source properties in this file takes information from a social identity provider. When a user registers with their social identity account, that information is reconciled to the matching target property for IDM. For example, the email property from a social identity provider is normally reconciled to the IDM managed user mail property.