Post-installation steps
Following installation, it is recommended to perform the following checks to verify that your environment has been set up as expected.
Check Windows Services
Make sure that the ForgeRock Radius Proxy service is installed and running via Windows Services:
-
Press Windows + R on your keyboard.
-
Type services.msc.
-
Hit Enter to open the service.
-
Search for the service under the name column. The service name is ForgeRock Radius Proxy.
Verify installation of folders and files
Verify that all the folders and files are installed under C:\Program Files{forgerock_name}\Radius Agent.
|
The configuration settings are stored in |
Verify functionality with RADIUS client
Once the Windows RADIUS proxy has been configured and installed on a Windows machine, it is important to test the setup.
Before beginning the verification process, make sure the following prerequisites are met:
-
The Windows RADIUS proxy is installed.
-
On a separate Windows machine, a test RADIUS client is installed. For example, NTRadPing.
-
Ensure the appropriate network connectivity is allowed between the two Windows machines. The default port is
1812unless changed in the installation of the Windows RADIUS proxy.
-
-
Have a test account with a username and password.
Validate service is listening
To validate the service is listening, use a tool such as netstat on the Windows machine running the Windows RADIUS proxy:
netstat -ano | find "1812"Test with RADIUS client
To test with the RADIUS client, you must have the following information from the Windows RADIUS proxy installation:
-
Windows RADIUS proxy server and port.
-
RADIUS Secret.
-
Test account with username and password to use with the RADIUS client. Ensure the user account exists in the ForgeRock environment.
For this example, NTRadPing is used as a test RADIUS client; however, any other RADIUS client will work.
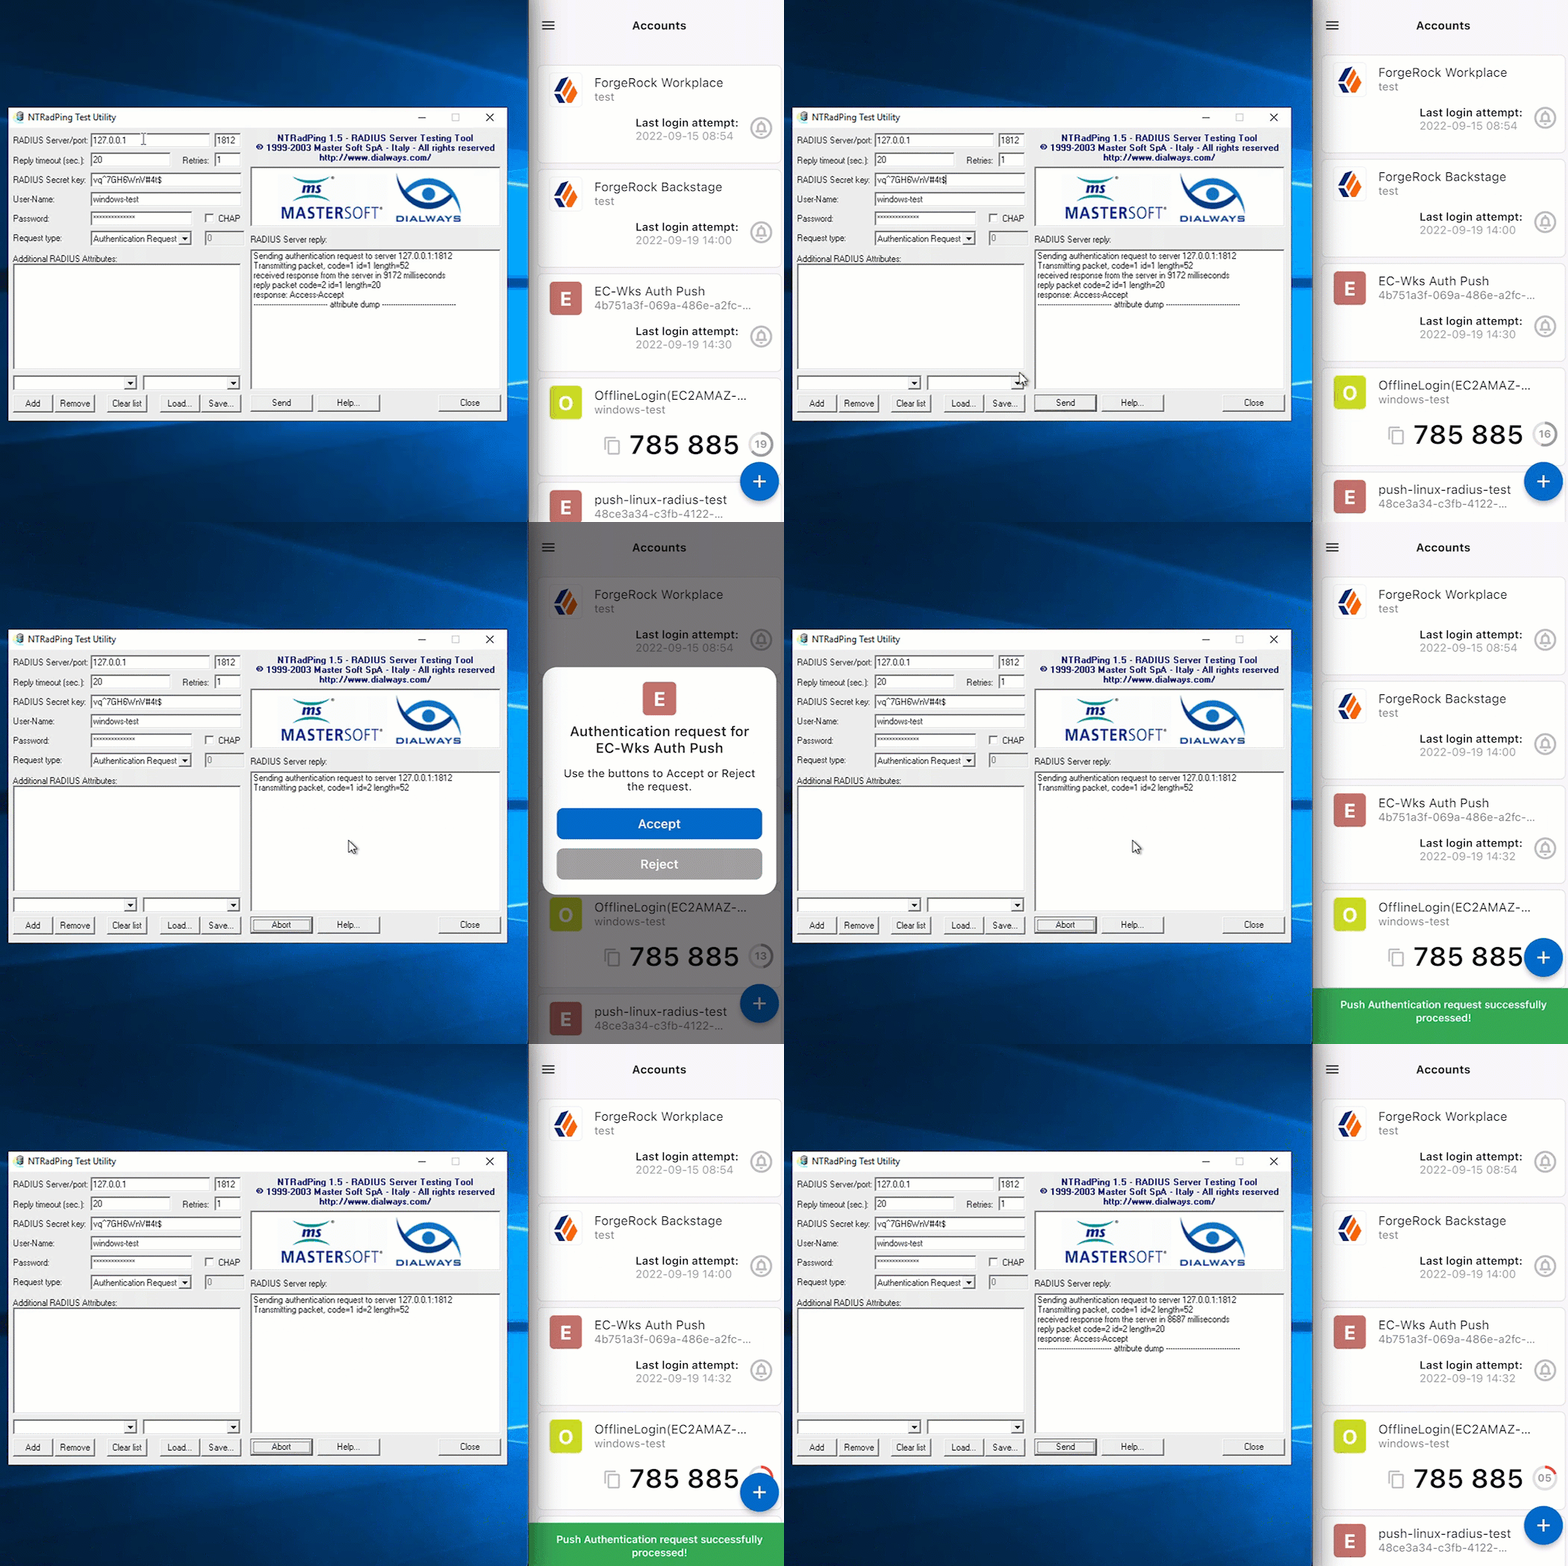
Display an example

-
Open desired RADIUS client, in this case, NTRadPing.
-
Enter the Windows RADIUS proxy specific items. This includes the server, port, secret, and username and password for the test account.
-
Click Send to initiate communication from the RADIUS client to the Windows RADIUS proxy.
-
If the MFA method push was selected, for example, approve the login attempt from the ForgeRock Authenticator application.
For push, users must pre-register as described in Prerequisites and Create push journey.
-
Await a response from the Windows RADIUS proxy (server) that states
Access-Accept.
Change Windows RADIUS proxy secret
Due to security reasons or change management, it can become necessary to change the secret you configured for the Windows RADIUS proxy (during the time of installation).
The installation path includes an executable to assist with the updating of the secret:
-
Via Command Prompt, go to C:\Program Files{forgerock_name}\Radius Agent on your Windows machine.
-
Run the ConfigTool.exe file with the appropriate parameters:
ConfigTool.exe set-secret --secret enterNewSecretHere -
A message such as
`appsettings.Production.json` Updated Successfully!should appear. -
The Windows RADIUS proxy secret has now been updated.
|
Ensure to update the Windows RADIUS proxy on dependent applications utilizing the service. |