MSI deployment of Windows Workstation Authentication
Once the MSI package is generated post the MSI Updater client, it is ready to be deployed to your end user’s workstations.
The three options for deployment are:
-
Through a silent installation. This installation type should be used for organizational and other large-scale deployments.
-
Through the Installation Wizard.
-
Through your preferred distribution tool.
|
The MSI package to be used is generated from the MSI Updater client, as described in Configure the MSI Updater client. The following sections will reference a |
Perform silent installation
Silent installation allows administrators to manually install workstation authentication or push the installation to all client workstations from a central tool silently without disturbing the end user’s workstation.
This is the preferred method for organizational and other large-scale deployments.
Before performing installation with software distribution tools, make sure the Visual C++ 2017 (or later) Redistributable (x64)/(x86) - 14.30.30704.0 is installed. If this package is not installed, the installation will abort and an error message will be displayed.
|
Administrator permissions are required to run the workstation authentication for Windows MSI. |
To perform silent installation:
-
Open the command prompt as an administrator, and run
workstation authentication.msi. -
Run
Workstation Authentication.msi:C:\>msiexec -i Workstation Authentication – xx_xxx_xx.msi /qn -
If you want the workstation authentication credential provider to be disabled on some workstations after installation (allowing for gradual deployment), refer to Enable/disable the workstation authentication CP post-installation.
Perform deployment using the Installation Wizard
This method deploys the MSI package using the workstation authentication installation wizard. All required components (including the Visual C++ Redistributable) are automatically installed as part of the deployment.
|
This deployment option must be run directly from the end user’s workstation. |
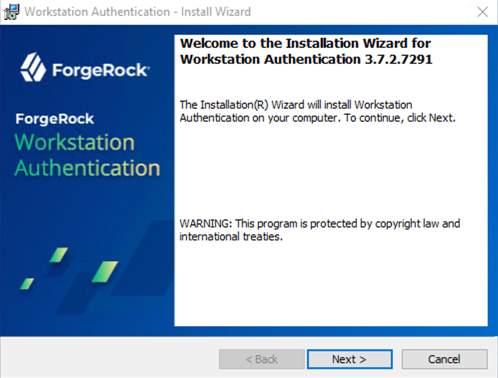
To deploy workstation authentication using the installation wizard:
-
To launch the wizard, run the updated workstation authentication MSI file. This is the outputted file from the MSI Updater client, as described in configuring-windows-msiupdater.adoc#configure_the_msiupdater_client.
A warning screen from Windows Defender can pop up stating "Windows Protected your PC". Click More Info > Run anyway to continue to run the MSI file.
-
On the Welcome page, click Next.
-
On the page that opens, accept the license agreement, and then click Next.
-
To begin the installation, click Install.
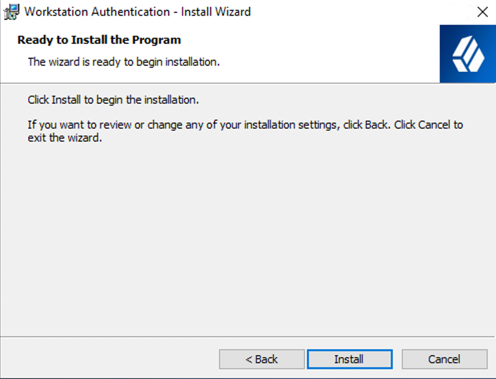
A status bar is displayed during the installation process.
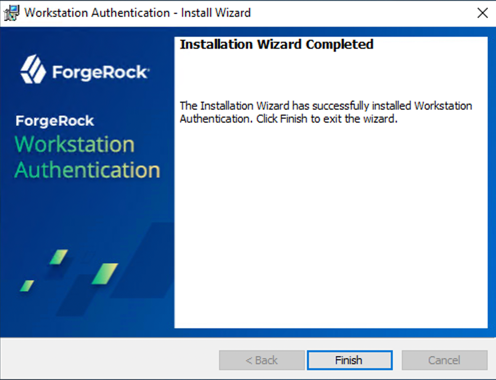
-
To exit the wizard, click Finish.
Perform installation through distribution tools
Follow the steps below to push the installation through your endpoint management or software distribution tool.
|
Administrator permissions are required to run the workstation authentication for Windows MSI. |
To push installation through distribution tools:
-
Open and run your distribution software.
-
Install Visual C++ 2017 (or later) Redistributable (x64)/(x86) - 14.30.30704.0.
-
Open the command prompt as Admin, and run
Workstation Authentication.msi:C:\> Workstation Authentication – xx_xxx_xx.msi /qnSubstitute the file name with your outputted, deployment specific, MSI file.
Windows Registry Keys post-deployment
Upon deployment of your specific MSI file, registry keys are created/updated on the target Windows machine. To reference the specific registry keys pertaining to Windows Workstation Authentication:
-
Open Registry Editor as an administrator.
-
Navigate to Enterprise Connect specific registry keys by going to HKEY_LOCAL_MACHINE > SOFTWARE > SecretDoubleOctopus.
-
From here, select the various tabs to see the specific values of the Registry Keys. You will notice values that you configured during the Configure the MSI Updater client process.
MSI Updater - ForgeRock tab registry keys
During the MSI Updater client configurations, on the ForgeRock tab, the corresponding registry key and values (under the ForgeRock directory) are shown below:
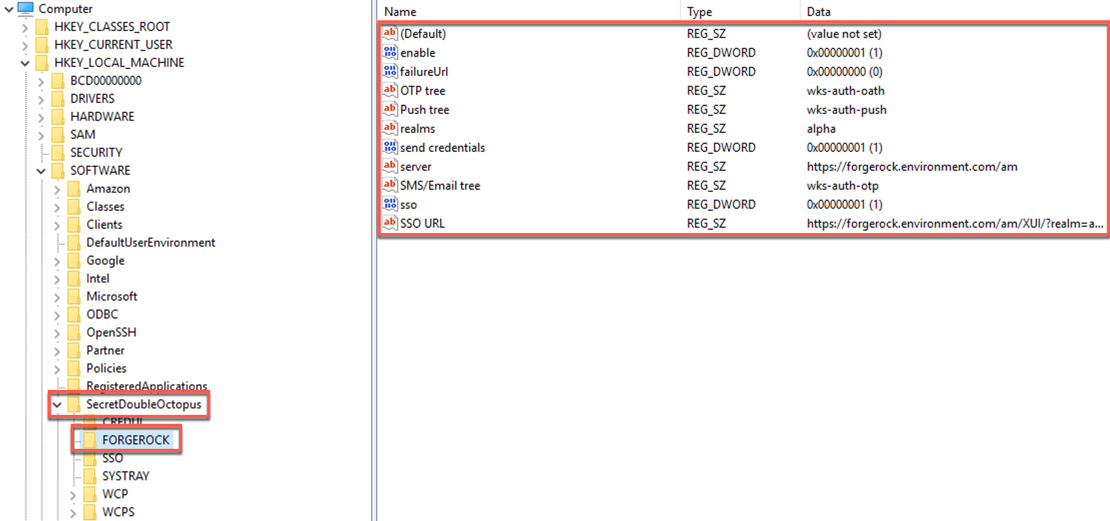
MSI Updater - Advanced tab registry keys
During the MSI Updater client configurations, on the advanced tab. The corresponding registry key and values (under the WCPS directory) are shown below:
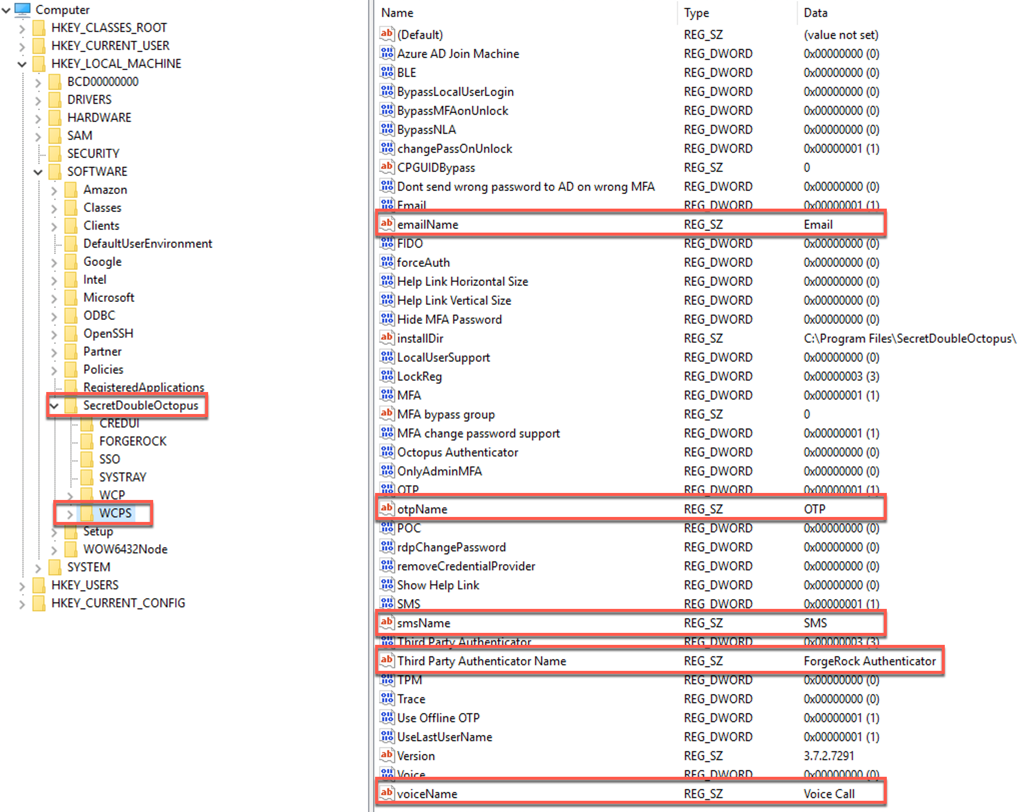
|
Changing the registry key values must only take place if required (for example, resetting the Offline OTP process). Otherwise, all configurations should come through configuring the MSI Updater client for consistent values on all Windows workstations. |
-
Download and install the binaries from Backstage (you must be logged in). This includes the base MSI file as well as the MSI Updater client.
-
Pre-configure the relevant journey(s).
-
Install the MSI Updater client on an administrative Windows machine.
-
Configure the MSI Updater client specific to your organization’s needs.
-
(Optional) Consider additional configurations.
-
Deploy the generated MSI file through your desired mechanism.
-
Verify and test your deployment.