Set up the platform UIs
The ForgeRock® Identity Platform includes three UIs:
- Admin UI
-
Lets platform administrators manage applications, identities, end user journeys, and so on.
- End User UI
-
An example UI that demonstrates profile maintenance, consent management, workflow, and delegated administration capabilities. This UI makes REST calls to IDM (using an OAuth 2 bearer token) and to AM (using an SSO cookie).
This UI is not the same as the standalone IDM End User UI.
The platform End User UI is designed specifically for an integrated platform deployment.
The IDM end user UI should be used only in a standalone IDM deployment.
- Login UI
-
A unified Login UI that lets both administrators and end users log in to the platform.
This document describes two ways to deploy the UIs:
Run Docker images
In this deployment, the three UIs are deployed from three Docker images.
|
Either deploy the Platform UI by running Docker images or by installing a If you have already deployed the Platform UI by installing a |
-
Download the Docker images:
-
Download the Admin UI:
docker pull gcr.io/forgerock-io/platform-admin-ui:7.3.0bash -
Download the End User UI:
docker pull gcr.io/forgerock-io/platform-enduser-ui:7.3.0bash -
Download the Login UI:
docker pull gcr.io/forgerock-io/platform-login-ui:7.3.0bash
-
-
Create an environment file named
platform_envthat will be passed to thedockercommand.The file should have the following contents:
AM_URL=http://am.example.com:8081/am AM_ADMIN_URL=http://am.example.com:8081/am/ui-admin IDM_REST_URL=http://openidm.example.com:8080/openidm IDM_ADMIN_URL=http://openidm.example.com:8080/admin IDM_UPLOAD_URL=http://openidm.example.com:8080/upload IDM_EXPORT_URL=http://openidm.example.com:8080/export ENDUSER_UI_URL=http://enduser.example.com:8888 PLATFORM_ADMIN_URL=http://admin.example.com:8082 ENDUSER_CLIENT_ID=end-user-ui ADMIN_CLIENT_ID=idm-admin-ui THEME=default PLATFORM_UI_LOCALE=enpropertiesWhen you deploy multiple Platform UI Docker containers with the same hostname, use the
SUBFOLDERenvironment variable to prefix a base URL path for each UI.For example, if you deploy all the UIs on
ui.example.com, use the following settings to make the End User UI accessible under/enduser:In the End User UI configuration, set:
SUBFOLDER=enduser
In all Platform UI environments, set:
ENDUSER_UI_URL=http://ui.example.com:8888/enduser
Adapt your configuration to account for the path changes.
-
Start each Docker container, specifying the environment file:
-
Change to the directory in which you saved the
platform_envfile, then start the Login UI:docker run -t -i --rm -p 8083:8080 --env-file=platform_env \ gcr.io/forgerock-io/platform-login-ui:7.3.0 Replacing env vars in JS Setting AM URL as http://am.example.com:8081/am Setting AM ADMIN URL as http://am.example.com:8081/am/ui-admin Setting IDM REST URL as http://openidm.example.com:8080/openidm Setting IDM ADMIN URL as http://openidm.example.com:8080/admin ...bashThe --rmoption causes thedocker runcommand to remove the container on exit. Remove this option if you want to keep a container when it exits. -
In a new terminal, change to the directory in which you saved the
platform_envfile, then start the Admin UI:docker run -t -i --rm -p 8082:8080 --env-file=platform_env \ gcr.io/forgerock-io/platform-admin-ui:7.3.0 Replacing env vars in JS Setting AM URL as http://am.example.com:8081/am Setting AM ADMIN URL as http://am.example.com:8081/am/ui-admin Setting IDM REST URL as http://openidm.example.com:8080/openidm Setting IDM ADMIN URL as http://openidm.example.com:8080/admin ...bash -
In a new terminal, change to the directory in which you saved the
platform_envfile, then start the End User UI:docker run -t -i --rm -p 8888:8080 --env-file=platform_env \ gcr.io/forgerock-io/platform-enduser-ui:7.3.0 Replacing env vars in JS Setting AM URL as http://am.example.com:8081/am Setting AM ADMIN URL as http://am.example.com:8081/am/ui-admin Setting IDM REST URL as http://openidm.example.com:8080/openidm Setting IDM ADMIN URL as http://openidm.example.com:8080/admin ...bash-
Test access to the Admin UI by logging in through the Login UI.
-
Sign in as
amAdmin. You are redirected to the Admin UI: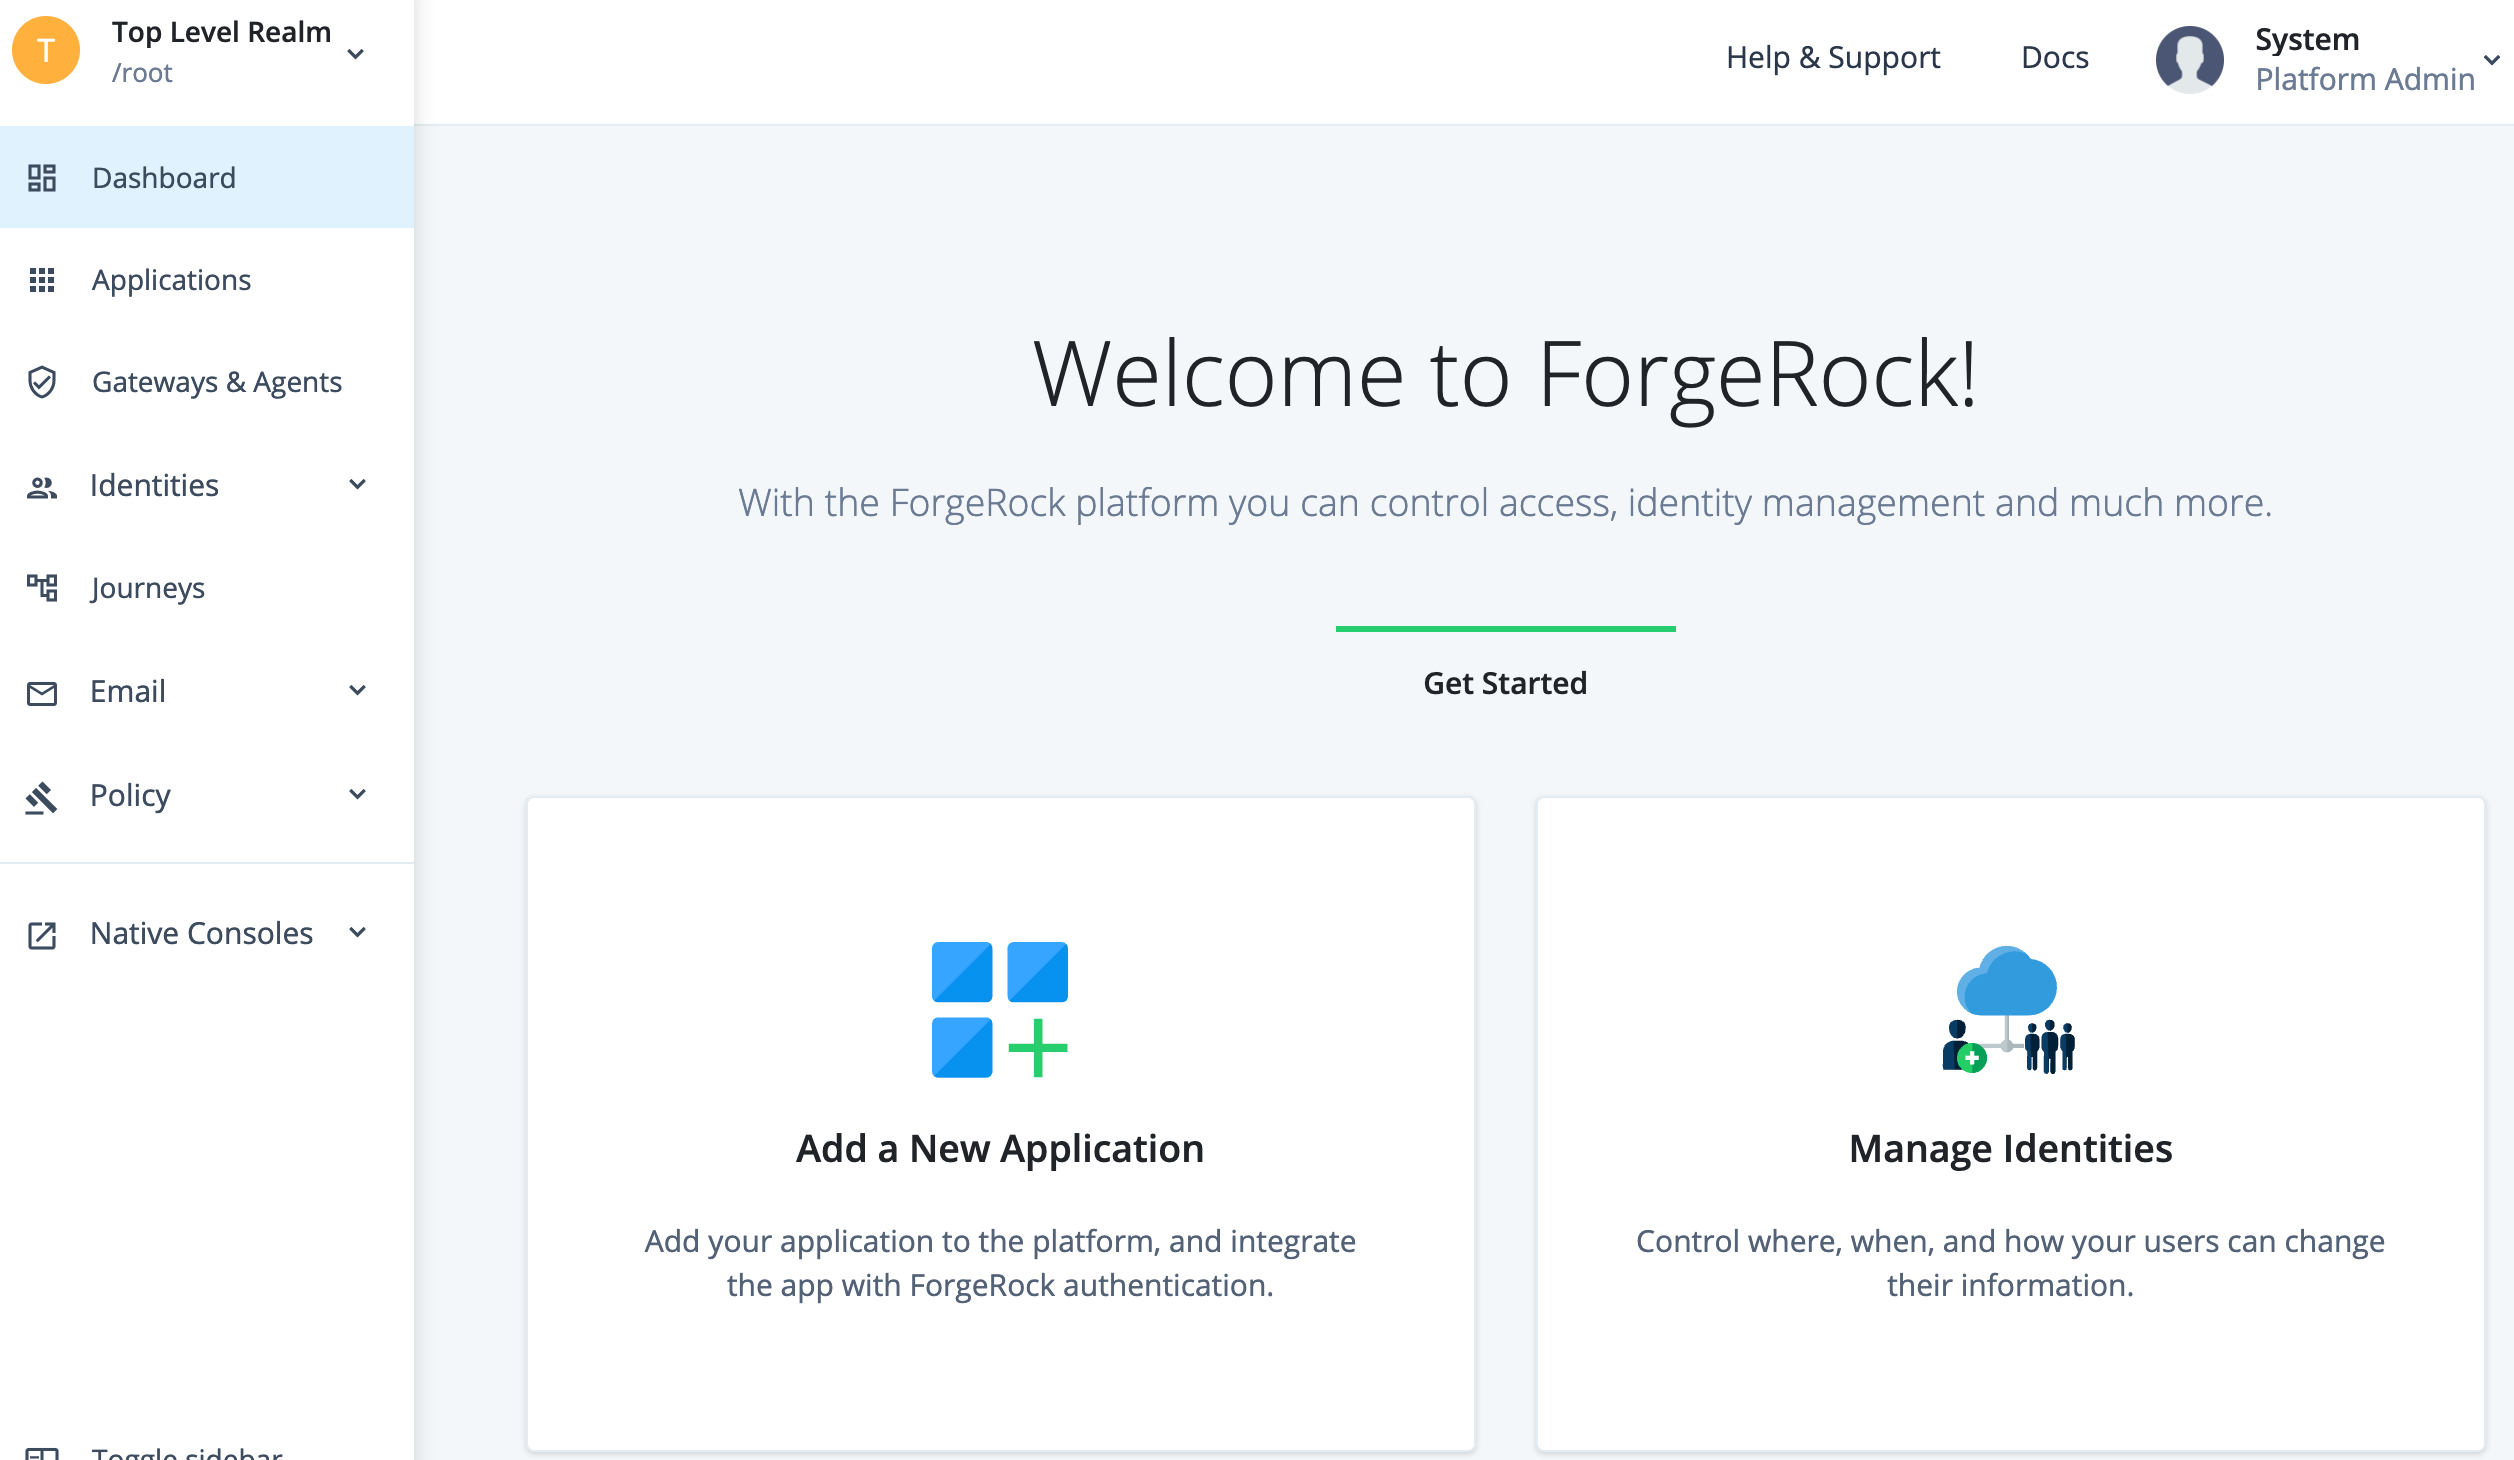
-
Sign out of the Admin UI.
-
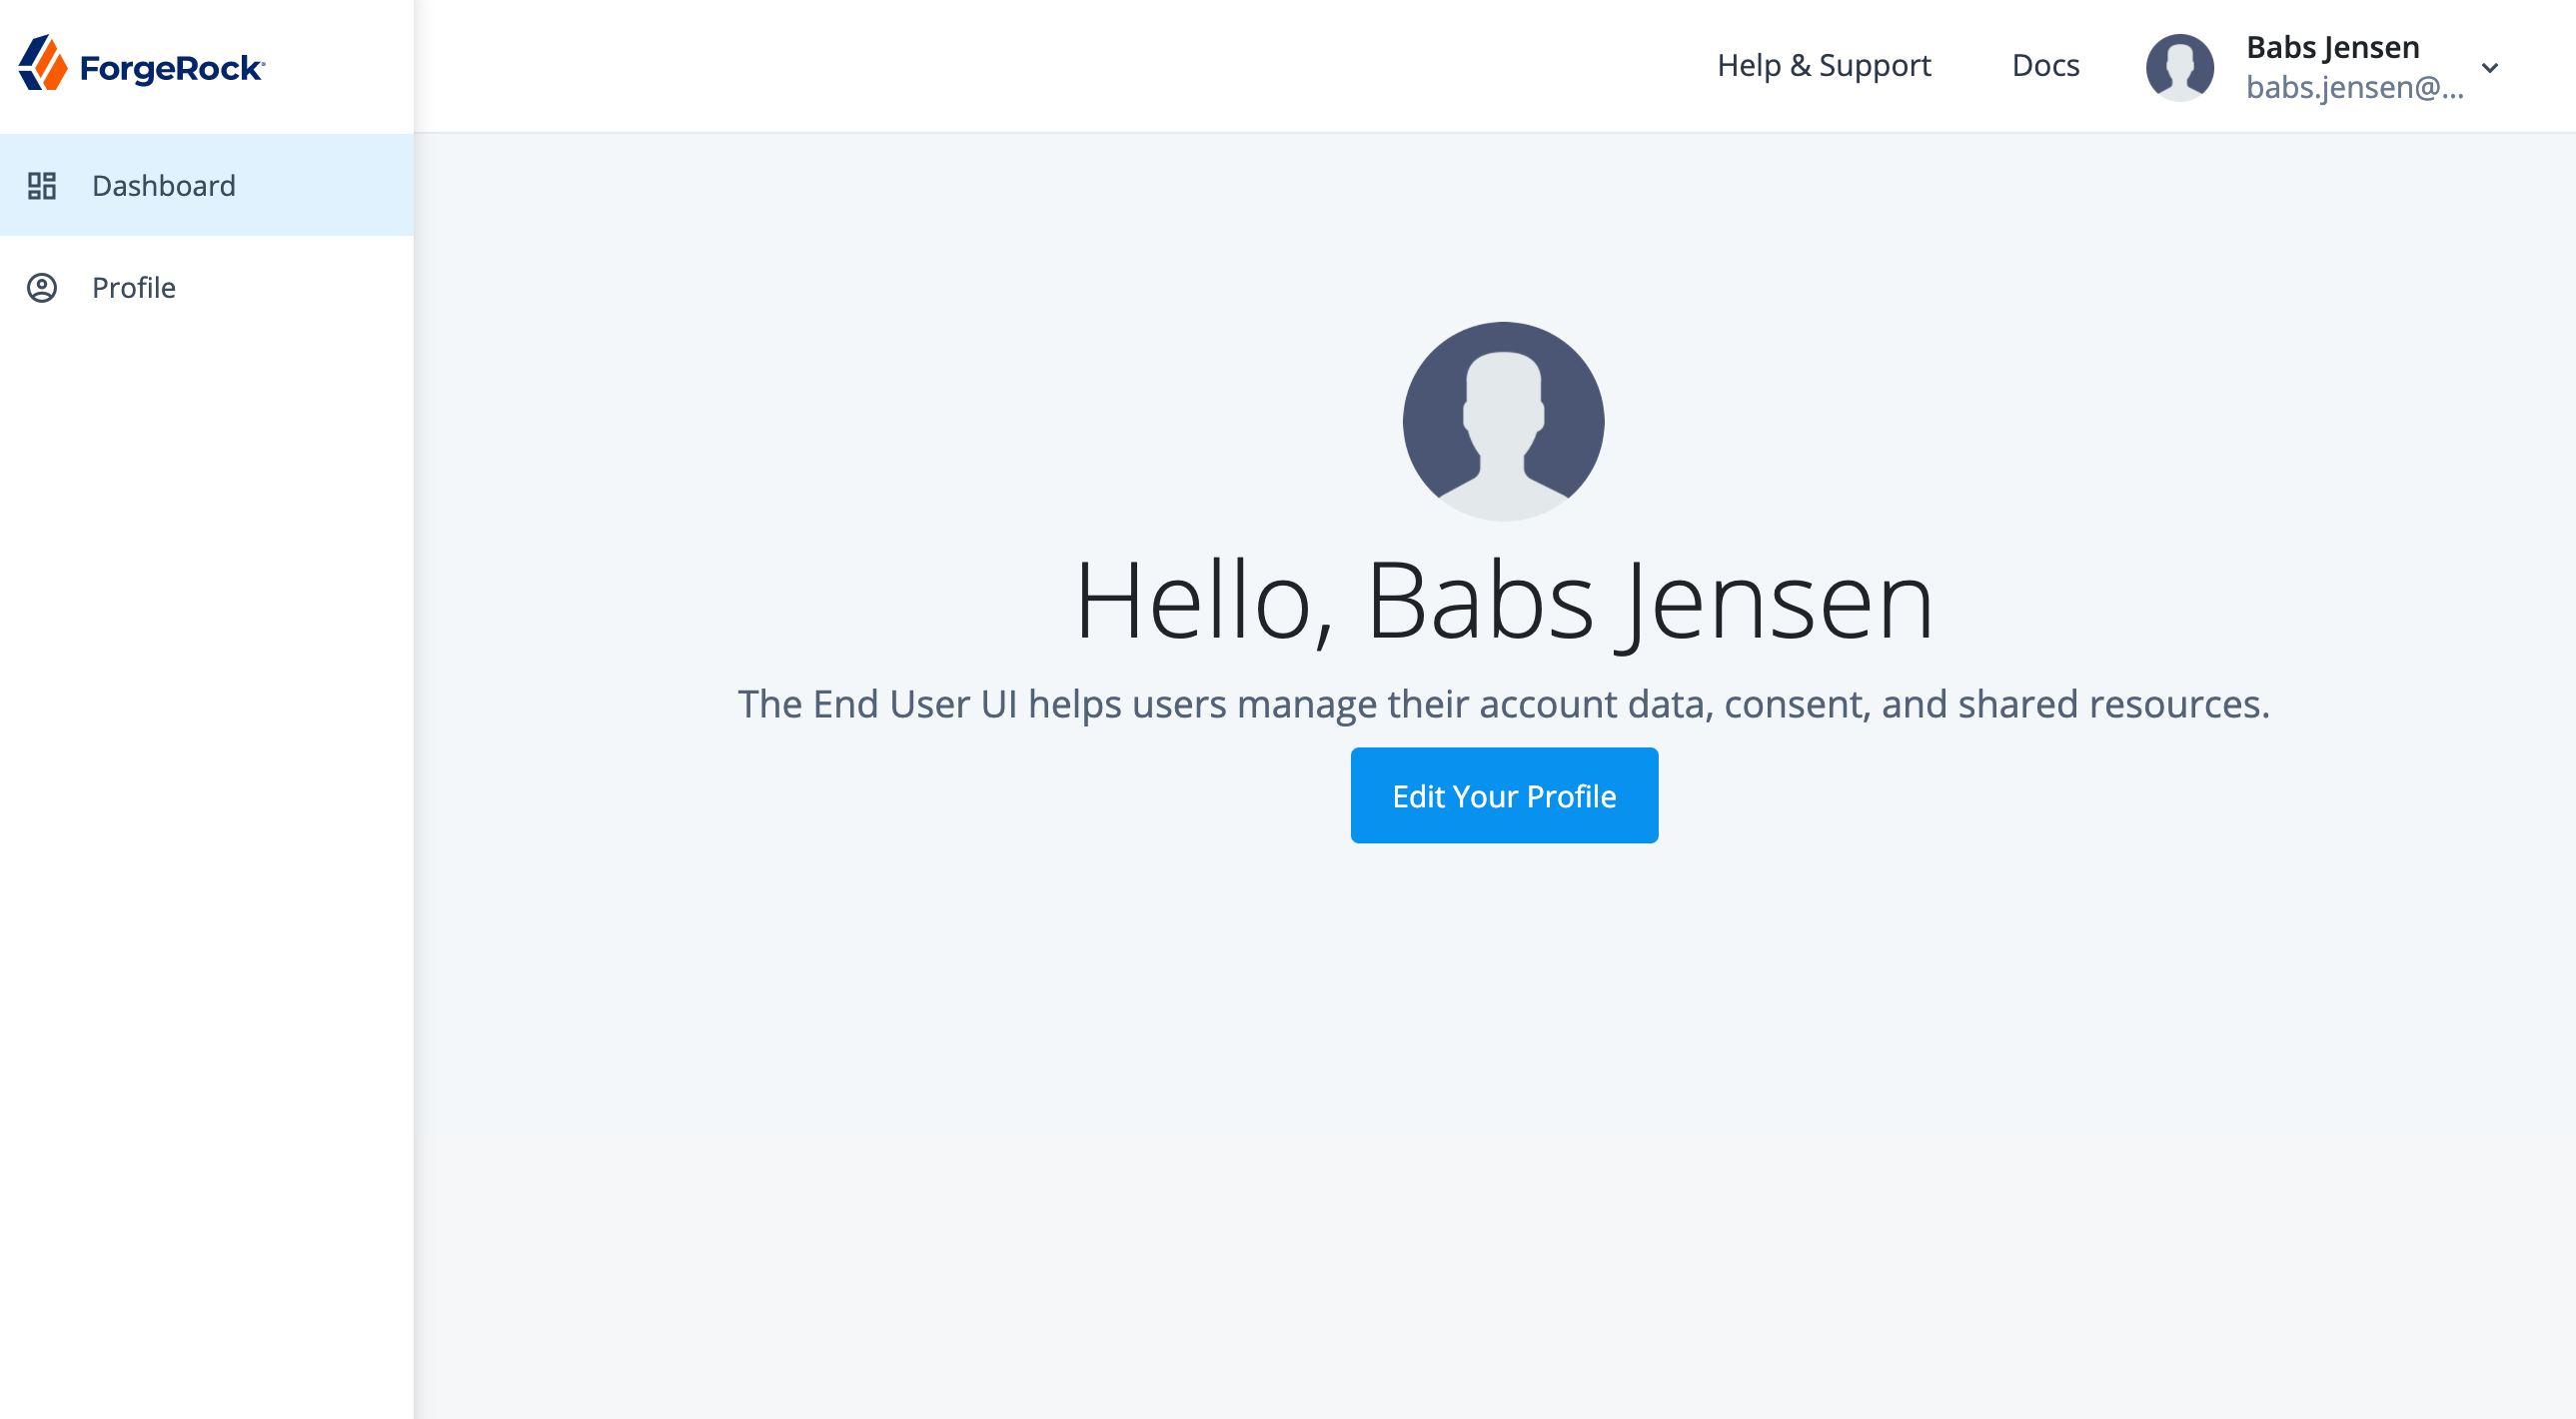
To test the End User UI, self-register as a new user.
Click Create an account.
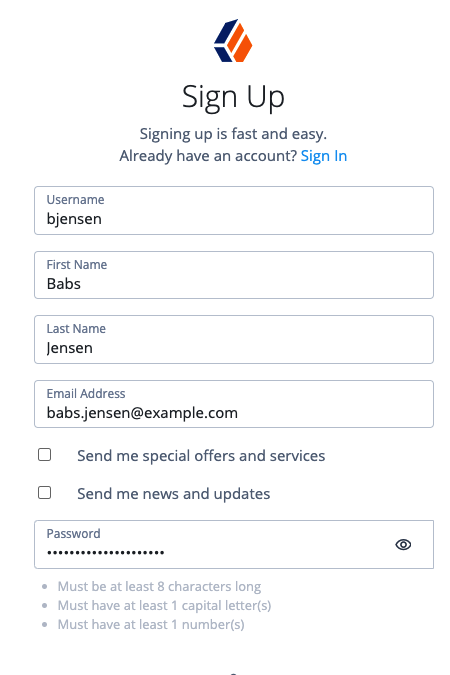
-
When the required fields have been completed, you are logged into the End User UI, as that user:
-
Install a .zip file
In this deployment, you obtain the three UIs from a .zip file that you get
from ForgeRock. Then, you install them in the AM web container. You also
tweak the AM and IDM configurations so that they work with this
UI installation.
|
Either deploy the Platform UI by running Docker images or by installing a If you have already deployed the Platform UI by running Docker images, do not perform these steps. |
-
Get the UI
.zipfile, and unzip it into the tmp directory:-
Create the /tmp/ui-zip directory.
-
Download the most recent version of the 7.3.x UI
.zipfile from the Platform section of the ForgeRock downloads site. -
Copy the UI
.zipfile into the /tmp/ui-zip directory. -
Unzip the UI
.zipfile.
-
-
Replace URLs in the UI application with URLs for your ForgeRock Identity Platform deployment:
-
Change to the /tmp/ui-zip/PlatformUI directory.
-
Run the following commands:
export AM_URL=http://am.example.com:8081/am
export AM_ADMIN_URL=http://am.example.com:8081/am/ui-admin
export IDM_REST_URL=http://openidm.example.com:8080/openidm
export IDM_ADMIN_URL=http://openidm.example.com:8080/admin
export IDM_UPLOAD_URL=http://openidm.example.com:8080/upload
export IDM_EXPORT_URL=http://openidm.example.com:8080/export
export ENDUSER_UI_URL=http://am.example.com:8081/enduser
export PLATFORM_ADMIN_URL=http://am.example.com:8081/platform
export ENDUSER_CLIENT_ID=end-user-ui
export ADMIN_CLIENT_ID=idm-admin-ui
export THEME=default
export PLATFORM_UI_LOCALE=en
bash -
Run the variable_replacement.sh script.
This script replaces variables in the
.zipfile’s UI web application with the values of the environment variables that you set in the previous step:./variable_replacement.sh www/platform/js/*.js www/enduser/js/*.js www/login/js/*.js Replacing env vars in JS Setting AM URL as http://am.example.com:8081/am Setting AM ADMIN URL as http://am.example.com:8081/am/ui-admin Setting IDM REST URL as http://openidm.example.com:8080/openidm ...bash
-
-
Install the UI:
-
Install the
platformandenduserweb applications into AM’s web container:cd /path/to/tomcat/webapps cp -r /tmp/ui-zip/PlatformUI/www/platform . cp -r /tmp/ui-zip/PlatformUI/www/enduser .bash -
Modify AM to use the new Login UI:
cd /path/to/tomcat/webapps/am/XUI
cp -r /tmp/ui-zip/PlatformUI/www/login/* .
bash
-
-
Revise the AM and IDM configurations to work with the new UI installation:
-
If you’re not currently logged in to the AM admin UI as the
amAdminuser, log in. -
Revise the success URL for three authentication trees, so that they refer to the End User UI:
-
Change the success URL for the
Platform Regstrationtree.In the
alpharealm, select Authentication > Trees, and click on PlatformRegistration. Select the Success URL node. Change the Success URL value to http://am.example.com:8081/enduser, and then click Save. -
Use the same technique to change the Success URL value for the
PlatformLogintree to http://am.example.com:8081/enduser. -
Use the same technique to change the Success URL value for the
PlatformResetPasswordtree to http://am.example.com:8081/enduser.
-
-
Clear the External Login Page URL value.
In the
alpharealm, select Authentication > Settings, and click the General tab. Set External Login Page URL to an empty string, and then click Save Changes. -
Log out of the AM admin UI.
-
Create the /path/to/openidm/conf/ui-themerealm.json file with the following contents:
{
    "realm": {}
}
json
-
-
Test access to the Admin UI:
-
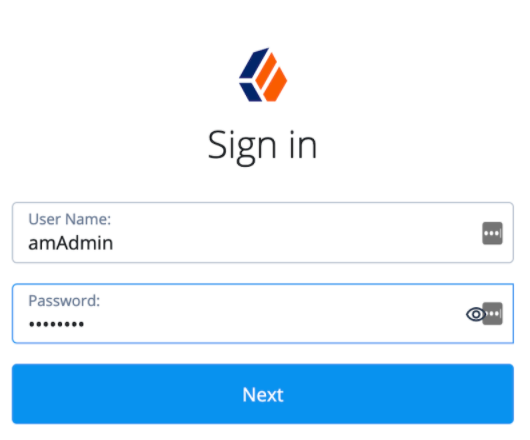
Go to http://am.example.com:8081/platform.
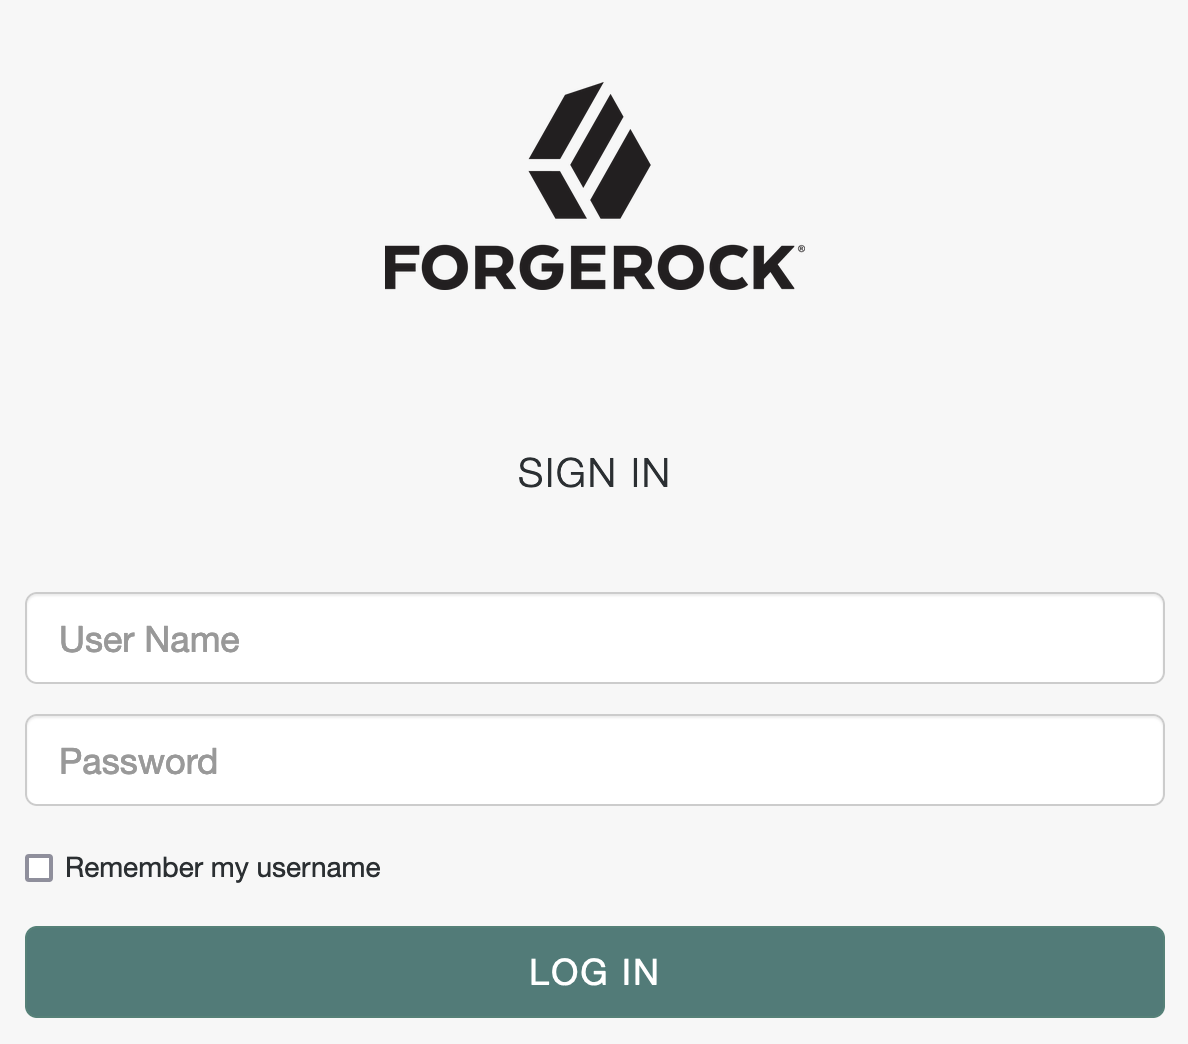
The Sign in page appears:
-
Sign in as the
amAdminuser. You are redirected to the Admin UI:
-
-
Test access to the End User UI:
-
In the Admin UI, create a test user:
-
Click Identities > Manage.
-
Click + New User.
-
Fill in the user details.
-
Click Save.
-
-
Sign out of the Admin UI.
-
Go to http://am.example.com:8081/enduser.
The Sign in page appears.
-
Sign in as the test user you just created. You should be redirected to the End User UI.
-
Redirect on signout
When the test user signs out of the End User UI, the browser redirects to the AM XUI login page:
You can change this behavior to redirect to your application. Options for managing redirection on sign out include:
-
Use IG, as described in Protect the deployment, with a route to redirect the browser from the XUI to your application.
If you choose this option, skip the steps that follow.
-
Script a
post_logout_urlclaim that AM returns to the End User UI through the user’s ID token. When the user signs out, the End User UI redirects the browser to the URL specified in the claim.
Follow these steps to configure a post_logout_url claim:
-
If you’re not currently logged in to the AM admin UI as the
amAdminuser, log in. -
Under Scripts, find the OIDC Claims Script, and click to view the script.
This script lets you customize the OpenID Connect 1.0 claims in the user’s ID token.
-
Add a
post_logout_urlclaim method to the array ofclaimAttributes.The following Groovy example adds a final item to
claimAttributesto returnhttps://forgerock.comas thepost_logout_urlclaim. Adapt the method used to return the appropriate URL for your application:claimAttributes = [ //..., "post_logout_url": { claim, identity -> return [(claim.getName()): "https://forgerock.com"] } ]groovy -
Add the claim for the
fr:idm:*scope as a final item in thescopeClaimsMap:scopeClaimsMap = [ //..., "fr:idm:*": [ "post_logout_url" ] ]groovy -
Click Validate, correct any errors accidentally introduced, and then click Save Changes.
-
Under Services > OAuth2 Provider, search for
Always Return Claims in ID Tokens, then enable the option, and click Save Changes.AM can now return the custom claim in the user’s ID token.
-
Test the changes you have made:
-
Log out of the AM admin UI.
-
Sign in as a test user at http://login.example.com:8083/?realm=/alpha#/service/PlatformLogin.
-
Sign out.
The End User UI redirects the browser to the URL you configured for the
post_logout_urlclaim, in this case the main ForgeRock site.
-