Implement MFA using push notifications
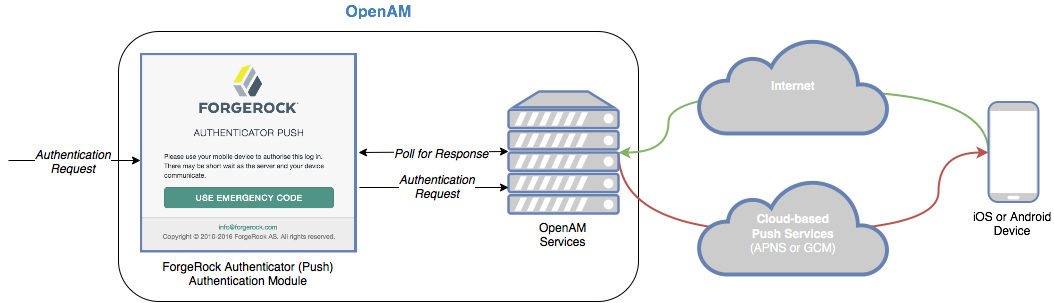
In this use case, you authenticate a user with MFA by setting up the ForgeRock Authenticator for push notification.
To receive push notifications when authenticating, end users must register an Android or iOS device running the ForgeRock Authenticator.
The registered device can then be used as an additional factor when authenticating. Your server sends the device a push notification, which is handled by the ForgeRock Authenticator. In the app, you can allow or deny the request that generated the push notification and return the response to AM.
How push authentication works
The following steps occur as a user completes a push notification journey:
-
The user provides credentials to enable AM to locate the user profile and determine if they have a registered mobile device.
-
The journey prompts the user to register a mobile device if they have not done so already.
The user registers their device by using the ForgeRock Authenticator. The application supports a variety of methods for responding to push notifications, such as tapping a button, or using biometrics.
Registering a device stores device metadata in the user profile that is required for push notifications. AM uses the configured ForgeRock Authenticator (Push) service, which supports encrypting the metadata.
-
Once the user has a registered device, AM creates a push message specific to the device.
The message has a unique ID that AM stores while waiting for the response.
AM writes a pending record with the same message ID to the CTS store for redundancy should an individual server go offline during the authentication process.
-
AM sends the push message to the registered device.
AM delivers the message through the configured push notification service.
Depending on the registered device, AM uses either Apple Push Notification Services (APNS) or Google Cloud Messaging (GCM) to deliver the message.
AM begins to poll the CTS for an accepted response from the registered device.
-
The user responds to the notification through the ForgeRock Authenticator application on the device, for example, approving or rejecting the notification.
The application responds to the push notification message with the user’s choice.
-
AM verifies the message is from the correct registered device and has not been tampered with, and marks the pending record as accepted if valid.
AM detects the accepted record and redirects the user to their profile page, completing the authentication.
Step 1. Enable the ForgeRock Authenticator Push service
In this step you configure your server to operate with the ForgeRock Authenticator. We will use the default settings.
-
Advanced Identity Cloud
-
Self-managed PingAM server
-
Log in to the PingOne Advanced Identity Cloud admin UI as an administrator.
-
In the left menu pane, select Native Consoles > Access Management.
The realm overview for the Alpha realm displays.
-
Select Services, and then click Add a Service.
-
In Choose a service type, select ForgeRock Authenticator (Push) Service, and then click Create.
-
Click Save Changes to accept the default settings.
-
Log in to the AM admin UI as an administrator.
The realm overview for the Top Level Realm displays.
-
Select Services, and then click Add a Service.
-
In Choose a service type, select ForgeRock Authenticator (Push) Service, and then click Create.
-
Click Save Changes to accept the default settings.
Step 2: Create Push service credentials in Backstage
Your server uses an external AWS service to send push notifications. Its configuration requires access keys and other metadata. As a customer, you have streamlined access to the required metadata:
-
In a web browser, log in to the Service Credentials page on Backstage.
-
Under Push Authentication AWS Credentials, click Create.

-
In Description, enter
Push credentials for MFA journey. -
In Region, select the location closest to the majority of your users.
-
Click Create.
The Create New AWS Credential screen displays the settings you must add to your server.
-
Click Download as JSON.
This downloads a file in JSON format containing all the values for you to store securely:
Example of a downloaded JSON file with push service credential values{ "id": "uzW8...rwJC", "provider": "AWS", "creationTimestamp": "2023-10-18T17:02:00.882Z", "createdBy": "admin.user", "updateTimestamp": null, "updatedBy": null, "description": "Push credentials for MFA journey", "supportKey": null, "validUntil": null, "writable": true, "region": "eu-west-1", "accessKeyId": "AKIA...6N74", "accessKeySecret": "uVjT...uu+k", "applicationArns": { "APNS": "arn:aws:sns:eu-west-1:1234:app/APNS/rgBO...n4RA", "GCM": "arn:aws:sns:eu-west-1:1234:app/GCM/rgBO...n4RA" } }jsonIt is vital that you have a copy of these values, especially the accessKeySecretvalue, as it is not stored on Backstage. -
Click Close.
Step 3: Configure the Push Notification service in your server
In this step you configure your server with the settings it needs to be able to send push notifications to mobile devices.
You will need the AWS service credentials obtained in the previous step.
-
Advanced Identity Cloud
-
Self-managed PingAM server
-
Log in to the PingOne Advanced Identity Cloud admin UI as an administrator.
-
In the left menu pane, select Native Consoles > Access Management.
The realm overview for the Alpha realm displays.
-
Select Services, and then click Add a Service.
-
In Choose a service type, select Push Notification Service.
-
Open the JSON file you obtained in the previous step:
{
  "id": "uzW8...rwJC",
  "provider": "AWS",
  "creationTimestamp": "2023-10-18T17:02:00.882Z",
  "createdBy": "admin.user",
  "updateTimestamp": null,
  "updatedBy": null,
  "description": "Push credentials for MFA journey",
  "supportKey": null,
  "validUntil": null,
  "writable": true,
  "region": "eu-west-1",
  "accessKeyId": "AKIA...6N74", (1)
  "accessKeySecret": "uVjT...uu+k", (2)
  "applicationArns": {
    "APNS": "arn:aws:sns:eu-west-1:1234:app/APNS/rBO...n4A", (3)
    "GCM": "arn:aws:sns:eu-west-1:1234:app/GCM/rBO...n4A" (4)
  }
}
json -
Enter the fields from the JSON file into the fields that display:
Field in PingOne Advanced Identity Cloud admin UI Field in JSON file Description SNS Access Key ID
①
accessKeyIdThe generated Key ID; the
"accessKeyId"key in the JSON.SNS Access Key Secret
②
accessKeySecretThe generated Secret; the
"accessKeySecret"key in the JSON.SNS Endpoint for APNS
③
APNSThe generated APNS value; the
"applicationArns/APNS"key in the JSON.The Apple Push Notification Service (APNS) endpoint that SNS uses to send push notifications to iOS devices.
SNS Endpoint for GCM
④
GCMThe generated GCM value; the
"applicationArns/GCM"key in the JSON.The Google Cloud Messaging (GCM) endpoint that SNS uses to send push notifications to Android devices.
Do not enter the quotes that surround the JSON values. -
Click Create, and then click Save Changes.
-
Log in to the AM admin UI as an administrator.
The realm overview for the Top Level Realm displays.
-
Select Services, and then click Add a Service.
-
In Choose a service type, select Push Notification Service.
-
Open the JSON file you obtained in the previous step:
{
  "id": "uzW8...rwJC",
  "provider": "AWS",
  "creationTimestamp": "2023-10-18T17:02:00.882Z",
  "createdBy": "admin.user",
  "updateTimestamp": null,
  "updatedBy": null,
  "description": "Push credentials for MFA journey",
  "supportKey": null,
  "validUntil": null,
  "writable": true,
  "region": "eu-west-1",
  "accessKeyId": "AKIA...6N74", (1)
  "accessKeySecret": "uVjT...uu+k", (2)
  "applicationArns": {
    "APNS": "arn:aws:sns:eu-west-1:1234:app/APNS/rBO...n4A", (3)
    "GCM": "arn:aws:sns:eu-west-1:1234:app/GCM/rBO...n4A" (4)
  }
}
json -
Enter the fields from the JSON file into the fields that display:
Field in AM admin UI Field in JSON file Description SNS Access Key ID
①
accessKeyIdThe generated Key ID; the
"accessKeyId"in the JSON.SNS Access Key Secret
②
accessKeySecretThe generated Secret; the
"accessKeySecret"in the JSON.SNS Endpoint for APNS
③
APNSThe generated APNS value; the
"applicationArns/APNS"key in the JSON.The Apple Push Notification Service (APNS) endpoint that SNS uses to send push notifications to iOS devices.
SNS Endpoint for GCM
④
GCMThe generated GCM value; the
"applicationArns/GCM"key in the JSON.The Google Cloud Messaging (GCM) endpoint that SNS uses to send push notifications to Android devices.
Do not enter the quotes that surround the JSON values. -
Click Create, and then click Save Changes.
Step 4: Create a push registration and authentication journey
In this step you create an authentication journey that registers a device running the ForgeRock Authenticator to the user’s profile if they have not done so already, then send a push notification to that device.
The journey then polls until it receives a response or timeout from the device. It verifies the returned data and completes the authentication journey if valid.
Choose whether you are creating the journey in PingOne Advanced Identity Cloud or a self-managed PingAM server, and follow the instructions to create the required authentication journey:
-
Advanced Identity Cloud
-
Self-managed PingAM server
-
In the PingOne Advanced Identity Cloud admin UI
-
Select the realm that will contain the authentication journey.
-
Select Journeys, and click New Journey.
-
Enter a name for your tree in Name page; for example,
MFAwithPush -
In Identity Object, select the identity type that will be authenticating, for example
Alpha realm - Users. -
Click Save.
The authentication journey designer page is displayed with the default Start, Failure, and Success nodes.
-
-
Add the following nodes to the designer area:
-
Connect the nodes as shown:
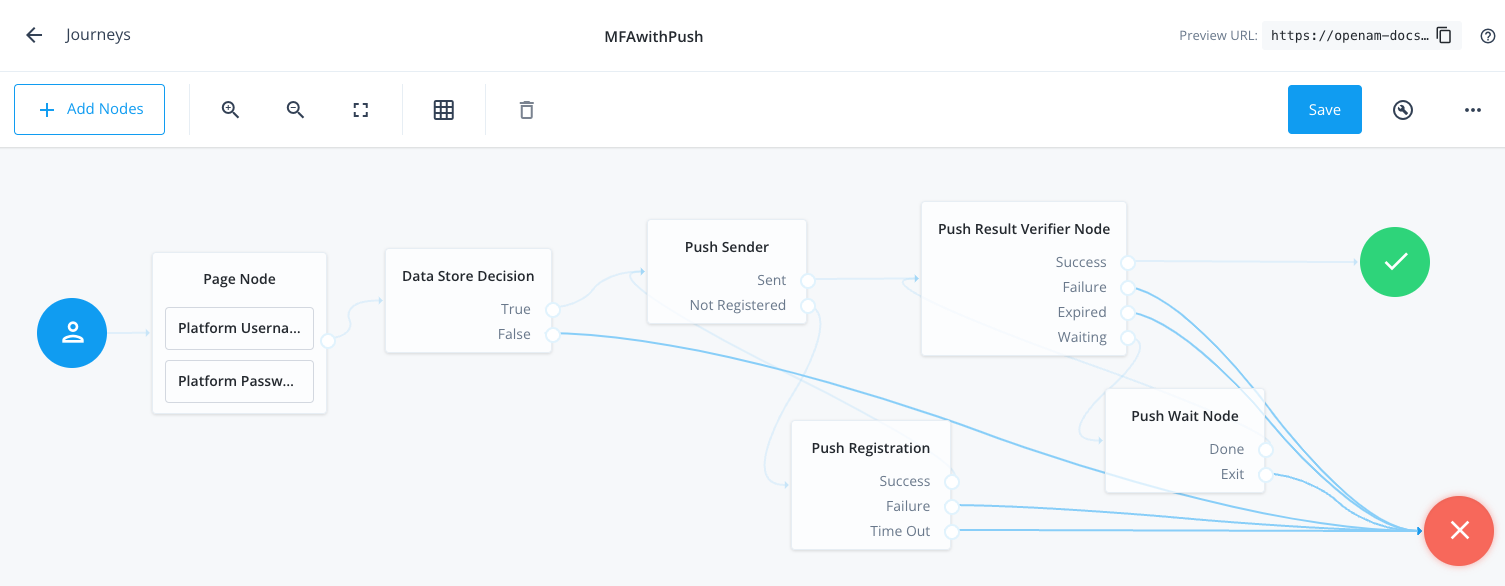 Figure 2. Connect the nodes to identify the user, send a push notification, and very the result.
 -
In the Push Sender node, select the type of push notification the journey sends to the ForgeRock Authenticator:
- Tap to Accept
-
Requires the user to tap to accept.
- Display Challenge Code
-
Requires the user to select one of three numbers displayed on their device. This selected number must match the code displayed in the browser for the request to be verified.
- Use Biometrics to Accept
-
Requires the user’s biometric authentication to process the notification.
For information on how these options appear in the ForgeRock Authenticator, refer to Authenticate using a push notification.
-
Save your changes.
-
In the AM admin UI:
-
Select the realm that will contain the authentication tree.
-
Select Authentication > Trees, and click Create Tree.
-
Enter a name for your tree in the New Tree page; for example,
MFAwithPush, and click Create.The authentication tree designer page is displayed with the default Start, Failure, and Success nodes.
-
-
Add the following nodes to the designer area:
-
Connect the nodes as shown:
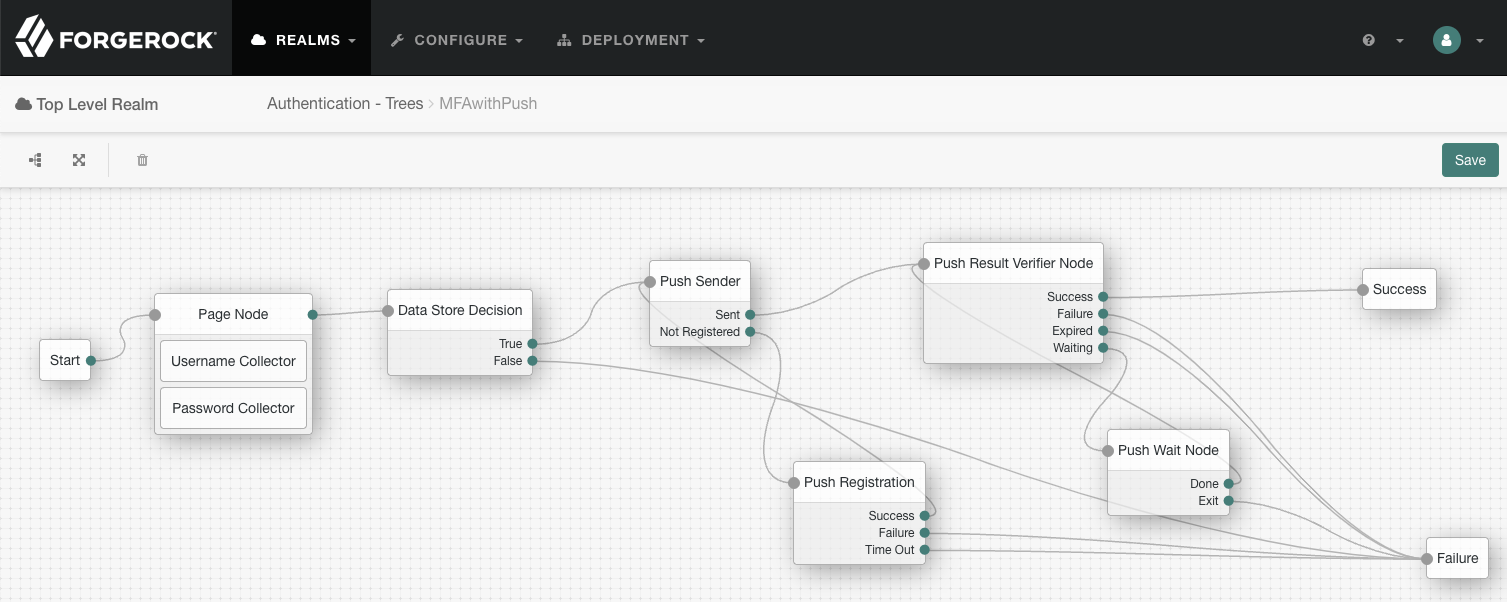 Figure 3. Connect the nodes to identify the user, send a push notification, and very the result.
 -
In the Push Sender node, select the type of push notification the journey sends to the ForgeRock Authenticator:
- Tap to Accept
-
Requires the user to tap to accept.
- Display Challenge Code
-
Requires the user to select one of three numbers displayed on their device. This selected number must match the code displayed in the browser for the request to be verified.
- Use Biometrics to Accept
-
Requires the user’s biometric authentication to process the notification.
For information on how these options appear in the ForgeRock Authenticator, refer to Authenticate using a push notification.
-
Save your changes.
The tree you create is a simple example for the purposes of demonstrating a basic push authentication journey. In a production environment, you could include additional nodes, such as:
- Get Authenticator App node
-
Provides links to download the ForgeRock Authenticator for Android and iOS.
- MFA Registration Options node
-
Provides options for users to register a multi-factor authentication device, get the authenticator app, or skip the registration process.
- Opt-out Multi-Factor Authentication node
-
Sets an attribute in the user’s profile which lets them skip multi-factor authentication.
- Recovery Code Display node
-
Lets a user view recovery codes to use in case they lose or damage the authenticator device they register.
- Recovery Code Collector Decision node
-
Lets a user enter their recovery codes to authenticate in case they have lost or damaged their registered authenticator device.
- Retry Limit Decision node
-
Lets a journey loop a specified number of times, for example, in case the user’s device is experiencing connectivity issues, for example.
Step 5: Authenticate using a push notification
After creating the journey, you can register the ForgeRock Authenticator, and use it to respond to the push notificaiton message:
-
If you have not already done so, create a demo user in your server:
-
In an incognito browser window, browse to the journey you created in the previous step:
- Advanced Identity Cloud
-
https://openam-forgerock-sdks.forgeblocks.com/am/XUI/?realm=alpha&authIndexType=service&authIndexValue=MFAwithPush - Self-managed PingAM server
-
https://openam.example.com:8443/openam/XUI/?realm=alpha&authIndexType=service&authIndexValue=MFAwithPush
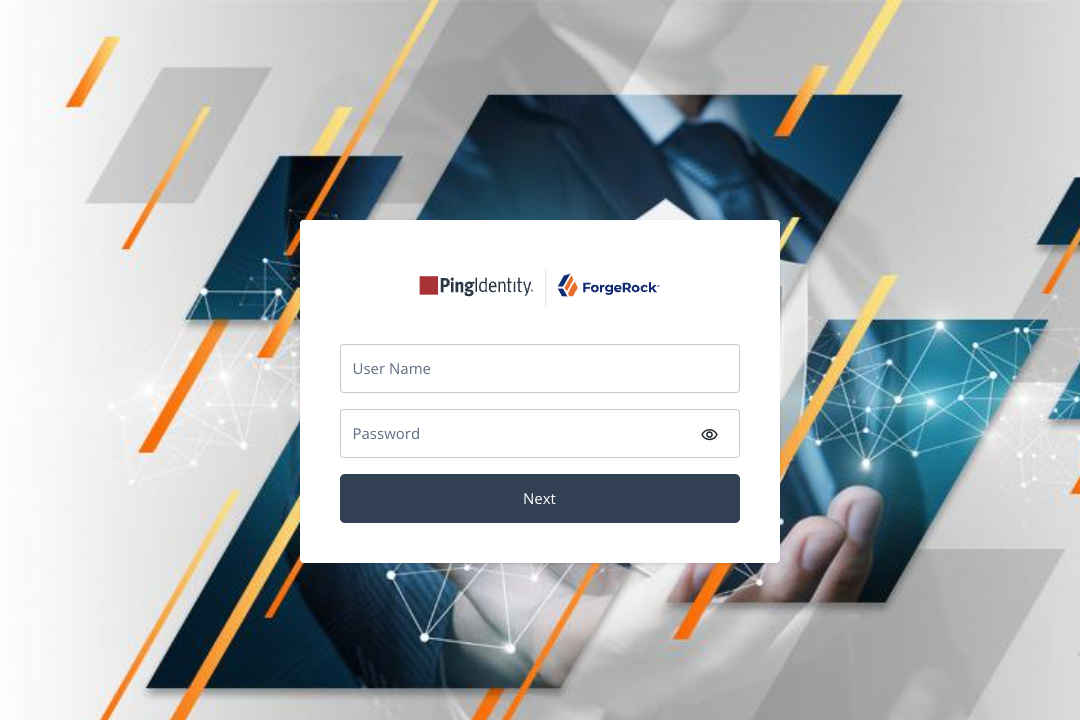
The journey asks for your credentials:
-
Sign in with the username and password of your demo user.
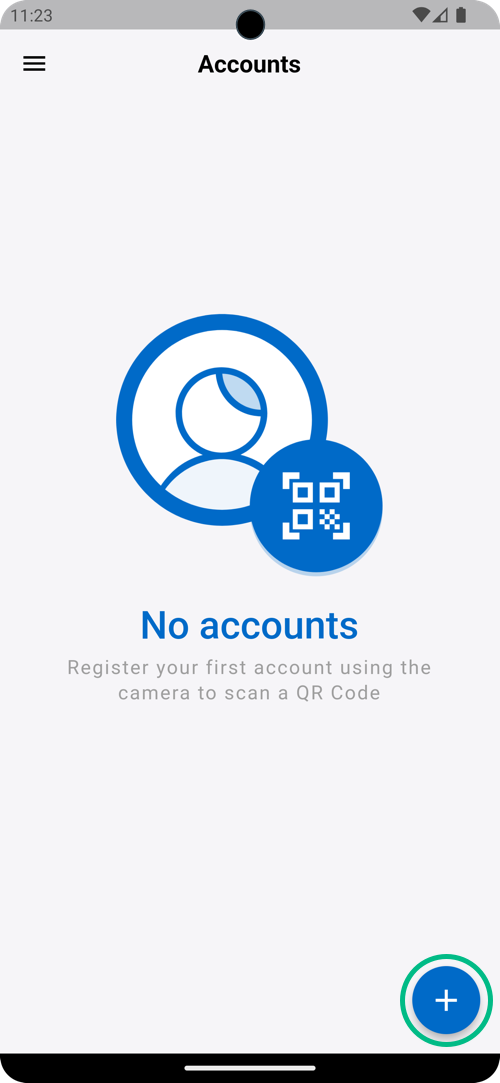
If you have not yet registered the ForgeRock Authenticator, the journey displays a QR code:

-
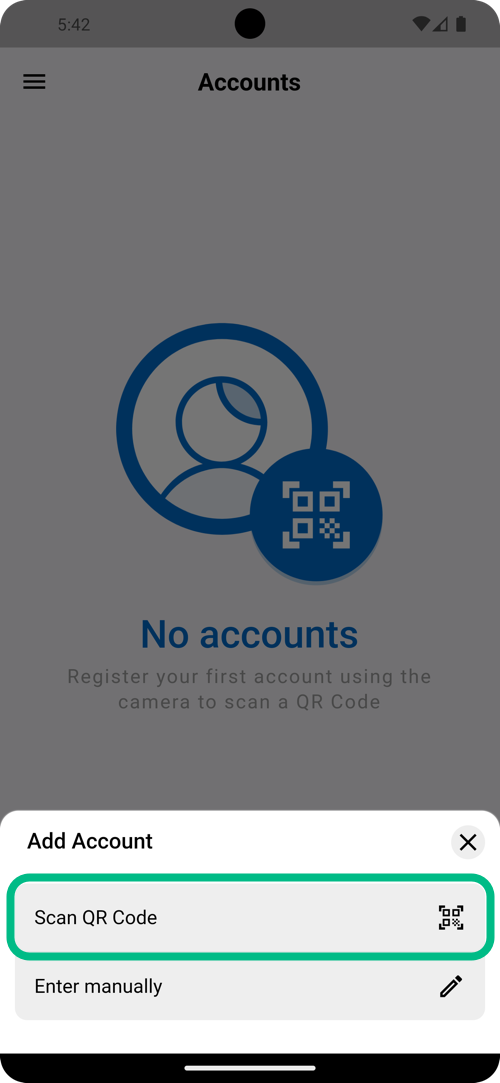
In the ForgeRock Authenticator, click the blue plus icon to register the account on the device:
-
In the Add Account menu that appears, select Scan QR Code:
-
Scan the QR code on screen using the ForgeRock Authenticator:

When the ForgeRock Authenticator registers the account it notifies your server, which then initiates the configured push notification.
-
In the ForgeRock Authenticator, complete the authentication as requested:
-
If the journey is configured with the default Push Type setting,
Tap to Accept, tap the Accept button: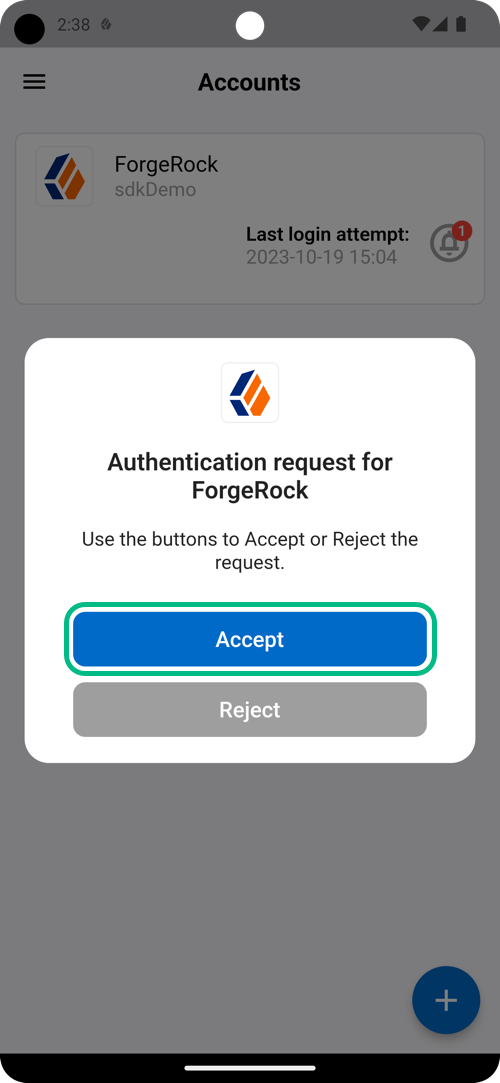 Figure 4. Tap the Accept button.
 -
If the journey is configured with a Push Type setting of
Display Challenge Code, tap the number in the ForgeRock Authenticator that matches the number displayed by the journey: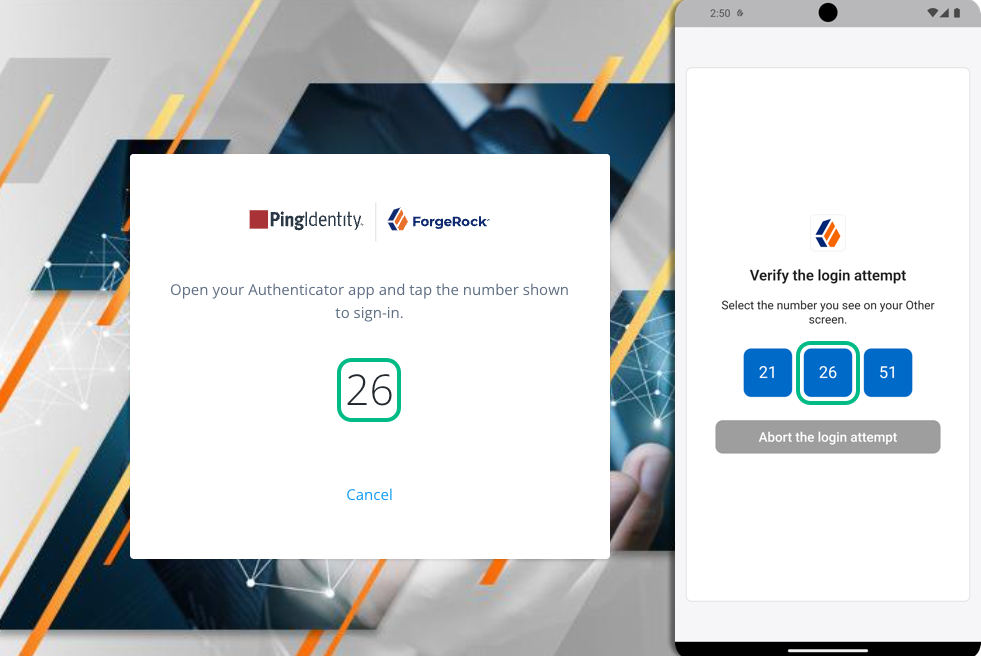 Figure 5. Tap the number in the app that matches the one displayed by the journey.
 -
If the journey is configured with a Push Type setting of
Use Biometrics to Accept, tap the Accept button, and then use your devices biometric capabilities to complete authentication: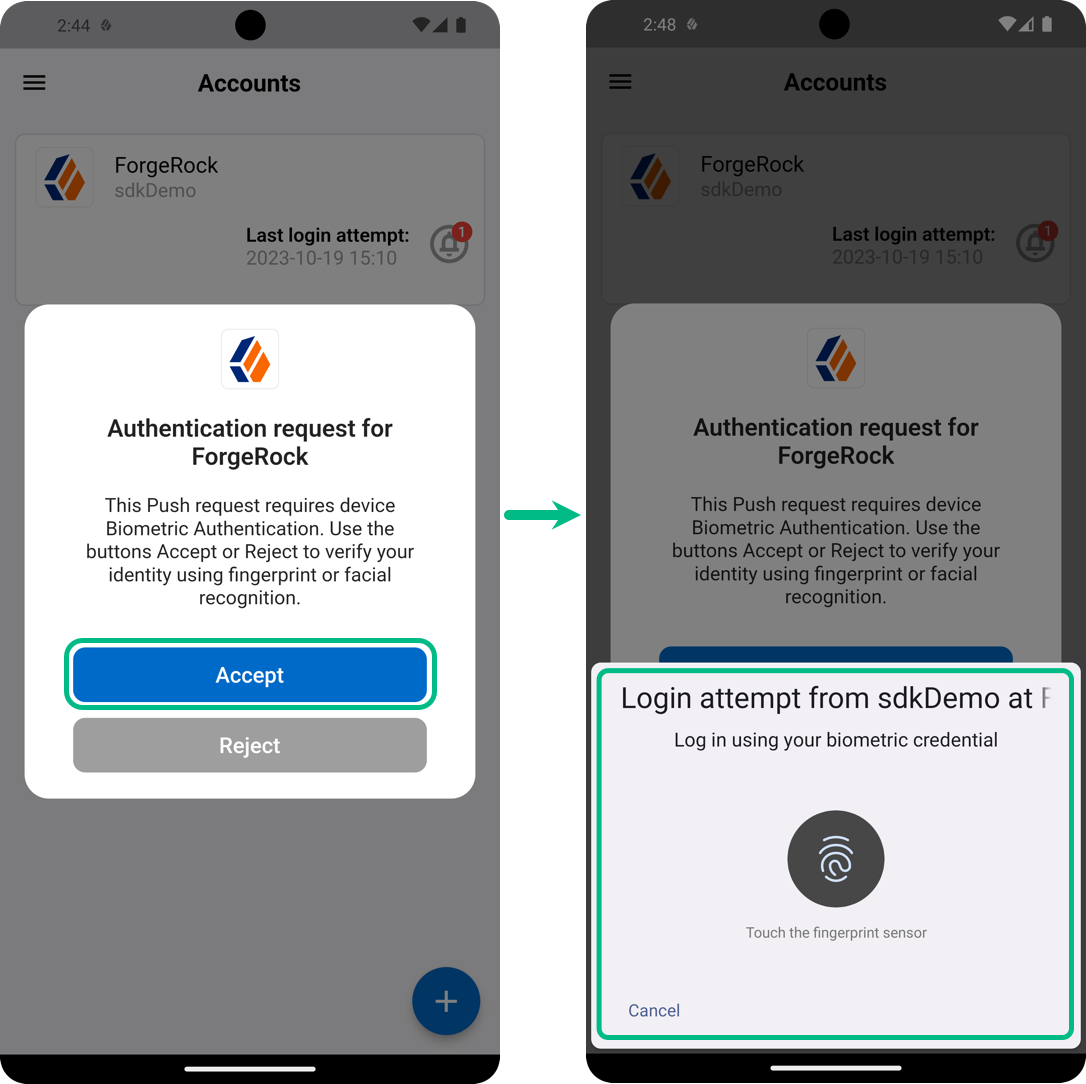 Figure 6. Tap Accept, then use a biometric method to authenticate.
After you successfully complete the required response, the browser displays the user’s profile page.
-
Next steps
You can add support for MFA using push notifications to your own Android and iOS applications, by using the Ping (ForgeRock) Authenticator module.
For more information, refer to Integrate MFA using push notifications.