Set up social login in iOS apps
This page shows how to use the iOS SDK with authentication journeys that provide social login and registration.
Setup your providers
Configure Facebook
-
Create a Facebook client for iOS.
For details, see Configure social login identity providers.
Facebook provides you with the
.plistconfiguration. -
Follow the instructions on the page and copy the values in your app’s
Info.plistin Xcode.The final
Info.plistfile in your project, containing the Facebook generatedCustom URL Scheme, and theLSApplicationQueriesSchemes, should look something like this: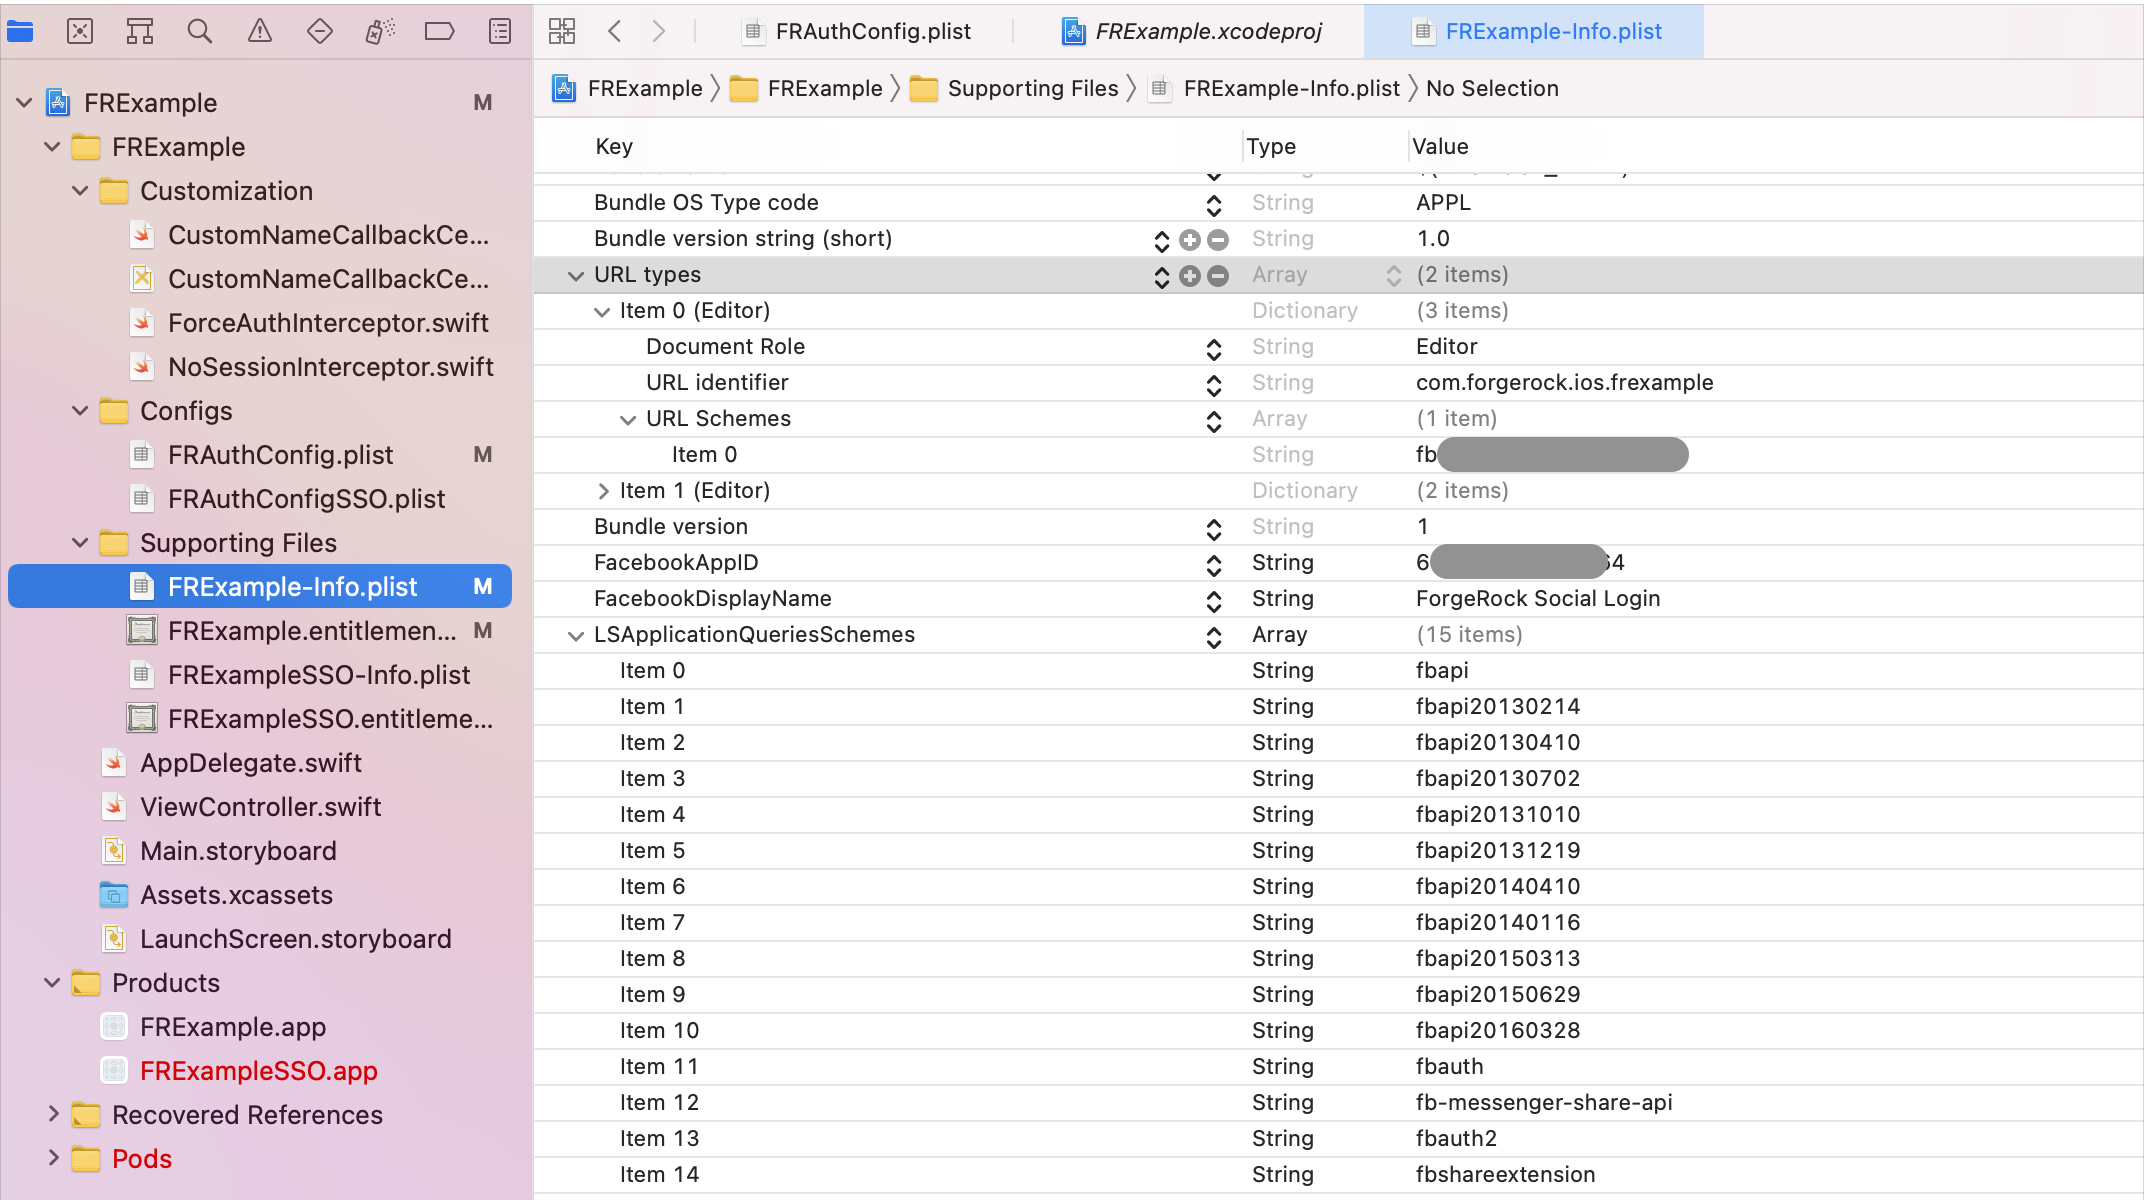
-
Include the
FRFacebookSignInmodule in your project.The
FRFacebookSignInis a new module that is distributed separately ofFRAuth.Assuming you are using CocoaPods, add the following lines in your projects
Podfile:pod 'FRAuth' pod 'FRFacebookSignIn' ... ... Other Pods ... -
Run the following command to install pods:
pod installAlternatively, you can add the FRFacebookSignInmodule to your project using the Swift Package Manager in Xcode. -
Initialize the Facebook sign-in handler in your app’s
AppDelegatefile:-
Locate the following method:
func application(_ application: UIApplication, didFinishLaunchingWithOptions launchOptions: [UIApplication.LaunchOptionsKey: Any]?) -
Add a call to the
FacebookSignInHandler.application(_:didFinishLaunchingWithOptions:)method, before thereturn trueline:FacebookSignInHandler.application(application, didFinishLaunchingWithOptions: launchOptions)The result might resemble the following:
func application(_ application: UIApplication, didFinishLaunchingWithOptions launchOptions: [UIApplication.LaunchOptionsKey: Any]?) -> Bool {

    // Enable logs for all levels
    FRLog.setLogLevel([ .all])

    // Initialize the Facebook sign-in handler
    FacebookSignInHandler.application(application, didFinishLaunchingWithOptions: launchOptions)

    return true
}
-
Configure Google
-
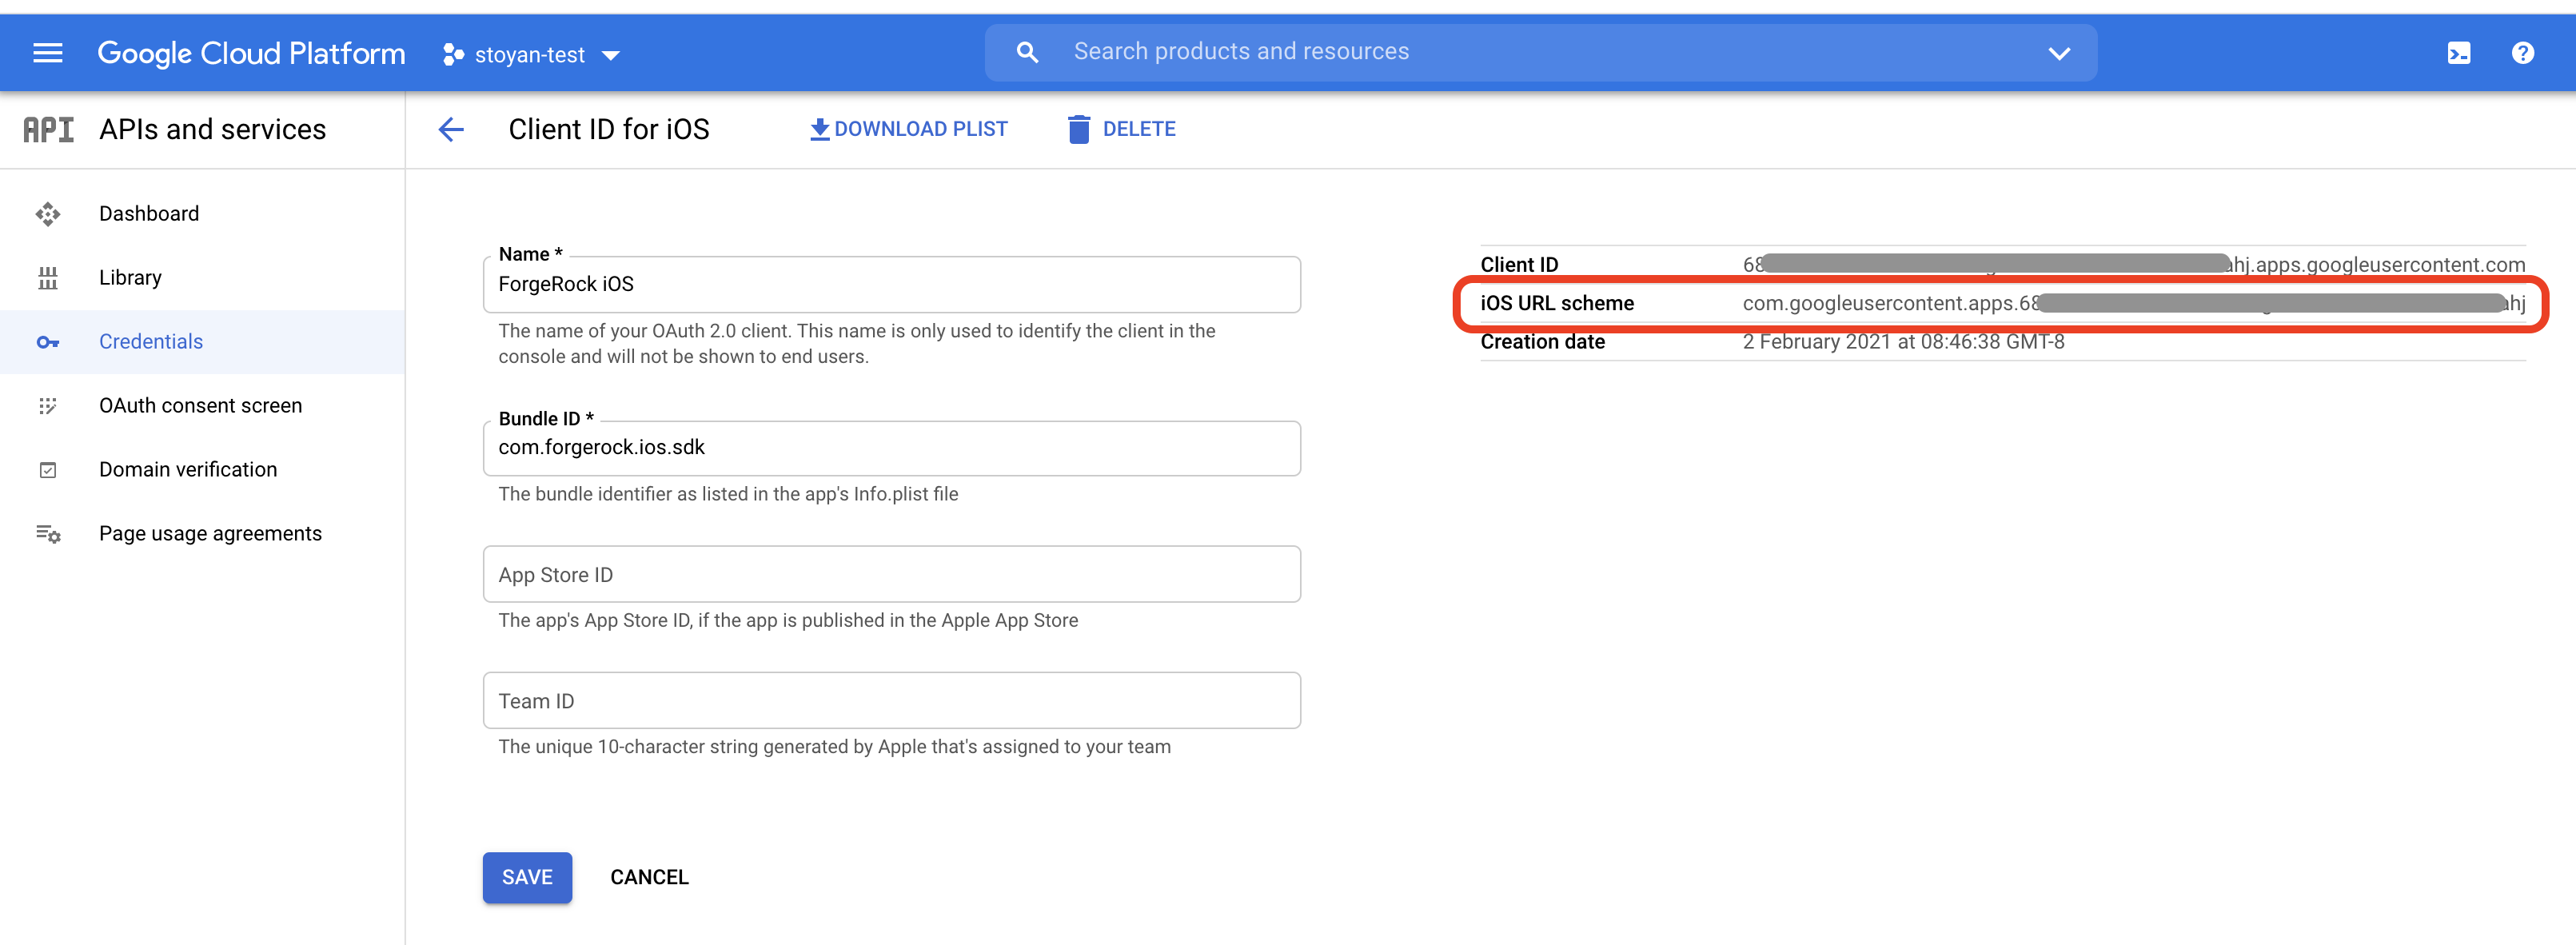
Create a Google client for iOS.
For details, refer to Create a Google client.
-
Access the client in the Google Console, and make a note of the generated custom iOS URL scheme:
-
Configure your Xcode project with the Google generated custom iOS URL scheme:
-
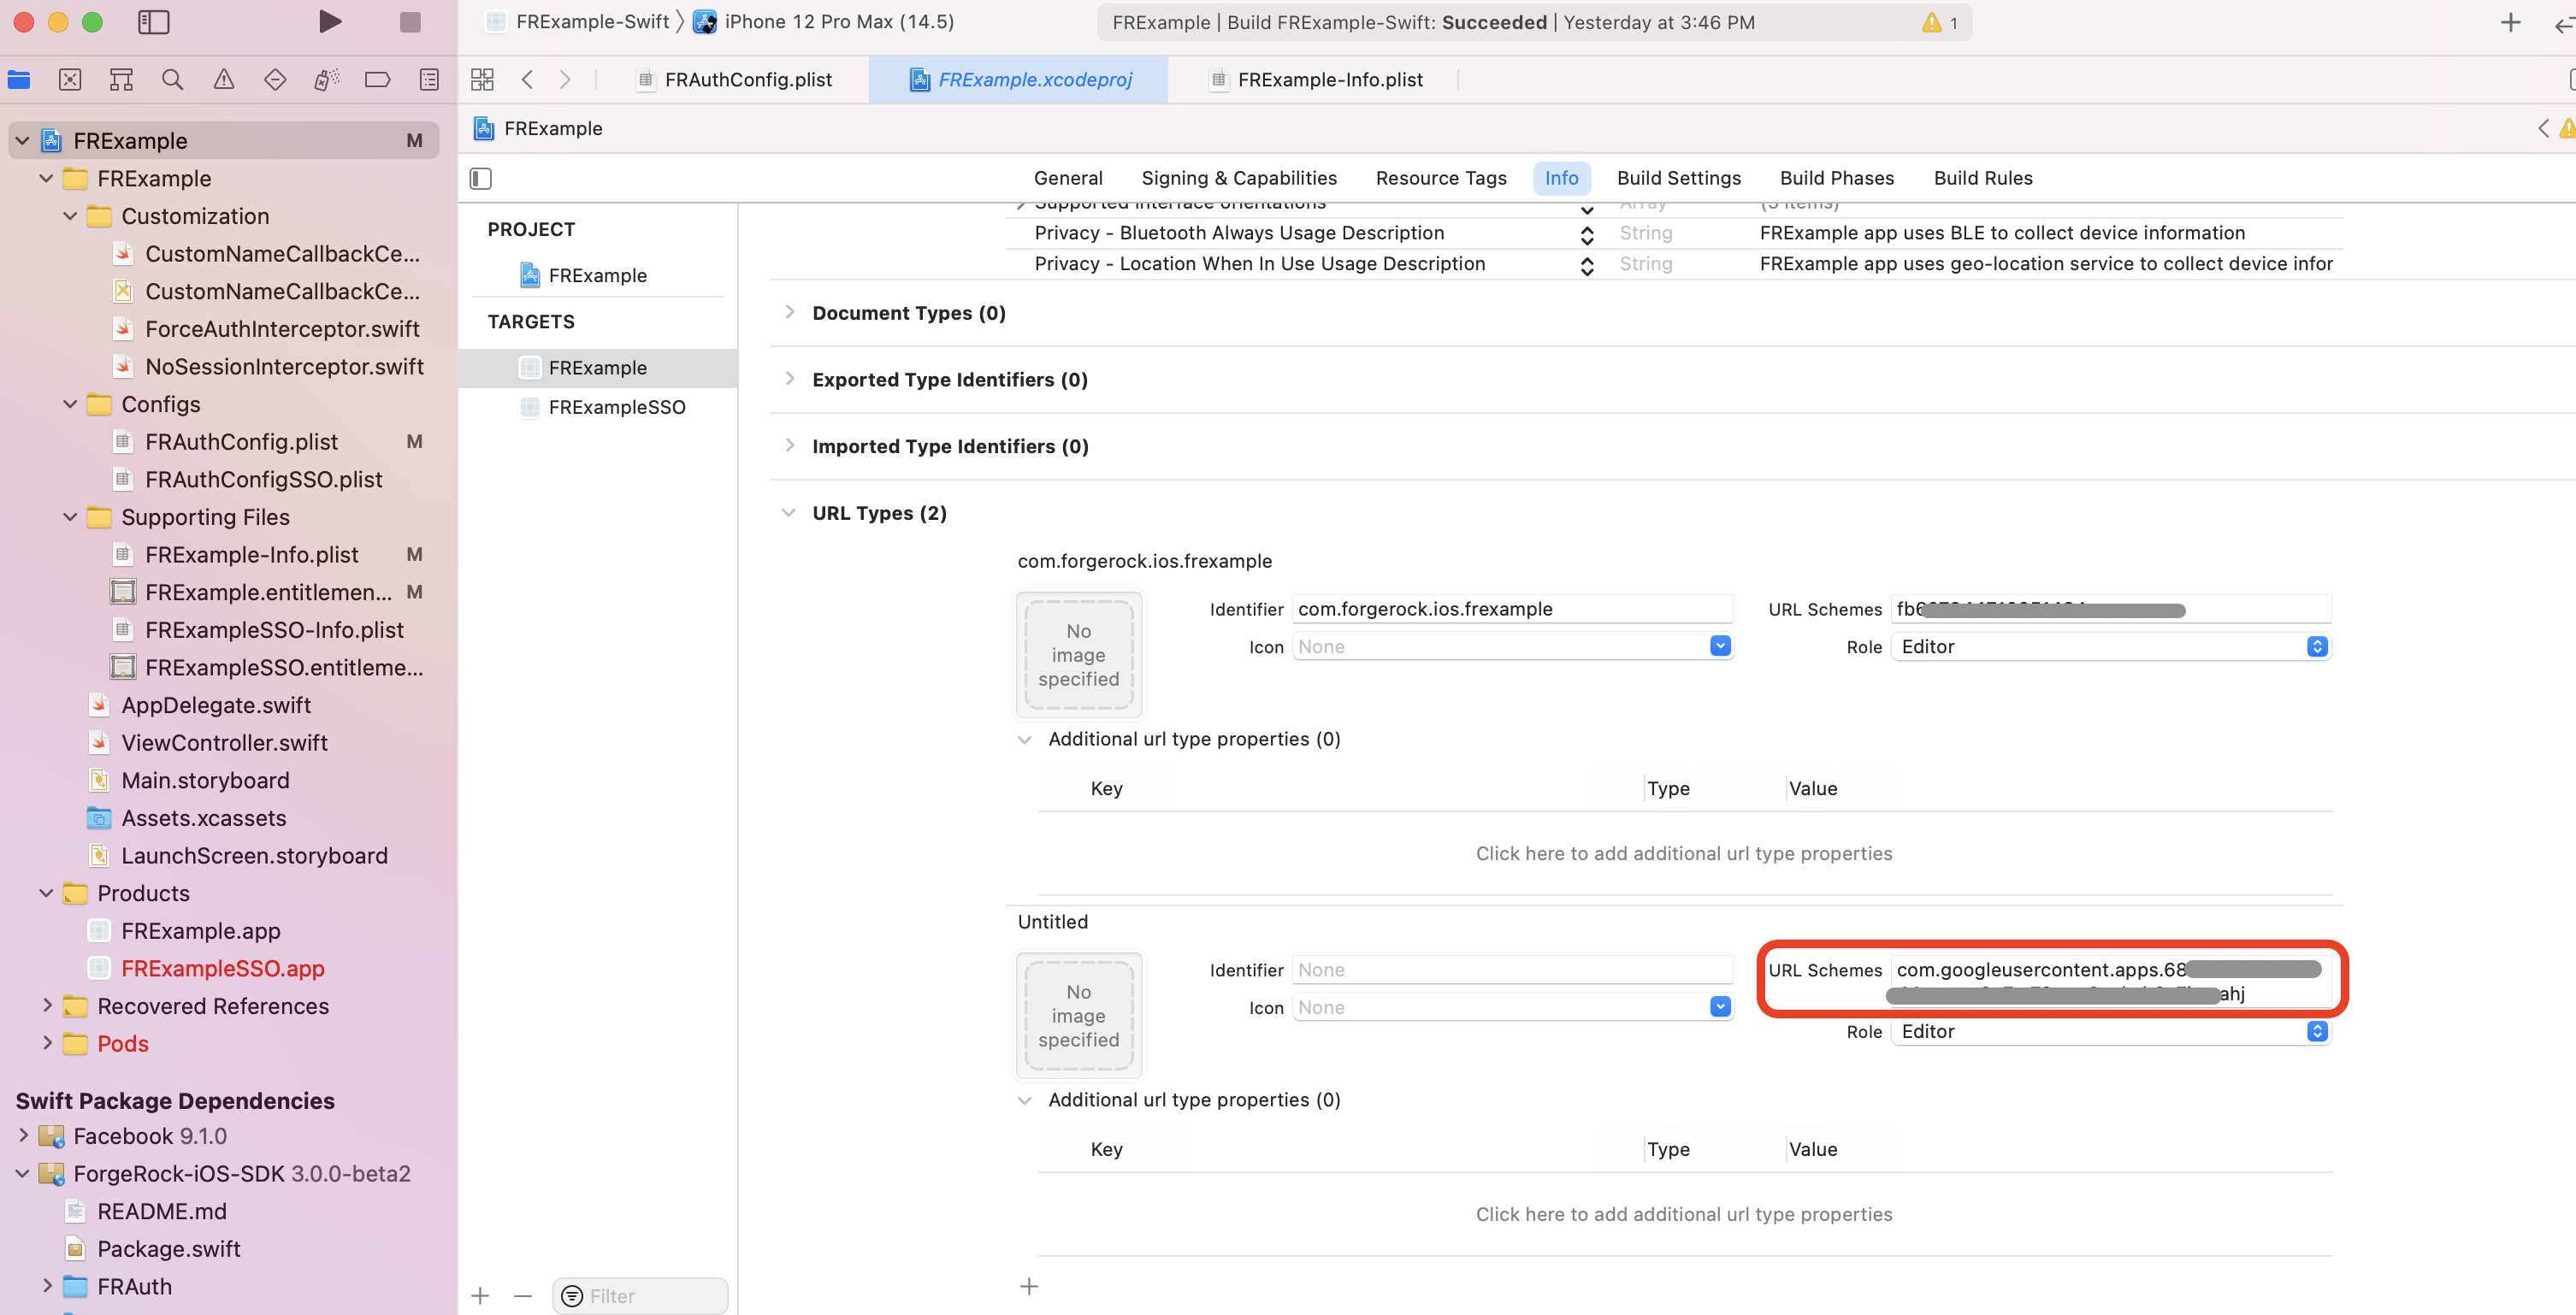
Select your project file, select the app target, and in the Info pane, expand the URL Types option.
-
Click on the icon to add a new custom URL scheme, and paste the generated URL scheme in the URL Scheme field.
The configuration should look something like this:
-
-
Include the
FRGoogleSignInmodule in your project.The
FRGoogleSignInis a new module that is distributed separately ofFRAuth.Assuming you are using CocoaPods, add the following lines in your projects
Podfile:pod 'FRAuth' pod 'FRGoogleSignIn' ... ... Other Pods ... -
Run the following command to install pods:
pod install
The FRGoogleSignIn module is not available through the Swift Package Manager.
|
Configure Apple
-
Create an Apple Client for iOS.
For details, refer to Create an Apple client.
-
Configure your Xcode project with the Google generated custom iOS URL scheme.
-
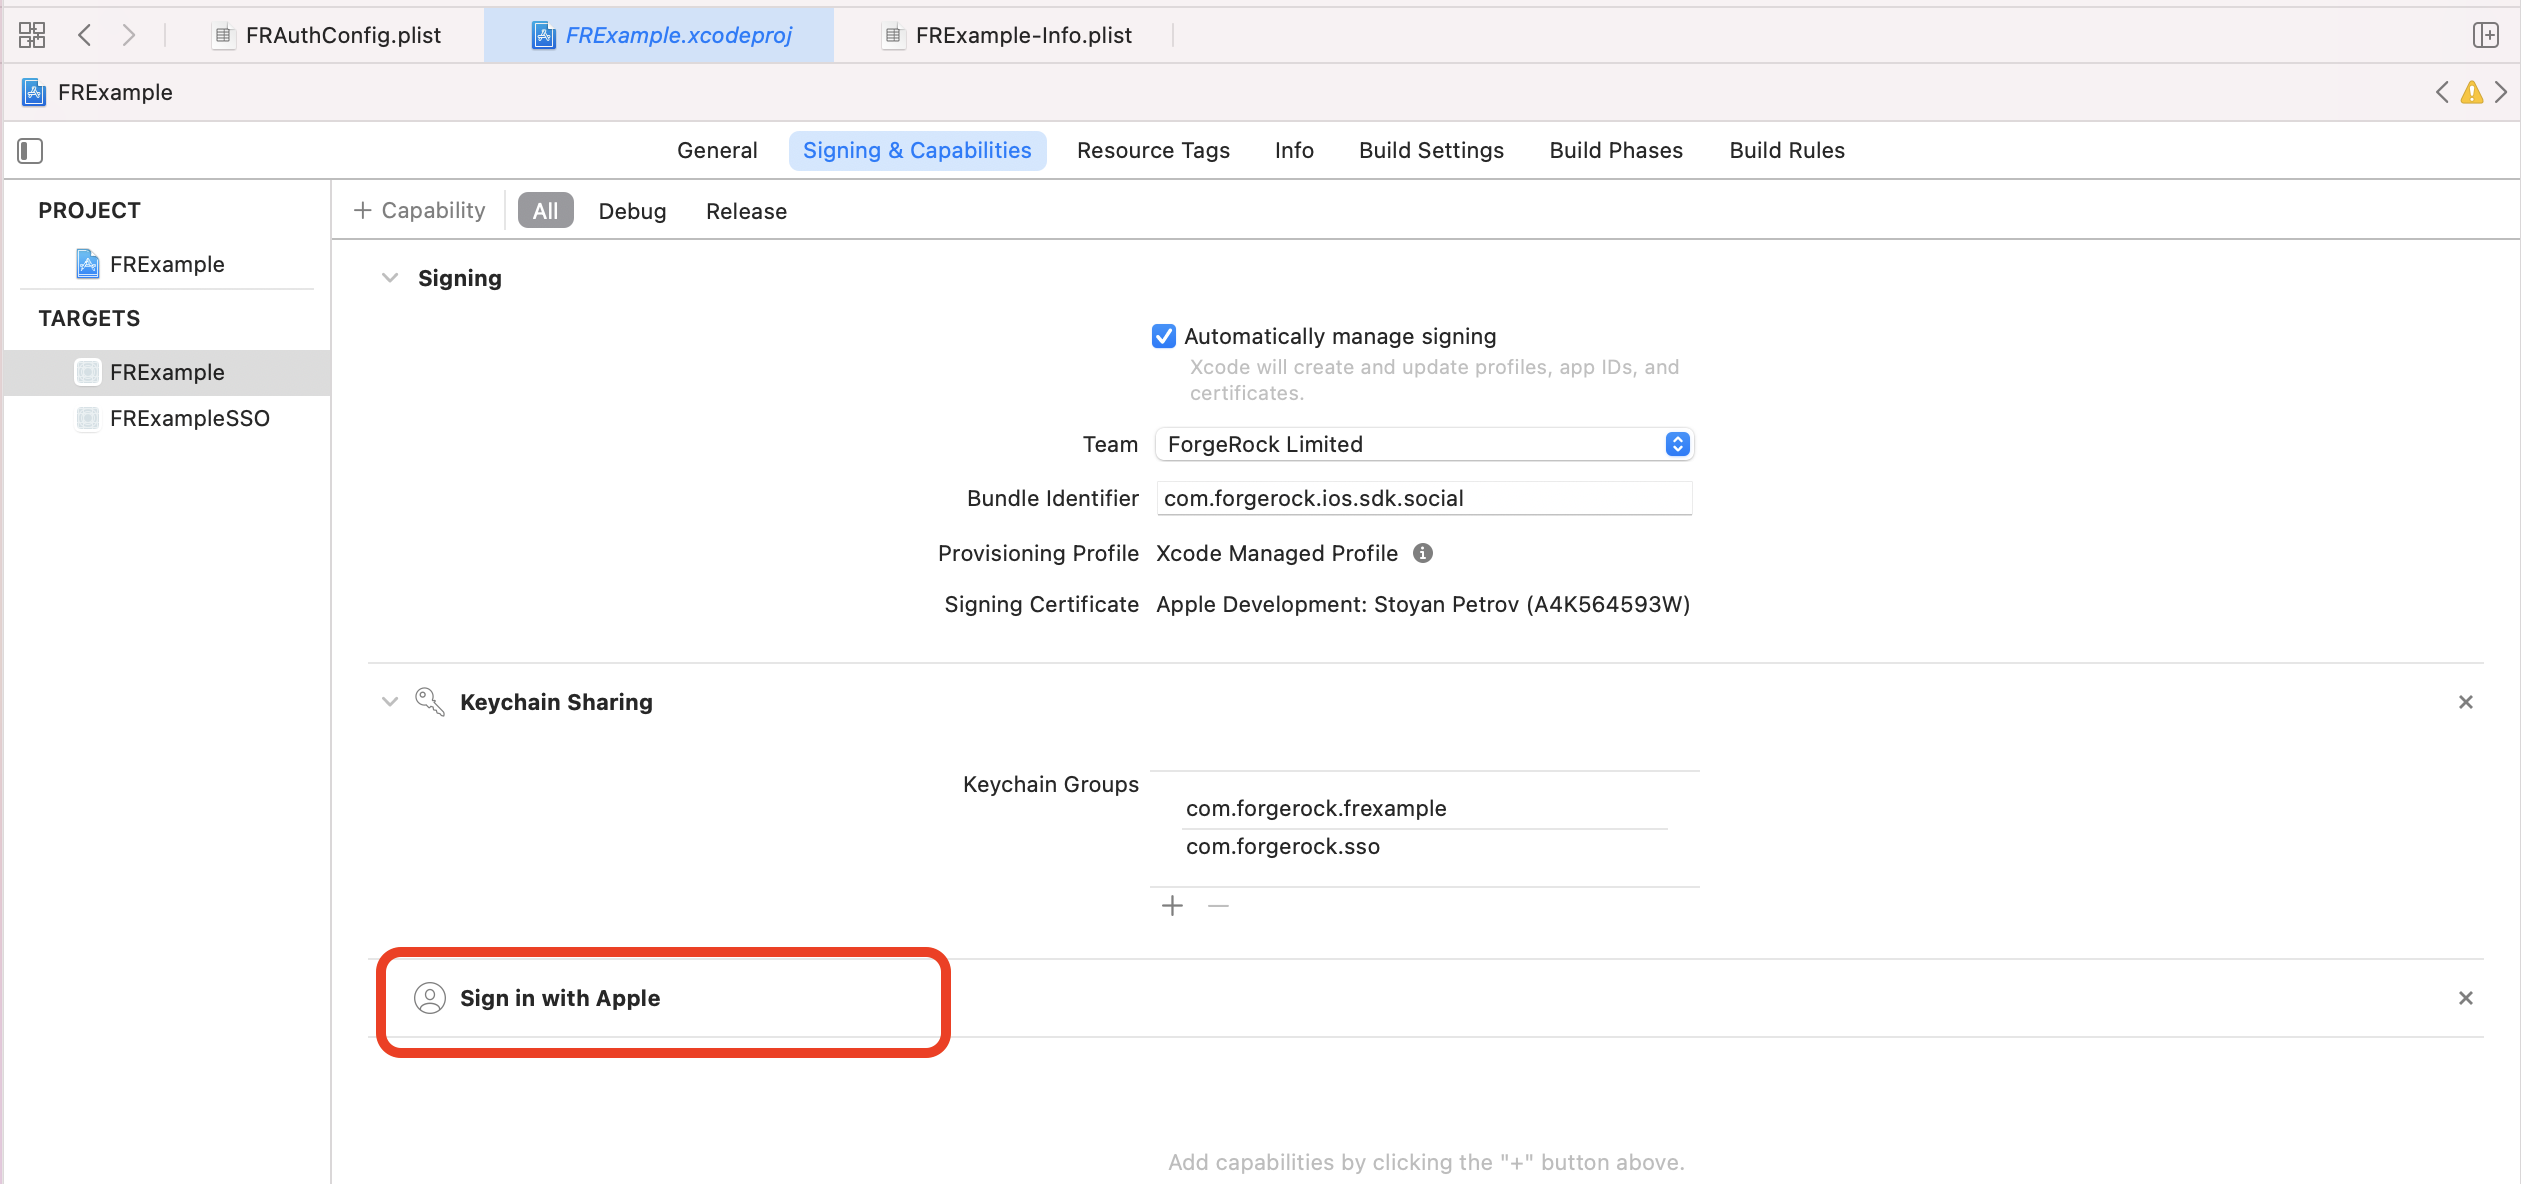
Select your project file, select the app target and go to the Signing & Capabilities tab in Xcode.
-
Click the + Capability button, and search for
Sign In with Apple.After enabling the capability the Xcode page should look something like this.
Authenticate with ForgeRock
Use the ForgeRock iOS SDK
After configuring social providers in Identity Cloud, and configuring your Xcode project to work with Facebook, Google, and Apple IdPs, you are ready to use the ForgeRock iOS SDK to authenticate.
The first callback your app encounters is the SelectIdPCallback, which lets the user choose their IdP.
Use the providers array to display the available providers, and setProvider() method when the user makes a choice:
// Within your login flow
let selectIdPCallback = callback as? SelectIdPCallback
let providersArray = selectIdPCallback.providers

// display providers
// user makes choice

// Sets provider on the callback within `selectIdPCallback`
selectIdPCallback.setProvider(provider: providersArray[self.selectedIndex])
node.next { (user: FRUser?, node, error) in

    // Handle node

}
The next callback returned is the IdPCallback.
The SDK automatically identifies the correct IdP for authentication as long as the IdPClient,
derived from the Social Identity Provider Service configuration in AM,
contains facebook, google or apple.
Detection is case-insensitive.
//  Node is returned with IdPCallback
let idpCallback = node.callbacks.first as! IdPCallback

//  Call the following to perform login
callback.signIn(handler: nil) {
  (token: String?, tokenType: String?, error: Error?) in

  //  Social Login flow is completed
  node.next { (user: FRUser?, node, error) in
    //Handle node
  }
}|
To override the automatic provider detection and identify the returned provider manually,
check the |