Step 1. Set up the servers
In this step, you set up your ForgeRock and PingOne servers to perform risk evaluations.
Create a worker application in PingOne
To allow your ForgeRock server to access the PingOne administration API you must create a worker application in PingOne.
The worker application provides the client credentials your ForgeRock server uses to communicate with the PingOne admin APIs using the OpenID Connect protocol.
To create a worker application in PingOne:
-
In the PingOne administration console, navigate to , and then click Add ().
-
In the Add Application panel:
-
In Application name, enter a unique identifier for the worker application.
For example,
ForgeRock SDK Worker. -
Optionally, enter a Description for the application and select an Icon.
These do not affect the operation of the worker application but do help you identify it in the list.
-
In Application Type, select Worker.
-
Click Save.
-
-
In the application properties panel for the worker application you created:
-
On the Roles tab, click Grant Roles.
-
On the Available responsibilities tab, select the Identity Data Admin row, and ensure the environment is correct.
-
Click Save.
-
On the Overview tab, ensure your worker application resembles the following image, and then enable it by using the toggle (1):
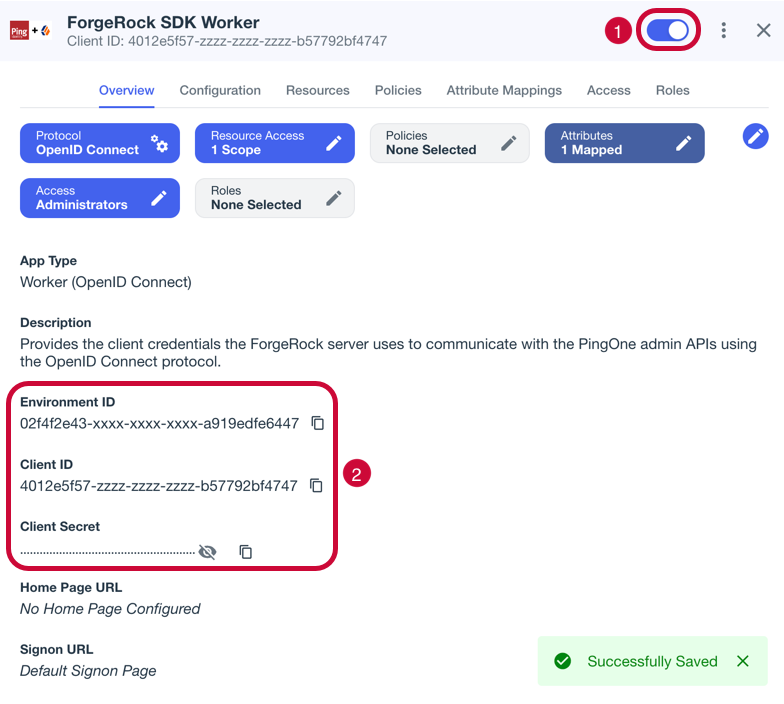 Figure 1. Example worker application in PingOne
 -
Make a note of the Environment ID, Client ID, and Client Secret values (2).
You need these values in the next step when you Configure the PingOne Worker service in your ForgeRock server.
-
Configure the PingOne Worker service in your ForgeRock server
After you create a worker application in PingOne, you must configure the PingOne Worker service in your ForgeRock server with the credentials.
Prerequisites
You need the following values from the PingOne Worker application you created in PingOne:
- Client ID
-
Client ID of the worker application in PingOne.
Example:
6c7eb89a-66e9-46df-9ee2-eeaf795650b2 - Client Secret
-
Client secret of the worker application in PingOne.
Use the Secret Mask () or Copy to Clipboard () buttons to obtain the value in the PingOne administration console. Example:
Ch15~o5Hm8N4_eS_m8~ARrV0KQAIQS6d.sJWe8TMXurEb~KWexY_p0gelR - Environment ID
-
Identifier of the environment that contains the worker application in PingOne.
Example:
3072206d-c6ce-4c19-a366-f87e972c7cc3
|
The PingOne Worker Service requires a configured OAuth2 provider service in your ForgeRock server.
|
Register the client secret in the server
You need to make the client secret of the worker application in PingOne available for use in the PingOne worker service.
- ForgeRock Identity Cloud
-
If you are using Identity Cloud you will need to create an environment secret to hold the client secret value, as follows:
-
In the Identity Cloud admin UI, go to Tenant Settings > Global Settings > Environment Secrets & Variables.
-
Click the Secrets tab.
-
Click + Add Secret.
-
In the Add a Secret modal window, enter the following information:
Name
Enter a secret name. For example,
ping-protect-client-secret.Secret names cannot be modified after the secret has been created. Description
(optional) Enter a description of the purpose of the secret.
Value
Enter the Client Secret value you obtained when creating the worker application in PingOne.
For example,
Ch15~o5Hm8N4_eS_m8~ARrV0KQAIQS6d.sJWe8TMXurEb~KWexY_p0gelR.The field obscures the secret value by default. You can optionally click the visibility toggle () to view the secret value as you enter it.
-
Click Save to create the variable.
-
Click View Update, check the details of the new secret, and then click Apply Update.
Identity Cloud displays a final confirmation page.
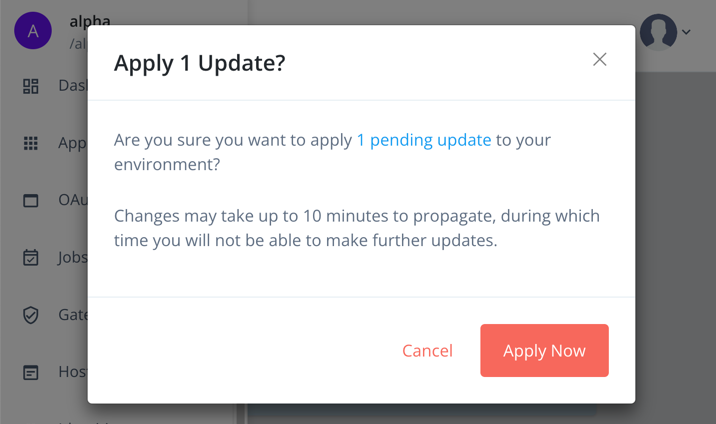 Figure 2. Apply updated secrets in Identity Cloud
 -
Click Apply Now.
Identity Cloud propagates the new secret and its value to all servers. You must wait until the secrets have propagated throughout the environment before attempting to use the secret.
The Environment Secrets & Variables page displays the following message while the update is in progress:
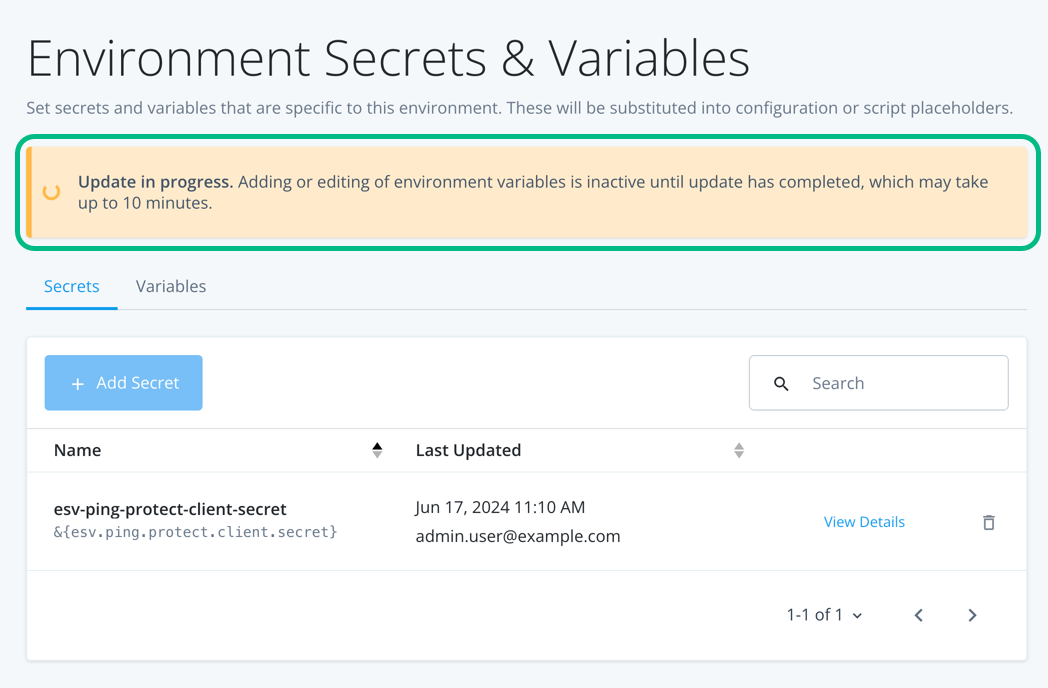 Figure 3. Propagating secrets in progress in Identity Cloud.
-
- Self-managed AM
-
For information on adding secret values for use in services in a self-managed AM instance, refer to Create key aliases in the AM documentation.
Configure the PingOne worker service
To configure the PingOne worker service:
-
If you are using ID Cloud, in the administration console navigate to Native Consoles > Access Management.
-
In the AM admin UI, click Services.
-
If the PingOne Worker Service is in the list of services, select it.
-
If you do not yet have a PingOne Worker Service:
-
Click Add a Service.
-
In Choose a service type, select
PingOne Worker Service, and then click Create.
-
-
On the Secondary Configurations tab, click Add a Secondary Configuration.
-
On the New workers configuration page:
-
Enter a Name for the configuration.
For example,
SDK PingOne Worker.You use this value when you configure an authentication journey that performs risk evaluations.
-
In Client ID, enter the client ID of the PingOne Worker application you created earlier.
-
In Client Secret Label Identifier, enter an identifier to create a specific secret label to represent the client secret of the worker application.
For example,
workerAppClientSecret.The secret label uses the template
am.services.pingone.worker.identifier.clientsecretwhere identifier is the Client Secret Label Identifier value.This field can only contain characters
a-z,A-Z,0-9, and.and can’t start or end with a period. -
In Environment ID, enter the environment ID containing the PingOne Worker application you created earlier.
-
Click Create
-
-
On the Workers Configuration page, ensure that the PingOne API Server URL and PingOne Authorization Server URL are correct for the region of your PingOne servers:
PingOne URLs by region Region Authorization URL API URL North America
(Excluding Canada)
https://auth.pingone.comhttps://api.pingone.com/v1Canada
https://auth.pingone.cahttps://api.pingone.ca/v1Europe
https://auth.pingone.euhttps://api.pingone.eu/v1Asia-Pacific
https://auth.pingone.asiahttps://api.pingone.asia/v1 -
Confirm your configuration resembles the image below, and then click Save changes.
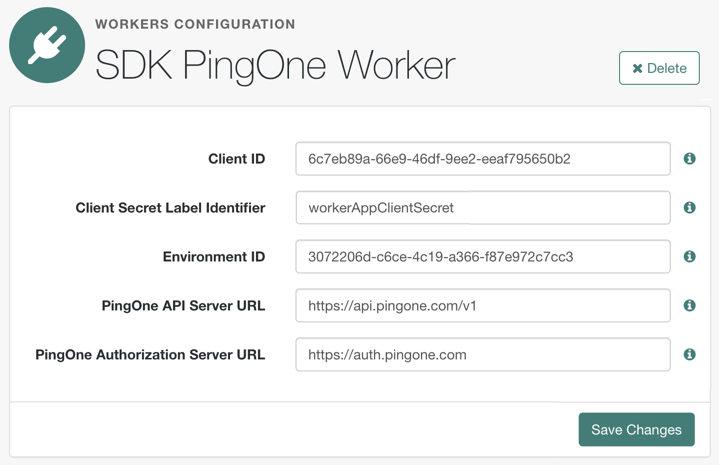 Figure 4. Example worker application in PingOne
Map the Client Secret Label Identifier to a secret
To make the client secret available to the PingOne Worker Service, you must map the secret to the ID created.
Map secrets in Identity Cloud
-
In the Identity Cloud admin UI, click Native Consoles > Access Management.
-
In the AM admin UI (native console), go to Realm > Secret Stores.
-
Click the ESV secret store, then click Mappings.
-
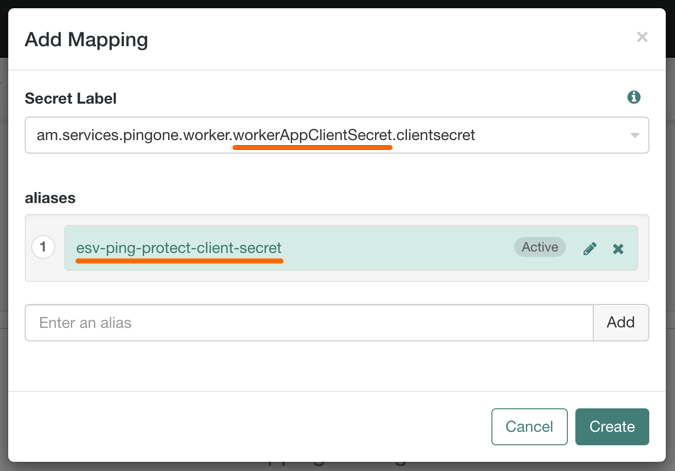
Click + Add Mapping.
-
In Secret Label, select the label generated when you entered the Client Secret Label Identifier previously.
For example,
am.services.pingone.worker.workerAppClientSecret.clientsecret. -
In aliases, enter the name of the ESV secret you created earlier, including the
esv-prefix, and then click Add.For example,
esv-ping-protect-client-secret
The result resembles the following:
-
-
Click Create.
To learn more about mapping secrets and label identifiers in Identity Cloud, refer to Secret labels.
Map secrets in self-managed AM
To learn about mapping secrets in self-managed AM, refer to Map and rotate secrets.
You have now configured the PingOne Worker service in your ForgeRock server. You can now Configure a journey to perform PingOne Protect risk evaluations.
Configure a journey to perform PingOne Protect risk evaluations
To make risk evaluations in PingOne, you must configure an authentication journey in your ForgeRock server.
The following table covers the authentication nodes and callbacks for integrating your authentication journeys with PingOne Protect.
| Node | Callback | Description |
|---|---|---|
Instruct the embedded PingOne Signals SDK to start gathering contextual information. |
||
Returns contextual information that the ForgeRock server can send to your PingOne Protect instance to perform a risk evaluation. |
||
Non-interactive |
Inform the PingOne Protect instance about the status of the transaction. |
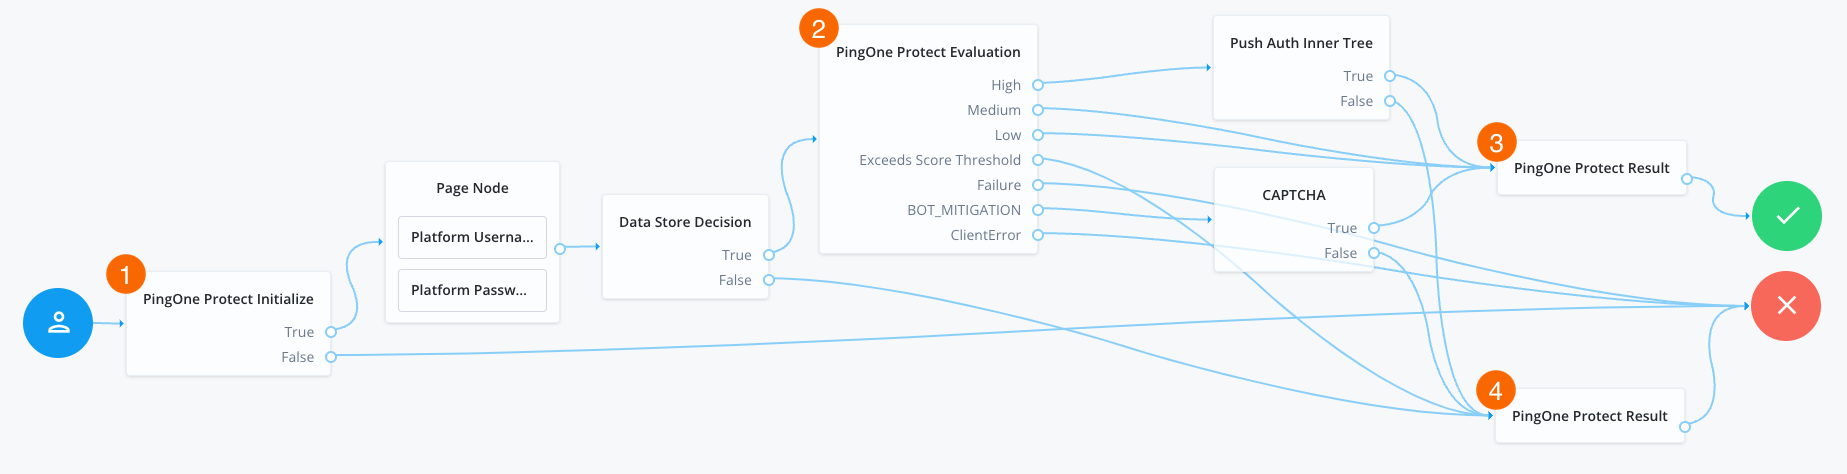
In your ForgeRock server, log in as an administrator and create a new authentication journey similar to the following example:
-
The PingOne Protect Initialize node 1 instructs the SDK to initialize the PingOne Protect Signals API with the configured properties.
Initialize the PingOne Protect Signals API as early in the journey as possible, before any user interaction.
This enables it to gather sufficient contextual data to make an informed risk evaluation.
You can initialize the PingOne Protect Signals API whenever you want to start collecting data. This could be at application startup, or when a particular page or view is visited.
Learn more at initializing data collection.
-
The user enters their credentials, which are verified against the identity store.
-
The PingOne Protect Evaluation node 2 performs a risk evaluation against a risk policy in PingOne.
The example journey continues depending on the outcome:
High-
The journey requests that the user respond to a push notification.
MediumorLow-
The risk is not significant, so no further authentication factors are required.
Exceeds Score Threshold-
The score returned is higher than the configured threshold and is considered too risky to complete successfully.
Failure-
The risk evaluation could not be completed, so the authentication attempt continues to the Failure node.
BOT_MITIGATION-
The risk evaluation returned a recommended action to check for the presence of a human, so the journey continues to a CAPTCHA node.
ClientError-
The client returned an error when attempting to capture the data to perform a risk evaluation, so the authentication attempt continues to the Failure node.
-
An instance of the PingOne Protect Result node 3 returns the
Successresult to PingOne, which can be viewed in the audit console to help with analysis and risk policy tuning. -
A second instance of the PingOne Protect Result node 4 returns the
Failedresult to PingOne, which can be viewed in the audit console to help with analysis and risk policy tuning.
You have now configured a suitable authentication journey in your ForgeRock server. You can now proceed to Step 2. Install dependencies.