Implement MFA using OATH one-time passwords
In this use case you configure your server to require a single-use, one-time password generated by the ForgeRock Authenticator when users authenticate.
Overview
The ForgeRock Authenticator supports one-time password (OTP) authentication as defined in the OATH standard protocols.
The following methods for generating one-time passwords are supported:
- HMAC-based one-time passwords (HOTP)
-
As described in RFC 4226, HOTP authentication generates the one-time password (OTP) every time the user requests a new password on their device.
The device tracks the number of times the user requests a new one-time password with a counter. The user may be further in the counter on their device than the server.
Your server resynchronizes the counter when the user finally logs in. To accommodate this, you set the number of passwords a user can generate before their device cannot be resynchronized.
For example, if you set the HOTP Window Size to
50and someone presses the button 30 times in the ForgeRock Authenticator to generate a new password, the counter in your server will review the passwords until it reaches the one-time password entered by the user.If, however, someone presses the button 51 times, you will need to reset the counter to match the number on the device’s counter before the user can log in.
HOTP authentication does not check earlier passwords, so if the user attempts to reset the counter on their device, they will not be able to log in until you reset the counter on the server to match their device.
- Time-based one-time passwords (TOTP)
-
As described in (RFC 6238), TOTP authentication constantly generates a new one-time password based on a time interval you specify.
The TOTP Time Step Interval setting configures how often a new password is generated by the ForgeRock Authenticator.
Use the TOTP Time Steps setting to provide a margin in case the time varies between your server and the device running the ForgeRock Authenticator. For example, set this to
1to accept either the previous, the current, or the next password as valid.
Step 1. Create an OATH registration and authentication journey
In this step you create an authentication journey that registers a device running the ForgeRock Authenticator to the user’s profile if they have not done so already, then requests a one-time password from the device.
Choose whether you are creating the journey in PingOne Advanced Identity Cloud or a self-managed PingAM server, and follow the instructions to create the required authentication journey:
-
Advanced Identity Cloud
-
Self-managed PingAM server
-
In the PingOne Advanced Identity Cloud admin UI
-
Select the realm that will contain the authentication journey.
-
Select Journeys, and click New Journey.
-
Enter a name for your tree in Name page; for example,
MFAwithOATH -
In Identity Object, select the identity type that will be authenticating, for example
Alpha realm - Users. -
Click Save.
The authentication journey designer page is displayed with the default Start, Failure, and Success nodes.
-
-
Add the following nodes to the designer area:
-
Connect the nodes as shown:
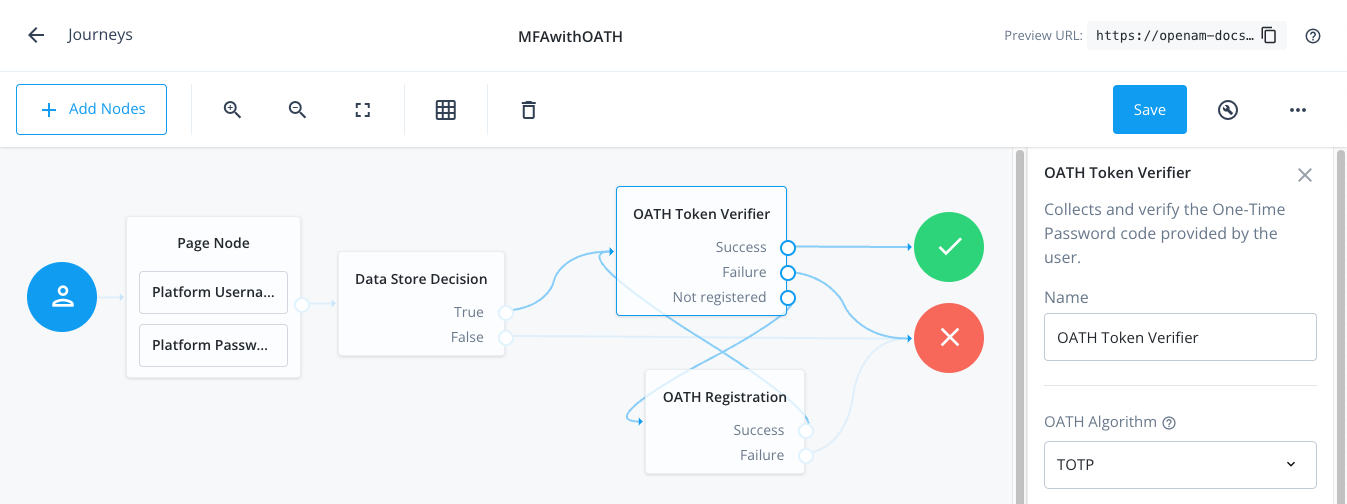 Figure 1. Connect the nodes to identify the user, then verify their OATH token.
 -
Ensure that the OATH Token Verifier node and the OATH Registration node or Combined MFA Registration node are using the same value for OATH Algorithm.
In this example, select
TOTP. -
Save your changes.
-
In the AM admin UI:
-
Select the realm that will contain the authentication tree.
-
Select Authentication > Trees, and click Create Tree.
-
Enter a name for your tree in the New Tree page; for example,
MFAwithOATH, and click Create.The authentication tree designer page is displayed with the default Start, Failure, and Success nodes.
-
-
Add the following nodes to the designer area:
-
Connect the nodes as shown:
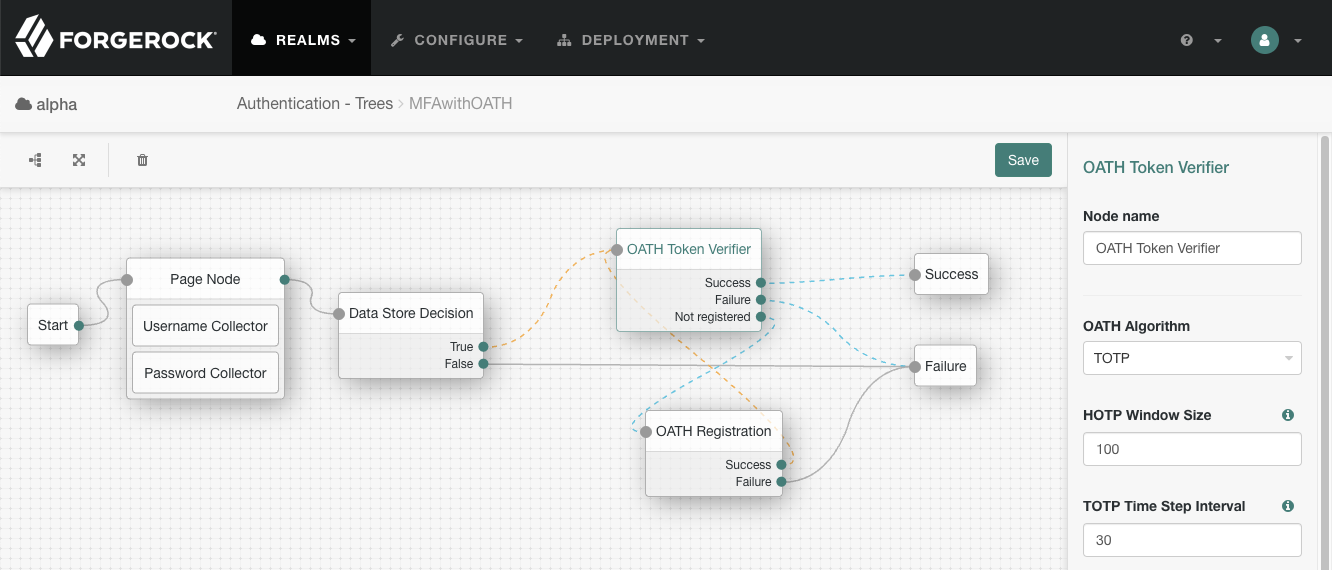 Figure 2. Connect the nodes to identify the user, then verify their OATH token.
 -
Ensure that the OATH Token Verifier node and the OATH Registration node or Combined MFA Registration node are using the same value for OATH Algorithm.
In this example, select
TOTP. -
Save your changes.
The tree you create is a simple example for the purposes of demonstrating a basic OATH authentication journey. In a production environment, you could include additional nodes, such as:
- Get Authenticator App node
-
Provides links to download the ForgeRock Authenticator for Android and iOS.
- MFA Registration Options node
-
Provides options for users to register a multi-factor authentication device, get the authenticator app, or skip the registration process.
- Opt-out Multi-Factor Authentication node
-
Sets an attribute in the user’s profile which lets them skip multi-factor authentication.
- Recovery Code Display node
-
Lets a user view recovery codes to use in case they lose or damage the authenticator device they register.
- Recovery Code Collector Decision node
-
Lets a user enter their recovery codes to authenticate in case they have lost or damaged their registered authenticator device.
- Retry Limit Decision node
-
Lets a journey loop a specified number of times, for example, to allow a user to retry entering their OATH token.
Step 2. Authenticate using a one-time password
After creating the journey, you can register the ForgeRock Authenticator, and use it to generate and authenticate with a single-use, one-time password:
-
If you have not already done so, create a demo user in your server:
-
In an incognito browser window, browse to the journey you created in the previous step:
- Advanced Identity Cloud
-
https://openam-forgerock-sdks.forgeblocks.com/am/XUI/?realm=alpha&authIndexType=service&authIndexValue=MFAwithOATH - Self-managed PingAM server
-
https://openam.example.com:8443/openam/XUI/?realm=alpha&authIndexType=service&authIndexValue=MFAwithOATH
The journey asks for your credentials:

-
Sign in with the username and password of your demo user.
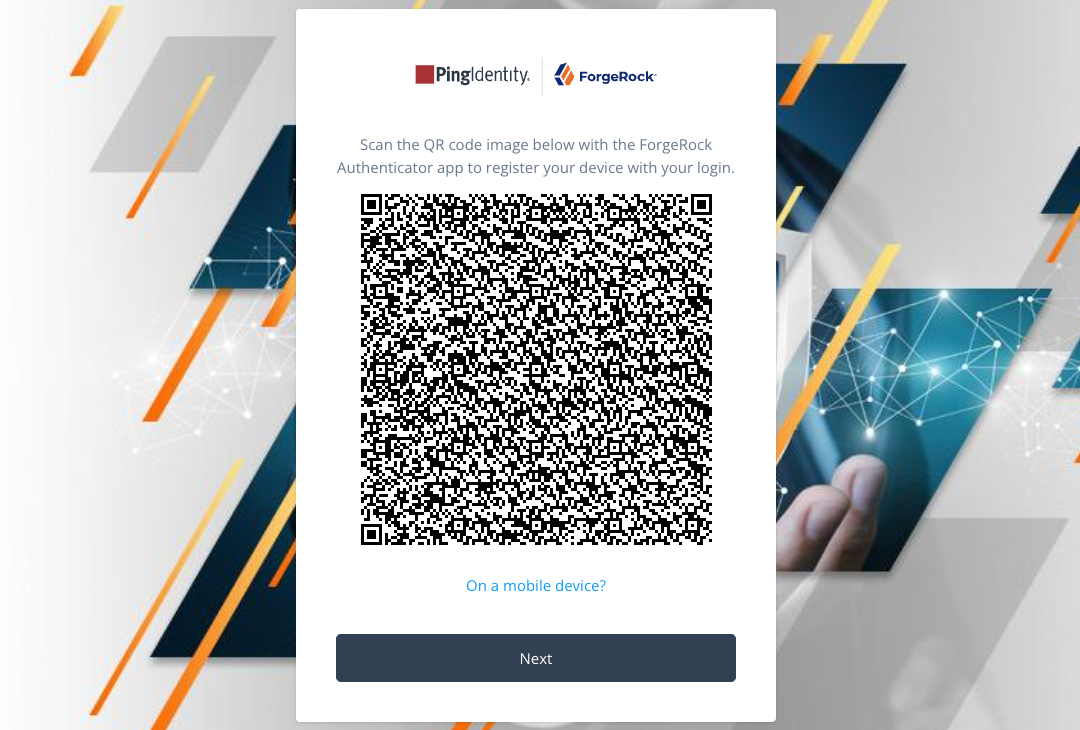
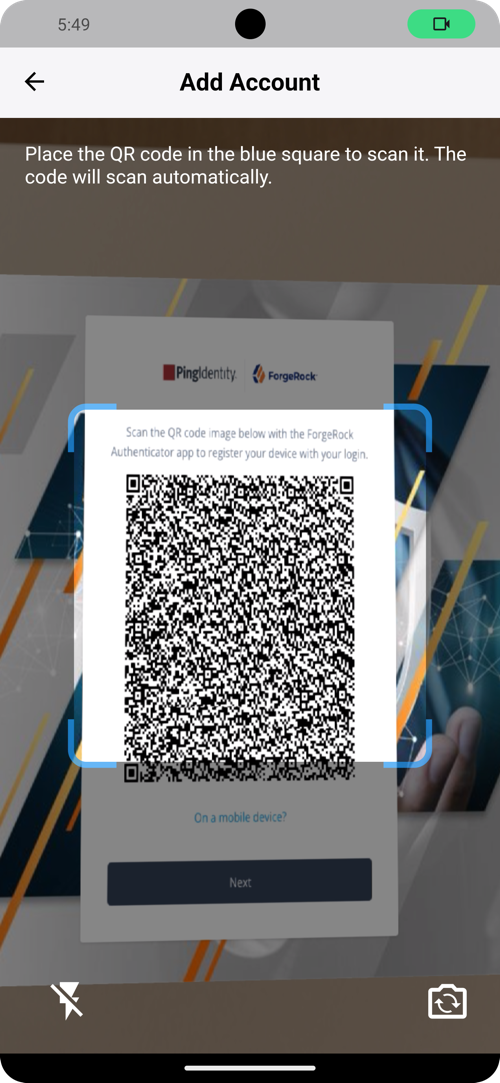
If you have not yet registered the ForgeRock Authenticator, the journey displays a QR code:
-
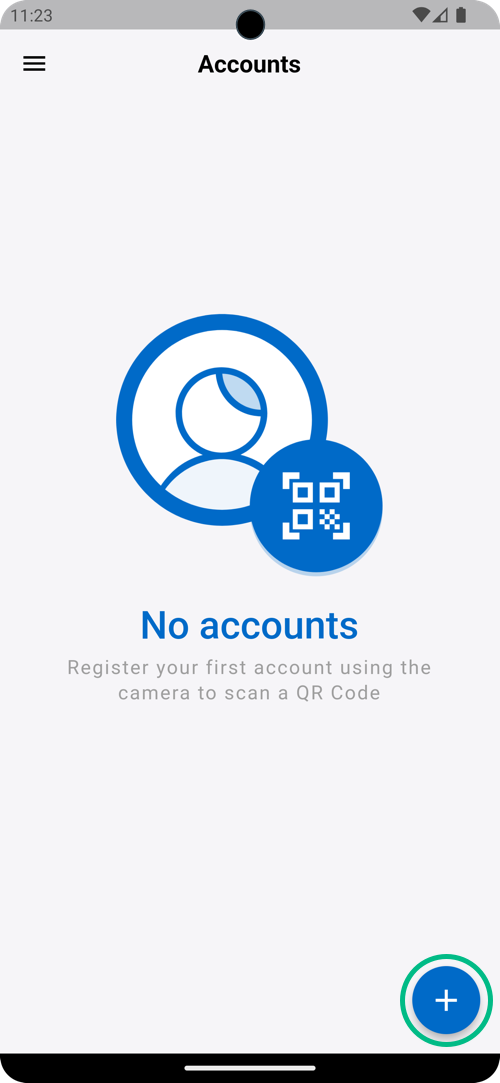
In the ForgeRock Authenticator, click the blue plus icon to register the account on the device:
-
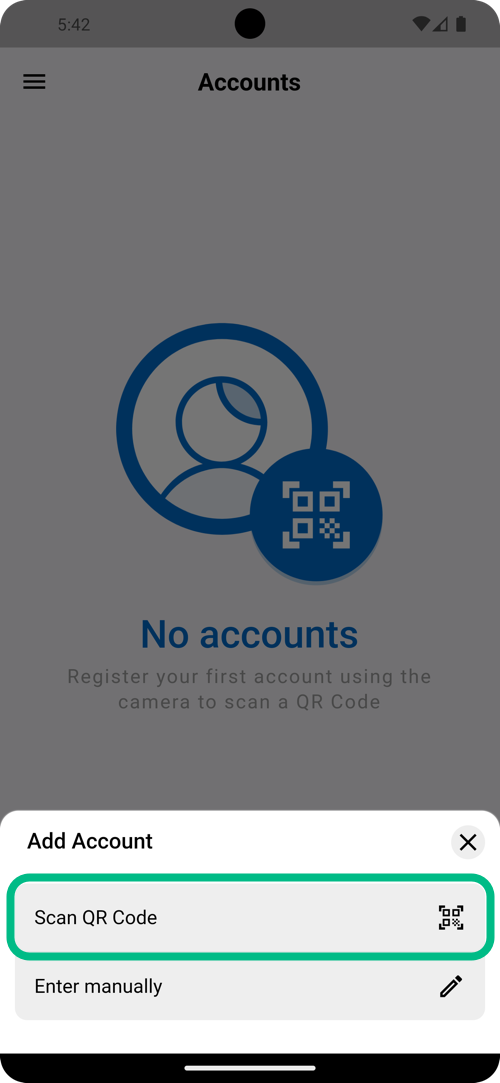
In the Add Account menu that appears, select Scan QR Code:
-
Scan the QR code on screen using the ForgeRock Authenticator:
-
When the ForgeRock Authenticator registers the account, in your browser, click Next to continue the journey.
The journey requests the one-time password:

-
Enter the verification code from the ForgeRock Authenticator.
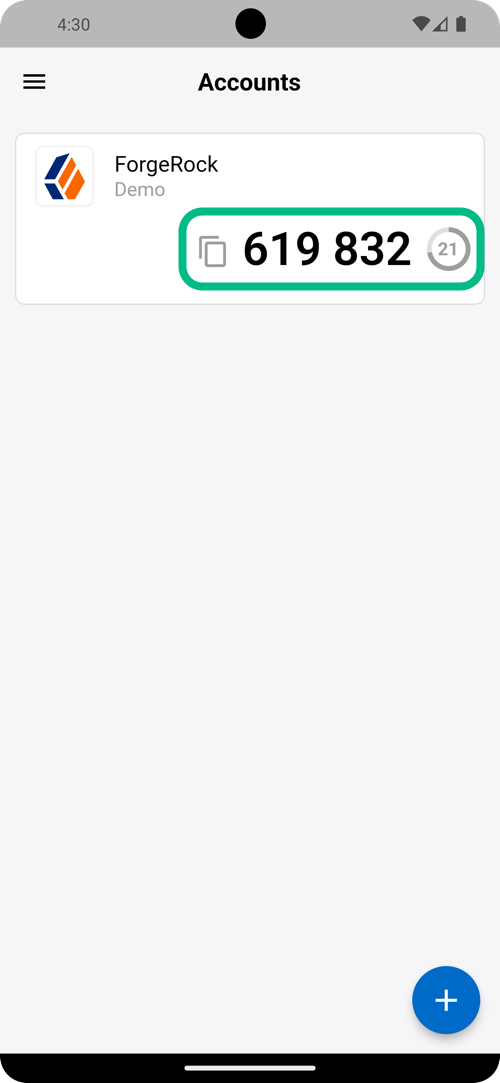
If the animated timer indicates the one-time password is close to expiry, wait for the app to generate a new one.
If you enter a valid one-time password, the browser displays the user’s profile page.
Next steps
You can add support for MFA using one-time passwords to your own Android and iOS applications, by using the Ping (ForgeRock) Authenticator module.
For more information, refer to Integrate MFA using OATH one-time passwords.