Integrate the Ping (ForgeRock) Login Widget into a React app
In this tutorial, you will learn how to integrate the Ping (ForgeRock) Login Widget into a simple React app that you scaffold using Vite.
You install the Ping (ForgeRock) Login Widget using npm, add an element to the HTML file for mounting the modal form factor, and wrap the app’s CSS in a layer.
With the app prepared, you then import and instantiate various components of the Ping (ForgeRock) Login Widget to start a journey. You subscribe to the events the Ping (ForgeRock) Login Widget emits so that the app can respond and display the appropriate UI.
When you have successfully authenticated a user, you add code to log the user out and invalidate their tokens, as well as update the UI to alter the button state.
Configure your server
Configure your PingOne Advanced Identity Cloud or self-managed PingAM server by following the steps in the Ping (ForgeRock) Login Widget Tutorial.
-
When creating the OAuth 2.0 client, add the URL that you are using to host the app to the Sign-In URLs property.
The URL is output to the console when you run the
npm run devcommand, and defaults tohttp://localhost:5173/ -
If your instance has the default Login journey, you can use that instead of creating a new journey as described in the tutorial.
Create a Vite app
-
In a terminal window, create a Vite app with React as the template:
npm create vite@latest login-widget-react-demo -- --template reactFor more information, refer to Scaffolding Your First Vite Project in the Vite developer documentation.
-
When completed, change to the new directory, for example
login-widget-react-demo, and then install dependencies withnpm:npm install -
Run the app in developer mode:
npm run dev -
In a web browser, open the URL output by the previous command to render the app. The URL is usually
http://localhost:5173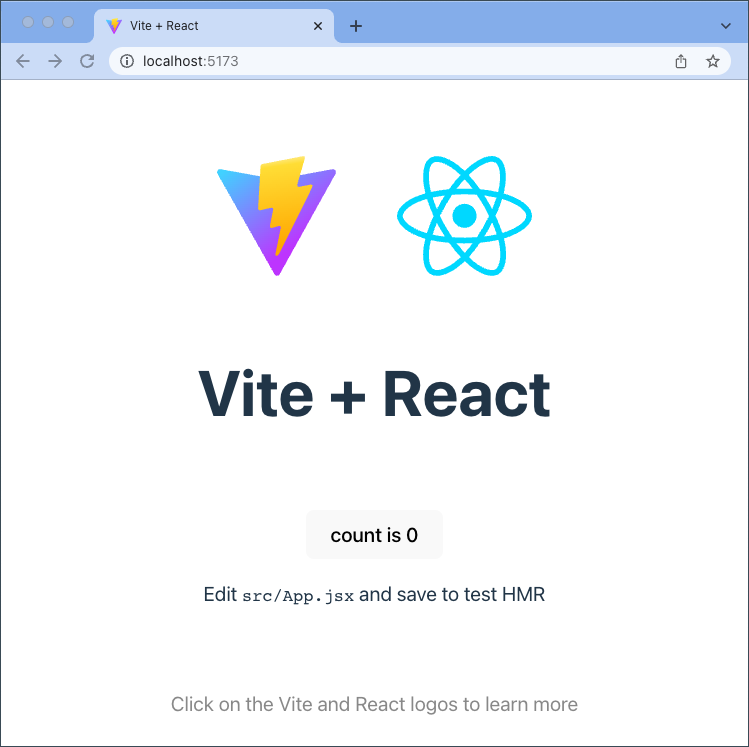 Figure 1. Example Vite + React app
|
Use a different browser for development testing than the one you use to log into PingOne Advanced Identity Cloud or PingAM. This prevents admin user and test user sessions colliding and causing unexpected authentication failures. |
Install the Ping (ForgeRock) Login Widget
In a new terminal window, install the Ping (ForgeRock) Login Widget using npm:
npm install @forgerock/login-widgetPrepare the HTML
In your preferred IDE, open the directory where you created the Vite app, and then open the index.html file.
To implement the modal form factor, create a root element to contain the Ping (ForgeRock) Login Widget.
Add <div id="widget-root"></div> toward the bottom of the <body> element but before the <script> tag:
<!DOCTYPE html>
<html lang="en">
  <head>
    <meta charset="UTF-8" />
    <link rel="icon" type="image/svg+xml" href="/vite.svg" />
    <meta name="viewport" content="width=device-width, initial-scale=1.0" />
    <title>Vite + React</title>
  </head>
  <body>
    <div id="root"></div>
    <!-- Widget mount point -->
    <div id="widget-root"></div>
    <script type="module" src="/src/main.jsx"></script>
  </body>
</html>
Prepare the CSS
You should wrap the app’s CSS using @layer. This helps control the CSS cascade.
To wrap the app’s CSS, in your IDE, open src/index.css and src/App.css and wrap them both with the following code:
@layer app {
    /* existing styles */
    #root {
        max-width: 1280px;
        margin: 0 auto;
        padding: 2rem;
        text-align: center;
    }

    .logo {
        height: 6em;
        padding: 1.5em;
        will-change: filter;
        transition: filter 300ms;
    }
    /* ... */
}
You can then specify the order of the various layers as follows:
<style>
  @layer app;
  /* List the Widget layers last */
  @layer 'fr-widget.base';
  @layer 'fr-widget.utilities';
  @layer 'fr-widget.components';
  @layer 'fr-widget.variants';
</style>
Import and configure the Ping (ForgeRock) Login Widget
In your IDE, open the top-level application file, often called App.jsx.
Import the Widget class, the configuration module, and the CSS:
import Widget, { configuration } from '@forgerock/login-widget';
import '@forgerock/login-widget/widget.css';
Add a call to the configuration method within your App function component and save off the return value to a config variable for later use.
This internally prepares the Widget for use.
function App() {
  const [count, setCount] = useState(0);

  // Initiate all the Widget modules
  const config = configuration();

  // ...
Instantiate and mount the Ping (ForgeRock) Login Widget
To continue, you need to import useEffect from the React library. This is to control the execution of a number of statements you are going to write.
After importing useEffect, write it into the component with an empty dependency array:
import React, { useEffect, useState } from 'react';

// ...

function App() {

  // ...

  useEffect(() => {}, []);

// ...|
The empty dependency array is to tell React this has no dependencies at this point and should only run once. |
Now that you have the useEffect written, follow these steps:
-
Instantiate the
Widgetclass withinuseEffect -
In the arguments, pass an object with a
targetproperty that specifies the DOM element you created in an earlier step -
Assign its return value to a
widgetvariable -
Return a function that calls
widget.$destroy()
useEffect(() => {
  const widget = new Widget({ target: document.getElementById('widget-root') });

  return () => {
    widget.$destroy();
  };
}, []);|
The reason for the returned function is for proper clean up when the React component unmounts. If it remounts, you do not get two widgets added to the DOM. |
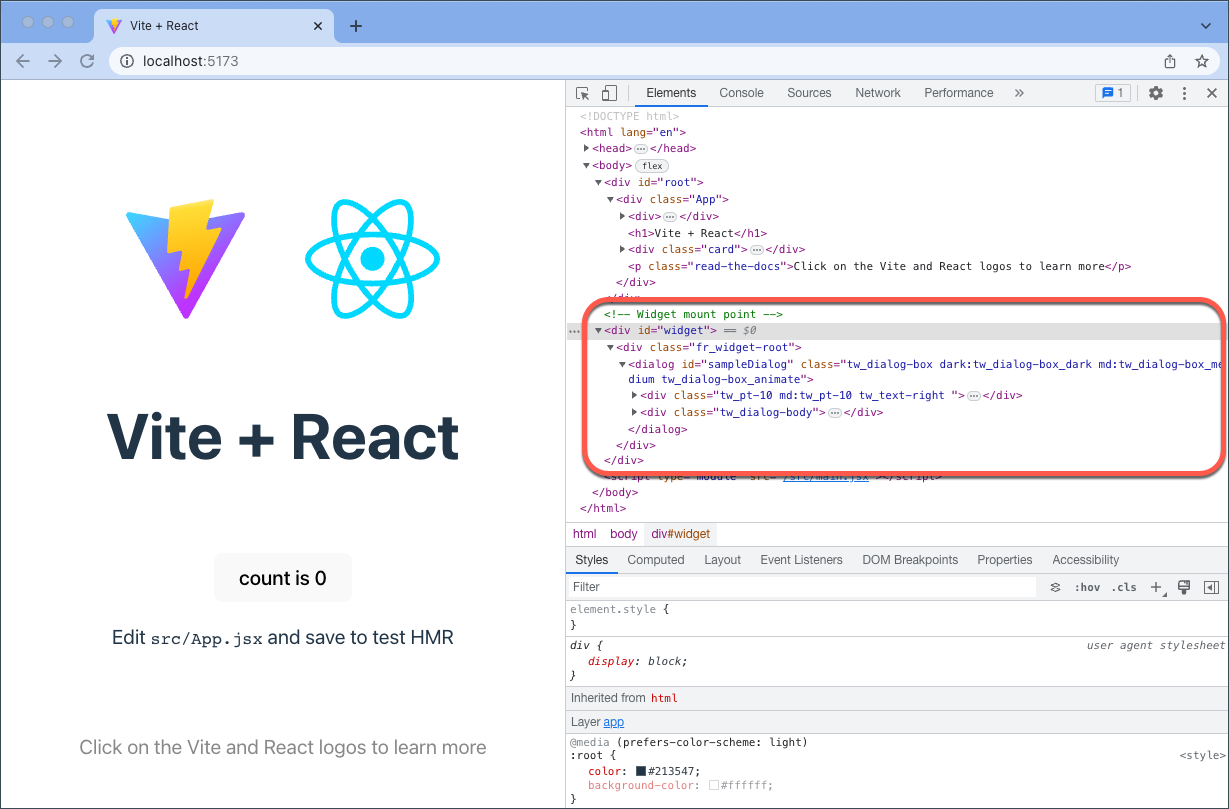
In your browser, the app doesn’t look any different. This is because the Widget, by default, is invisible at startup.
To ensure it is working as expected, inspect the DOM in the browser developer tools.
Open the <div id="widget-root"> element in the DOM, and you should see the Ping (ForgeRock) Login Widget mounted within it:
Controlling the component
An invisible Ping (ForgeRock) Login Widget is not all that useful, so your next task is to pull in the component module to manage the component’s events.
-
Add the
componentmodule to the list of imports from the@forgerock/login-widget -
Call the
componentfunction just under theconfigurationfunction -
Assign its return value to a
componentEventsvariable:
import Widget, { component, configuration } from '@forgerock/login-widget';

// ...

function App() {
  // ...

  const config = configuration();
  const componentEvents = component();

  // ...
Now that you have a reference to the component events observable, you can trigger an event such as open, and you can also listen for events.
Before calling the open method, repurpose the existing count is 0 button within the App component.
-
Within the button’s
onClickhandler, change thesetCountfunction tocomponentEvents.open -
Change the button text to read "Login"
The result resembles the following:
<button
  onClick={() => {
    componentEvents.open();
  }}>
  Login
</button>
You can now revisit your test browser and click the Login button. The modal opens and displays a "spinner" animating on repeat.
This is expected, because the Ping (ForgeRock) Login Widget does not yet have any information to render.
Click the button in the top-right to close the modal. The modal should be dismissed as expected.
Now that you have the modal mounted and functional, move on to the next step which configures the Ping (ForgeRock) Login Widget to be able to call the authorization server to get authentication data.
Calling the authorization server
Before the Ping (ForgeRock) Login Widget can connect you need to use the config variable you created earlier.
Call its set method within the exiting useEffect, and provide the configuration values for your server:
useEffect(() => {

  config.set({
    forgerock: {
      serverConfig: {
        baseUrl: 'https://openam-forgerock-sdks.forgeblocks.com/am',
        timeout: 3000,
      },
    },
  });

  const widget = new Widget({ target: document.getElementById('widget-root')});

  // ...
Now that you have the Ping (ForgeRock) Login Widget configured, add the journey module to the list of imports so that you can start the authentication flow:
import Widget, {
  component,
  configuration,
  journey,
} from '@forgerock/login-widget';
Execute the journey function and assign its returned value to a journeyEvents variable.
Do this underneath the other existing "event" variables:
import Widget, { component, configuration, journey } from '@forgerock/login-widget';

// ...

function App() {
  // ...

  const config = configuration();
  const componentEvents = component();
  const journeyEvents = journey();

  // ...
This new observable provides access to journey events. Within the Login button’s onClick handler add the start method.
Now, when you open the modal, you also call start to request the first authentication step from the server.
<button onClick={() => {
    journeyEvents.start();
    componentEvents.open();
  }>
  Login
</button>
You are now capable of authenticating a user. With an existing user, authenticate as that user and see what happens.
If successful, you’ll notice the modal dismisses itself but your app is not capturing anything from this action. Proceed to the next step to capture user data.
Authenticating a user
There are multiple ways to capture the event of a successful login and access the user information.
In this guide, you use the journeyEvents observable created previously.
Within the existing useEffect function:
-
Call the
subscribemethod and assign its return value to an unsubscribe variable -
Pass in a function that logs the emitted events to the console
-
Call the unsubscribe function within the return function of
useEffect
// ...

useEffect(() => {
  // ...

  const widget = new Widget({ target: document.getElementById('widget-root') });

  const journeyEventsUnsub = journeyEvents.subscribe((event) => {
    console.log(event);
  });

  return () => {
    widget.$destroy();
    journeyEventsUnsub();
  };
}, []);|
Unsubscribing from the observable is important to avoid memory leaks if the component mounts and unmounts frequently. |
Revisit your app in the test browser, but remove all of the browser’s cookies and Web Storage to ensure you have a fresh start.
|
In Chromium browsers, you can find it under the "Application" tab of the developer tools. In Firefox and Safari, you can find it under the "Storage" tab. |
Once you have deleted all the cookies and storage, refresh the browser and try to log in your test user.
You will notice in the developer tools console that a lot of events are emitted.
Initially, you may not have much need for all this data, but over time, this information might become more valuable to you.
To narrow down all of this information, capture just one piece of the event: the user response after successfully logging in.
To do that, you can add a conditional, as follows:
-
Add an
ifcondition within thesubscribecallback function that tests for the existence of the user response.const journeyEventsUnsub = journeyEvents.subscribe((event) => { if (event.user.response) { console.log(event.user.response); } });
With the above condition, the Ping (ForgeRock) Login Widget only writes out the user information when it’s truthy. This helps narrow down the information to what is useful right now.
Remove all the cookies and Web Storage again and refresh the page. Try logging in again, and you should see only one log of the user information when it’s available:
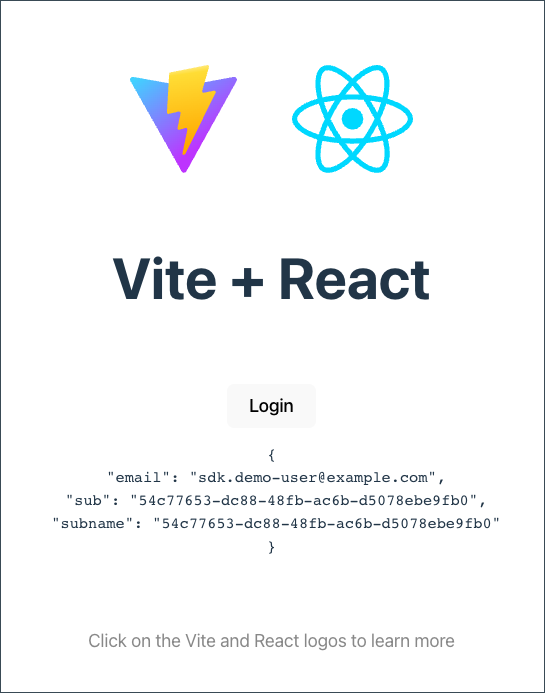
user.event.response output{
email: 'sdk.demo-user@example.com',
sub: '54c77653-dc88-48fb-ac6b-d5078ebe9fb0',
subname: '54c77653-dc88-48fb-ac6b-d5078ebe9fb0'
}Next, repurpose the useState hook that’s already used in the component to save the user information.
-
Change the zeroth index of the returned value from
counttouserInfo -
Change the first index of the returned value from
setCounttosetUserInfo -
Change the default value passed into the
useStatefrom0tonull -
Change the condition from just truthy to
userInfo !== event.user.response -
Replace the
console.logwith thesetUserInfofunction -
Add the
userInfovariable in the dependency array of theuseEffect
The top part of your App function component should resemble the following:
function App() {
  const [userInfo, setUserInfo] = useState(null);

  // Initiate all the Widget modules
  const config = configuration();
  const componentEvents = component();
  const journeyEvents = journey();

  useEffect(() => {
    // Set the Widget's configuration
    config.set({
      forgerock: {
        serverConfig: {
          baseUrl: 'https://openam-forgerock-sdks.forgeblocks.com/am',
          timeout: 3000,
        }
      }
    });

    // Instantiate the Widget and assign it to a variable
    const widget = new Widget({ target: document.getElementById('widget-root') });

    // Subscribe to journey observable and assign unsubscribe function to variable
    const journeyEventsUnsub = journeyEvents.subscribe((event) => {
      if (userInfo !== event.user.response) {
        setUserInfo(event.user.response);
      }
    });

    // Return a function that destroys the Widget and unsubscribes from the journey observable
    return () => {
      widget.$destroy();
      journeyEventsUnsub();
    };
  }, [userInfo]);

// ...|
The condition comparing |
Now that you have the user data set into the React component, print it out into the DOM.
-
Replace the paragraph tag containing the text
Edit <code>src/App.jsx</code> and save to test HMRwith a<pre>tag -
Within the
<pre>tag, write a pair of braces:{} -
Within these braces, use the
JSON.stringifymethod to serialize theuserInfovalue
Your JSX should now look like this:
<pre>{JSON.stringify(userInfo, null, ' ')}</pre>|
The |
After clearing the browser data, try logging the user in and observe the user info get rendered onto the page after success.
Logging a user out
The final step is to log the user out, clearing all the user-related cookies, storage, and cache.
To do this, add the user module to the list of imports from the Ping (ForgeRock) Login Widget:
import Widget, {
  configuration,
  component,
  journey,
  user,
} from '@forgerock/login-widget';
Next, configure the app to display the button as a Login button when the user has not yet authenticated and a Logout button when the user has already logged in:
-
Wrap the button element with braces containing a ternary, using the falsiness of the
userInfoas the condition -
When no
userInfoexists—the user is logged out—render the Login button -
Write a Logout button with an
onClickhandler to run theuser.logoutfunction
The resulting JSX should resemble this:
import Widget, { user, component, configuration, journey } from '@forgerock/login-widget';

// ...

<h1>Vite + React</h1>
<div className="card">
  {
    !userInfo ? (
      <button
        onClick={() => {
          journeyEvents.start();
          componentEvents.open();
        }}>
        Login
      </button>
    ) : (
      <button
        onClick={() => {
          user.logout();
        }}>
        Logout
      </button>
    )
  }
  <pre>{JSON.stringify(userInfo, null, ' ')}</pre>
</div>
// ...|
You do not have to add code to reset the |
If your app is already reacting to the presence of user info, it should be rendering the Logout button already. Click it and observe the application reacting.
You should now be able to log a user in and out, with the app reacting to the changes in state.