Authorization code grant with PKCE
- Endpoints
-
-
/oauth2/userinfo (OpenID Connect [OIDC])
The authorization code grant, when combined with the Proof Key for Code Exchange (PKCE) standard (RFC 7636), is used when a public client, such as a native or SPA application, requires access to protected resources.
The flow is similar to the regular authorization code grant but the client must generate a code that is used in the communication between the client and the authorization server. This code mitigates against interception attacks performed by malicious users.
Browser-based clients making OAuth 2.0 requests to different domains must implement Cross-Origin Resource Sharing (CORS) calls to access OAuth 2.0 resources in different domains.
The PKCE flow adds three parameters to those used for the authorization code grant:
code_verifier-
A random string that correlates the authorization request to the token request.
code_challenge-
A string derived from the code verifier sent in the authorization request, which is validated against the code verifier during the token request.
code_challenge_method-
The method used to derive the code challenge.
The authorization code grant with PKCE flow
OAuth 2.0

-
The client receives a request to access a protected resource. To access the resource, the client requires authorization from the resource owner. When using the PKCE standard, the client must generate a unique code and a way to verify it, and append the code to the request for the authorization code.
-
The client redirects the resource owner’s user-agent to the authorization server.
-
The authorization server authenticates the resource owner, confirms resource access, and gathers consent if not previously saved.
-
If the resource owner’s credentials are valid, the authorization server stores the code challenge and redirects the resource owner’s user agent to the redirection URI.
-
During the redirection process, the authorization server appends an authorization code to the request to the client.
-
The client receives the authorization code and calls the authorization server’s token endpoint to exchange the authorization code for an access token appending the verification code to the request.
-
The authorization server verifies the code stored in memory using the validation code. It also verifies the authorization code. If both codes are valid, the authorization server returns an access token (and a refresh token, if configured) to the client.
-
The client requests access to the protected resource from the resource server.
-
The resource server contacts the authorization server to validate the access token.
-
The authorization server validates the token and responds to the resource server.
-
If the token is valid, the resource server allows the client to access the protected resource.
OIDC

-
The end user wants to use the services provided by the relying party (RP). The RP, usually a web-based service, requires an account to provide those services.
The end user issues a request to share their information with the RP.
-
To access the end user’s information in the OpenID provider (OP), the RP requires end user consent. When using the PKCE standard, the RP must generate a unique code and a way to verify it, and append the code to the request for the authorization code.
-
The RP redirects the end user’s user-agent with
code_challengeandcode_challenge_method… -
…to the OP.
-
The OP authenticates the end user, confirms resource access, and gathers consent if necessary.
-
On success, the OP stores the code challenge and its method.
-
The OP redirects the end user’s user-agent to the redirection URI, usually at the RP.
-
During the redirection process, the OP appends an authorization code.
-
The RP authenticates to the OP and exchanges the authorization code for an access token and an ID token, appending the verification code to the request.
-
The OP verifies the code challenge it stored using the validation code, and verifies the authorization code.
-
If the codes are valid, the OP issues an access token and an ID token to the RP.
-
The RP validates the ID token and its claims.
The RP can use the ID token subject ID claim as the end user’s identity.
-
If the RP requires additional claims, it sends a request to the /oauth2/userinfo endpoint with the access token for authorization.
-
If the access token is valid, the
/oauth2/userinfoendpoint returns any additional claims.The RP can use the subject ID and the additional claims to identify the end user.
Demonstrate the authorization code grant with PKCE flow
Follow these steps to get an authorization code and exchange it for an access token:
Prepare the demonstration
This demonstration assumes the following configuration:
-
AM is configured as an OAuth 2.0 authorization server. Ensure that:
-
The
codeplugin is configured in the Response Type Plugins field. -
The
Authorization Codegrant type is configured in the Grant Types field.
For more information, refer to Authorization server configuration.
-
-
A public client called
myClientis registered in AM with the following configuration:-
Scopes:
write(for OAuth 2.0)
openidandprofile(for OIDC) -
Response Types:
code -
Grant Types:
Authorization Code
For more information, refer to Client application registration.
-
Generate a code verifier and a code challenge
The client application must generate a code verifier, a high-entropy URL-safe random string between 43 and 128 characters long, and a code challenge, a base64url-encoded hash of the code verifier.
It is mandatory to create the challenge using a SHA-256 algorithm if the client supports it, as specified in the PKCE standard (RFC 7636).
This example JavaScript code generates values such as
082b7ab3042995bcb3163ec83cf5f348ff4393d5713630eb5f09dcf7d0c2cca39749313556c260558eb49355ff86d0e61449
for the code verifier and K7Dz7AcV1urbgo4FYNgy2QAAz6v2LyIdmmGPzsFZbAc for the code challenge:
const crypto = require('crypto');

const verifier = crypto.randomBytes(50).toString('hex').slice(0, 128);
const challenge = crypto.createHash('sha256')
    .update(Buffer.from(verifier))
    .digest('base64')
    .replace(/=/g, '')
    .replace(/\+/g, '-')
    .replace(/\//g, '_');

console.log("verifier: " + verifier);
console.log("challenge: " + challenge);
The client is now ready to request an authorization code.
Get an authorization code using a browser
-
The client redirects the resource owner’s user-agent to the authorization server’s /oauth2/authorize endpoint specifying, at least, the following query parameters:
-
client_id=your-client-id
-
response_type=code
-
redirect_uri=your-redirect-uri
-
code_challenge=your-code-challenge
-
code_challenge_method=S256
If the OAuth 2.0 provider is configured for a subrealm rather than the Top Level Realm, you must specify it in the endpoint. For example, if the OAuth 2.0 provider is configured for the
/customersrealm, then use/oauth2/realms/root/realms/customers/authorize.For example:
https://openam.example.com:8443/openam/oauth2/realms/root/realms/alpha/authorize \
?client_id=myClient \
&response_type=code \
&scope=write \
&redirect_uri=https://www.example.com:443/callback \
&code_challenge=K7Dz7AcV1urbgo4FYNgy2QAAz6v2LyIdmmGPzsFZbAc \
&code_challenge_method=S256 \
&state=abc123
For OIDC, set
scope=openid profileinstead.The URL is split and spaces added for readability purposes.
The
scopeparameter is optional if default values are configured in the authorization server or the client.The
stateparameter is included to protect against CSRF attacks but is also optional. -
-
The resource owner authenticates to the authorization server, for example, using the credentials of the
demouser. In this case, they log in using the default chain or tree configured for the realm. -
On a successful login, the authorization server presents the AM consent screen unless AM is configured to use implied consent.
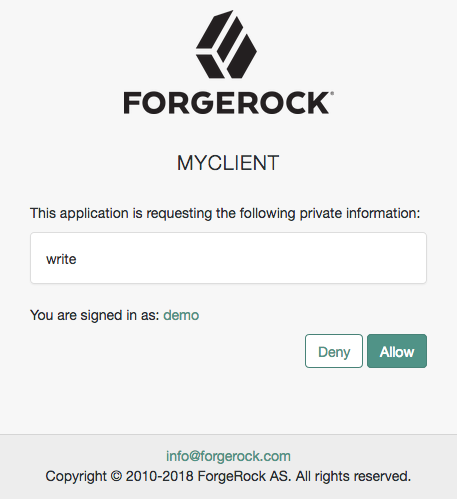 Figure 1. OAuth 2.0 consent screen
 -
Click Allow to consent.
The authorization server redirects the resource owner to the URL specified in the
redirect_uriparameter. -
Inspect the URL in the browser.
It contains a
codeparameter with the authorization code the authorization server has issued.For example:
http://www.example.com/callback?code=ZNSDo8LrsI2w-6NOCYKQgvDPqtg&scope=write&iss… -
The client performs the steps in Exchange an authorization code for an access token to exchange the authorization code for an access token.
Get an authorization code using REST
-
The resource owner logs in to the authorization server, for example, using the credentials of the
demouser.For example:
$ curl \ --request POST \ --header "Content-Type: application/json" \ --header "X-OpenAM-Username: demo" \ --header "X-OpenAM-Password: Ch4ng31t" \ --header "Accept-API-Version: resource=2.0, protocol=1.0" \ 'https://openam.example.com:8443/openam/json/realms/root/realms/alpha/authenticate' { "tokenId":"AQIC5wM…TU3OQ*", "successUrl":"/openam/console", "realm":"/alpha" } -
The client makes a POST call to the authorization server’s /oauth2/authorize endpoint specifying the resource owner’s SSO token in a cookie, and the following parameters:
-
client_id=your-client-id
-
response_type=code
-
redirect_uri=your-redirect-uri
-
decision=allow
-
csrf=demo-user-SSO-token
-
code_challenge=your-code-challenge
-
code_challenge_method=S256
The
Code Verifier Parameter Requiredsetting (Realms > Realm Name > Services > OAuth2 Provider > Advanced) specifies whether AM requires clients to include a code verifier in their calls. However, if a client makes a call to AM with thecode_challengeparameter, AM will honor the code exchange regardless of theCode Verifier Parameter Requiredvalue. For more information, refer to Authorization server configuration.If the OAuth 2.0 provider is configured for a subrealm rather than the Top Level Realm, you must specify it in the endpoint. For example, if the OAuth 2.0 provider is configured for the
/customersrealm, then use/oauth2/realms/root/realms/customers/authorize.For example:
$ curl --dump-header - \ --request POST \ --Cookie "iPlanetDirectoryPro=AQIC5wM…TU3OQ*" \ --data "redirect_uri=https://www.example.com:443/callback" \ --data "scope=write" \ --data "response_type=code" \ --data "client_id=myClient" \ --data "csrf=AQIC5wM…TU3OQ*" \ --data "state=abc123" \ --data "decision=allow" \ --data "code_challenge=K7Dz7AcV1urbgo4FYNgy2QAAz6v2LyIdmmGPzsFZbAc" \ --data "code_challenge_method=S256" \ "https://openam.example.com:8443/openam/oauth2/realms/root/realms/alpha/authorize"For OIDC, set
scope=openid profileinstead.The
scopeparameter is optional if default values are configured in the authorization server or the client.The
stateparameter is included to protect against CSRF attacks but is also optional.If the authorization server is able to authenticate the user and the client, it returns an HTTP 302 response with the authorization code appended to the redirection URL:
HTTP/2 302 … location: https://www.example.com:443/callback?code=<authorization-code>&iss… … -
-
Follow the steps in Exchange an authorization code for an access token.
Exchange an authorization code for an access token
As the client, call the /oauth2/access_token endpoint to exchange the authorization code for an access token. Provide the following parameters:
-
grant_type=authorization_code
-
code=your-authorization-code
-
client_id=your-client-id
-
redirect_uri=your-redirect-uri
-
code_verifier=your-code-verifier
For example:
$ curl \
--request POST \
--data "grant_type=authorization_code" \
--data "code=g5B3qZ8rWzKIU2xodV_kkSIk0F4" \
--data "client_id=myClient" \
--data "redirect_uri=https://www.example.com:443/callback" \
--data "code_verifier=082b7ab3042995bcb3163ec8…" \
"https://openam.example.com:8443/openam/oauth2/realms/root/realms/alpha/access_token"The client_id and the redirect_uri parameters specified in this call
must match those used as part of the authorization code request, or the authorization server will not validate the code.
For OAuth 2.0, the authorization server returns an access token; for example:
{
  "access_token": "sbQZuveFumUDV5R1vVBl6QAGNB8",
  "scope": "write",
  "token_type": "Bearer",
  "expires_in": 3599
}
For OIDC, the OP returns an access token and an ID token; for example:
{
  "access_token": "<access-token>",
  "scope": "openid profile",
  "id_token": "<id-token>",
  "token_type": "Bearer",
  "expires_in": 3599
}|
The authorization server can also issue refresh tokens at the same time the access tokens are issued. For more information, refer to Refresh tokens. |
Additional OIDC claims
An RP can request additional claims about the end user with the access token at the /oauth2/userinfo endpoint:
$ curl \
--request GET \
--header "Authorization Bearer <access-token>" \
"https://openam.example.com:8443/openam/oauth2/realms/root/realms/alpha/userinfo"
{
  "name": "<resource-owner-display-name>",
  "family_name": "<resource-owner-family-name>",
  "given_name": "<resource-owner-given-name>",
  "sub": "<resource-owner-sub>",
  "subname": "<resource-owner-id>"
}