AM as client and authorization server
This section describes the steps required to set up AM both as an OAuth 2.0 authorization server and as an OAuth 2.0 client, to protect resources on a resource server by using an AM web agent.
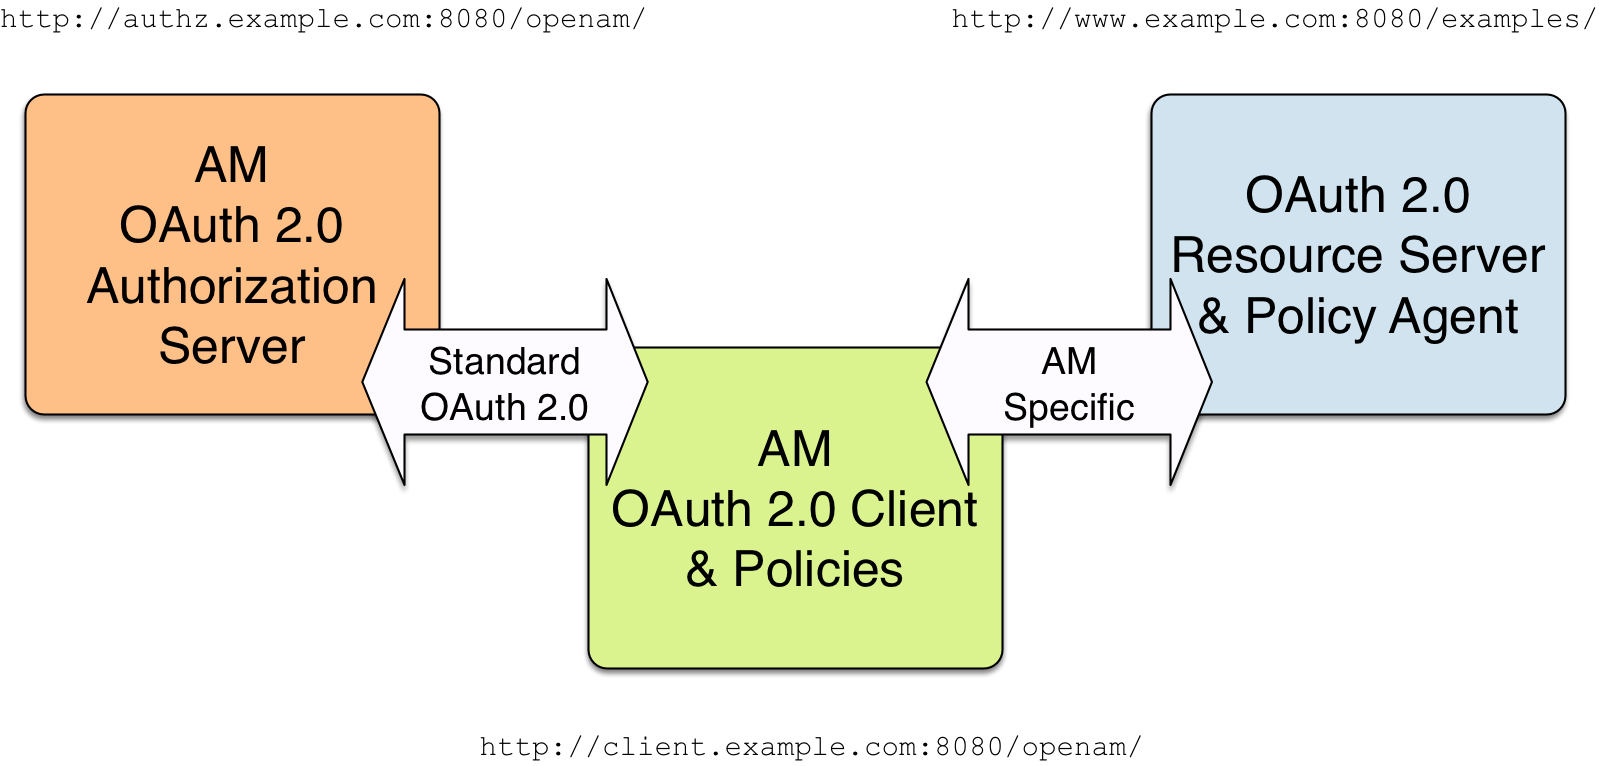
The example uses three servers:
-
http://authz.example.com:8080/openamas the OAuth 2.0 authorization server -
http://client.example.com:8080/openamas the OAuth 2.0 client, which also handles policy -
http://www.example.com:8080/as the OAuth 2.0 resource server protected with an AM web agent, where the resources to protect are deployed in Apache Tomcat
The two AM servers communicate using OAuth 2.0. The web agent on the resource server communicates with AM as agents normally do, using AM specific requests. The resource server in this example does not need to support OAuth 2.0.
The high-level configuration steps are as follows:
-
On the AM server that you will configure to act as an OAuth 2.0 client, configure an agent profile, and the policy used to protect the resources.
On the web server or application container that will act as an OAuth 2.0 resource server, install and configure an AM web agent.
Make sure that you can access the resources when you log in through an authentication module that you know is working, such as the default DataStore authentication module.
In this example, you would try to access
http://www.example.com:8080/examples/. The web agent should redirect you to the AM login page. After you log in successfully as a user with access rights to the resource, AM should redirect you back tohttp://www.example.com:8080/examples/, and the web agent should allow access.Fix any problems you have in accessing the resources before you try to set up access through an OAuth 2.0 or OpenID Connect authentication module.
-
Configure one AM server as an OAuth 2.0 authorization service, which is described in Authorization server configuration.
-
Configure the other AM server, the one with the agent profile and policy, as an OAuth 2.0 client, by setting up an OAuth 2.0 or OpenID Connect authentication module according to social authentication modules.
-
On the authorization server, register the OAuth 2.0 or OpenID Connect authentication module as an OAuth 2.0 client, which is described in Client application registration.
-
Log out and access the protected resources to see the process in action.
Example: Protecting a website with OAuth 2.0
This example pulls everything together (except security considerations), using AM servers both as the OAuth 2.0 authorization server, and also as the OAuth 2.0 client, with an AM web or Java agent on the resource server requesting policy decisions from AM as OAuth 2.0 client. In this way, any server protected by an agent that is connected to an AM OAuth 2.0 client can act as an OAuth 2.0 resource server:
-
On the AM server that will be configured as an OAuth 2.0 client, set up an AM web or Java agent and policy in the Top Level Realm,
/, to protect resources.You can find details on installing an agent in the Web Agents Installation Guide and the Java Agents Installation Guide. This example relies on the Tomcat Java agent, configured to protect resources in Apache Tomcat (Tomcat) at
http://www.example.com:8080/.The policies for this example protect the Tomcat examples under
http://www.example.com:8080/examples/, allowing GET and POST operations by all authenticated users. Learn more in Dynamic OAuth 2.0 authorization.After setting up the web or Java agent and the policy, you can make sure everything is working by attempting to access a protected resource, in this case,
http://www.example.com:8080/examples/. The agent should redirect you to AM to authenticate with the default authentication module, where you can login as userdemopasswordCh4ng31t. After successful authentication, AM redirects your browser back to the protected resource and the Java agent lets you get the protected resource, in this case, the Tomcat examples top page.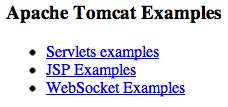 Figure 2. Accessing the Apache Tomcat examples
 -
On the AM server to be configured as an OAuth 2.0 authorization server, configure AM’s OAuth 2.0 authorization service as described in Authorization server configuration.
The authorization endpoint to protect in this example is at
http://authz.example.com:8080/openam/oauth2/realms/root/authorize. -
On the AM server to be configured as an OAuth 2.0 client, configure an AM OAuth 2.0 or OpenID Connect social authentication module instance for the Top Level Realm:
Under Realms > Top Level Realm > Authentication > Modules, click Add Module. Name the module
OAuth2, and select the Social Auth OAuth2 type, then click Create.The key settings for this example are the following:
- Client Id
-
This is the client identifier used to register your client with AM’s authorization server, and then used when your client must authenticate to AM.
Set this to
myClientIDfor this example. - Client Secret
-
This is the client password used to register your client with AM’s authorization server, and then used when your client must authenticate to AM.
Set this to
passwordfor this example. Make sure you use strong passwords when you actually deploy OAuth 2.0. - Authentication Endpoint URL
-
In this example,
http://authz.example.com:8080/openam/oauth2/realms/root/authorize.This AM endpoint can take additional parameters. In particular, you must specify the realm if the AM OAuth 2.0 provider is configured for a subrealm rather than for the Top Level Realm.
When making a REST API call, specify the realm in the path component of the endpoint.
You must specify the entire hierarchy of the realm, starting at the Top Level Realm.
Prefix each realm in the hierarchy with the realms/ keyword.
For example, /realms/root/realms/customers/realms/europe.
+
For example, if the OAuth 2.0 provider is configured for the realm customers within the Top Level Realm,
then use the following URL: http://authz.example.com:8080/openam/oauth2/realms/root/realms/customers/authorize.
+
The /oauth2/authorize endpoint can also take module and service parameters.
Use either as described in Authenticate with a browser,
where module specifies the authentication module instance to use
or service specifies the authentication chain to use when authenticating the resource owner.
- Access Token Endpoint URL
-
In this example,
http://authz.example.com:8080/openam/oauth2/realms/root/access_token.This AM endpoint can take additional parameters. In particular, you must specify the realm if the AM OAuth 2.0 provider is configured for a subrealm rather than the Top Level Realm (/).
When making a REST API call, specify the realm in the path component of the endpoint.
You must specify the entire hierarchy of the realm, starting at the Top Level Realm.
Prefix each realm in the hierarchy with the realms/ keyword.
For example, /realms/root/realms/customers/realms/europe.
+
For example, if the OAuth 2.0 provider is configured for the realm /customers,
use the following URL: http://authz.example.com:8080/openam/oauth2/realms/root/realms/customers/access_token.
- User Profile Service URL
-
In this example,
http://authz.example.com:8080/openam/oauth2/realms/root/tokeninfo. - Scope
-
In this example,
cn.The demo user has common name
demoby default, so by setting this tocn|Read your user name, AM can get the value of the attribute without the need to create additional identities, or to update existing identities. The description,Read your user name, is shown to the resource owner in the consent page. - Subject Property
-
In this example,
cn. - Proxy URL
-
The client redirect URL, which in this example is
http://client.example.com:8080/openam/oauth2c/OAuthProxy.jsp. - Account Mapper
-
In this example,
org.forgerock.openam.authentication.modules.common.mapping.JsonAttributeMapper. - Account Mapper Configuration
-
In this example,
cn=cn. - Attribute Mapper
-
In this example,
org.forgerock.openam.authentication.modules.common.mapping.JsonAttributeMapper. - Attribute Mapper Configuration
-
In this example,
cn=cn. - Create account if it does not exist
-
In this example, disable this functionality.
AM can create local accounts based on the account information returned by the authorization server.
-
On the AM server configured to act as an OAuth 2.0 authorization server, register the Social Auth OAuth2 authentication module as an OAuth 2.0 confidential client, which is described in Client application registration.
Under Realms > Top Level Realm > Applications > OAuth 2.0 > myClientID, adjust the following settings:
-
- Client type
-
In this example,
confidential. AM protects its credentials as an OAuth 2.0 client. - Redirection URIs
-
In this example,
http://client.example.com:8080/openam/oauth2c/OAuthProxy.jsp.If any Redirection URI scheme, host, or port differs from that of AM, add it to the global validation service to ensure that it is pre-approved, as described in Success and failure redirection URLs. Otherwise, AM rejects the redirection URI, even if it matches the client profile, and redirection fails.
- Scopes
-
In this example,
cn.-
Before you try it out, on the AM server configured to act as an OAuth 2.0 client, you must make the following additional change to the configuration.
Your AM OAuth 2.0 client authentication module is not part of the default chain, and therefore AM does not call it unless you specifically request the OAuth 2.0 client authentication module.
To cause the Java agent to request your OAuth 2.0 client authentication module explicitly, go to your agent profile configuration, in this case Realms > Top Level Realm > Applications > Agents > Java > Agent Name > AM Services > AM Login URL, and add
http://client.example.com:8080/openam/XUI/?realm=/&module=OAuth2, moving it to the top of the list.Save your work.
This ensures that the Java agent directs the resource owner to AM with the instructions to authenticate using the
OAuth2authentication module. -
Try it out.
First, make sure you are logged out of AM. For example, by browsing to the logout URL, in this case
http://client.example.com:8080/openam/XUI/?realm=/#logout.Next attempt to access the protected resource, in this case
http://www.example.com:8080/examples/.If everything is set up properly, the Java agent redirects your browser to the login page of AM with
module=OAuth2among other query string parameters. After you authenticate (for example, as userdemo, passwordCh4ng31t), AM displays an authorization decision page.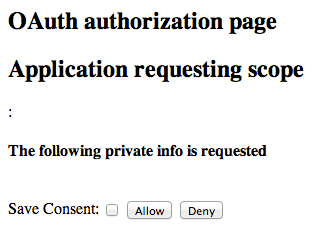 Figure 3. The authorization decision page displayed to the resource owner
When you click Allow, the authorization service creates an SSO session, and redirects the client back to the resource, thus letting the client access the protected resource. If you configured an attribute to store the saved consent decision, and you choose to save the consent decision for this authorization, AM can use that saved decision to avoid prompting you for authorization next time the client accesses the resource, but only ensure that you have authenticated and have a valid session.
Figure 4. Successfully accessing the Apache Tomcat examples
-