Implicit grant
- Endpoints
-
-
/oauth2/userinfo (OpenID Connect [OIDC])
The implicit grant is designed for public clients that run inside the resource owner’s user-agent, for example, JavaScript applications. For OIDC, this flow lets the relying party (RP) interact directly with the OpenID provider (OP), and receive tokens directly from the authorization endpoint.
Because applications running in the user-agent are considered less trusted than applications running in servers, the authorization server or OP never issues refresh tokens in this flow. Also, you must consider the security impact of cross-site scripting (XSS) attacks that could leak the access token to other systems, and implement Cross-Origin Resource Sharing (CORS) to make OAuth 2.0 requests to different domains.
Due to the security implications of this flow, ForgeRock recommends that you use the Authorization code grant with PKCE flow whenever possible.
The implicit grant flow
OAuth 2.0

-
The client, usually a single-page application (SPA), receives a request to access a protected resource. To access the resource, the client requires authorization from the resource owner.
-
The client redirects the resource owner’s user-agent or opens a new frame to the AM authorization service.
-
The authorization server authenticates the resource owner, confirms resource access, and gathers consent if not previously saved.
-
If the resource owner’s credentials are valid, the authorization server returns the access token to the user-agent as part of the redirection URI.
-
Now, the client must extract the access token from the URI. In this example, the user-agent follows the redirection to the web-hosted server that contains the protected resources without the access token.
-
The web-hosted server returns a web page with an embedded script to extract the access token from the URI.
In another possible scenario, the redirection URI is a dummy URI in the client, and the client already has the logic in itself to extract the access token.
-
The user-agent executes the script and retrieves the access token.
-
The user-agent returns the access token to the client.
-
The client requests access to the protected resource presenting the access token to the resource server.
-
The resource server contacts the authorization server to validate the access token.
-
The authorization server validates the token and responds to the resource server.
-
If the token is valid, the resource server allows the client to access the protected resource.
OIDC

-
The RP, usually an SPA, receives a request to access user information at the OP. To access this information, the RP requires authorization from the end user.
-
The RP redirects the end user’s user-agent or opens a new frame to the OP.
As part of the implicit flow, the request includes the
openidscope and thenonceparameter. -
The OP authenticates the end user, confirms resource access, and gathers consent if necessary.
-
On success, the OP returns access and ID tokens to the user-agent in the redirection URI.
-
The user-agent extracts the tokens from the URI.
In this example, the user-agent follows the redirection to the RP without the tokens.
-
The RP returns a web page with an embedded script to extract the tokens from the URI.
In another possible scenario, the redirection URI is a dummy URI in the RP application and the RP application already has the logic to extract the tokens.
-
The user-agent executes the script and retrieves the tokens.
-
The user-agent returns the tokens to the RP.
-
The RP validates the ID token and its claims.
The RP can use the ID token subject ID claim as the end user’s identity.
-
If the RP requires additional claims, it sends a request to the /oauth2/userinfo endpoint with the access token for authorization.
-
If the access token is valid, the
/oauth2/userinfoendpoint returns any additional claims.The RP can use the subject ID and the additional claims to identify the end user.
Demonstrate the implicit grant flow
Perform these steps to get an access token:
Prepare the demonstration
This demonstration assumes the following configuration:
-
AM is configured as an OAuth 2.0 authorization server. Ensure that:
-
The
tokenplugin is configured in the Response Type Plugins field. -
The
Implicit Grantgrant type is configured in the Grant Types field.
For more information, see Authorization server configuration.
-
-
A public client called
myClientis registered in AM with the following configuration:-
Scopes:
write(for OAuth 2.0)
openidandprofile(for OIDC) -
Response Types:
tokenandtoken id_token -
Grant Types:
Implicit
-
For more information, see Client application registration.
Get an access token using a browser
Perform the steps in this procedure to obtain an access token using the implicit grant:
-
The client redirects the resource owner’s user-agent to the authorization server’s /oauth2/authorize endpoint, including the following query parameters:
-
client_id: your-client-id
-
response_type:
token(OAuth 2.0);token id_token(OIDC) -
scope:
write(OAuth 2.0);openidandprofile(OIDC) -
redirect_uri=your-redirect-uri
If the OAuth 2.0 provider is configured for a subrealm rather than the Top Level Realm, you must specify it in the endpoint. For example, if the OAuth 2.0 provider is configured for the
/alpharealm, then use/oauth2/realms/root/realms/alpha/authorize.For example:
https://openam.example.com:8443/openam/oauth2/realms/root/realms/alpha/authorize \
?client_id=myClient \
&response_type=token \
&scope=write \
&redirect_uri=https://www.example.com:443/callback \
&state=abc123
For OIDC, use
scope=openid profileandresponse_type=token id_tokeninstead.The URL is split and spaces added for readability purposes.
The
scopeparameter is optional if default values are configured in the authorization server or the client.The
stateparameter is included to protect against CSRF attacks but is also optional. -
-
The resource owner logs in to the authorization server, for example, using the credentials of the
demouser.In this case, they log in using the default chain or tree configured for the realm.
After logging in, the authorization server presents the AM user interface consent screen:
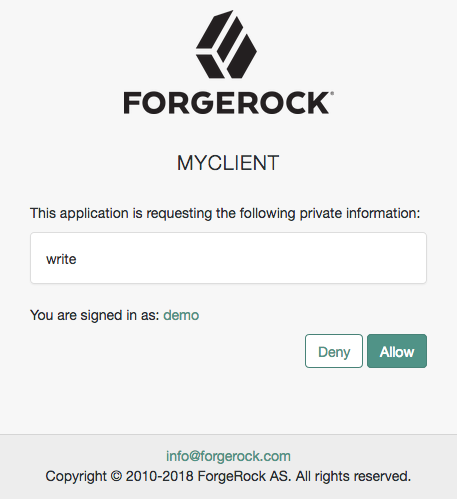 Figure 1. OAuth 2.0 consent screen
 -
The resource owner selects the
Allowbutton to grant consent for thewritescope.The authorization server redirects the resource owner to the URL specified in the
redirect_uriparameter. -
Inspect the URL in the browser.
For OAuth 2.0, it contains the access token the authorization server has issued, for example:
https://www.example.com:443/callback#access_token=[.var]##<access_token>##&iss...
For OIDC, it contains the access and ID tokens; for example:
https://www.example.com/callback#access_token=<access_token>&id_token=<id_token>…
Get an access token using REST
-
Authenticate as the resource owner.
For example:
$ curl \ --request POST \ --header "Content-Type: application/json" \ --header "X-OpenAM-Username: demo" \ --header "X-OpenAM-Password: Ch4ng31t" \ --header "Accept-API-Version: resource=2.0, protocol=1.0" \ 'https://openam.example.com:8443/openam/json/realms/root/realms/alpha/authenticate' { "tokenId":"AQIC5wM…TU3OQ*", "successUrl":"/openam/console", "realm":"/alpha" } -
As the client, call the /oauth2/authorize endpoint to request the authorization code. Provide the resource owner’s SSO token in a cookie and the following parameters:
-
client_id: your-client-id
-
response_type:
token(OAuth 2.0);token id_token(OIDC) -
decision:
allow -
csrf: demo-user-SSO-token
-
redirect_uri: your-redirect-uri
-
scope:
write(OAuth 2.0);openidandprofile(OIDC)
For information about the parameters supported by the
/oauth2/authorizeendpoint, see /oauth2/authorize.If the OAuth 2.0 provider is configured for a subrealm rather than the Top Level Realm, you must specify it in the endpoint. For example, if the OAuth 2.0 provider is configured for the
/alpharealm, then use/oauth2/realms/root/realms/alpha/authorize.For example:
curl --dump-header - \ --request POST \ --Cookie "iPlanetDirectoryPro=AQIC5wM…TU3OQ*" \ --data "client_id=myClient" \ --data "response_type=token" \ --data "scope=write" \ --data "state=123abc" \ --data "decision=allow" \ --data "csrf=AQIC5wM…TU3OQ*" \ --data "redirect_uri=https://www.example.com:443/callback" \ "https://openam.example.com:8443/openam/oauth2/realms/root/realms/alpha/authorize"For OIDC, use
scope=openid profileandresponse_type=token id_tokeninstead.The
scopeparameter is optional if default values are configured in the authorization server or the client.The
stateparameter is included to protect against CSRF attacks but is also optional.For OAuth 2.0, if the authorization server is able to authenticate the user, it returns an HTTP 302 response with the access token appended to the redirection URI:
HTTP/2 302 … location: https://www.example.com:443/callback#access_token=<access-token>&iss…For OIDC, it returns the access and ID tokens in the redirection URI:
HTTP/2 302 … location: https://www.example.com:443/callback#access_token=<access-token>&id_token=<id_token>… … -
Additional OIDC claims
An RP can request additional claims about the end user with the access token at the /oauth2/userinfo endpoint:
$ curl \
--request GET \
--header "Authorization Bearer <access-token>" \
"https://openam.example.com:8443/openam/oauth2/realms/root/realms/alpha/userinfo"
{
  "name": "<resource-owner-display-name>",
  "family_name": "<resource-owner-family-name>",
  "given_name": "<resource-owner-given-name>",
  "sub": "<resource-owner-sub>",
  "subname": "<resource-owner-id>"
}