Administration interfaces and tools
This page provides a brief introduction to the web-based AM admin UI. It also lists and describes each command-line interface (CLI) administration tool.
Web-based AM admin UI
After you install AM, log in to the AM admin UI as AM administrator,
amAdmin with the password you set during installation.
Go to a URL, such as http://openam.example.com:8080/openam.
In this case, communications proceed over the HTTP protocol to a FQDN (openam.example.com),
over a standard Java web container port number (8080), to a specific deployment URI (/openam).
When you log in as the AM administrator, amAdmin, you have access to the complete AM admin UI.
In addition, AM has set a cookie in your browser that lasts until the session expires,
you logout, or you close your browser.
(Persistent cookies can remain valid when you close your browser.
This section reflects AM default behavior before you configure additional functionality.)
The amAdmin account is a special user built-in to AM.
The amAdmin account does not have a user profile and is not present in the configured identity store,
so cannot use functionality that requires a user profile, such as Device Match or Push notifications.
You should create users or groups, and delegate administrative privileges to them.
If you configure AM to grant administrative capabilities to users that do have a user profile and appear in the configured identity store, that user is able to access both the AM admin UI in the realms they can administer, and their self-service profile pages:
When you log in to the AM admin UI as a non-administrative end user, you do not have access to the administrative console. Your access is limited to self-service profile pages and the user dashboard.
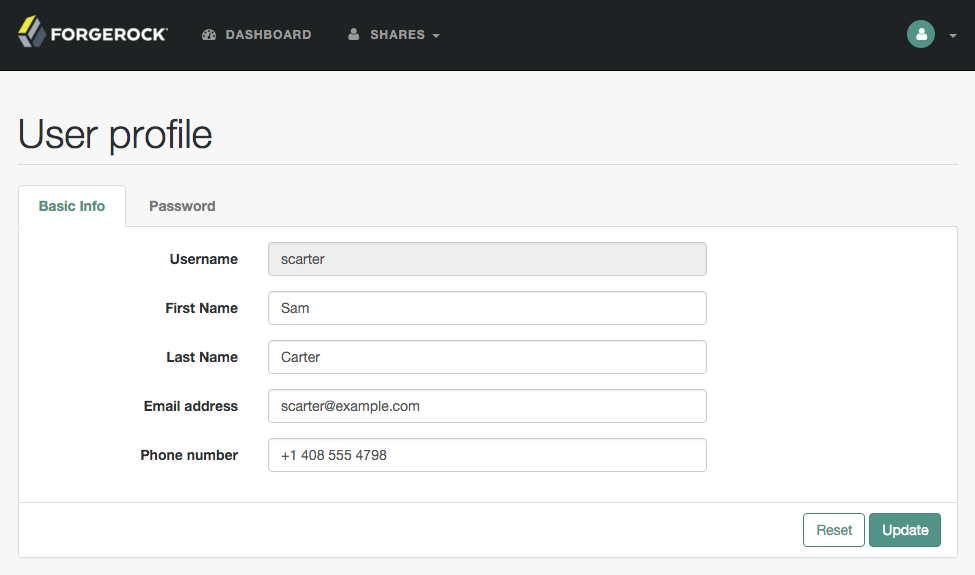
The profile attribute allowlist controls the information returned to non-administrative users when they access json/user
endpoints. For example, the allowlist controls the attributes shown in the user profile page.
Common profile attributes are allowlisted by default. You must add any custom attributes that you want non-administrative users to see.
The allowlist can be set globally, or per realm, in the user self-service service. To modify the list:
-
Globally: Go to Configure > Global Services > User Self-Service > Profile Management, and edit the Self readable attributes field.
-
By realm: Go to Realms > Realm Name > Services > User Self-Service > Profile Management, and edit the Self readable attributes field.
Note that you need to add the user self-service service to the realm if you have not done so already, but you do not need to configure anything other than the allowlist.
AM admin UI responsiveness
The AM admin UI is a responsive website, which means it will resize some of its features to fit the size of your screen and the layout design.
For example, the header menu will change into a dropdown menu, and pages with many tabs will shed most of them for a dropdown menu to the left-hand side.

Amster command-line tool
The amster tool provides a lightweight command-line interface, ideal for use in DevOps processes,
such as continuous integration and deployment.
The amster tool manages an AM configuration over REST,
so you can store AM server configuration as an artifact
and import a stored configuration to set up an AM server.
For details, see the amster documentation.
Deprecated command-line tools
The script tools in the following list have .bat versions for use on Microsoft Windows.
You can install the following command-line tools:
ampassword-
This tool lets you change Administrator passwords, and display encrypted password values.
Install this from the
AM-SSOAdminTools-5.1.3.21.zip. amverifyarchive-
This tool checks log archives for tampering.
Install this from
AM-SSOAdminTools-5.1.3.21.zip. openam-configurator-tool-14.1.3.21.jar-
This executable
.jarfile lets you perform a silent installation of an AM server with a configuration file. For example, thejava -jar configurator.jar -f config.filecommand couples theconfigurator.jararchive with the config.file. Thesampleconfigurationfile provided with the tool is set up with the format for theconfig.file, and it must be adapted for your environment.Install this from
AM-SSOConfiguratorTools-5.1.3.21.zip. ssoadm-
This tool provides a rich command-line interface for the configuration of core services.
Install this from
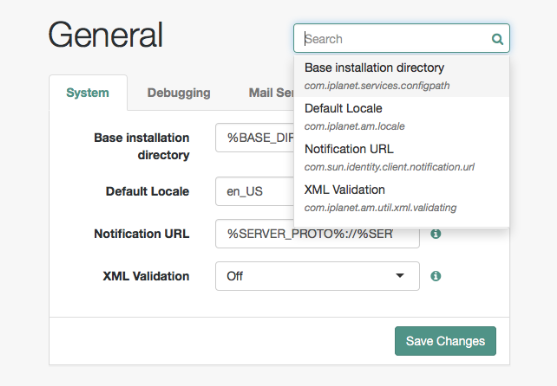
AM-SSOAdminTools-5.1.3.21.zip.To translate settings applied in the AM admin UI to service attributes for use with
ssoadm, in the AM admin UI, access the services page, such ashttps://openam.example.com:8443/openam/services.jsp.
The commands access the AM configuration over HTTP (or HTTPS). When using the administration commands in a site configuration, the commands access the configuration through the front end load balancer.
Sometimes a command cannot access the load balancer because:
-
Network routing restrictions prevent the tool from accessing the load balancer.
-
For testing purposes, the load balancer uses a self-signed certificate for HTTPS, and the tool does not have a way of trusting the self-signed certificate.
-
The load balancer is temporarily unavailable.
In such cases you can work around the problem by adding an option for each node,
such as the following to the java command in the tool’s script.
Node 1:
-D"com.iplanet.am.naming.map.site.to.server=https://lb.example.com:443/openam=
http://server1.example.com:8080/openam"
Node 2:
-D"com.iplanet.am.naming.map.site.to.server=https://lb.example.com:443/openam=
http://server2.example.com:8080/openam"
In the above example the load balancer is on the lb host, https://lb.example.com:443/openam is the site name,
and the AM servers in the site are on server1 and server2.
The ssoadm command will only use the latest value in the map, so if you have a mapping like:
-D"com.iplanet.am.naming.map.site.to.server=https://lb.example.com:443/openam=
http://server1.example.com:8080/openam, https://lb.example.com:443/openam=
http://server2.example.com:8080/openam"
The ssoadm command will always talk to:
http://server2.example.com:8080/openam