Integrating PingOne Protect into Identity Cloud
You can integrate three PingOne Protect nodes into the Identity Cloud to take advantage of its threat protection features.
Before you begin
|
Please note, this integration only targets Identity Cloud hosted pages. In a future release, support for native devices will be incorporated through the ForgeRock SDK. |
Before you start this integration, make sure you have the following prerequisites:
-
Basic understanding of ForgeRock Identity Cloud and PingOne Protect.
-
An administrator account on Identity Cloud.
-
The client ID and client secret for an account in a configured PingOne environment.
Preliminary tasks
Task 1: Get a PingOne account trial with PingOne Protect
You can try out a demo of PingOne Protect by starting a PingOne trial. The following steps get you up-and-running:
-
Obtain a PingOne trial account and start a PingOne trial.
-
Sign on to the PingOne admin console.
-
Add an environment to set up your PingOne services. On the
Your Environmentspage, click Add Environment.PingOne organizes a company’s tenant account into an organization, a top-level identifier within the system. -
Click Customer solution, and then click Next.
PingOne SSO, PingOne MFA, PingOne Protect, PingOne Verify, and PingOne DaVinci services are loaded.
-
Click Next again to create the environment.
-
Enter the details of your environment:
-
Environment Name Enter a descriptive name for your environment.
-
Description Enter a general description of your environment.
-
Environment Type Accept the default:
Sandbox. -
Generate sample populations and users in this environment. Click this checkbox for sample data.
-
Region Accept the default.
-
License Leave as-is.
-
Include a solution designer to easily design and test experiences Make sure this checkbox is enabled.
-
Choose your industry Leave as-is.
-
-
Click Finish.
PingOne creates your environment and generates a sample application that you can access.
-
-
Next, add a test user in the directory.
-
On the left navigation, click Directory, and then click Users.
-
At the top of the Users page, click the .
-
In the right pane, add a test user. Fill in the fields, and then click Save. Wait for about 15 minutes for the application to add the user to the directory.
-
In the left navigation menu, click Getting Started. The Sample application is displayed.
-
-
Click Sign On to log in.
-
On the Sign On page, enter your email address and password that you set for the test user. Click Sign On.
-
Click Overview, and check that you have PingOne Protect in your Services.
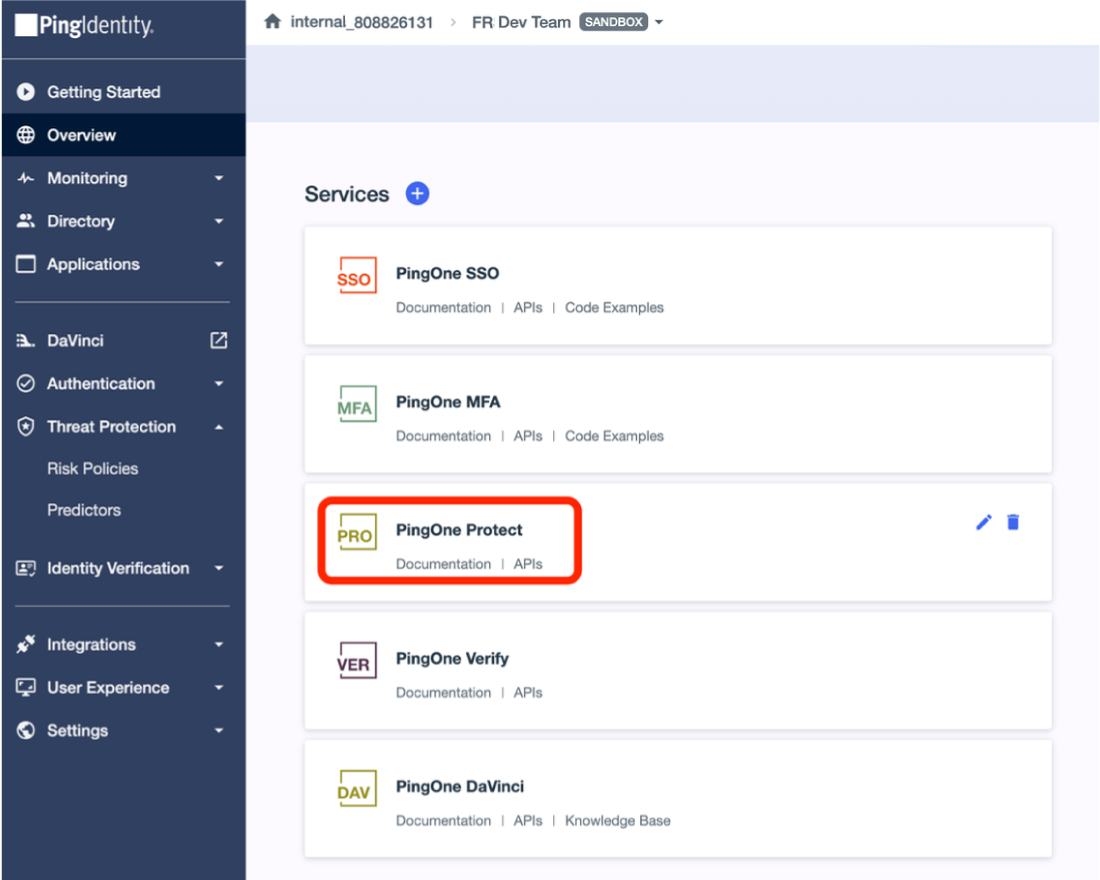
-
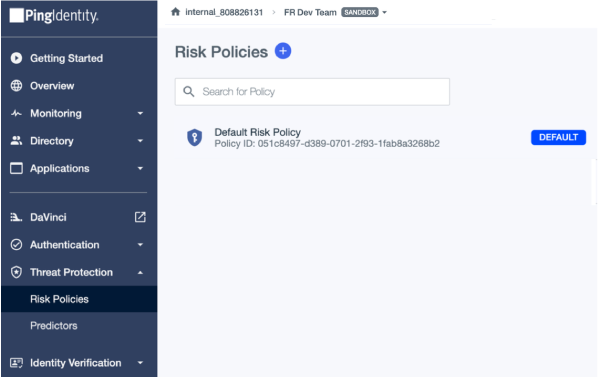
Task 2: Set a risk policy
A risk policy lets you include risk predictors in the PingOne Protect risk evaluation. For starting, use the Default Risk Policy.
-
Click Risk Policies > Default Risk Policy to view the risk settings.
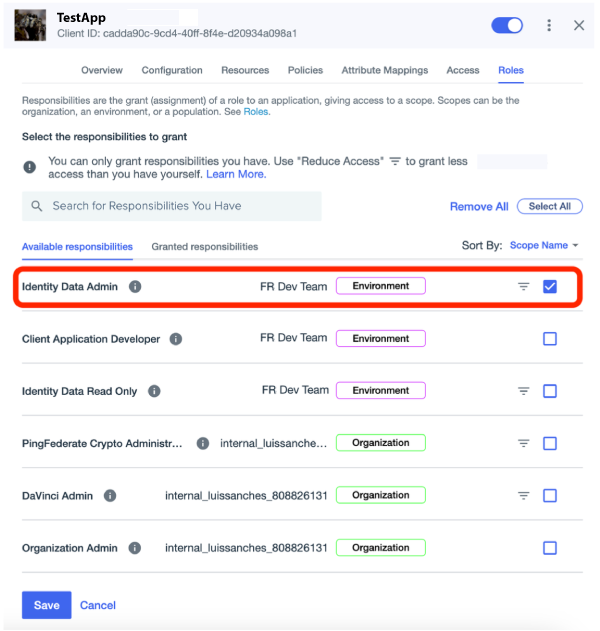
Task 3: Create a PingOne worker application
A worker application is a software application used to access the PingOne Admin API. The worker application uses the client credentials grant type to authorize and obtain an access token for the API.
-
On the PingOne Admin console, click Appications > Applications .
-
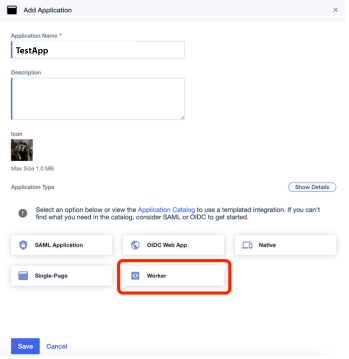
On the Add Application page, enter the following:
-
Application Name
-
Description
-
Application Type. Select Worker.
-
-
Click Save.
Integration tasks
Task 1: Set up the PingOne Service
-
If you have not already set up PingOne Service in your Identity Cloud environment, then set it up using PingOne Service.
Task 2: Set up your journey
-
Log in to the Identity Cloud as an administrator.
-
In the Identity Cloud admin UI, click Journeys. All existing Identity Cloud journeys display.
-
Click + New Journey.
-
Configure options for the new journey:
Field Value Description Name
Enter
PingOne ProtectDescriptive name to display in the journeys list.
Identity Object
Select
Alpha Realm - UsersType of object that this journey authenticates.
Description
Enter
A login journey for the PingOne Protect integration.Description of the journey.
Override theme
Do not enable
Lets you provide a unique UI for this journey.
Default journey for end users
Do not enable
Lets you designate this journey as the default journey for your Identity Cloud environment.
Tags
Enter
Implementation GuideKeywords for organizing the journey list.
-
Click Save. The journey editor displays.
To save your progress, periodically click Save in the top right of the journey editor. Failure to do this results in losing your work if the page reloads or if you lose your network connection. -
Next, implement the following basic authentication journey in Identity Cloud.

-
Run the following steps:
-
On the Journeys page, click Risk.
-
Drag the following nodes onto the journey canvas:
-
PingOne Protect Initialize node to initialize the PingOne Protect Web SDK on the client device.
-
PingOne Protect Evaluation node to calculate the risk level and other risk-related details associated with an event. Depending on how you configure your risk policies in PingOne, the returned response could be a risk score, a risk level, such as
high,medium, orlow, and recommended actions, such asbot mitigation. -
Two PingOne Protect Result nodes to update the risk evaluation configuration or modify the completion status of the resource when the risk evaluation is still in progress.
-
-
Click PingOne Protect Initialize, and enter the following:
Field Value Name
PingOne Protect InitializePingOne Service
Select your PingOne service.
Enable SDK Logs
Click to output messages to the developer console. Default is not enabled.
Collect Behavioral Data
Click to enable behavioral data collection. Default is not enabled.
-
Click PingOne Protect Evaluation, and enter the following:
Field Value Name
PingOne Protect EvaluationPingOne Service
Select your PingOne service.
Flow Type
Select
AUTHENTICATION.Device Sharing Type
Select
SHARED.User Type
Select
EXTERNAL.Score Threshold
Keep the default:
300.Node State Attribute for User ID
Enter
username. -
Click PingOne Protect Result, and enter the following:
Field Value Name
PingOne Protect ResultCompletion Status
Select
SUCCESS. -
Click the other PingOne Protect Result, and enter the following:
Field Value Name
PingOne Protect ResultCompletion Status
Select
FAILED. -
Connect the nodes:
-
Connect the start (person) icon to the PingOne Protect Initialize node.
-
Connect the
Nextoutput of the PingOne Protect Initialize node to the Page Node node, containing the Platform Username and Platform Password nodes. -
Connect the
Erroroutput of the PingOne Protect Initialize node to the Failure node (red X circle).
-
-
Connect the output of the Page node to the PingOne Protect Evaluation node.
-
Connect the
Highoutput of the PingOne Protect Evaluation node to the Ping One Protect Result (Failure) node.-
Connect the
MediumandLowoutputs of the PingOne Protect Evaluation node to the Data Store Decision node. -
Connect the
Exceed Score Threshold,FailureandErroroutputs of the PingOne Protect Evaluation node to the PingOne Protect Result (Failure) node.
-
-
Connect the
Trueof the Data Store Decision node to the PingOne Protect Result (Success) node. -
Connect the
Falseof the Data Store Decision node to the PingOne Protect Result (Failure) node. -
Connect the output of the PingOne Protect Result (
Successpath) node to the Success node (green checkmark circle). -
Connect the output of the PingOne Protect Result (
Failurepath) node to the Failure node (red X circle).
-
-
-
Click Save.
Validation
Task: Validate the PingOne Protect Evaluation node
-
From a web browser, invoke the journey, and when prompted, enter the username and password of an existing user.
-
Open the PingOne console, and navigate to Monitoring > Audit page. There should be a Risk Evaluation Created event corresponding to the call made from Identity Cloud.
2024-02-23 08:41:03 pm UTC | Risk Evaluation Created | Created Risk Evaluation "Default Risk Policy" d58c8d38-054d-4159-a6e8-06d8412b8ef8
-
Open the event details and examine the output:
-
First, check for a successful
RISK_EVALUATION."action": { "type": "RISK_EVALUATION.CREATED", "description": "Risk Evaluation Created" }, "resources": [ { "type": "RISK_EVALUATION", "id": "d58c8d38-054d-4159-a6e8-06d8412b8ef8", "name": "d58c8d38-054d-4159-a6e8-06d8412b8ef8", "environment": { "id": "02fb4743-189a-4bc7-9d6c-a919edfe6447" }, "href": "https://api.pingone.ca/v1/environments/02fb4743-189a-4bc7-9d6c-a919edfe6447/riskEvaluations/d58c8d38-054d-4159-a6e8-06d8412b8ef8" } ], "result": { "status": "SUCCESS", "description": "Created Risk Evaluation\Default Risk Policy\d58c8d38-054d-4159-a6e8-06d8412b8ef8." } … -
Check the riskEvaluation value(s) in the event details. You should see the risk evaluation level and default risk policy.
"riskEvaluation": { "result": { "level": "MEDIUM", "score": 40, "source": "AGGREGATED_SCORES", "type": "VALUE" }, "createdAt": 1707856863390, "environment": { "id": "02fb4743-189a-4bc7-9d6c-a919edfe6447" }, "riskPolicySet": { "id": "051c8497-d389-0701-2f93-1fab8a3268b2", "name": "Default Risk Policy" } …
-
Next steps
Once you have successfully integrated PingOne Protect into Identity Cloud. With the help of Ping, you can start planning PingOne Protect to meet your company’s requirements by following the PingOne Protect best practices to get your system ready for production.
For example:
-
Train your risk models with 1–3 weeks of production data using the default risk policy.
-
Analyze the risk evaluation results and look out for false positives using the PingOne Protect dashboard.
-
Make adjustments to your PingOne Protect policy.
-
Set up your specific journeys in Identity Cloud.
-
When ready, set up a staging policy to test your risk evaluations before putting them into production.