Set up Microsoft Azure AD as a federation identity provider
To set up Azure AD as a federation identity provider for PingOne Advanced Identity Cloud, perform the steps in the following sections in the order presented.
| Azure AD is also known by the new name Microsoft Entra ID. Learn more in New name for Azure Active Directory. |
Step 1: Complete Azure AD prerequisites
Before setting up Azure AD as a federation identity provider, you must set up an instance of Azure AD.
Step 2: Configure Azure AD as a federation provider
-
In a browser, navigate to the Microsoft Azure portal dashboard.
-
On the Azure Active Directory admin center page, navigate to Azure Active Directory > App registrations.
-
Click + New registration.
-
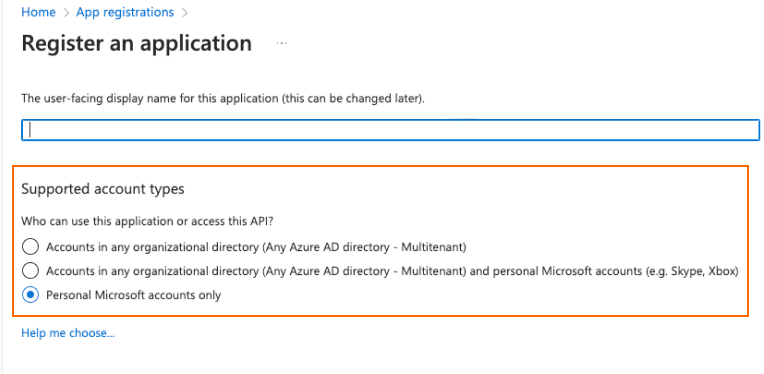
On the Register an application page, enter the application Name.
-
Select one or more Supported account types that can use the application or access the API.
-
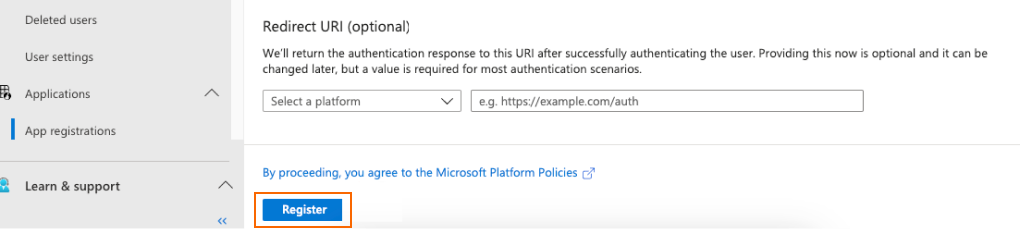
In the Redirect URI (optional) section, in the drop-down list, select Web.
-
Enter the Redirect URI (from the Redirect URI field on the Advanced Identity Cloud azure page).
-
Click Register.
-
Click Add a certificate or secret.
-
Add a new client secret.
-
Copy or make note of your application client ID and client secret.
-
Save your changes.
-
On the Azure Active Directory admin center page, navigate to Azure Active Directory > App registrations.
-
Click Endpoints at the top of the page.
-
Make note of your OpenID Connect metadata document endpoint, ensuring it contains your Azure tenant ID. For example: https://login.microsoftonline.com/<azure-tenant-id>/v2.0/.well-known/openid-configuration.
Step 3: Use group membership to enable federation in Azure AD
Groups let you add and remove sets of administrators based on their group membership in your identify provider. You can also specify the administrator access (super administrators or tenant administrator) for an entire group of users.
Create groups containing Advanced Identity Cloud tenant administrators
Follow these steps to create a group in Azure AD that contains the Advanced Identity Cloud tenant administrators.
-
On the Azure Active Directory admin center page, navigate to Azure Active Directory.
-
In the left menu pane, under Manage, select Groups.
-
On the top menu bar, select New group.
-
In the New Group pane, enter values for:
-
Group type. The group type - specify
Microsoft 365. -
Group name. The name of the group.
-
Group description: A description of the group.
-
-
Select Create.
-
Add users to the group.
| If you modify group membership in Azure, it can take a few minutes for those changes to take effect in Advanced Identity Cloud. |
Include additional claims in the tokens for Advanced Identity Cloud
Complete the following steps to acquire claims from the application instead of the user info endpoint.
-
On the Azure Active Directory admin center page, navigate to Azure Active Directory.
-
In the left menu pane, under Manage, select App registrations.
-
Choose your application.
-
Under Manage, select Token configuration.
-
Select Add optional claim.
-
Select the token type you want to configure.
-
Select the optional claims to add:
-
email: The email address for the user.
-
family_name: The last name, surname, or family name of the user.
-
given_name: The first or "given" name of the user.
-
groups: The groups the user belongs to.
-
-
Select Add.