Create journeys
|
End of life for Autonomous Access After much consideration and extensive evaluation of our product portfolio, Ping Identity is discontinuing support for the Advanced Identity Cloud Autonomous Access product, effective October 31, 2024. To support our Autonomous Access customers, we’re offering migration assistance to PingOne Protect, an advanced threat detection solution that leverages machine learning to analyze authentication signals and detect abnormal online behavior. PingOne Protect is a well-established product, trusted by hundreds of customers worldwide. The end of life for Autonomous Access indicates the following:
For any questions, please contact Ping Identity Support for assistance. |
When your company purchases the Autonomous Access add-on capability, Ping Identity Professional Services configure an example journey in your tenants using three Autonomous Access nodes.
This section outlines several example journeys to illustrate how can configure journeys for your specific use cases. Consult with your ForgeRock representative to formulate your specific journeys.
Example journey
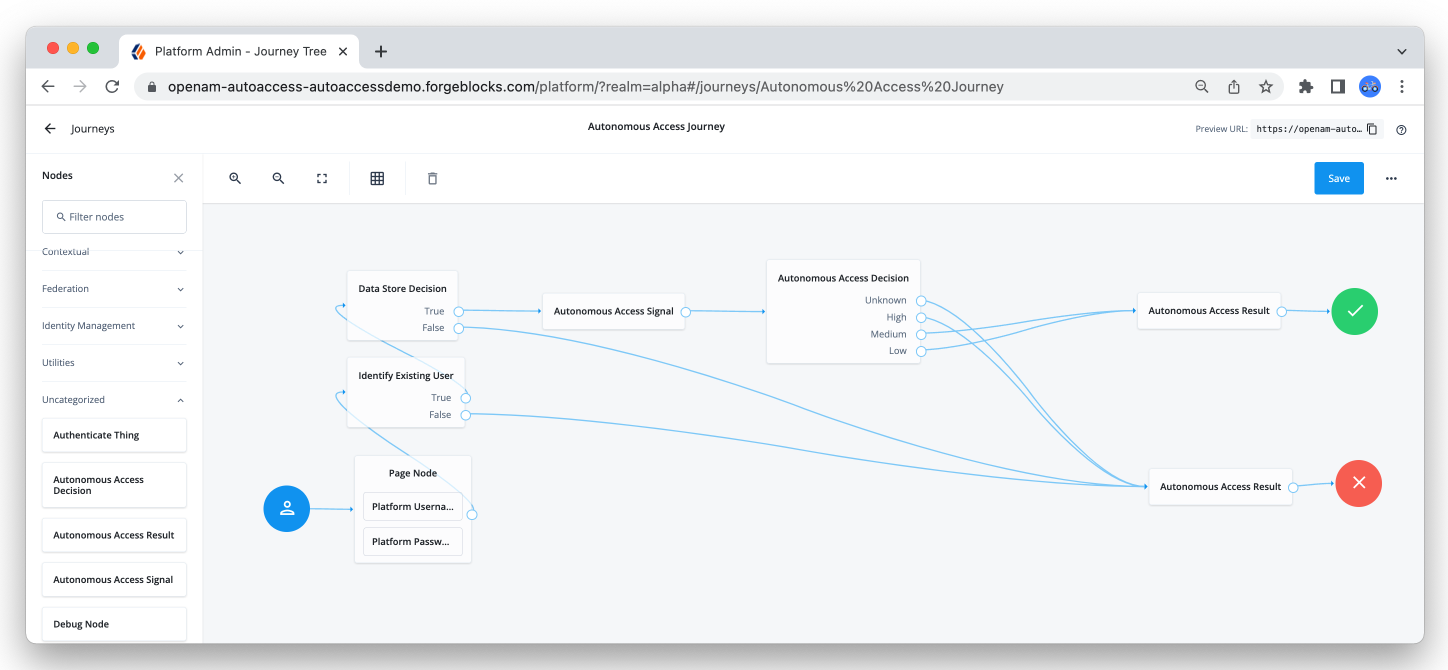
ForgeRock uses the following example journey for data collection and API calls to the Autonomous Access AI server to get the risk scores. This journey is also a good starter template to create more advanced journeys for production purposes.
-
In the Advanced Identity Cloud admin UI, go to Journeys, and edit the Autonomous Access template.
-
Provide details for these nodes in the journey:
-
For information about all available nodes, refer to Authentication nodes reference. For Autonomous Access nodes, refer to Learn about the Autonomous Access nodes.
-
To test the journey, copy the Preview URL, and paste the URL into a browser using Incognito or Browsing mode.
-
When you’re satisfied with your journey, click Save.
Example journey with step-up multifactor authentication
The following example journey illustrates a step-up multifactor authentication (MFA) with Autonomous Access nodes.
| There are various ways to implement MFA using journeys. Consult with your Ping Identity representative to discuss your particular application. |
This example MFA setup uses the ForgeRock Authenticator (OATH) module, which supports HMAC one-time password (HOTP) and a time-based one-time password (TOTP) authentication method. It is assumed that the user has an OATH-compliant device that can provide a password.
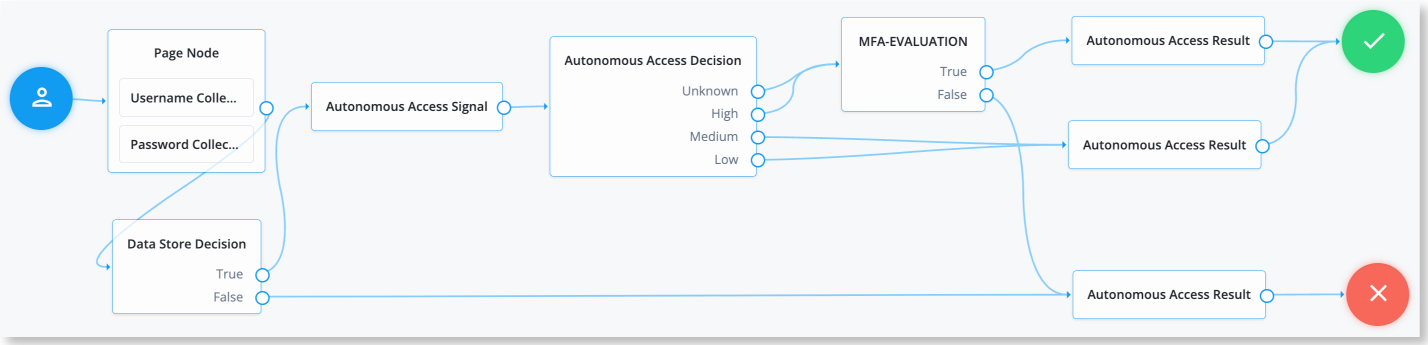
The journey starts off in the same manner as the Example journey in the previous section, except that the journey uses an Inner Tree Evaluator node, relabelled as "MFA-EVALUATION" that calls a subtree called "PushStepUp."
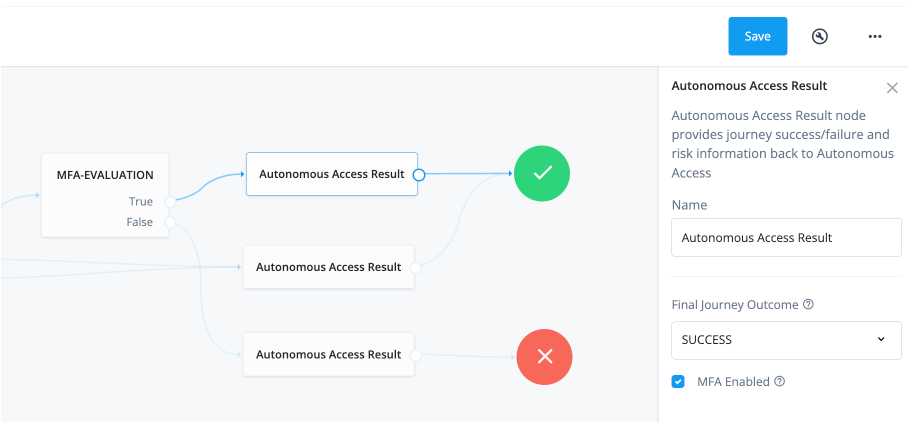
The journey also implements three Autonomous Access result nodes: two "SUCCESS" nodes and one "FAILURE" node. The first result node takes the destination of a true outcome in the "MFA-EVALUATION" node. The node has a "SUCCESS" outcome and MFA Enabled checkbox enabled, so that the AAI server can keep track of users and knows that MFA has completed successfully.
The second result node has a "SUCCESS" outcome for low decision scores.
This node does not have MFA Enabled as low and medium risk scores are passed through successfully.
The third result node is for "FAILURE" states and has MFA Enabled checked,
so that Autonomous Access knows that the MFA journey has failed during the its process.
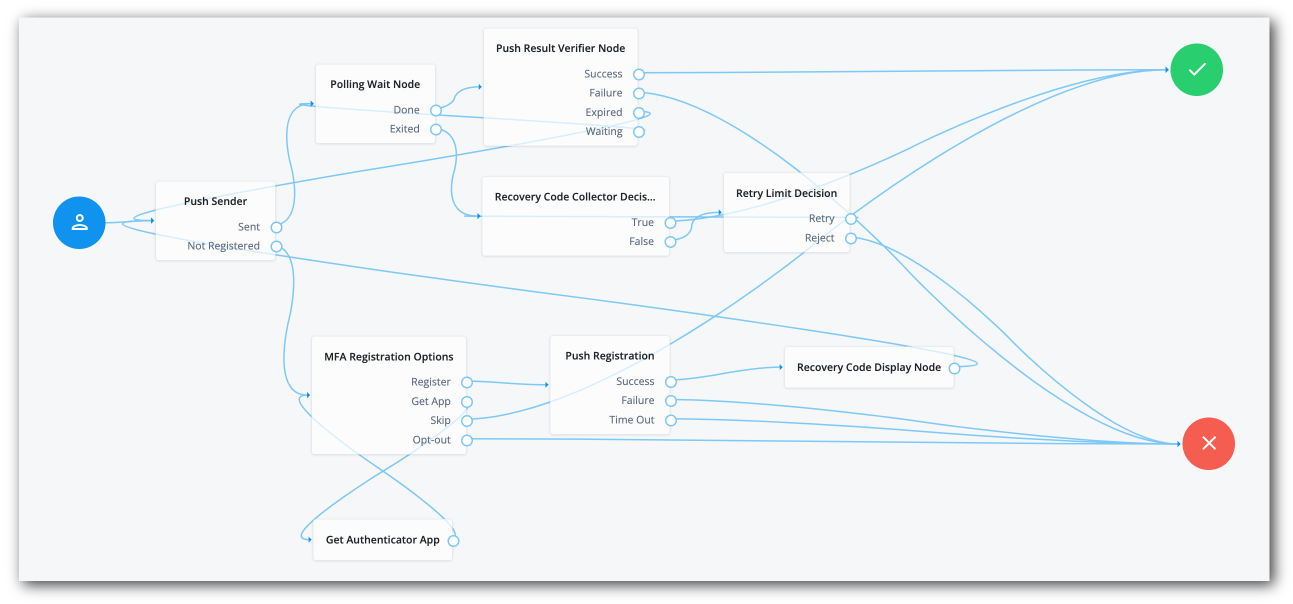
The MFA EVALUATION node calls a subtree, PushStepUp, as follows:
-
In the Advanced Identity Cloud admin UI, go to Journeys, and edit the Autonomous Access template.
-
Provide details for these nodes in the MFA journey:
-
The MFA EVALUATION node is an Inner Tree Evaluator node that calls the PushStepUp journey.
-
The Validate Credentials node is a renamed Data Store Decision node.
-
For information about all available nodes, refer to Authentication nodes reference. For Autonomous Access nodes, refer to Learn about the Autonomous Access nodes.
-
To test the journey, copy the Preview URL, and paste the URL into a browser using Incognito or Browsing mode. A login screen prompts you to enter your user ID and password.
-
Verify that you can use the ForgeRock Authenticator application to perform MFA. For more details, refer to Authentication nodes and journeys.
-
When you’re satisfied with your journey, click Save.