Ping Identity as external authentication method for Microsoft Entra ID (Azure AD)
| While this PingOne Advanced Identity Cloud use case was validated for accuracy, it can always be improved. To provide feedback, click or in the top right of this page (you must be logged into Backstage). |
Description
Estimated time to complete: 30 minutes.
In this use case, you configure Advanced Identity Cloud as an external authentication method for Microsoft Entra ID (Azure AD).
Specifically, you configure Advanced Identity Cloud as the identity provider (IdP) for Microsoft Entra ID using OIDC. This allows a user from Microsoft Entra ID to use Advanced Identity Cloud as a second factor authentication solution.
Prerequisites
Before you start work on this use case, ensure you have these prerequisites:
-
A basic understanding of:
-
The Advanced Identity Cloud admin UI
-
SSO (Federation)
-
OIDC
-
The Advanced Identity Cloud end-user UI
-
Microsoft Entra ID
-
-
Access to your development environment as an administrator.
-
A test Microsoft Entra ID environment with at least a P1 license.
-
An admin with the Privileged Role Administrator or Global Administrator role in Microsoft Entra ID.
-
A test user in Advanced Identity Cloud to serve as the application owner for the custom OIDC (Microsoft Entra ID) application.
-
The use case matches a user from Microsoft Entra ID to a test user in Advanced Identity Cloud. Specifically, make sure the test user’s
frIndexedString1attribute in Advanced Identity Cloud matches theObject IDattribute for the user in Microsoft Entra ID.
Tasks
| This use case requires the use of third-party services. Use your environment specific details where necessary. |
Task 1: Create a new OIDC web app in Advanced Identity Cloud
-
Create a new OIDC Web App (Applications > Custom Applications > OIDC - OpenId Connect > Web) with the following config:
Field Value Sign-in URLs
https://login.microsoftonline.com/common/federation/externalauthprovider
Grant Type
Implicit
Scopes
openid
Response Types
id_token
Claims
profile
Advanced > Authentication > Token Endpoint Authentication Method
none
Task 2: Set up Microsoft Entra ID as the service provider
|
Please reference Configure a new external authentication provider with Microsoft Entra ID. |
The next task is to prepare Microsoft Entra ID to serve as a service provider (SP) and use Advanced Identity Cloud as an external authentication method.
Register a new app (required)
-
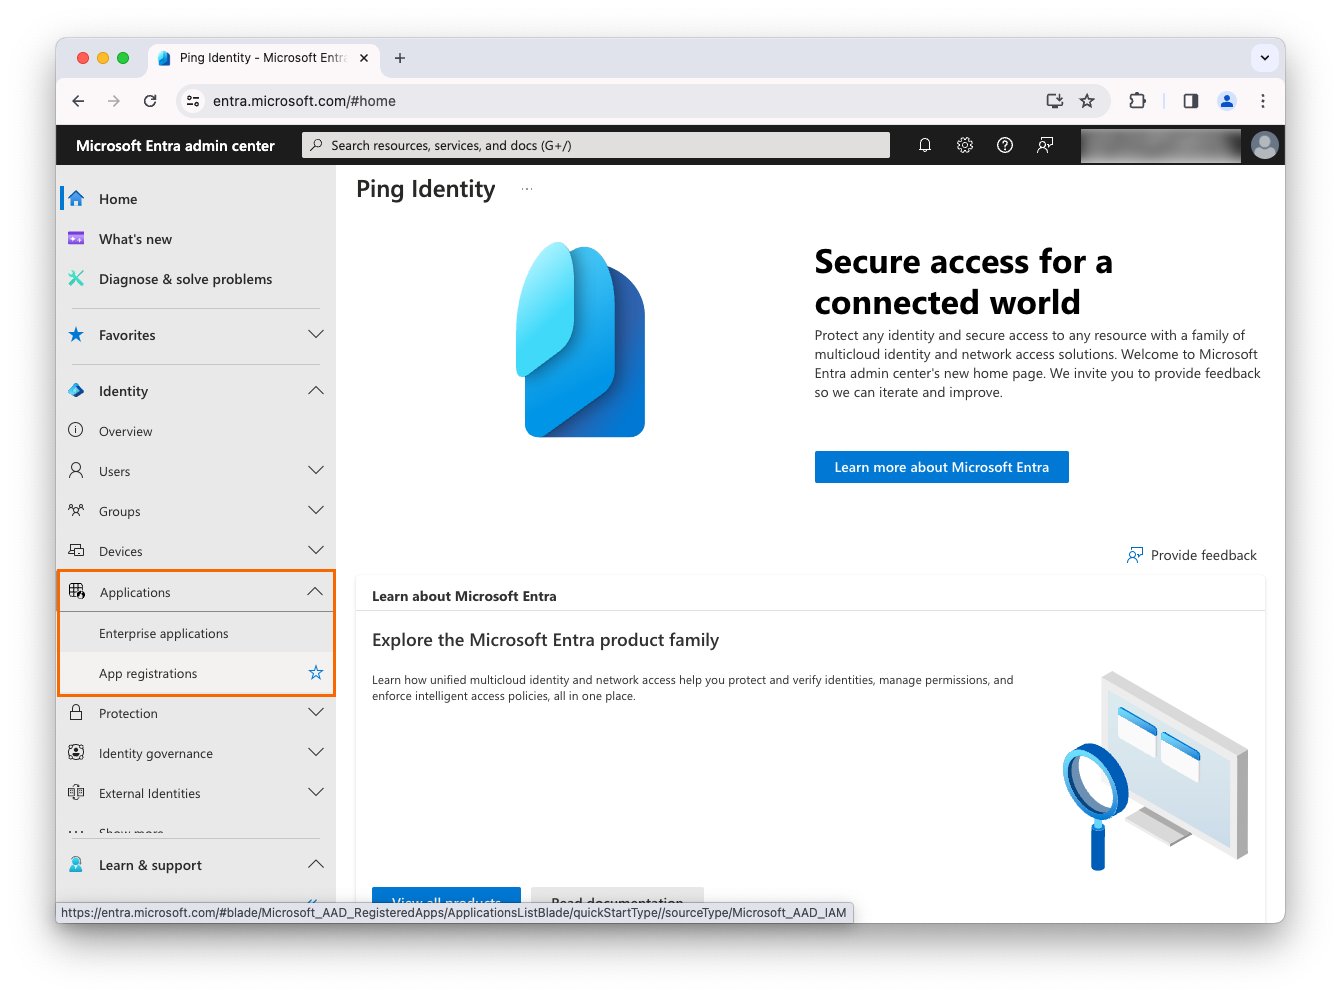
Navigate to https://entra.microsoft.com/#home.
-
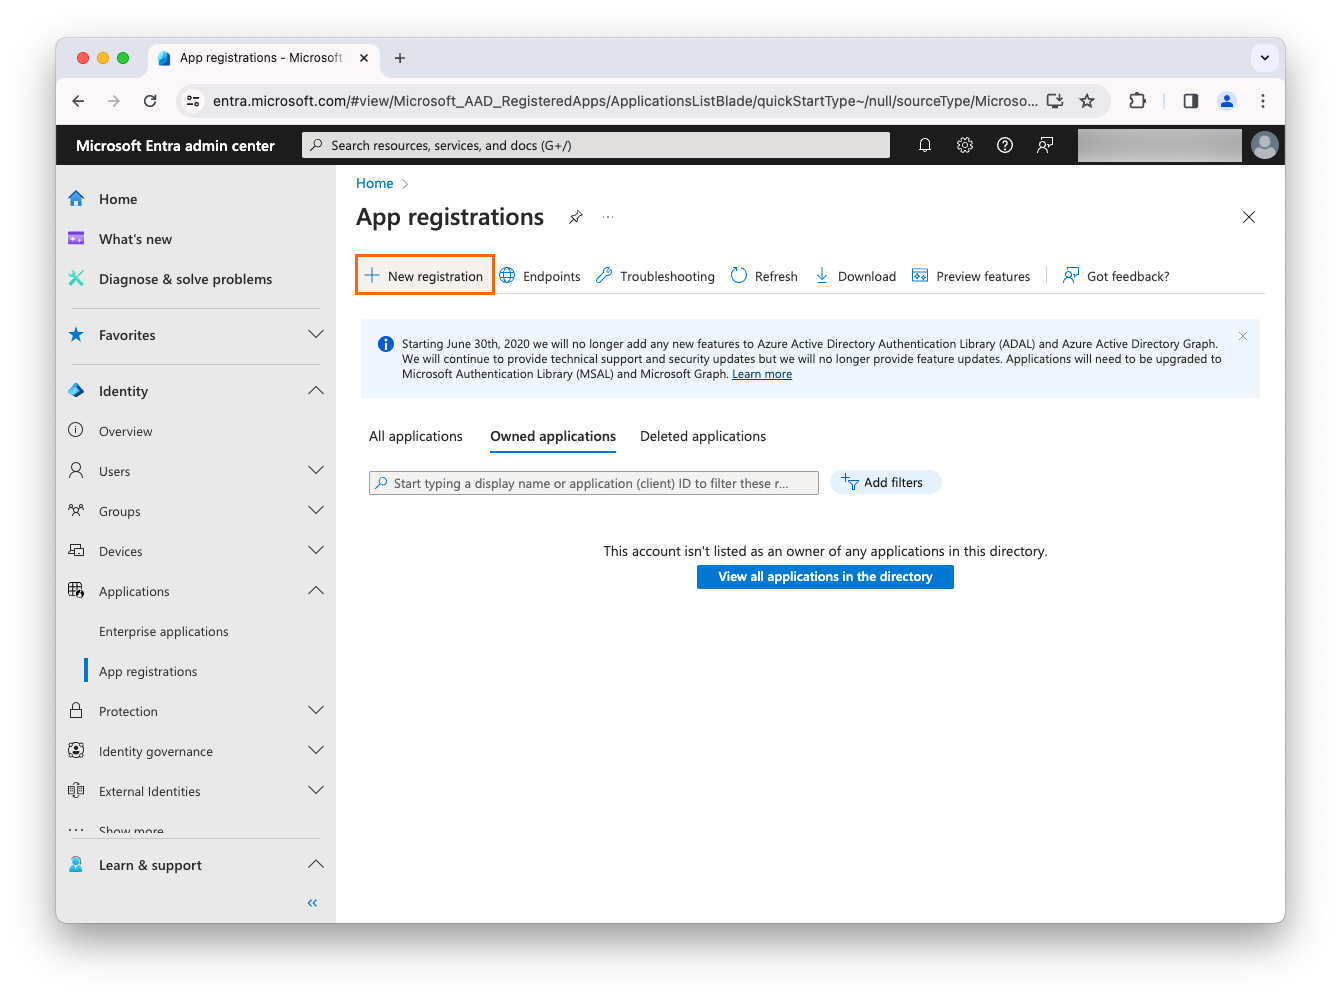
In the left panel, click Applications > App registrations.
-
Click New registration.
-
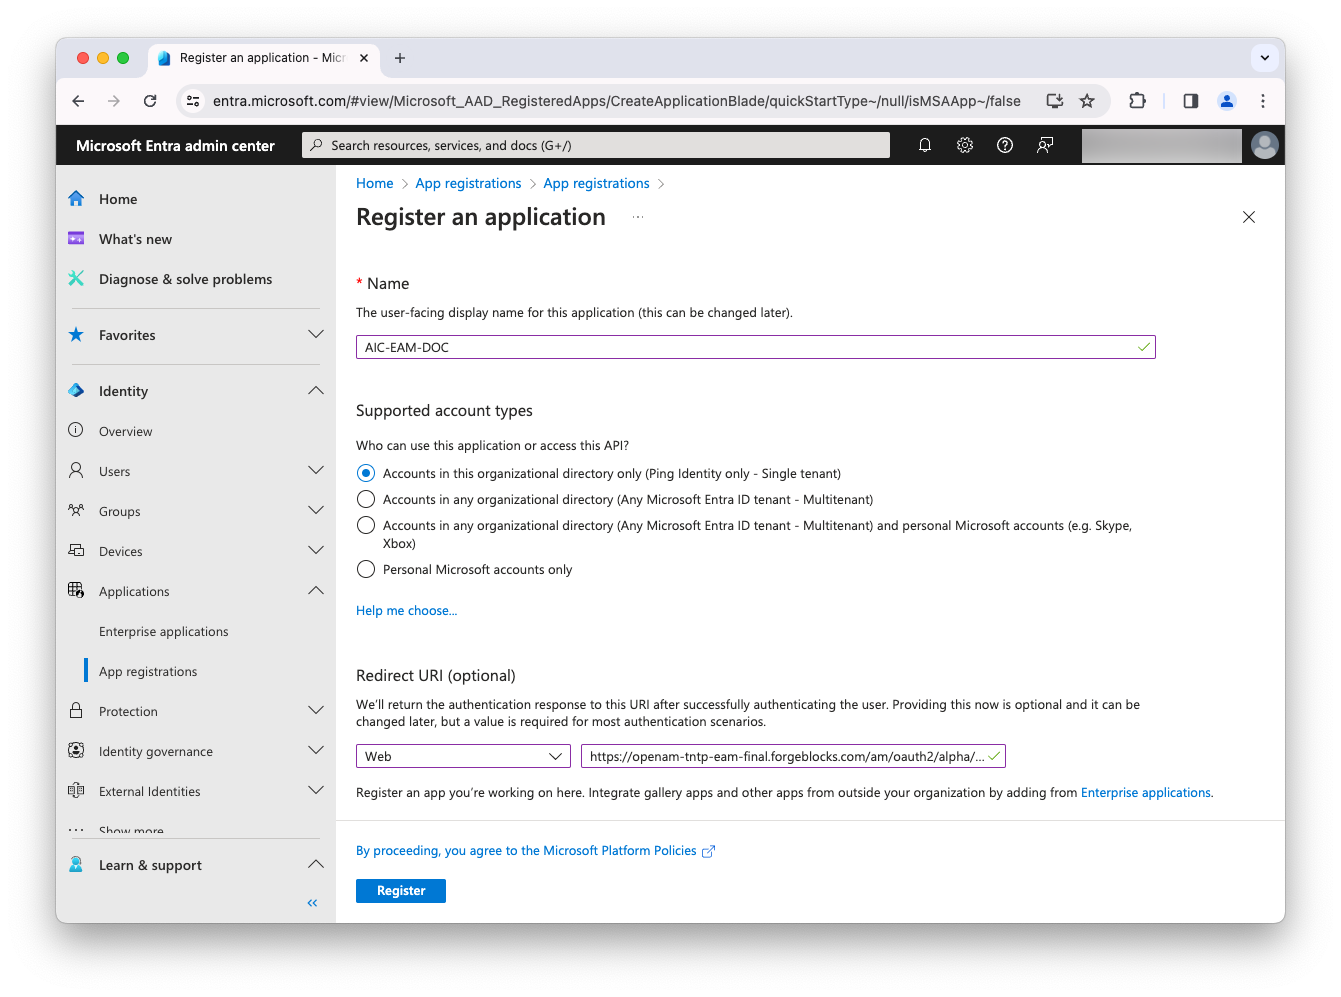
Complete the following fields, and click Register:
Field Value Name
<AIC-EAM-DOC>
Supported account types
Accounts in this organizational directory only (... - Single tenant)
Redirect URI
<Your AIC authorization_endpoint> https:// <your instance>.forgeblocks.com/am/oauth2/alpha/authorize
Select a platform
Web
-
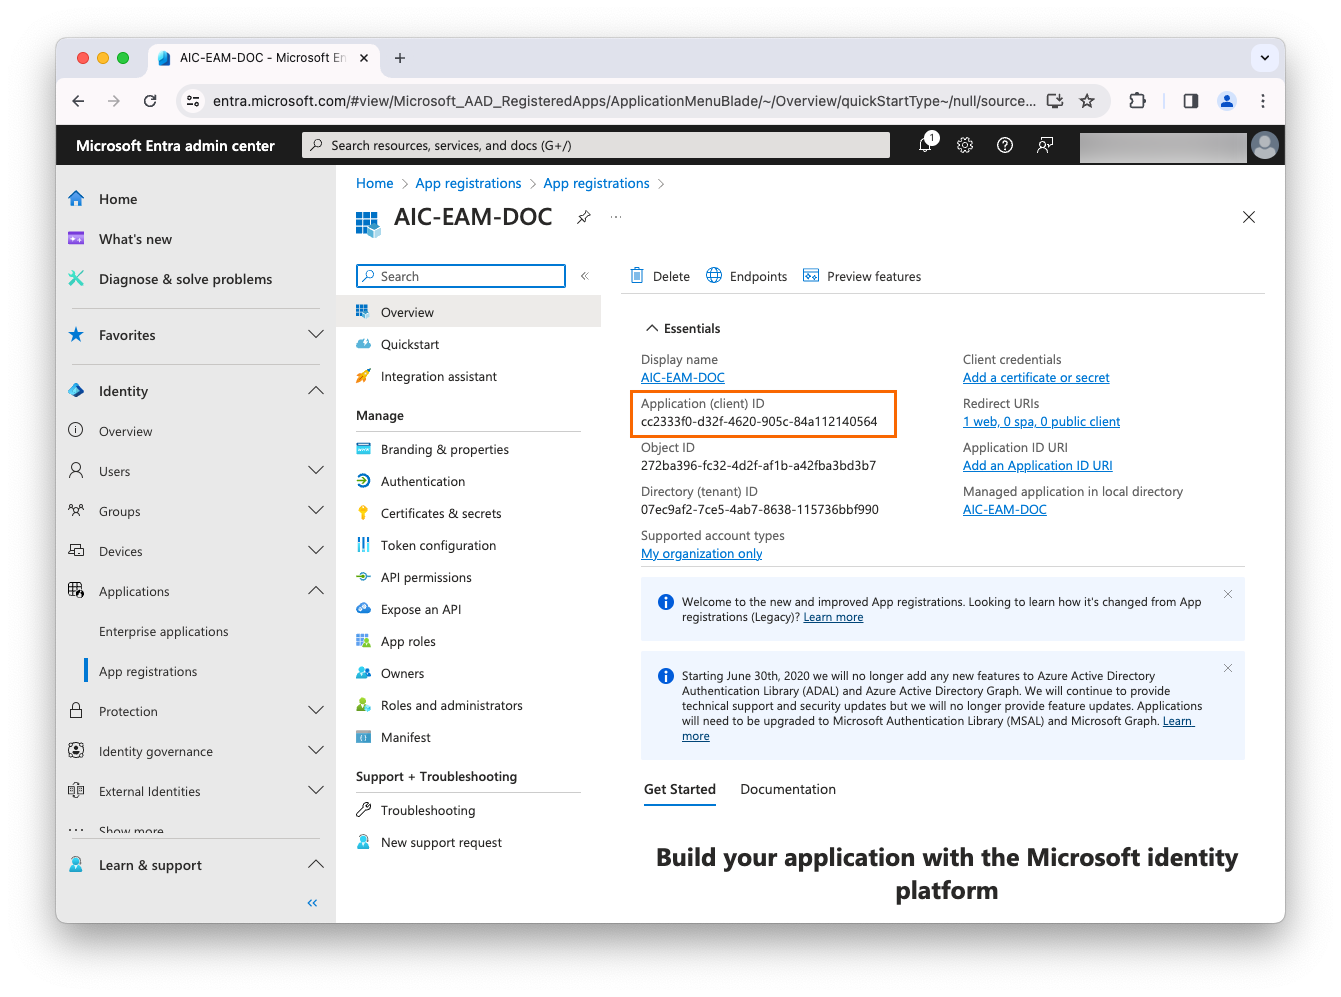
In the new app’s Overview page, note the UUID under Application (client) ID. You will need it to create an external authentication method.
-
On the left, under Manage, click API permissions.
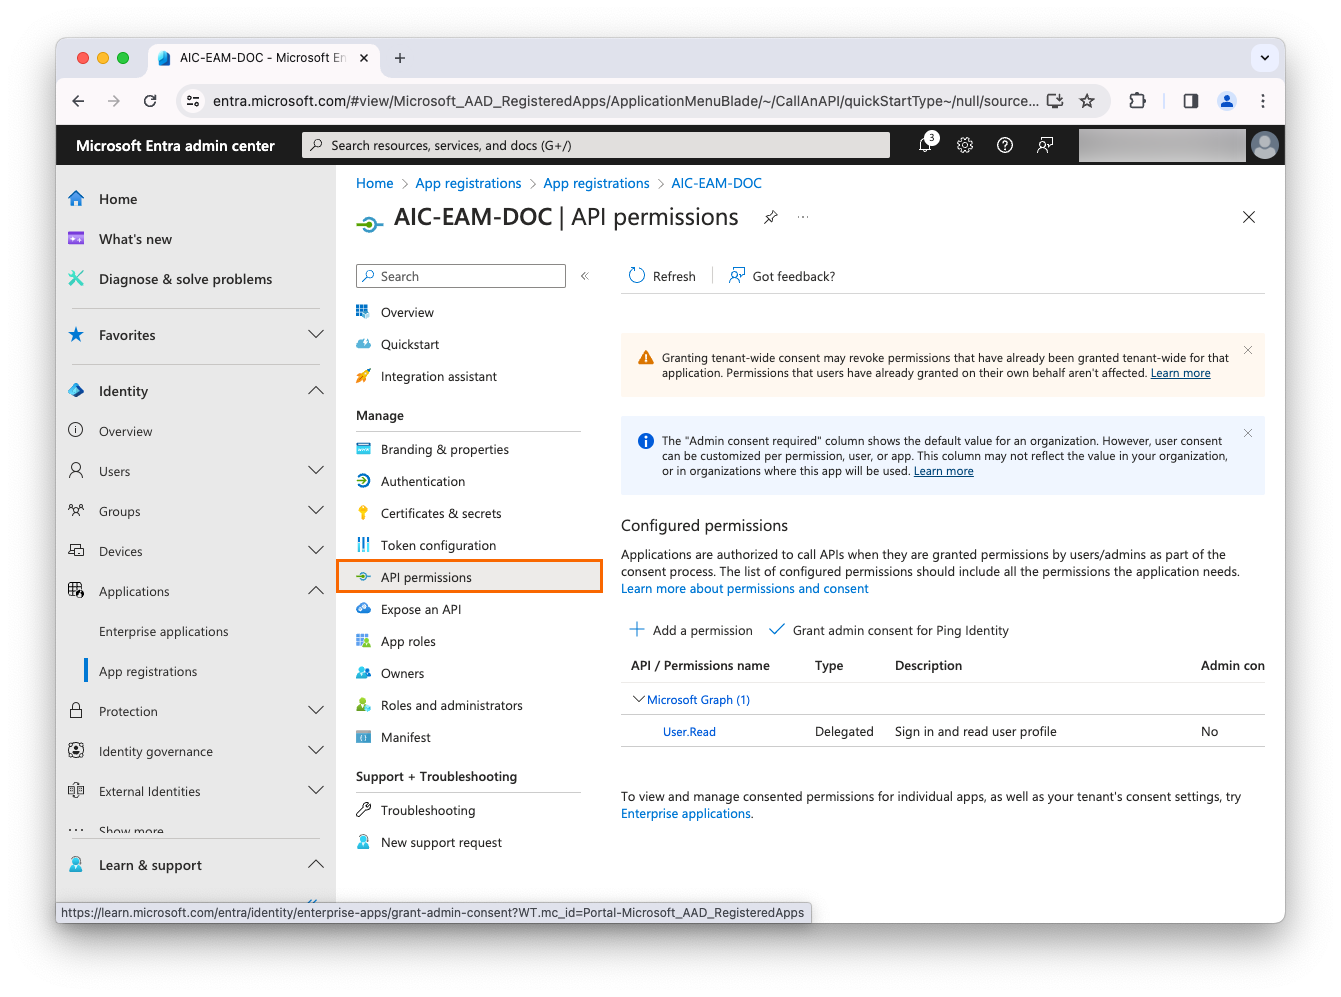
-
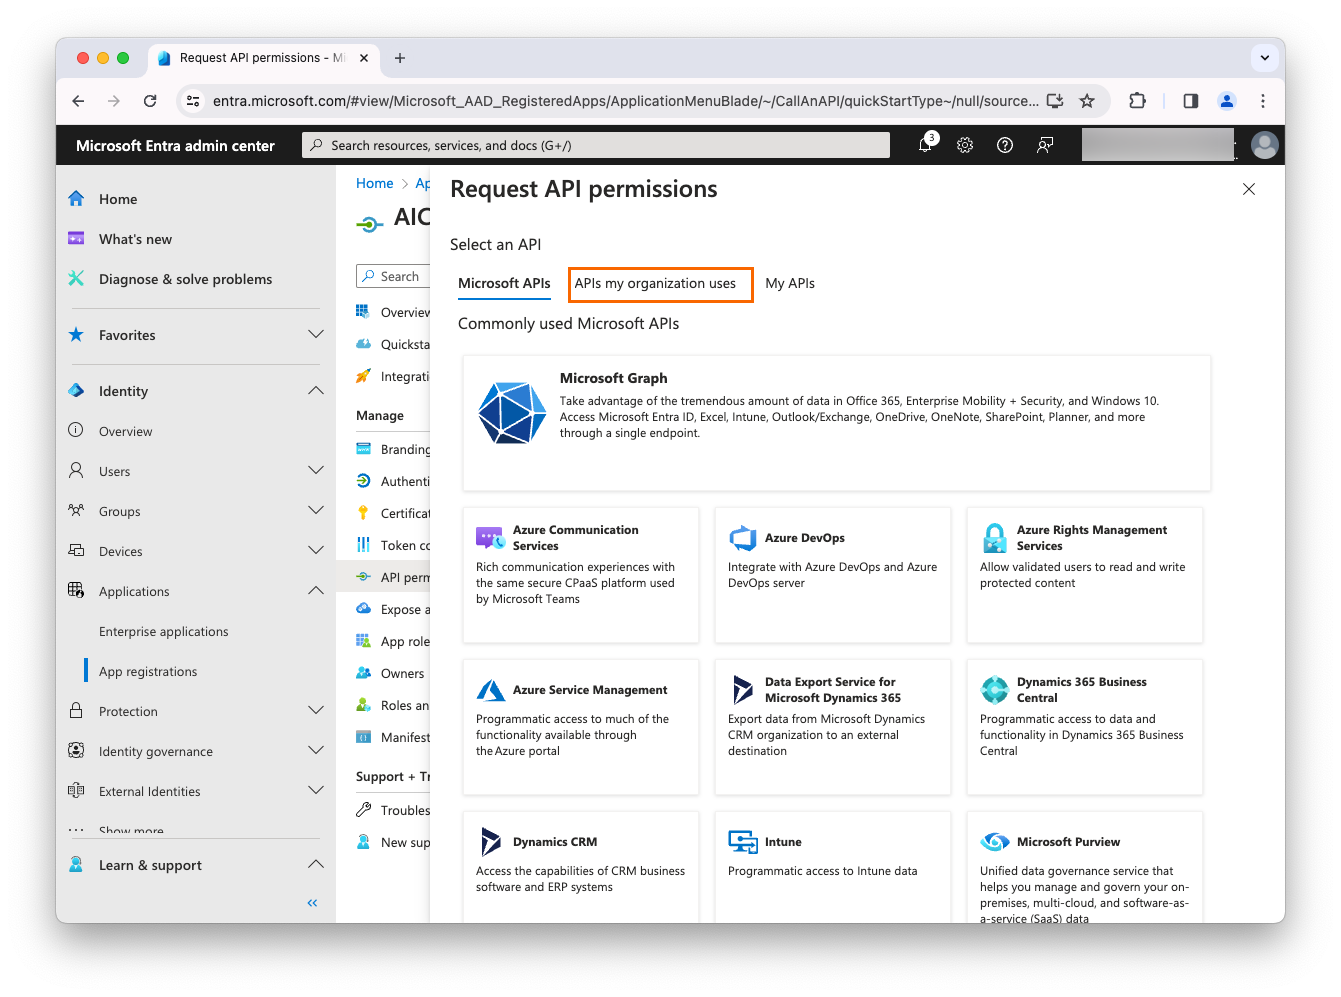
Click Add a permission.
-
Click APIs my organization uses.
-
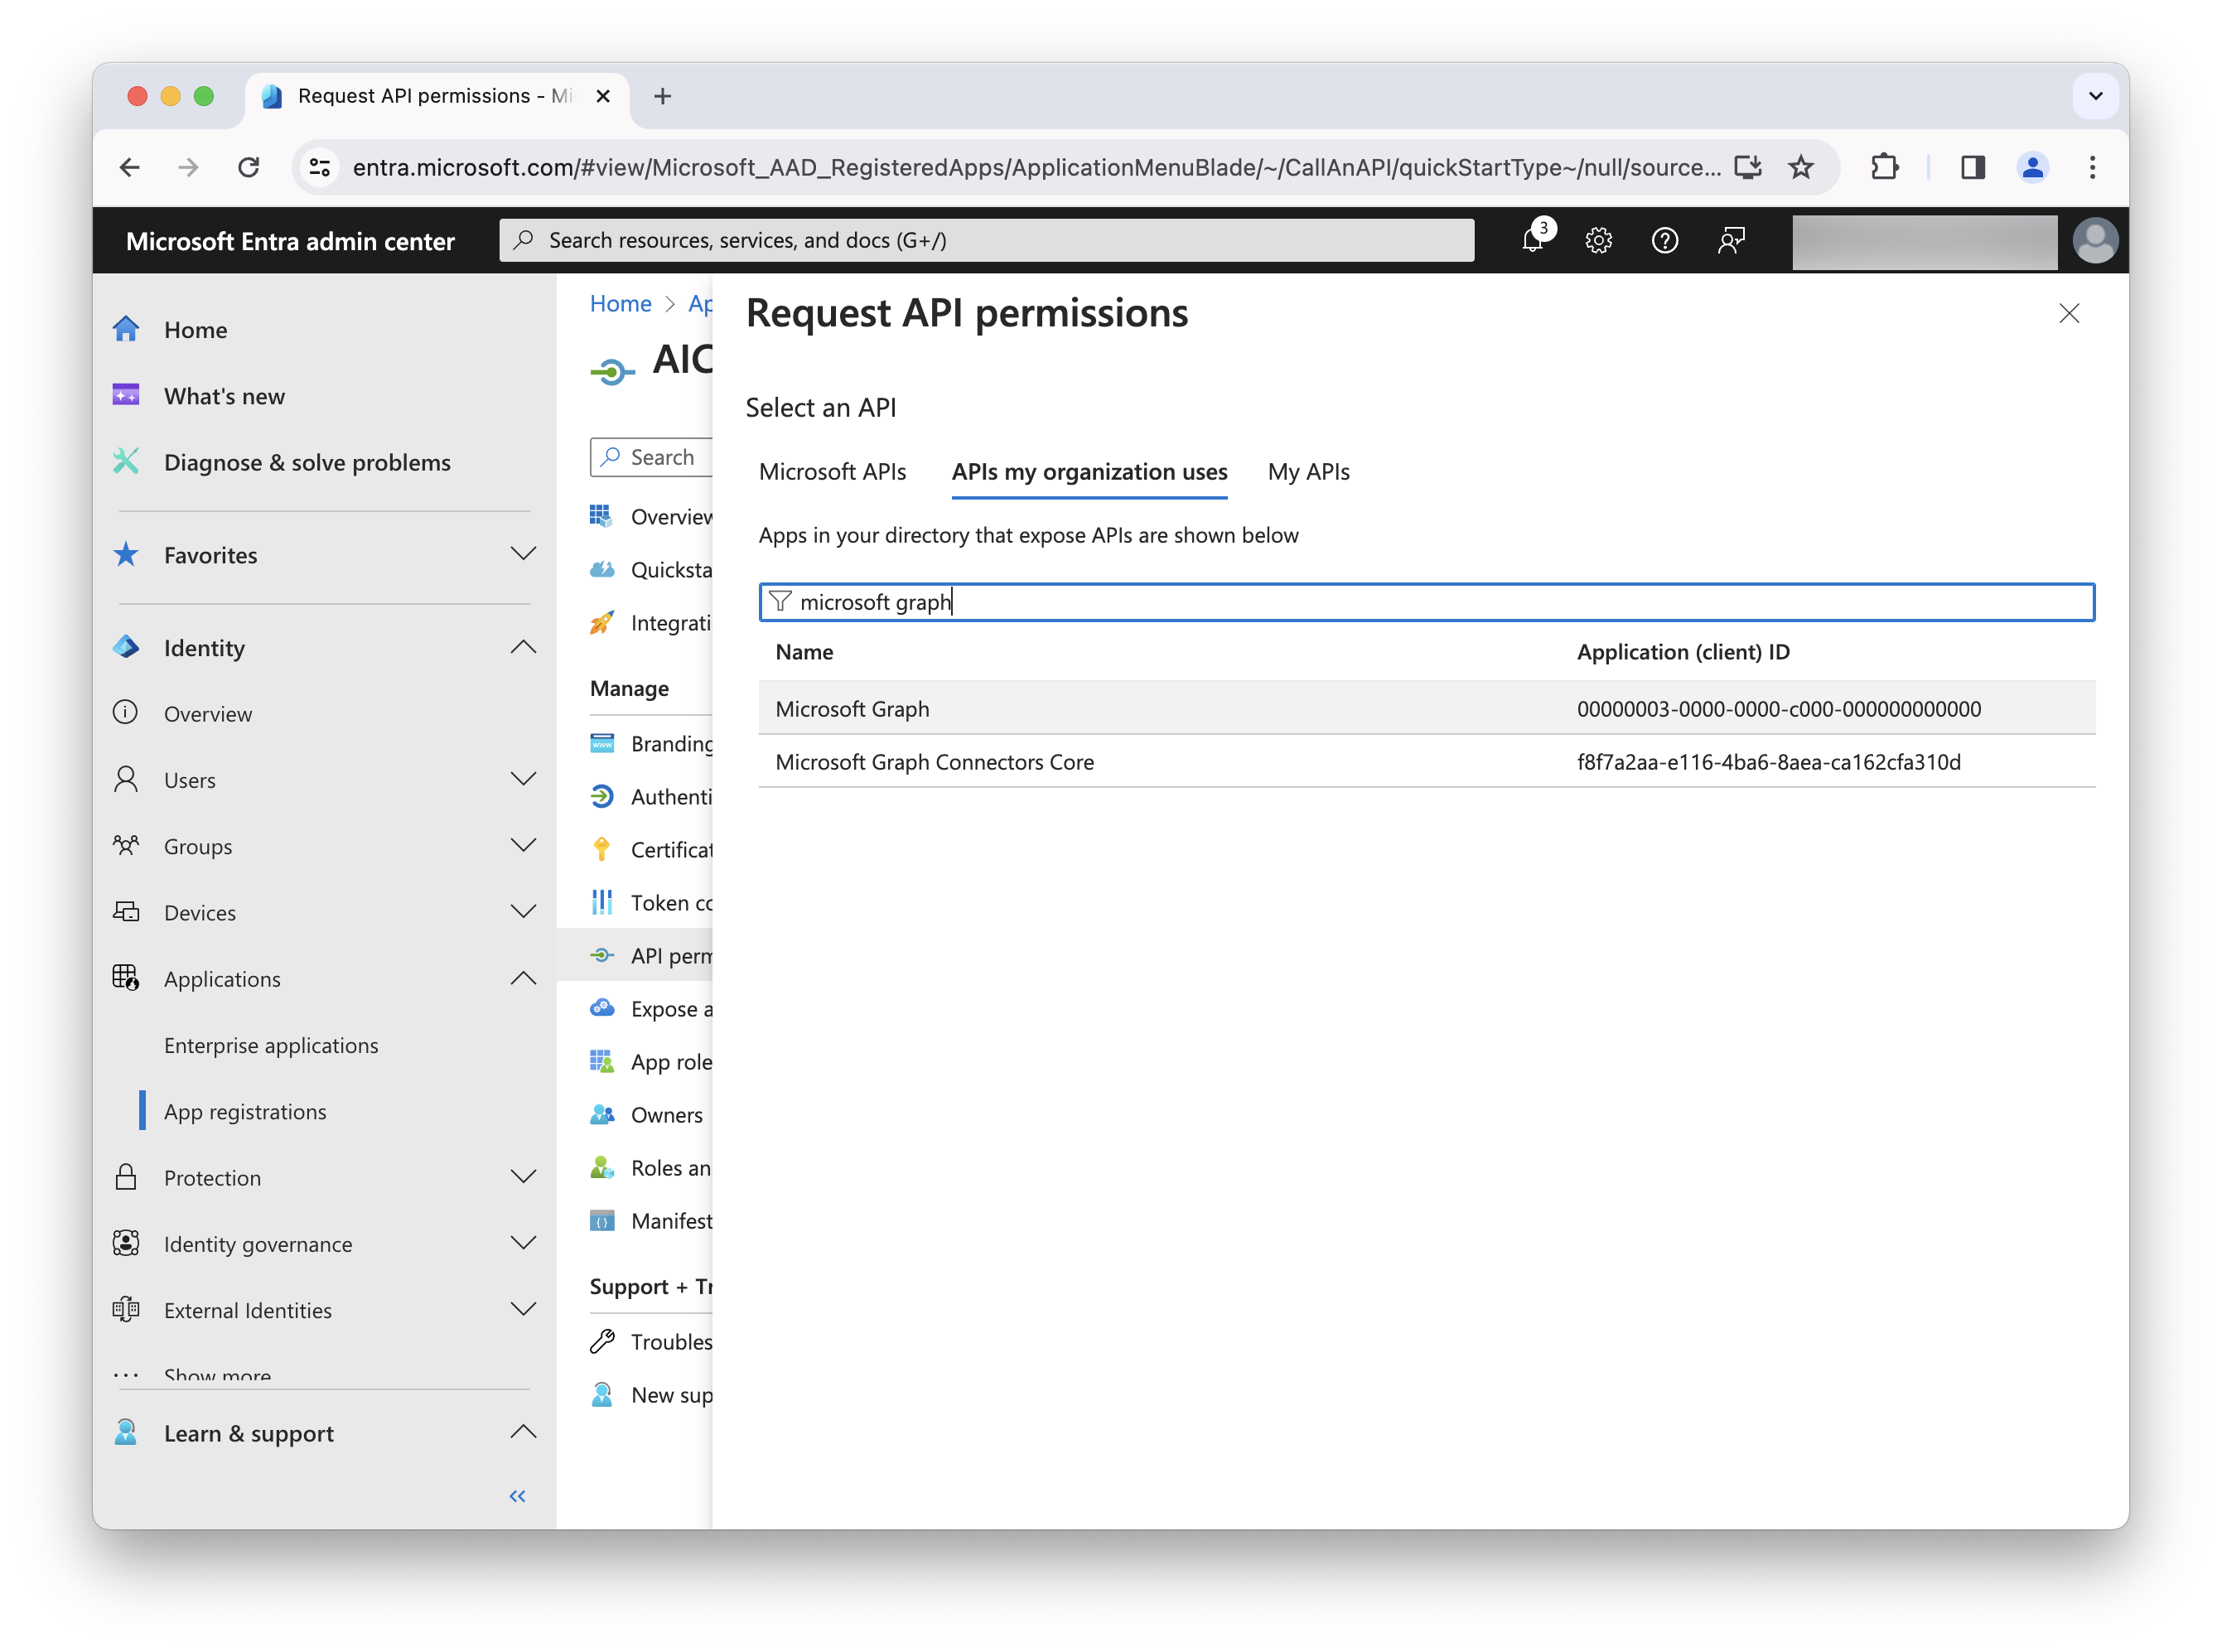
In the search box, search for Microsoft Graph.
-
In the result list, select Microsoft Graph.
-
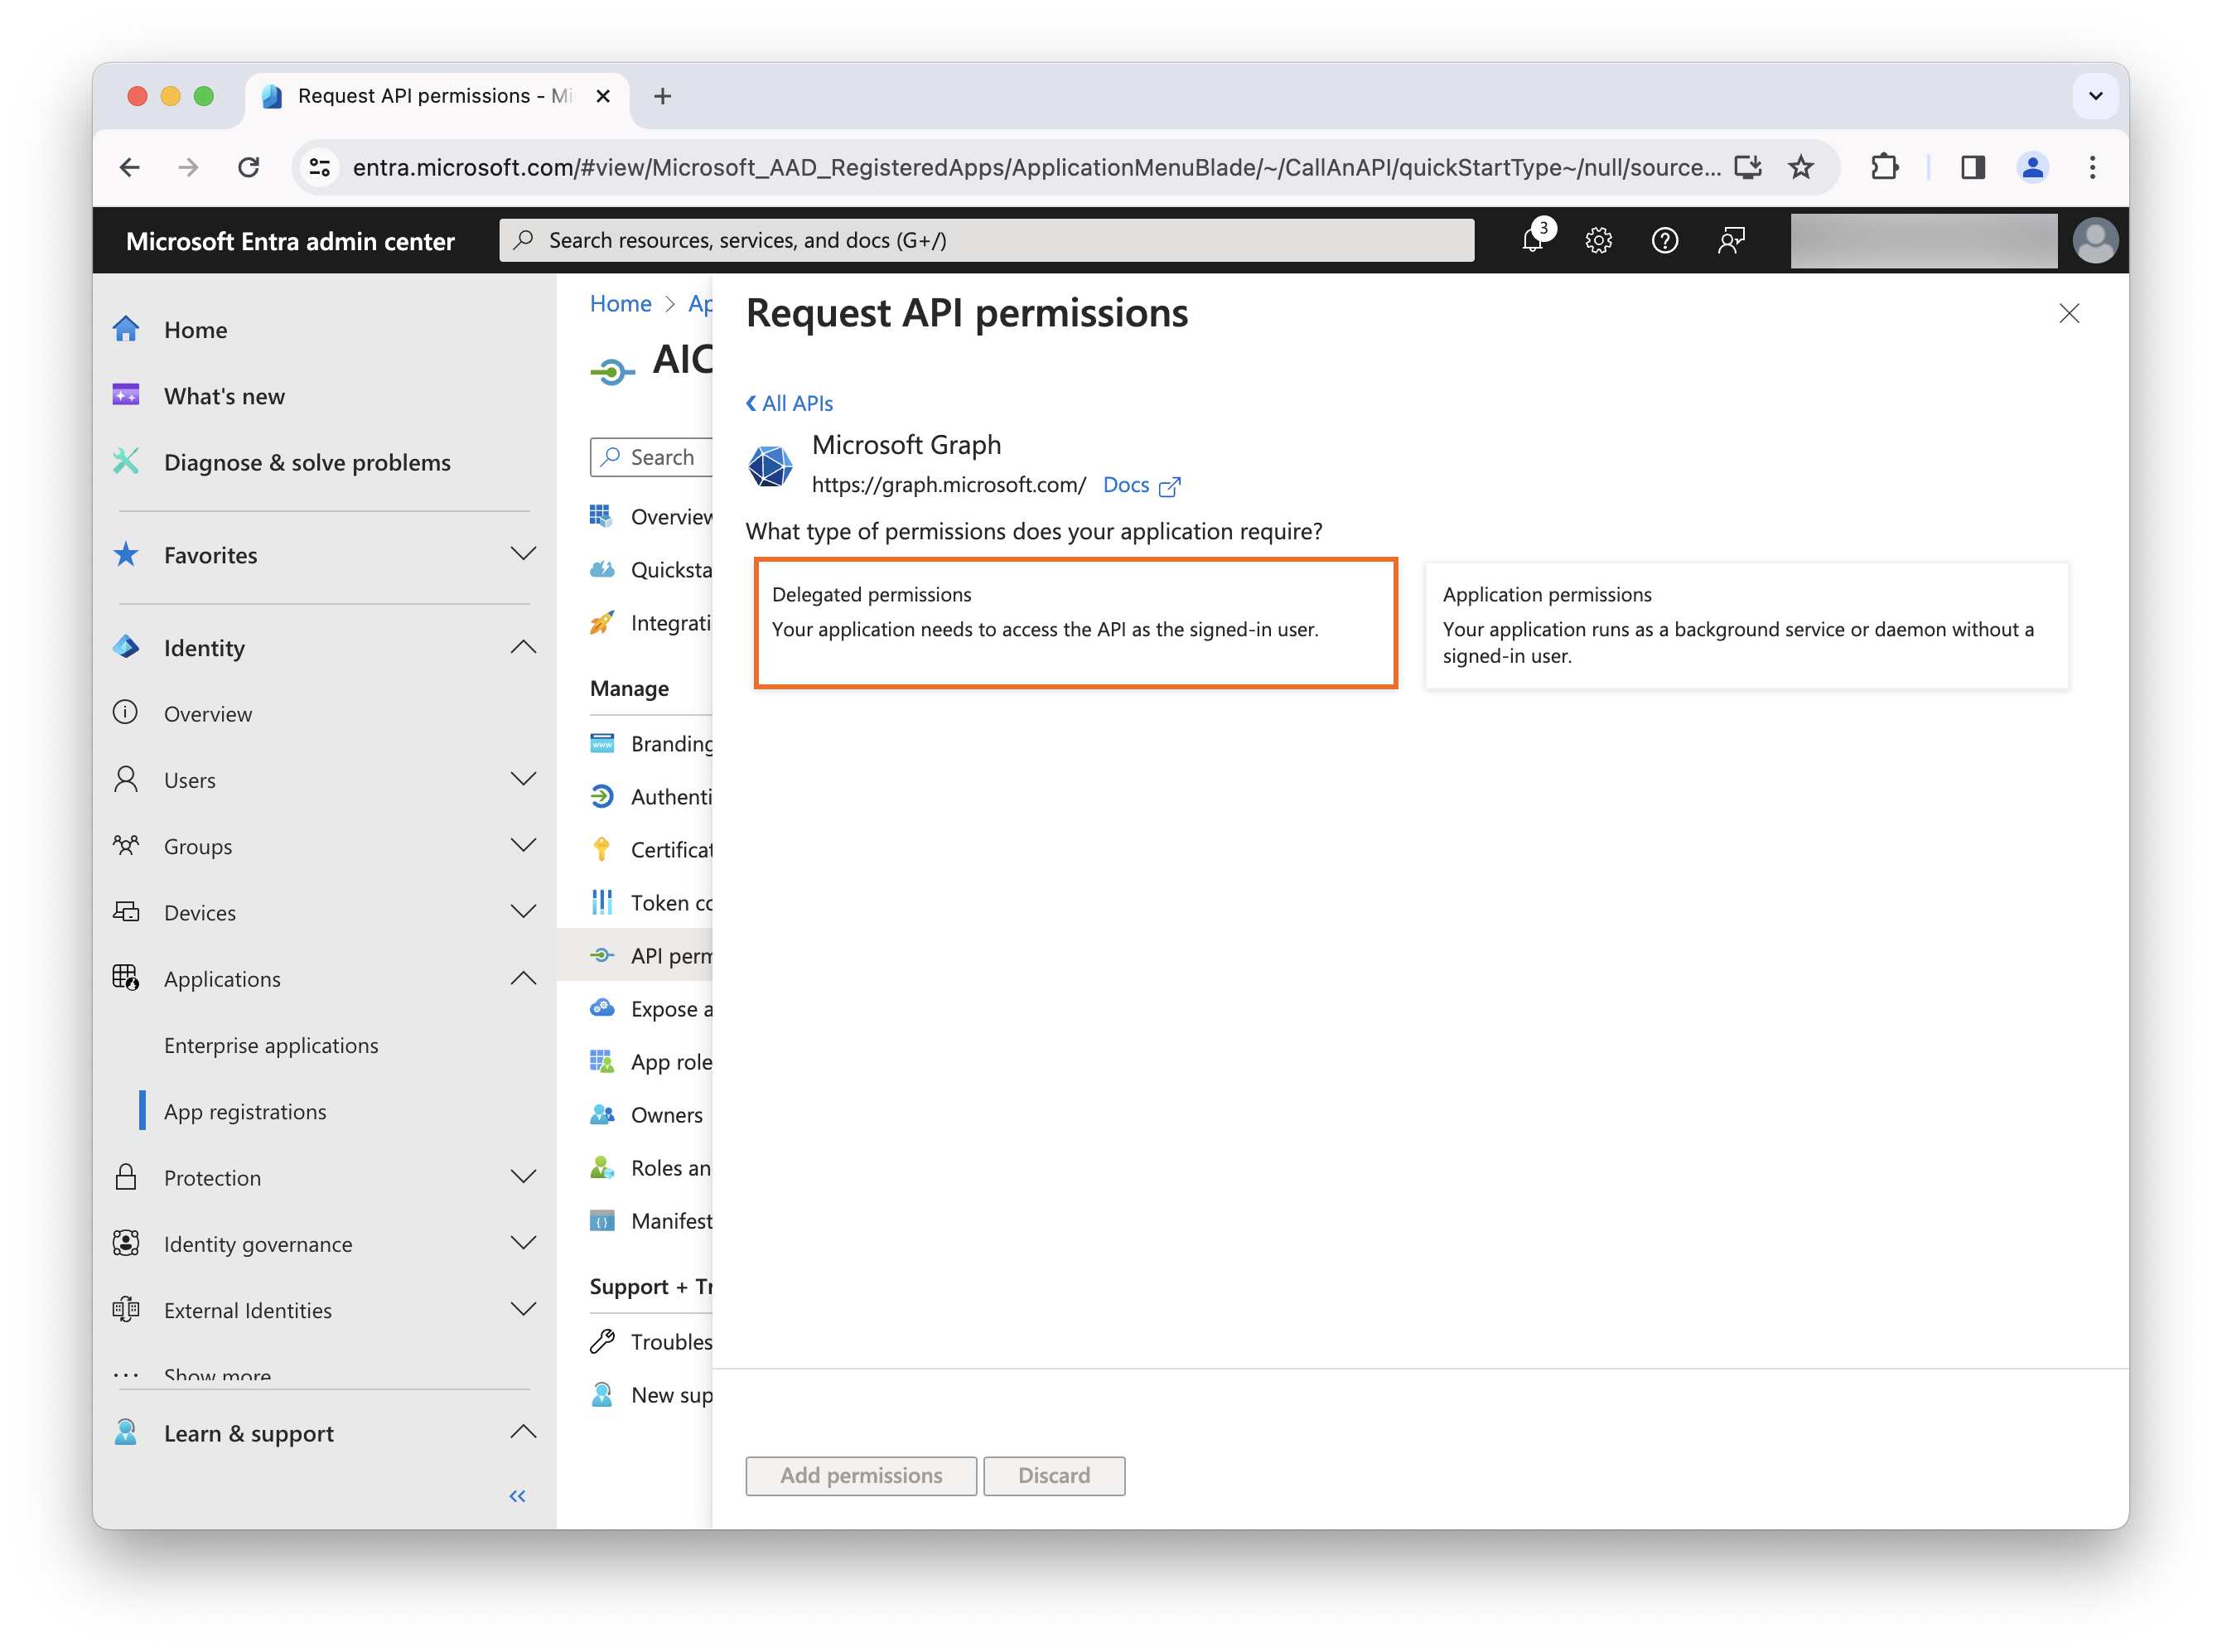
Select Delegated permissions.
-
Under the Openid permissions section, select the openid and profile checkboxes, and click Add permissions.
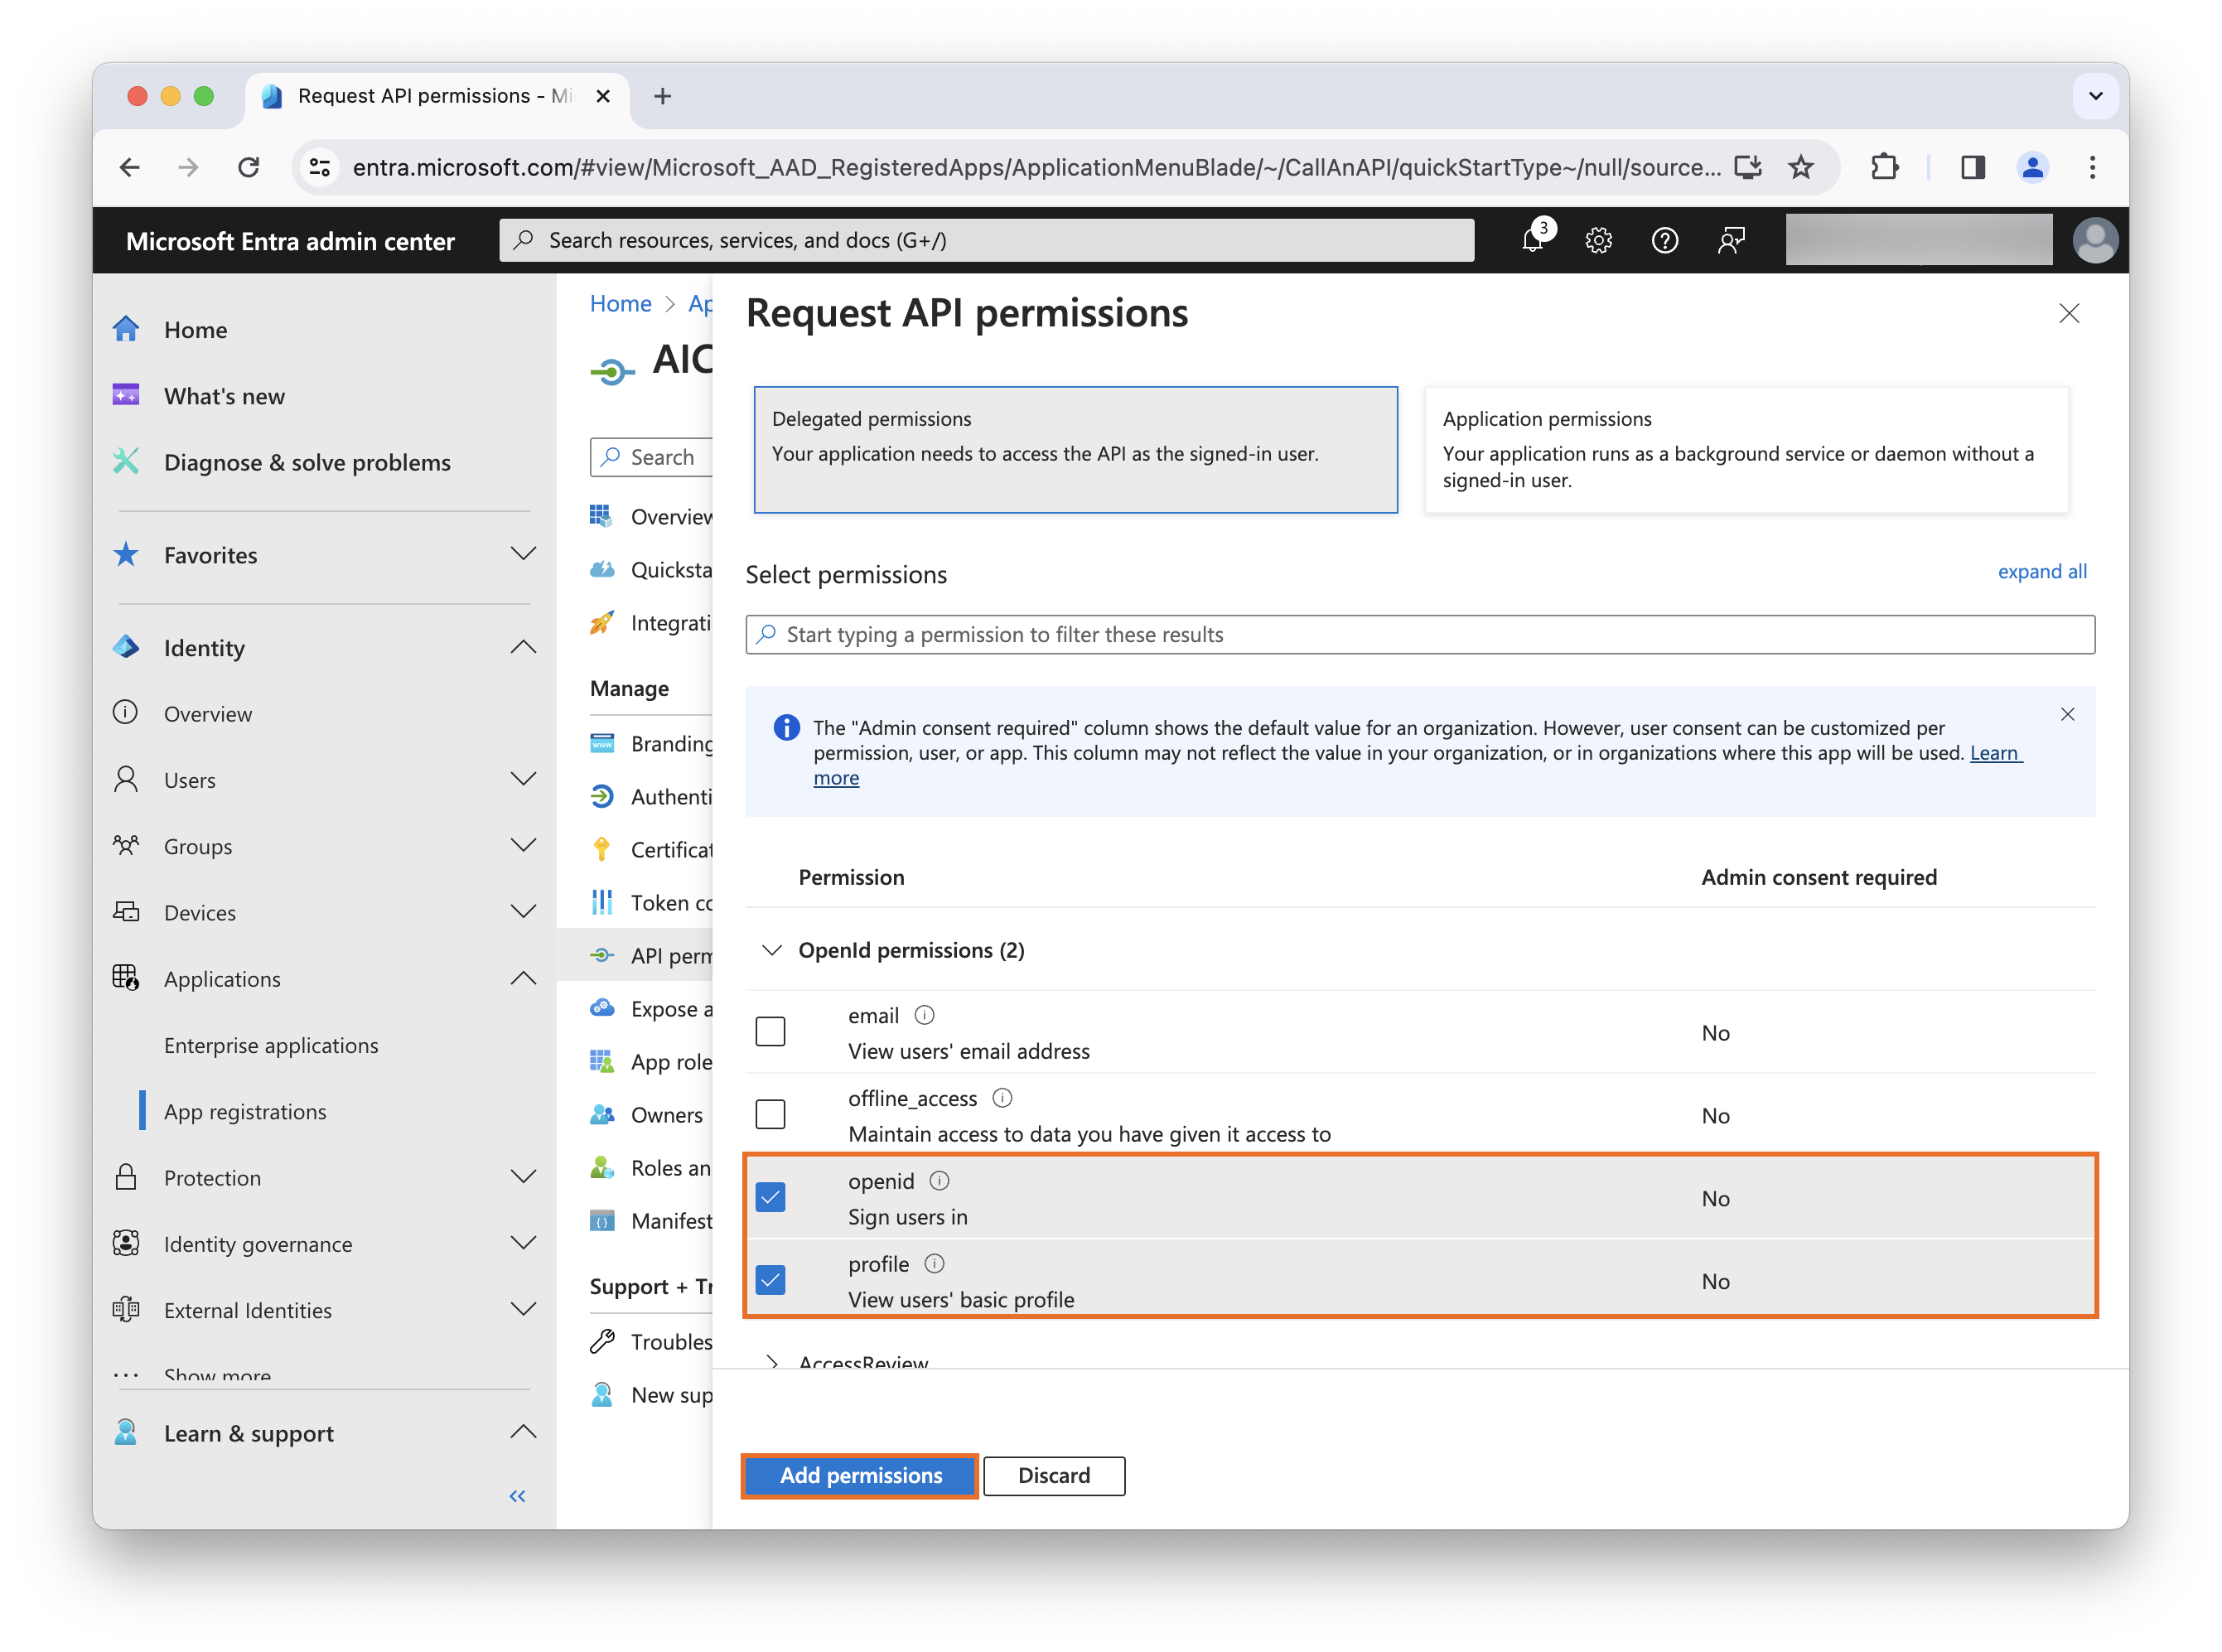
-
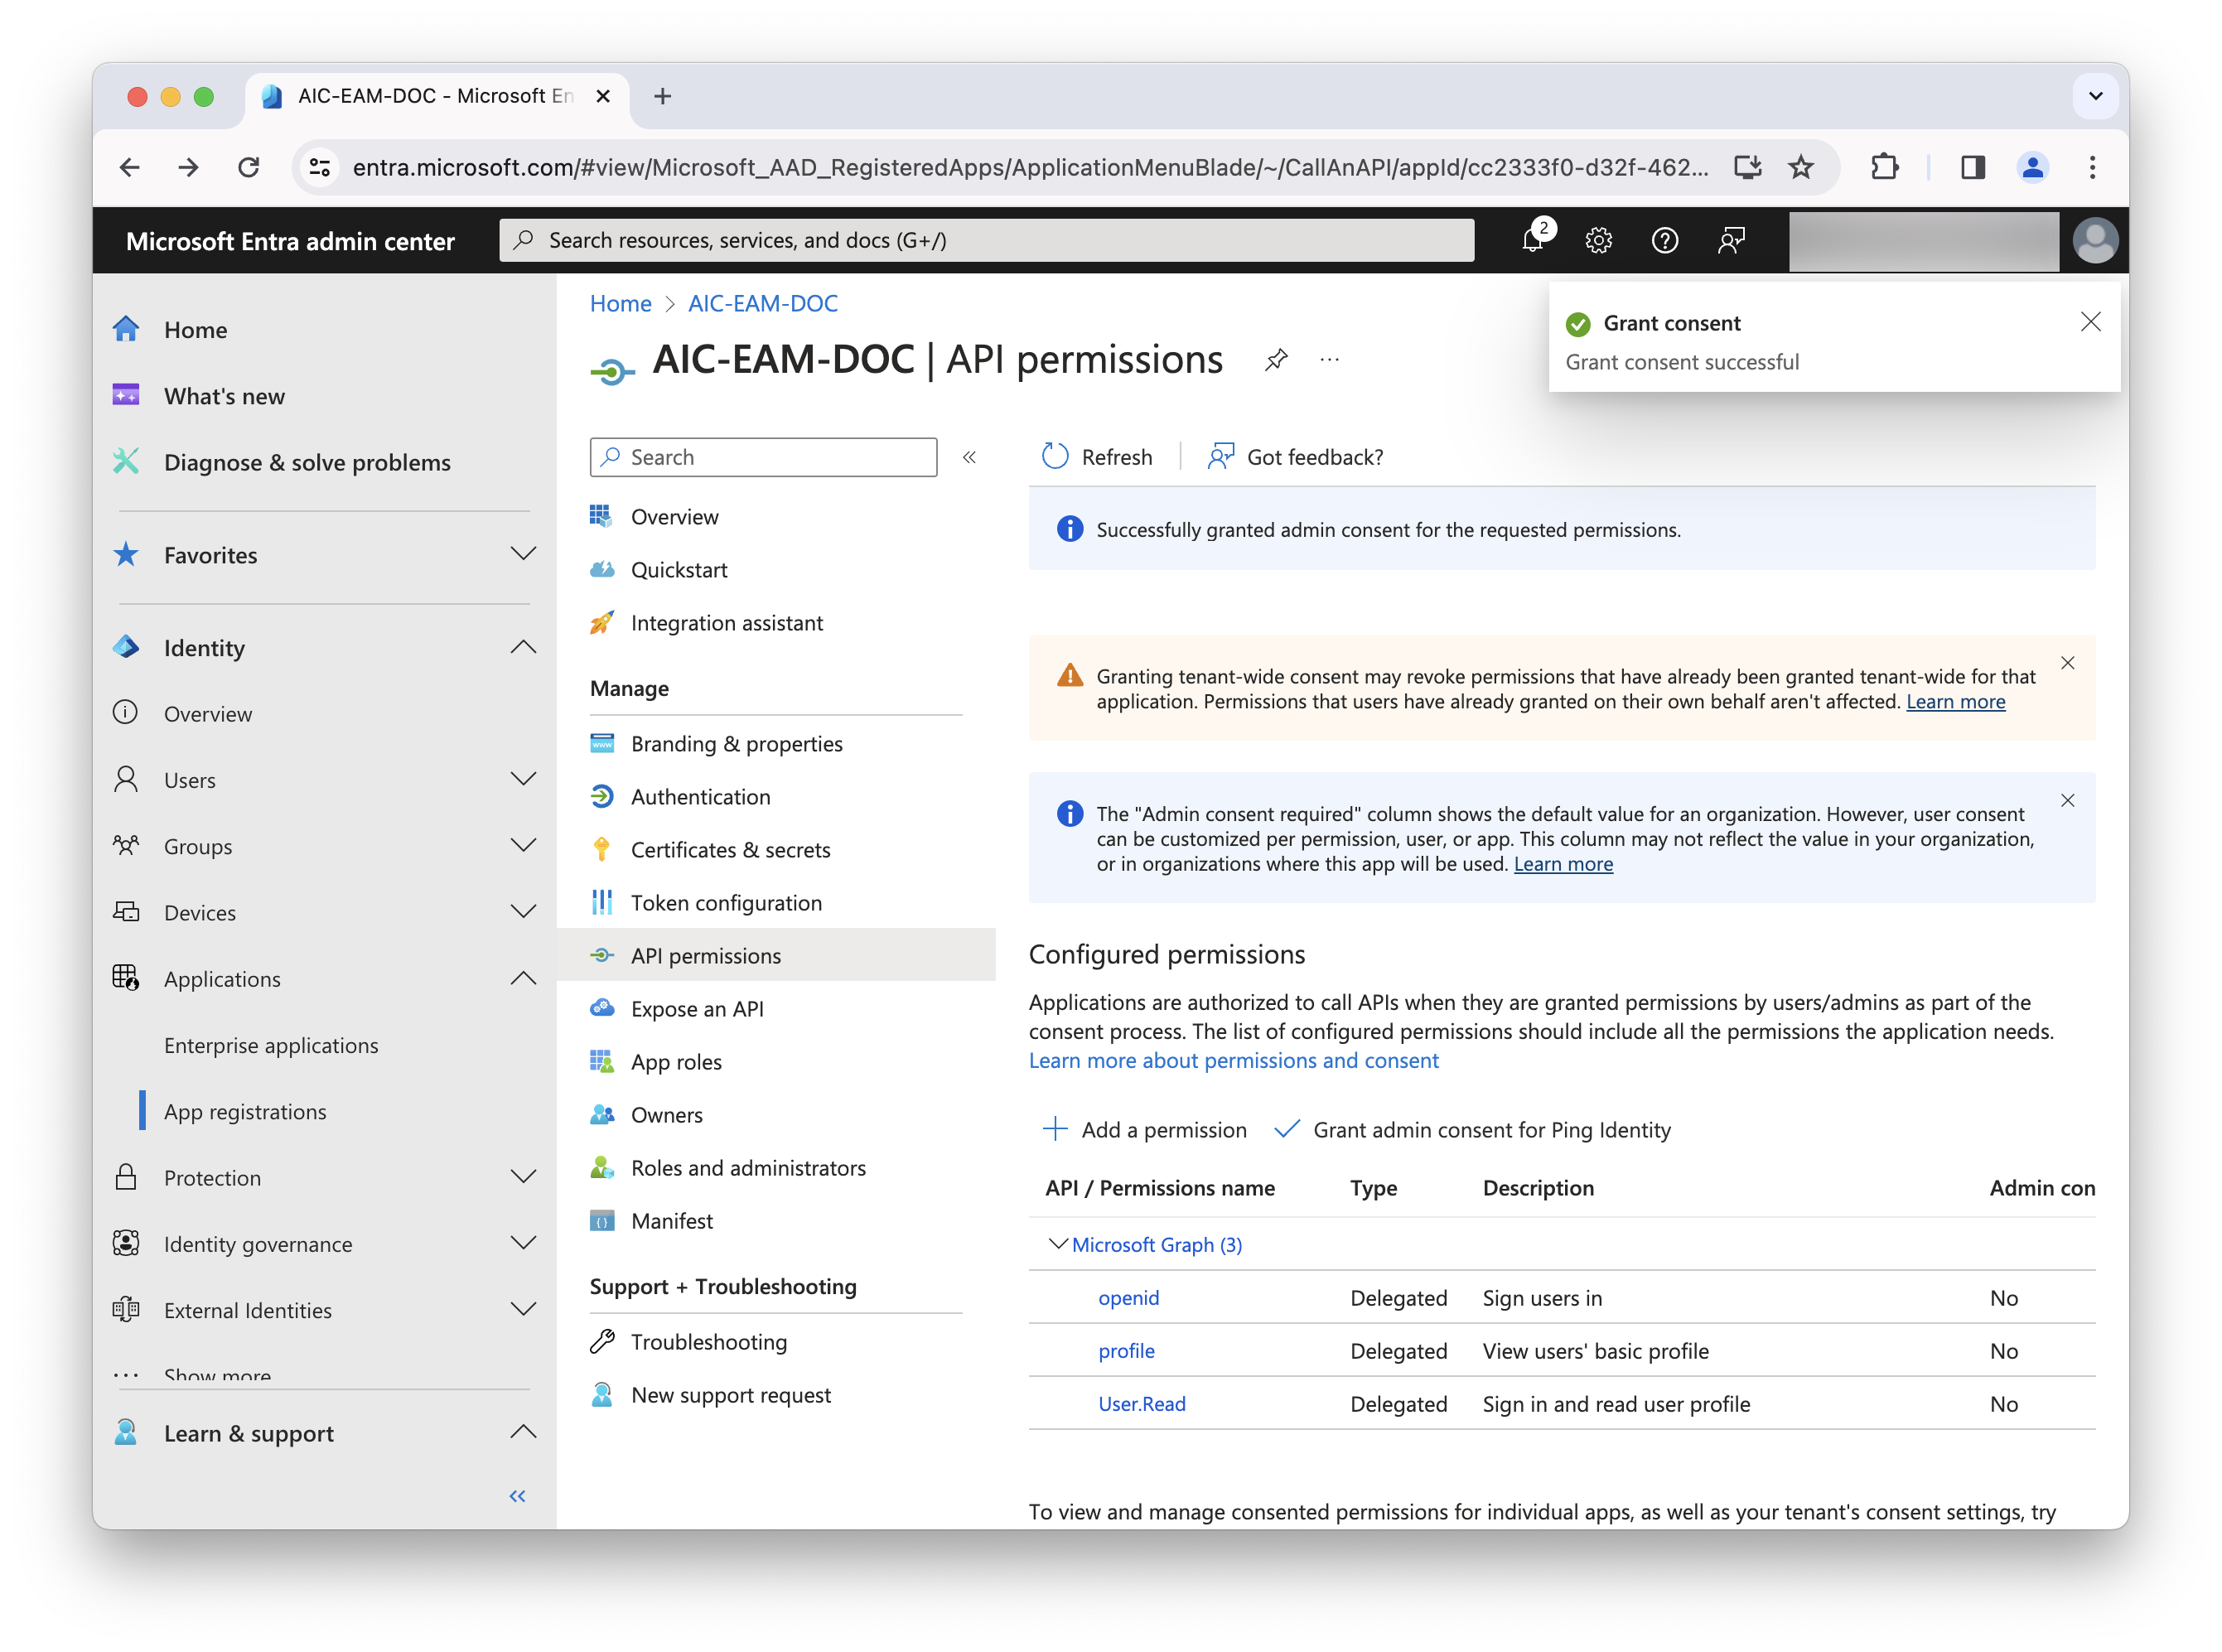
Click Grant admin consent for <your company>.
-
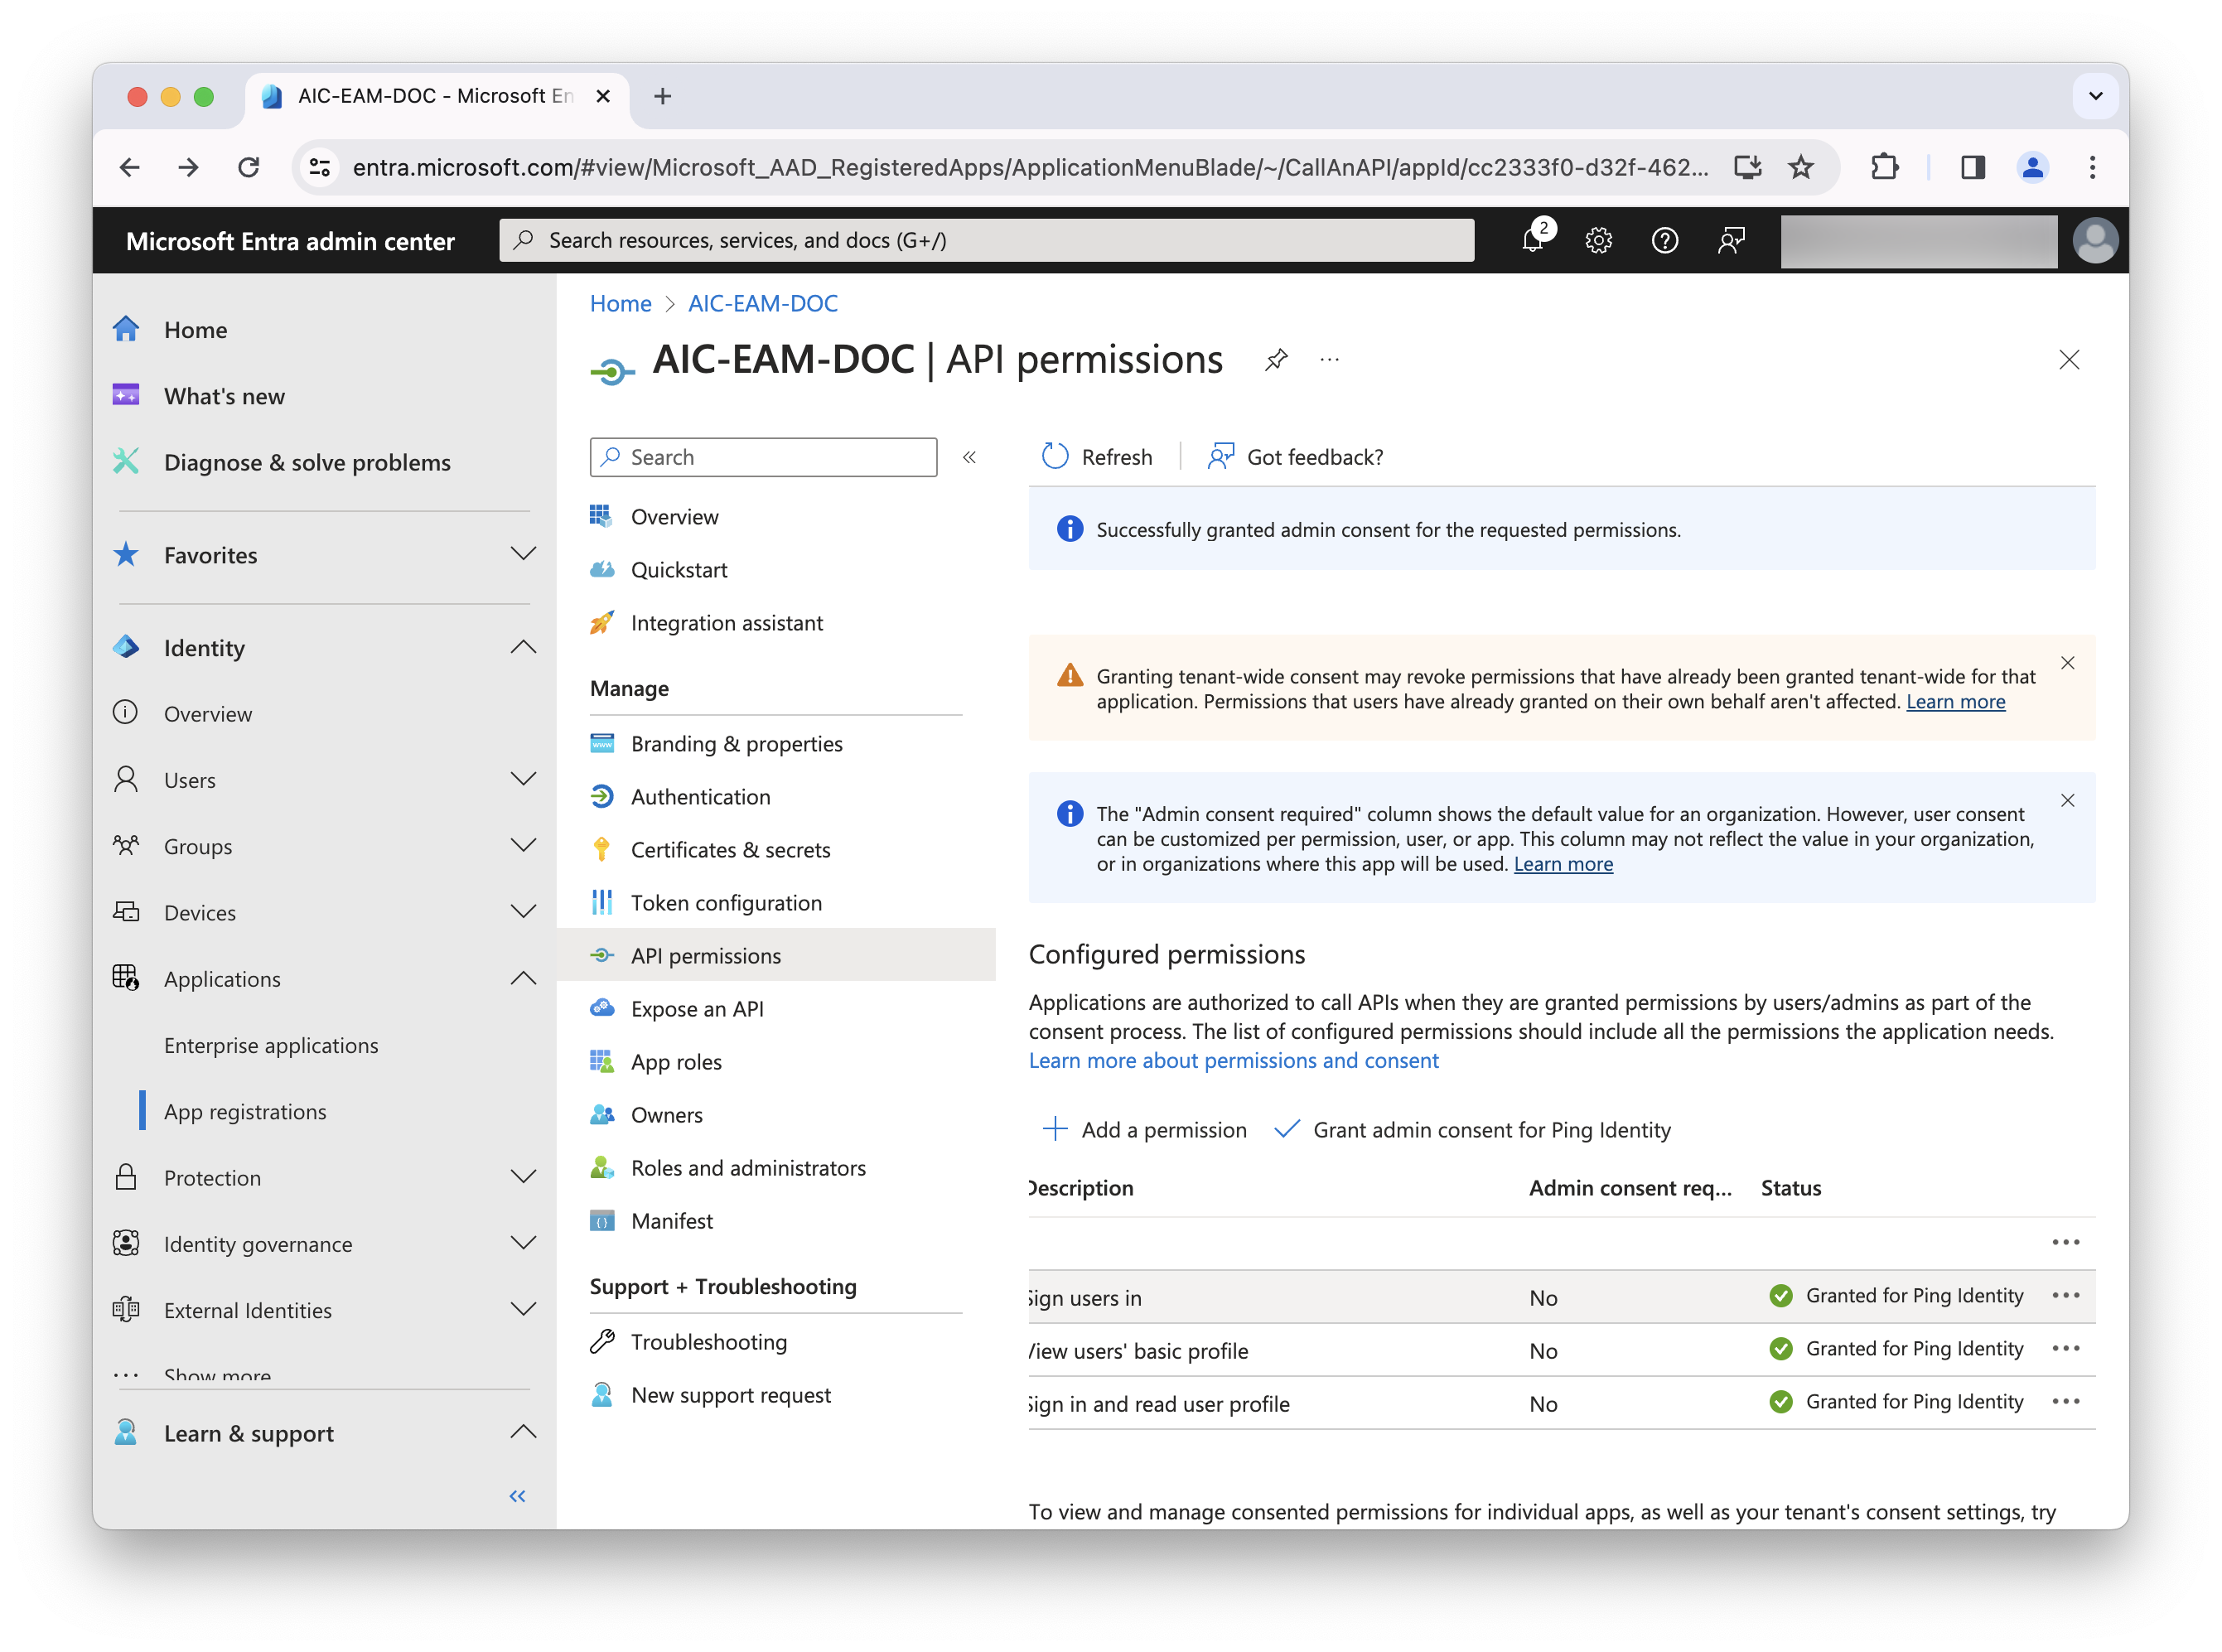
Complete the necessary steps for this task, including granting admin consent, and refresh the screen to display the updated permission status. Learn more in Grant tenant-wide admin consent to an application in the Microsoft Entra ID documentation.
Create a new group (if needed)
We highly recommend that you initially don’t include all users in case you encounter issues. Instead, we recommend that you use a group.
-
In the left panel, click Identity > Groups > All groups.
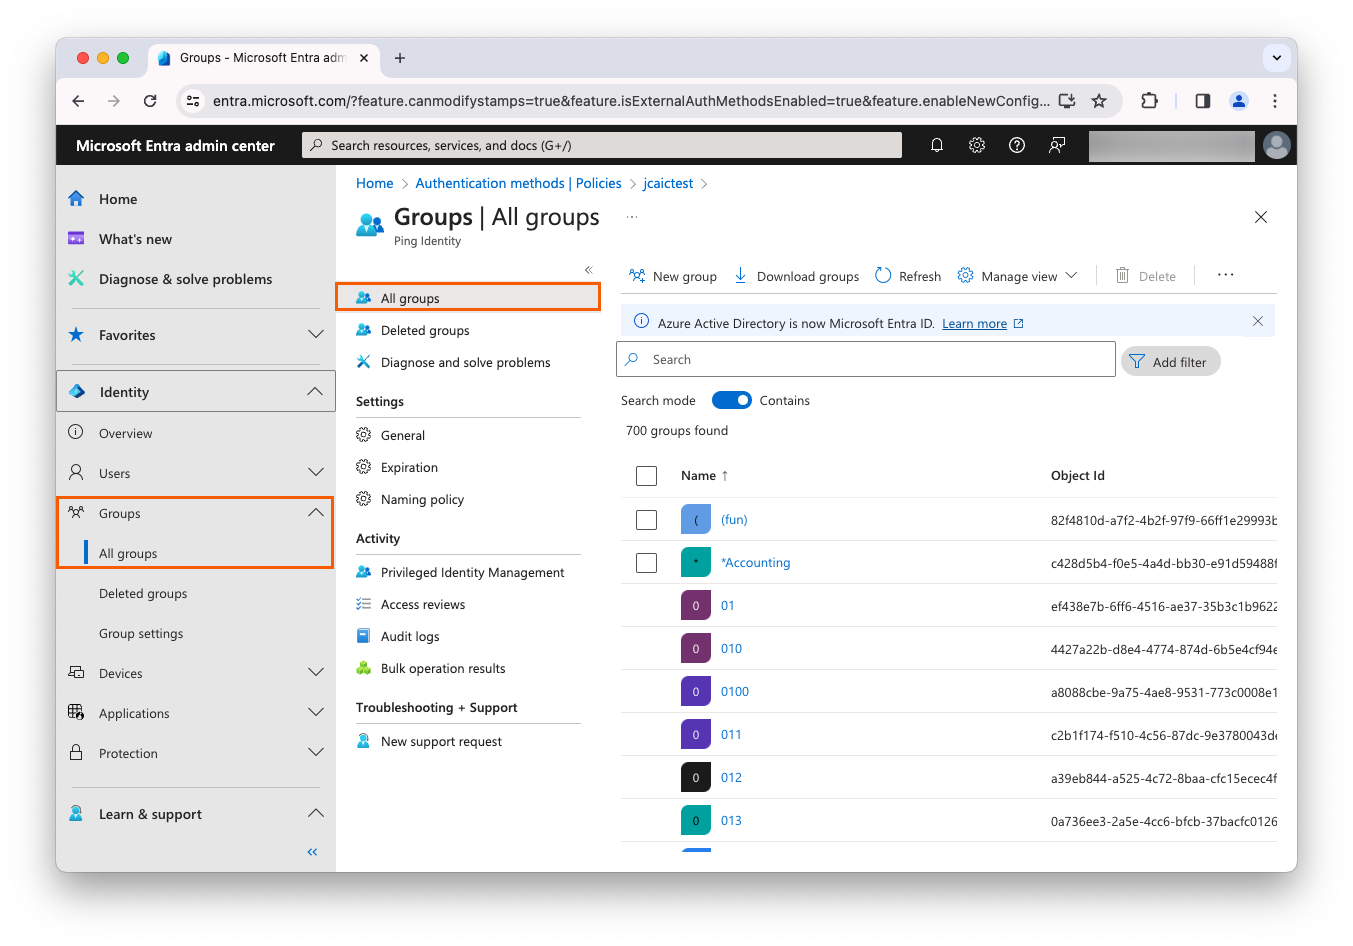
-
Click New group, and complete the following fields:
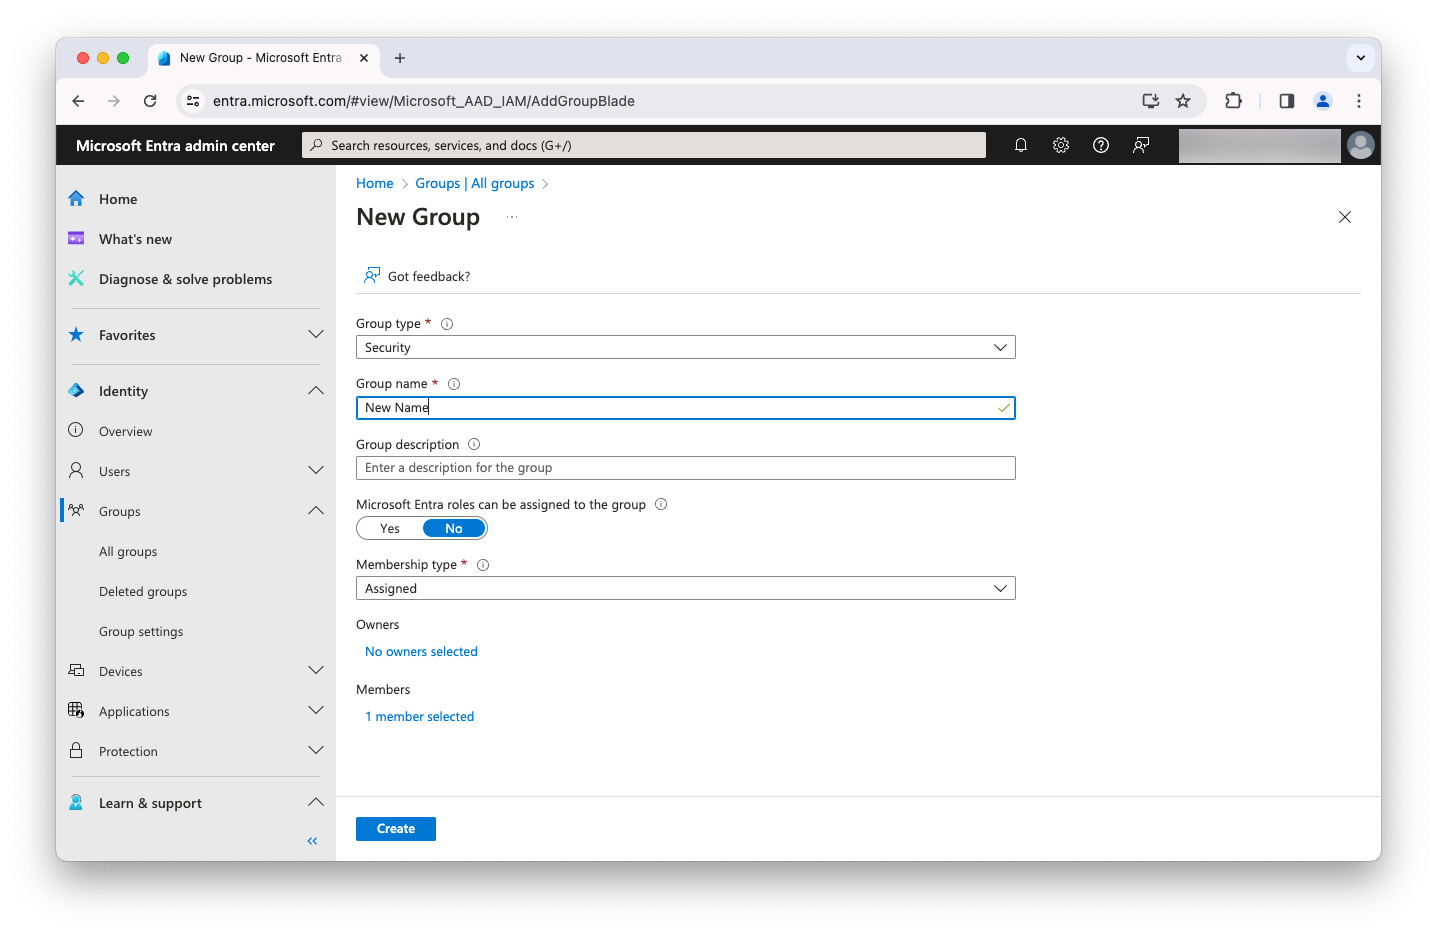
Field Value Group type
Security
Group Name
Anything you want
Membership type
Assigned
-
Add a few test users, as needed.
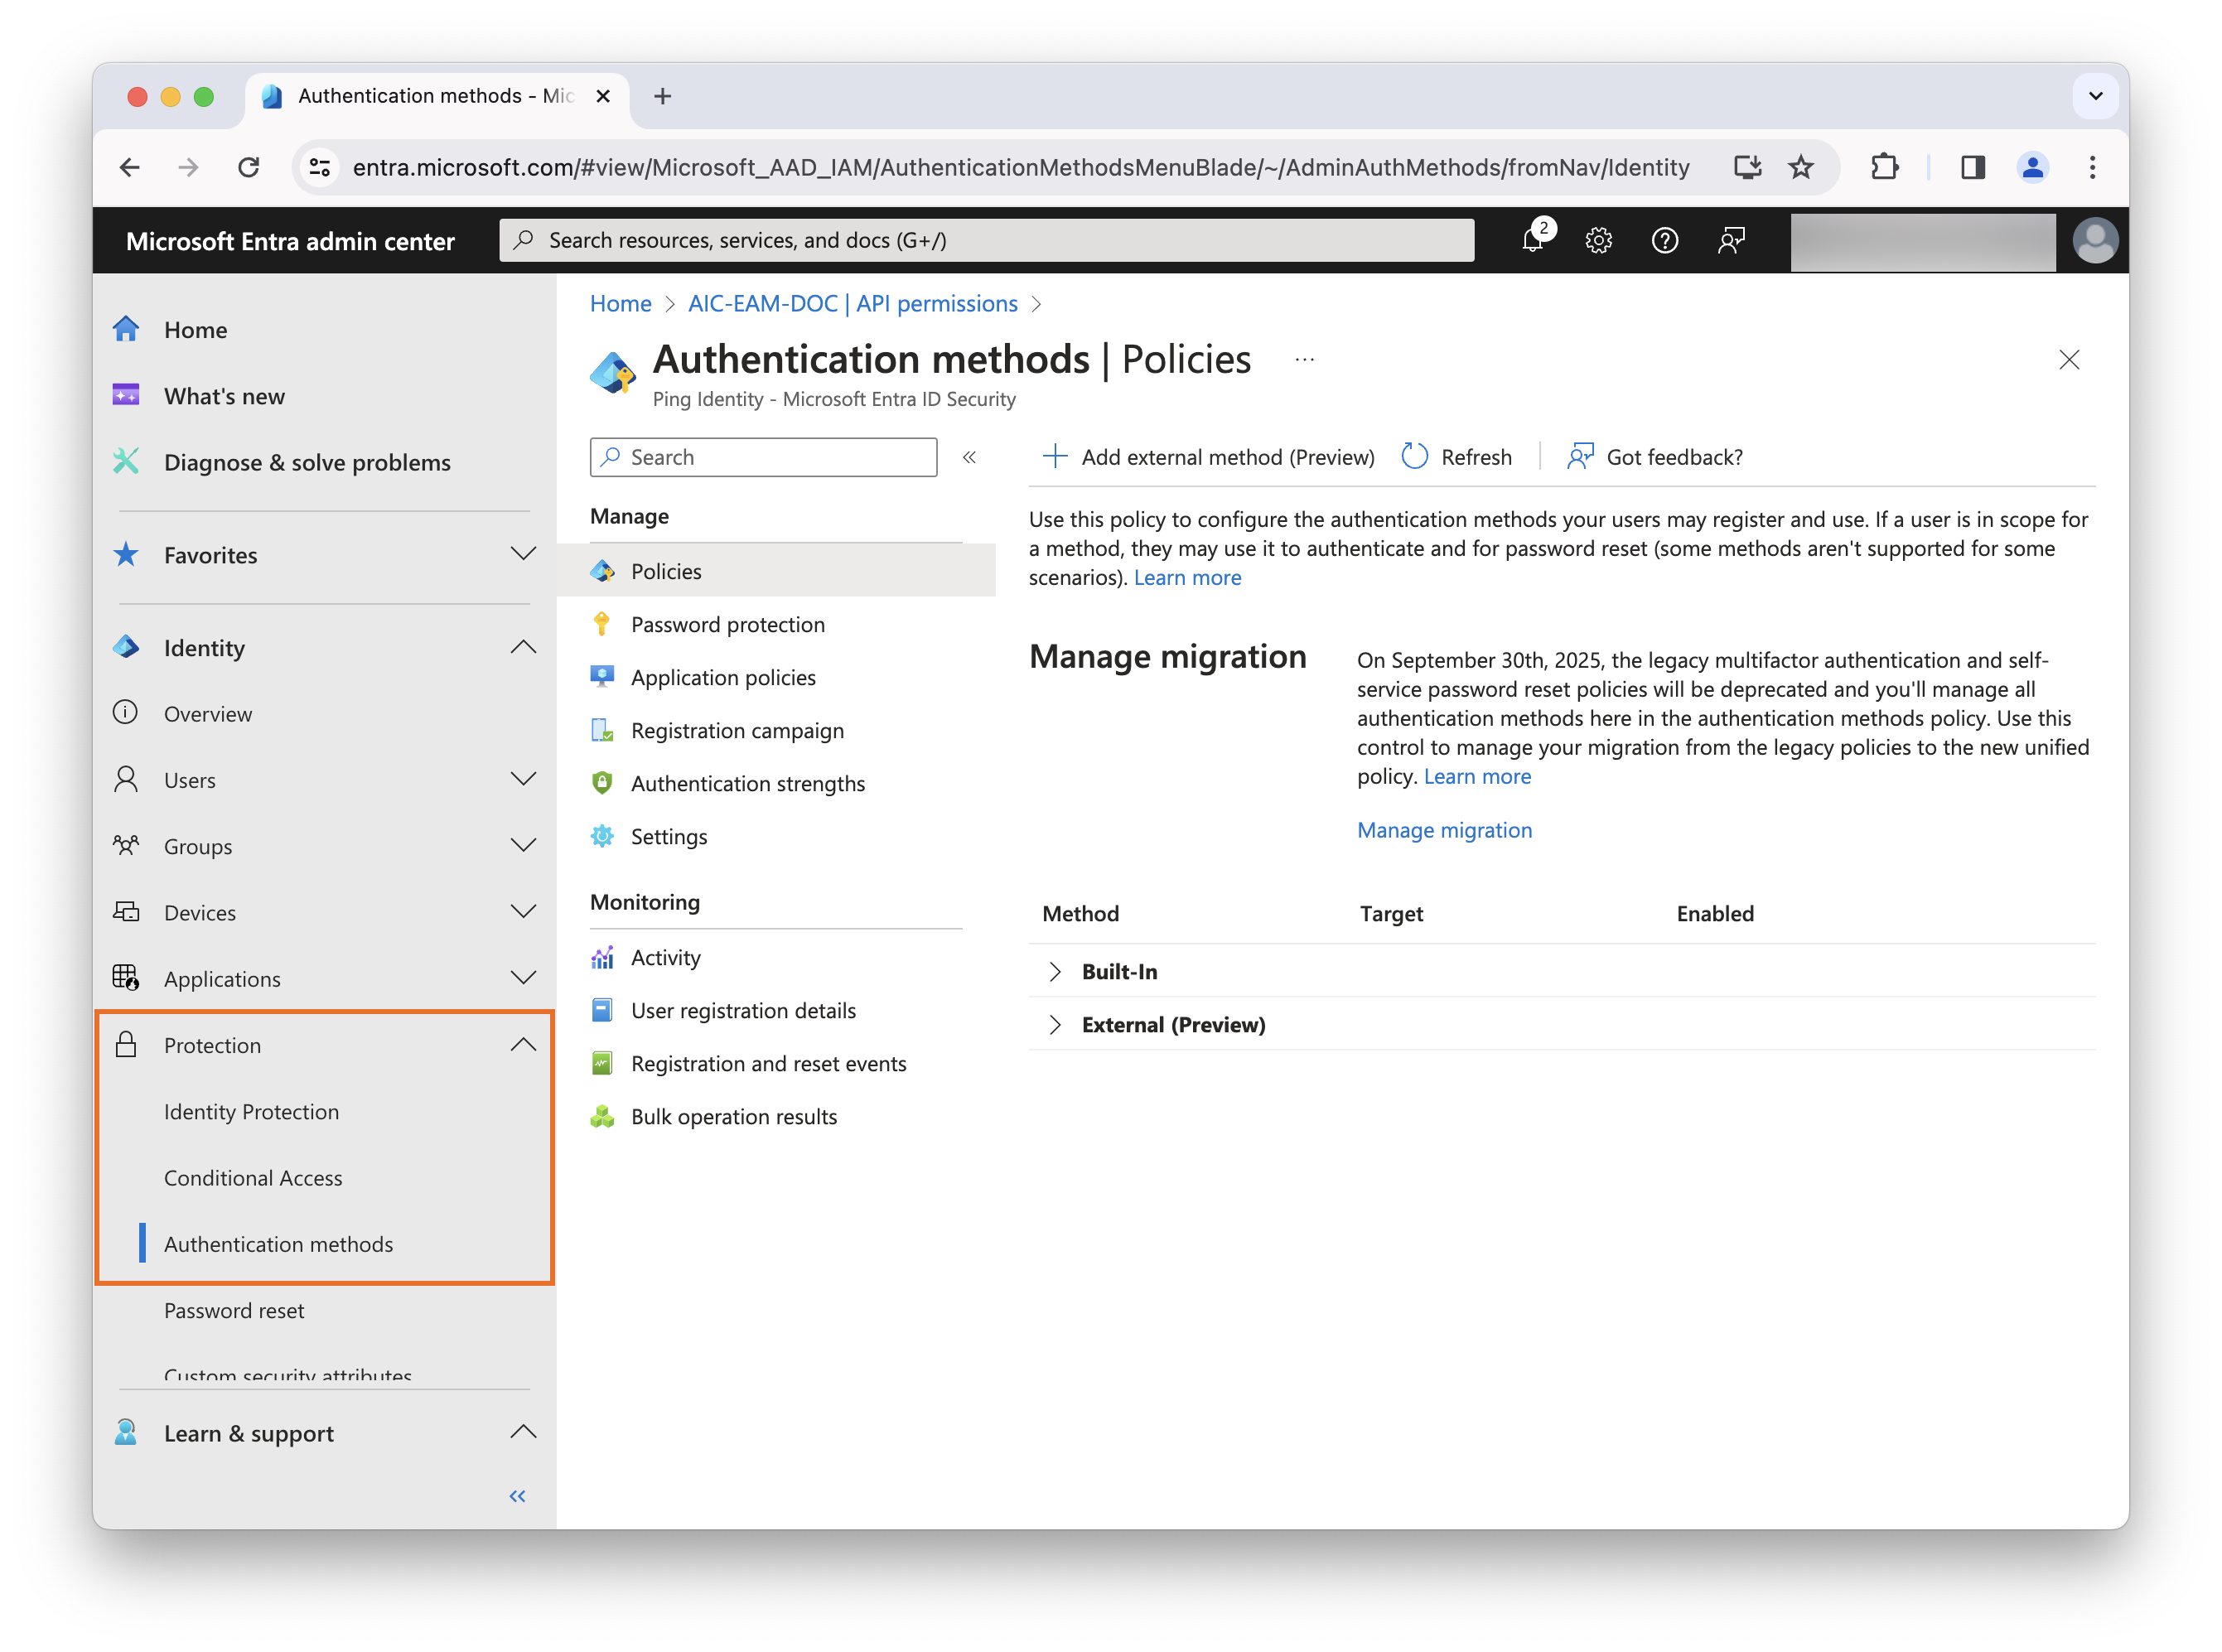
Add a new authentication method (required)
-
Navigate to https://entra.microsoft.com/#home.
-
In the left panel, click Protection > Authentication methods.
-
Click Add external method (Preview), complete the following fields, and click Save:
Field Value Name
<Anything you want>
Client ID
Use the generated Application (client) ID you recorded when setting up the application in Advanced Identity Cloud
Discovery Endpoint
.var##<tenant-env-fqdn>##.forgeblocks.com/am/oauth2/alpha/.well-known/openid-configuration
App ID
Use the generated Application (client) ID you recorded when setting up the application in Advanced Identity Cloud
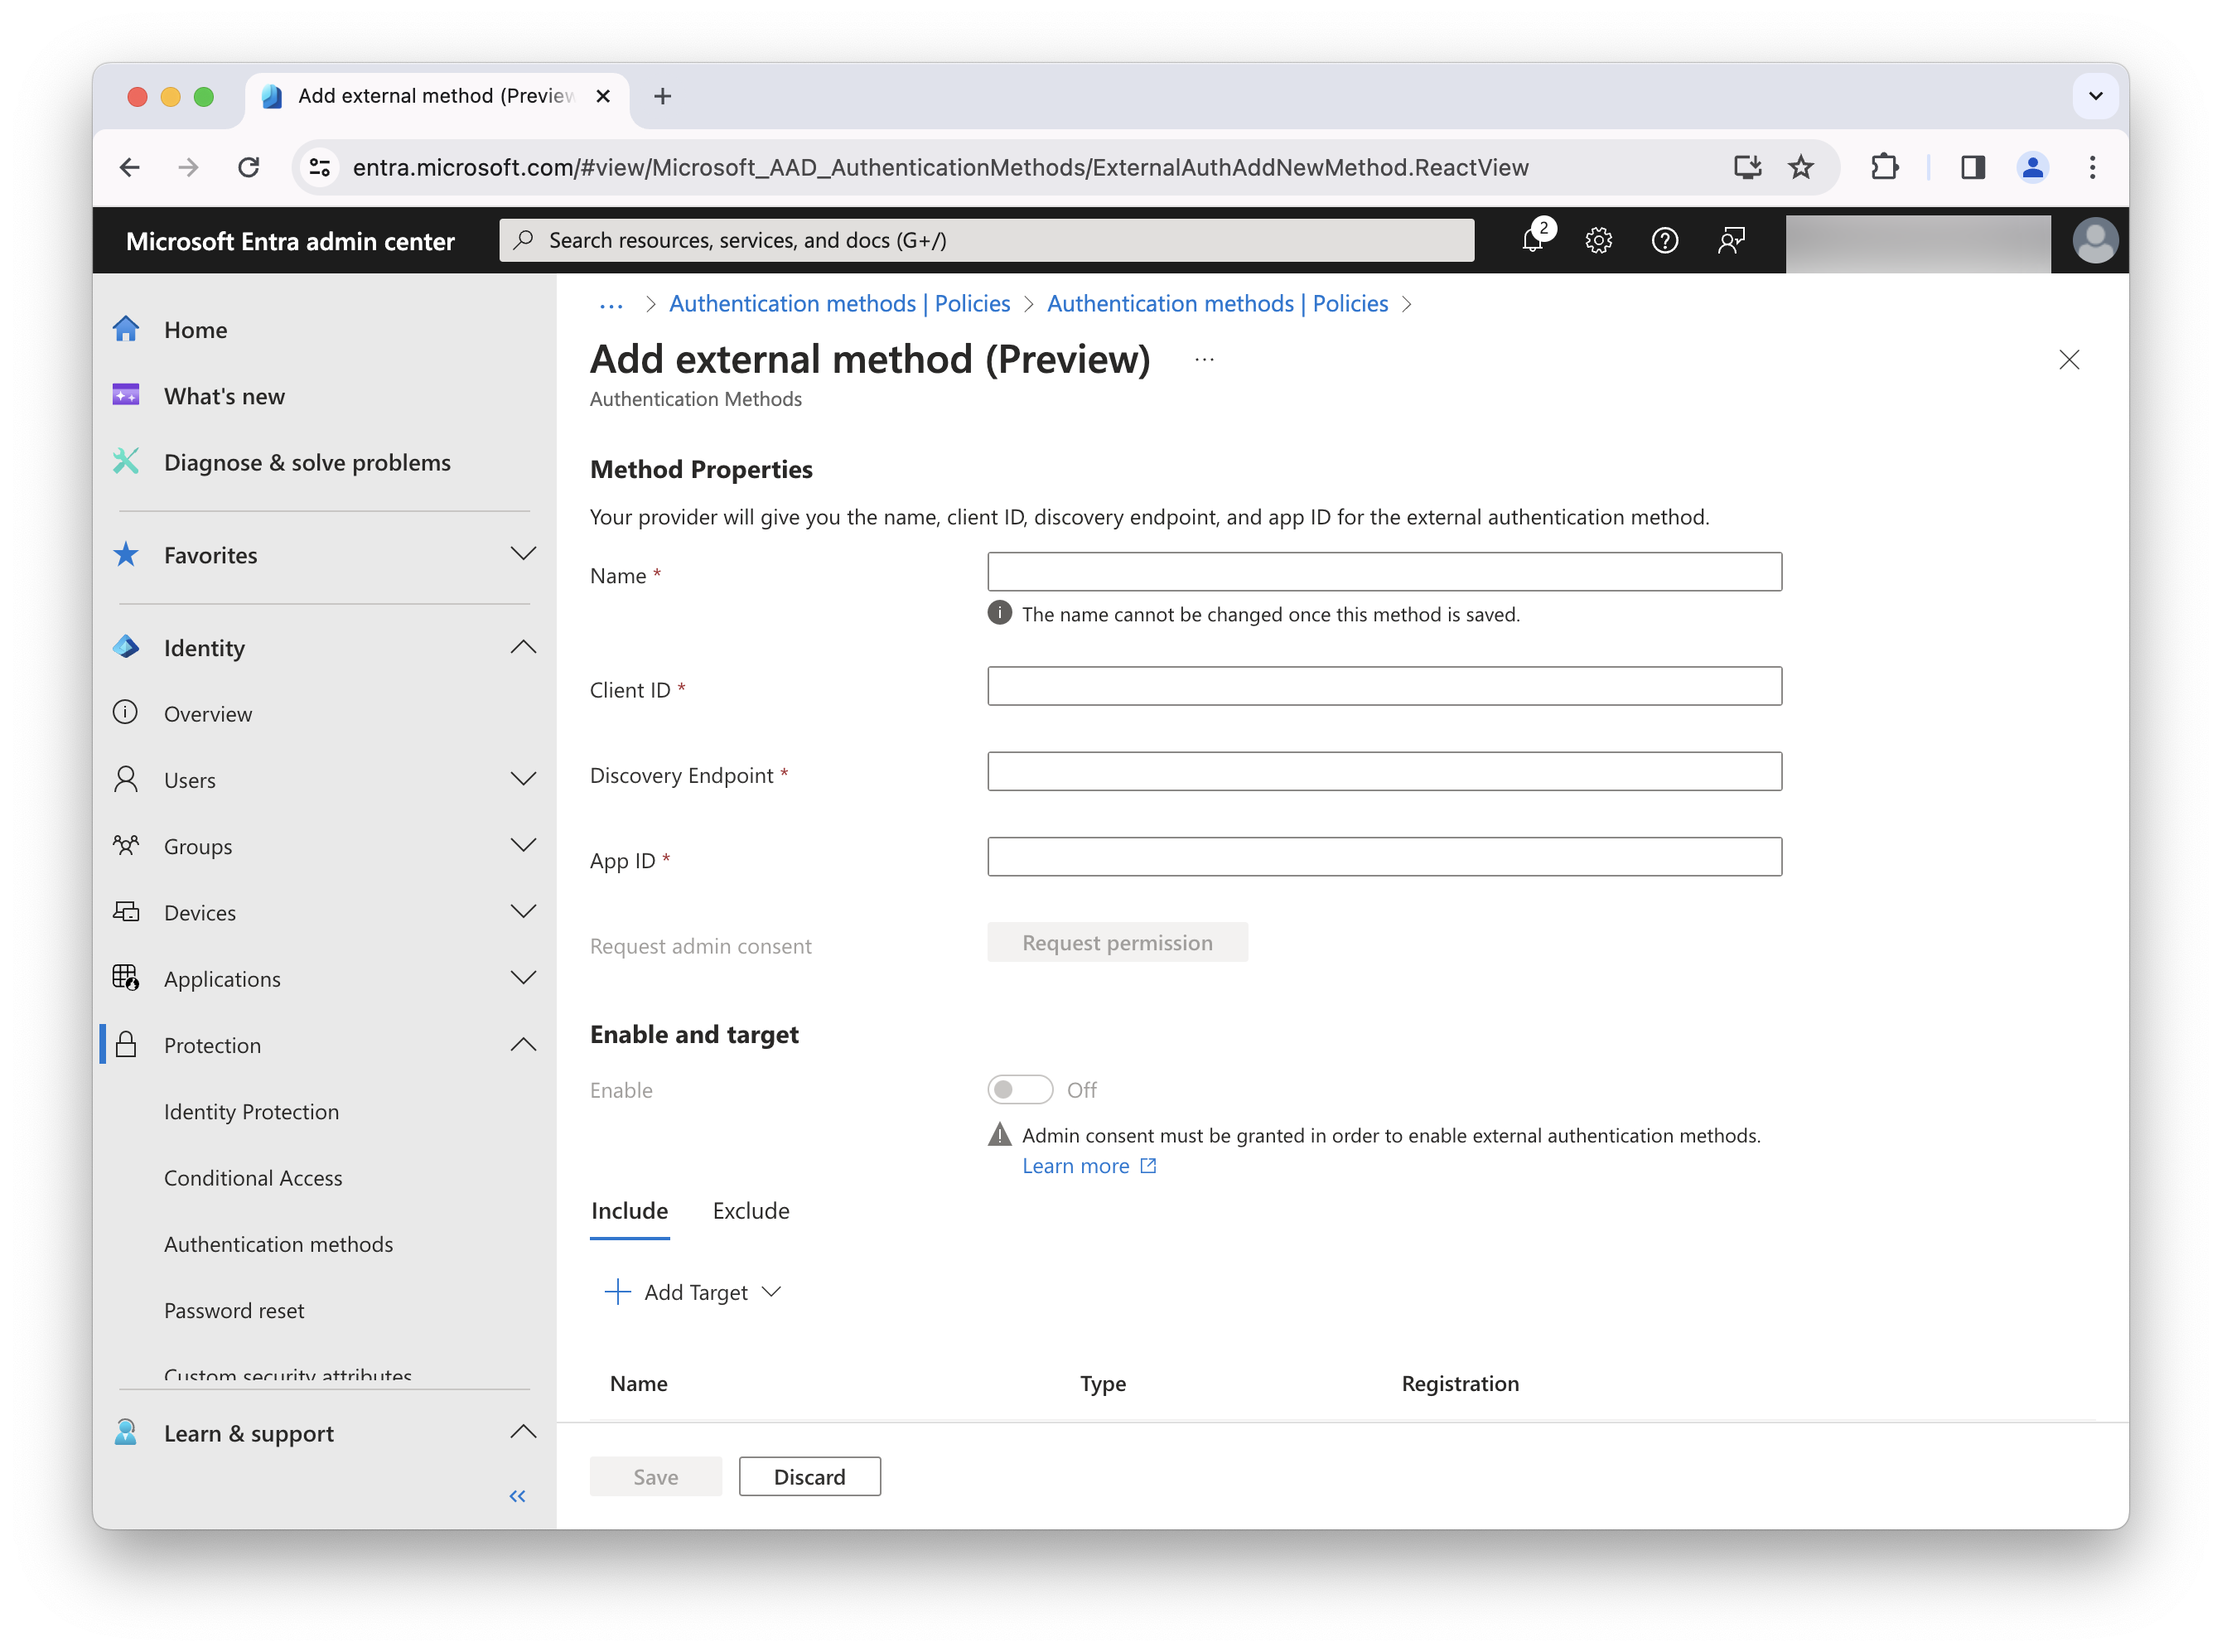
-
Set Include or Exclude of users/groups, as needed.
-
Ensure that you granted admin consent from Task 2 - Register a new app, step 20. You need the Privileged Role Administrator or Global Administrator role to grant admin consent for the provider’s application.
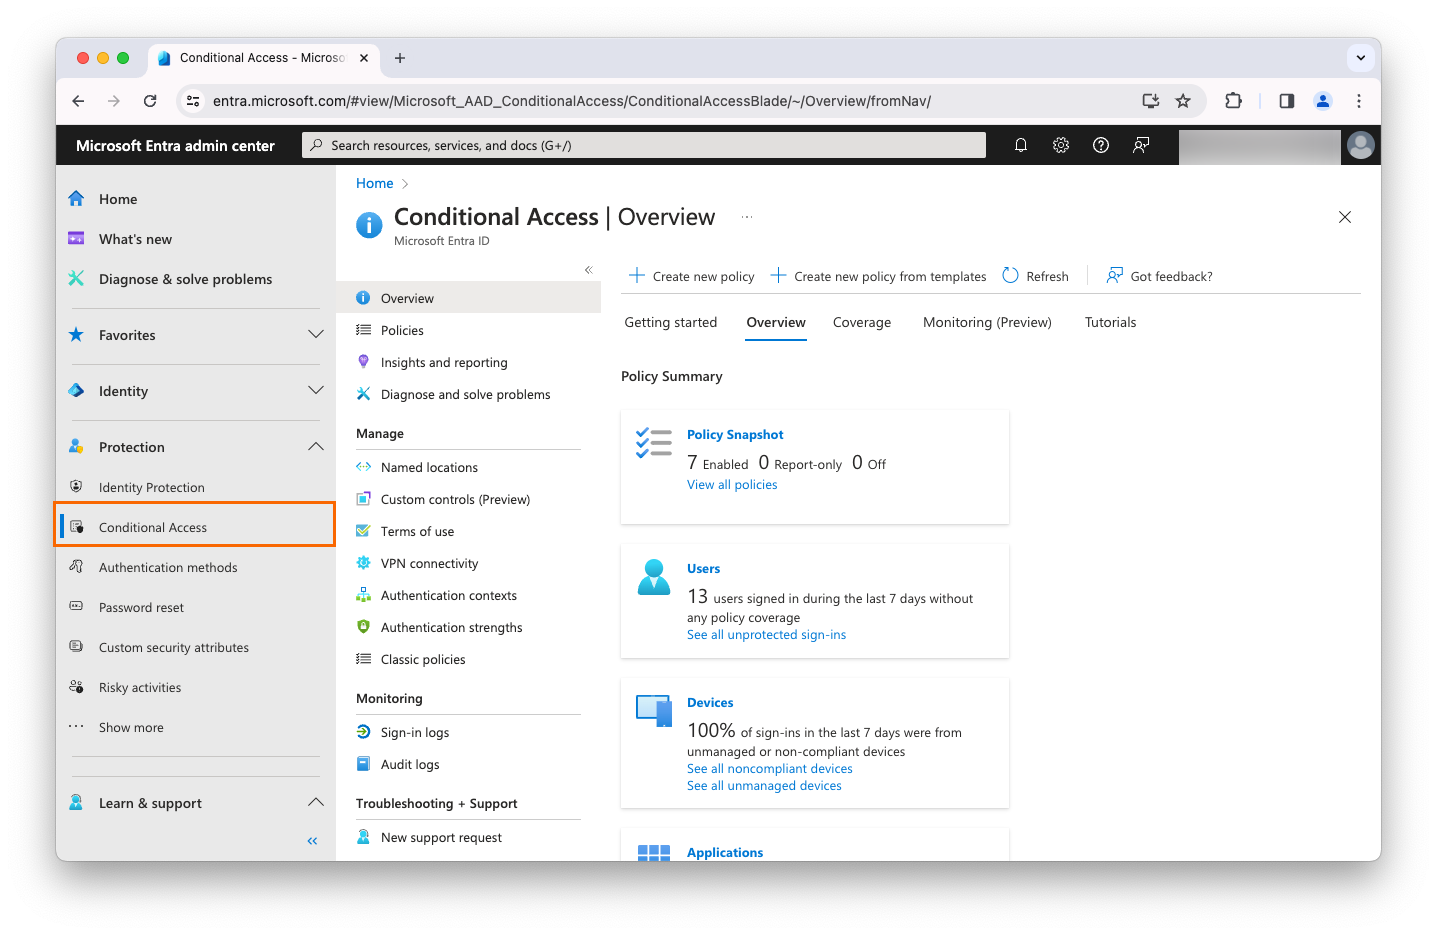
Create new conditional access (required)
-
Navigate to https://entra.microsoft.com/#home.
-
In the left-hand panel, click Protection > Conditional Access.
-
Click Create new policy, and complete the following fields:
Field Value Name
<anything you want>
Users
You can add anyone you want, but we highly recommend that you don’t include all users at first in case you encounter issues. Instead, we recommend that you use a group. For example, the optional one created above.
Target resources
Apps you want to protect (My Apps for testing purposes)
Network
Set as needed
Condition
Set as needed
Grant
Grant access selected: Check Require multifactor authentication
Grant
For multiple controls: Set according to your security model
Task 3: Complete set up of Microsoft Entra ID in Advanced Identity Cloud
-
Make a copy of the
Alpha OIDC Claims Script, and add the following lines in thegetComputedClaimsfunction, right before the return://MS Entra EAM var recievedSub = session.getProperty("eamsub"); computedClaims.put("sub", recievedSub); var amrMFAUsed = session.getProperty("eam-mfa-type"); var amrClaim = [amrMFAUsed]; computedClaims.put("amr", amrClaim); -
Update your OIDC Client. From the Platform UI, navigate to Native Consoles > Access Management > Applications > OAuth 2.0 - Clients > clients > <The Client you create in the AIC Initial Setup above>.
-
On the Core tab, complete the following fields:
Field Value Redirection URIs
https:// login.microsoftonline.com/common/federation/externalauthproviderDefault Scope(s)
openid profile
-
On the Advance tab, complete the following fields:
Field Value JavaScript Origins
https://login.microsoftonline.com
https://login.microsoftonline.com:443Response Types
id_token
Grant Types
Implicit
Token Endpoint Authentication Method
None
-
On the OAuth2 Provider Overrides tab, complete the following fields:
Field Value Enable OAuth2 Provider Overrides
Enabled
Access Token Modification Plugin Type
Scripted
Access Token Modification Script
Alpha OAuth2 Access Token Modification Script
OIDC Claims Plugin Type
SCRIPTED
OIDC Claims Script
Name of the script you created in step 1
OIDC Claims Plugin Implementation Class
org.forgerock.openam.oauth2.OpenAMScopeValidator
Use Client-Side Access & Refresh Tokens
Enabled
Allow Clients to Skip Consent
Enabled
Scope Evaluation Plugin Implementation Class
org.forgerock.openam.oauth2.OpenAMScopeValidator
Scope Validation Plugin Type
JAVA
Scope Validation Plugin Implementation Class
org.forgerock.openam.oauth2.OpenAMScopeValidator
Authorize Endpoint Data Provider Plugin Type
SCRIPTED
Authorize Endpoint Data Provider Script
OAuth2 Authorize Endpoint Data Provider Script
Authorize Endpoint Data Provider Plugin Implementation Class
org.forgerock.openam.oauth2.OpenAMScopeValidator
Overrideable Id_Token Claims
sub acr amr
-
-
In the left panel, click Services.
-
Click Add a Service.
-
In the drop-down list, select Session Property Whitelist Service, and click Create.
-
In the Allowlisted Session Property Names and Session Properties to return for session queries fields, enter
eamsubandeam-mfa-type, and click Save Changes.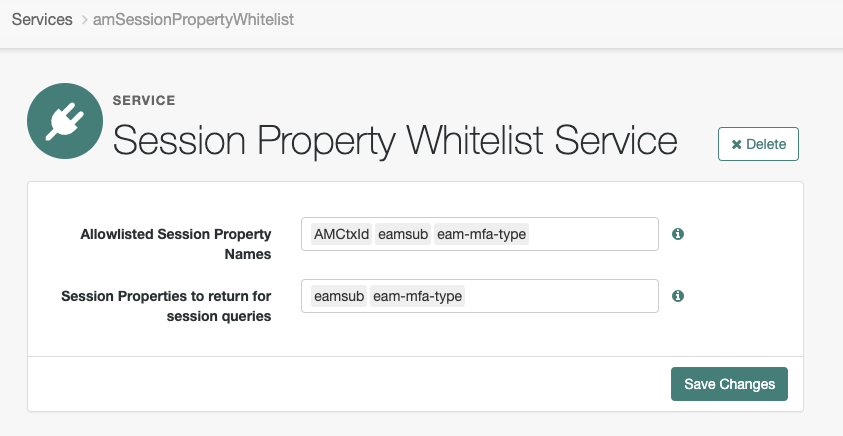
-
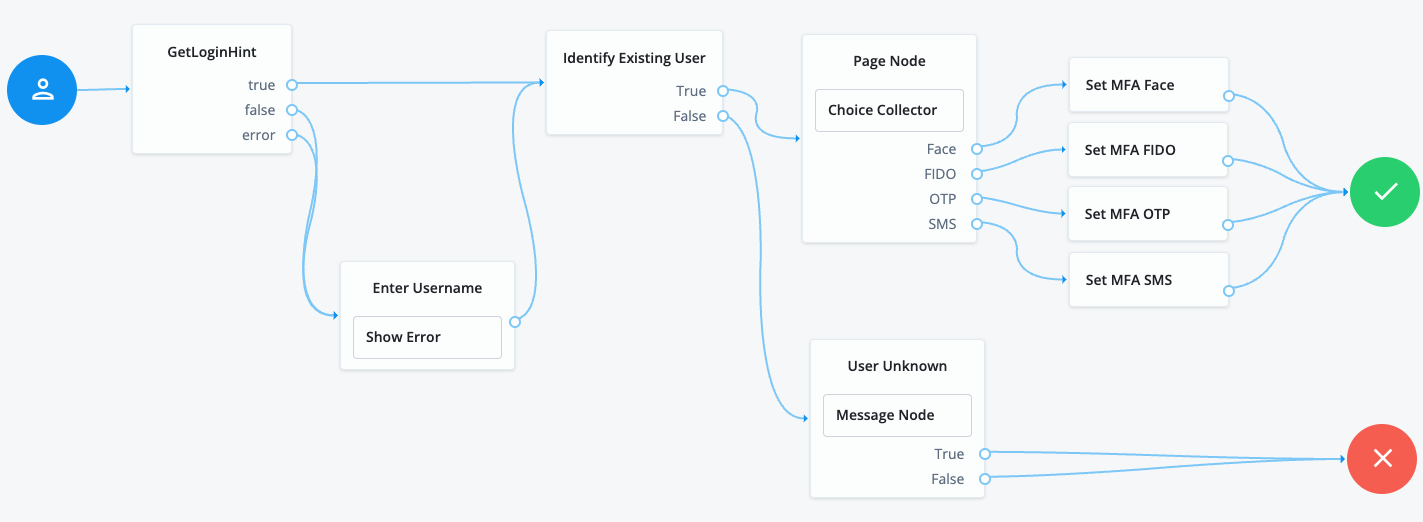
Import this journey, and update the config variable in the EAMGetLoginHint script with your EAM-specific data.
The EAMGetLoginHint script takes the redirect from Entra with a signed JWT containing the username to auth-n in the journey.
Learn more in Importing journeys.
|
This journey is only provided as an example. It isn’t configured to perform MFA. |
-
Update the
EAMGetLoginHintscript within the journey with the following details:Field Value issuer
The issuer URL in the format - https://login.microsoftonline.com/
<tid>/v2.0For
<tid>, on the left panel, navigate to Identity > Overview to find your tenant ID (TID).jwksJson
The full JWKS that can be found at https://login.microsoftonline.com/
<tid>/discovery/v2.0/keysaudience
The MS EAM App ID
tid
The MS EAM Tenant ID
nodeName
The name used for logging purposes
-
Make sure your test user has the User principal name from MS set on the
frIndexedString1field for your test user in Advanced Identity Cloud. -
Navigate to the Access Management native console (Native Consoles > Access Management) and in the Advanced OpenID Connect tab, update your OAuth2 Provider by completing the following fields:
Field Value Enable "claims_parameter_supported"
True (on)
OpenID Connect acr_values to Auth Chain Mapping
possessionorinherence: EAM SAMPLE (my journey name)
Validation
Now that you have created and configured the EAM setup, validate the configurations:
Steps
-
Navigate to https://myapps.microsoft.com.
-
Enter the test user’s username and password.
-
Select the external authentication method you set up.
-
Select your MFA Choice (Assumption - Your Journey Administrator set up the MFA challenge).
|
At this point, the user should be logged into Entra. |