Manage forms
PingOne Identity Governance lets you create request and approval forms to make it easier for end users to request access to applications. You can create new forms or access existing forms from the Advanced Identity Cloud admin UI Request Forms page.
Types of forms
The forms page lets you create two types of forms:
- Application Request form
-
Administrators create a request form linked to an application and its associated account object type. They can then connect this form to an Approval node within the workflow editor. When an end user requests access to the application, the form is displayed. End users can view their form submissions by clicking My Requests. After the form is submitted, administrators can review it by navigating to Governance > Requests.
- Custom Request form
-
To create a form for a new custom request type, an administrator first creates the request type and links it to a workflow using either the UI or the API. The form can then be associated with the Approval node in the workflow editor. End users can access the forms by navigating to {enduserUrl}/?realm=/alpha#/requestForm/${formId}, where they can approve or provide the necessary information. Once the end user submits the form, administrators can view it by going to Governance > Requests.
View forms
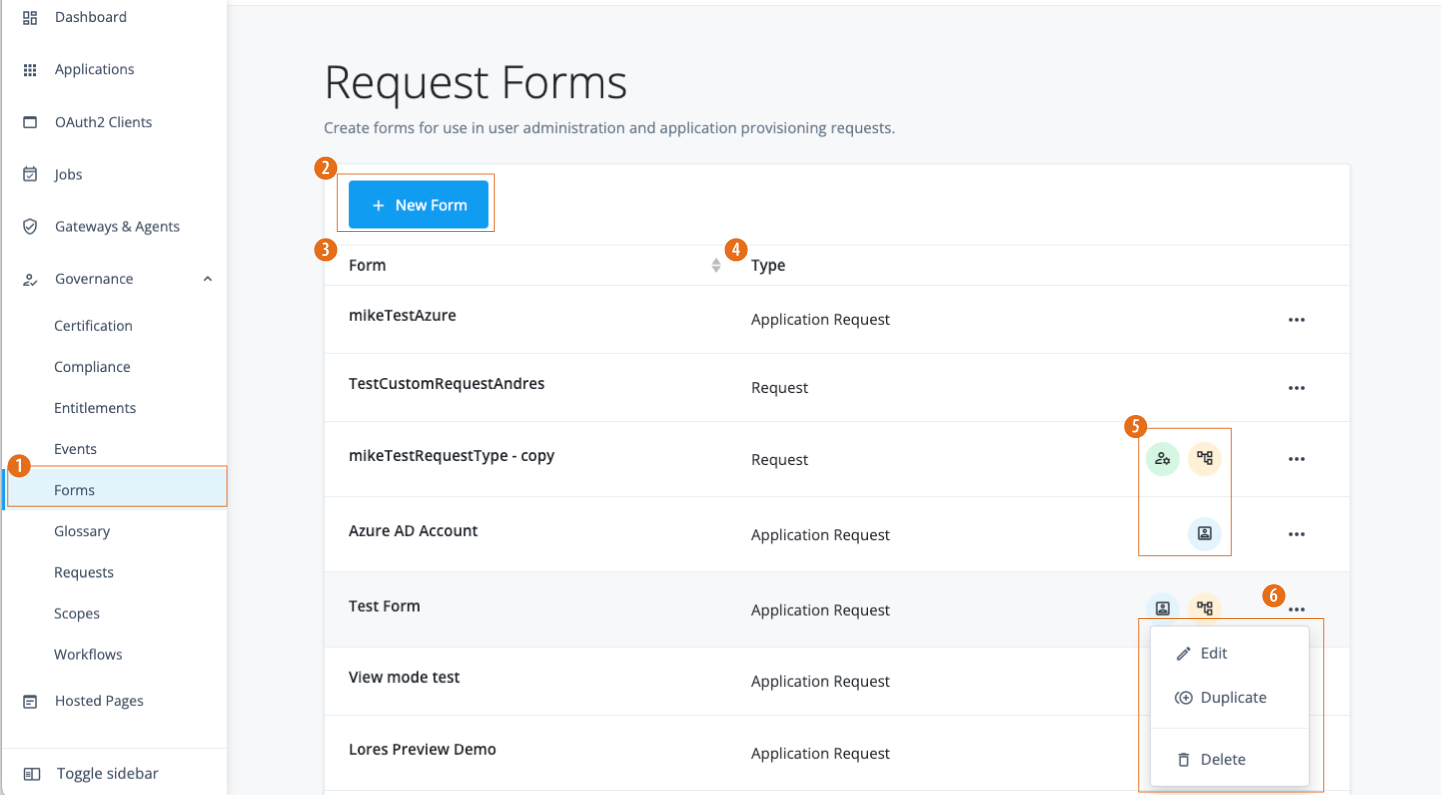
In the Advanced Identity Cloud admin UI, click Governance > Forms. The Forms page appears with a list of existing forms. If no forms are present, the page displays a New Form button.
-
1 Click the Forms link in the left navigation bar.
-
2 Click the New Form button to add a new form.
-
3 Form: Name of the form.
-
4 Type: Type of form: application request or custom request.
-
5 Information icons about associated custom request types, workflows, and applications. Hover your cursor over each icon for further information:
-
- Associated request types
-
- Associated workflows
-
- Associated applications
-
-
6 Ellipsis (). Click to edit, duplicate, or delete the form.
Forms editor canvas
When you click New Form, you will see a blank form canvas appears with nodes in the left pane, which you can drag and drop onto the canvas.
![{iga_name] Forms Editor canvas](../_images/governance-forms-editor.png)
-
1 Search forms nodes.
-
2 Available forms editor nodes:
-
Text: Add an input field to accept a single text string.
-
Textarea: Add an input field to accept multiple text strings.
-
Checkbox: Add a checkbox to accept a single boolean value.
-
Select: Add an input field to accept a single string from a list of enumerated values.
-
Multiselect: Add an input field to accept multiple strings from a list of enumerated values or freeform text input.
-
Date: Add an input field to accept a single ISO-formatted date stamp.
-
-
3 Forms editor canvas with configured form nodes.
-
4 Ellipsis (). Click to edit the form settings or delete the form.
-
5 Click Preview to see your form.
-
6 Click Save.