Request access
After you configure access requests, end users can request access to resources on the Advanced Identity Cloud end-user UI. An end user can request access to resources for themselves or for others. They can also request access to multiple resources in the same request.
Access request landing page
The access request landing page displays the access requests an end user submits for themselves and for others.
Learn more about how to sign on to the Advanced Identity Cloud end-user UI in end-user screens.

-
1 Click My Requests from the Advanced Identity Cloud end-user UI to display the access requests landing page.
-
2 Filter access requests by status:
-
Pending — The access request is pending approval by the approver(s).
-
Completed — The approver has either
ApprovedorRejectedthe request. Click a request to view the approver’s decision. -
Canceled — Requests that expire or you cancel.
-
-
3 Click Sort By and sort the request by an attribute in ascending or descending order.
-
4 Click Show Filters to filter by attributes or priority. An end user sets the priority when they create the request.
-
5 To view the details of a submitted request, click the request.
Create request
There are many options an end user can select when creating a request.
The following sections breakout the request process for readability purposes.
Start request
-
From the access request landing page, click + New Request.
-
Select one of the following:
-
Myself — Create a request for yourself.
-
Other Users — Select up to 10 users to submit a request for.
-
-
Click Next.
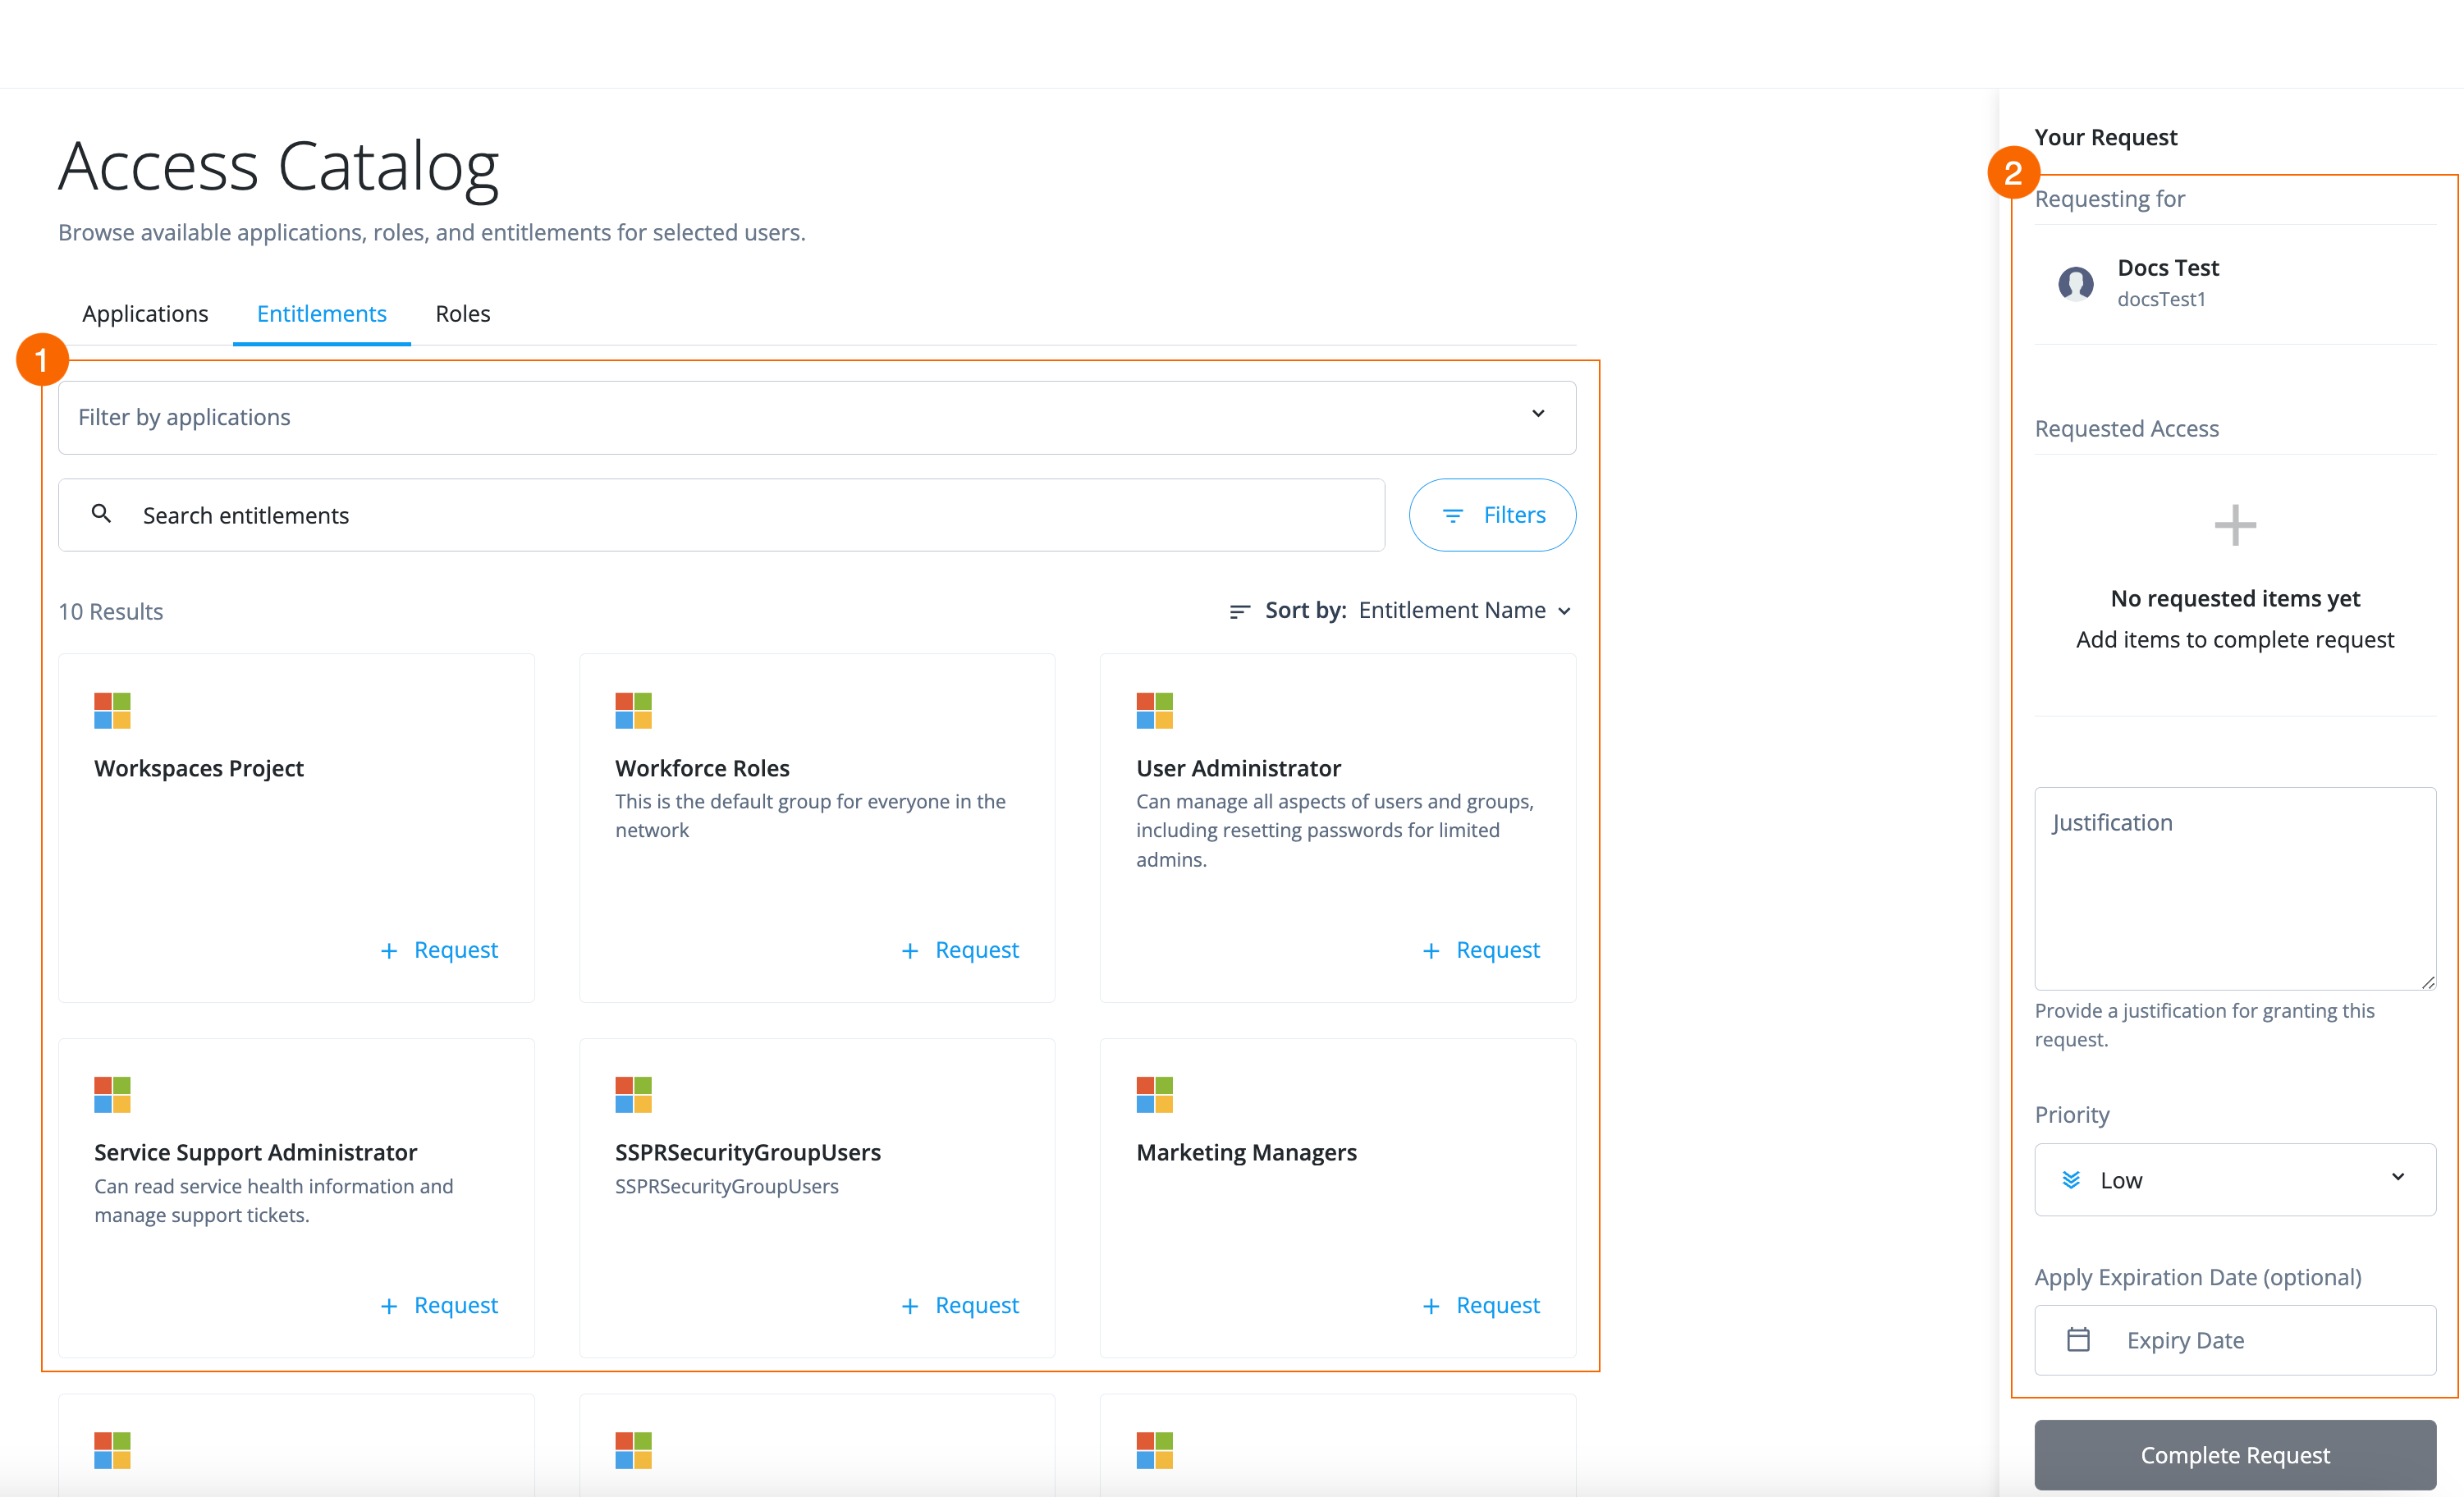
A page to select resources displays.
-
1 Search, sort, and select resources to add to the access request.
-
2 End users review current access and the resources they’ve selected, add a justification for the access, set a priority of the request, and optionally add an expiration date.
Select resources
End users can select a combination of up to 10 applications, entitlements, and/or roles in the same request.
There are three types of resources: applications, entitlements, and roles.
On each tab, an end user can:
-
Search for a resource in the search bar.
-
Filter on resources using attributes.
For more information, refer to create and configure glossary attributes.
-
Sort returned results by owner or resource name in ascending or descending order.
The following steps explore going through each resource tab to select which resources an end user wants. However, it isn’t necessary to click through each resource tab.
To select resources:
-
From the Applications tab, click + Request next to each application to search for and select the desired applications.
If an end user selects a resource they already have access to or if the request is in a pending state, an error code is generated:
The following user(s) either already have the requested item assigned or in
a pending request. Choose another item to request for the selected user(s).
The message also appears if other users are submitting on behalf of the end user.
-
Click the Entitlements tab. Entitlements are specific privileges in applications.
-
Search for and select desired entitlements. To do this, click + Request next to each entitlement.
Select applications in the Filter by application field to display entitlements that pertain to a specific application. -
Click the Roles tab.
-
Search for and select desired roles. To do this, click + Request next to each role.
Enter request details and submit request
The request details pane is where an end user reviews the resources selected in the request and enters information, such as justification.
-
In the right pane, under Requesting for, click the user(s) name to view their current access.
-
Under Requested Access, review the resources selected.
-
Fill out the following fields:
-
Justification — Enter a reason for requesting access to the selected resources.
-
Priority — Select one of the following:
The priority levels bear no meaning in Identity Governance. your company determines the value assigned to the request. -
Low
-
Medium
-
High
-
-
Apply Expiration Date — Optional. Expire (cancel) the access request if it isn’t approved or rejected by the approver(s) by the specified date.
For example, an end user might need access to a resource by the end of the week, and if they don’t get the access by that time, then they don’t need the permission anymore.
-
-
Click Complete Request. The end user is redirected to the access request landing page.
After the end user submits a request, a Request IDdisplays on each resource the end user requests access to. TheRequest IDtracks the request from the end user requesting access to the approver approving or rejecting access.