Customize emails
Description
Estimated time to complete: 20 minutes
In this use case, you:
-
Duplicate the default registration email
-
Customize the duplicated email to match your organization’s branding
-
Add the new email template to the
User Registrationjourney (you must complete the User registration use case) -
Register as a new end user to test the newly branded email
Prerequisites
Before you start work on this use case, ensure you have these prerequisites:
-
You have completed the User registration use case
-
Access to your Advanced Identity Cloud development environment as an administrator
-
A basic understanding of journeys and nodes
-
A basic understanding of CSS
Tasks
Task 1: Create a new user registration email template
| In your staging and production tenant environments, you must update the email provider configuration with values to connect to something other than the built-in SMTP server. |
Duplicate the default user registration email
-
In the Advanced Identity Cloud admin console, go to Email > Templates.
-
On the Email Templates page, click the ellipsis icon () for the
Registrationtemplate and select Duplicate. -
In the Duplicate Template window, enter the following details:
Field Value Template Name
Branded RegistrationFrom Address
Enter an email address for the group or individual sending the email.
From Name
Enter a name for the group or individual sending the email.
Description
Branded version of the default Registration email. -
Click Save.
The email templates editor displays.
Customize the new email template
| You can add images to your email template if they are hosted online. Learn more in Add an image to an email template. |
-
In the email templates editor, make the following changes to the
Branded Registrationemail template:Change Detail Update the heading text
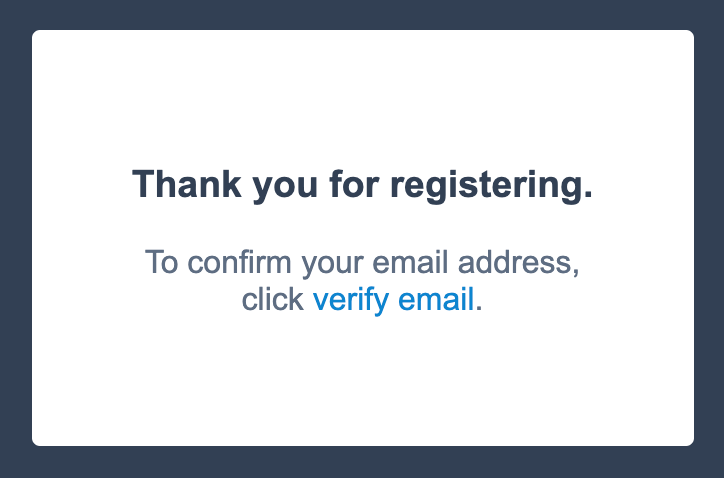
Replace the heading text in line 1 with
Thank you for registering.Leave the
#characters. This indicates a heading, in this case, an H3 heading.Update the email verification link text
Update the email verification link text in line 3 to:
To confirm your email address, click [verify email](<{{object.resumeURI}}>). -
Click Save.
-
Click Styles to change the look and feel of the email template. Make the following changes:
Change Detail Update the font
Add
font-family:arial;under .content to change the font used in the email.Change the link color
Change the color value under a to
#0C85CF.Format the heading text
Add the following CSS to format the heading text:
h3{
   color:#324054
}
css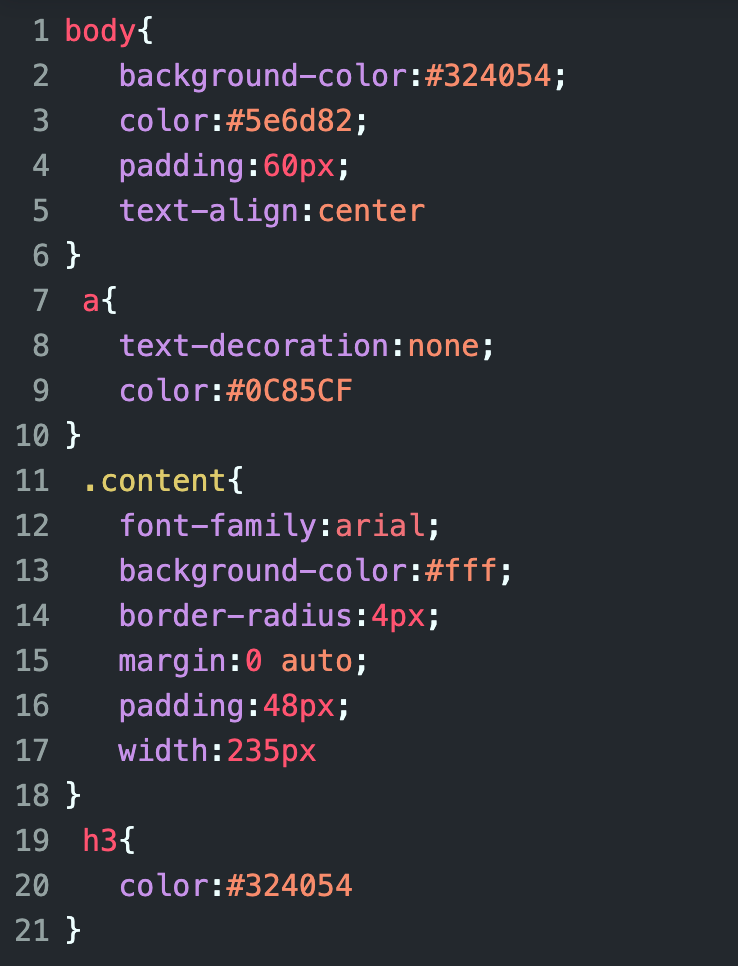
-
Click Save.
The email preview shows the updated email template:
-
In the URL, copy the email template name shown after /edit (
brandedRegistration). You will need this in the next task.
| You can send yourself a test email to check everything looks correct before proceeding. Click Send Test Email, enter your email address, and click Send. |
Task 2: Update the user registration journey
In this task, you update the User Registration journey to use your new email template.
-
In the Advanced Identity Cloud admin console, go to Journeys.
-
Click the ellipsis icon () for the
Registrationjourney and select Edit. -
Click the Email Suspend Node and enter
brandedRegistrationin the Email Template Name field.The name you enter must exactly match the name shown in the URL when you customized the email template.
-
Click Save.
Validation
Now that you have created a new email template for user registration and added it to the User Registration journey, you are ready to validate the email.
The steps in this validation register a new end user in Advanced Identity Cloud so you can check they receive the branded email during the registration process.
| When you register the new end user, ensure you use an email address that you can access. |
Steps
-
In the Advanced Identity Cloud admin console, go to Journeys and click on the
User Registrationjourney you just updated. -
In the Preview URL field, click and paste the URL into an Incognito window.
The Sign Up page for the tenant displays.
-
In the Sign Up page, enter the following details:
Field Value Username
cbarnesFirst Name
CharlieLast Name
BarnesEmail Address
Enter an email address for this new user. You must have access to this email account.
-
Click Next. A message displays informing you an email has been sent.
-
Check the inbox for the email address you entered and view the registration email. Confirm it has been branded as expected.
-
Click the link in the email to confirm your email address and continue registration.
-
Enter
Ch4ng3it!in the Password field. -
Click Next.
You are logged into the Advanced Identity Cloud end-user UI as Charlie Barnes.
Explore further
Reference material
| Reference | Description |
|---|---|
Learn about creating, editing and managing email templates. |
|
Steps for enhancing email templates in Advanced Identity Cloud with images and HTML formatting |
|
Steps for including Environment secrets and variables (ESVs) in email templates. |
|
Steps to send localized emails from a journey. |
|
Conceptual information on journeys and their purpose in Advanced Identity Cloud. |