Gateway Communication setup
You must set up the following before using the Gateway Communication node:
Two key pairs
You must set up two sets of public and private key pairs; one set each for
Advanced Identity Cloud and PingGateway.
You can use mkjwk simple JSON Web Key generator to
generate sample keys in the following format:
-
Type: RSA
-
Key size: 2048
-
Algorithm: RSA1_5: RSAES-PKCS1-v1_5
-
Key ID: Timestamp
Store one set of public and private keys in Advanced Identity Cloud along with the public key from the second set.
Similarly, store the second set of public and private keys in PingGateway, along with the public key from the first set.
PingGateway JWT validation
PingGateway must be configured to validate the JWT sent by Advanced Identity Cloud, and create a signed and encrypted JWT to be sent back to Advanced Identity Cloud.
The example shown here assumes that the public and private keys between Advanced Identity Cloud and PingGateway are in PEM format.
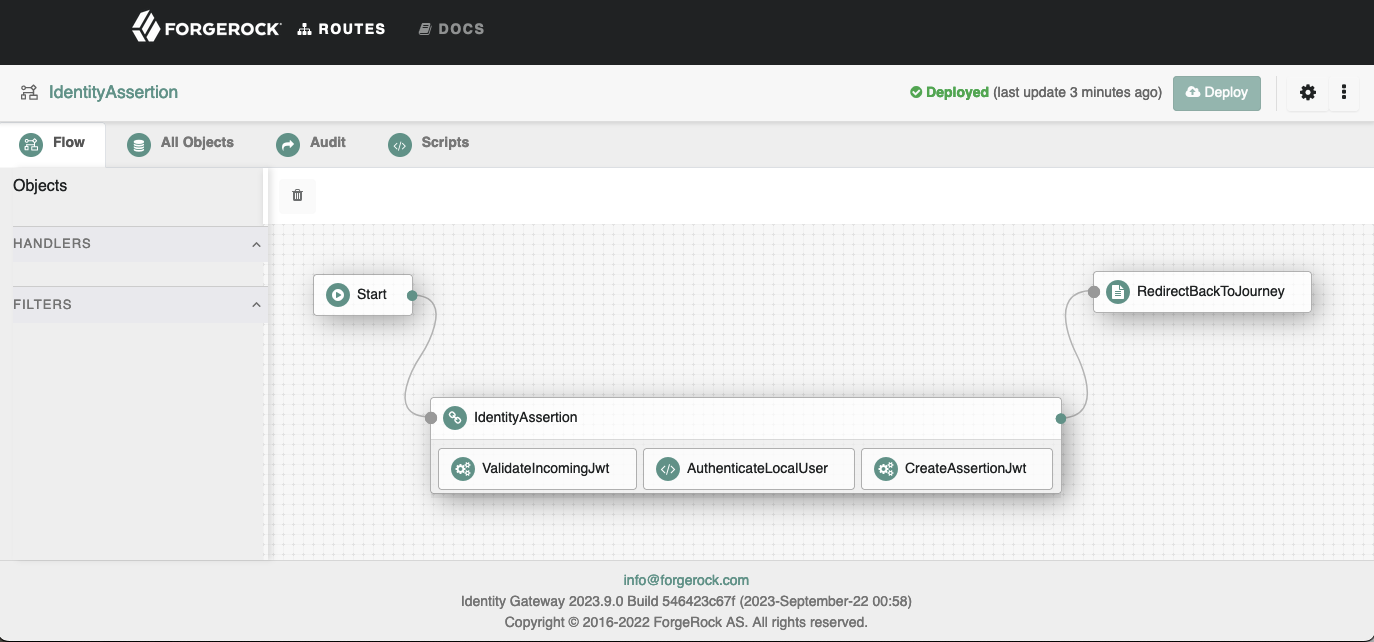
You can download the sample IdentityAssertion route from here.
The sample route assumes that the keys in PEM format have been added to the config.json heap. The keys are stored in a top-level (at the same level as config/logs/scripts) directory called secrets etc). The key files are named using the convention of secretId.pem.
Gateway Communication service
You must set up the Gateway Communication service in your Advanced Identity Cloud tenant before using the Gateway Communication node in an authentication journey.
To configure the Gateway Communication service:
-
Log in to your Advanced Identity Cloud admin UI, and navigate to Native Consoles > Access Management.
-
In the Realm Overview page, click Service Management.
-
Click + Add a Service.
-
Select Gateway Communication Service from the Choose a service type menu, and click Create.
-
In the Gateway Communication Service page, ensure that Enable is selected.
-
In the
Secondary Configurationstab, click Add a Secondary Configuration, and provide the following details:-
Name: A unique name for the PingGateway server. *Identity Gateway Public Key: Enter the public key portion of the PingGateway in JWK format. It is recommended to use an ESV for these keys.
Here is an example of a public key:
{ "kty": "RSA", "e": "AQAB", "use": "enc", "kid": "enc-1697673430", "alg": "RSA1_5", "n": "lGR1KKw...QOHSRTfQ" } -
Identity Cloud Public and Private Key: Enter the public and private keypair for Advanced Identity Cloud in JWK format. We recommend that you use an ESV for these keys.
Here is an example of a public and private keypair:
{ "p": "45DaO0K...cruR85AWc", "kty": "RSA", "q": "pu8V15...H75-wXs", "d": "LSYzj2...bT628Q", "e": "AQAB", "use": "enc", "kid": "enc-1697673430", "qi": "YO—Ox3d...MaHSU2M", "dp": "n-Icwbf1...g0khhw8", "alg": "RSA1_5", "dq": "T_VO8f0W...8X7WGonTsc", "n": "lGR1K...1QOHSRTfQ" } -
JWT Parameter Name: Enter the name of the parameter that contains the JWT. This name is used for sending the JWT to PingGateway and is the expected name of the JWT returned by PingGateway.
-
-
In the COMMCONFIGS CONFIGURATION, enter the additional details:
-
Identity Gateway URL: Full URL of your PingGateway. This should not include a specific route, because the route will be configured in the node.
-
Send to Gateway Security: Security type used for transporting the JWT to PingGateway. The options are:
-
Signed: The JWT sent to PingGateway is signed by the Advanced Identity Cloud private key.
-
SignAndEncrypt - The JWT sent to PingGateway is signed by the Advanced Identity Cloud public and private keys and then encrypted by the PingGateway public key.
-
Milliseconds JWT TTL - Time in milliseconds representing how long the JWT sent to PingGateway has for Time To Live.
-
-
-
Click Save Changes.