Learn about some configuration tips
This section presents tips on any aspect of Autonomous Access and will be updated on an ongoing basis.
GDPR Requests
PingOne Advanced Identity Cloud’s Autonomous Access capability stores user records with a 6-month archival rule. End users under specific privacy laws, such as General Data Protection Regulation (GDPR), can enter a self-service request to access or remove their data processed by Autonomous Access by filling out an online form. The general instructions are presented in the following section.
Handling GDPR requests
-
End users can request to access or remove their data by filling out a questionnaire on the ForgeRock Privacy Hub.
-
End user fills out and completes the form and sends it to the ForgeRock Privacy Team via privacy@forgerock.com.
-
ForgeRock Privacy Team enters a ticket with the completed form to the ForgeRock Operations team. The ForgeRock Operations team also copies the Autonomous Access Product team to action the request.
-
Autonomous Access Product team provides the Operations team with instructions to carry out the request.
-
The ForgeRock Operations team does the following:
-
Right to access: Downloads the data into a JSON or CSV file and deposits it into the end user’s preferred BackStage account.
-
Right to remove: Removes the data and advises the end user of the deletions via their BackStage account.
-
Allow and block lists
Autonomous Access supports allow and block IP lists to accept certain IP addresses and block known risky IPs.
Allow and block lists have the following general rules, Autonomous Access:
-
Supports IPv4 and IPv6 formats.
-
Takes single IP addresses, like 10.0.48.0, or IP subnets, like 10.0.48.0/24.
-
Cannot use regular expressions or wildcards with the IP addresses.
-
Assigns a risk score of 0 to any IPs on the allow list and excludes them from heuristics and machine learning.
-
Subjects IPs on the block list to heuristics and machine learning and overrides their computed risk score with a score of 100.
| Autonomous Access is not a firewall. You must consume the output risk score in a succeeding node in the journey for actionable outcomes. Autonomous Access cannot allow or block any IP address by itself. |
Configure allow and block IP lists
-
Set up a journey or edit an existing one.
-
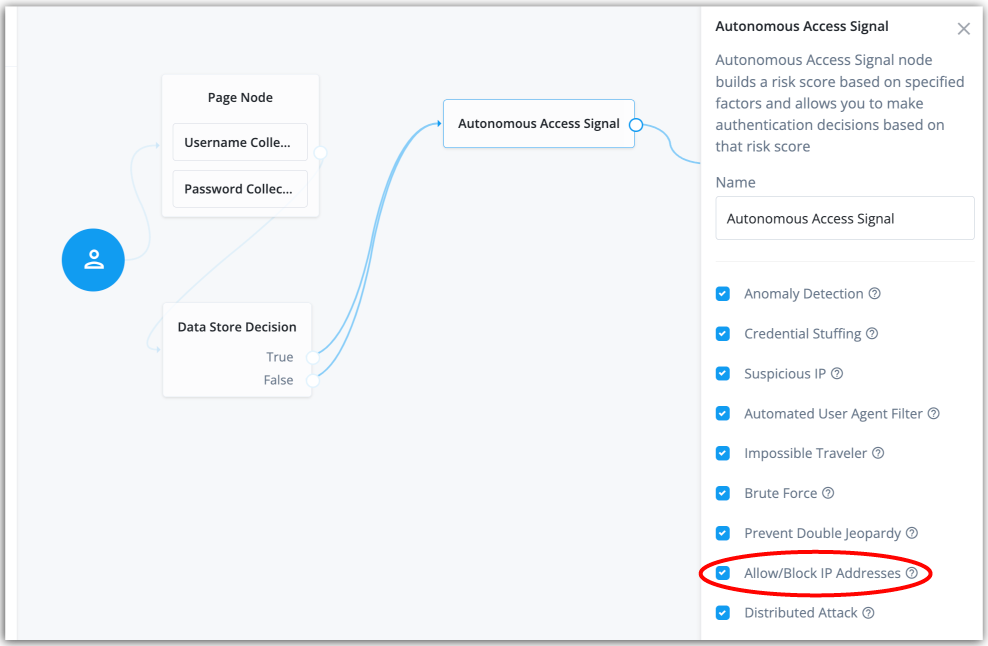
On your journey, click the Autonomous Access signal node, and then click Allow/Block IP Addresses. This checkbox enables the
Allow/Block IP Addressesheuristic in the machine learning process.Click to display the signal node
-
Click Risk Administration > Risk Config.
-
On the Risk Config page, enter the IP addresses that you want to include in the
BLOCK_LISTandALLOW_LIST. For example:block_and_allow_list: BLOCK_LIST: [120.18.1.10, 120.22.8.2] ALLOW_LIST: [10.0.48.0/24]
-
Click Save.
-
On the Preview Risk Evaluation popup window, do the following:
-
Click Bucket Search to select your data source location or type the name of the data source location.
-
Optional. Enter an object prefix to filter your search results.
-
Next to your desired object, click the trailing dots, and then click Preview Object to display your data source change(s).
-
Click Preview Risk Evaluation to review a simulated risk evaluation for the first event.
-
If you are satisfied with your change(s), click Save Config.
If you get a preview error, ignore the message and click Save Config.
-