Learn about the Autonomous Access nodes
This section provides a description of each Autonomous Access node you can use within your journeys.
The Autonomous Access nodes do not require any custom coding or connectors to implement within a journey.
| When you purchase the Autonomous Access add-on capability, the Autonomous Access nodes appear automatically in the Advanced Identity Cloud Journeys section under Autonomous Access. |
Signal node
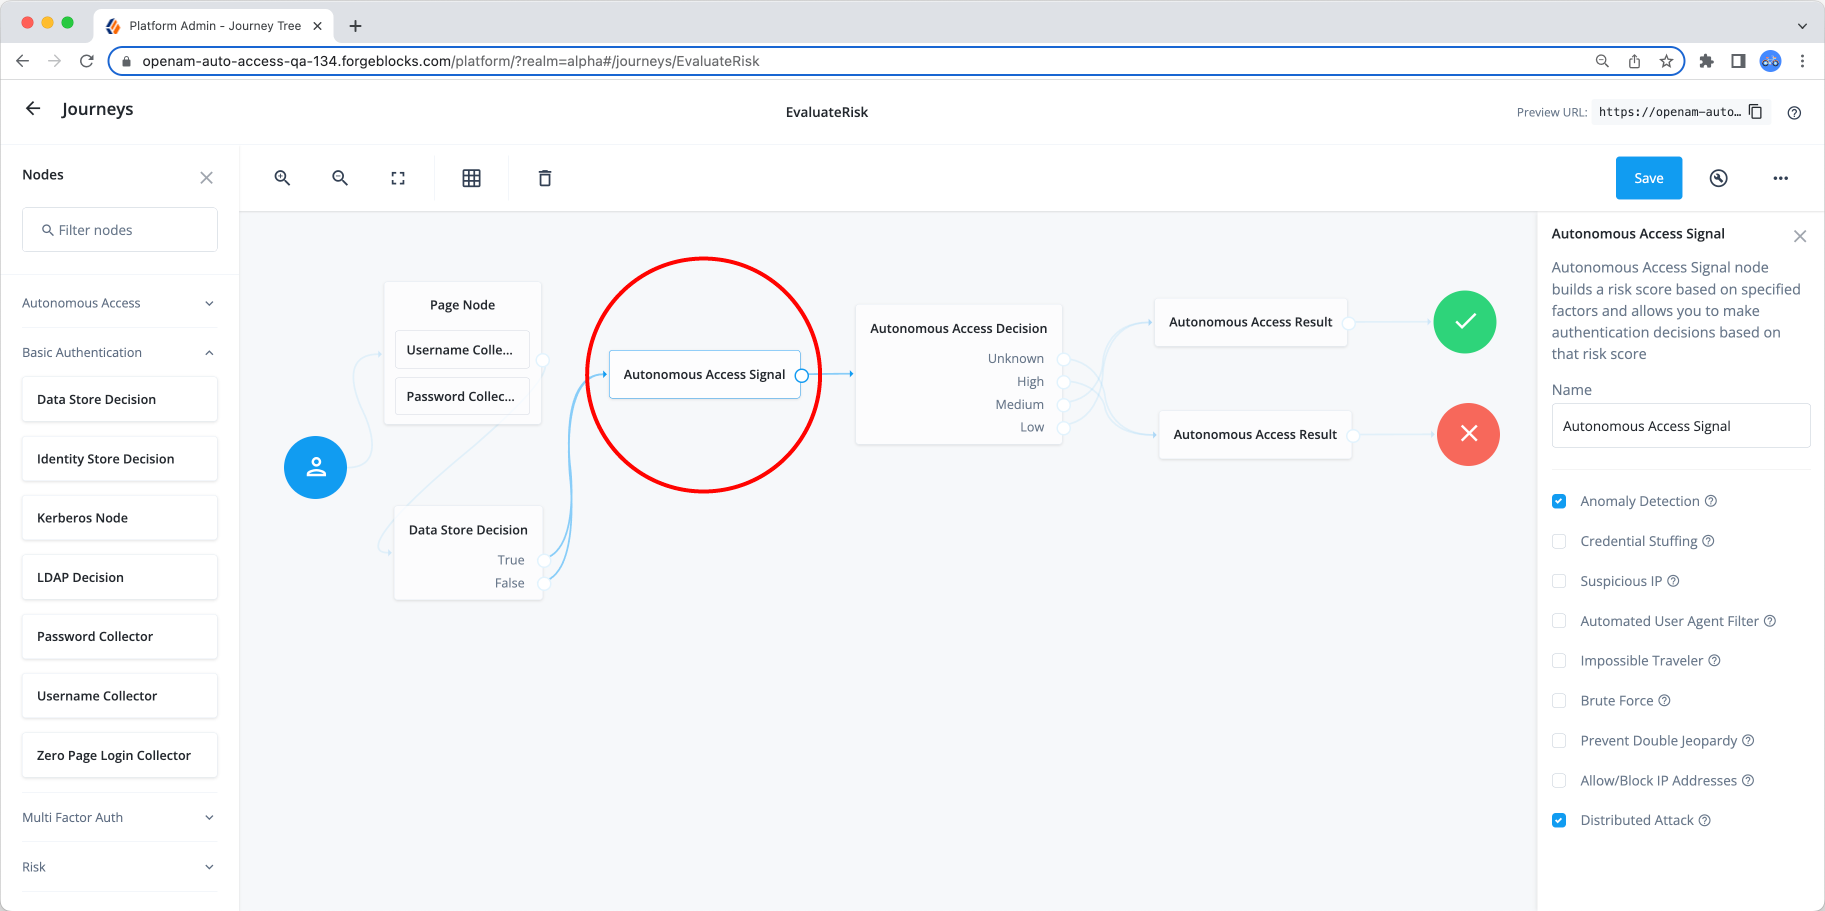
The Autonomous Access Signal node is a construction node where you specify the heuristics and/or anomaly detection to be included in risk score generation during the AI/ML pipelines. By default, all heuristics and anomaly detection are enabled, but you can specify multiple combinations depending on the use case.
The input typically comes from the Data Store Decision node, but can come from other similar nodes where Autonomous Access can obtain a user ID (for example, Platform Username node).
| The output must connect to the Autonomous Access Decision node for actionable paths. |
The signal node creates a transaction ID and sends an API call to the Autonomous Access server for information. In response, the Autonomous Access returns the risk scores and additional information associated with the transaction ID. The output connects to the Autonomous Access Decision node or a Scripted Decision node for some actionable paths.
| Heuristic | Usage |
|---|---|
Anomaly Detection |
Detects behavioral anomalies based on user city, country, day of week, time of day, operating system (OS), OS version, device, device type, and browser type. |
Credential Stuffing |
Detects if an IP address is trying to access a number of users over a period of time. |
Suspicious IP |
Detects if an IP is making many authentication attempts. |
Automated User Agent Filter |
Detects automated bots in the user-agent string. |
Impossible Traveler |
Detects if a user is moving between two locations at an impossible speed. |
Brute Force |
Detects direct users failing multiple authentication attempts. |
Prevent Double Jeopardy |
Ensures that if a user has been flagged as anomalous due to some explainable risk by the machine learning system
and subsequently passed a multifactor authentication (MFA),
the user will not be asked again for multifactor authentication for the same explainable risk within the preconfigured time window in the Risk Configuration UI. For example, if a user in New York flies to Toronto and authenticates to the system,
the system flags the user’s authentication event as anomalous ("Unusual city").
The system then issues a multifactor authentication challenge.
If the user passes the challenge,
the user will not be flagged again for the same explainable risk for any subsequent logins in Toronto as long
as it is within the preconfigured time window of 60 minutes (default). You must also check the MFA Enabled feature on the Result node whenever multifactor authentication is configured. Refer to Result node. |
Allow/Block IP Addresses |
Validates if an incoming request event and its IP address is in the Allow/Block IP address lists as defined in the Rick Configuration UI.
|
Distributed Attack |
Flags an event as a distributed attack when there are more than the preconfigured threshold of unique IP addresses attempting to log on using the same user ID in the time window specified in the configuration. |
Decision node
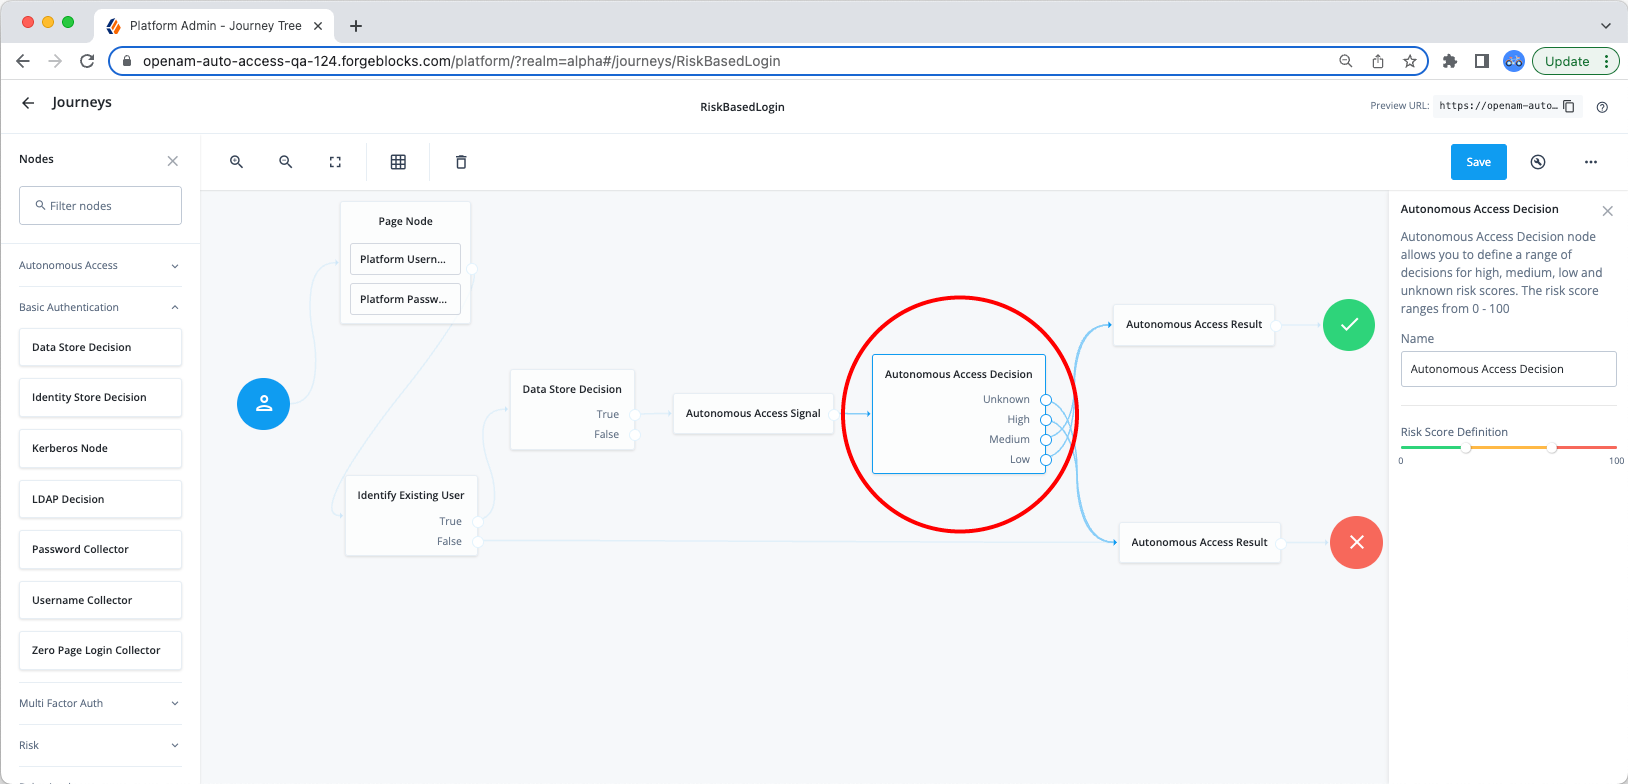
The Decision node takes the data sent by the Signal node and directs the flow to actionable paths depending on where the risk score falls within the range of high, medium, low, and unknown scores. The full range of scores is from 0 to 100, where 0 indicates no risk and 100 indicates the highest risk. You can adjust the dual range threshold sliders to set the ranges.
The node takes its input from the signal node and outputs to a corresponding path depending on the journey’s configuration.
| If you want more granularity for the risk score ranges, use the Scripted Decision node in place of the out-of-the-box decision node. Contact Ping Identity and refer to Scripted decision node API. |
The following list describes the decision node configuration for each heuristic:
| Property | Usage |
|---|---|
Unknown |
Unknown risk scores occur when a risk score could not be calculated during the AI/ML job runs for the following reasons:
|
High |
Evaluation continues along its outcome path if the risk node is within the high range of scores.
High risk scores indicate that the login attempt is highly likely to be a threat. The high range is determined by how you set it on the medium risk threshold slider. |
Medium |
Evaluation continues along its outcome path if the risk node is within the medium range of scores.
Medium risk scores indicate that the login attempt is unlikely to be a high-risk threat event,
but there is enough risk
to warrant flagging the user for additional information to complete the authentication process.
Depending on the application, you can use this range in your multifactor authentication journeys,
or send these scores together with high risk scores. The medium range is determined by how you set it on the medium risk threshold slider. |
Low |
Evaluation continues along its outcome path if the risk node is within the low range of scores.
Low risk scores indicate that the login attempt is unlikely to pose as a threat and does not require additional
information to complete the authentication process. The range is determined by how you set it on the low risk threshold slider. |
Low risk threshold slider |
Sets the maximum (inclusive) value for low risk score threshold. For example, if the low risk threshold is 30; then, the low risk range is from 0 to 30. The low risk range is displayed in green on the slider. |
Medium risk threshold slider |
Sets the maximum (inclusive) value for the medium range of scores. For example, if the medium risk threshold is 70, values between 31 (that is, the low risk threshold) to 70 specify the range for medium risk scores, displayed on the slider in yellow. Values between 71 and 100 are defined as the high risk score range, displayed on the slider as a red line. |
Result node
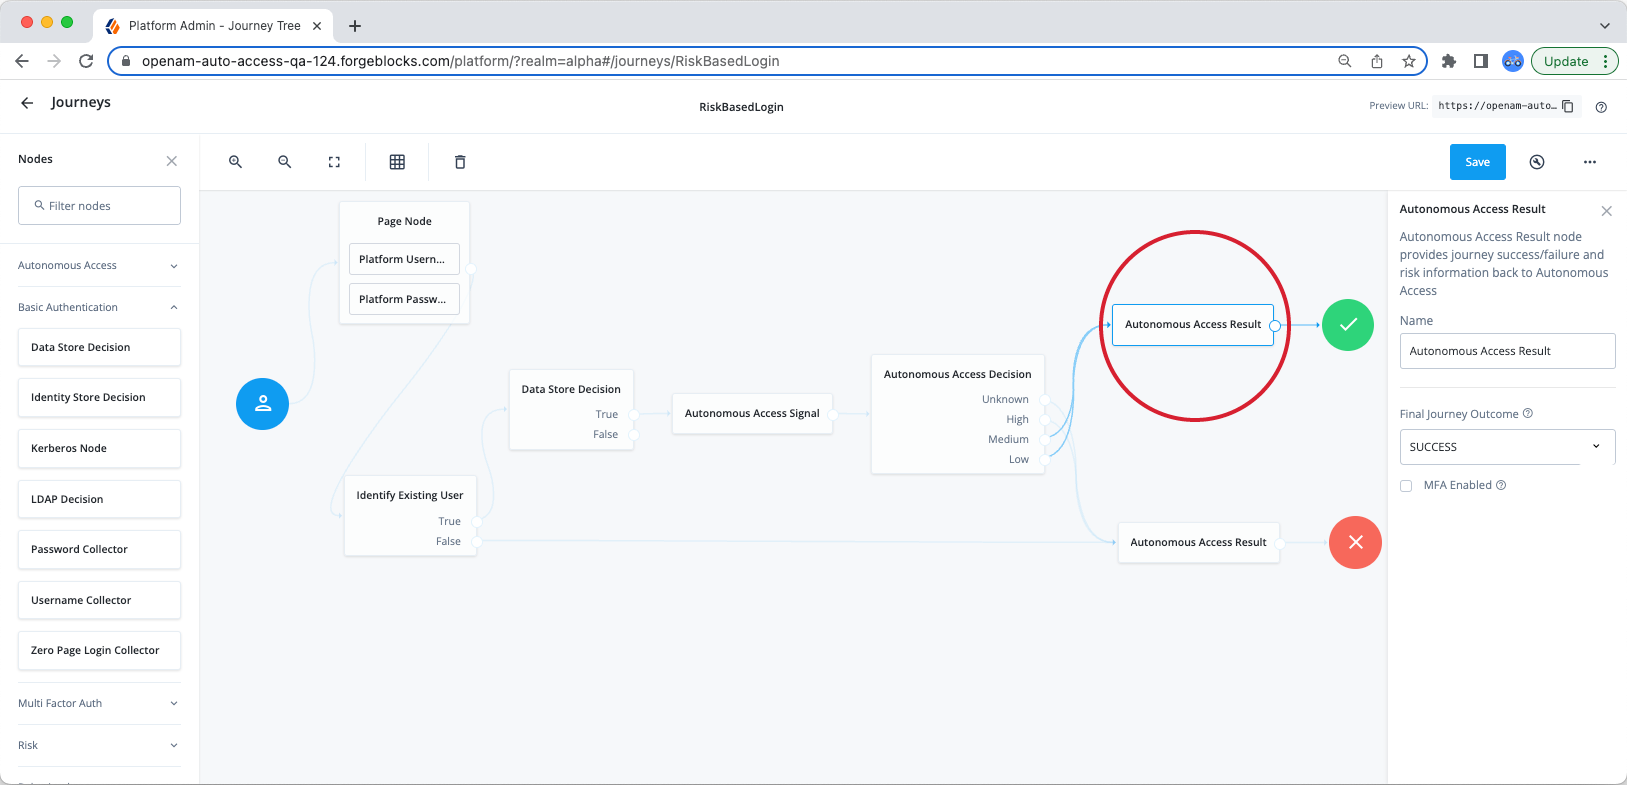
The Result node communicates the final state (e.g., SUCCESS, FAILURE, MFA ENABLED) and risk prediction results from the AI/ML analytics to the AAI server. The AAI server needs to know if the event and subsequent transaction has completed successfully or not to ensure up-to-date models.
| The Result node must be present before the Success node and Failure node for data collection. |
| You will need two or three result nodes for each journey, depending on application. One or two before the Success node and one before the Failure node. |
| Property | Usage |
|---|---|
Success |
Indicates a successful journey outcome. |
Failure |
Indicates a failed journey outcome. |
MFA Enabled |
Check this box if step up or multifactor authentication (MFA) is enabled for the journey. This node is required for the AAI server to know that MFA completed successfully or not. |