Salesforce as SP (SAML)
| While this PingOne Advanced Identity Cloud use case was validated for accuracy, it can always be improved. To provide feedback, click or in the top right of this page (you must be logged into Backstage). |
Description
Estimated time to complete: 30 minutes.
In this use case, you configure SSO using SAML federated identities with Advanced Identity Cloud as the Identity provider (IDP) and Salesforce as the Service provider (SP).
Specifically, you configure Advanced Identity Cloud as the IDP for Salesforce using SAML. This allows a user from the Advanced Identity Cloud end-user UI, to click the Salesforce application and be logged in to Salesforce with IDP-iniatied SSO.
Prerequisites
Before you start work on this use case, ensure you have these prerequisites:
-
A basic understanding of:
-
The Advanced Identity Cloud admin UI
-
SSO (Federation)
-
SAML
-
The Advanced Identity Cloud end-user UI
-
Salesforce
-
-
Access to your development environment as an administrator.
-
A test Salesforce environment
-
The use case, Provision users to a target application (Salesforce), completed with a test user provisioned from Advanced Identity Cloud to Salesforce. Specifically, make sure the user’s
mailattribute in Ping Identity matches theUser. Usernameattribute in Salesforce. -
A test user in Advanced Identity Cloud to serve as the application owner for the custom SAML (Salesforce) application.
Tasks
| This use case requires the use of third-party services. Use your environment specific details where necessary. |
Task 1: Create custom SAML application
-
In the Advanced Identity Cloud end-user UI, go to Applications > Custom Application.
-
Select SAML and click Next.
-
On the Application Details page, enter the following:
Field Value Name
Enter
Salesforce SAML SSO.Description
Enter
Ping Identity serving as the IDP for SAML. End users
can log into Salesforce from the Advanced Identity Cloud end-user UI, when they are assigned
to this application and have an account in Salesforce.
Owners
Select a user to be the application owner.
App Logo URI
-
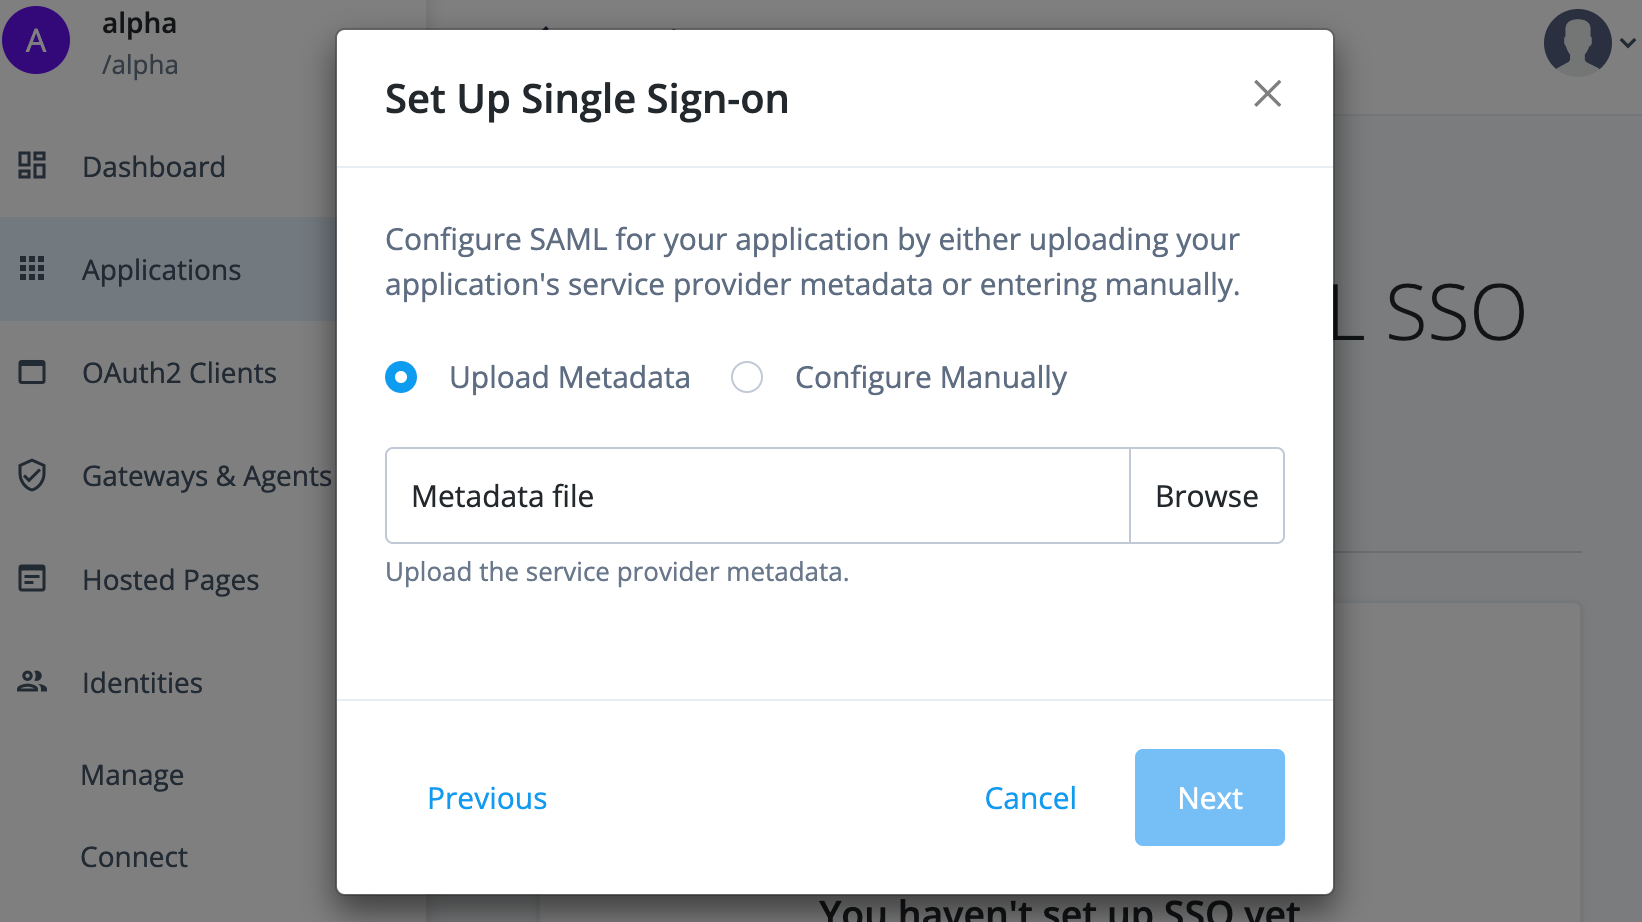
From the custom SAML application Salesforce SAML SSO, click the Sign On tab > Set up SSO.
-
On the Set up Single Sign-On modal window, click Download Metadata. The metadata to import into Salesforce displays in a new browser tab.
-
Save this file as identity-cloud-idp-saml-metadata.xml. You will import this file into Salesforce later.
-
Click Next.
-
In a new browser tab, go to your Salesforce environment.
Task 2: Configure Salesforce to serve as SP
The next task is to prepare Salesforce to serve as an SP.
-
Salesforce documents these steps; therefore, in Salesforce’s documentation, Create a SAML Single Sign-On Setting in Salesforce.
In step 3 of the Salesforce documentation, import the XML file you saved in task 1 by selecting New from Metadata File in Salesforce. The XML file you upload in Salesforce sets the necessary configurations; therefore, you don’t need to complete the steps past step 3.
-
After configuring SSO in Salesforce, download Salesforce’s SP metadata to import into Advanced Identity Cloud by clicking Download Metadata in Salesforce.
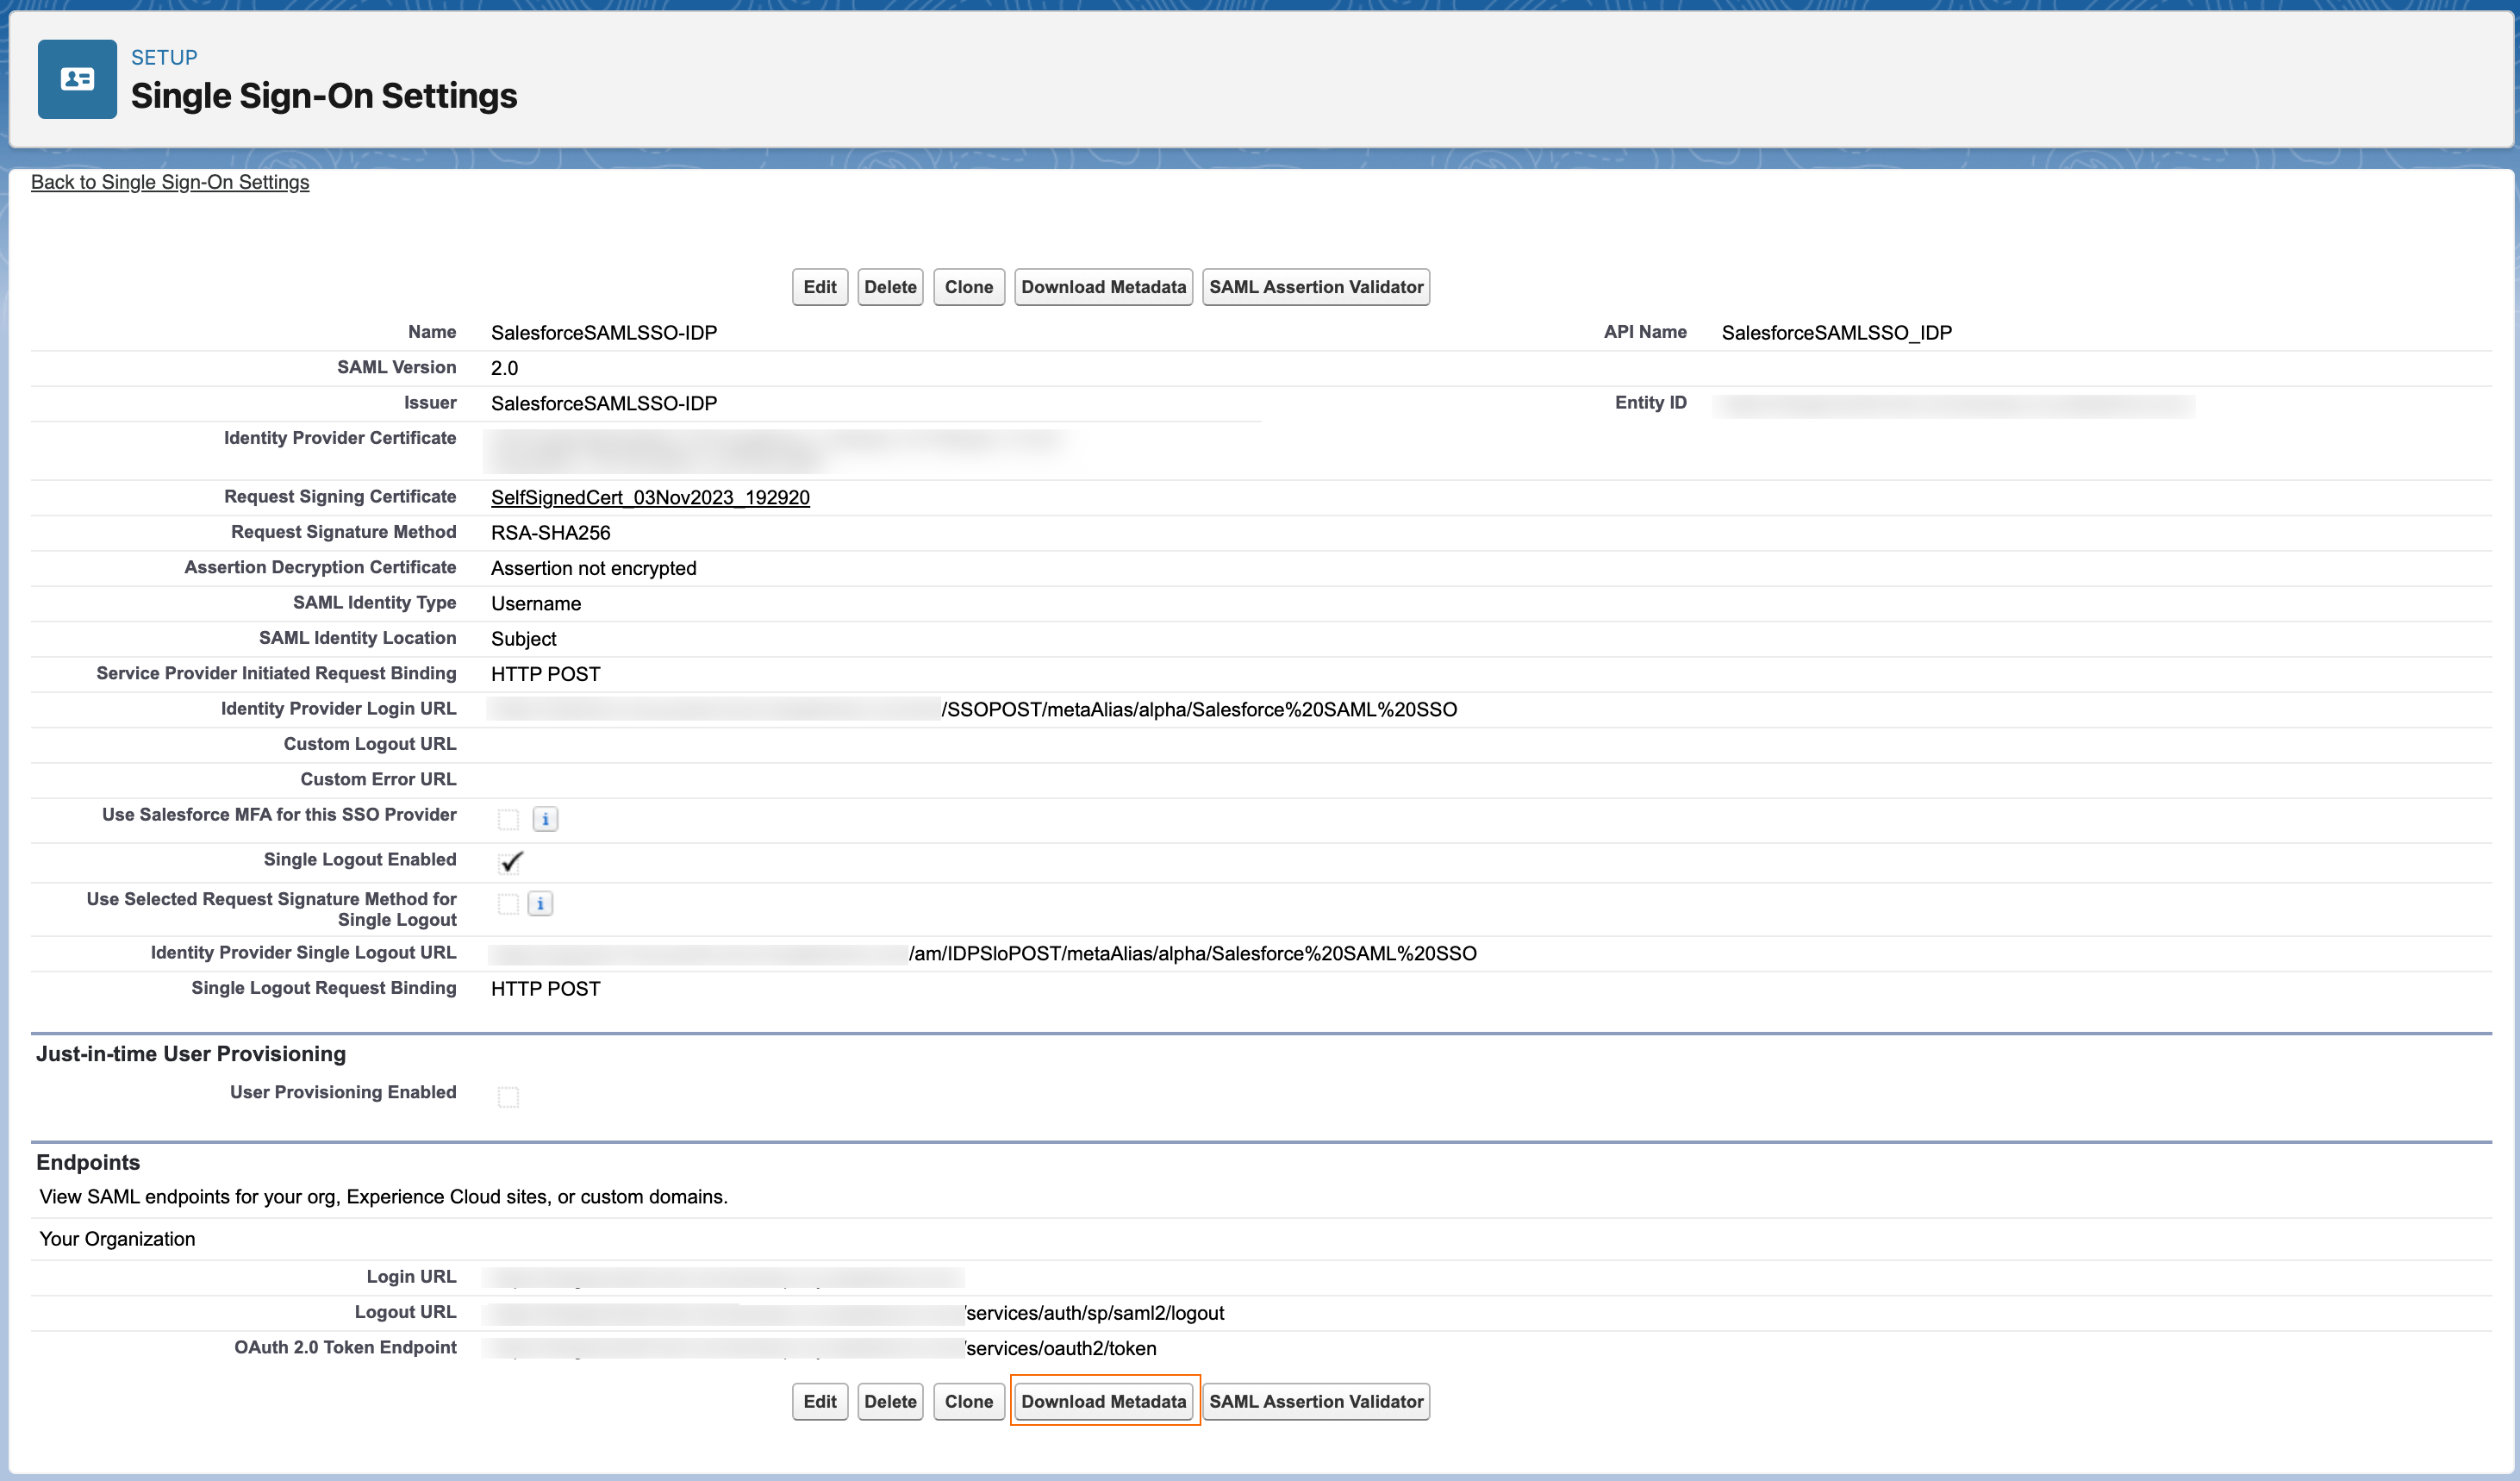
The metadata file name looks similar to
SAMLSP-00DDp000001yWwS.xml.
Task 3: Configure custom SAML application
Now that you have configured Salesforce, you must configure the custom SAML Salesforce application in Advanced Identity Cloud to include the information Salesforce requires in the SAML assertion.
-
Go back to the Advanced Identity Cloud admin UI. You should be on the Set Up Single Sign-On modal window.
-
Click Browse and upload the SP metadata file you downloaded from Salesforce.
-
Click Next. The application displays. By default, Advanced Identity Cloud maps the following assertion attributes:
Name (SAML attribute) Value (attribute in Advanced Identity Cloud) Description SSOIDmailAdvanced Identity Cloud sends the property of
mail(email) as the SAML attributeSSOID.User.EmailmailAdvanced Identity Cloud sends the property of
mail(email) as the SAML attributeUser.Email.User.ProfileID"Standard.User"Advanced Identity Cloud sends the static value of
Standard.Useras the SAML attributeUser.ProfileID.User.LastNamesnAdvanced Identity Cloud sends the property
sn(last name) as the SAML attributeUser.LastName.User.UsernamemailAdvanced Identity Cloud sends the property of
mail(email) as the SAML attributeUser.Username.By default, the federation identifier is mailto the Salesforce attributeUser.Username. Users can change theirmailaddress in Advanced Identity Cloud and doing so breaks their SAML connection to Salesforce. Either makemailimmutable in Advanced Identity Cloud, or set a different, immutable attribute as the federation identifier.Salesforce supports many SAML assertion formats. For example, you can configure SAML to have a user’s unique identifier in the
NameIDof theSubjectblock or in theAttributeStatementblock. Refer to Salesforce’s documentation on Example SAML Assertions.
Validation
Now that you created and configured a custom SAML application and configured Salesforce as the SP, validate the configurations by:
-
Adding a user to the application
-
Logging in as the end user to the Advanced Identity Cloud admin UI
-
Federating into Salesforce by clicking the Salesforce application
Steps
-
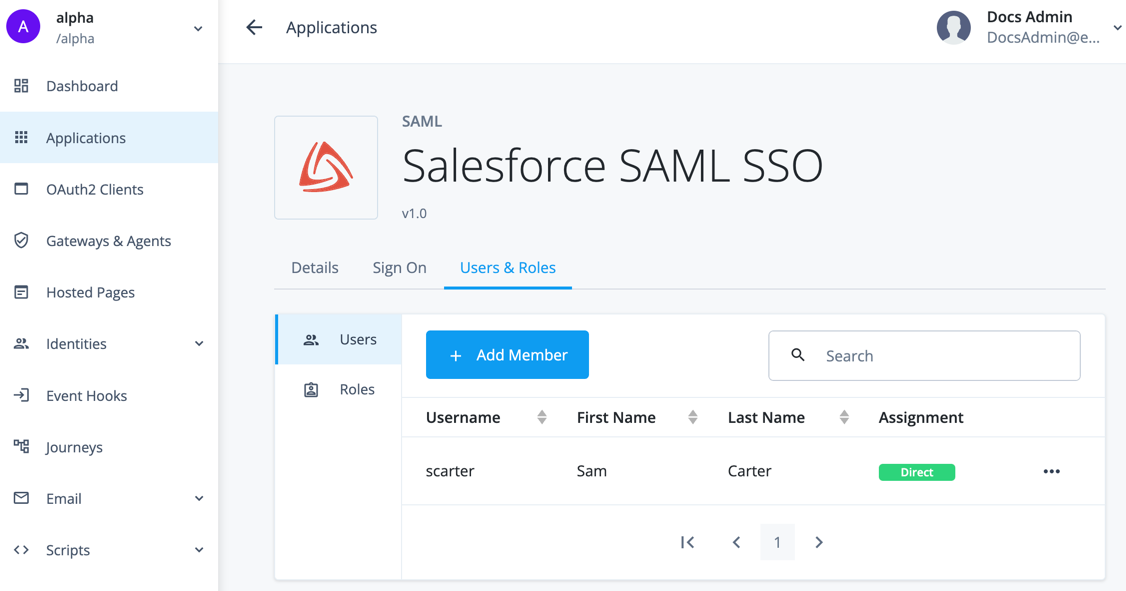
From the Advanced Identity Cloud admin UI, go to Applications > Salesforce SAML SSO > Users & Roles tab.
-
On the Users tab, click Add Member.
-
Add the test user that exists in both Advanced Identity Cloud and Salesforce. The application now displays to the test user in the Advanced Identity Cloud end-user UI.
-
In an incognito window, log into the Advanced Identity Cloud end-user UI as the test user.
The default login URL for end users is the
Loginjourney. In the Advanced Identity Cloud admin UI:-
Go to Journeys and click the
Loginjourney. -
In the Preview URL field, click (copy).
-
-
From the Advanced Identity Cloud end-user UI, click My Applications. The Salesforce SAML application displays.
-
Click the application. Advanced Identity Cloud redirects you to Salesforce logged in.
If you receive an error in Salesforce, refer to the Salesforce article Troubleshoot SAML Assertion Errors.
This article discusses using Salesforce’s SAML validator by providing the SAML assertion Advanced Identity Cloud sends. One way to obtain the SAML assertion is to use the browser plugin SAML tracer.
Explore further
Reference material
| Reference | Description |
|---|---|
Instructions on setting up a custom SAML application for SSO. |
|
Detailed information on SAML SSO and single logout (SLO). |
|
Learn about how end users can access applications for SSO in the Advanced Identity Cloud end-user UI. |
|
Learn how to configure Salesforce as a SAML service provider. |