Create a form for custom request types
Creating a form for custom request types requires several steps the administrator must carry out:
-
Create a custom request type using the API.
-
Create a simple form for the new custom request type.
-
Create a workflow to handle the custom request type and the form.
-
Submit a request.
Key points
The Form creator must consider the following key points:
-
You can only link a custom request type to a single form. While a form can be used with multiple custom requests, each custom request can only be associated with one form at a time.
-
The typical use case is to create a form that aligns with the custom request’s object type schema. For an example, refer to administration/example-workflow-custom-request-type-with-form.adoc#create-custom-request-type.
-
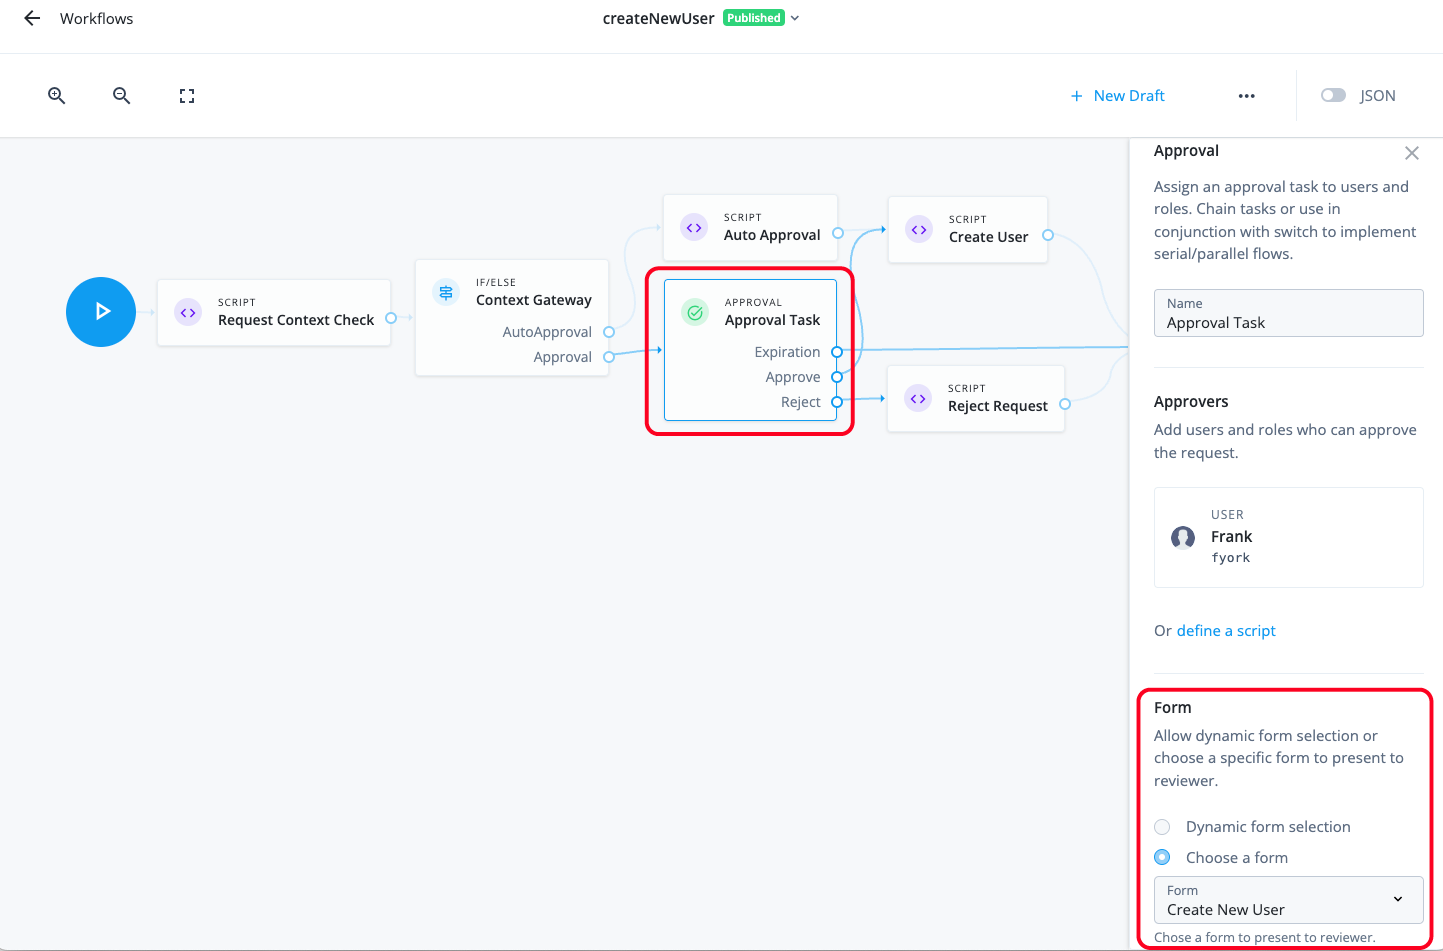
In a workflow, you can assign a form in the Approval node properties pane. For typical cases, you can select Choose a form and select your custom request form.
Details
-
For more customization, you can define the keys exactly as you want. Once a request is generated, the form’s contents are copied into the request, making those properties available for use within the workflow to provision access as needed. For example, you can define a key with a value of
NAME. When a user submits a request, the key appears inrequest.common.object.blob.NAMEwith the value, "Testing"``:{ "id": "409f28fc-65f6-41b8-a9f5-bb3a64f55925", "requester": { "givenName": "Frank", "id": "managed/user/c51d9ee1-43b3-49d1-8742-cbb33842a5cc", "mail": "frank.york@forgerock.com", "sn": "York", "userName": "fyork", "isAdmin": false }, "requestType": "applicationGrant", "request": { "common": { "priority": "low", "justification": "Testing", "applicationId": "d248cc89-79b2-4f6a-98bc-46d0a938318f", "userId": "f3617664-4dd2-48eb-bdae-512f45b157df", "blob": { "form": { "NAME": "Testing" } }, "isDraft": false, "context": { "type": "request" } }, "_rev": 1 } ..... }-
First, create a custom request type. For an example, refer to Workflow using a custom request type and form.
Currently, you can only create a custom request type using the API. -
In the Advanced Identity Cloud end-user UI, click Forms > New Form.
-
On the New Form modal, click Custom request form, and then click Next.
-
On the modal, enter the following and click Save when completed:
Field Description Form
Enter a descriptive name for your form. Follow any convention established by your company.
Description (optional)
Enter a general description for the form.
Request Type (optional)
Select a custom request type.
You can only assign one form to each request type. -
On the Forms editor, drag-and-drop the forms node onto the canvas and fill in the fields in the right pane.
-
Click Preview to see the form you created.
-
Click Save. Your form appears on the Forms page.
For an example use case, refer to Workflow using a custom request type and form.
-