Adobe Admin Console application
The Advanced Identity Cloud Adobe Admin Console application lets you manage users, groups, and user group memberships between Adobe Admin Console and Advanced Identity Cloud. This application requires an Adobe Admin Console administrator account and a properly configured Adobe Admin Console.
To create an Advanced Identity Cloud Adobe Admin Console application, complete the following:
Adobe Admin Console requirements
| The steps for configuring Adobe Admin Console should be used as an outline, as the specific options, menus, and features may have changed. |
Before you can configure the Advanced Identity Cloud application, you must create and configure a project in Adobe Admin Console. You need an Adobe Admin Console developer account to complete this procedure:
-
Create or log in to an Adobe Admin Console developer account.
-
From the Adobe Developer Console, click the Projects tab, and then click Create new project.
Show Me

-
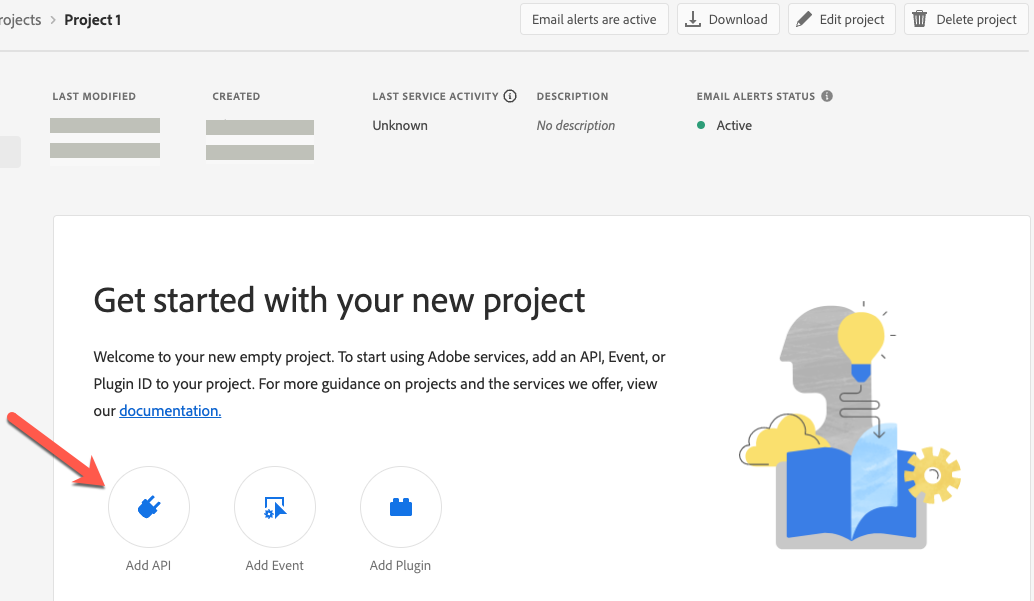
On the Project Name page, click Add API.
Show Me
-
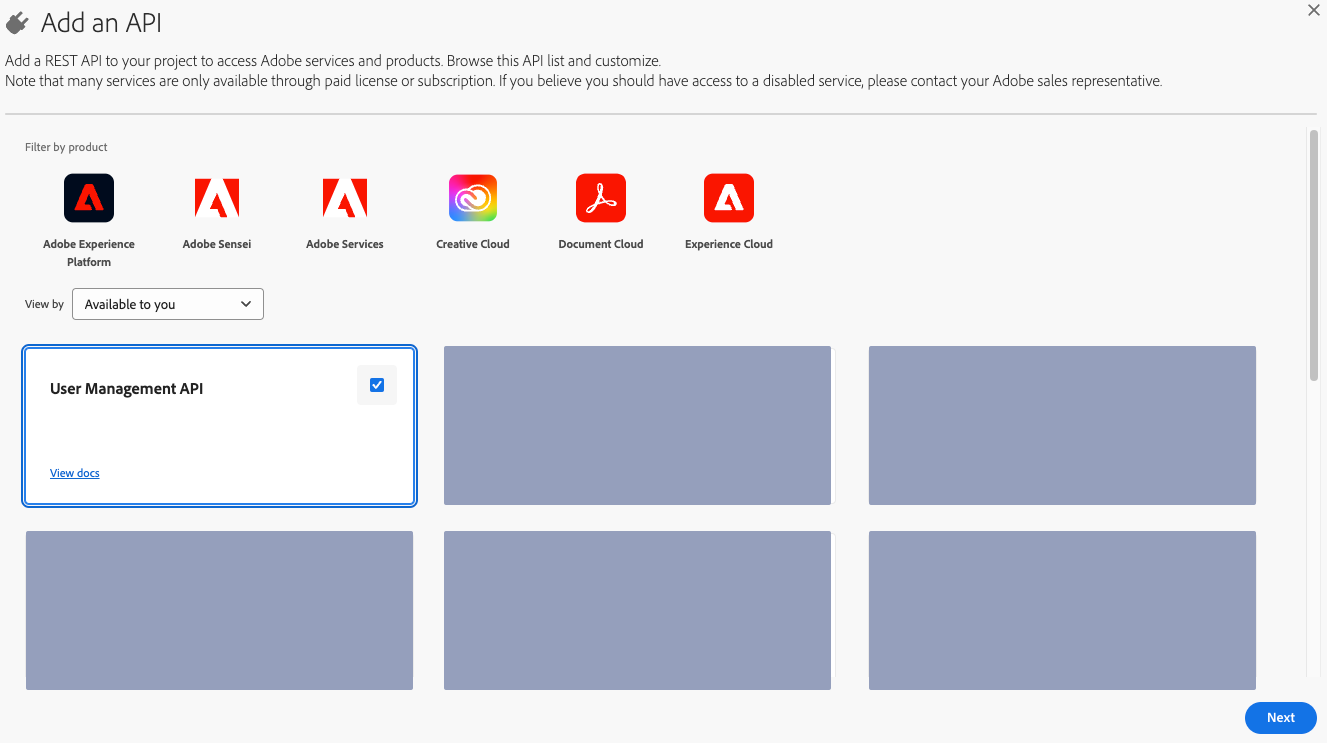
In the Add an API window, select User Management API, and click Next.
Show Me
-
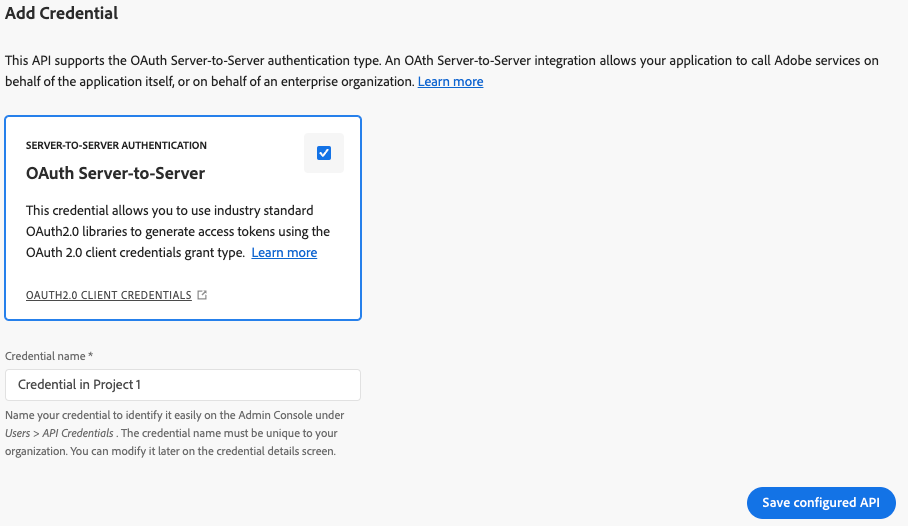
In the Add Credential area, select OAuth Server-to-Server, enter a Credential name, and then click Save configured API.
Show Me
-
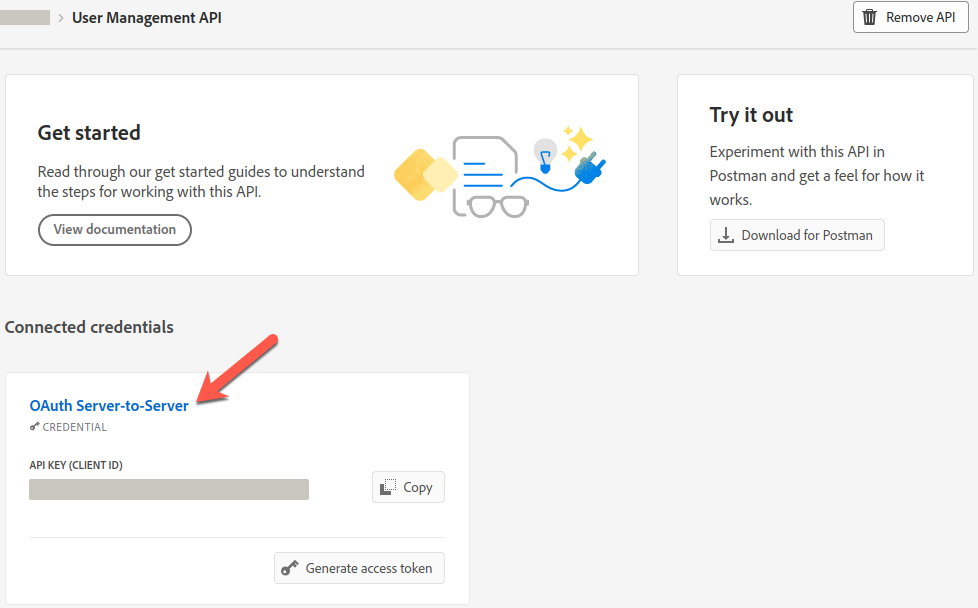
On the Project Name > User Management API page, in the Connected credentials area, click the credential you just added (OAuth Server-to-Server).
Show Me
-
From the Credential detail tab, make note of the following:
-
CLIENT ID
-
CLIENT SECRET
-
SCOPES
-
ORGANIZATION ID
Show Me
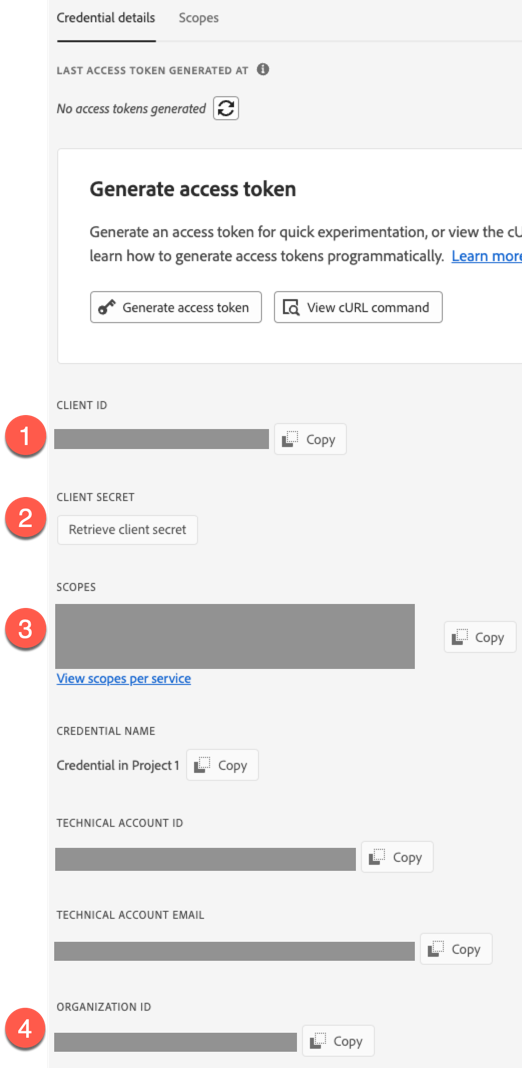
Use these values when you configure provisioning for an Advanced Identity Cloud Adobe Admin Console application.
-
Provision settings for an Adobe Admin Console application
-
Complete Adobe Admin Console requirements.
-
In Advanced Identity Cloud admin UI, on the Provisioning tab:
-
If setting up provisioning for the first time, on the Provisioning tab, click Set up Provisioning.
-
If editing existing settings, in the Connection area, click Settings.
-
-
Configure the following fields:
Field Description Service URI
The service endpoint URI.
Organization ID
Your organization’s unique ID. For example,
12345@AdobeOrg.Refer to Adobe Admin Console requirements for help locating this value.
Token Endpoint
The endpoint to query for a new access token.
Client ID
The client ID for OAuth 2.0 flow.
Refer to Adobe Admin Console requirements for help locating this value.
Client Secret (optional)
The client secret for OAuth 2.0 flow.
Refer to Adobe Admin Console requirements for help locating this value.
-
Optionally, click Show advanced settings to set any of the following options:
Field Description Scope (optional)
The OAuth 2.0 scope(s) to use.
Refer to Adobe Admin Console requirements for help locating this value.
Group Read Rate Limit
Defines throttling for group read operations either per second ("30/sec") or per minute ("100/min").
User Read Rate Limit
Defines throttling for user read operations either per second ("30/sec") or per minute ("100/min").
Write Rate Limit
Defines throttling for write operations (create/update/delete) either per second ("30/sec") or per minute ("100/min").
Maximum Connections
The maximum size of the HTTP connection pool. The default is 10 connections.
Connection Timeout
The timeout for the underlying HTTP connection in seconds. The default is 30 seconds.
-
Click Connect.
-
Verify the information in the Details tab.