DocuSign application
The Advanced Identity Cloud DocuSign application lets you manage DocuSign service accounts and synchronize DocuSign accounts and Advanced Identity Cloud identities.
You must have a DocuSign administrator account and be able to add an integrator key (DocuSign Documentation).
| To modify the settings for an existing provisioning connection, in the Advanced Identity Cloud admin UI, click the Provisioning tab, and then click Settings. |
To create an Advanced Identity Cloud DocuSign application, complete the following:
Configure a DocuSign application
-
In DocuSign, set up a DocuSign app and integration key:
-
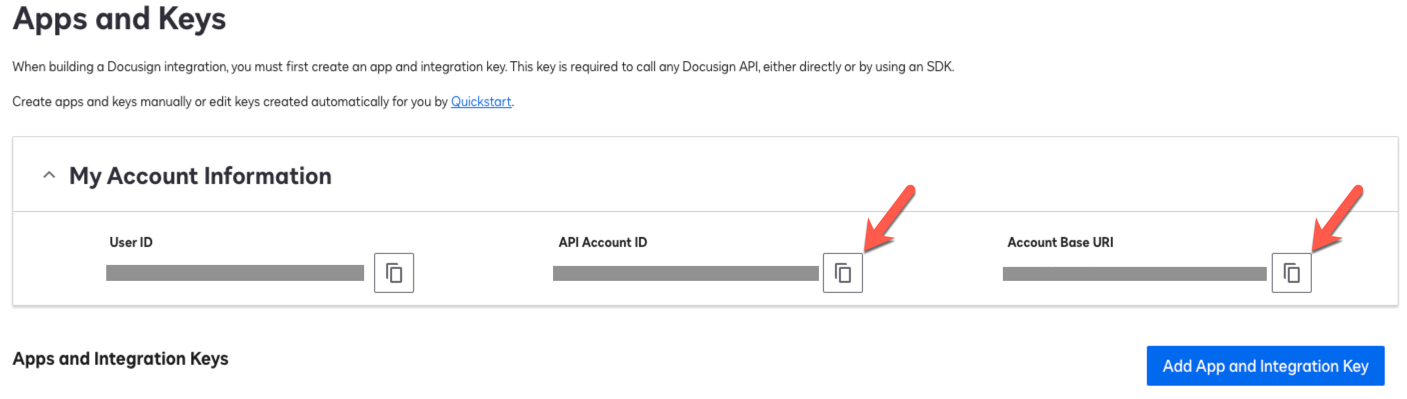
Log in to DocuSign and go to Integrations > Apps and Keys.
-
On the Apps and Keys page, in the My Account Information area, copy and save the following values:
DocuSign field Advanced Identity Cloud application field API Account ID
Account
Account Base URI
Service Endpoint URI
Show Me
-
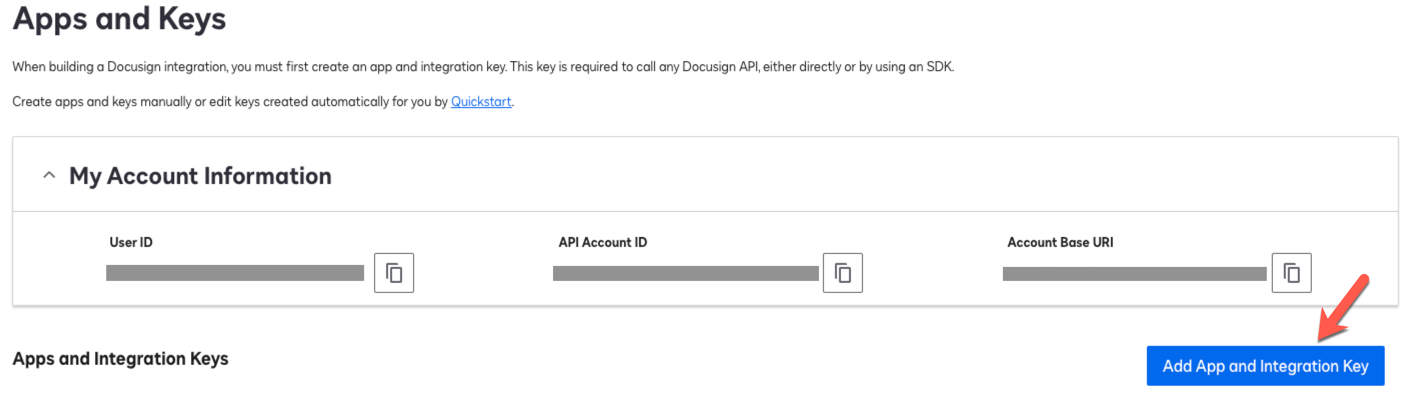
Click Add App and Integration Key.
Show Me
-
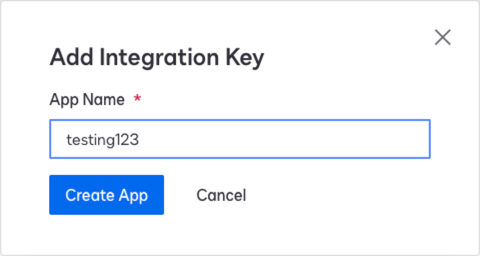
In the Add Integration Key modal, enter an App Name, and click Create App.
Show Me
-
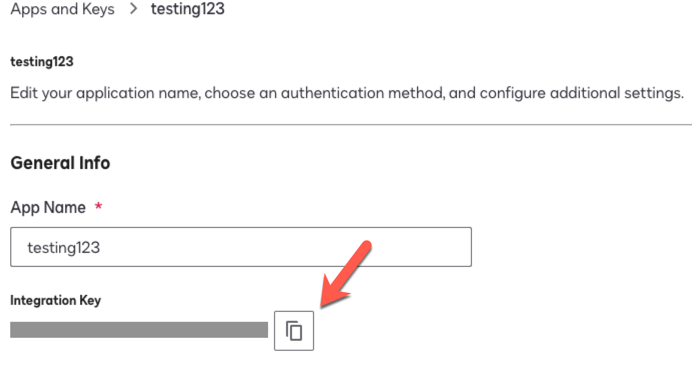
On the Apps and Keys > App Name page, copy the Integration Key and save the value. Use this value as the Client Id in Advanced Identity Cloud.
Show Me
-
In the Authentication area, click + Add Secret Key, and copy and save the value. Use this value as the Client Secret in Advanced Identity Cloud.
Show Me

Keep DocuSign open, as you’ll need to add information during provisioning configuration. -
-
In the Advanced Identity Cloud admin UI, click the Provisioning tab, and then click Set up Provisioning.
-
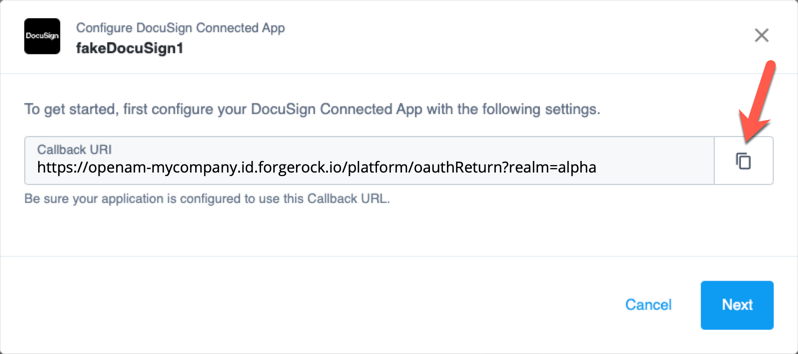
In the Configure DocuSign Connected App modal, copy the Redirect URI, and click Next.
Show Me
-
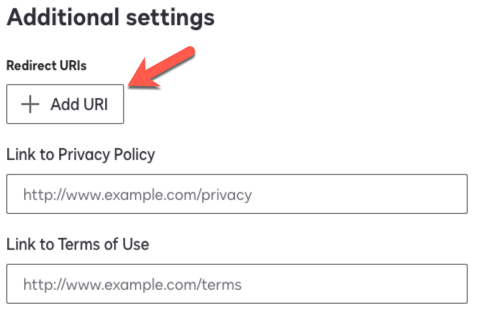
In DocuSign, in the Additional settings area, click Add URI, paste the redirect URI, and click Save.
Show Me
-
Go to Integrations > API Usage Center, and in the API Limit area, note the following:
-
Hourly Limit
-
Burst Limit
Show Me

Use these values in the Advanced Identity Cloud advanced settings.
-
-
In Advanced Identity Cloud admin UI, configure the following fields:
Field Description Service Endpoint URI
The DocuSign Account Base URI.
Account
The DocuSign API Account ID.
Client ID
The client ID for OAuth 2.0 flow. The DocuSign Integration Key.
Client Secret
The client secret for OAuth 2.0 flow. The DocuSign Secret Key.
Maximum Connections
The maximum size of the HTTP connection pool. The default is 10 connections.
Connection Timeout
The timeout for the underlying HTTP connection in seconds. The default is 30 seconds.
-
Optionally, click Show advanced settings to set any of the following options:
Field or option Description Use Basic Auth for Token Negotiation
Select this option to send the client ID and client secret to DocuSign as authorization headers. If the option is not selected, the ID and secret are sent as form data.
Hour Rate Limit
The hourly rate limit for the DocuSign API. The DocuSign Hourly Limit.
Burst Rate Limit
The burst rate limit for the DocuSign API. The DocuSign Burst Limit.
Disable Http Compression
Content compression is enabled by default. Select this option to disable it.
Debug/Test settings
Only use these settings for test environments. Don’t enable for production environments. Selecting this option displays the following options:
-
Accept Self Signed Certificates: Enable to accept self-signed certificates.
-
Disable Host Name Verifier: Enable to disable hostname verifiers.
Exclude Unmodified
Select this option to synchronize only the modified properties on a target resource.
-
-
Click Connect.
-
Verify the information in the Details tab.